

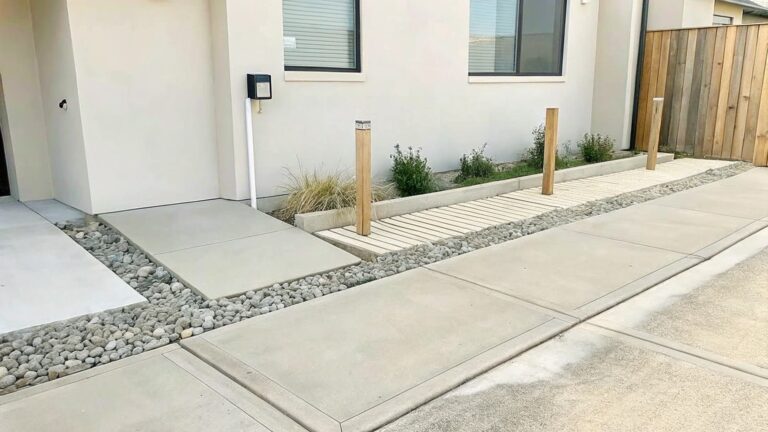
I often notice how the borders in a garden shape the way paths feel underfoot and how beds hold together through the seasons. Using different materials next to each other can keep those edges clean without needing constant upkeep once the weather takes its toll.
That part matters more than I expected. Mixing stone with wood tends to create a stable line that still lets water drain properly around the roots. Several of the combinations here look like they could adapt well to yards with varying sun and shade.
Pavers With Pebble Borders Along Garden Beds
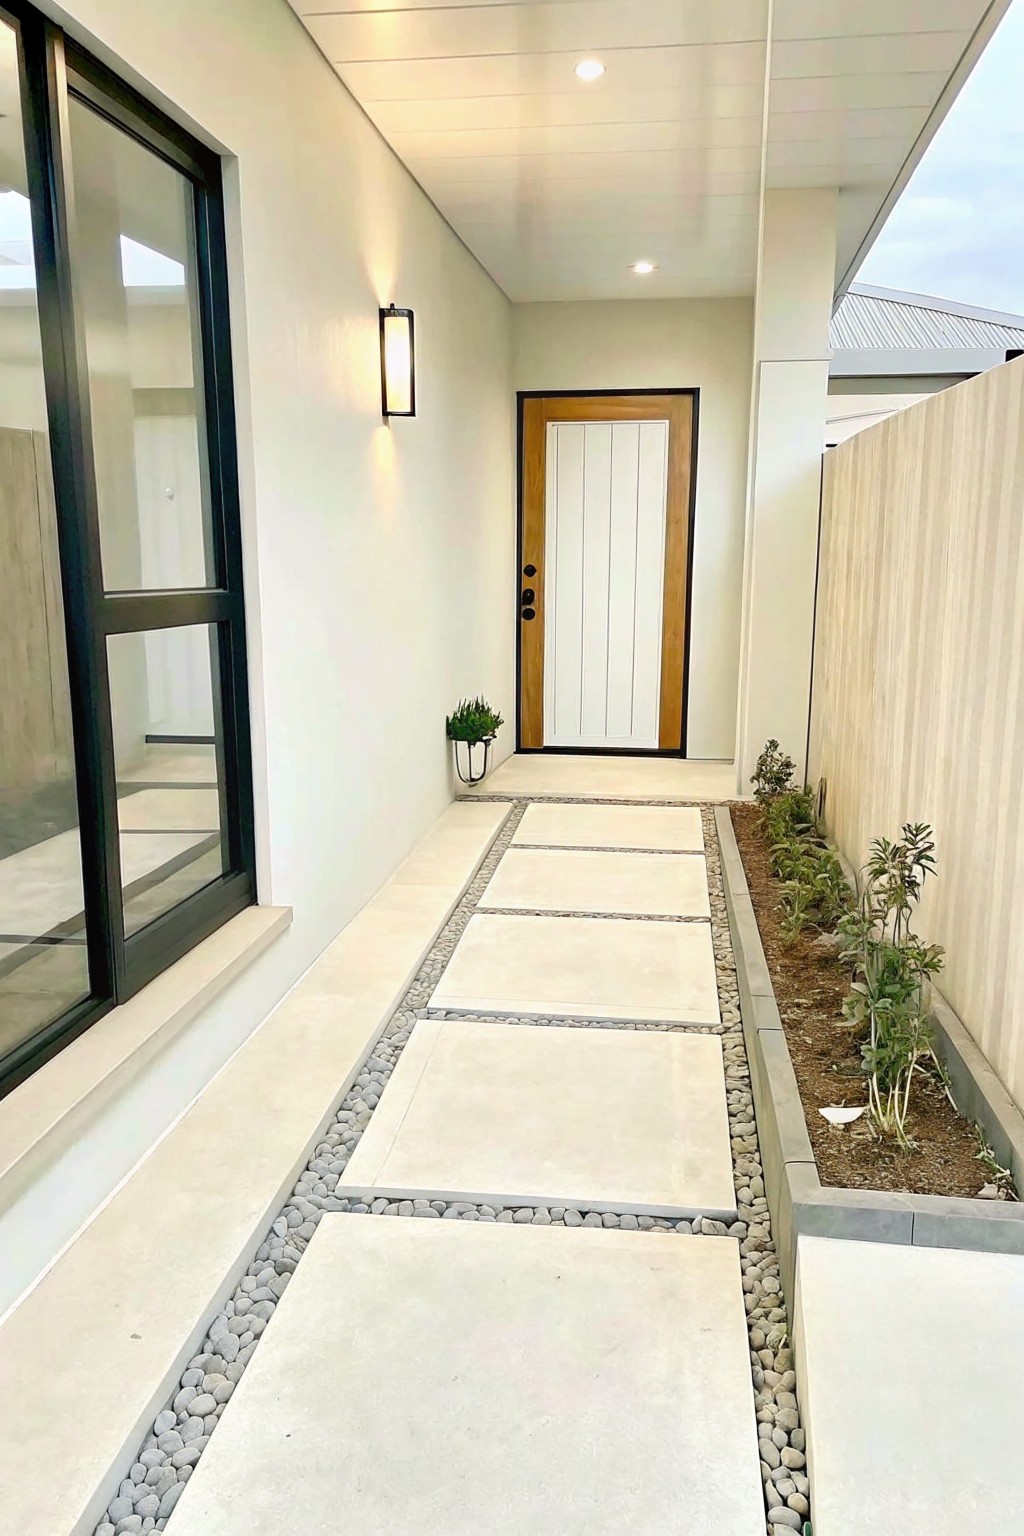
Large square pavers set into a bed of small pebbles create a simple path that also forms a clean edge next to a planted strip. The contrast in size and texture keeps the walkway looking neat while giving the garden bed a clear boundary without extra edging pieces.
This approach works well in narrow side yards or along the front of a house where you want a low-maintenance path that still feels intentional. Use it where foot traffic is light and keep the pebbles a consistent size so they stay in place next to the plants.
Edge a Path With a Thin Strip of Turf
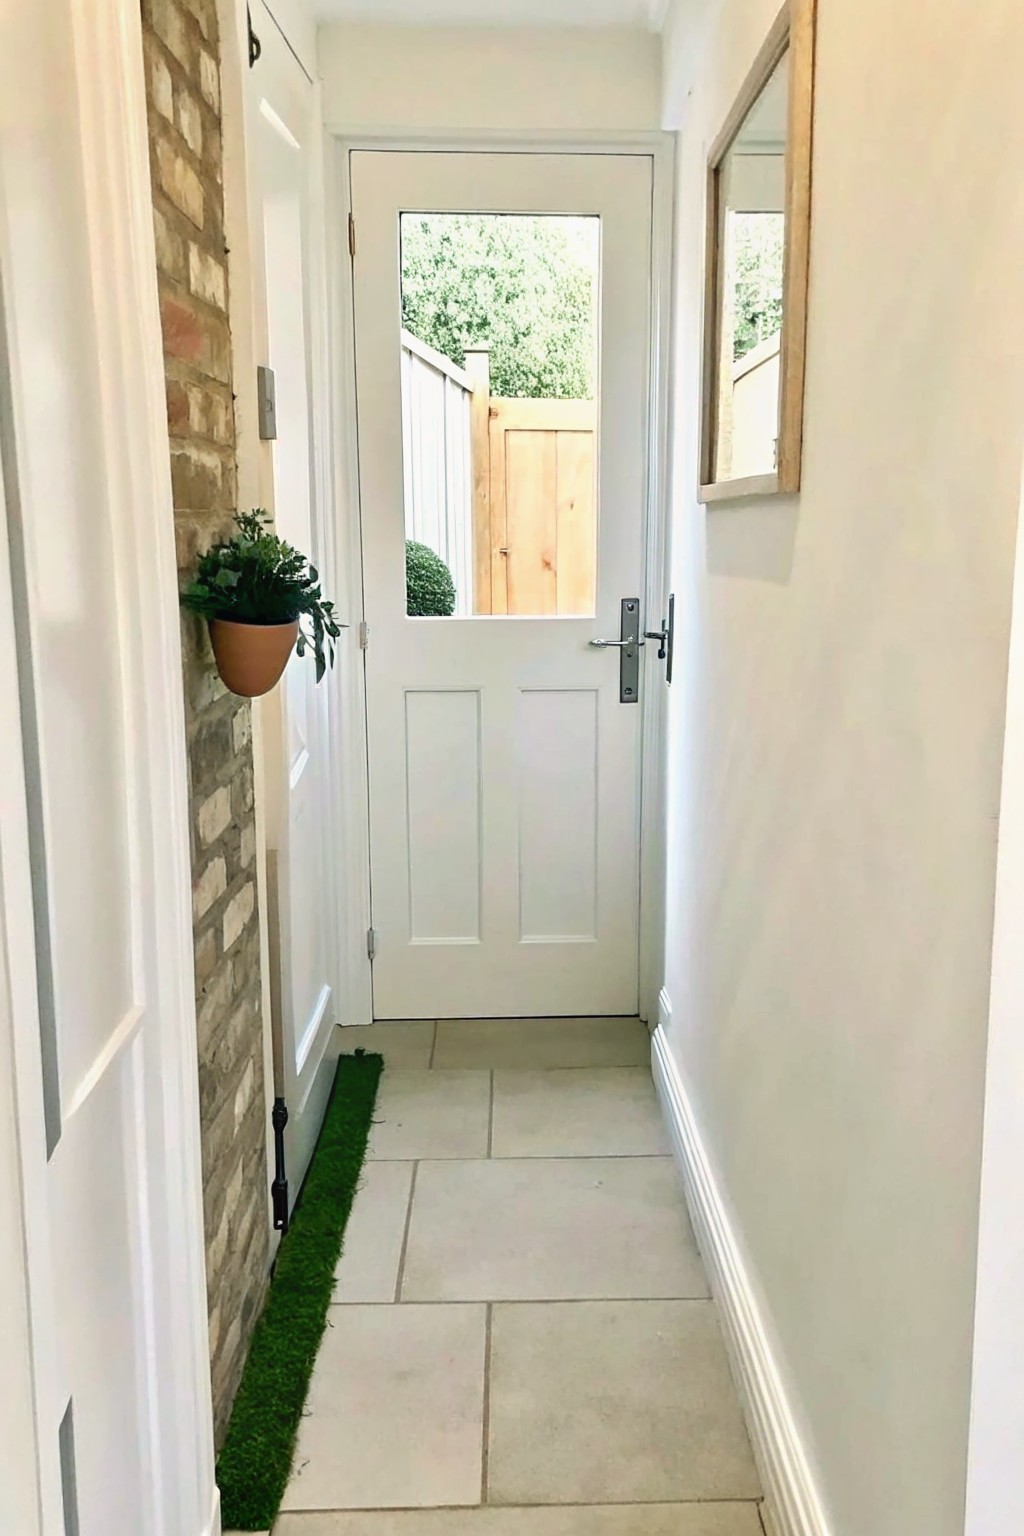
A narrow band of grass next to stone or tile gives a garden border without taking up much space. It creates a clear line that separates the walking surface from the wall and adds a bit of softness in an otherwise hard area. The look works especially well in tight passages or side entries where a full bed would feel too much.
This approach suits homes with brick or rendered walls and simple paving. Keep the strip only a few inches wide so it stays neat and does not trip anyone. Use artificial turf if the spot gets little light or heavy foot traffic, and make sure it sits slightly lower than the paving to avoid fraying edges.
Concrete Planters As Garden Borders
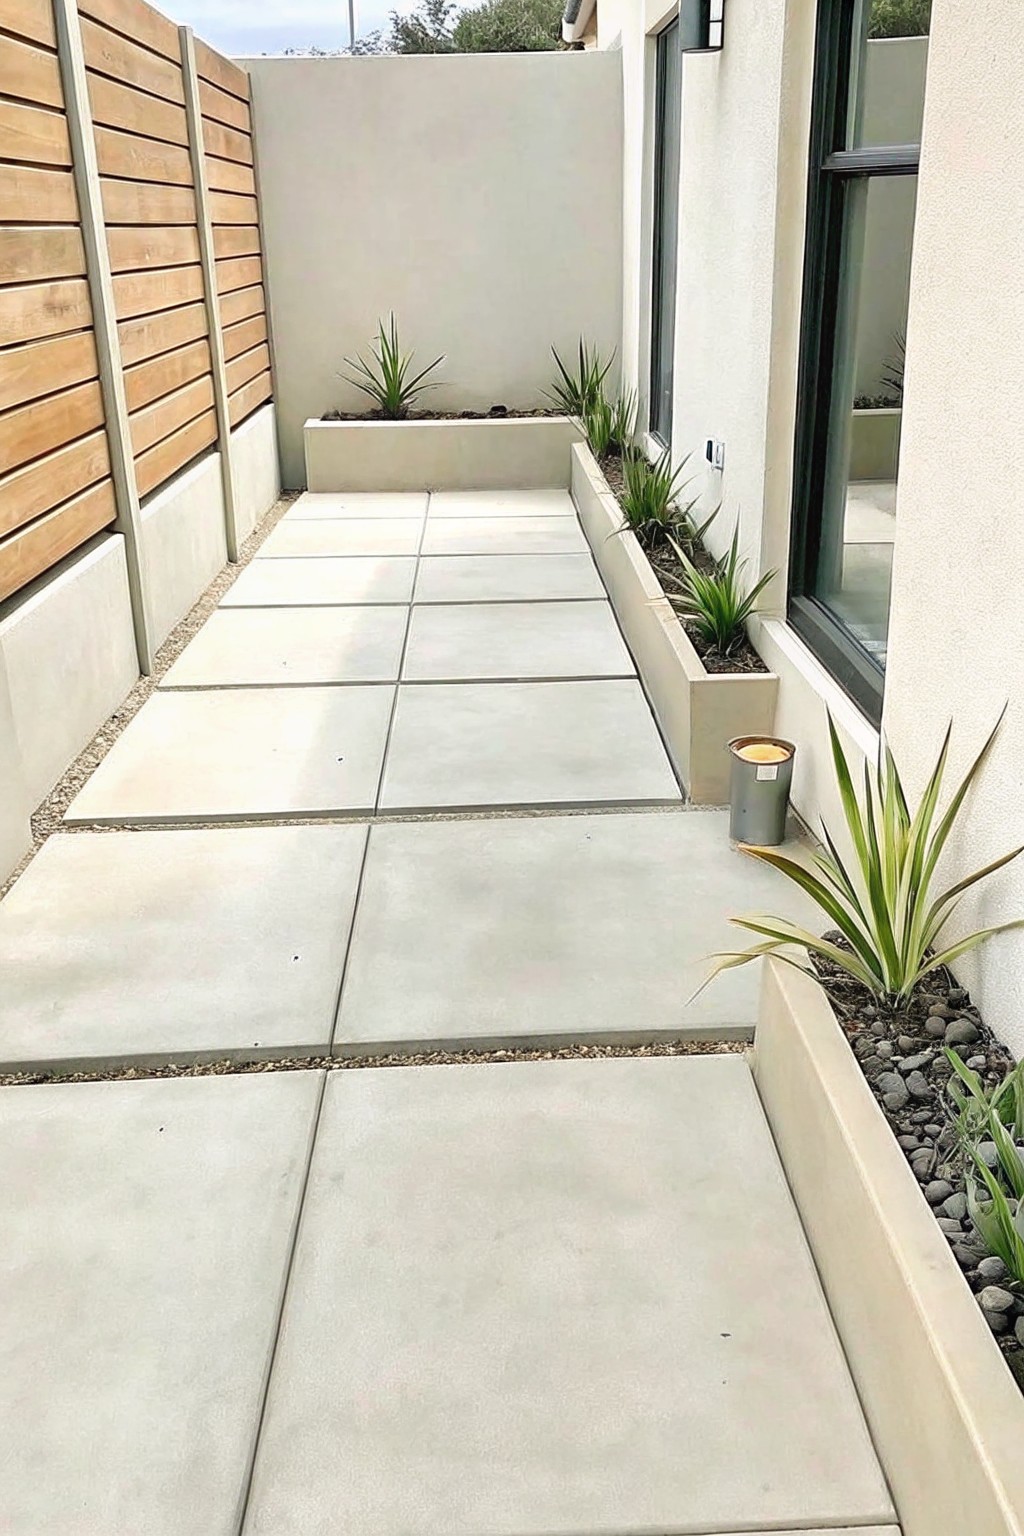
Concrete planters built along the edge of a path create a solid border that holds back soil and plants without extra edging pieces. The contrast between the smooth concrete, loose gravel, and larger pavers gives the border a simple but finished look that stays in place over time.
This approach works best in narrow side yards or along house walls where space is tight. Keep the planters low and narrow so they do not block the walkway, and let the gravel fill the small gaps between the pavers and the border for better drainage.
Pebble Borders Beside Concrete Planters
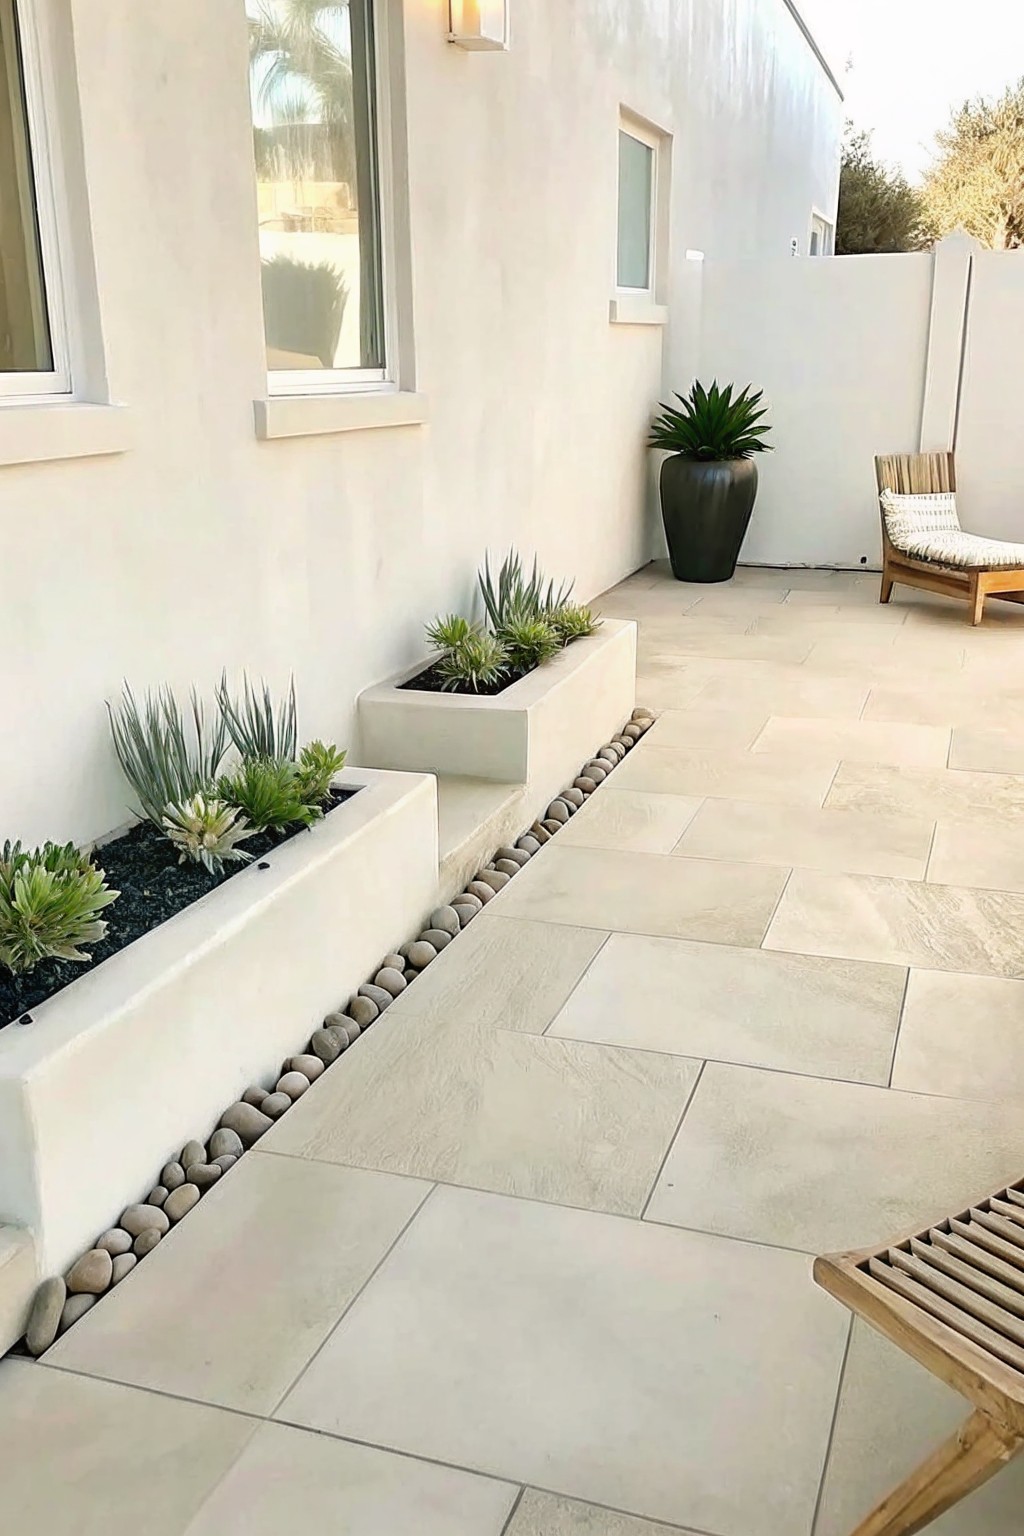
A narrow strip of river rocks makes a simple divider between large patio pavers and raised concrete planters. The small stones stand out against the bigger tiles and give the edge a finished look without adding height or extra structure.
This border works best in dry climates with low-water plantings and flat outdoor spaces. Keep the pebble line narrow so it reads as an accent rather than a path, and choose stones that are similar in color to the pavers for a quieter effect.
Gravel Borders Between Stone Pavers
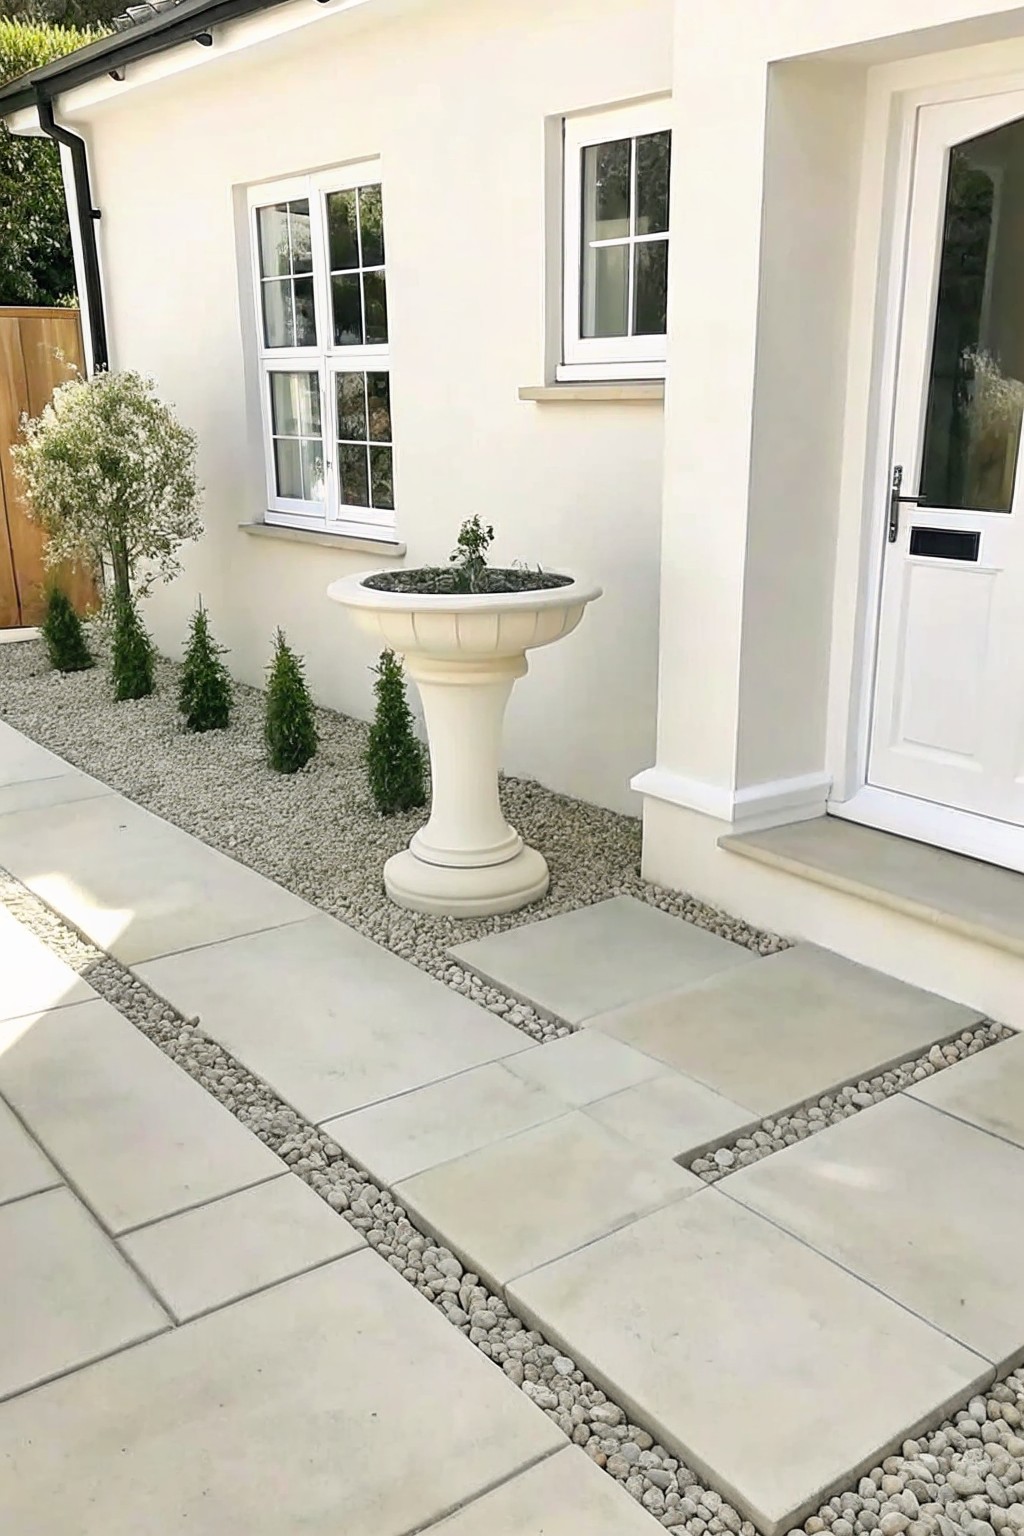
Gravel works well as a border when you want to break up large pavers without adding another material that needs sealing or weeding. The small stones fill the gaps cleanly and keep the path from feeling too solid or heavy next to planting beds.
This setup suits homes with simple front paths or side yards where you want low maintenance but still need clear separation between walking areas and soil. Keep the gravel depth even so it does not shift underfoot, and choose a light stone tone if your pavers are pale so the contrast stays soft rather than stark.
Wood Edging For A Pebble Border
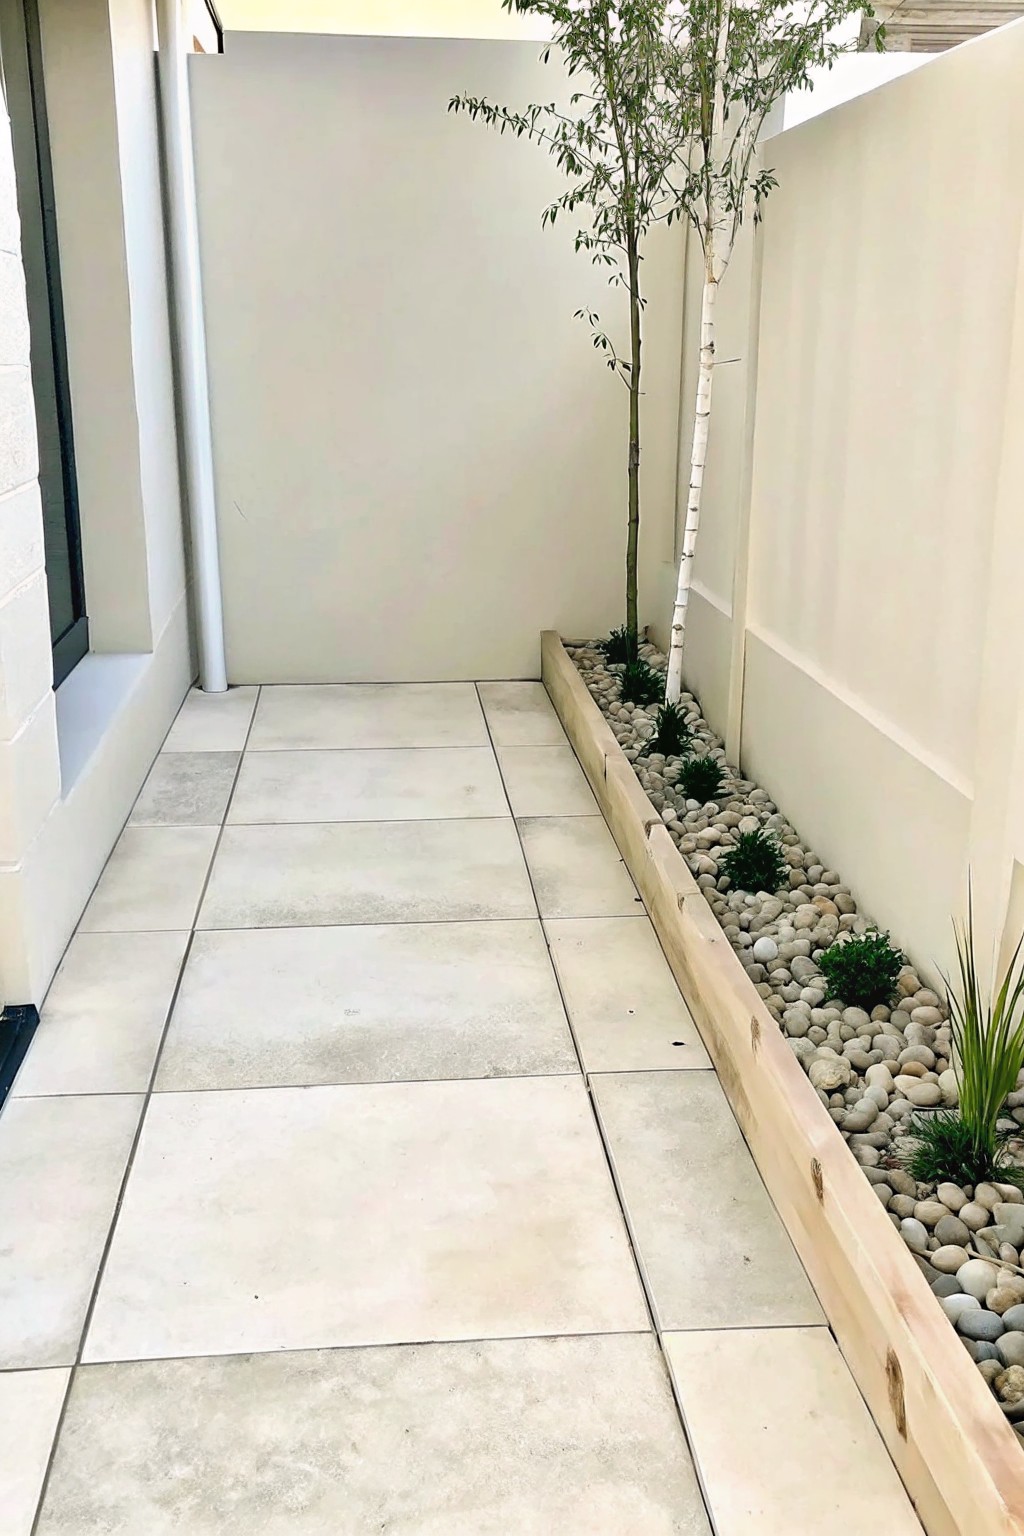
A wood border gives a pebble planting strip a clean edge that stays in place next to a paved path. The contrast between the smooth tiles and the loose stones feels deliberate but simple, and the wood keeps the whole thing from looking messy over time.
This setup suits narrow side yards or tight spaces along a house wall where full planting beds would be too much. It works best with light-colored paving and neutral walls, and the wood can be left to weather or sealed depending on the look you want.
Ledges Built Into Walls For Garden Borders
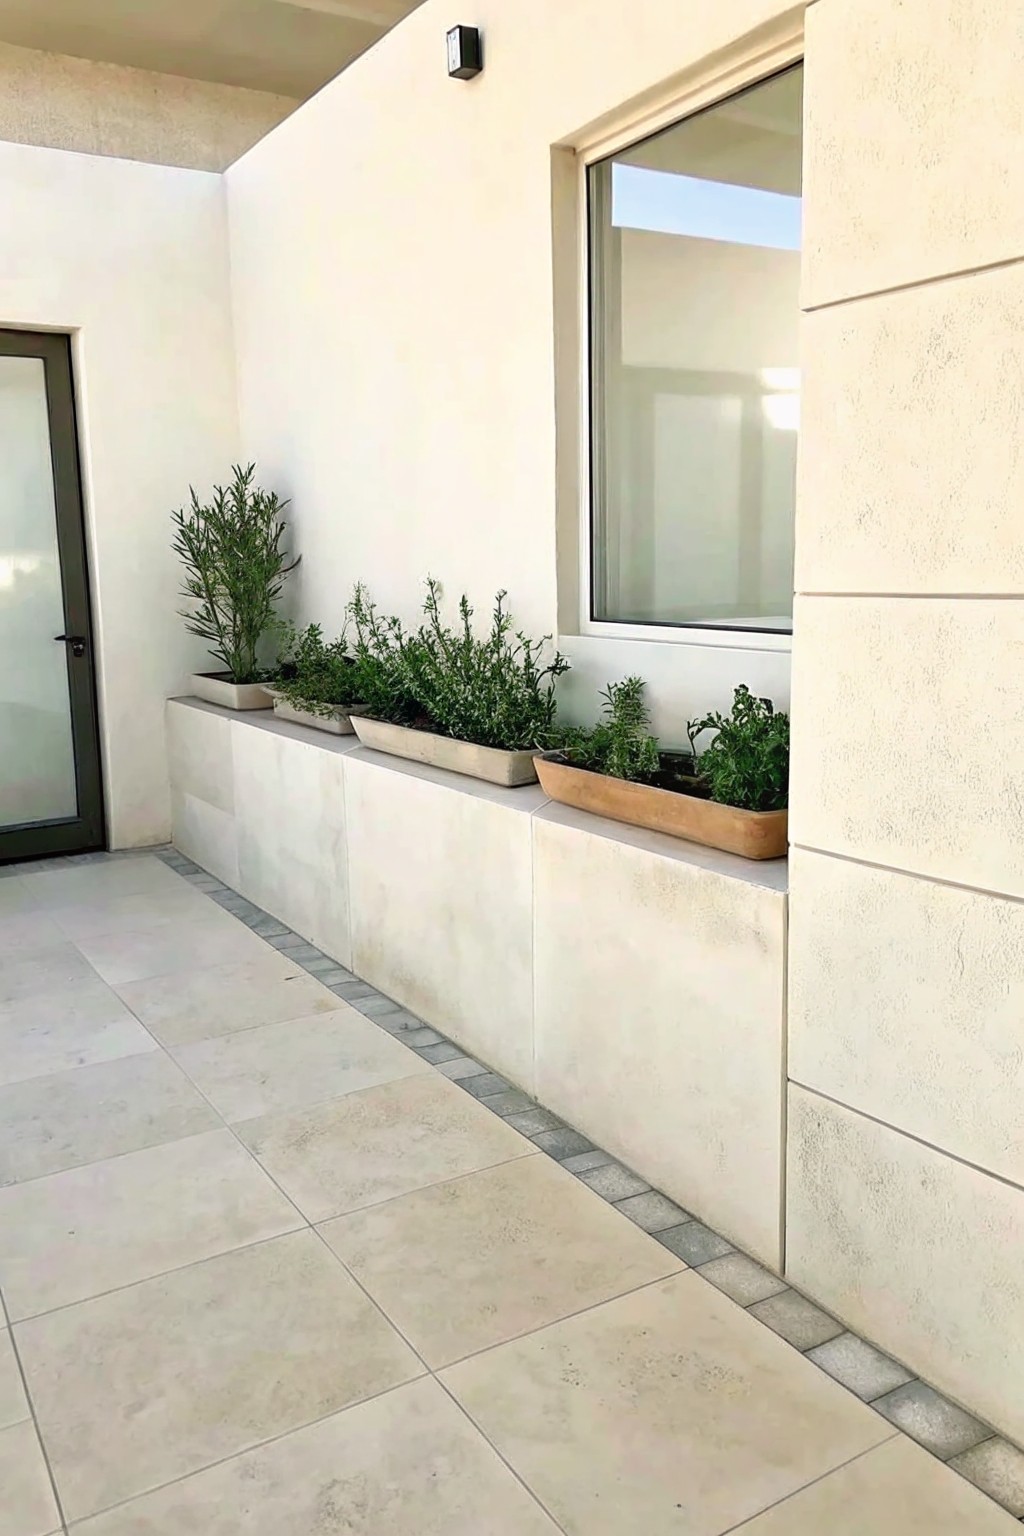
A low ledge running along the base of a wall gives you a simple way to add plants without building separate beds. It keeps the border neat and ties the planting directly to the house structure.
This approach works best on paved outdoor areas where you want greenery but still need clear floor space. Use a ledge material that contrasts with the paving, and vary the planters slightly so the look stays relaxed rather than too uniform.
Concrete and Gravel Garden Borders
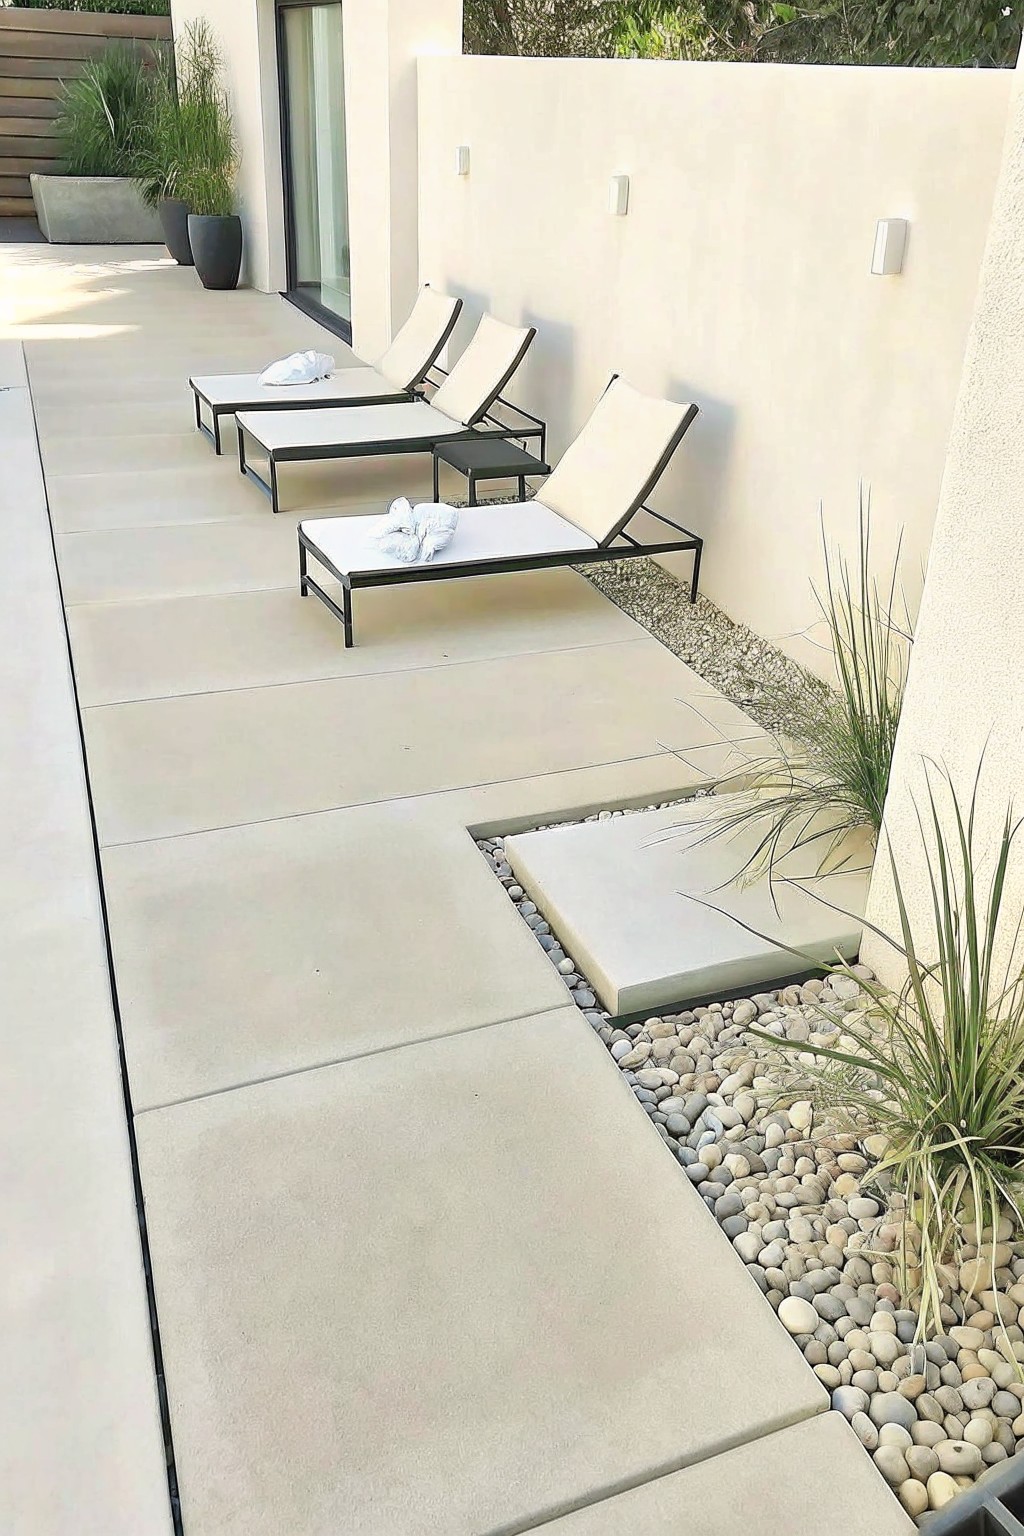
Switching from solid concrete to a gravel or pebble strip is a simple way to mark where the patio ends and the garden begins. The change in texture makes the edge easy to see and keeps the planting area contained without adding extra trim pieces.
This works best along the side of a house or on a flat yard where you want low maintenance and decent drainage. Keep the gravel strip narrow so it does not take over the space, and use it mainly where you plan to add a few taller grasses or shrubs.
Stone Walls Along Paver Steps
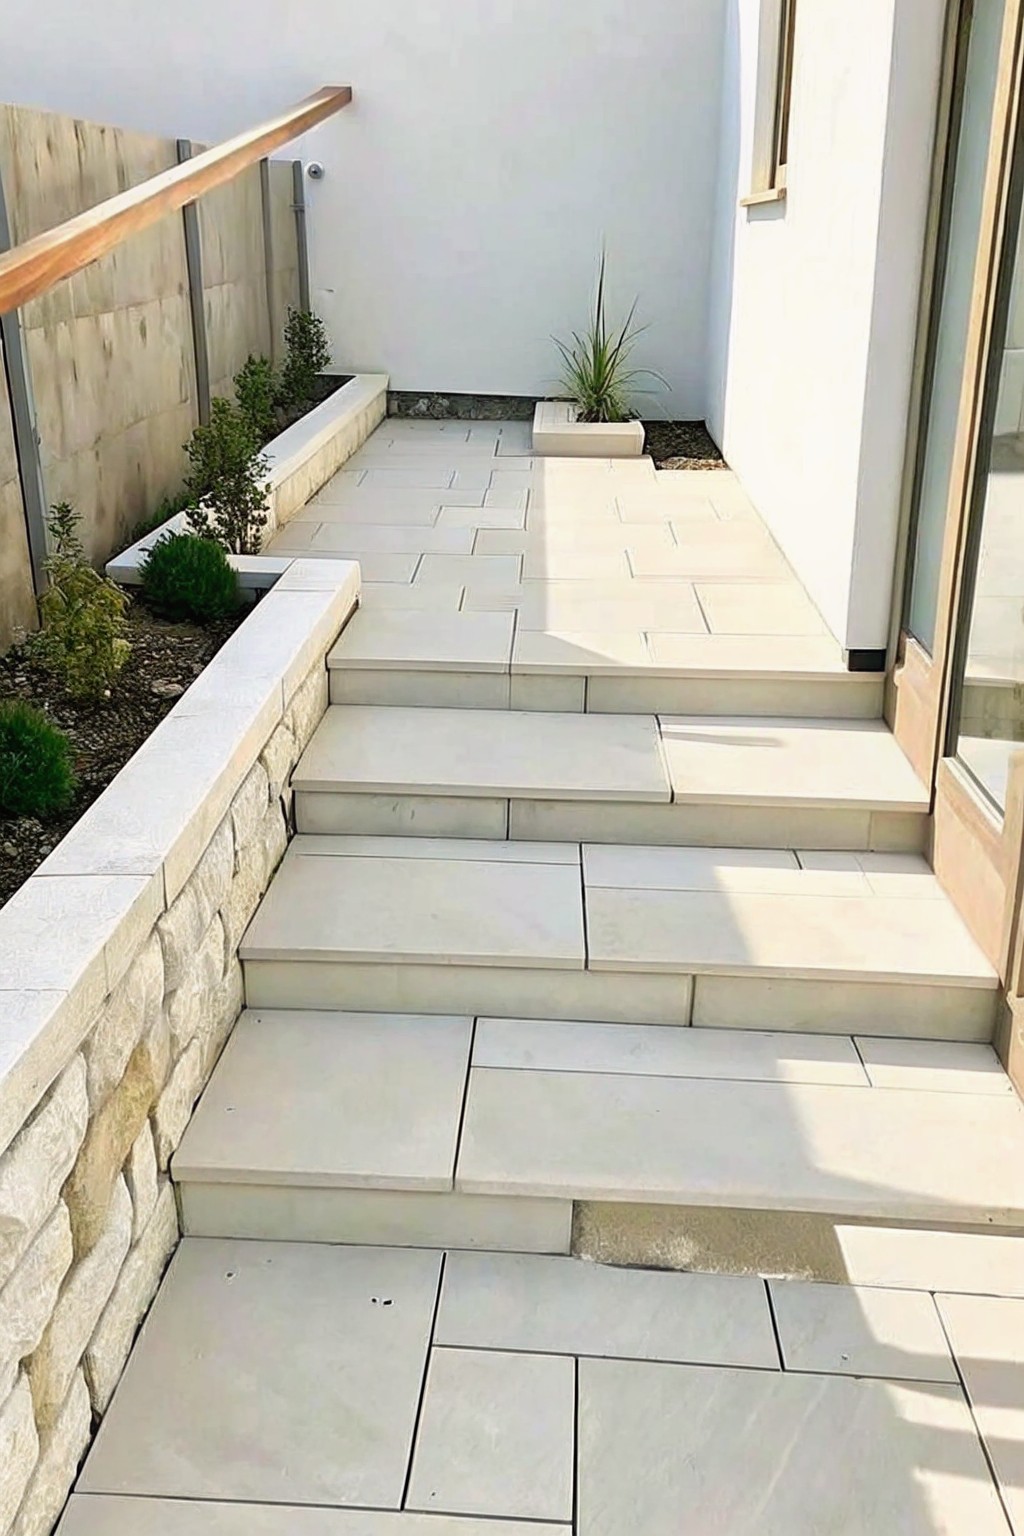
A low stone wall makes a strong border when it runs beside concrete pavers. The rough texture of the stone stands out against the flat, light surface of the paving and gives the garden bed a clear edge without needing extra trim.
This setup works well on sloped entries or side paths where you need both support and a planting line. Keep the stone wall low and let the pavers handle the main walking surface so the contrast stays simple and the maintenance stays low.
Pebble Borders Along Paved Paths
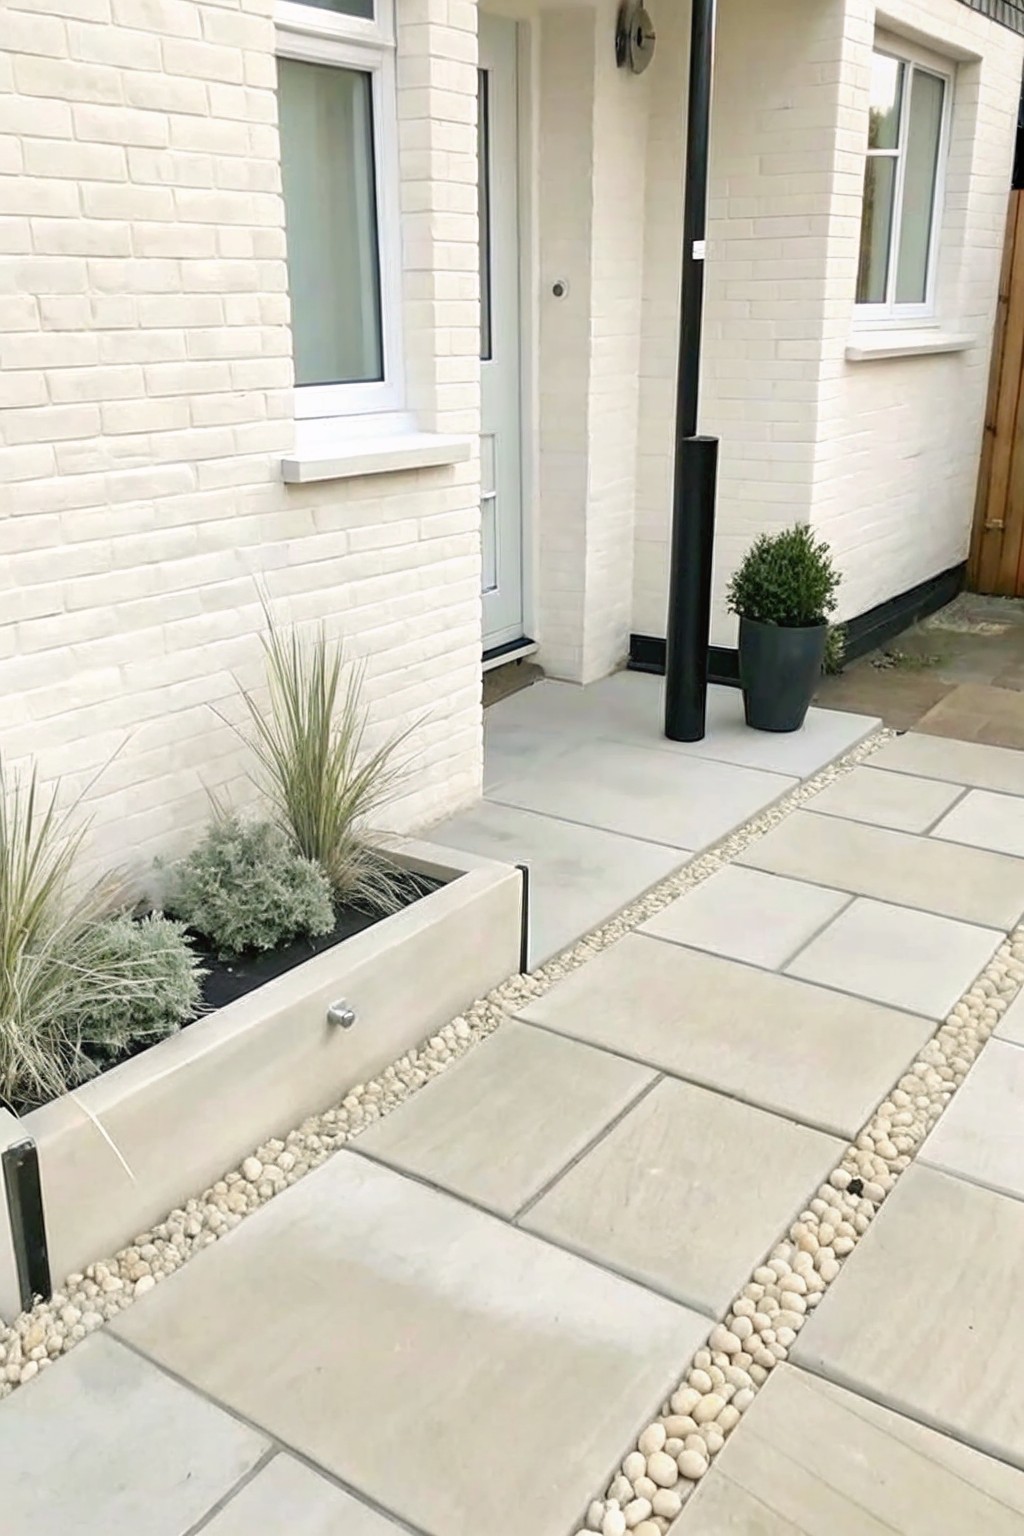
A narrow strip of pebbles next to larger paving stones creates a simple way to mark the edge of a path while keeping planting areas separate. The contrast in texture and size makes the layout feel more structured without adding extra height or bulk.
This approach suits homes with clean brickwork or modern front entries where you want the garden to look tidy but not overly formal. Keep the pebble band narrow so it stays easy to maintain and does not compete with the main paving.
Patterned Mats for Defined Entry Borders
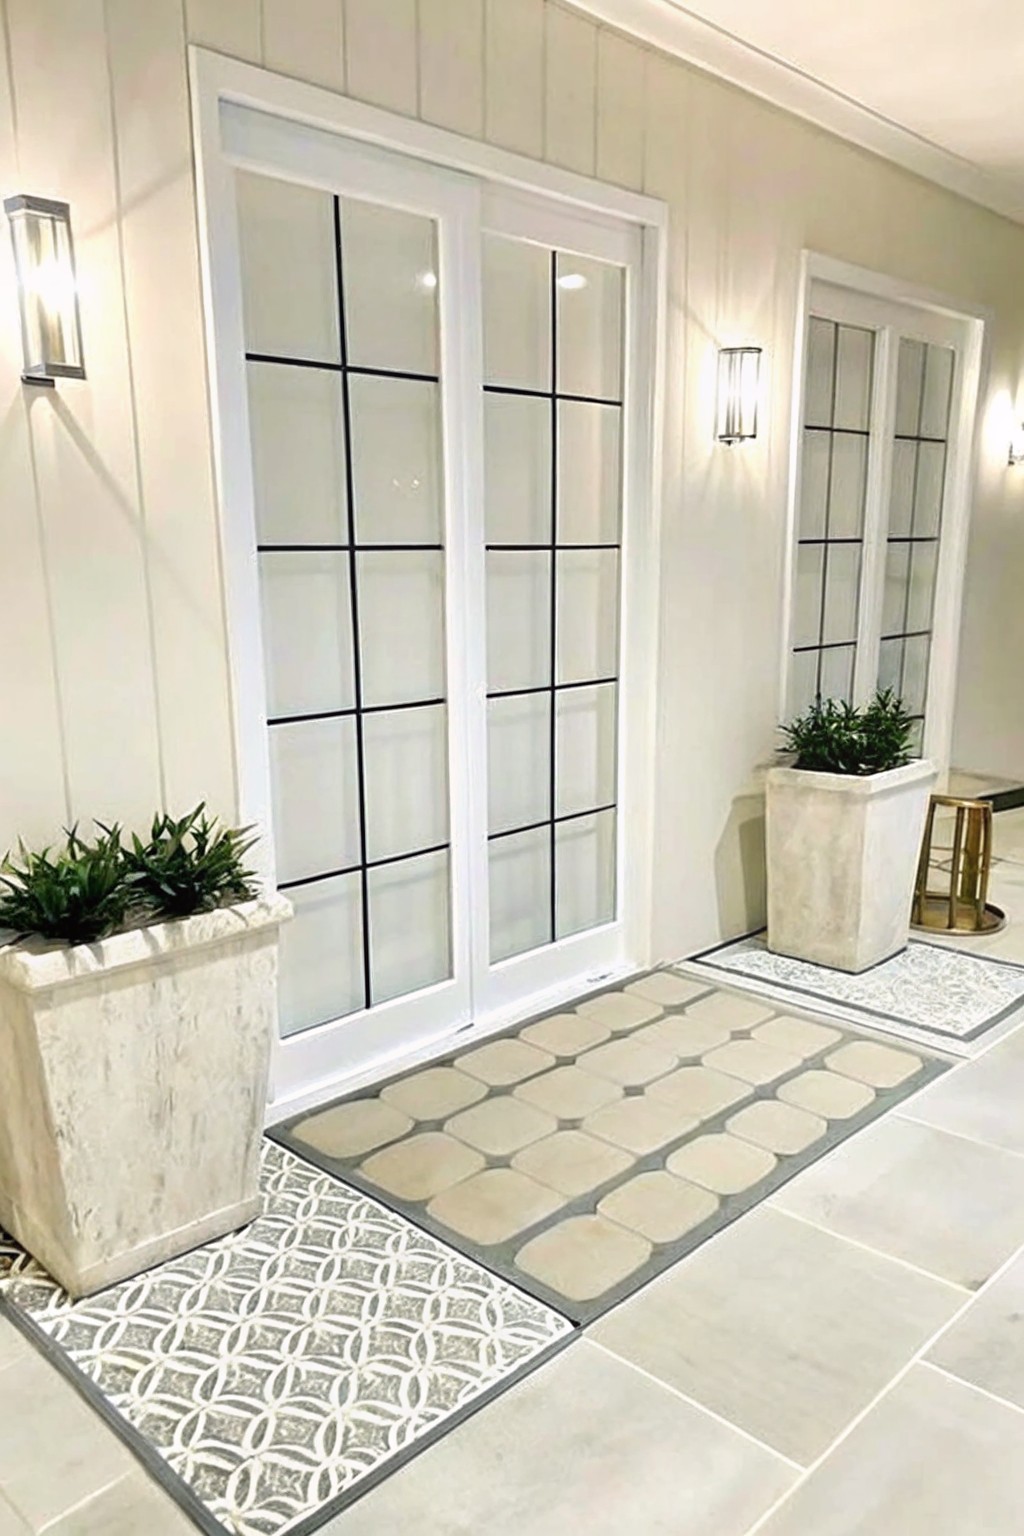
Mixing patterned outdoor mats with a plain tile floor gives an entry a clear border without any permanent construction. The contrast in texture and design makes the walkway feel intentional and helps separate the porch area from the rest of the yard.
This approach works well on covered porches or side entries where you want something easy to change with the seasons. Stick to two or three mat patterns at most so the look stays simple, and choose colors that echo nearby planters or door trim.
Pebble Strips To Define Path Edges
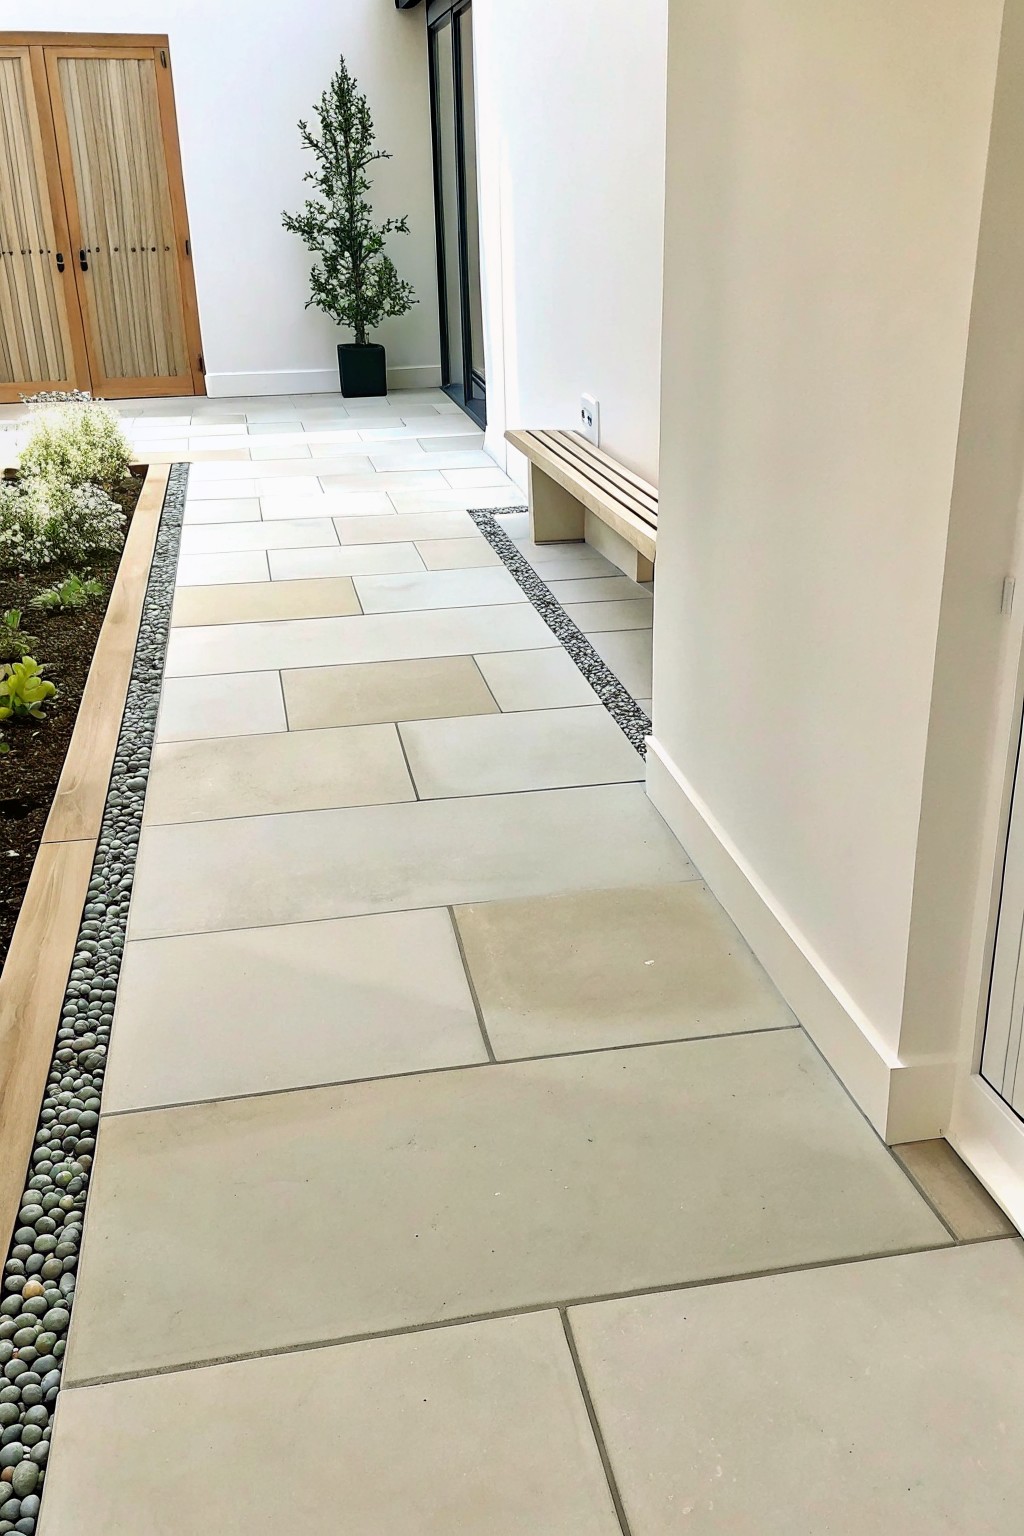
A narrow band of pebbles next to large pavers makes a clean break between the walkway and the garden bed. The small stones keep soil and plants from creeping onto the path while adding texture that stands out against the flat surface of the pavers.
This edging works best in straight, simple layouts where you want low maintenance and a tidy look. It suits modern homes with stone or concrete paths and raised or ground-level beds. Keep the pebbles in a shallow trench or use edging on both sides so they stay in place over time.
Pair Concrete Paths With Pebble Borders
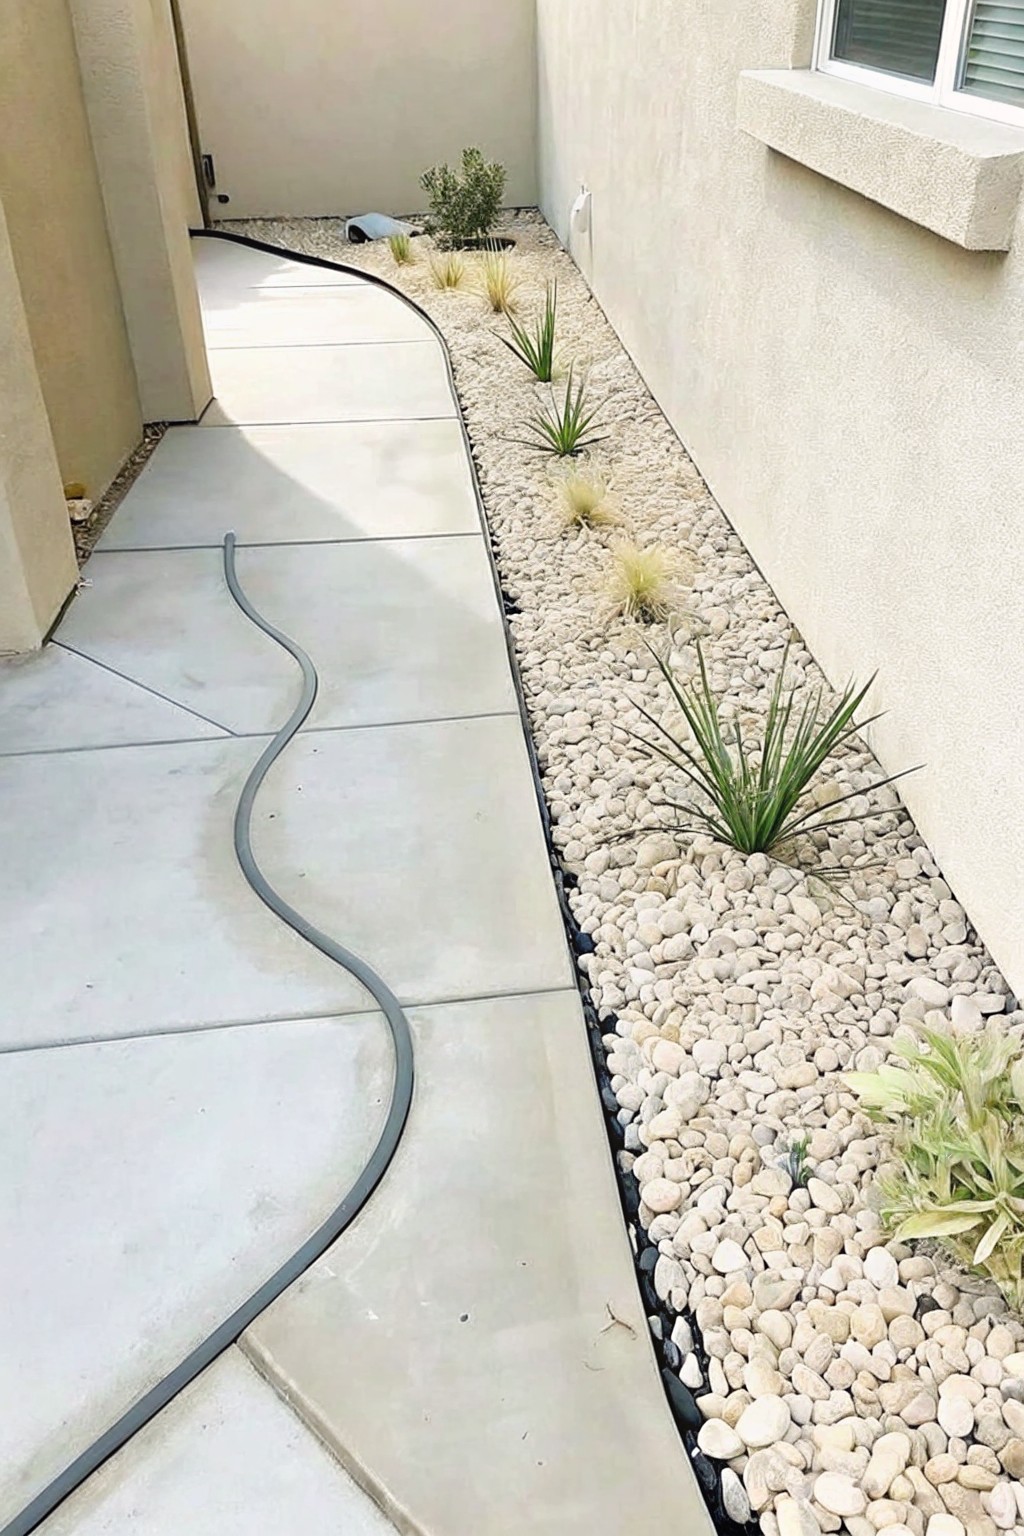
This setup works because the smooth concrete and loose pebbles create a clear visual break without needing extra edging materials. The contrast keeps the walkway looking intentional while the pebble strip handles drainage and planting space right next to the house.
It suits narrow side yards or service paths where you want low maintenance and easy walking access. Just keep the pebble bed narrow enough to avoid spreading onto the concrete over time.
Pebble Borders Along Tiled Patios
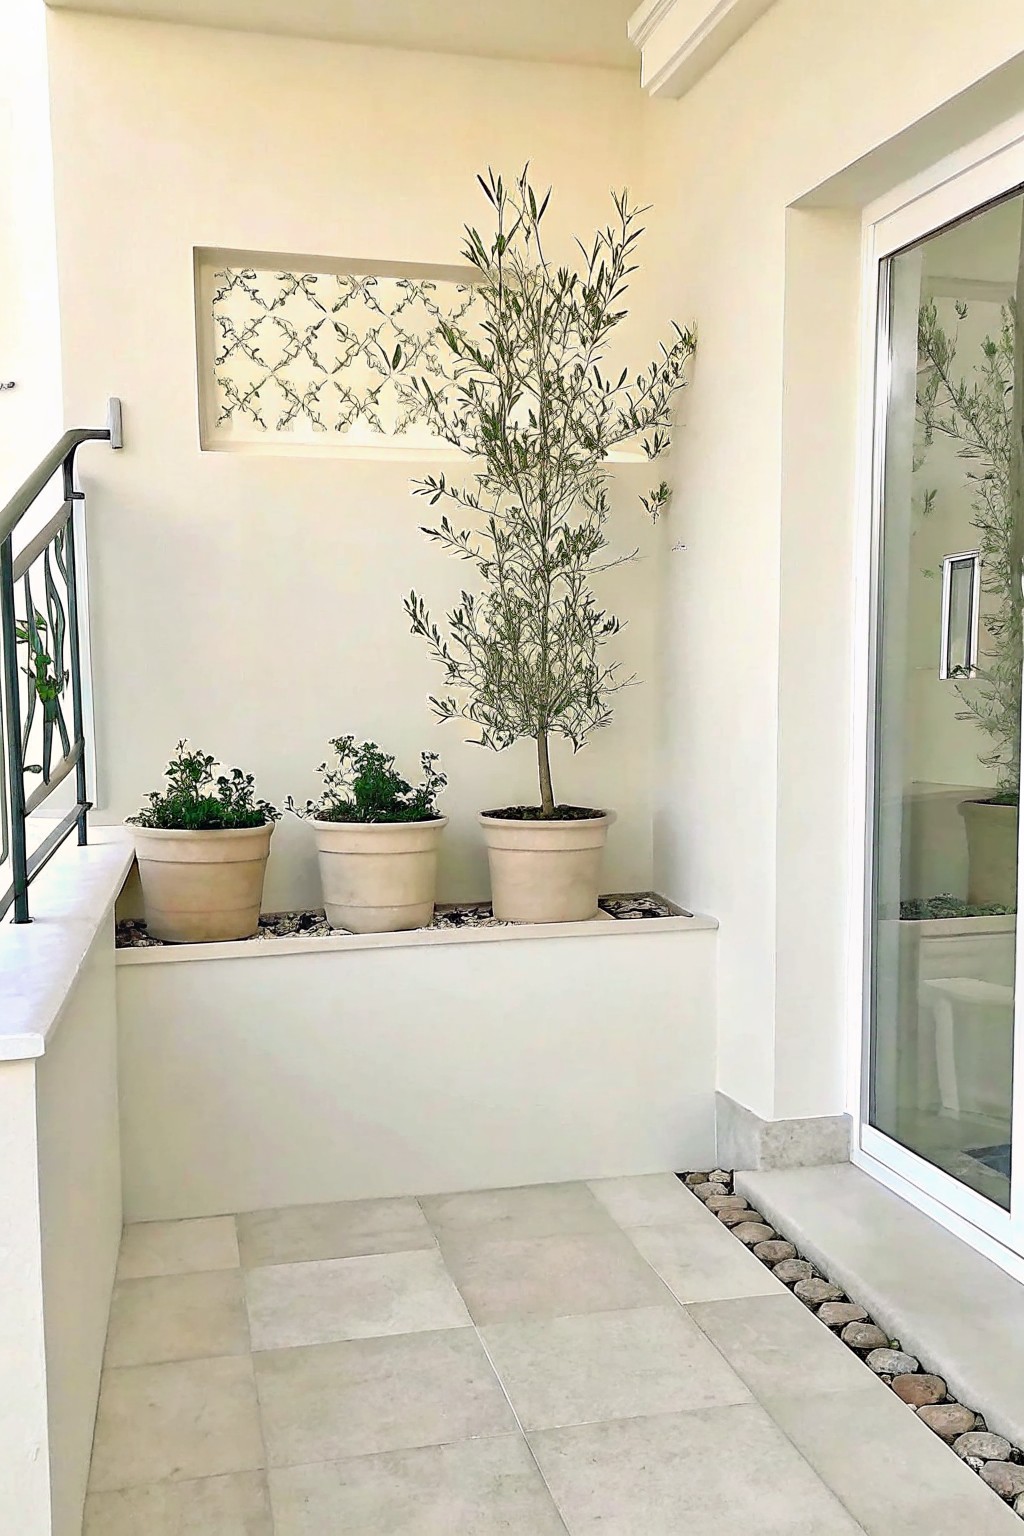
A narrow strip of pebbles can mark the edge between a tiled patio and a raised planting area without adding bulk. The small stones stand out against the larger tiles and give the space a finished look that still feels simple.
This works best on patios or side entries where you want low upkeep and clear separation between walking areas and beds. Keep the pebble strip narrow and contained so it stays in place and does not spill onto the main floor.
Narrow Dark Borders Against Light Paving
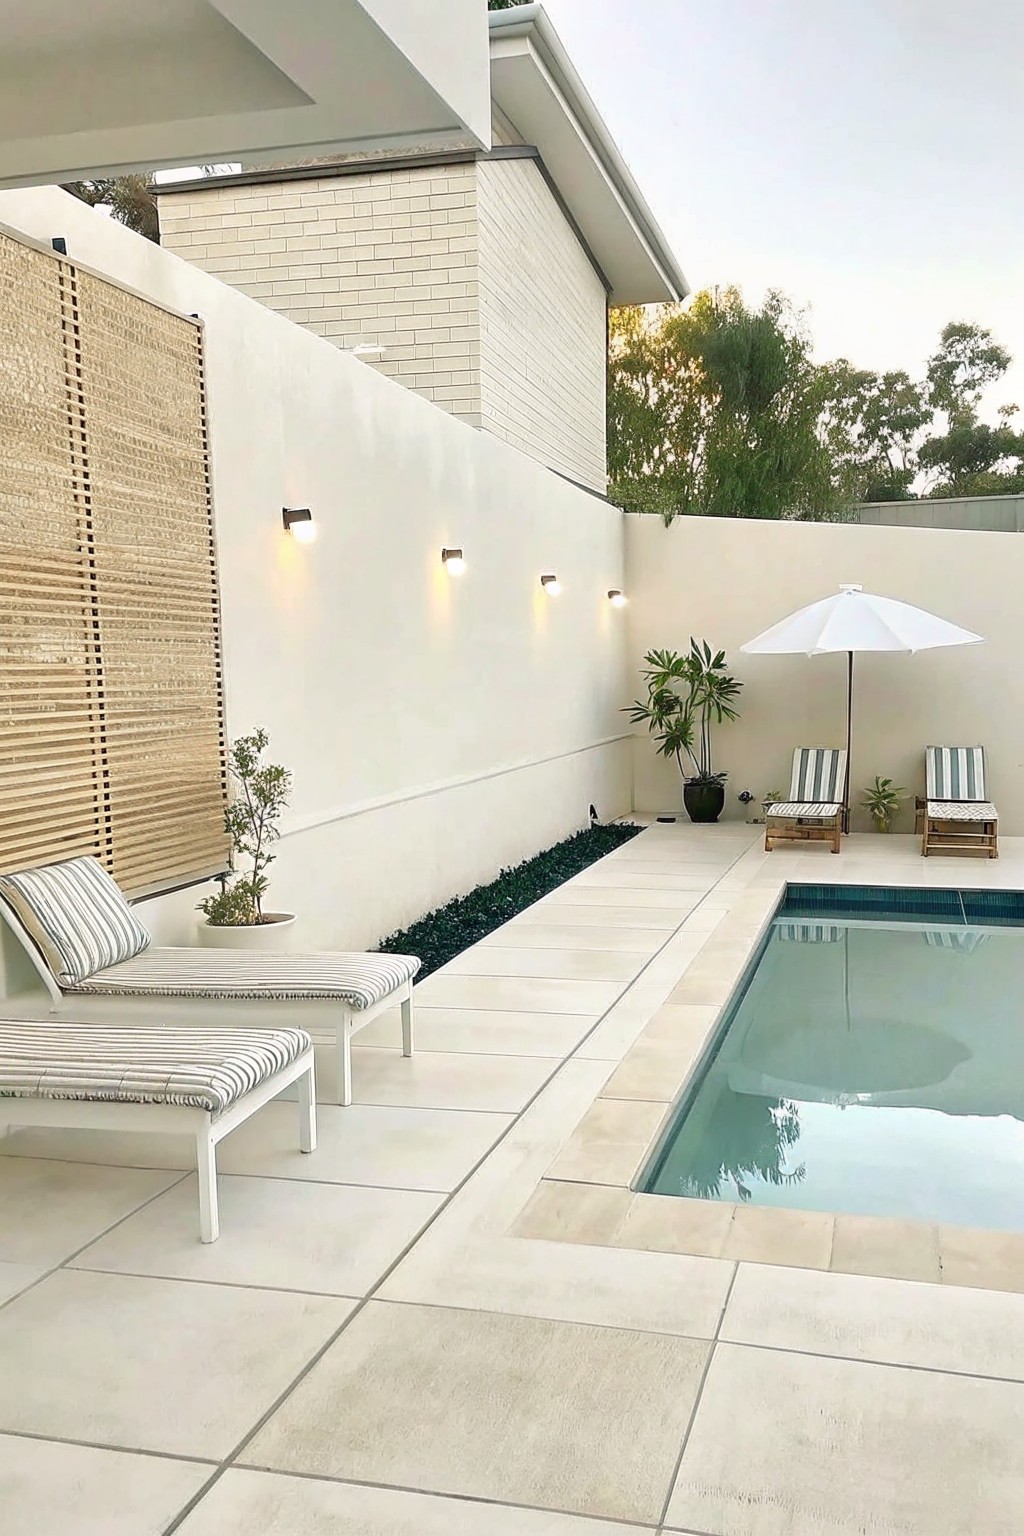
A narrow strip of dark groundcover running along a wall can give a clean contrast when the rest of the space uses light stone. It breaks up the large pale surface without adding clutter or needing much height.
This works well on flat sites where you want a simple edge that still feels intentional. Keep the strip only a foot or two wide, choose low plants that stay neat, and let the color difference do the work rather than adding extra features.
Defining a Path with Contrasting Tile Borders
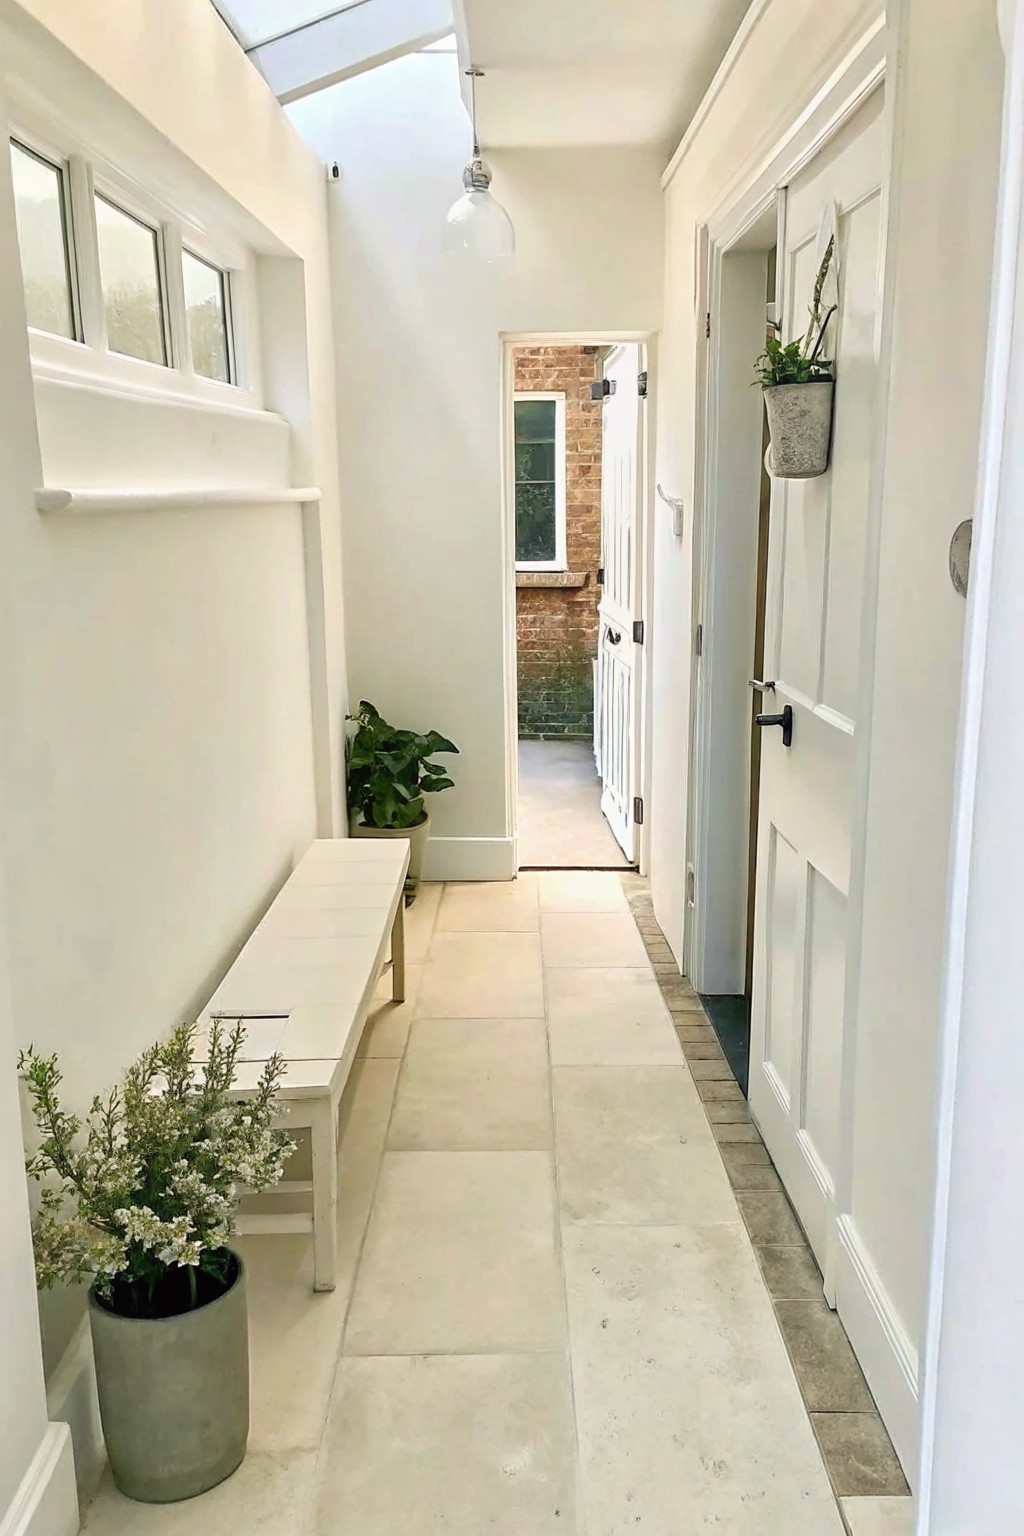
A simple border of smaller, darker tiles along the edges of a light stone floor can make a narrow indoor passage feel more structured and intentional. It adds a subtle frame without needing extra furniture or decoration, and the change in material keeps the eye moving forward through the space.
This works best in homes with long hallways or connecting areas where you want a bit of rhythm underfoot. Keep the border width modest so it does not crowd the main walking surface, and choose tones that still sit close to the main floor color for a quiet effect rather than a bold stripe.
Large Pavers With Concrete Planters
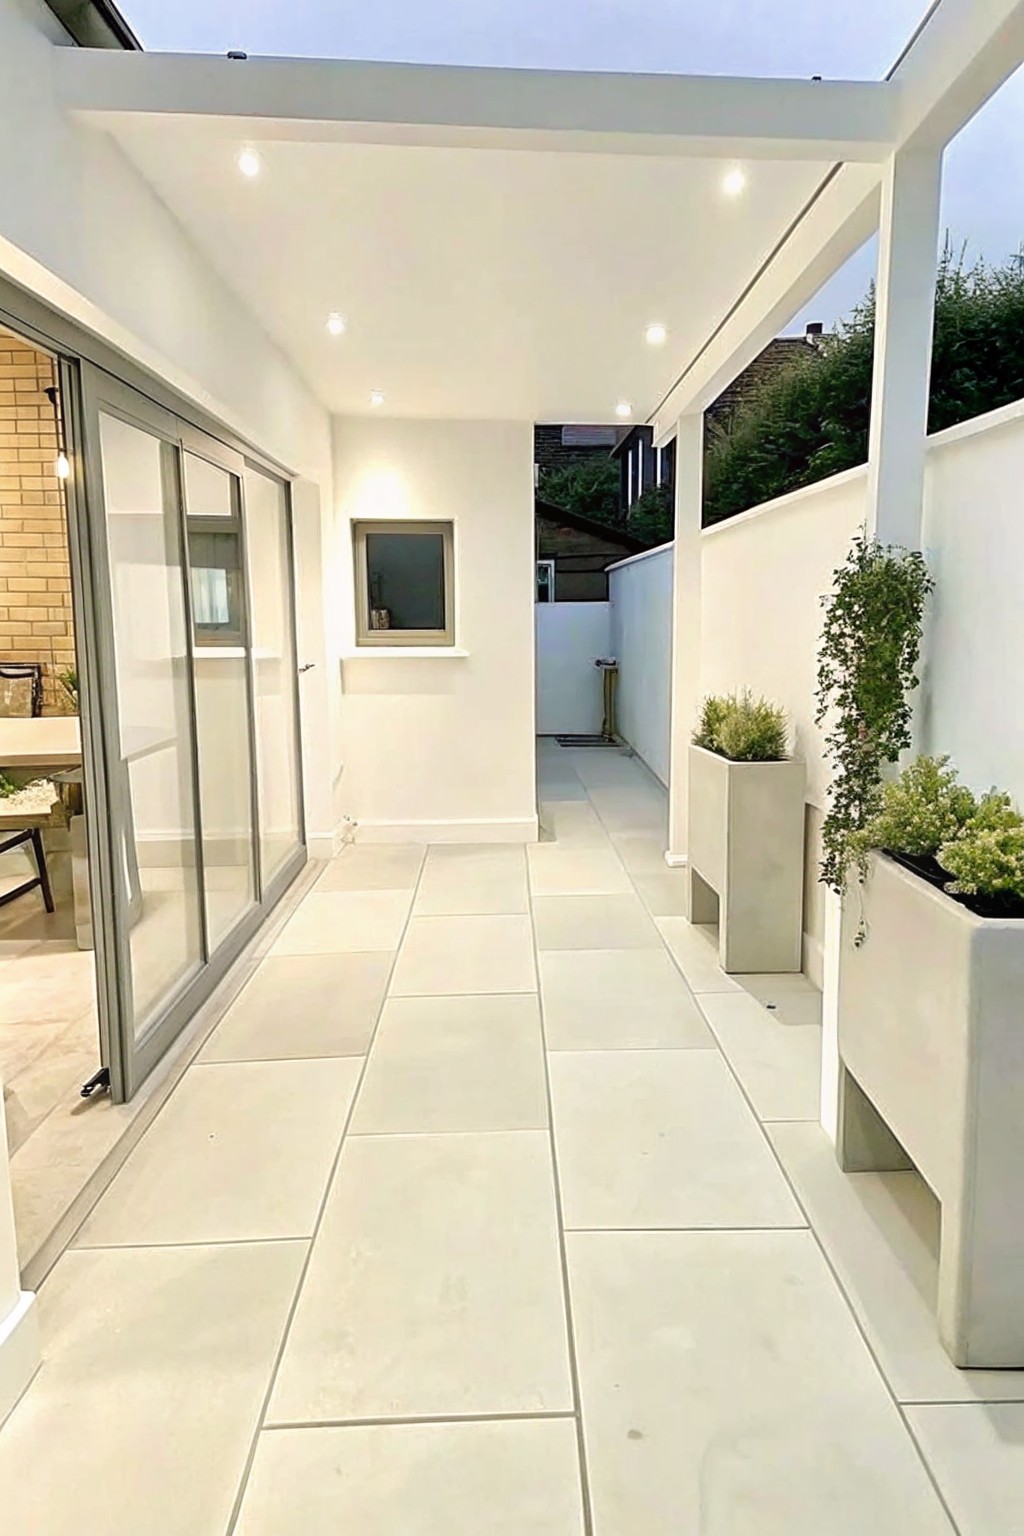
Large light pavers create a simple base that lets concrete planters stand out as the border. The flat tiles keep the ground open and easy to walk on while the planters add height and a solid edge without extra trim or metal strips. This mix works because the two materials play off each other instead of blending together.
It fits best along side paths or narrow courtyards where you need a clear line between paving and planting. Keep the planters in the same light tone as the house walls so the whole area feels connected. Just make sure the pavers are big enough that the joints do not compete with the planter shapes.
Frequently Asked Questions
Q: How do I pick two materials that contrast without clashing in my yard? A: Grab one textured option like rough cedar and set it next to something smooth such as concrete pavers. Walk the space at different times of day to check how shadows fall between them before you commit to the full length.
Q: Will these borders need extra work once the seasons change? A: Check the edges every month or so for shifting gravel or lifted boards. A quick reset keeps the contrast sharp and stops small gaps from turning into bigger problems later.
Q: Can I try this on a tight budget without buying everything new? A: Reuse old bricks or leftover metal scraps from another project and buy only the second material in small amounts. Mixing what you already own with one fresh choice keeps costs down while still giving that standout look.
