
Have you ever found yourself staring at a dead lawn mower battery on a sunny weekend, ready to tackle your yard? It’s a frustrating situation many face, but don’t worry—charging your battery is easier than you think.
Key Takeaways
- Understand Battery Types: Familiarize yourself with the various lawn mower battery types, including lead-acid, lithium-ion, gel cell, and AGM batteries, to choose the best one for your needs.
- Follow Proper Charging Techniques: Adhere to safety precautions and the correct charging process to prolong the battery’s lifespan and ensure optimal performance.
- Monitor Battery Health: Regularly check the battery voltage, clean connections, and inspect for damage to maintain your battery in good condition.
- Recognize Signs of Battery Issues: Be aware of symptoms such as slow starting, dimming lights, or fluid leakage, which may indicate the need for battery replacement.
- Charge Fully and Store Correctly: Always fully charge your battery, and store it in a cool, dry place to enhance its longevity and reliability.
Understanding Lawn Mower Batteries
Lawn mower batteries provide the power your mower needs for efficient operation. Knowing about their types and proper charging techniques enhances tool longevity and performance.
Types of Lawn Mower Batteries
- Lead-Acid Batteries: These batteries are common in lawn mowers. They’re affordable and reliable but require maintenance, like regular water checks.
- Lithium-Ion Batteries: Lithium-ion batteries are lighter and offer longer run times. They charge quickly and maintain power better over time, though they’re generally pricier.
- Gel Cell Batteries: Gel cell batteries are sealed and spill-proof. They function well in various temperatures and require less maintenance, making them convenient options.
- Absorbed Glass Mat (AGM) Batteries: AGM batteries combine convenience with performance. They’re resistant to vibration and provide excellent power and longevity.
Importance of Proper Charging
Proper charging protects battery health and ensures optimal performance. Following the manufacturer’s guidelines prevents overcharging, which can cause damage. Here are key reasons proper charging matters:
- Extends Battery Life: Regularly following good charging practices significantly extends battery lifespan.
- Prevents Damage: Overcharging leads to overheating and potential failure, risking your ability to start the mower when needed.
- Maximizes Performance: A well-charged battery ensures reliable power delivery, improving mowing efficiency.
- Improves Safety: Overcharged batteries increase the risk of leaks and explosions. Proper charging reduces this risk.
By understanding the different battery types and adhering to proper charging methods, you ensure your lawn mower runs smoothly and lasts longer.
How to Charge Your Lawn Mower Battery
Charging your lawn mower battery is simple and can be done in a few steps. Following the right process ensures your battery lasts longer and operates efficiently.
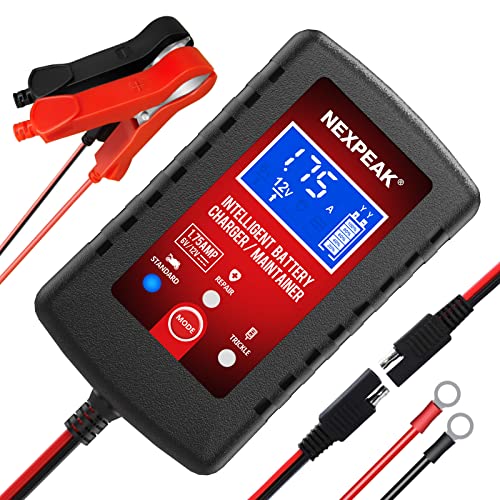
Recommended Products

This smart battery charger/maintainer is equipped with a microprocessor-controlled program that ensures optimal charging for lead-acid, flooded or sealed maintenance-free batteries (AGM and Gel Cell), as well as Lithium (LiFePO4) batteries.

4-in-1 Battery Charger, Tester, Maintainer & Desulfator — Why spend $200+ on multiple tools? Trusted by professionals for over 17 years, FOXWELL BC521 combines smart battery charging, testing, maintenance, and desulfation in one durable, space-saving device. Designed for all 12V lead-acid batteries (AGM, GEL, EFB, Flooded), it helps ensure reliable starts for cars, SUVs, ATVs, motorcycles, RVs, boats and lawn mower— perfect for waking up vehicles after winter storage as spring arrives. Not compatible with lithium, 6V, or 24V batteries. Not a Jump Starter. Note: Outer warmth means active heat dissipation. It is completely normal and protected by multi-thermal safeguards.
Safety Precautions
- Disconnect the Battery: Always disconnect the battery from the mower before charging. This reduces the risk of electric shock.
- Work in a Ventilated Area: Charge the battery in a well-ventilated space to avoid inhaling harmful gases that might be released.
- Wear Gloves and Safety Goggles: Protect your hands and eyes during the charging process. This minimizes injury from acid spills or electrical arcs.
- Check for Damage: Inspect the battery for cracks, leaks, or corrosion. Don’t charge a damaged battery, as it can lead to further issues or hazards.
- Battery Charger: Choose a charger compatible with your battery type. Automatic chargers adjust the voltage and prevent overcharging.
- Wrench or Socket Set: Use these tools to disconnect and reconnect battery terminals securely.
- Multimeter: A multimeter helps check the voltage of your battery, ensuring it’s properly charged.
- Protective Gear: Obtain gloves and safety goggles to protect yourself during handling.
Ensure you prepare adequately with these tools and precautions before starting the charging process. Properly following these steps will keep your battery healthy and your lawn mower running smoothly.
Step-by-Step Charging Process
Charging your lawn mower battery involves a few straightforward steps. Following these instructions helps ensure effective charging and extends battery life.
Recommended Products

【THE PERFECT WINTER BATTERY CHARGING SOLUTION】Corebox automatic battery trickle charger with 8 charging protections is an all-in-one solution: charger, maintainer, trickle charger and desulfator. It ensures perfect maintenance of battery charging safety during the winter or vacation months, avoiding battery failure in advance. Temp compensation in hot or cold climates, reverse protection, cooling system, overcurrent, fireproof material, overcharge, short circuit.

【10-AMP QUICK BATTERY CHARGER】12V 10-Amp and 24V 5-Amp 7-stage quick battery charger and maintainer, charging speed is much faster than 8-Amp or 5-Amp automatic chargers also harmless to the battery cycle life. Charge or repair all 12-volt and 24-volt lead-acid automotive, marine and deep-cycle batteries including AGM, GEL, SLA, and Flooded in cars, trucks, SUVs, motorcycles, lawn mowers, boats, etc. NOTE: Charging current exceeding 15A could lead to overcharging of the battery and damage to the internal chemicals, choosing the appropriate battery charger is essential!
【Battery Charger, Maintainer&Desulfator】An compact size portable 4 in 1 battery charger, battery maintainer, trickle charger, and battery desulfator. Perfect for all types of 6-volt and 12-volt lead-acid automotive, RV, powersport, and deep-cycle batteries, including flooded, gel, AGM, SLA, VRLA and maintenance-free batteries, suitable for cars, golf carts, motorcycles, boats, lawn mowers, marines, ATVs, UTVs etc.
Connecting the Charger
- Gather Your Tools: Ensure you have a compatible battery charger, a wrench or socket set, and safety gear.
- Turn Off the Charger: Before connecting, make sure the charger is turned off.
- Disconnect the Battery: Always disconnect the battery from the mower for safety. Use a wrench to remove the negative (black) cable first, then the positive (red) cable.
- Attach Charger Clips: Connect the charger’s positive (red) clip to the battery’s positive terminal. Then, connect the negative (black) clip to the battery’s negative terminal. Make sure connections are secure.
- Check Connections: Ensure all connections are tight, preventing arcing or poor contact.
Charging Duration
- Standard Charging Time: Typically, charging takes 4 to 8 hours, depending on the battery type and capacity.
- Check the Charger: Follow your charger’s instructions regarding charging time. Some chargers feature automatic shut-off functions when charging completes.
- Monitor the Battery: Use a multimeter to check the battery voltage after charging. A fully charged battery should read around 12.6 to 12.8 volts.
- Turn Off the Charger: Always switch off the charger before disconnecting clips.
- Remove Clips in Reverse Order: First, detach the negative (black) clip, then the positive (red) clip. This prevents sparks from forming during disconnection.
- Reattach the Battery: Reconnect the battery to your mower by attaching the positive (red) cable first, followed by the negative (black) cable.
- Ensure Secure Connections: Check all connections to make sure they’re tight and secure before starting your mower.
By carefully following these steps, you maintain a healthy and long-lasting lawn mower battery.
Maintaining Your Lawn Mower Battery
Maintaining your lawn mower battery ensures optimal performance and extends its lifespan. Regular checks and minor care can prevent unexpected failures during your mowing tasks.
Recommended Products

Fleet and Vehicle Maintenance
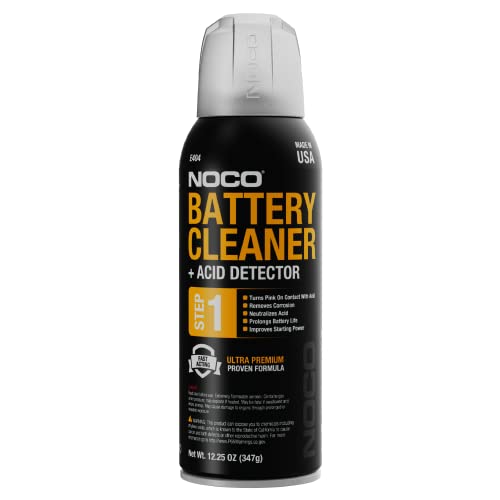
Removes Battery Corrosion - Instantly neutralizes, dissolves, and removes battery corrosion - simply spray-on and rinse-off.

Specially designed to protect battery terminals from corrosion, a leading cause of hard starting and battery failure.
Regular Maintenance Tips
- Check Voltage: Use a multimeter to regularly test the battery’s voltage. A voltage below 12.4 volts indicates charging is necessary.
- Clean Connections: Inspect and clean battery terminals regularly. Remove corrosion with a mixture of baking soda and water. Use a wire brush for effective cleaning.
- Inspect for Damages: Regularly examine the battery for cracks, leaks, or swelling. Any signs of damage mean it’s time to replace the battery.
- Store Properly: Store your lawn mower battery in a cool, dry place. Avoid extreme temperatures that can affect performance.
- Charge Fully: Always charge your battery fully, even if you only plan to use it briefly. A fully charged battery lasts longer and works better.
- Slow Starting: If your lawn mower struggles to start, a weak battery might be the cause. Check the battery voltage immediately.
- Dimming Lights: Notice dimming headlights or instrument panel lights? This indicates a weakening battery.
- Fluid Leakage: Look for any fluid leaking from the battery. This often signals serious issues and requires immediate attention.
- Age of Battery: Most batteries last 3 to 5 years. If yours is approaching this age and you notice issues, consider replacing it.
- Frequent Need for Charging: If you find yourself constantly recharging the battery, it’s likely losing its ability to hold a charge effectively.
Conclusion
Keeping your lawn mower battery charged and well-maintained is key to a healthy mower and a beautiful yard. By following the proper charging techniques and safety precautions you can avoid common pitfalls and extend the life of your battery.
Remember to check for any signs of wear and tear regularly and stay proactive with maintenance. With a little care and attention your lawn mower will be ready to tackle any task you throw its way. So gear up and get ready to enjoy a lush green lawn without the hassle of a dead battery!
Frequently Asked Questions
What types of lawn mower batteries are there?
Lawn mower batteries typically come in four main types: lead-acid, lithium-ion, gel cell, and absorbed glass mat (AGM). Each type has distinct characteristics, such as lifespan, maintenance needs, and charging requirements. Understanding these differences can help you choose the right battery for your mower.
How do I charge my lawn mower battery safely?
To charge your lawn mower battery safely, first disconnect the battery and charge in a well-ventilated area. Always wear gloves and safety goggles, check the battery for damage, and follow the manufacturer’s charging guidelines. This ensures that you prevent damage and maintain safety during the process.
What tools do I need to charge a lawn mower battery?
Essential tools for charging a lawn mower battery include a compatible battery charger, a wrench or socket set to disconnect the battery, a multimeter to check voltage, and protective gear like gloves and safety glasses. Having these tools ready will make the process smoother and safer.
How long does it take to charge a lawn mower battery?
Charging a lawn mower battery typically takes between 4 to 8 hours, depending on the battery type and charger specifications. Always monitor the charging process and ensure you turn the charger off once the battery is fully charged for optimal performance and longevity.
How can I maintain my lawn mower battery?
To maintain your lawn mower battery, check its voltage regularly with a multimeter, clean the battery connections, inspect it for damage, store it properly, and ensure it is fully charged. Regular maintenance can extend your battery’s lifespan and ensure reliable mower operation.
What are the signs of a weakening lawn mower battery?
Signs of a weakening lawn mower battery include slow starting, dimming lights, fluid leaks, an old age (typically over three years), and needing frequent charges. If you notice these issues, it may be time to test or replace your battery for optimal performance.