
Have you ever found yourself struggling with a lawn mower tire that’s popped off the bead? It’s a frustrating situation that can leave your mowing plans in limbo. You’re not alone—many people face this issue, especially after hitting a bump or running over rough terrain.
Key Takeaways
- Understanding Tire Beads: Lawn mower tire beads create a secure seal that prevents air leaks and maintains proper tire pressure, essential for safe operation.
- Tools for the Job: Necessary tools include a tire inflator, tire levers, valve core tool, soapy water for lubrication, and personal safety gear such as goggles and gloves.
- Step-by-Step Process: Follow a systematic approach: remove the tire, inspect for damage, clean and lubricate, and ensure proper seating before inflating.
- Check for Common Mistakes: Avoid overinflation and ensuring proper alignment to prevent damage and ensure a secure fit on the rim.
- Safety First: Always prioritize safety equipment like steel-toed boots and knee pads to protect yourself while working on lawn mower tires.
Understanding Lawn Mower Tire Beads
Lawn mower tire beads are an essential part of tire design. They help secure the tire to the wheel rim, ensuring proper functionality and safety while mowing.
What Are Tire Beads?
Tire beads are the circular bands made of rubber or reinforced materials, located at the inner edge of a tire. These beads fit into the rim’s groove, creating a tight seal when inflated. This design prevents air from escaping and maintains tire pressure. You may face issues if the bead loses its grip due to improper inflation or damage.
Importance of Proper Tire Bead Seating
Proper tire bead seating ensures that the tire remains securely attached to the rim during operation. If the bead isn’t seated correctly, it can lead to air leaks, decreased traction, and potential tire blowouts. For optimal performance, check the beads after any tire maintenance or repairs and ensure they seat evenly when inflating the tire. Regularly inspecting your lawn mower tires can save you time and enhance your mowing experience.
Tools Required for The Job
Getting your lawn mower tire back on the bead requires specific tools. Using the right equipment makes the process smoother and more efficient.
Recommended Products

Accurate pressure reading with easy-to-read digital display with highly accurate pressure read out (-2 PSI delta on all applications tested*)

The WYNNsky tire gauge is designed specifically to provide precision measurements for low pressure readings that higher PSI gauges are unable to provide
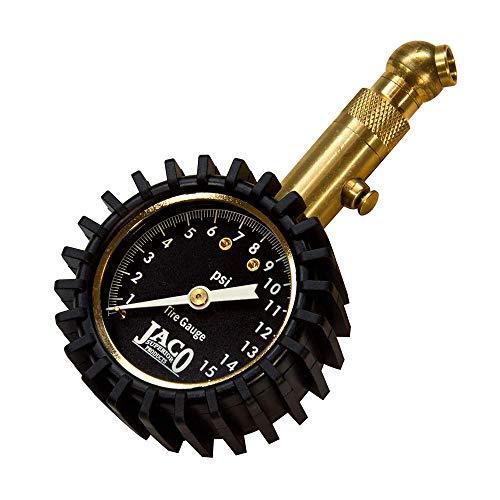
Mechanic Recommended - performance tested, certified, & calibrated accurate within ANSI Standards (±1.5%) at our NIST accredited industrial facility, ensuring precise tire pressure readings without relying on batteries; 0-15 PSI scale is ideal for low pressure tires found on an ATV, trail & dirt bikes, tractors, quads, and more
Essential Tools List
- Tire Inflator: Use an air compressor or portable tire inflator to properly inflate the tire.
- Tire Levers: Employ tire levers to help pry the tire back onto the rim.
- Valve Core Tool: Get a valve core tool to remove or install the valve core effectively.
- Soapy Water: Mix soap and water to create lubrication that helps the tire slide into place.
- Safety Goggles: Protect your eyes while working with pressurized air and tools.
- Work Gloves: Wear gloves for grip and to protect your hands during the process.
Safety Equipment
Ensure you have safety equipment on hand to avoid injuries.
- Steel-Toed Boots: Wear steel-toed boots for foot protection in case of tool slips.
- Knee Pads: Use knee pads if you’re working close to the ground to prevent discomfort.
- Ear Protection: Utilize ear protection if working with loud compressors or tools for extended periods.
Focusing on safety not only protects you but enhances your ability to complete the task effectively.
Step-by-Step Guide on How to Get Lawn Mower Tire Back on Bead
Getting a lawn mower tire back on the bead can seem daunting, but it’s straightforward with the right approach. Follow these steps to put your tire back in place.
Preparing the Tire
- Remove the Tire: Use tire levers to pry the tire off the wheel rim. Make sure you position the levers securely to avoid damaging the tire.
- Inspect for Damage: Check the tire and rim for any visible damage like cracks, tears, or worn areas. Replace any damaged components before proceeding.
- Clean the Rim: Wipe down the rim with soapy water or a degreaser to remove dirt and debris. A clean surface helps the tire bead seat properly.
- Lubricate the Bead: Apply soapy water to the tire bead. This lubrication assists in sliding the tire into position without unnecessary friction.
Seating the Tire Bead
- Position the Tire: Align the tire with the rim and push one side of the tire onto the rim. Ensure the bead fits inside the rim rim’s groove.
- Use a Valve Core Tool: Remove the valve core of the tire. This step allows air to flow freely while seating the bead.
- Press Down on the Tire: Apply pressure around the tire’s circumference to help the bead drop into place. Use your body weight if necessary to create an even push.
- Inflate the Tire: Use a tire inflator to start adding air. Keep an eye on the bead as you inflate. It should pop into place as the tire expands.
- Watch for Leaks: After inflation, check for any air leaks using soapy water. Bubbles indicate areas where air escapes.
- Replace the Valve Core: Once you ensure the bead is seated and no leaks are present, reinstall the valve core. Tighten it securely.
- Final Inflate: Inflate to the recommended PSI, which is usually around 12-15 PSI for most lawn mower tires. Check your mower’s manual for specific values.
By following these steps, your lawn mower tire should be back on the bead and ready for action.
Common Mistakes to Avoid
Avoiding common mistakes ensures a smooth process when getting your lawn mower tire back on the bead. Recognizing these pitfalls helps achieve better results and enhances safety.
Overinflation Issues
Overinflating the tire can lead to serious damage. When you inflate the tire beyond the recommended PSI, you risk popping the bead or even blowing out the tire. Always check the manufacturer’s specifications for the correct tire pressure. Use an accurate tire gauge to monitor pressure during inflation. Inflate slowly and stop as soon as you reach the suggested PSI.
Misalignment Problems
Misalignment of the tire can hinder proper bead seating. Ensure the tire is properly positioned on the wheel rim before inflating. If the tire isn’t aligned, it won’t create a tight seal, leading to air leaks. Inspect the tire as you work, adjusting it to fit snugly on the rim. As air fills the tire, watch for any areas that do not seat properly and make necessary adjustments.
Conclusion
Getting your lawn mower tire back on the bead doesn’t have to be a hassle. With the right tools and a bit of patience you can tackle this task confidently. Remember to prioritize safety by wearing appropriate gear and following the steps carefully.
Regularly checking your tires will not only enhance their performance but also keep your mowing experience enjoyable. By avoiding common mistakes and staying aware of your tire’s condition you’ll ensure a smoother ride every time you head out to mow. Happy mowing!
Frequently Asked Questions
What causes lawn mower tires to pop off the bead?
A lawn mower tire can pop off the bead mainly due to hitting bumps or rough terrain while mowing. This disrupts the tight seal between the tire and wheel rim, leading to air leaks, decreased traction, and potential blowouts.
How do I check if my lawn mower tire bead is seated properly?
To check if your lawn mower tire bead is seated properly, visually inspect the tire on the rim for any gaps or bulges. You can also lightly press around the tire’s edge; if it feels uneven or loose, the bead may not be seated correctly.
What tools do I need to fix a lawn mower tire bead?
You’ll need a tire inflator, tire levers, a valve core tool, soapy water for lubrication, safety goggles, and work gloves. Optional equipment like steel-toed boots and knee pads is also recommended for safety.
How do I get a lawn mower tire back on the bead?
Start by removing the tire from the rim, inspect for damage, and clean the rim. Lubricate the bead with soapy water, position the tire, and use a valve core tool to allow airflow. Inflate the tire while applying pressure to seat the bead and monitor for leaks.
What are common mistakes to avoid when fixing a lawn mower tire bead?
Avoid overinflating the tire, as this can cause serious damage. Make sure to follow the manufacturer’s specifications for tire pressure. Additionally, ensure the tire is properly aligned on the rim to achieve a tight seal and prevent leaks.
How often should I inspect my lawn mower tires?
It’s best to inspect your lawn mower tires regularly, especially before and after maintenance or repairs. Regular checks can enhance performance and ensure your mowing experience remains seamless.