
Have you ever found yourself struggling to start your Honda lawn mower, only to discover that the belt’s worn out? You’re not alone. Many homeowners face this issue, and it can be frustrating when your mower won’t work as it should.
Key Takeaways
- Gather Essential Tools: Before starting, ensure you have a socket set, wrench set, screwdrivers, pliers, rubber mallet, safety glasses, and gloves at hand.
- Follow Safety Precautions: Always wear safety gear, disconnect the battery if applicable, and work in a well-lit area to avoid accidents.
- Carefully Remove the Old Belt: Disassemble the mower deck, release tension on the belt, and inspect all components for damage while removing the old belt.
- Install the New Belt Properly: Align and route the new belt according to the manufacturer’s diagram, ensuring correct tension for optimal performance.
- Reassemble and Test: After reinstalling the mower deck, reconnect any components and perform a test run to ensure everything is functioning correctly without unusual noises.
Tools Needed
To change a belt on your Honda lawn mower, gather the following tools:
- Socket Set: Use a socket set that includes various sizes to loosen and tighten bolts and nuts.
- Wrench Set: A wrench set helps with any stubborn fasteners that require extra leverage.
- Screwdrivers: A flathead and a Phillips screwdriver assist in removing screws from covers and brackets.
- Pliers: Pliers can grip and maneuver different components during the process.
- Rubber Mallet: A rubber mallet may help dislodge any stuck parts without damaging them.
- Safety Glasses: Safety glasses protect your eyes from debris while you work.
- Gloves: Wear gloves to keep your hands clean and shielded from sharp edges.
Collect these tools before starting, as having everything on hand makes the job easier and quicker.
Preparation Steps
Before changing the belt on your Honda lawn mower, you’ll want to follow a few preparation steps to ensure a smooth process. Proper preparation can save time and make the task more manageable.
Safety Precautions
- Wear Safety Gear: Always wear safety glasses and gloves to protect yourself from debris and sharp edges.
- Disconnect the Battery: If your mower has an electric start, disconnect the battery to prevent accidental starts during the repair.
- Work in a Well-Lit Area: Make sure your workspace is well-lit to avoid mistakes while handling small parts.
- Clear the Workspace: Remove any obstacles from around your mower, ensuring you have enough space to work comfortably.
- Locate Your Tools: Gather the following tools to change the belt effectively:
- Socket set
- Wrench set
- Screwdrivers (flat-head and Phillips)
- Pliers
- Rubber mallet
- Check for Additional Supplies: Consider having a replacement belt on hand, as well as lubricant for moving parts.
- Organize Your Workspace: Arrange your tools in an easily accessible manner to minimize delays during the repair.
Removing the Old Belt
Removing the old belt from your Honda lawn mower involves several important steps. Follow these instructions carefully to ensure a smooth transition.
Recommended Products

***** USE FROM FRAME SERIAL # MZCG-8670001 - MZCG-1140000 *****
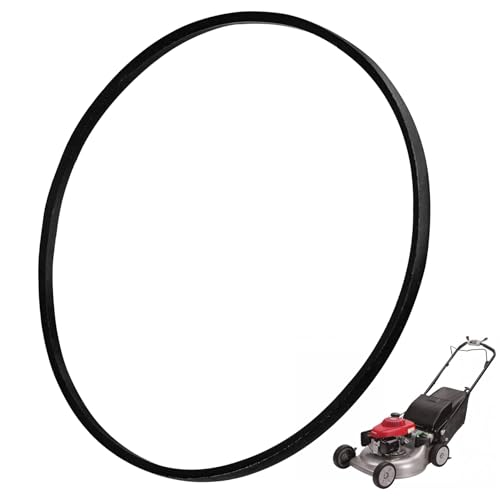
Replacement for Honda Lawn Mowers: This Drive V-Belt is designed to Replacement for Honda HRN216VKA 22431-VR8-N03 HRN216VLA HRN216VYA HRN216VKAA HRN216VLAA HRN216VYAA Walk-Behind Lawn Mowers Length: 39-3/8" Width: 3/8"
Disassembling the Mower Deck
- Gather Tools: Use a socket and wrench set to loosen and remove screws.
- Position the Mower: Raise the mower and securely support it with jack stands.
- Detach the Deck: Locate and remove any bolts securing the mower deck to the frame. This may include brackets or clamps.
- Disconnect the Drive Rod: If applicable, detach the drive rod connecting the deck to the engine. This may involve unscrewing or sliding it out of place.
- Remove the Deck: Carefully lift the mower deck away from the mower. Ensure you’re not damaging any components during this process.
- Locate the Belt: Identify where the old belt loops around the pulleys and engine.
- Release Tension: Use the appropriate wrench to loosen the tensioner pulley. This releases the tension on the old belt.
- Remove the Belt: Slide the old belt off the pulleys, starting at the engine and working your way toward the cutting deck.
- Inspect for Damage: Check the belt path and surrounding components for wear or damage. Clean any debris or grass clippings that may have accumulated.
Following these steps prepares you for the next phase of replacing your lawn mower’s belt.
Installing the New Belt
Installing the new belt requires careful attention to detail. Follow these steps to ensure a successful installation.
Recommended Products

PLEASE VERIFY THE CORRECT PARTS FOR YOUR ENGINE/EQUIPMENT BEFORE SUBMITTING YOUR ORDER - IF YOUR ENGINE IS NOT LISTED IN THE DESCRIPTION, PLEASE CONTACT SELLER AND DO NOT ASSUME THAT IT WILL FIT

Positioning the New Belt
- Align the Belt: Position the new belt over the pulleys, ensuring it fits snugly in the grooves. The belt should move freely without any twists or kinks.
- Route the Belt: Follow the manufacturer’s diagram often found in the user manual or on the mower itself for proper routing. This ensures the belt has the correct path through the pulleys.
- Check Tension: Slide the belt onto the tensioner pulley. Ensure the tensioner adds appropriate tension to the belt, allowing for smooth operation without excessive slack. Pull the belt slightly to verify tension.
- Reattach the Mower Deck: Position the mower deck back onto the frame. Align all brackets and holes.
- Secure Fasteners: Use your socket set to tighten the bolts that hold the deck in place. Start with the front and work your way to the back for even tightening.
- Reconnect Drive Rod: If applicable, reattach the drive rod to complete the connection between the deck and the mower.
- Test the Assembly: Before finalizing everything, manually rotate the blades to ensure they move freely without obstruction from the belt or deck.
By following these steps, you’ll ensure a proper installation of the new belt and the reassembly of your Honda lawn mower.
Testing the Mower
After assembling your Honda lawn mower, it’s crucial to ensure everything is functioning correctly. Testing the mower helps confirm that your new belt installation is effective.
Checking Belt Tension
Check the belt tension to ensure it’s properly tightened. If the belt is too loose, it can slip off the pulleys, leading to poor performance. To check, press down on the belt midway between the pulleys. It should feel snug but not overly tight. You can adjust the tension by modifying the position of the tensioner pulley if necessary. Refer to your owner’s manual for specific adjustments based on your mower model.
Performing a Test Run
Perform a test run to verify proper operation. Start the mower and let it run for a few minutes. Listen for any strange noises, like squeaks or grinding. These may indicate an incorrectly installed belt or other issues. Engage the blades manually while observing their movement. They should rotate smoothly without any obstruction. If everything sounds and looks good, you’ve successfully changed the belt.
Conclusion
Changing the belt on your Honda lawn mower can seem daunting but with the right tools and steps it’s a manageable task. By following the outlined process you can save time and money while ensuring your mower runs smoothly.
Remember to prioritize safety and take your time during the installation. After you’ve replaced the belt take a moment to test everything out. A successful belt change will have your mower back in action ready to tackle your lawn. Enjoy the satisfaction of a job well done and the beauty of your freshly mowed yard!
Frequently Asked Questions
What are common reasons for a Honda lawn mower not starting?
One common reason a Honda lawn mower may not start is a worn-out or broken belt. Other causes include fuel issues, a dead battery, or clogged air filters. Diagnosing the problem accurately can help determine the necessary repair.
What tools do I need to change a Honda lawn mower belt?
To change a Honda lawn mower belt, you’ll need a socket set, wrench set, screwdrivers, pliers, a rubber mallet, safety glasses, and gloves. Gathering these tools beforehand can help streamline the repair process.
What safety precautions should I take when changing the mower belt?
Always wear safety gear like gloves and goggles. For electric-start mowers, disconnect the battery beforehand. Work in a well-lit area and clear any obstacles from your workspace to ensure safety.
How do I remove the old belt from a Honda lawn mower?
To remove the old belt, start by disassembling the mower deck. Detach the deck, release tension on the tensioner pulley, and slide the old belt off the pulleys. Inspect the belt path for wear before proceeding.
How do I install a new belt on my Honda lawn mower?
Align the new belt over the pulleys, ensuring it fits snugly. Follow the manufacturer’s diagram for proper routing and check the tension on the belt once it’s on the tensioner pulley to ensure it’s correctly installed.
How do I reattach the mower deck after replacing the belt?
Reattach the mower deck by aligning the brackets and securing the fasteners with a socket set. If applicable, reconnect the drive rod, ensuring everything is properly fastened for safe operation.
What should I check after replacing the lawn mower belt?
Once the new belt is installed, manually rotate the blades to ensure they move freely. Check the belt tension to make sure it’s properly tightened and perform a test run to listen for unusual noises and verify smooth operation.