

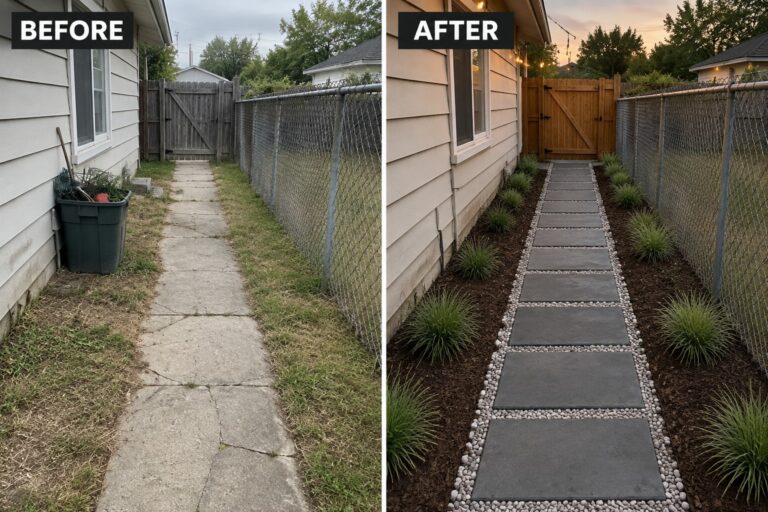
I have seen plenty of backyards where the paths wander without much purpose until pavers give them a better shape.
Landscape pavers let you build those routes in a way that lasts through seasons and foot traffic.
Structure matters more than I expected at first.
Once the main lines are set it becomes easier to add plants or seating without the space feeling scattered.
Small changes like these often make the whole yard feel more intentional when you step outside each day.
Use Pavers To Give A Narrow Side Path Clear Shape
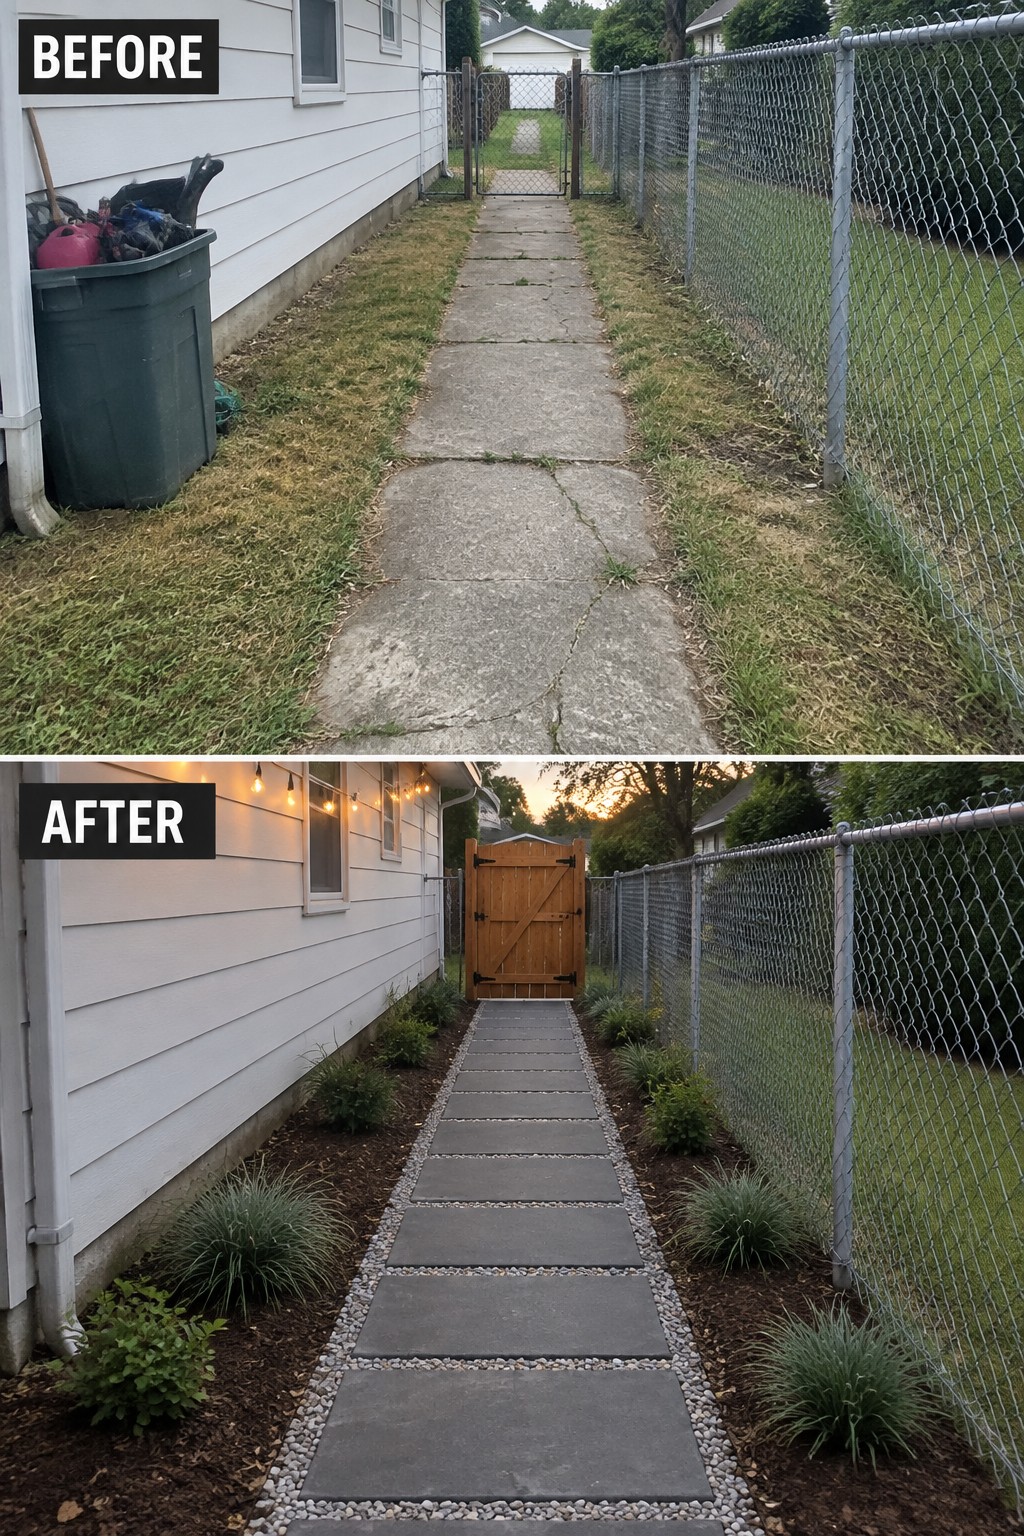
A cracked concrete strip next to the house tends to collect weeds and look unfinished. Replacing it with rectangular pavers set in gravel creates a solid walking surface while the gravel border keeps grass and soil from creeping onto the path. The same border also gives the eye a clean line to follow, which makes the whole side yard feel more organized.
This idea suits homes where the side path is mainly for access rather than seating. Keep the pavers in a simple rectangular pattern and use the same gravel width on both sides so the path reads as one deliberate feature. Make sure the base is properly compacted before laying the pavers, especially if the ground stays damp part of the year.
Define A Garden Path With Landscape Pavers
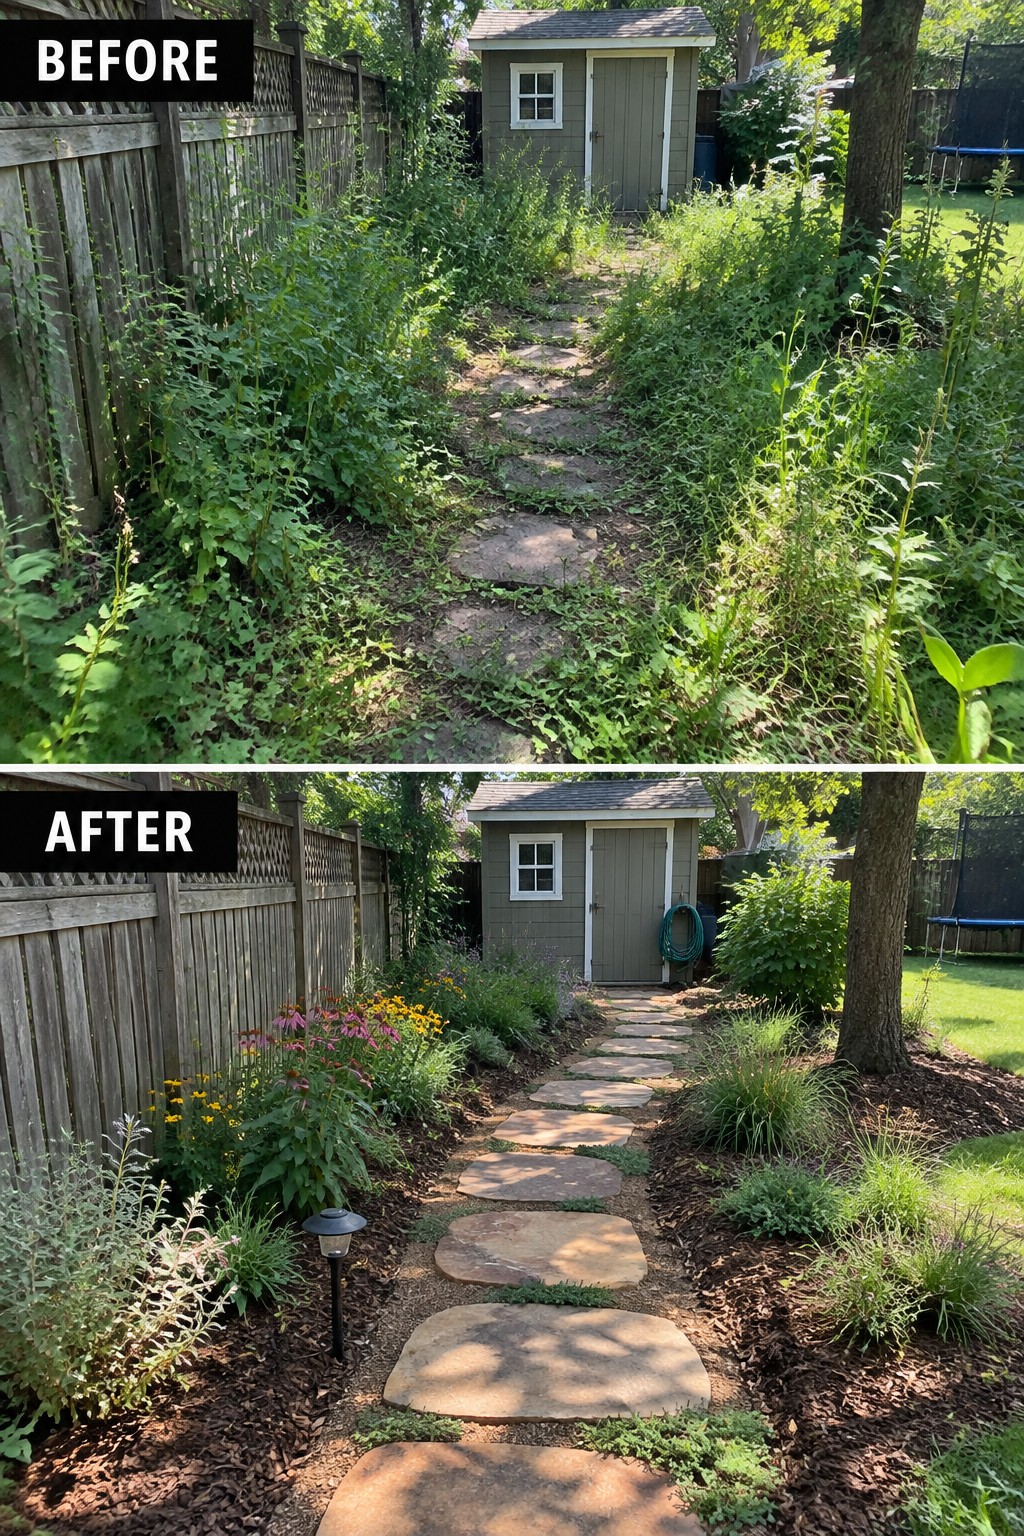
The biggest change here came from clearing the weeds and giving the path a clear shape. Once the overgrowth was gone, the stepping stones could sit evenly with mulch holding the edges in place and low plants keeping the borders neat.
This idea works well in side yards or back gardens that need a simple route to a shed or gate. Start with cleanup, choose pavers that match the scale of the space, and keep the planting low so the path stays easy to walk and maintain.
Replace Gravel With Pavers For A Cleaner Path Edge
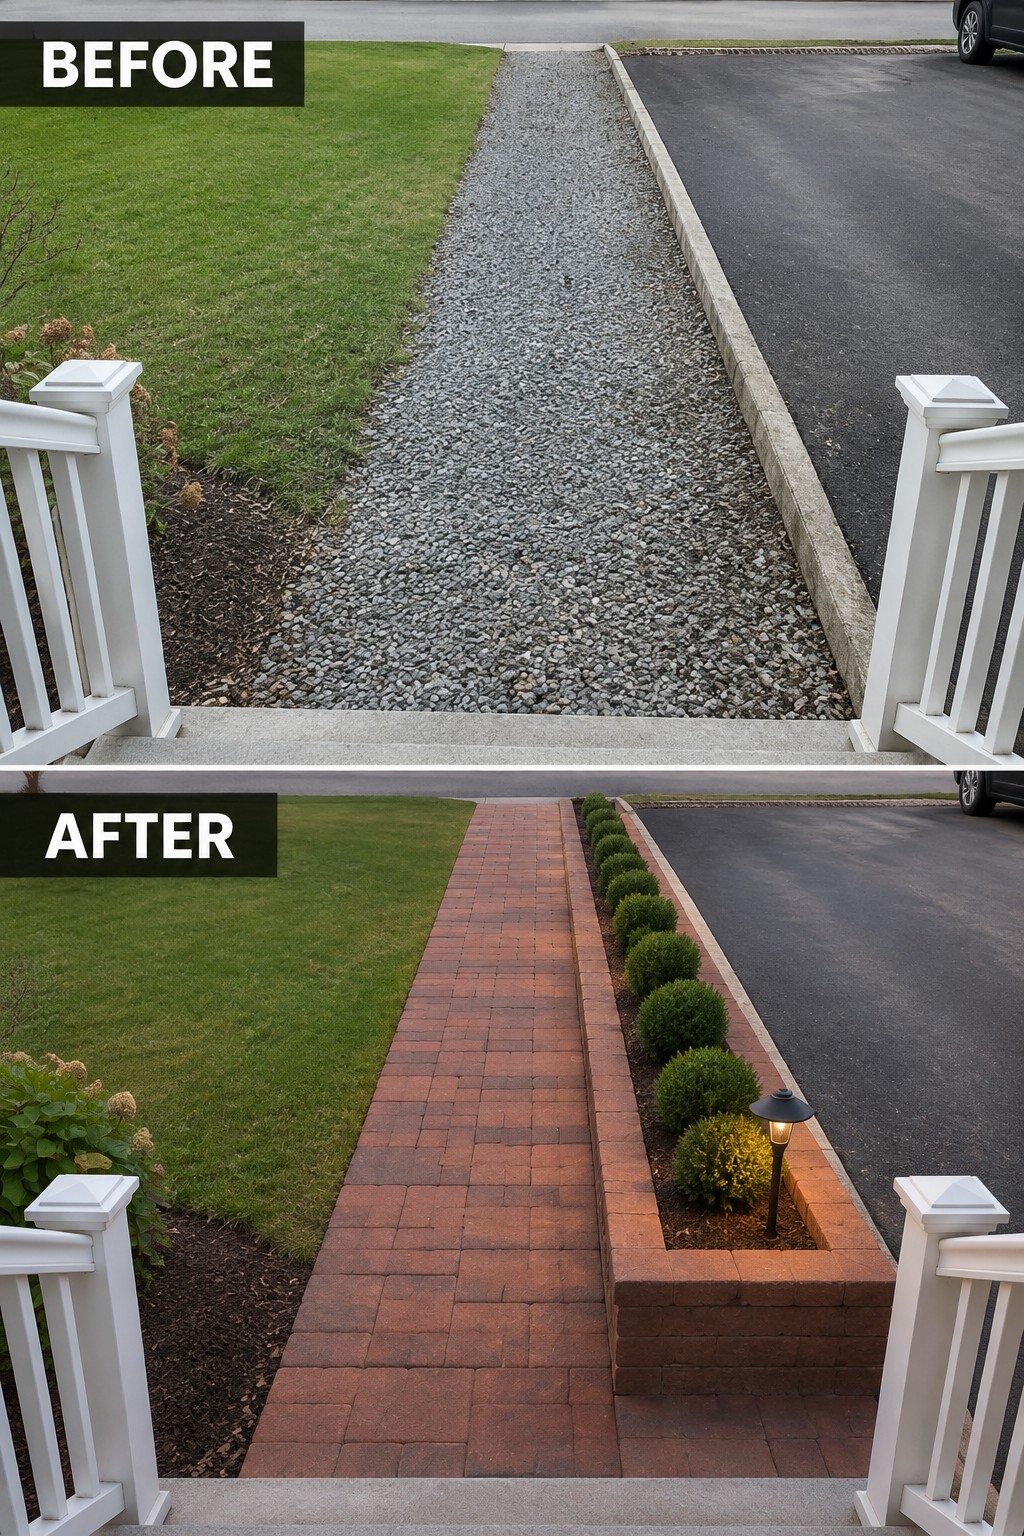
A gravel path often looks loose and messy where it meets the lawn or driveway. Switching to pavers gives the walkway a solid surface that stays in place and creates a clear line between the grass and the paved area. The added low brick wall on one side also turns the edge into a simple planting bed instead of a strip of mulch that spreads everywhere.
This approach works best along driveways or side yards where you need a walking route that still leaves room for some greenery. Lay a solid base first so the pavers do not shift, and keep the planting bed narrow enough that it does not crowd the path.
Turn A Bare Dirt Path Into A Paver Walkway
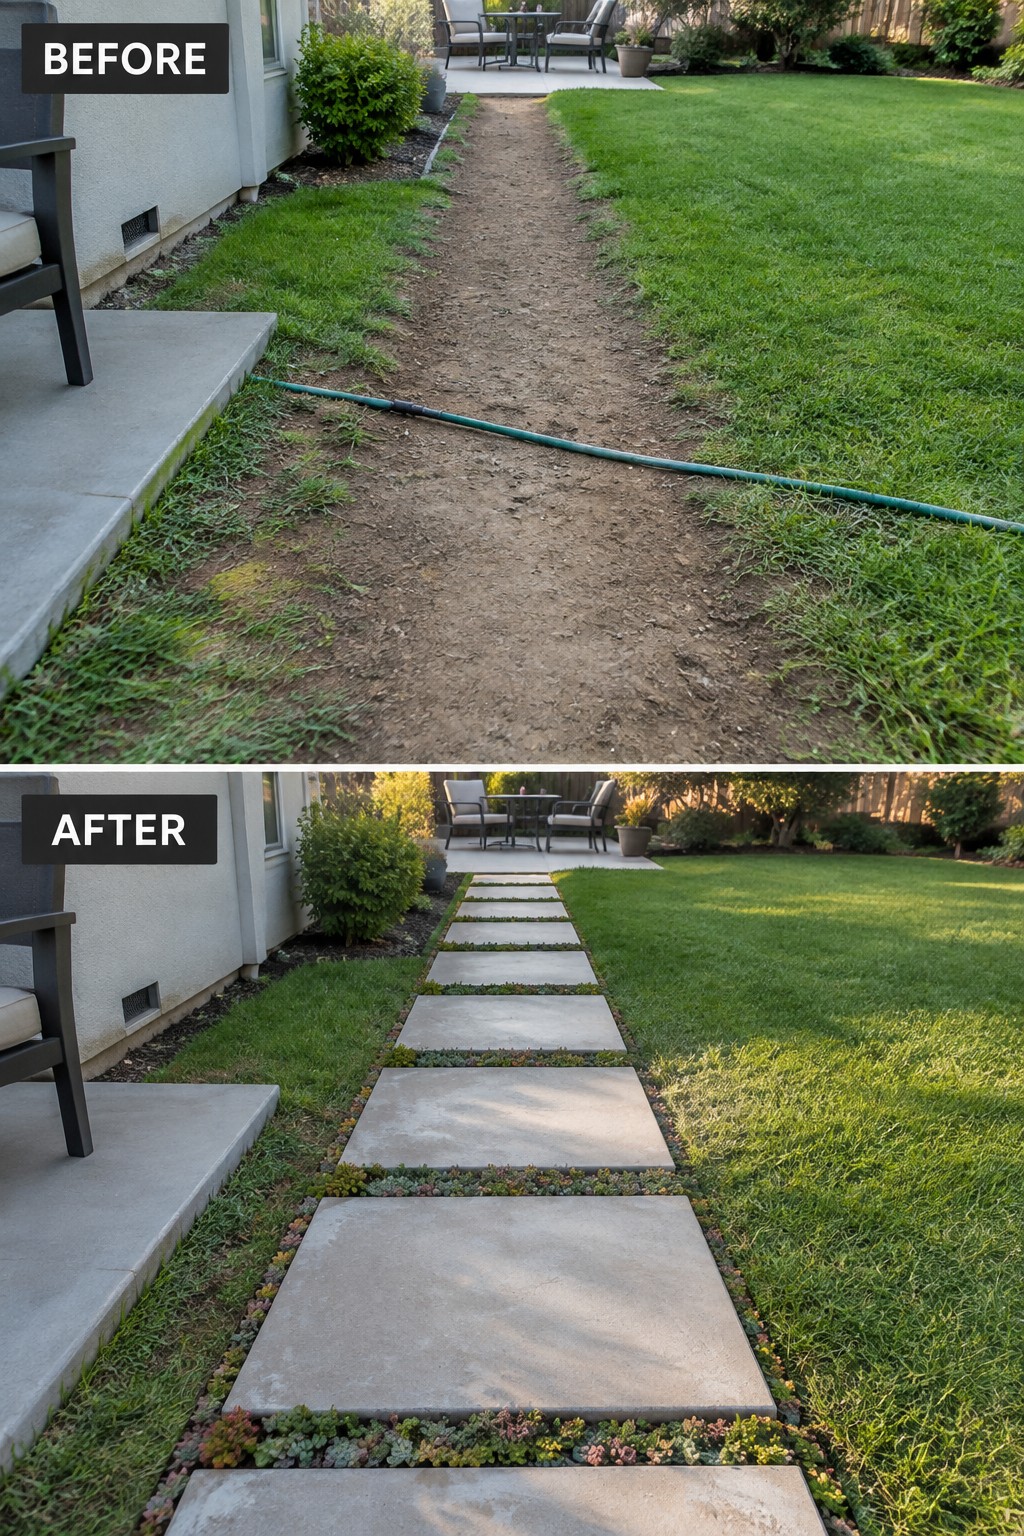
A dirt path often leaves a yard feeling unfinished and hard to navigate, especially after rain. Laying large concrete pavers in a straight line gives the space clear structure and a firm surface to walk on. Adding a narrow border of succulents along the edges softens the look and keeps the path from feeling too stark.
This idea works best in side yards or back gardens where you need a simple route between the house and lawn or patio. Measure the path first so it stays wide enough for comfortable walking, then choose pavers that suit your climate. The low plants along the sides reduce weeding and give the walkway a finished appearance without extra work.
Build Defined Steps With Pavers On A Slope
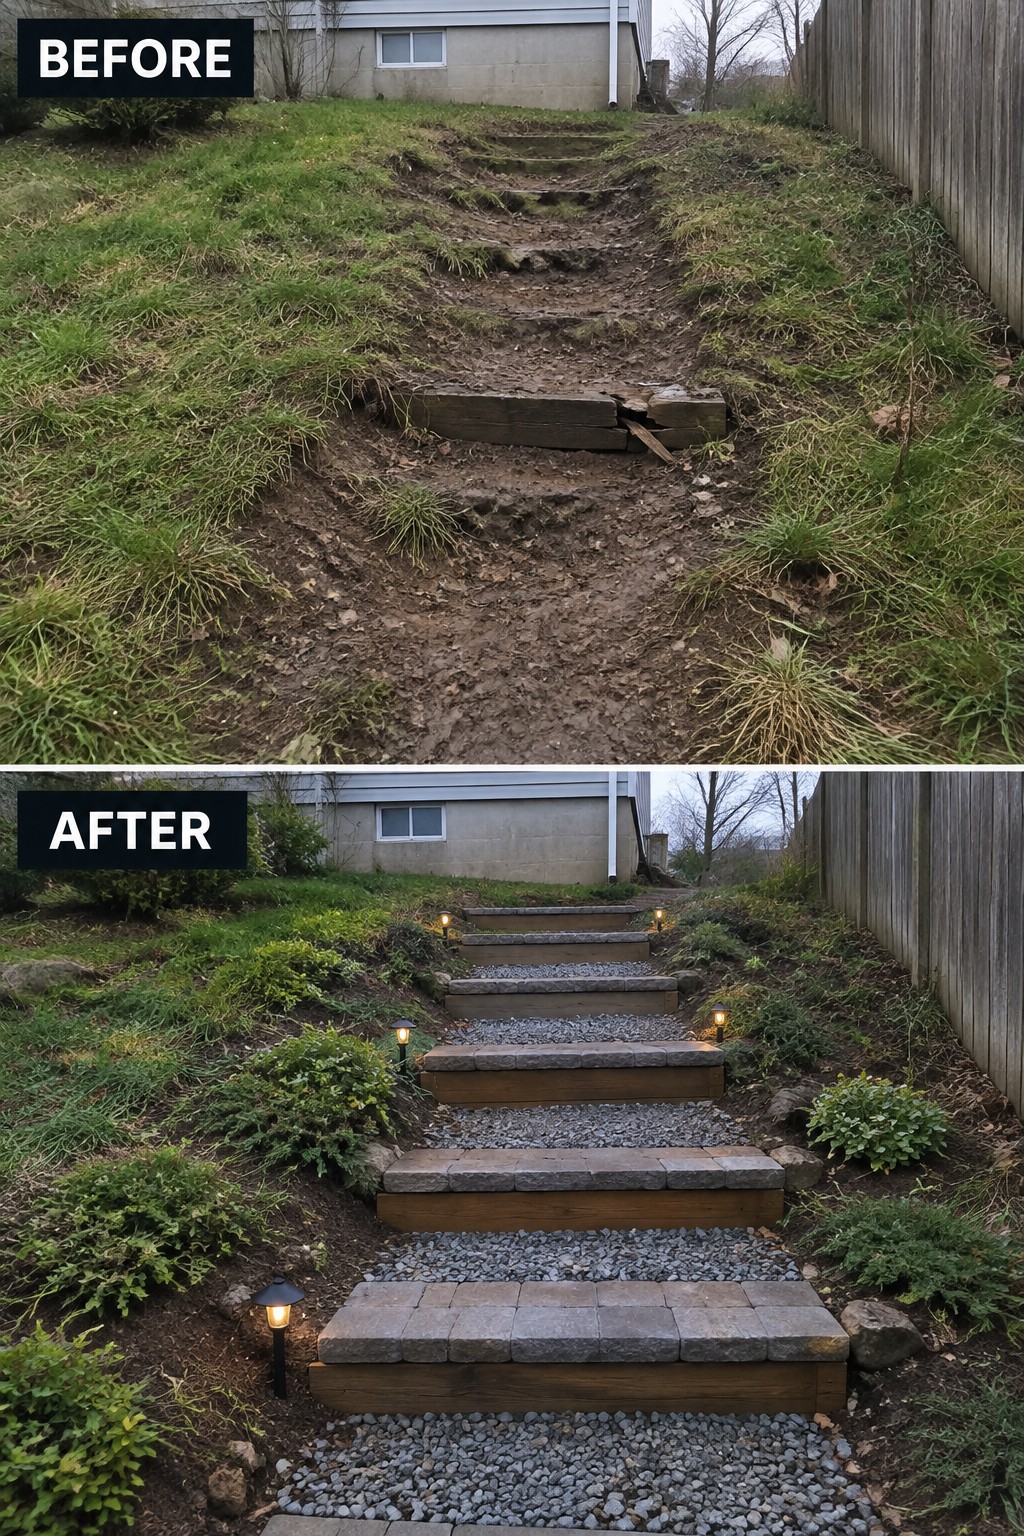
A worn dirt path on a slope quickly turns into a muddy, unsafe track after rain and regular use. Replacing it with timber-framed steps and paver treads gives the slope structure and makes it much easier to walk.
This idea works best on hillsides where grass alone cannot hold up to foot traffic. Set the timber bases level, fill each tread with pavers or gravel, and keep the sides planted so the soil stays in place. The result stays practical and does not require constant repairs.
Replace A Loose Stone Path With Brick Pavers
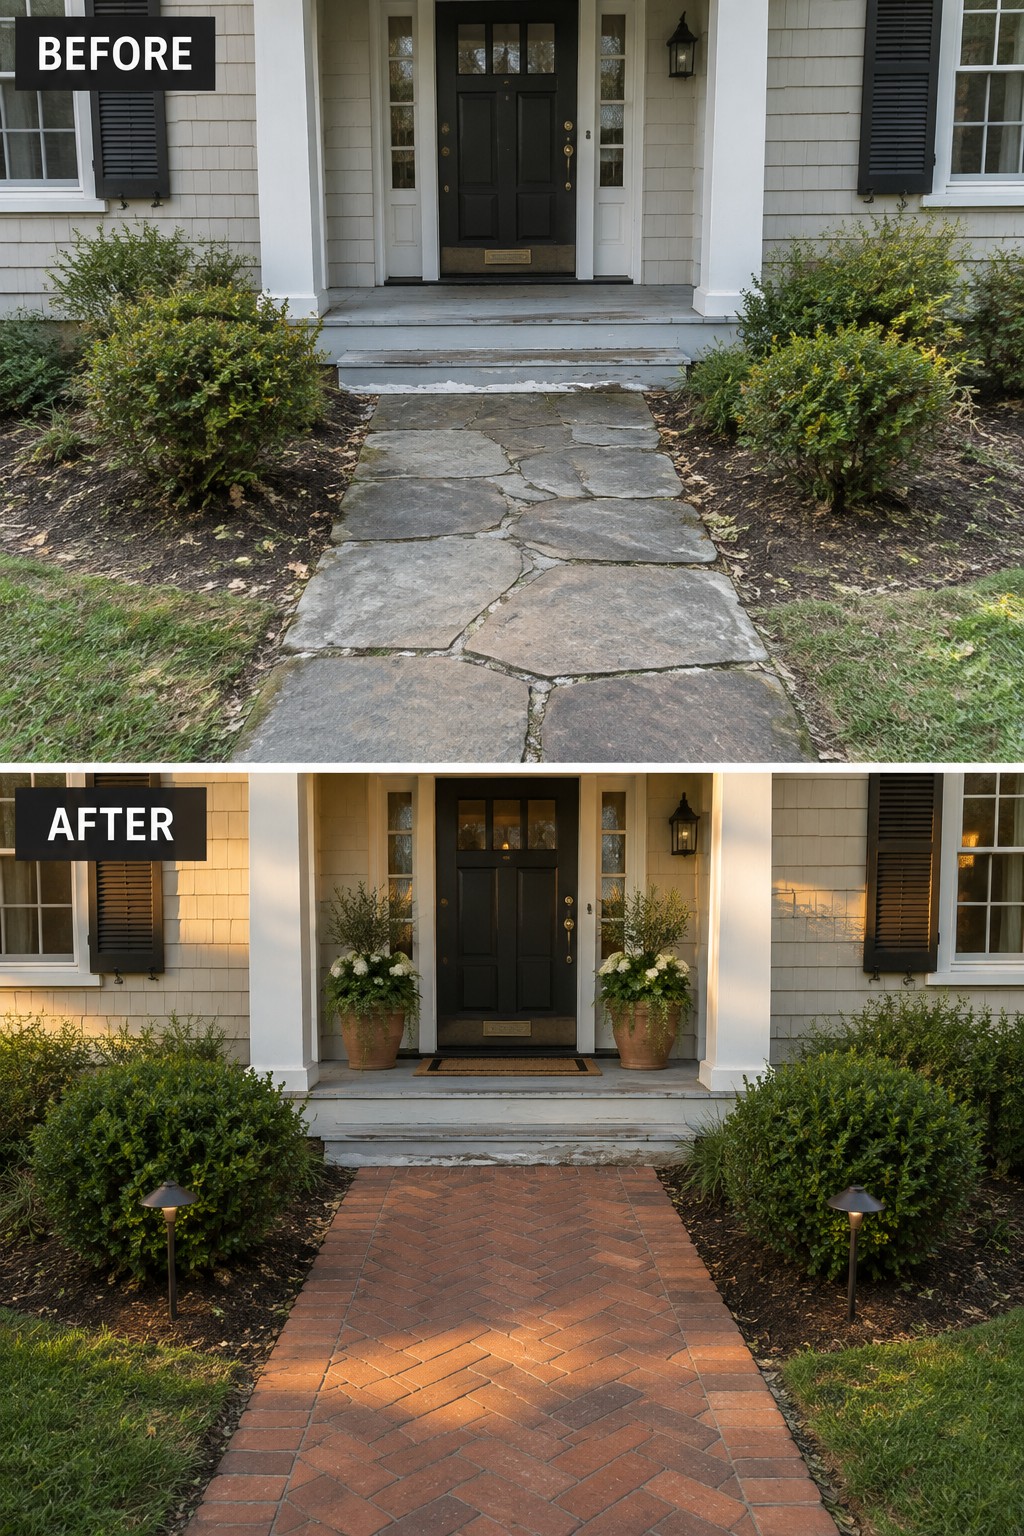
The old irregular flagstones sat uneven and blended into the surrounding mulch and grass. Switching to a tight herringbone brick layout gives the walkway clear edges and a finished look that leads straight to the door without any guesswork about where to step.
This approach works well on any front walk that feels scattered or dated. Start by removing the old surface completely, then lay a solid base so the new pavers stay level over time. Keep the width consistent and add low lights along the sides if the path is used after dark.
Lay Pavers In A Straight Line For A Clear Path
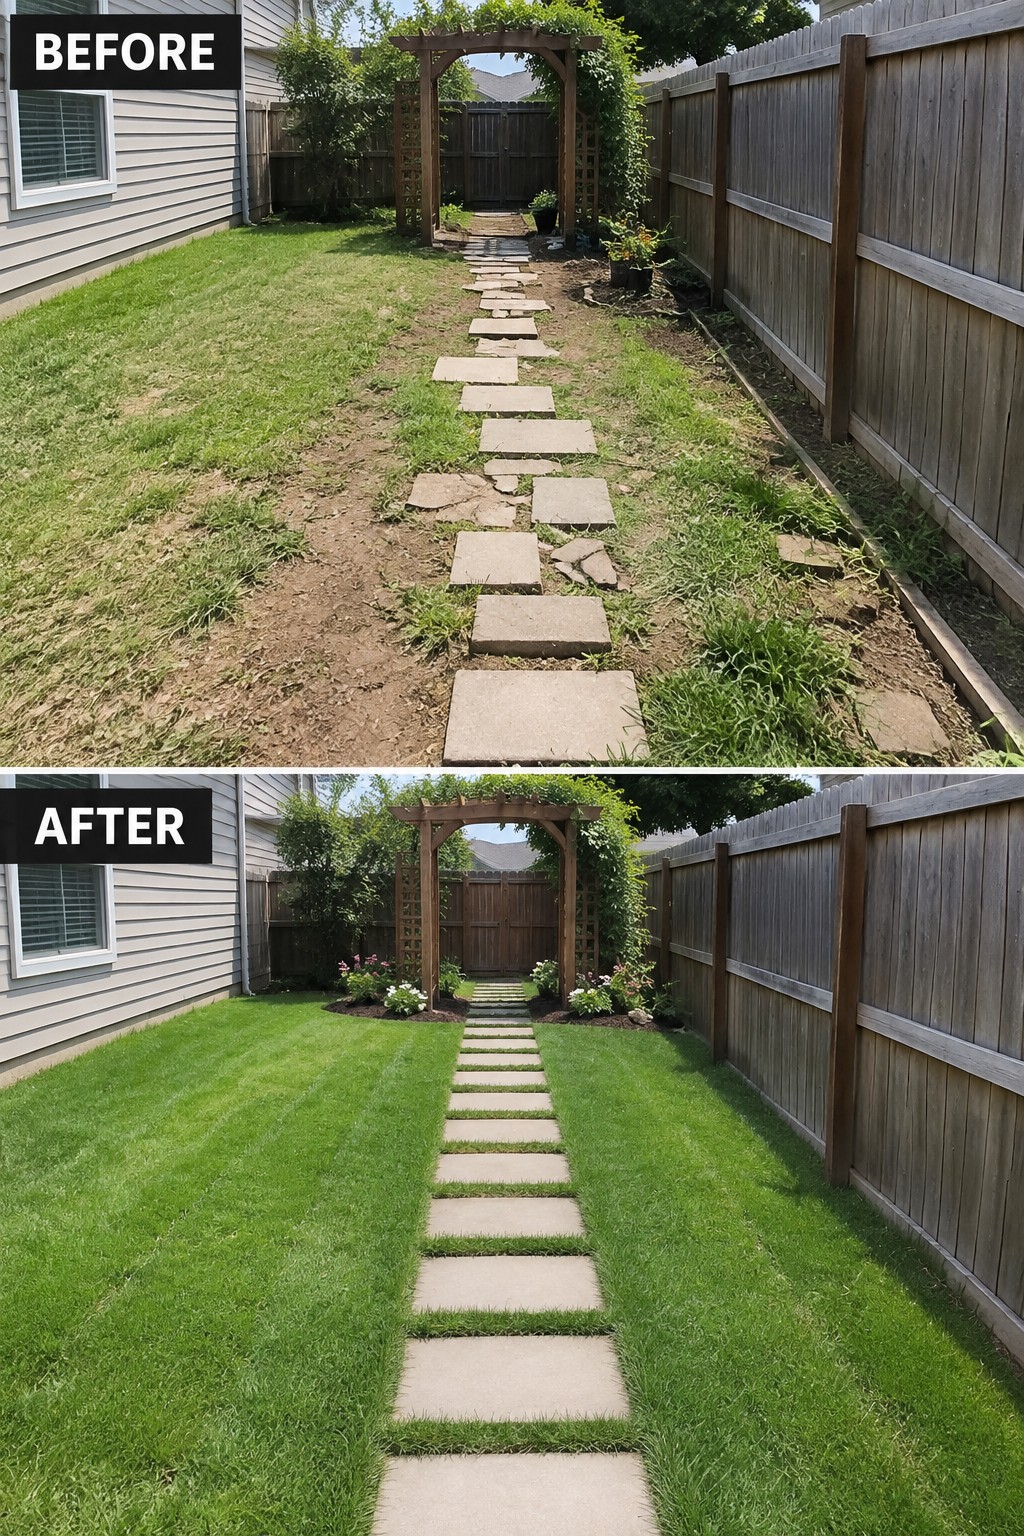
The before photo shows a scattered line of stepping stones that wandered across bare dirt and uneven grass. The after version replaces them with a single row of matching pavers set into a freshly mowed lawn, giving the whole yard a simple, finished look.
This idea works best in narrow side yards or back gardens where you need a direct route without adding extra features. Mark the center line first, pull up the old stones, and keep the pavers level with the lawn so mowing stays easy.
Refresh An Old Concrete Path With Landscape Pavers
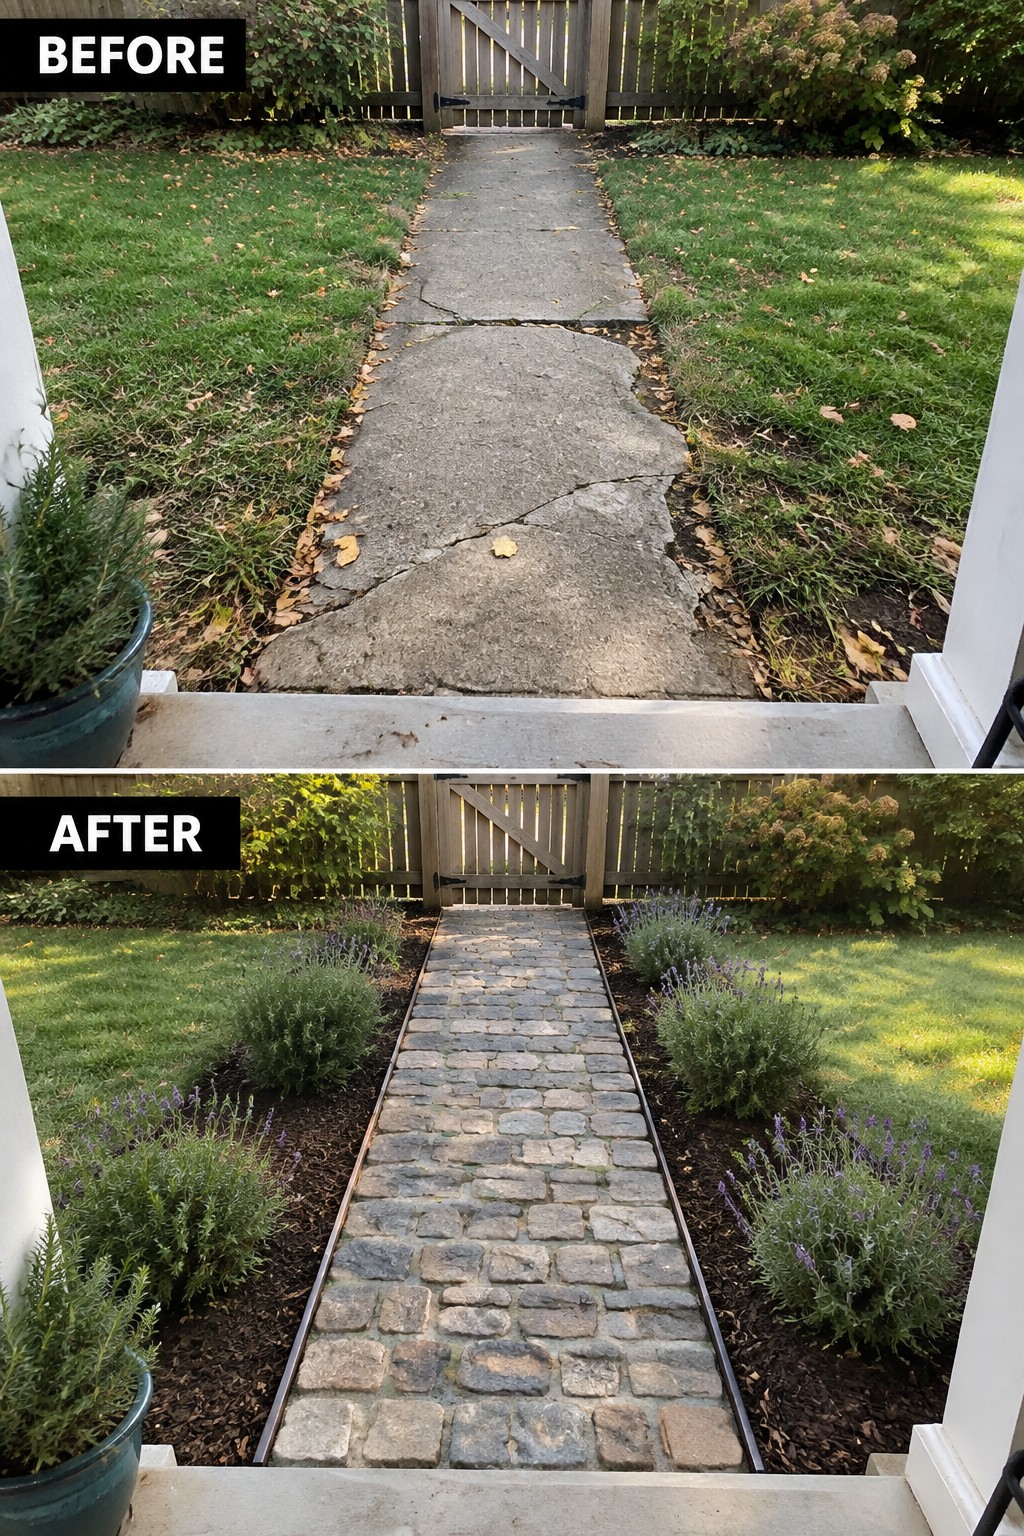
A cracked concrete walkway can make the whole yard feel neglected even when the lawn is fine. Replacing it with landscape pavers creates a clear, durable route while the added garden beds on both sides give the path a finished border instead of letting grass grow right up to the edge.
This idea works best on straight, narrow walkways that connect the house to a gate or backyard area. Keep the paver pattern simple, use metal edging to hold the shape, and choose low plants that stay neat along the sides. The result is a path that looks intentional without needing constant upkeep.
Use Landscape Pavers To Define A Yard Path
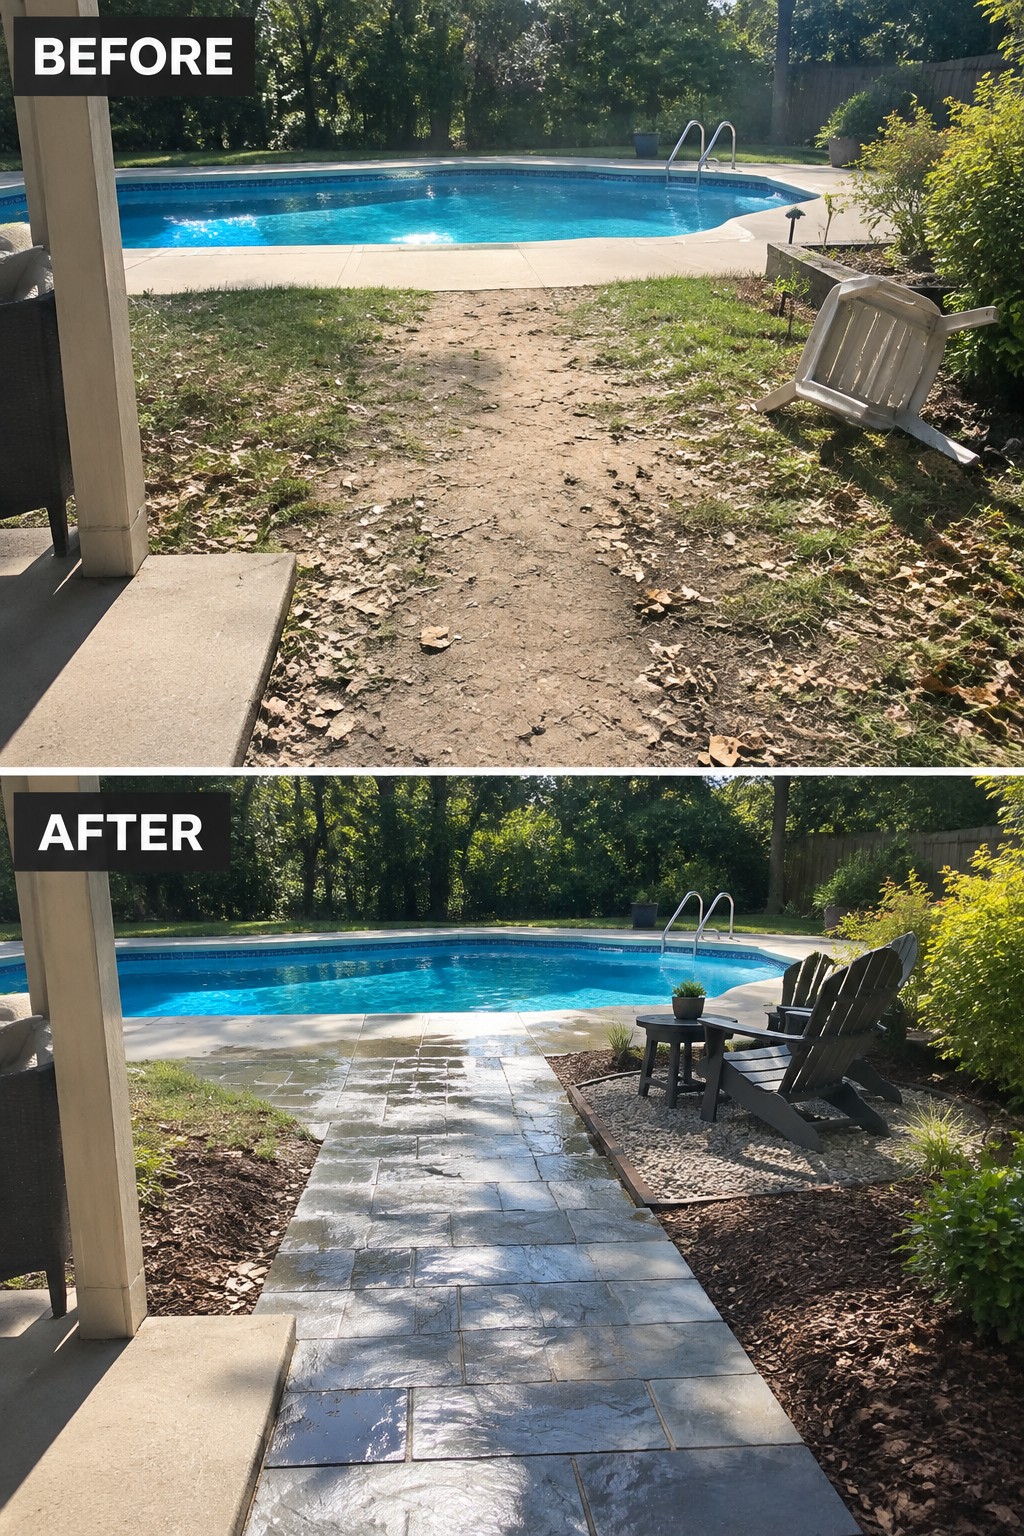
A dirt path that turned to mud after rain and collected leaves all season made the walk from the house to the pool feel unfinished. Laying a straight run of landscape pavers gave the route a solid surface that stays clean and directs traffic without spreading into the grass.
This idea works best in backyards where you already have a natural walking line between two main spots. Clear the path first, add a compacted base, and keep the paver width narrow enough to leave room for planting on both sides. It keeps the yard looking planned while still letting the pool area feel open.
Define Garden Paths With Landscape Pavers
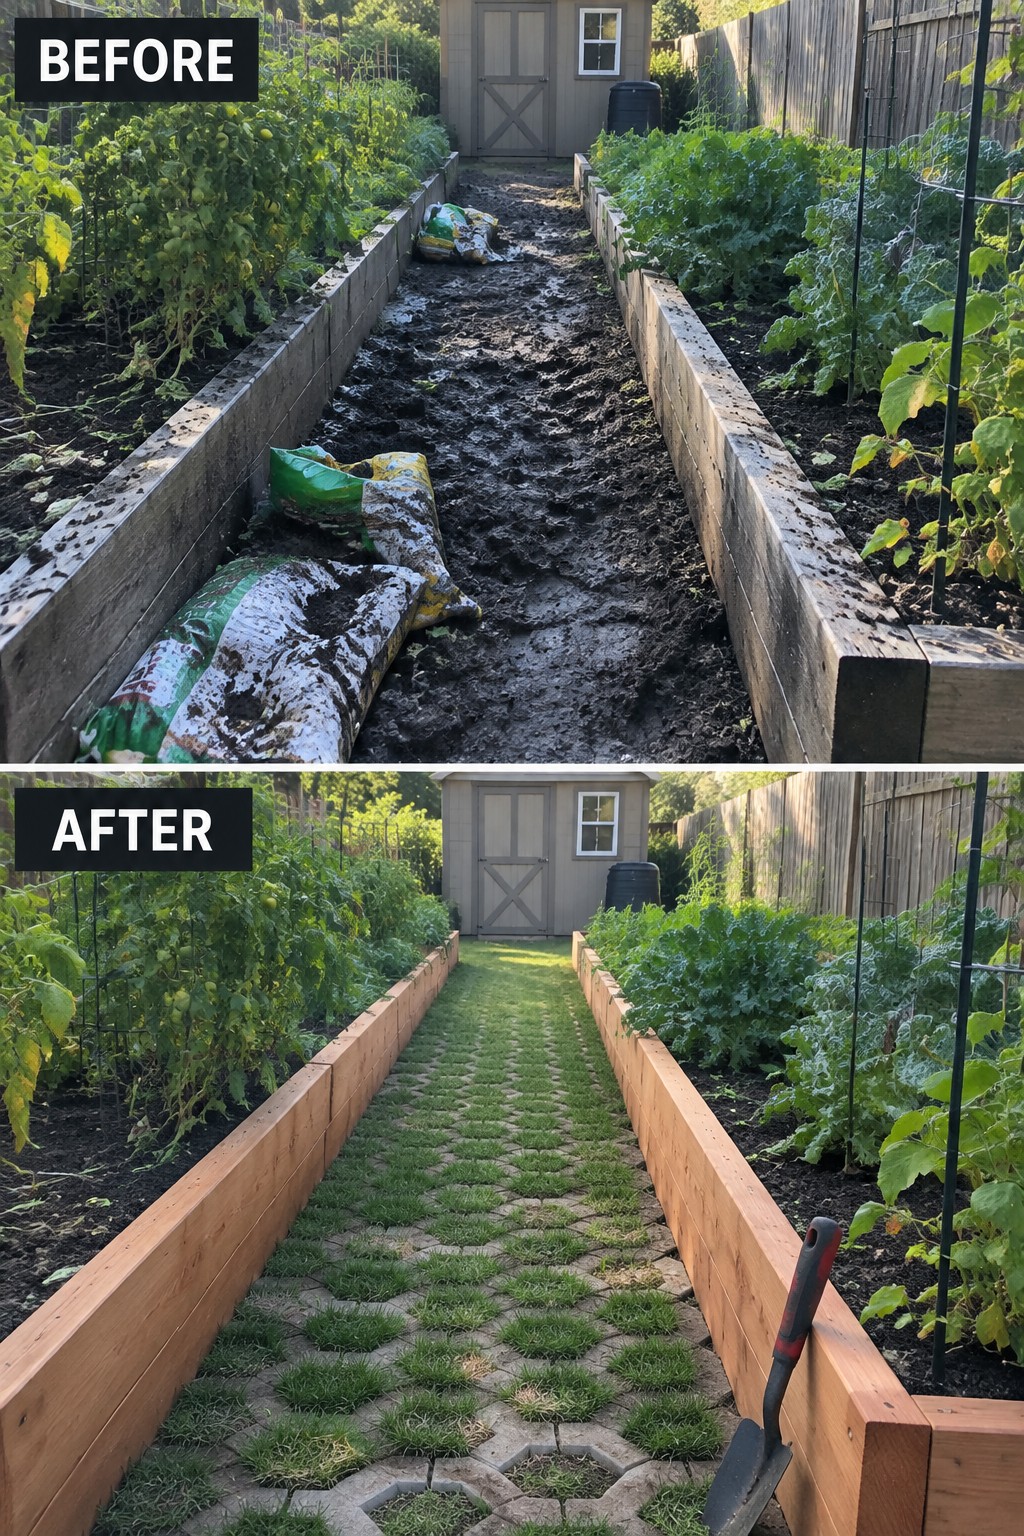
A muddy center path between raised beds makes it hard to reach plants without tracking dirt everywhere. Laying pavers in a simple grid pattern with grass growing between them turns the walkway into something stable and easy to use while still letting the garden feel open.
This approach works best in vegetable gardens or narrow spaces between beds where you need regular access. Keep the paver layout simple so it does not compete with the plants, and make sure the path stays wide enough for a wheelbarrow or basic tools.
Use Pavers To Define A Front Yard Path
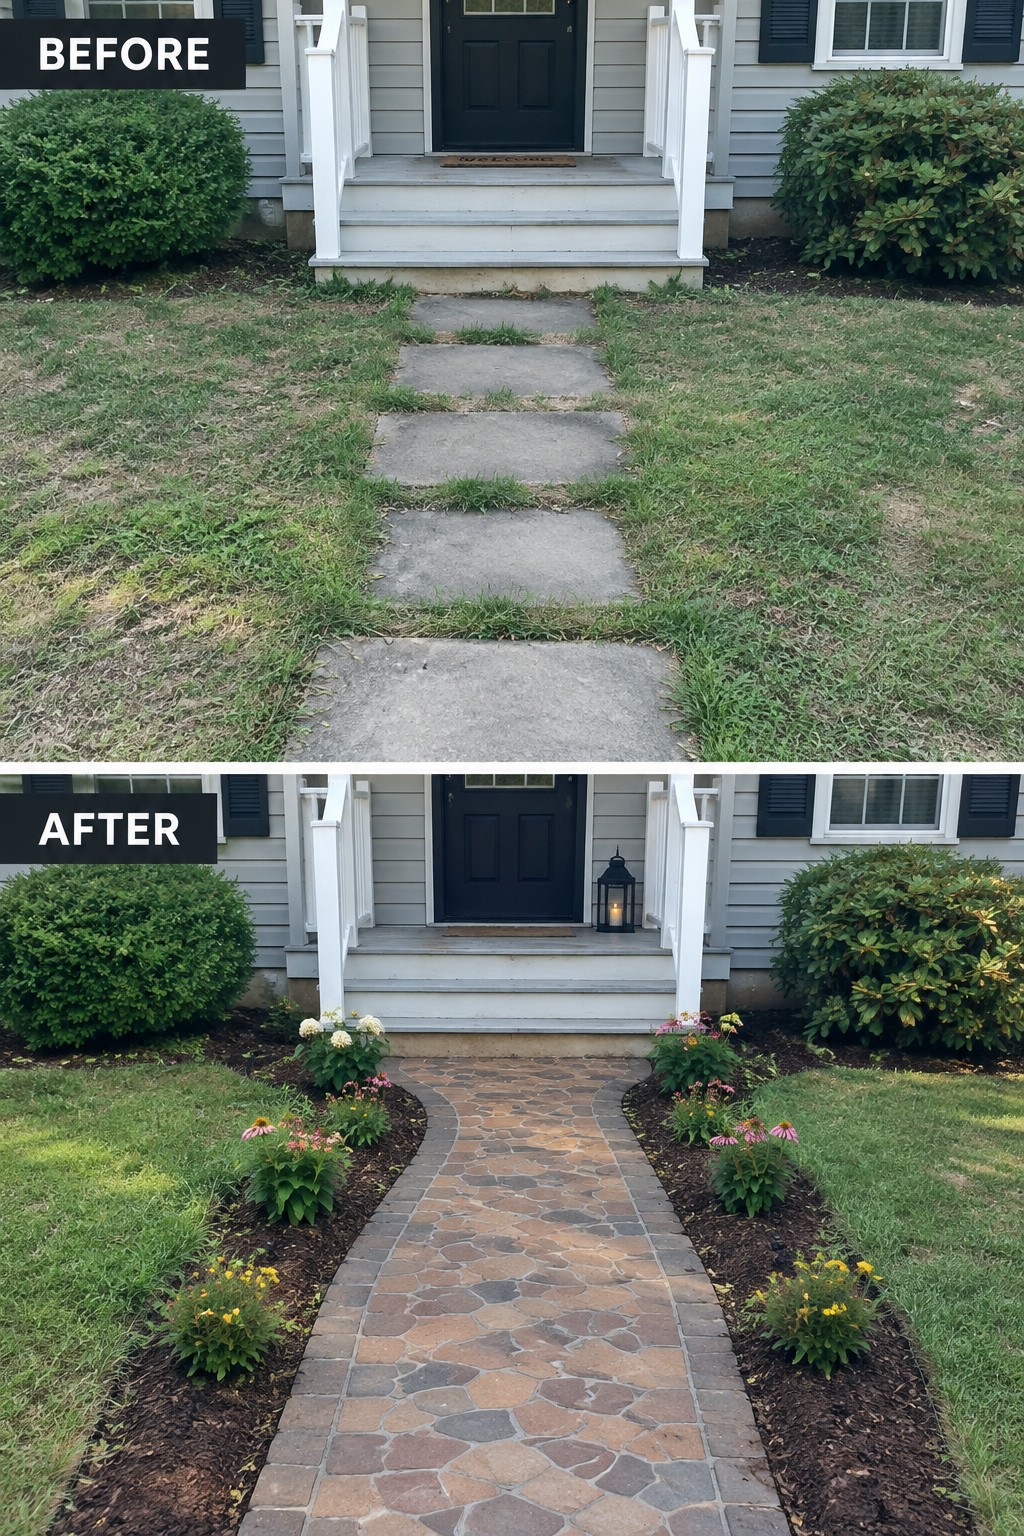
A scattered line of concrete stepping stones often leaves a front yard feeling unfinished. Replacing them with a solid paver path gives the space clear direction and makes the walk to the door feel intentional. The curved layout and mulched beds on both sides also keep grass from creeping in and give the whole front a neater look.
This approach works well on modest lots where the path is the main feature visitors see first. Start by mapping a gentle curve that matches how people actually walk, then choose pavers that match your house color. Keep the beds simple with a mix of low perennials so the path stays the focus.
Define A Backyard With A Paver Pathway
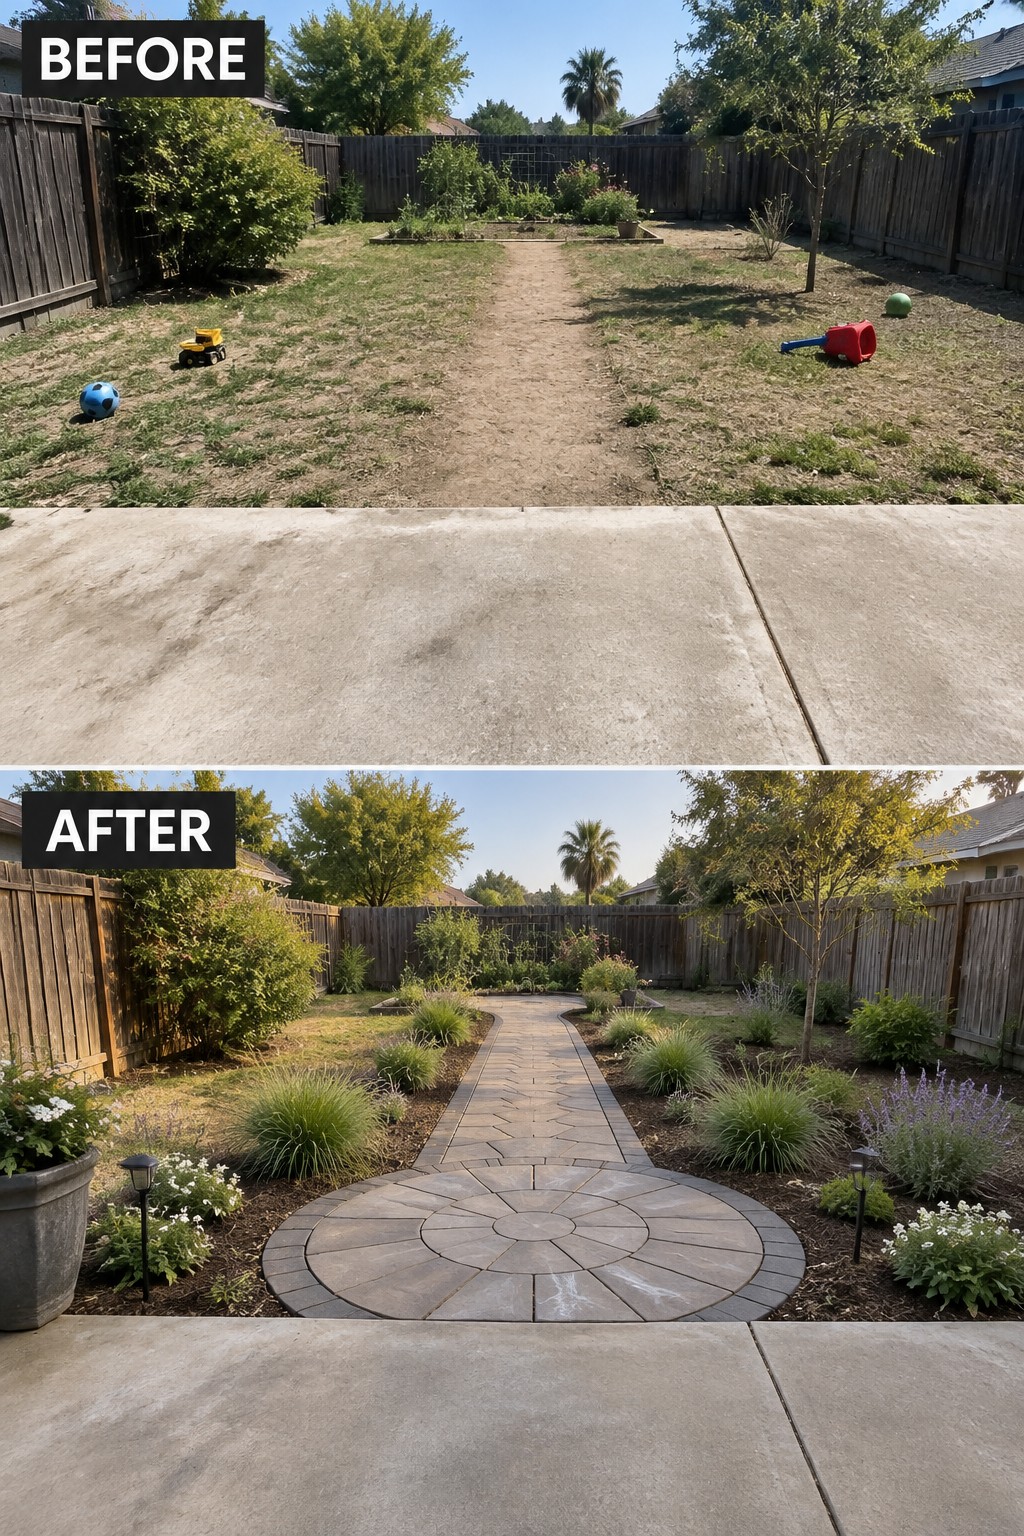
A bare dirt path through an open yard can feel unfinished and hard to use. Adding landscape pavers creates a clear route and gives the space a sense of order. In this case, a simple straight walkway was replaced with a stone path that widens into a circular patio at the start, which instantly makes the whole yard feel more planned and easier to walk through.
This approach works well in medium to large backyards where you want structure without crowding the space. Start by mapping the main route people actually take, then choose pavers in a neutral tone that blends with your house. Keep planting low along the edges so the path stays the focus, and make sure the circle is big enough for a couple of chairs if you want a spot to stop.
Replace A Plain Concrete Path With Stepping Stone Pavers
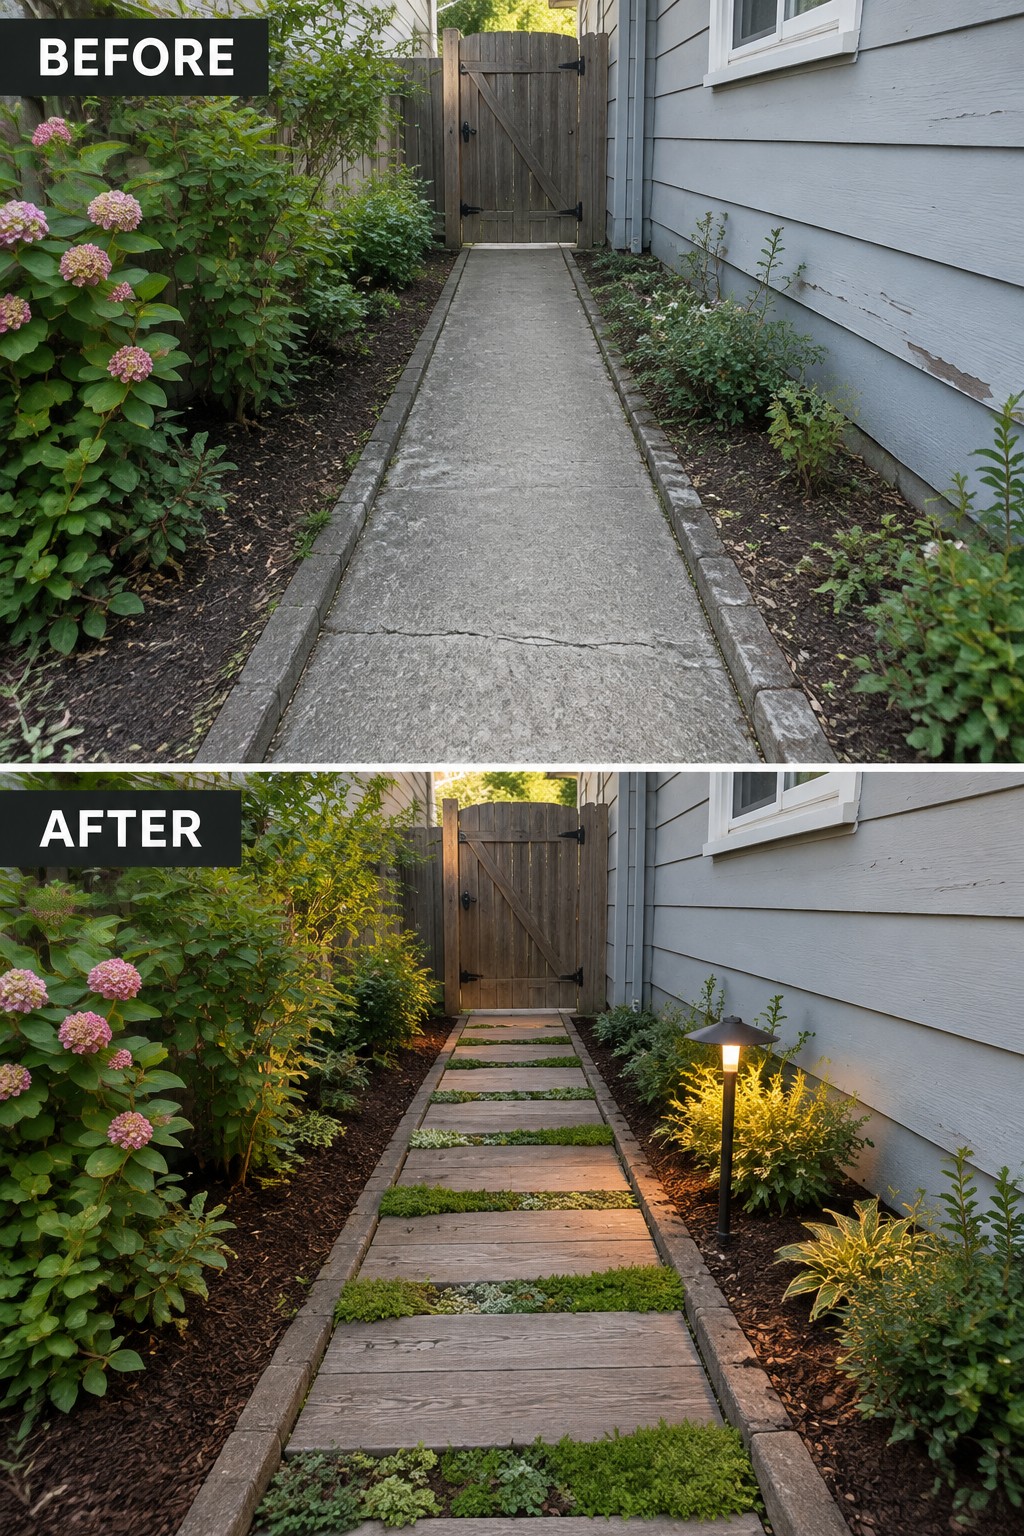
A long stretch of solid concrete often feels flat and out of place next to garden beds. Breaking it into individual pavers with low greenery between them gives the path more texture and helps it blend into the surrounding landscape.
This idea works best in narrow side yards or along the house where a full patio is not needed. Lay the pavers with consistent spacing so the walkway stays easy to walk on, and choose ground cover that stays low enough to avoid tripping hazards.
Use Landscape Pavers To Define A Garden Path
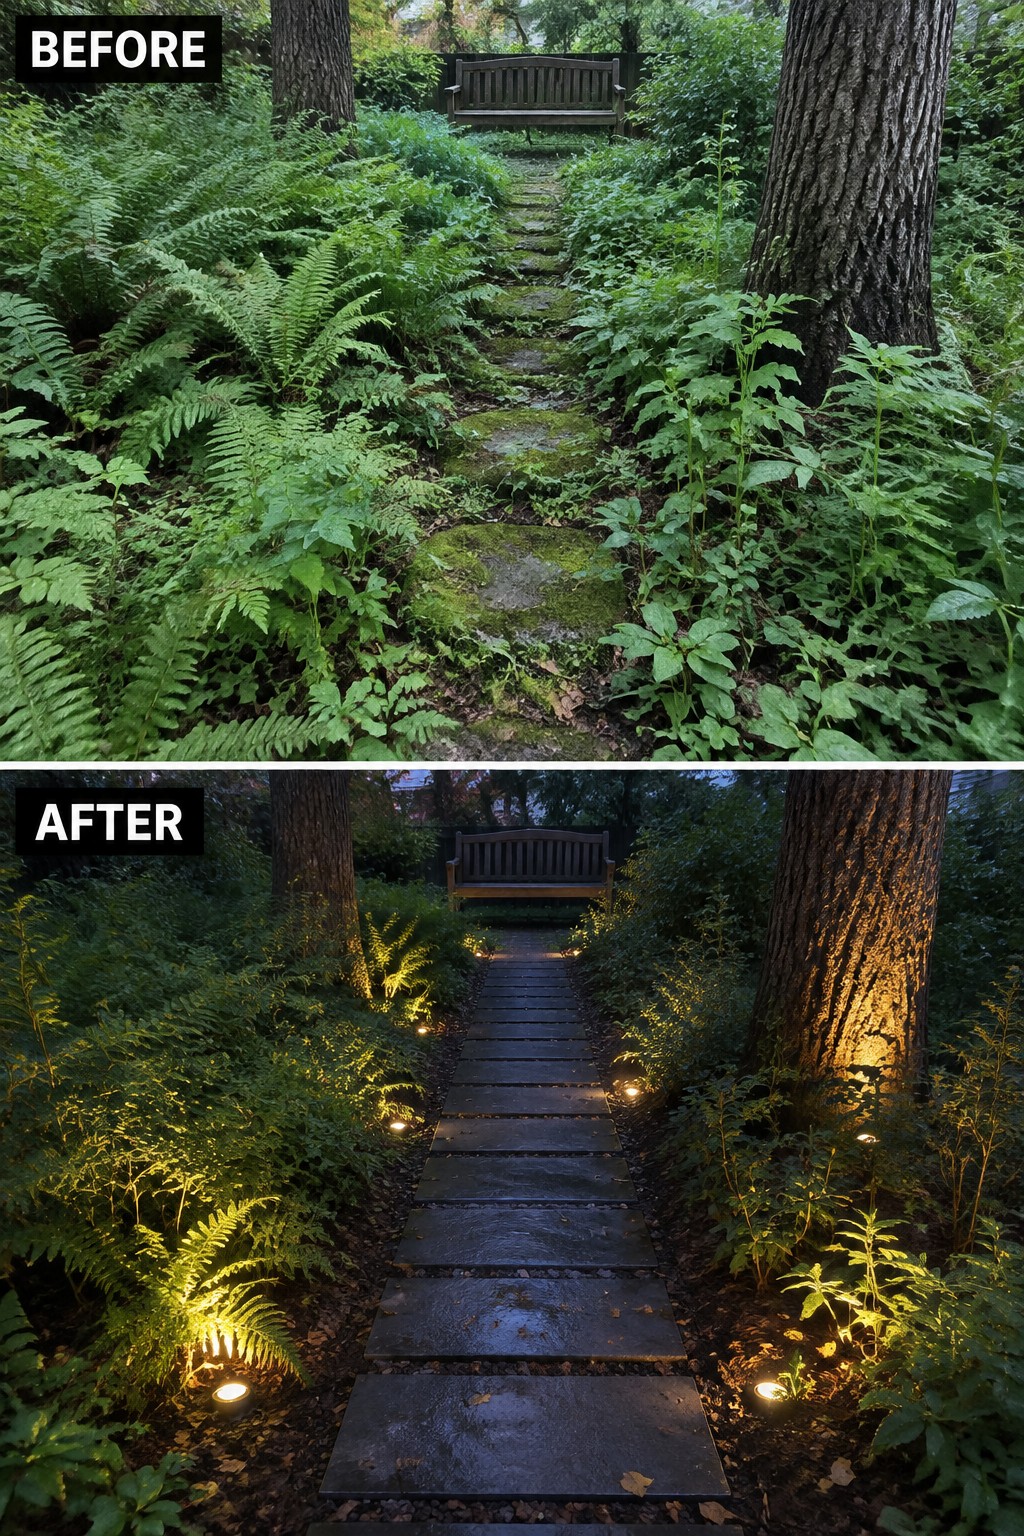
An overgrown path with uneven stones can make a garden feel smaller and harder to use. Replacing those stones with solid landscape pavers creates a clear walking surface that stays dry and easy to follow, even after rain.
This approach works best in shaded yards where plants tend to spill over the edges. Start by removing excess growth and leveling the ground, then lay the pavers on a simple gravel base. Low lights placed along the sides help keep the path visible at night without adding clutter.
Repair An Old Brick Path To Make It Safe And Clean
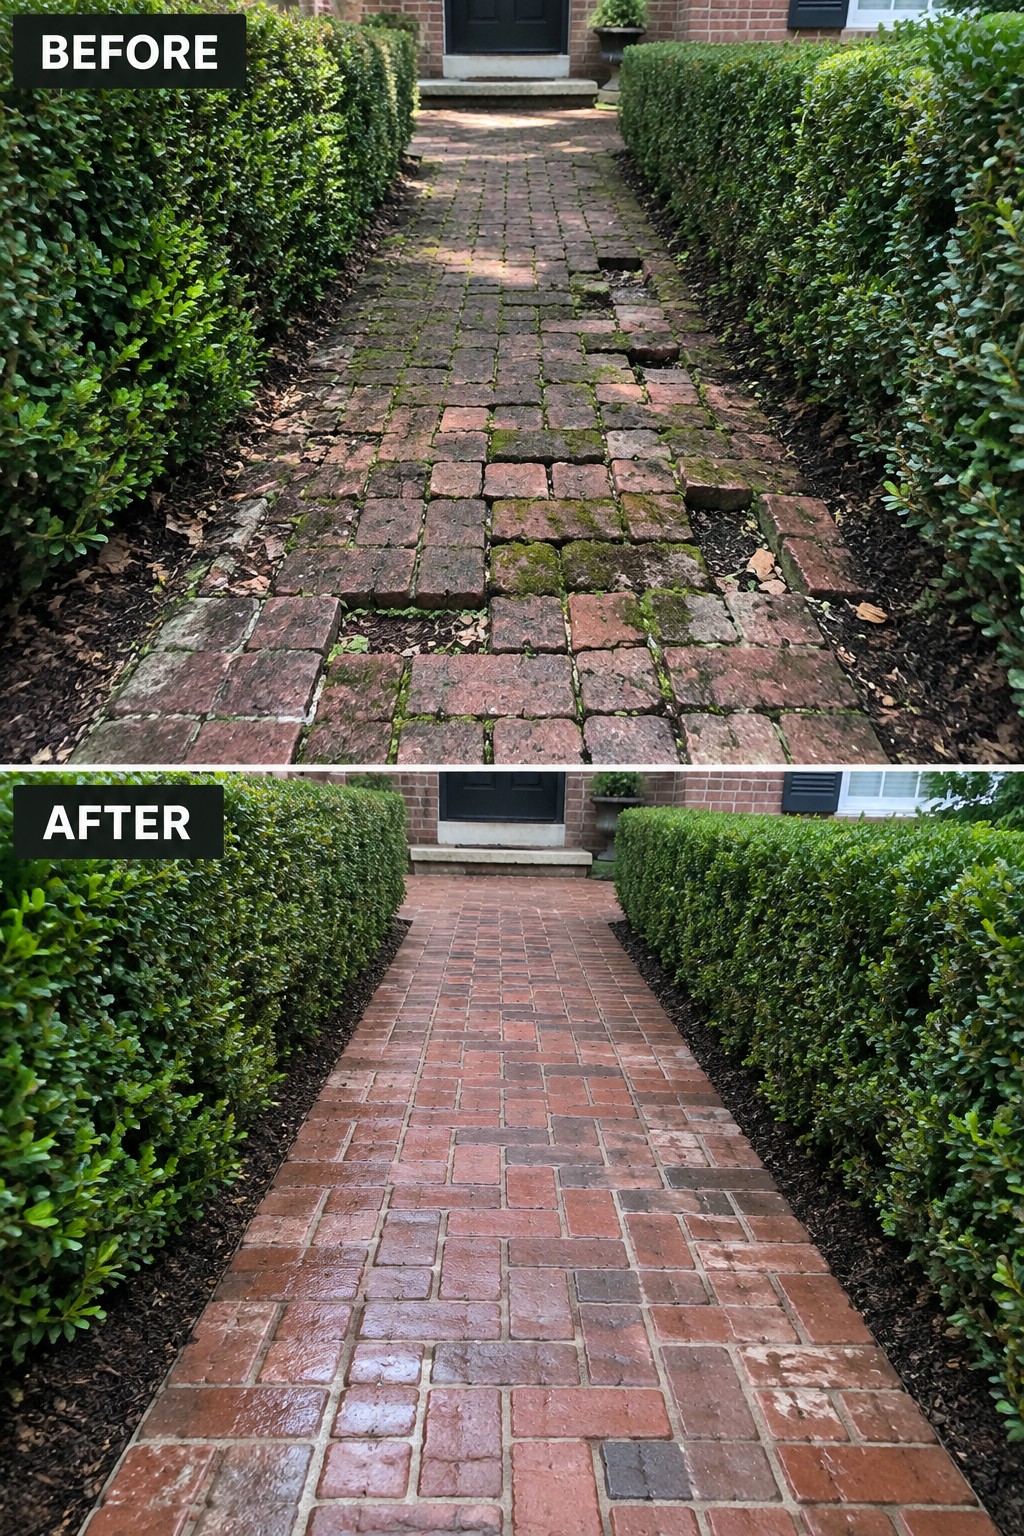
An uneven brick path with missing pieces and heavy moss can turn a simple walkway into a tripping hazard. In this case, the fix involved lifting the damaged sections, replacing broken bricks, and relaying the surface so it sits flat again. The result is a path that feels solid underfoot and looks cared for instead of neglected.
This approach works well on older homes where the original pavers are still usable but have shifted over time. Start by checking drainage and the base layer before relaying, then match the new bricks as closely as possible to the existing ones. Keep the surrounding hedges trimmed so the path stays the main feature rather than fighting for attention.
Define A Narrow Side Path With Pavers
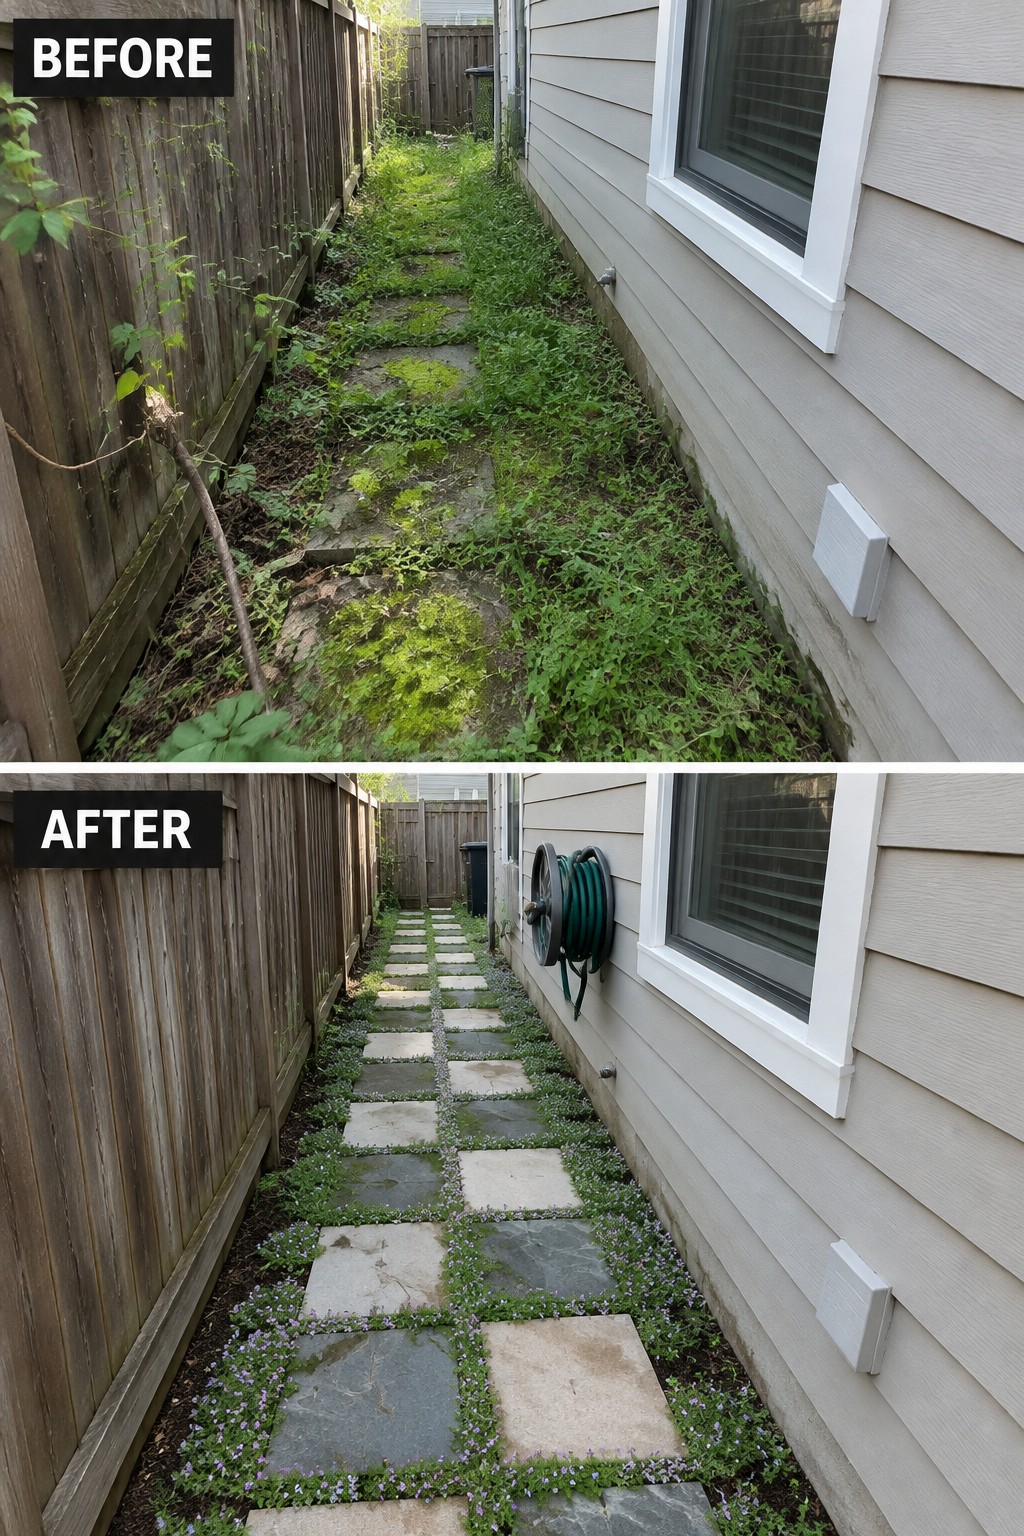
An overgrown side yard path quickly becomes a problem when weeds take over the stones and make walking difficult. Laying a clean row of pavers and adding a low ground cover along the edges gives the space a clear shape and makes the path usable again.
This idea works best in tight areas between houses and fences where you need simple structure without crowding the walkway. Clear everything first, then choose pavers that leave enough room on each side for easy movement and basic maintenance.
Replace A Concrete Walkway With Landscape Pavers
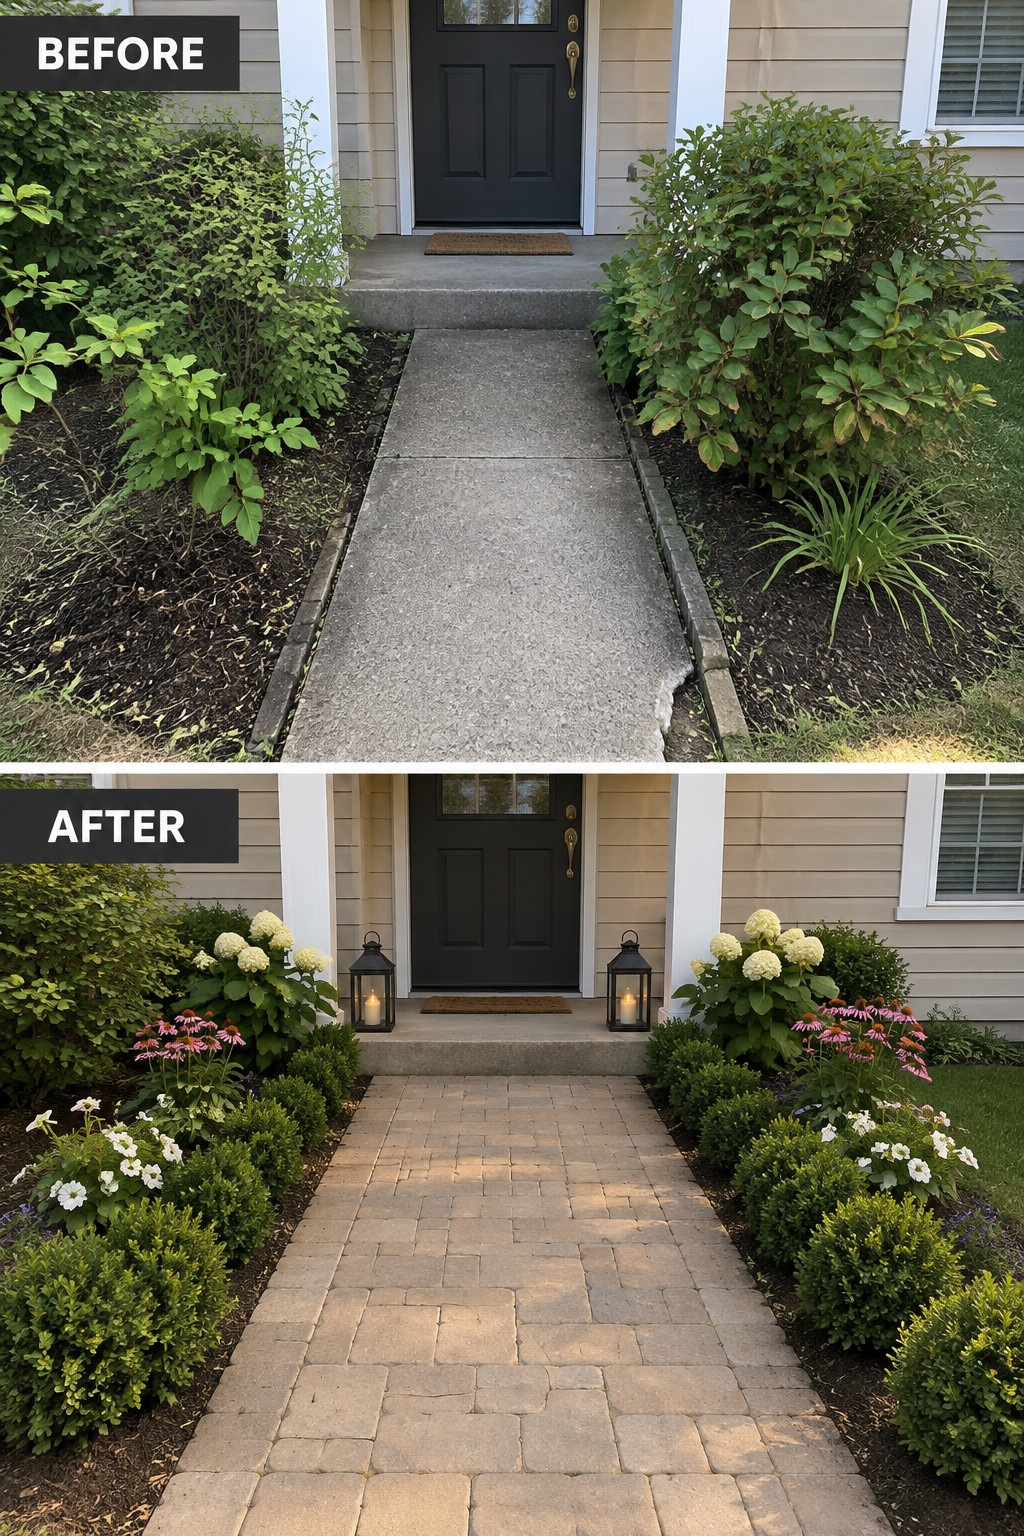
A plain concrete path often looks unfinished once the rest of the yard gets attention. Switching to pavers gives the walkway clear edges and a finished surface that holds up better over time. In this case, the old slab was replaced with a simple running bond pattern that leads straight to the door, and the beds on both sides were cleaned out and replanted so the path feels like part of the landscape instead of something laid on top of it.
This approach works well on older homes where the original walk has started to crack or settle. Keep the new path the same width as the door for good flow, and use a neutral paver color that blends with the siding and trim. Add a few low shrubs or perennials along the edges so the beds look intentional rather than leftover space.
Use Landscape Pavers To Create A Clear Path To The Fire Pit
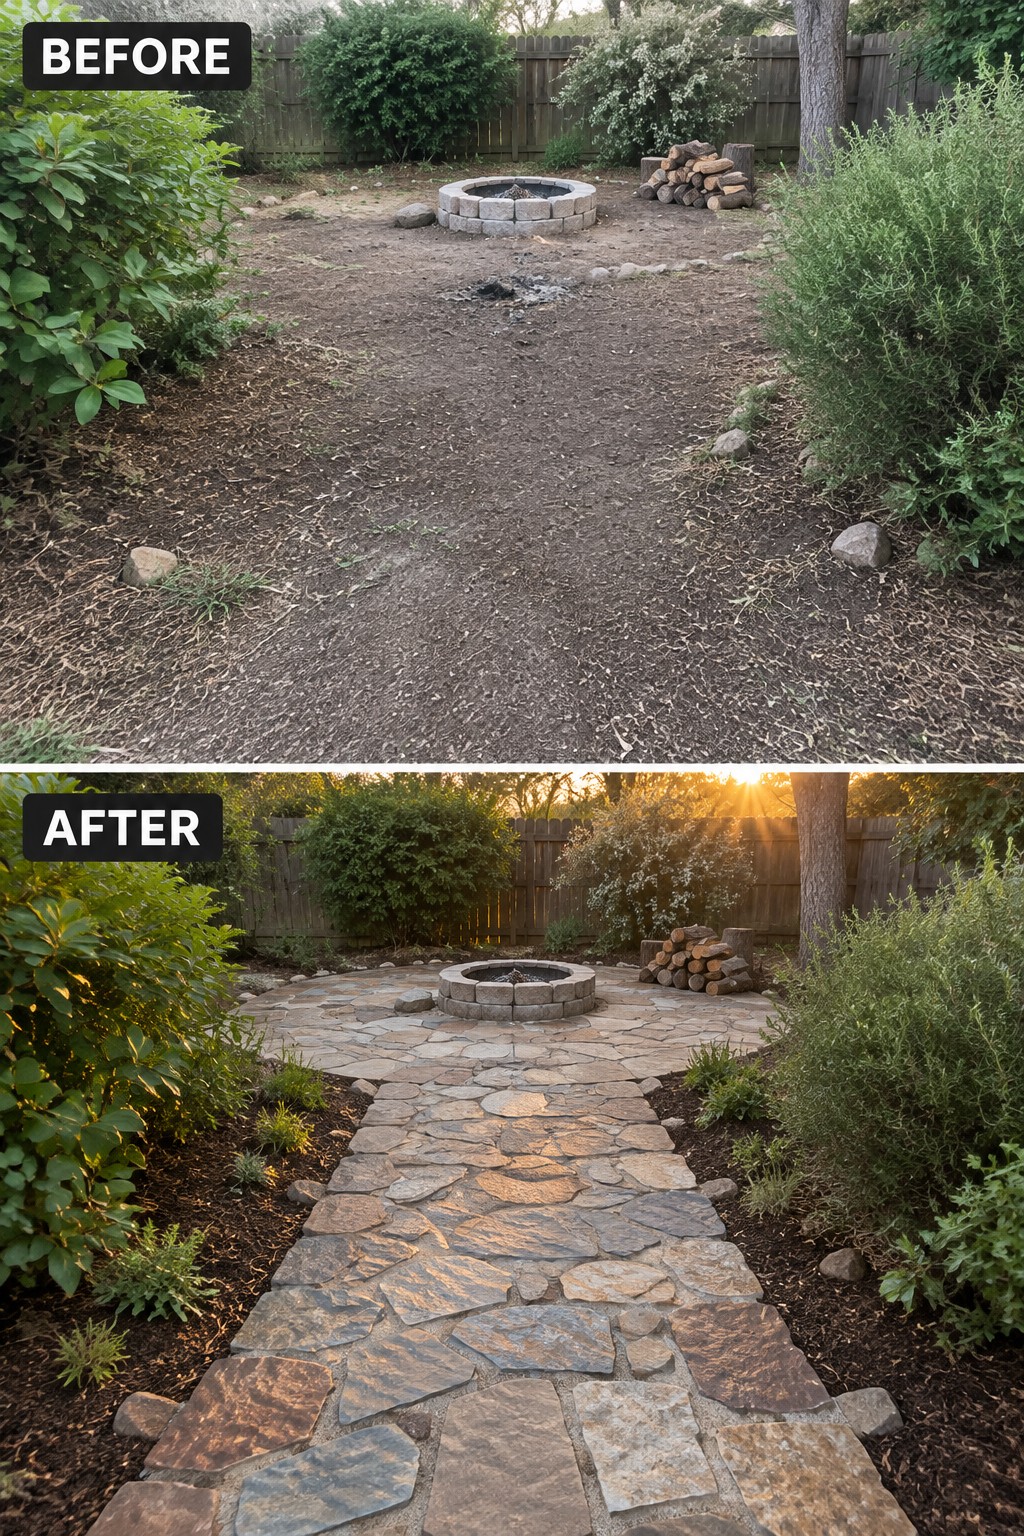
A bare dirt yard with a fire pit in the middle often leaves people walking on uneven ground or tracking mud after rain. Adding a stone paver path solves this by giving a solid route from the main yard area straight to the seating zone. The pavers also create a small paved circle around the fire pit itself, which keeps the area from feeling scattered.
This approach works well in backyards where the fire pit already sits in a central spot but the surrounding ground stays rough. Start by marking a simple path width that feels comfortable for two people to walk side by side, then choose pavers that match the fire pit material so everything feels connected. Keep the rest of the planting loose around the edges rather than trying to pave the entire yard.
Define A Lawn Path With Stone Pavers
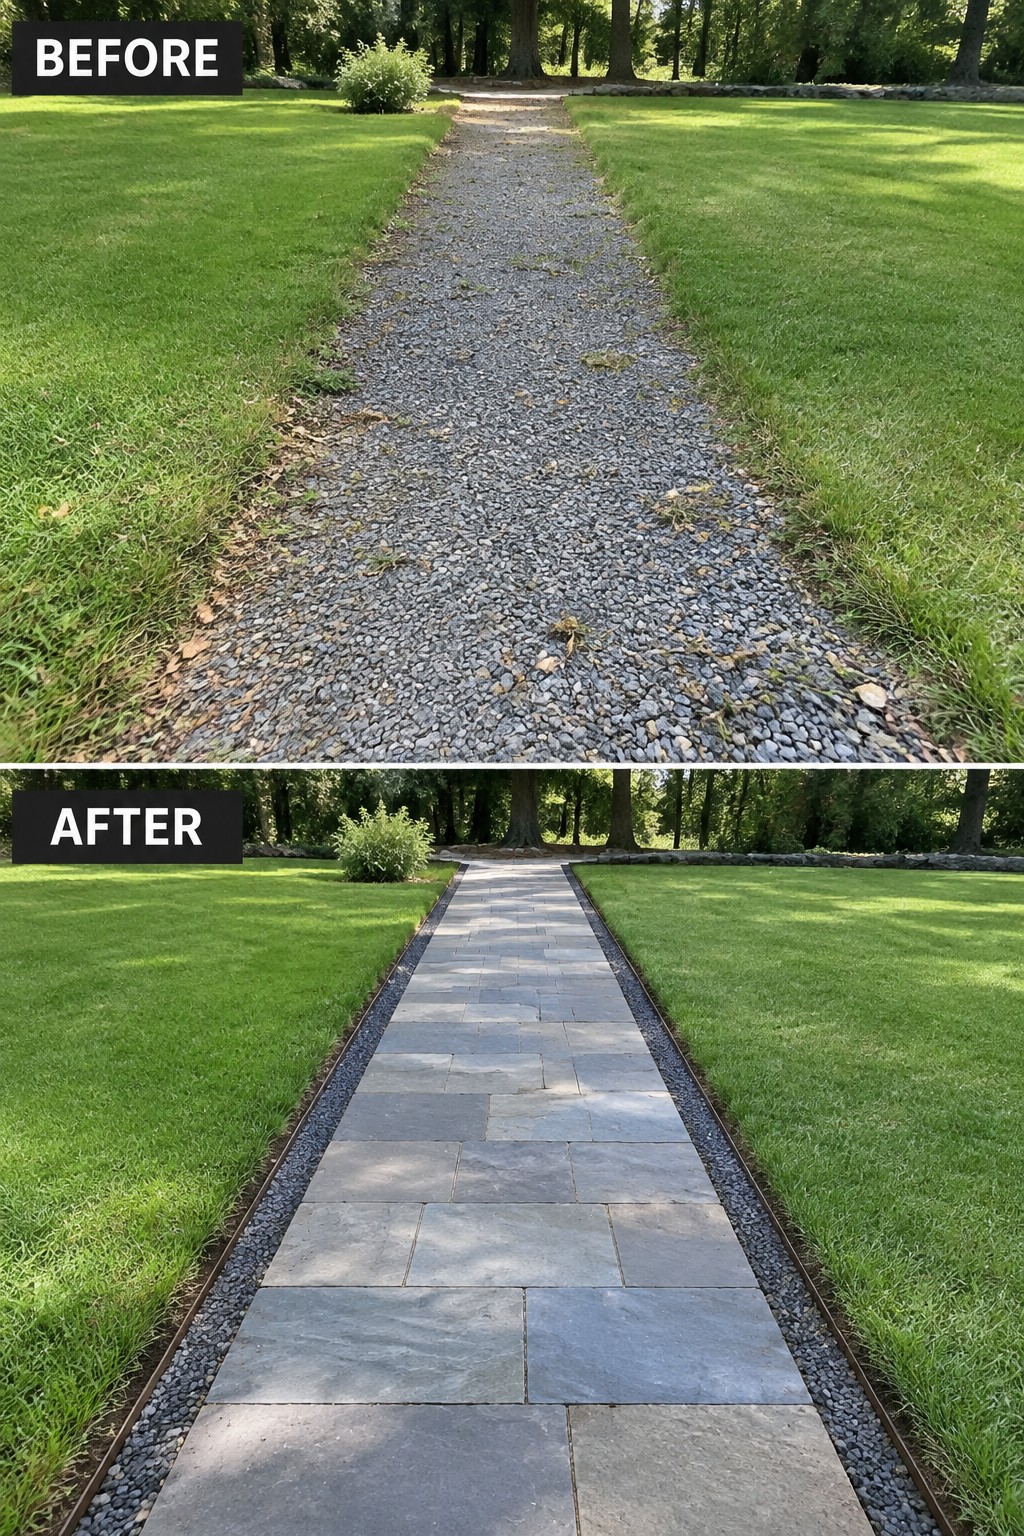
A loose gravel path often looks scattered after a season or two, with edges that blur into the grass and a surface that shifts underfoot. Switching to large stone pavers set in a straight line with narrow gravel borders on each side gives the path a solid walking surface and clear shape. The pavers stay put, the edges stay neat, and the whole route feels like it belongs in the yard instead of just cutting through it.
This approach works well on long, open stretches where you want a simple walkway that does not compete with the lawn. Lay the pavers first, then add the gravel strip and metal edging to keep everything in place. It suits homes with wide lawns or side yards that need a practical route to a back gate or seating area without adding too many extra features.
Use Pavers To Define A Narrow Pathway
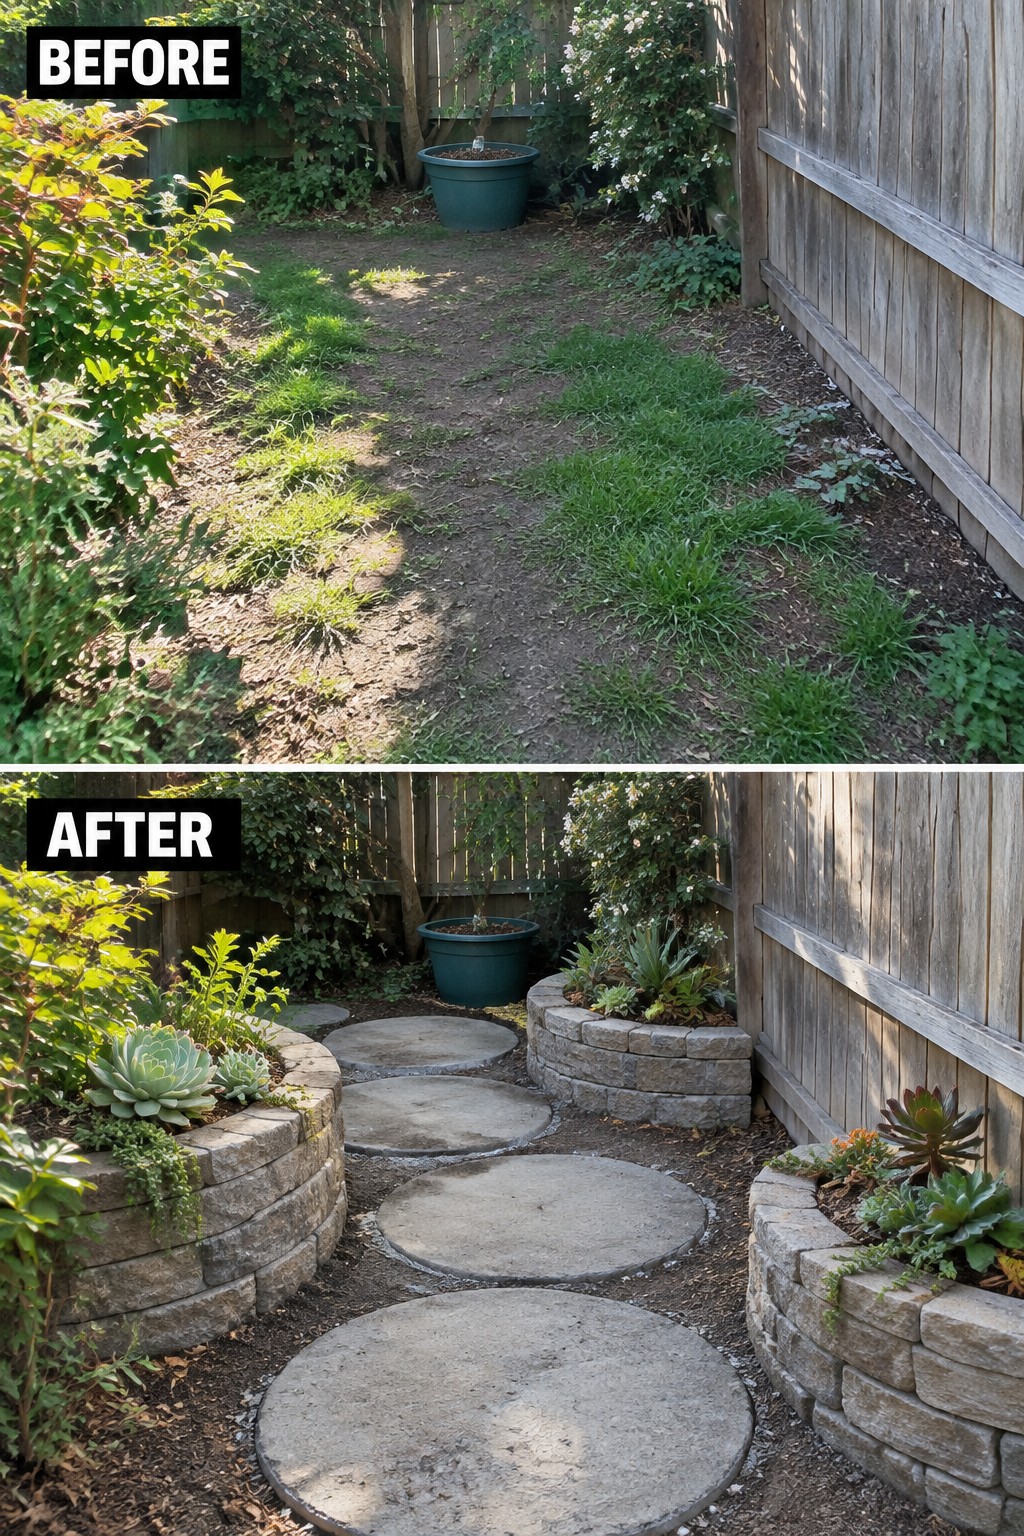
A narrow side yard often becomes a weedy strip because nothing marks where to walk or what belongs there. Laying down a simple line of circular pavers gives the space a clear route and turns the dirt into something usable.
This approach suits tight areas between a house and fence where grass struggles to grow. Start by clearing the weeds and leveling the ground, then place the pavers with comfortable stepping distance. Low stone borders on each side keep soil and plants contained so the path stays open.
Use Pavers To Give Shape To An Overgrown Path
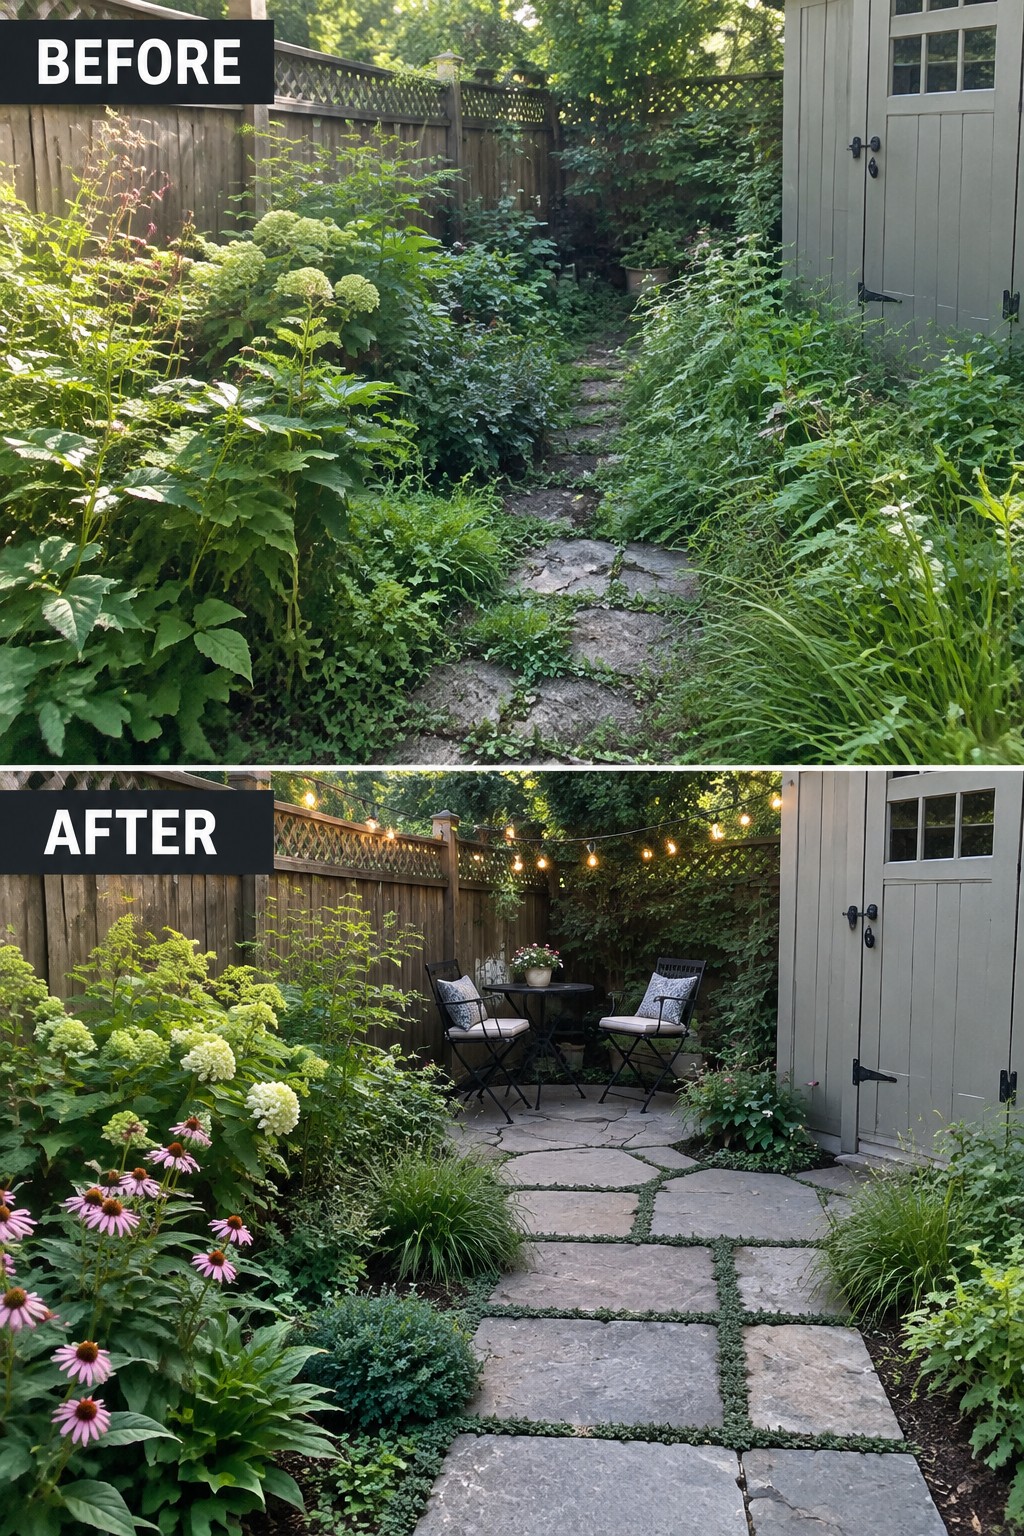
The main improvement here is replacing a narrow, uneven trail with a wide stone paver path that actually holds the garden together. The pavers add clear edges so the plants stay contained instead of spilling across the walkway.
This idea works best in side yards or back corners where the space is long and narrow. Cut back the heaviest growth first, then lay pavers in a simple running pattern that leaves enough room for two people to pass. Keep the planting loose on either side so the path feels like part of the garden rather than a separate feature.
Define A Worn Path With Landscape Pavers
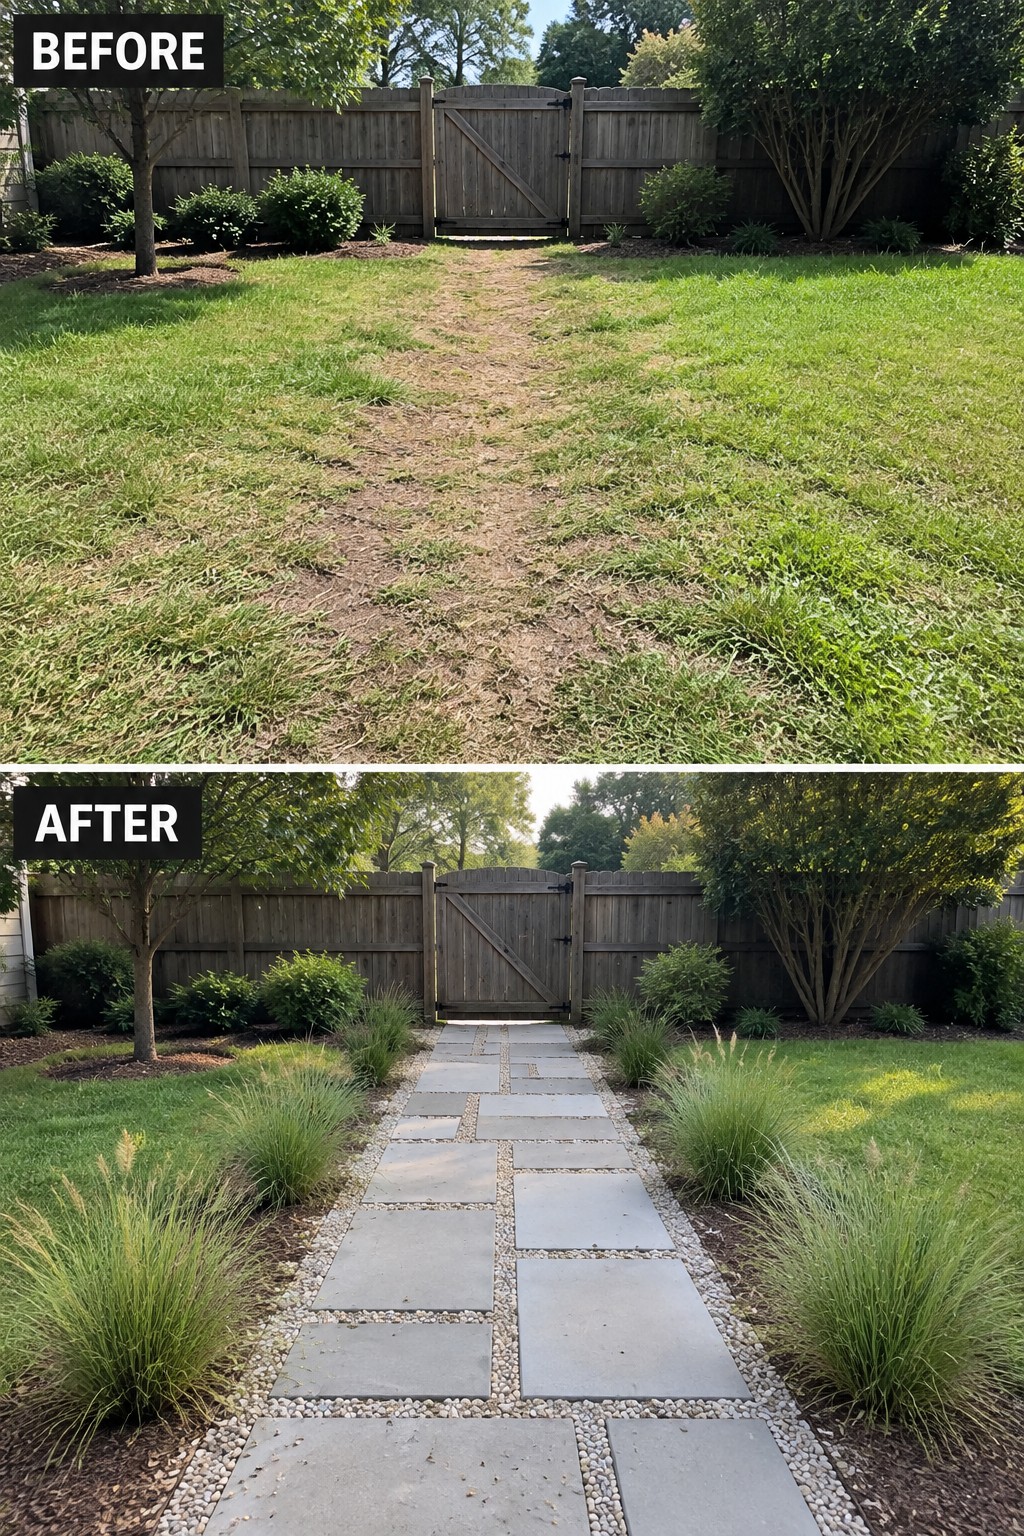
A dirt trail through the middle of a lawn usually gets worse over time as foot traffic wears the grass away. Setting landscape pavers in a straight line gives the path a firm surface and stops the mud from spreading.
This idea works best in side yards or backyards where people walk between a gate and the house. Keep the pavers simple, add a narrow gravel border for drainage, and plant a few clumps of tall grass along the edges so the walkway feels settled without looking crowded.
Replace A Straight Concrete Path With Curved Pavers
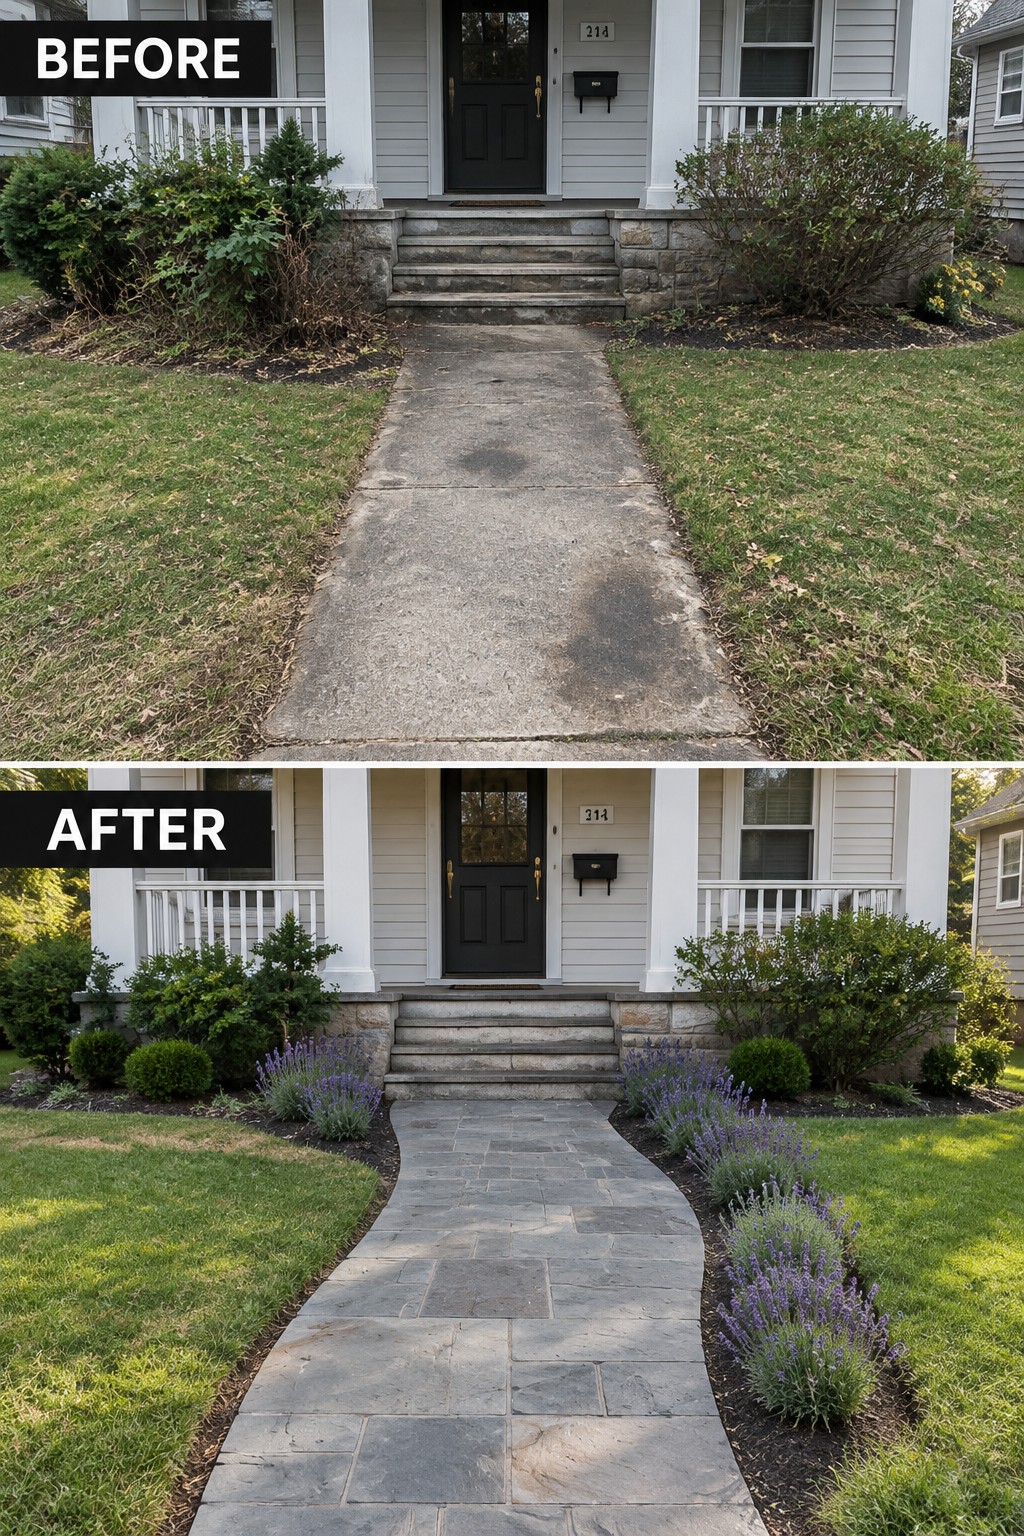
A straight concrete walkway often looks flat and dated once the surface starts to show wear. Switching to stone pavers lets you introduce a gentle curve that softens the approach and makes the entry feel more intentional. The new path also gives you clean edges for planting beds right beside the walk, so the whole front looks pulled together instead of just patched.
This idea works well on narrow lots or older homes where the original walk runs in a rigid line from the street. Keep the curve modest so the path still feels direct, and use the same paver material for any small landing at the steps. The planting can stay simple, just low shrubs or lavender tucked into the new beds, so the pavers stay the main feature.
Define A Narrow Side Path With Landscape Pavers
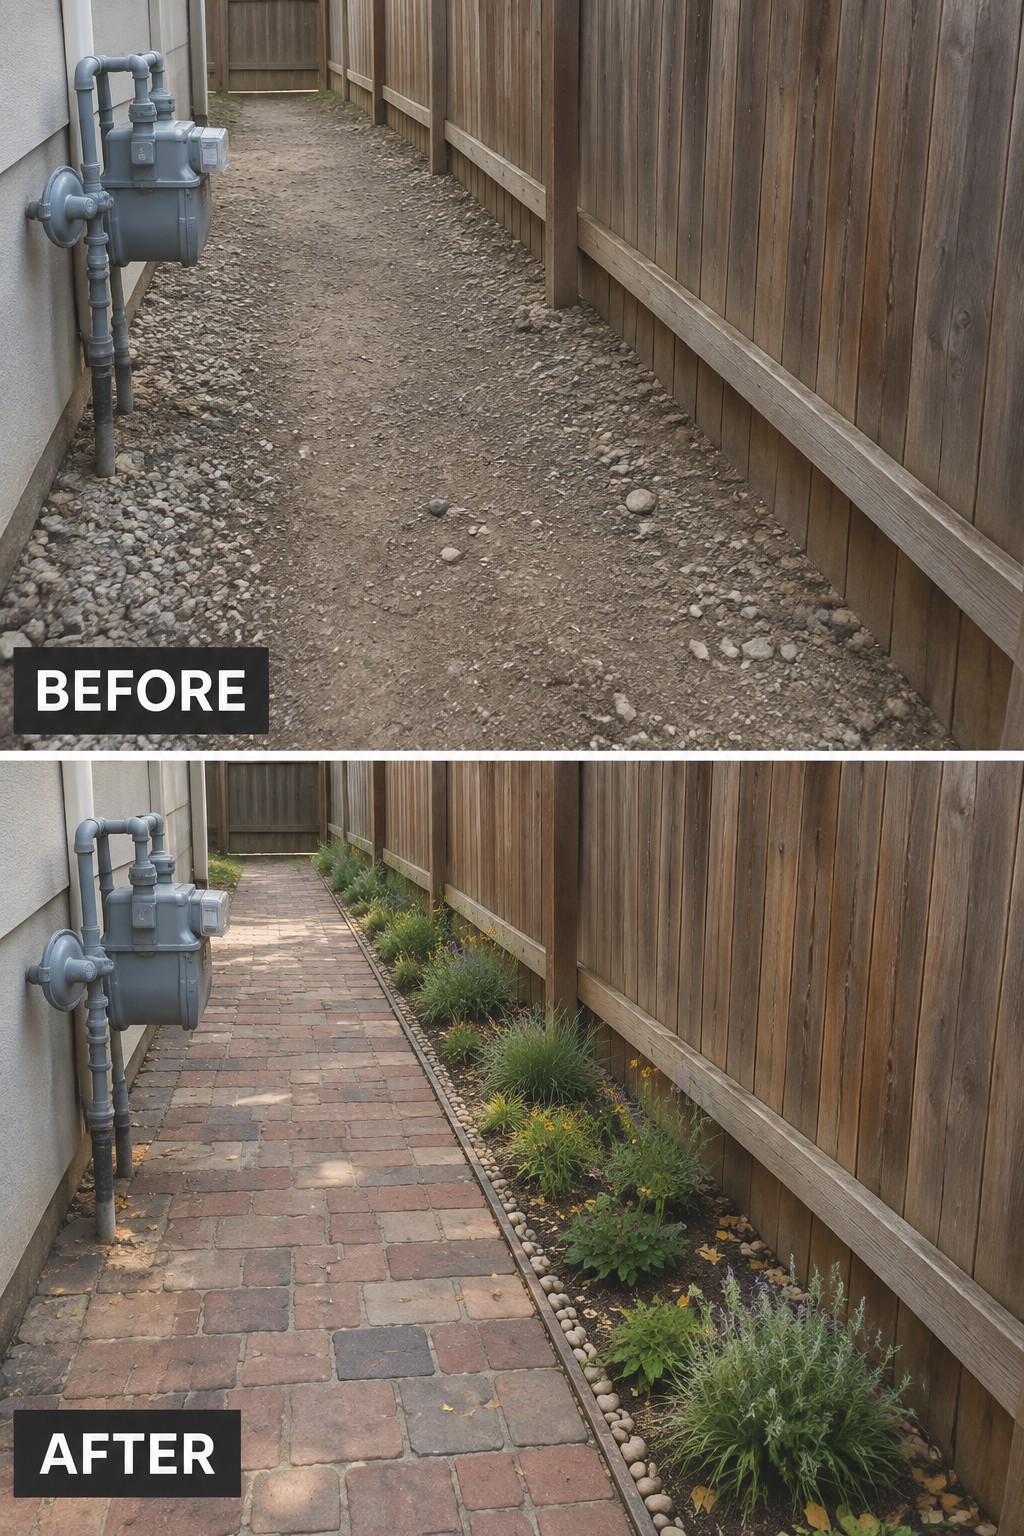
A bare dirt or gravel side path often feels unfinished and hard to maintain. Laying brick pavers gives the walkway a solid surface while creating a clear edge for a narrow planting bed along the fence. The change turns a space that was mostly ignored into something that feels intentional and easy to walk through.
This approach works well on homes where the side yard is tight but still needs regular access. Keep the planting strip simple with low-growing shrubs and ground cover so it does not crowd the path. Use pavers that match the color of nearby hardscaping if you have it, and make sure the bed has good drainage before you plant.
Lay Pavers To Give A Dirt Path Clear Shape
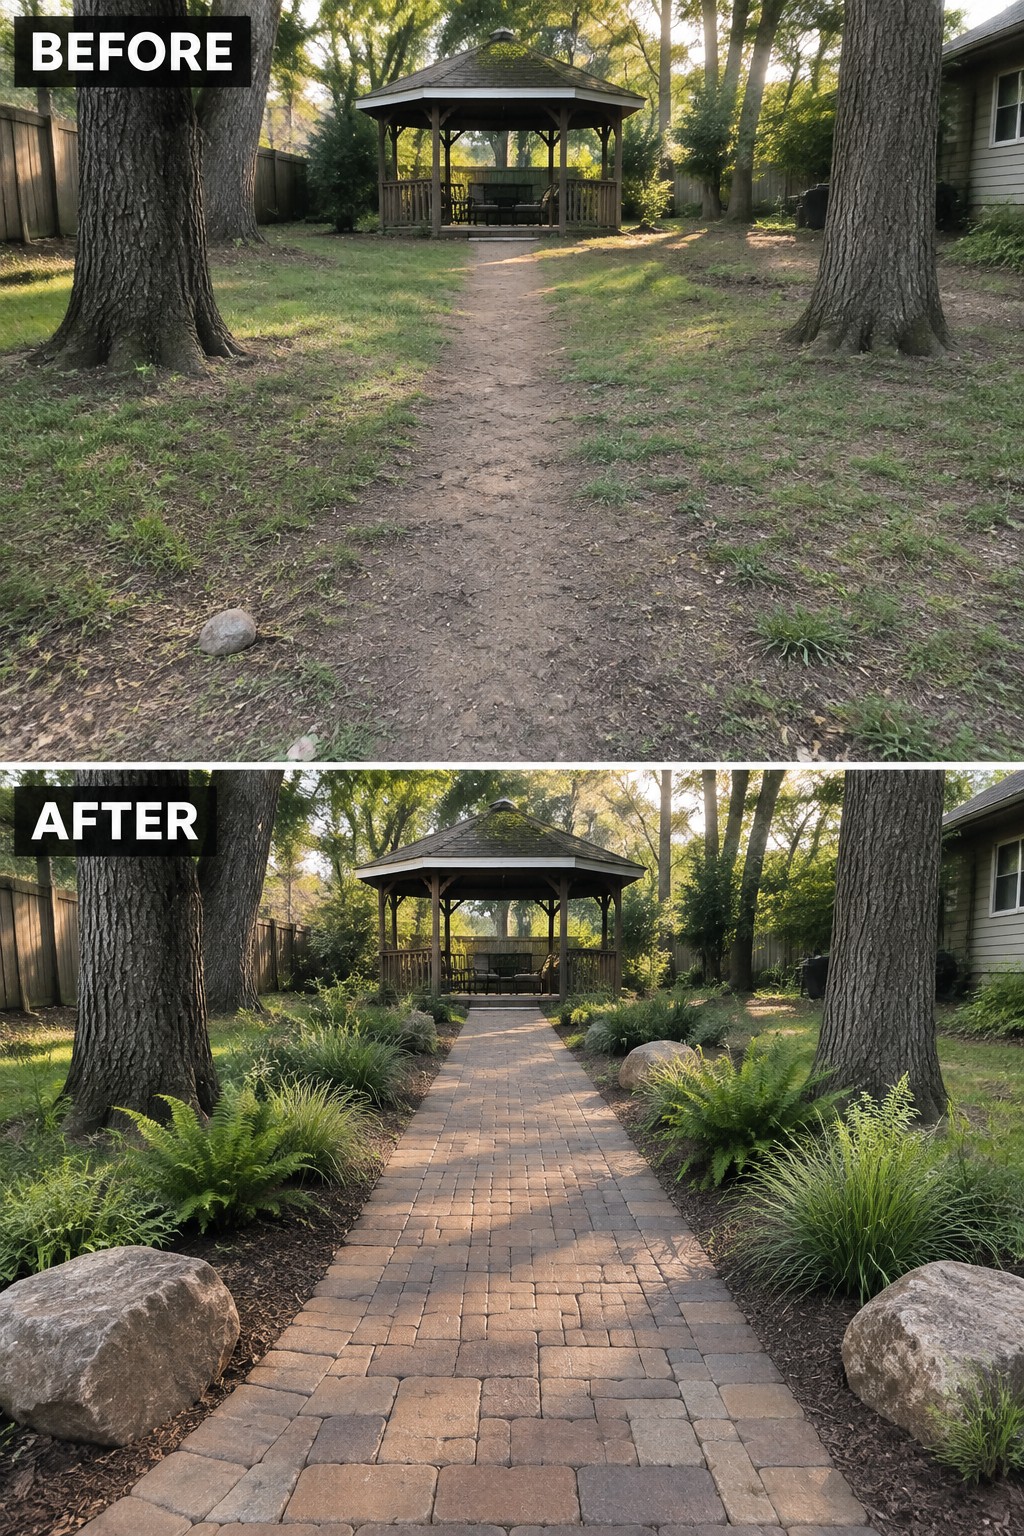
A dirt path through the yard often feels unfinished, especially when it leads to something worth reaching like a gazebo. Switching to pavers adds structure right away and makes the route feel like it belongs in the landscape instead of cutting through it. The before photo shows a plain trail of packed earth with scattered rocks and uneven grass. The after shows how a simple brick walkway with planted edges turns the same space into something that looks planned.
This idea works best in backyards where a path already exists but needs better definition. Start with the pavers first so the rest of the planting has a clear frame to follow. Keep the borders simple with a few types of ferns and grasses rather than filling every inch. It suits homes with larger yards or wooded lots where you want the path to feel natural but still easy to walk.
Frequently Asked Questions
Q: Do the pavers need a special base or can I set them straight on the ground?
A: You need a gravel layer to prevent sinking and shifting. Spread about four inches of crushed stone and tamp it down firm. This step keeps your path solid for years.
Q: What happens if water pools on the path after rain?
A: Slope the base slightly so water runs off to the sides. Add a thin sand layer that allows drainage between the pavers. Check the path after the first storm and adjust any low spots right away.
Q: How can I stop weeds from growing between the pavers?
A: Sweep polymeric sand into the joints after laying them. It hardens when wet and blocks most weed growth.
