

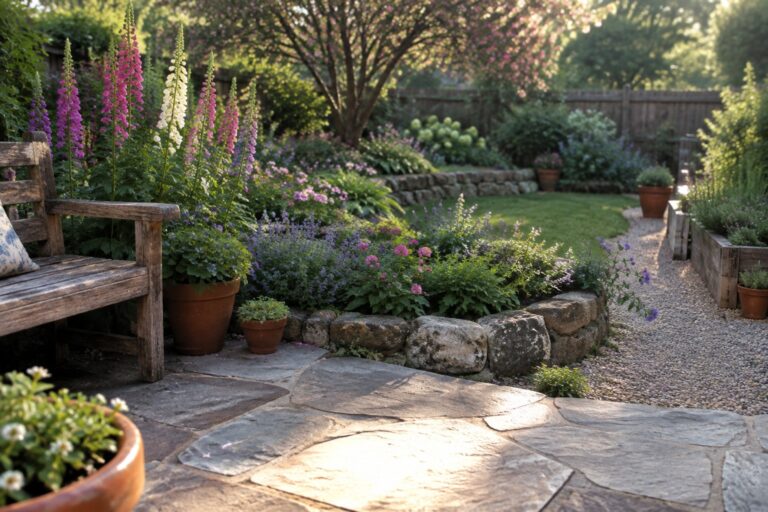
Backyards tend to feel more complete when the planting has clear layers that guide the eye from low ground covers up to taller accents and shrubs.
Without proper structure in the beds, flowers can quickly lose their impact once growth fills in unevenly.
Structure matters most.
I have found that adding different heights and textures early on prevents the need for major rework later when plants mature.
Paying attention to how the beds connect to the rest of the yard often makes the difference between a space that works daily and one that just looks good in photos.
Layer Flower Beds by Height
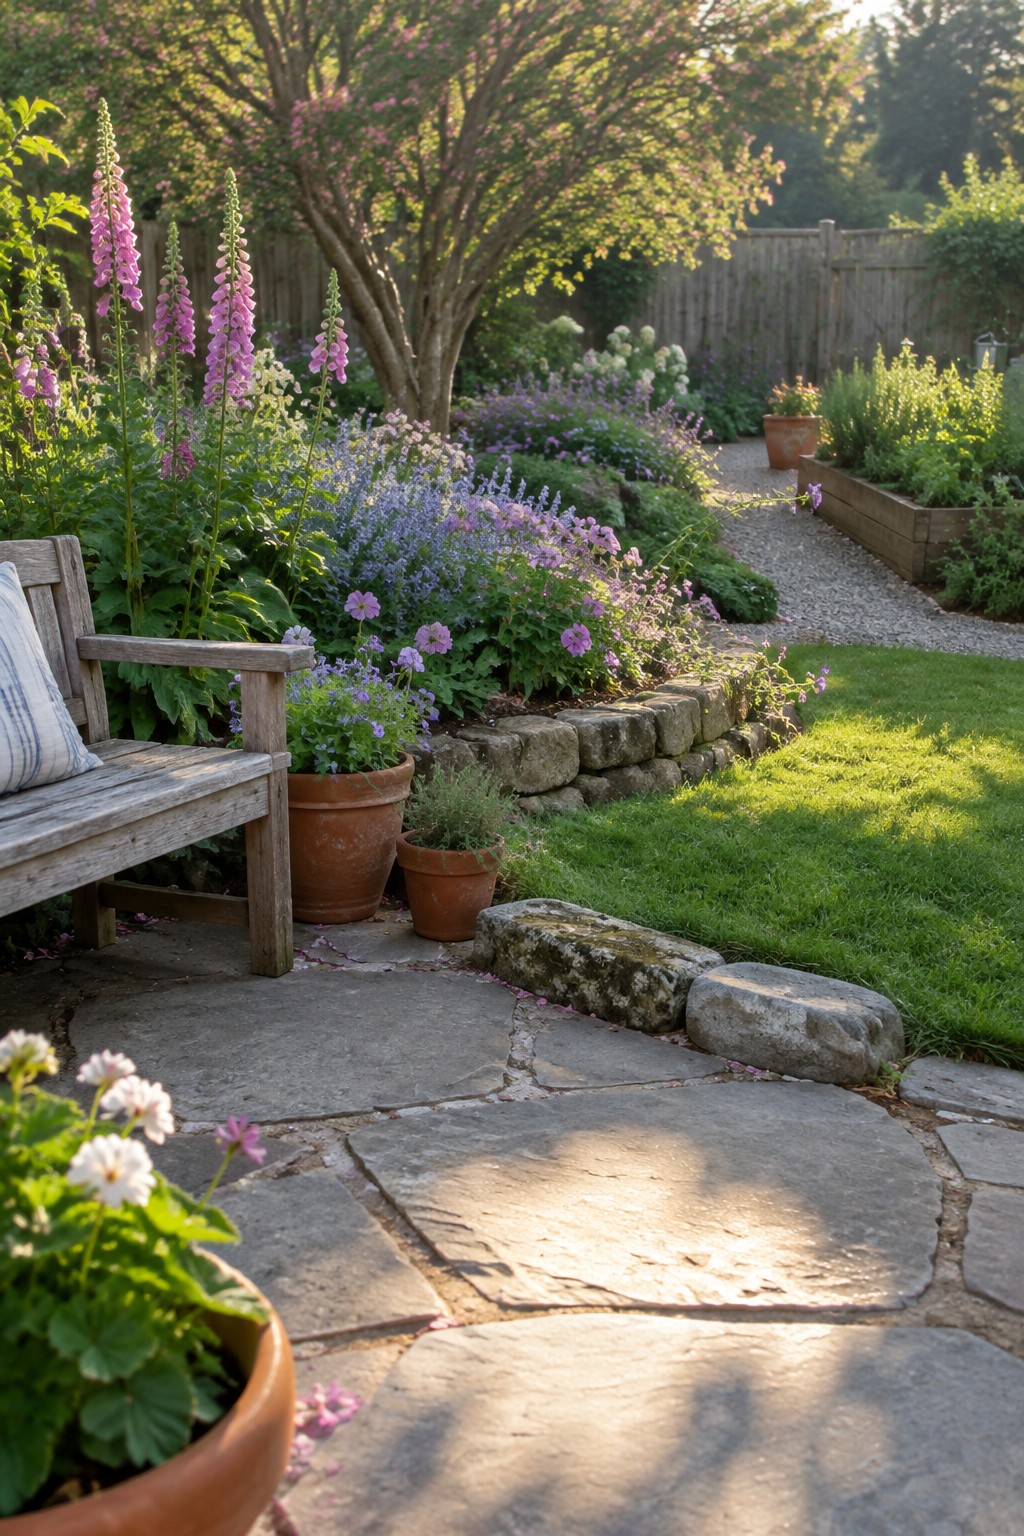
Planting in layers keeps a garden from looking flat. Tall flowers like the foxgloves go in the back, medium height plants fill the middle, and low growers sit along the front edge. The result feels full and balanced without crowding.
This works especially well along paths or low stone borders where the change in height guides the eye. Start with your tallest plants first, then work forward in stages so each layer has room to spread.
Raised Metal Beds For Layered Planting
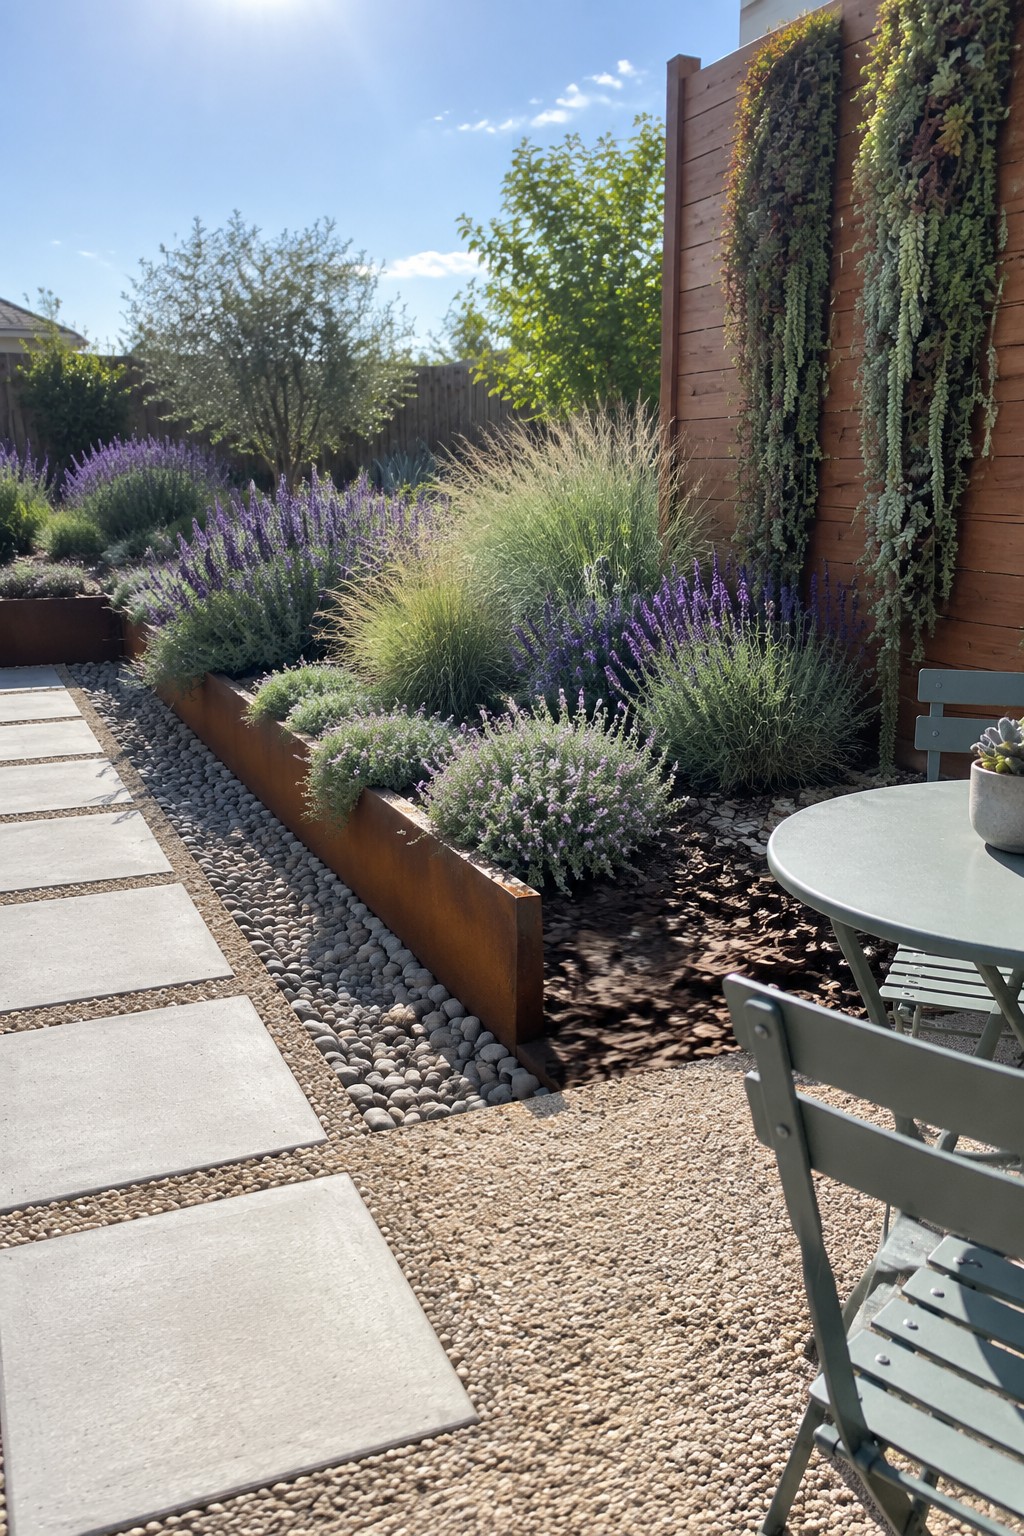
A raised metal bed like this one makes it easier to create layers in a flower bed. The height lets you place taller plants toward the back and shorter ones near the edge so the whole bed feels full without looking crowded.
This approach works well in smaller yards or along a path where you want clear lines and lower upkeep. Just check that the soil drains well and choose plants that stay in scale with the bed height.
Layered Beds With Stone Retaining Walls
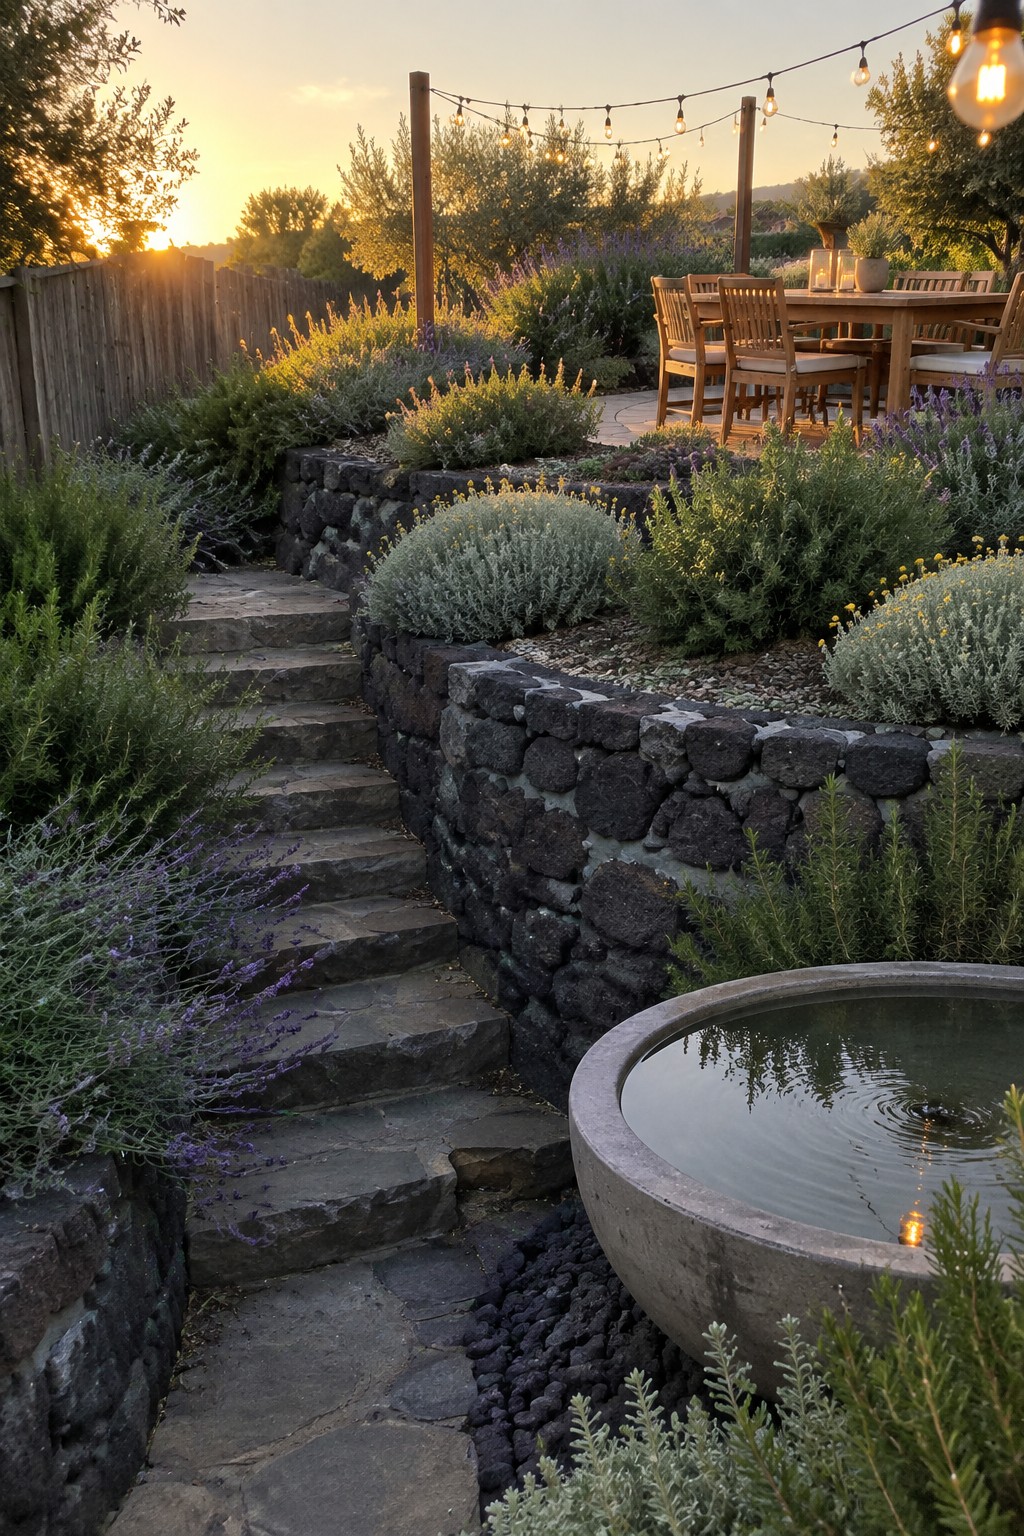
Stone retaining walls make it easy to build layered planting beds that add real depth to a backyard. The different heights let taller plants sit at the back while lower ones spill forward, and the whole setup keeps the garden from looking flat. This kind of structure also helps manage slight slopes without needing a big redesign.
It works best in medium to large yards where you want clear planting zones but still need room for paths and seating areas. Keep the walls low so they feel natural rather than heavy, and choose plants that match the scale of each level. Avoid packing too many varieties into one bed or the layers will start to compete.
Layered Flower Beds For More Depth
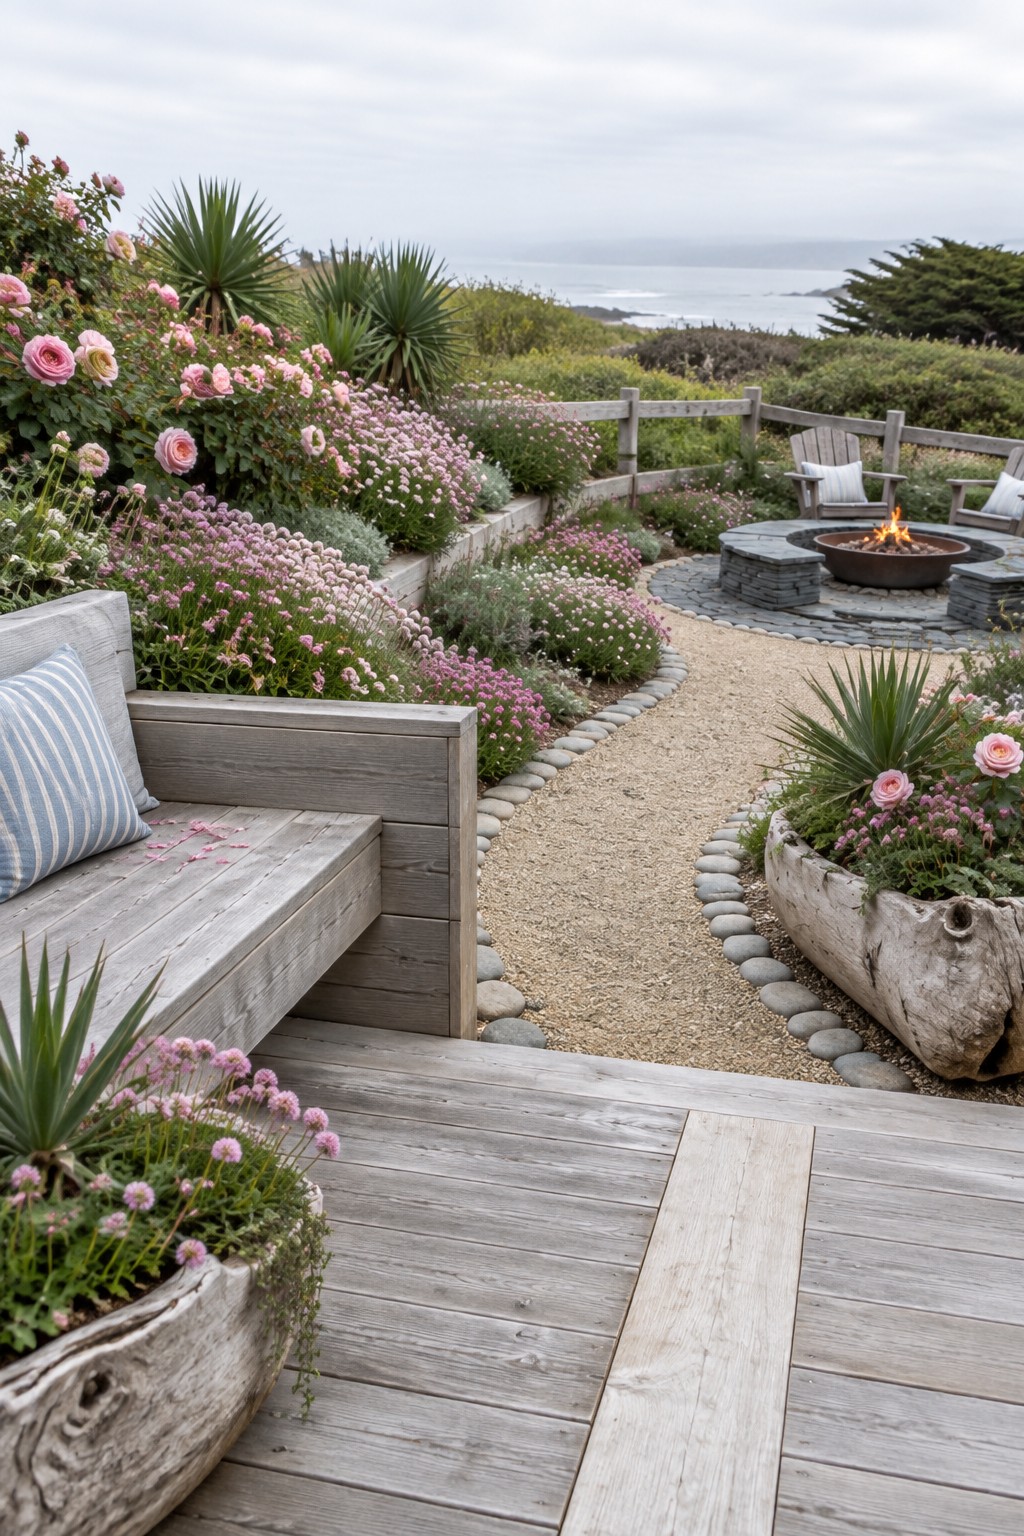
Layered flower beds give a garden real dimension by mixing plant heights in the same space. Tall spiky greens stand at the back while lower flowering plants fill in the middle and spill over the edges. This approach makes even a narrow bed look fuller without needing extra width.
It works especially well along paths or in raised beds where the layers stay visible. Group plants by height rather than spacing them evenly, and choose a simple border like wood or stone to keep the focus on the planting. This style suits most backyard sizes and holds up without constant fuss.
Layer Flower Beds With Hedges And Roses
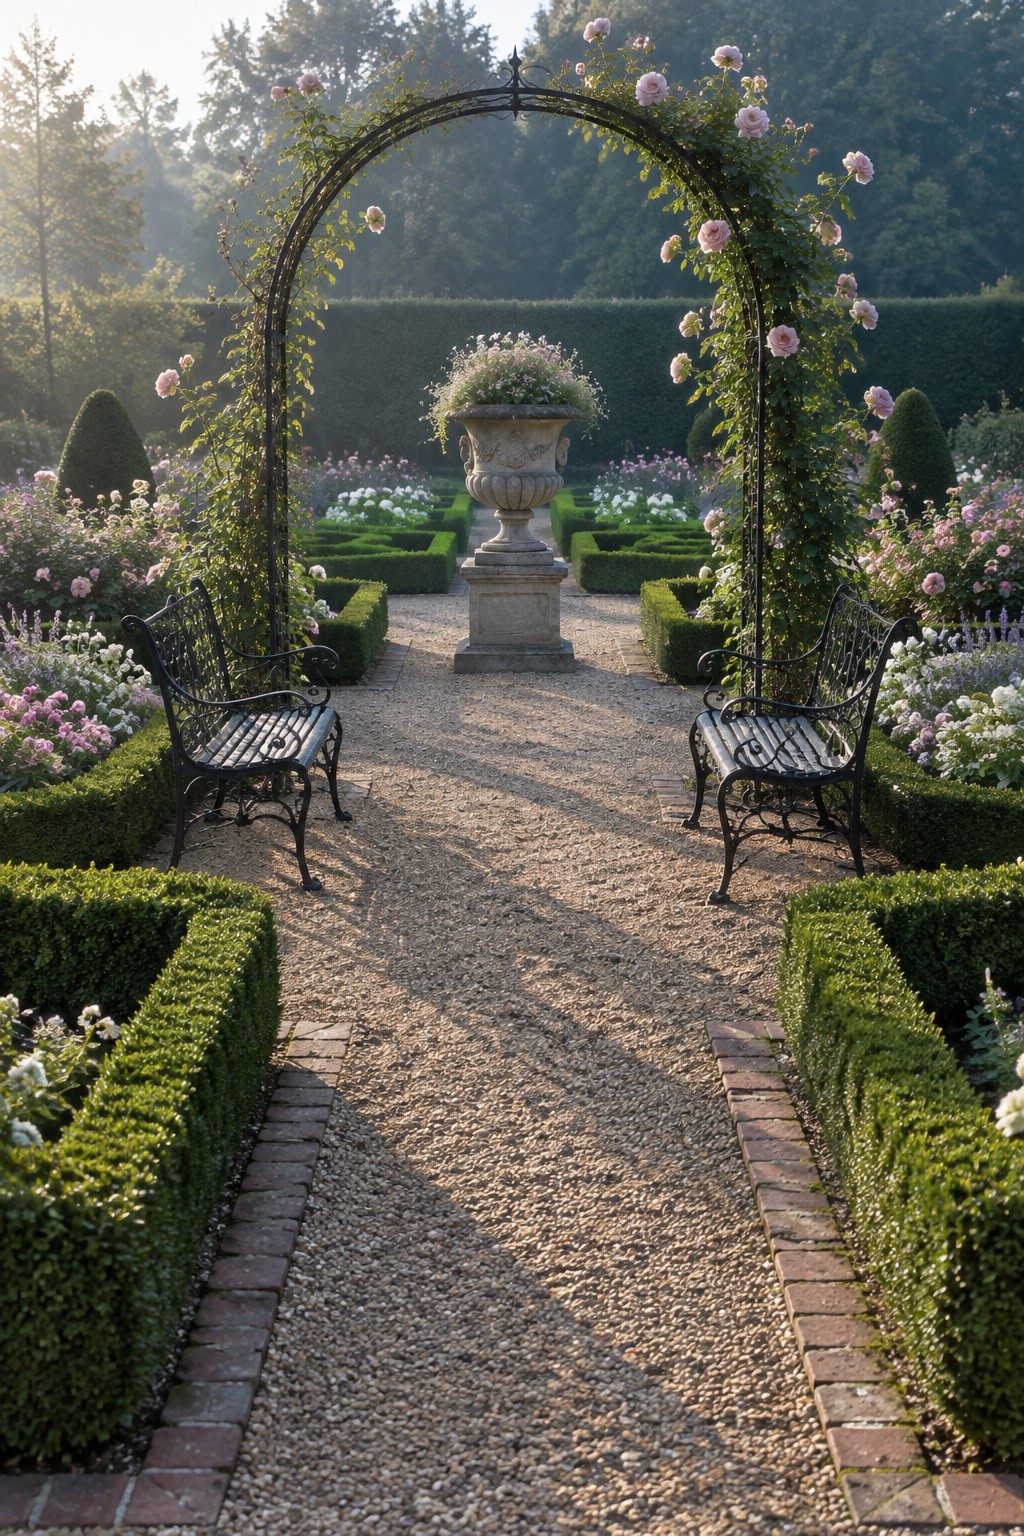
Layering low hedges with mid-height flowers and tall climbers gives a garden real structure. The beds feel full but stay organized because each level has its own height and role.
This works best in a backyard that already has a clear path running through it. Trim the hedges regularly so the flowers and roses stay visible and the layers do not blur together.
Layered Flower Beds Along a Path
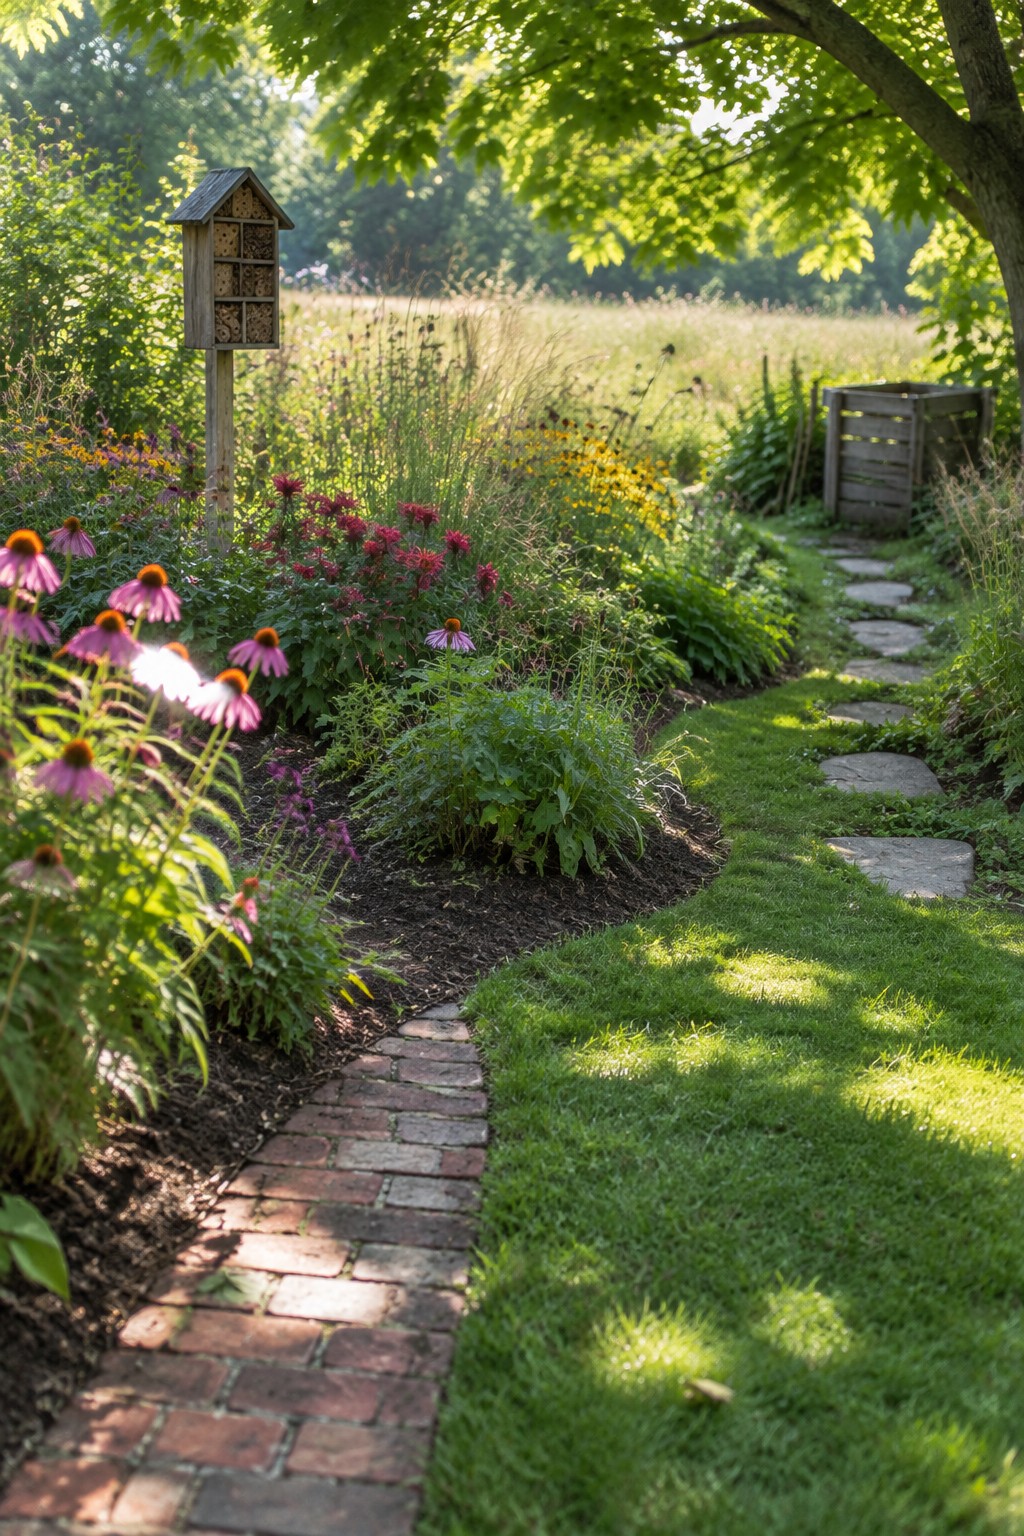
Layered flower beds give a garden more depth by mixing plant heights in a simple way. Taller stems sit toward the back while shorter blooms fill the front, so the whole strip looks fuller even in a narrow space. This setup turns a basic path edge into something that feels established rather than flat.
It works best along existing walkways or lawn borders on smaller lots. Keep the back row with taller perennials and let the front stay lower so the path stays clear and easy to walk. The curve in the bed also helps the eye move naturally through the space.
Layer Flower Beds On Different Heights
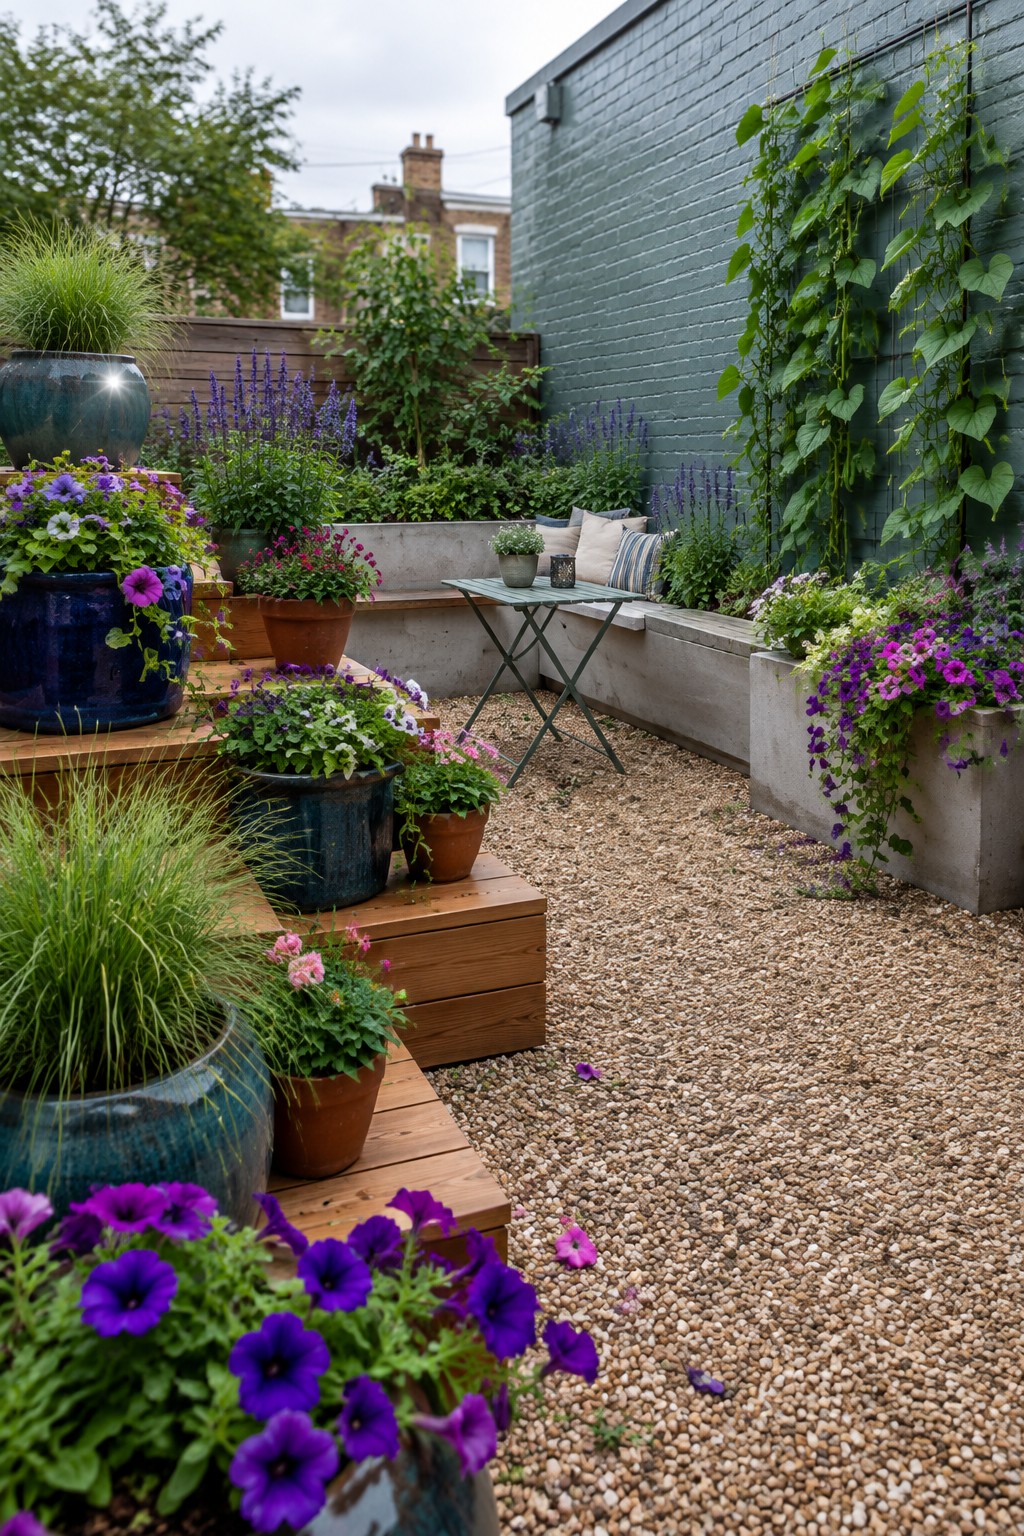
One way to add depth in a small backyard is to stack flower beds at different levels instead of keeping everything on the ground. Wooden platforms and steps let you place pots higher in the back and lower in front, so the flowers create natural layers without much extra work.
This approach suits tight urban yards or gravel areas where digging big beds is not practical. Mix a few taller containers on the lower steps with smaller ones higher up, and let some plants trail over the edges to soften the look.
Layer Plants By Height For More Impact
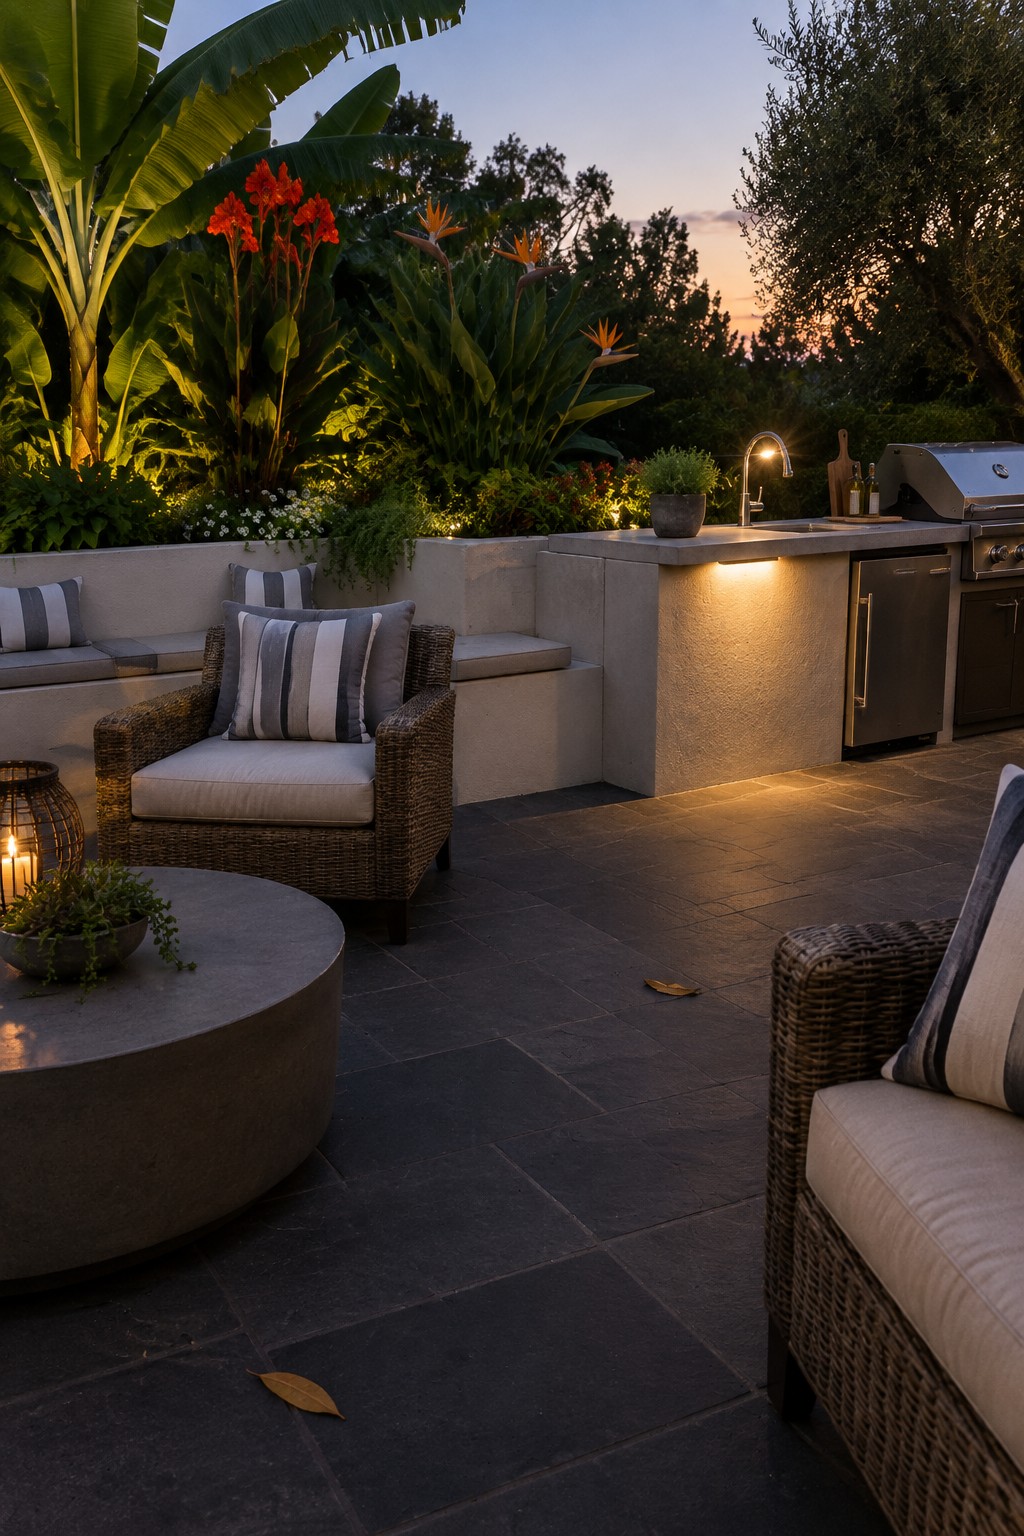
Layering plants of different heights gives a backyard bed more depth and makes the whole space feel finished. Placing taller foliage toward the back, medium sizes in the middle, and lower growers along the front edge creates a natural wall of color that changes through the year without looking flat.
This works best along the back of a patio or seating wall where the layers can frame the open area. It suits homes with simple hardscaping because the planting does most of the visual work and needs only basic trimming to stay full.
Layer Potted Plants Along Stone Walls
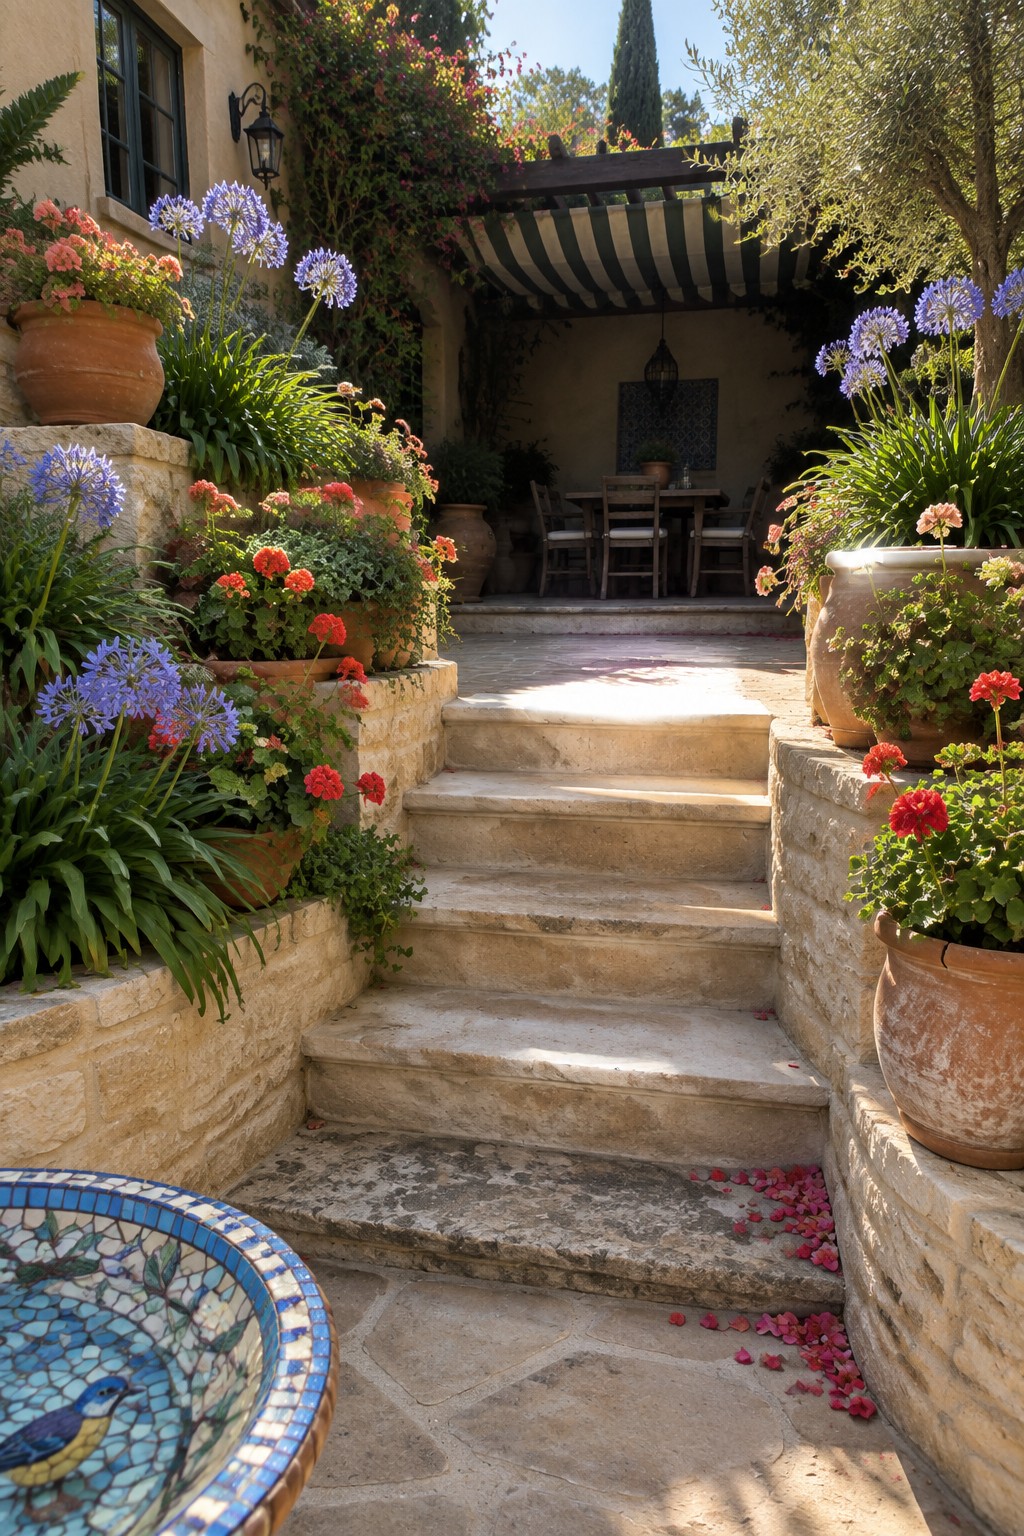
This setup adds height and structure without major construction. Placing pots at different levels on the walls creates that layered look people like in flower beds, and it makes the slope feel more intentional.
It suits homes with stairs or uneven ground where digging beds would be tricky. Stick to similar pot styles and repeat a few plant types so the layers stay simple rather than scattered.
Layered Flower Beds With Stone Edging
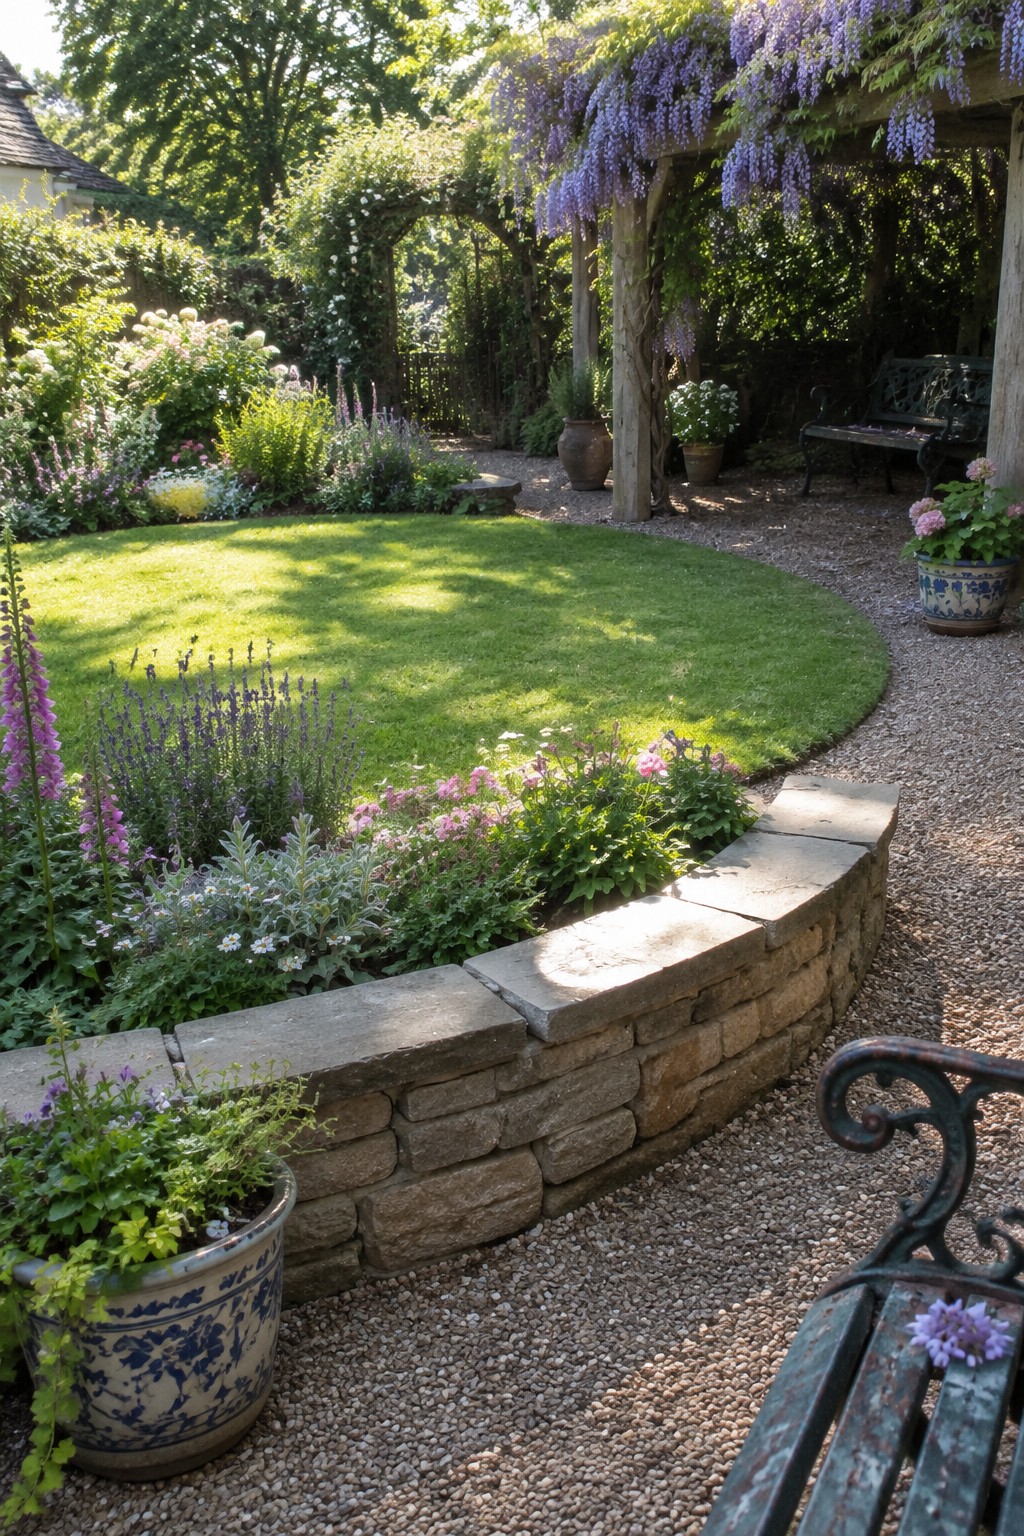
Layered beds like these give a garden more depth while keeping the overall look tidy. The plants rise in height from the front edge toward the back, and the low stone wall holds the shape without cutting off the flowers.
This approach works best along a lawn or path where you want a clear border but still like a soft edge. Use the same height of stone all the way around, then plant taller perennials behind shorter annuals and foliage so the layers stay visible from the main seating areas.
Layered Beds For Sloped Yards
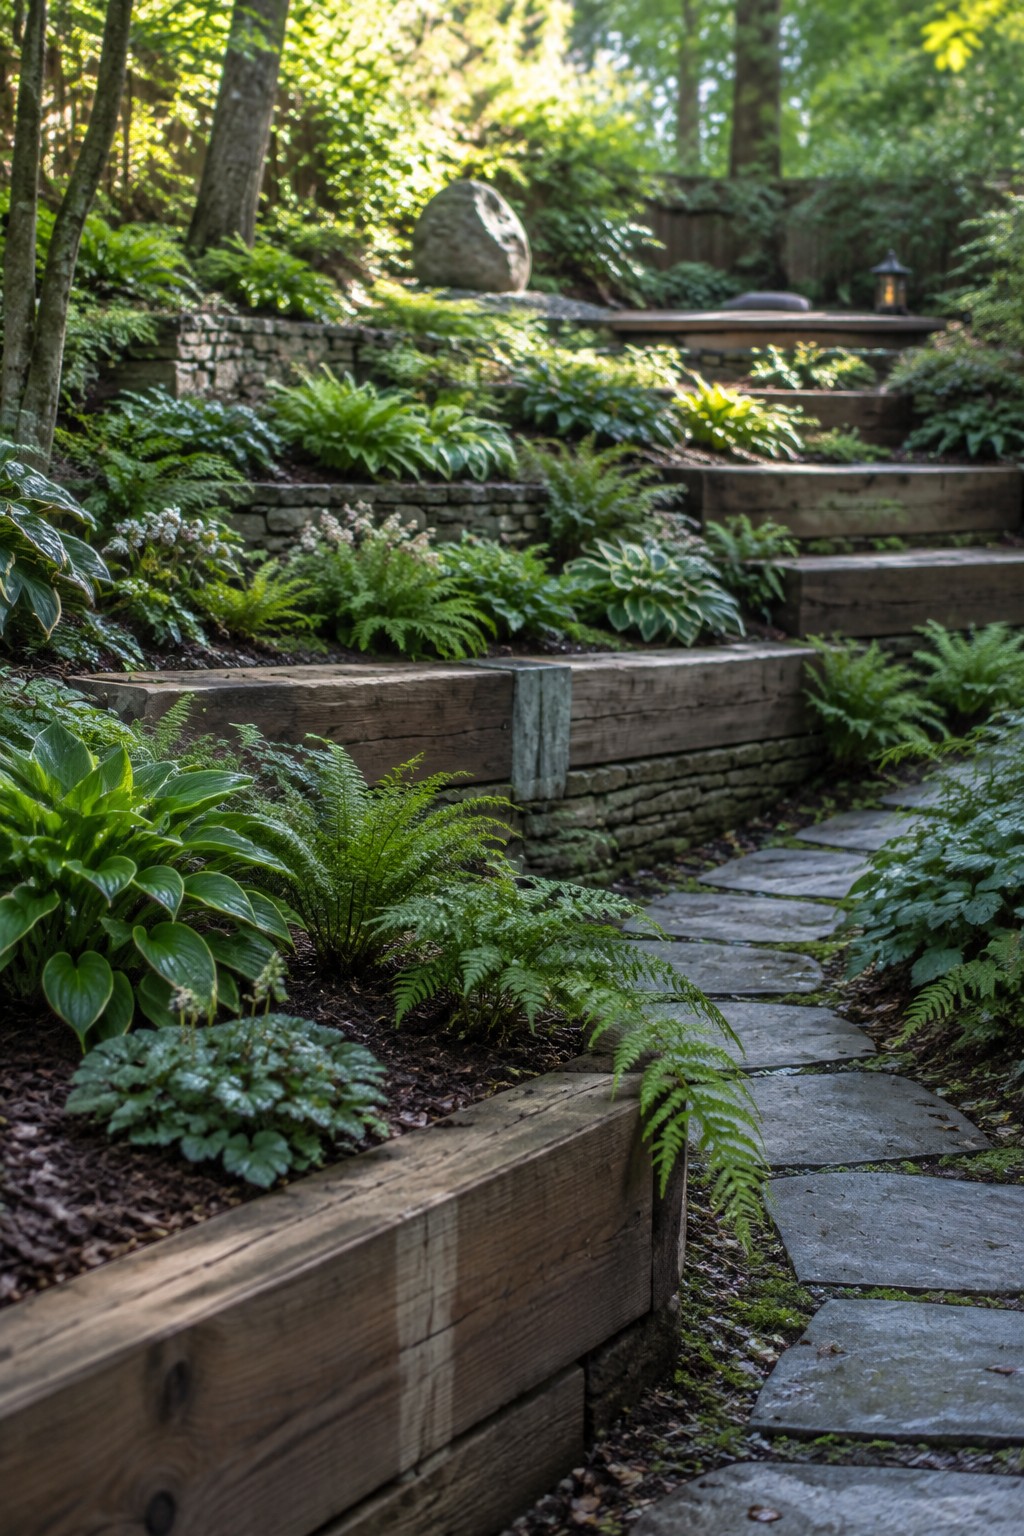
Sloped backyards often end up looking flat or messy when plants are just stuck in wherever they fit. Low wooden retaining walls solve that by creating separate levels where each layer of plants can be seen clearly instead of hiding behind the one in front.
This setup works best on gentle to moderate slopes where you want more planting space without a big construction project. Keep the front layers lighter with ferns and smaller greens, then step up to broader hostas and similar plants behind them so the whole bed feels full from the path.
Layer Your Flower Beds by Height
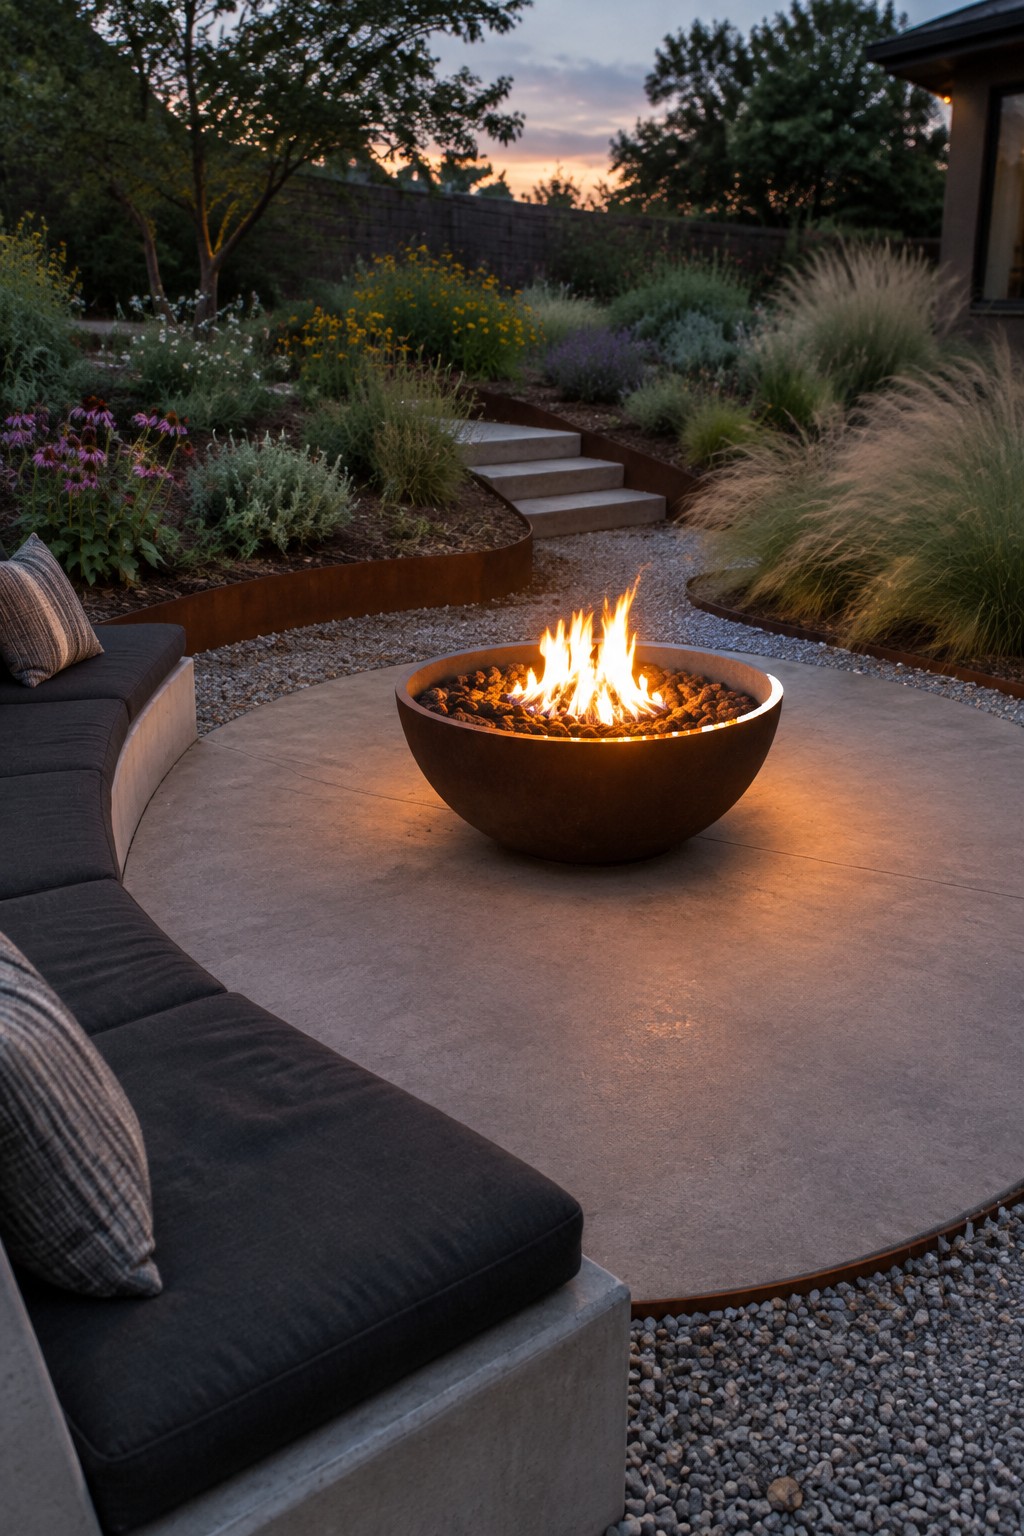
Layering plants of different heights gives flower beds more structure and keeps them from looking flat. The beds here use taller grasses and shrubs in the back, with mid-size flowers and lower perennials toward the front, all held in place by a simple curved edge.
This style works best along patios or seating areas where you want the garden to feel connected to the hardscape without crowding it. It suits most suburban backyards and helps the beds look intentional even as plants fill in over time.
Layer Plants by Height for More Depth
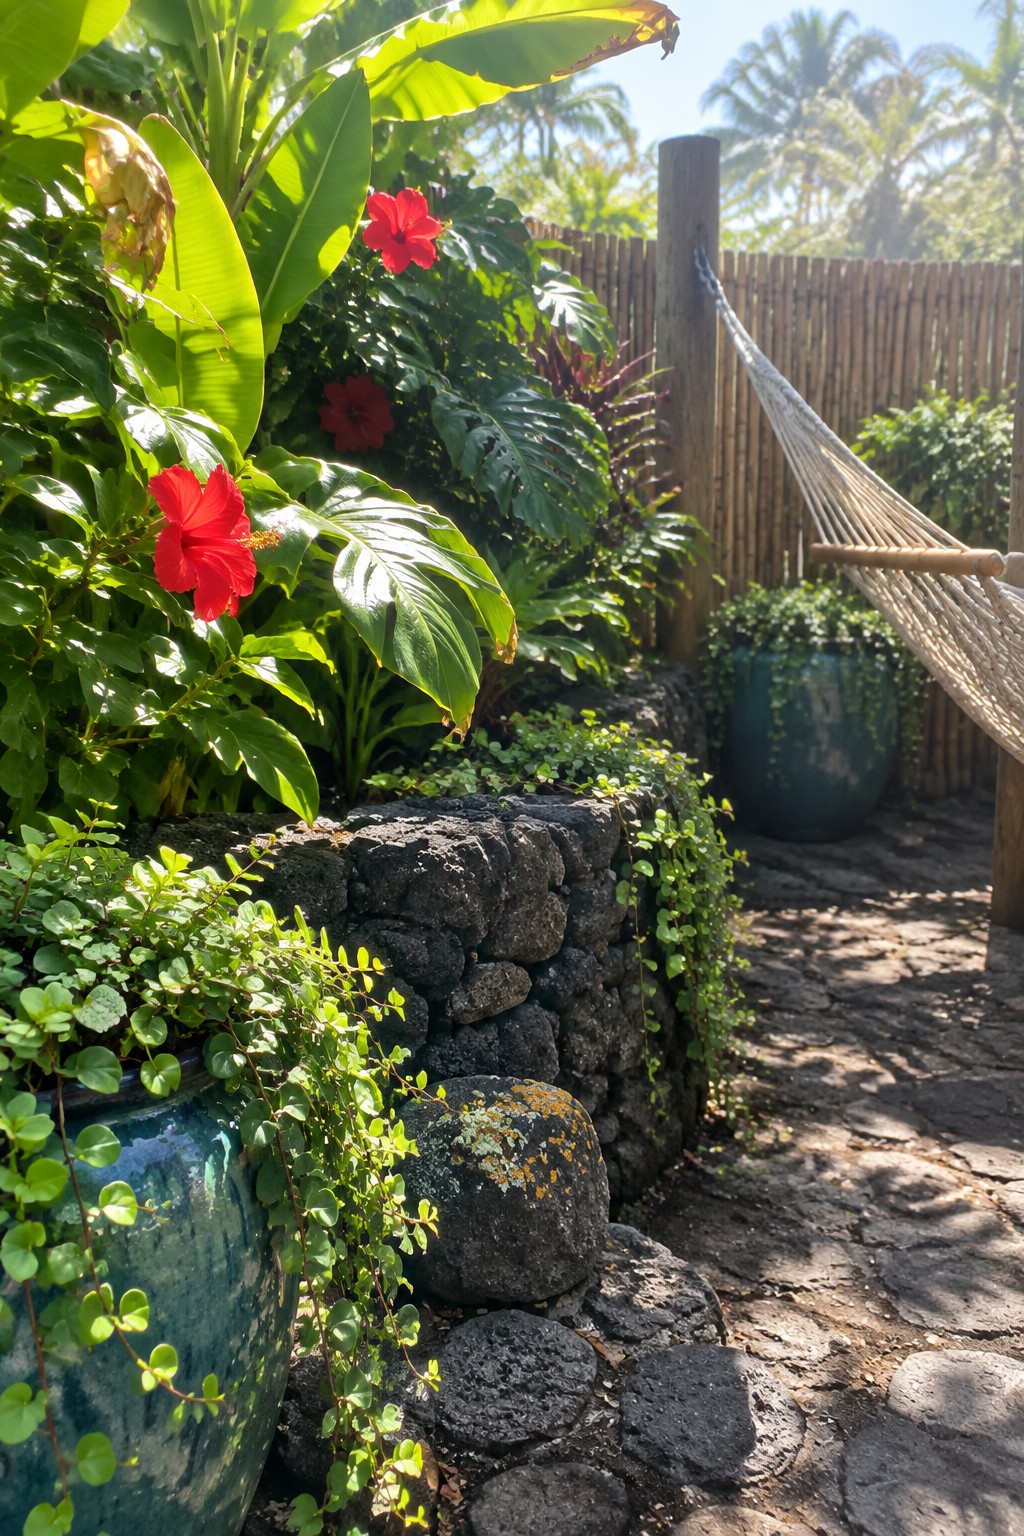
Layering plants by height gives a garden bed that full, settled look without needing a lot of extra space. Taller leaves and flowers sit toward the back while shorter ground covers spill forward, and the low stone wall here helps hold the layers in place along the path.
This approach works best in warm climates where bold foliage can thrive. Keep the tallest plants against a fence or wall, add mid-height flowers next, and finish with low trailers at the edge so the bed stays neat and easy to walk past.
Layer Flower Beds For A Fuller Look
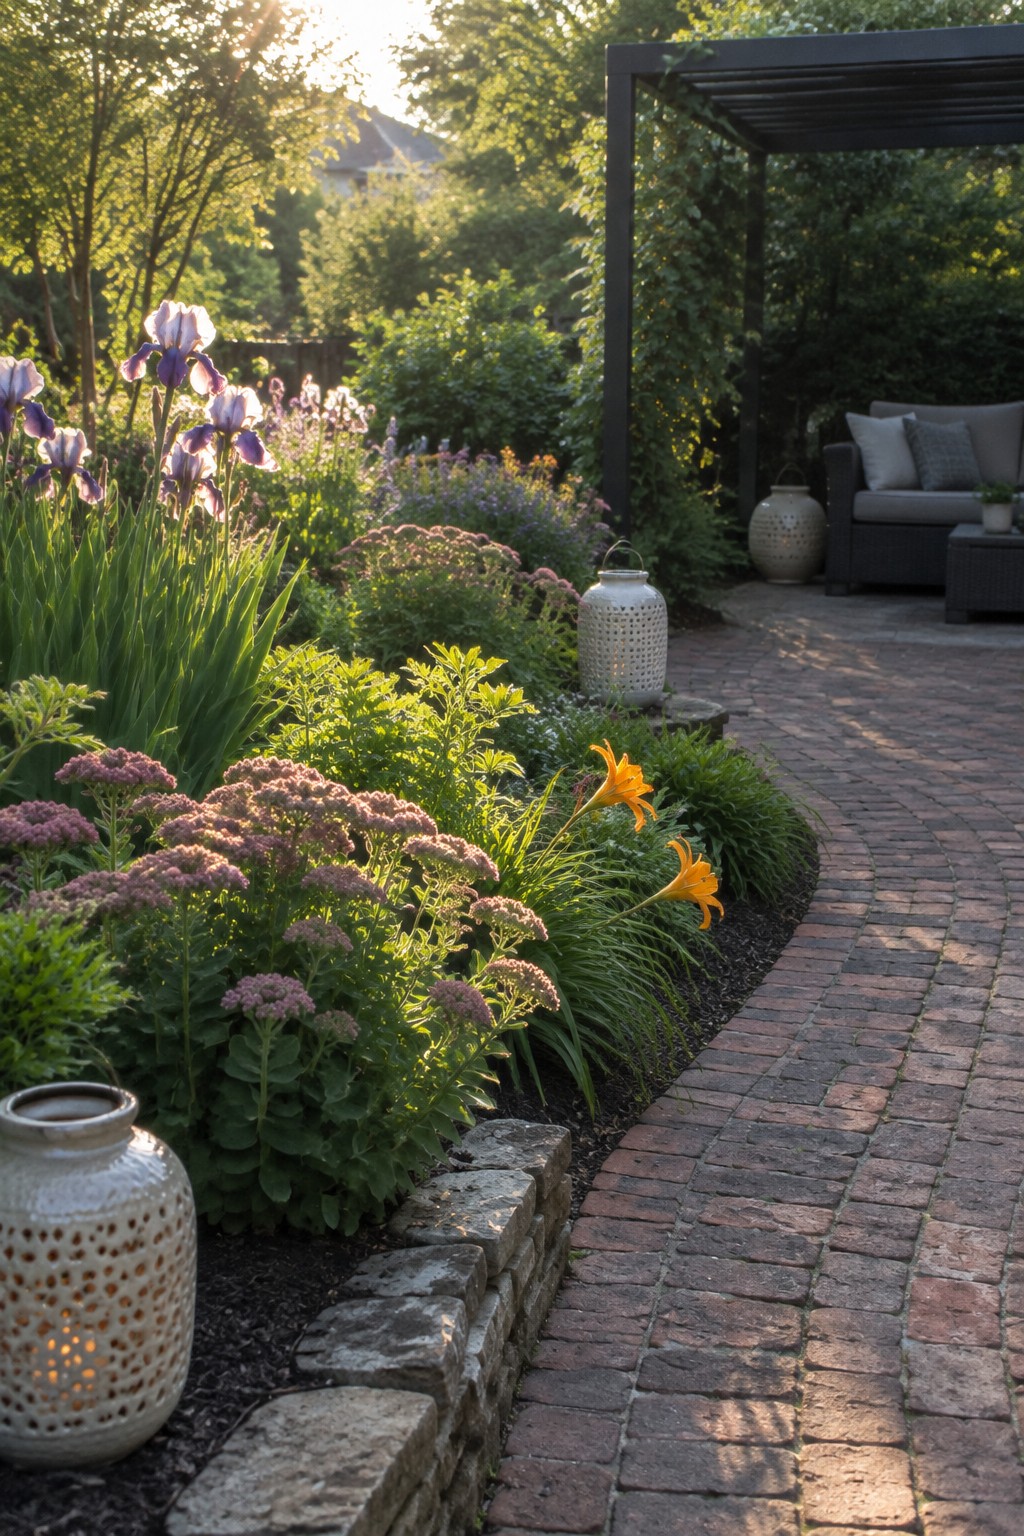
Layering plants by height gives a flower bed more depth without making it feel crowded. Low growers at the front, medium plants in the middle, and taller ones toward the back create that soft, natural flow that most people like in a backyard.
This approach works well along paths or near seating areas where you want the garden to feel intentional but not stiff. Stone edging helps hold the shape and keeps mulch in place over time. Stick with a simple mix of textures so nothing overpowers the rest.
Low Stone Walls For Layered Beds
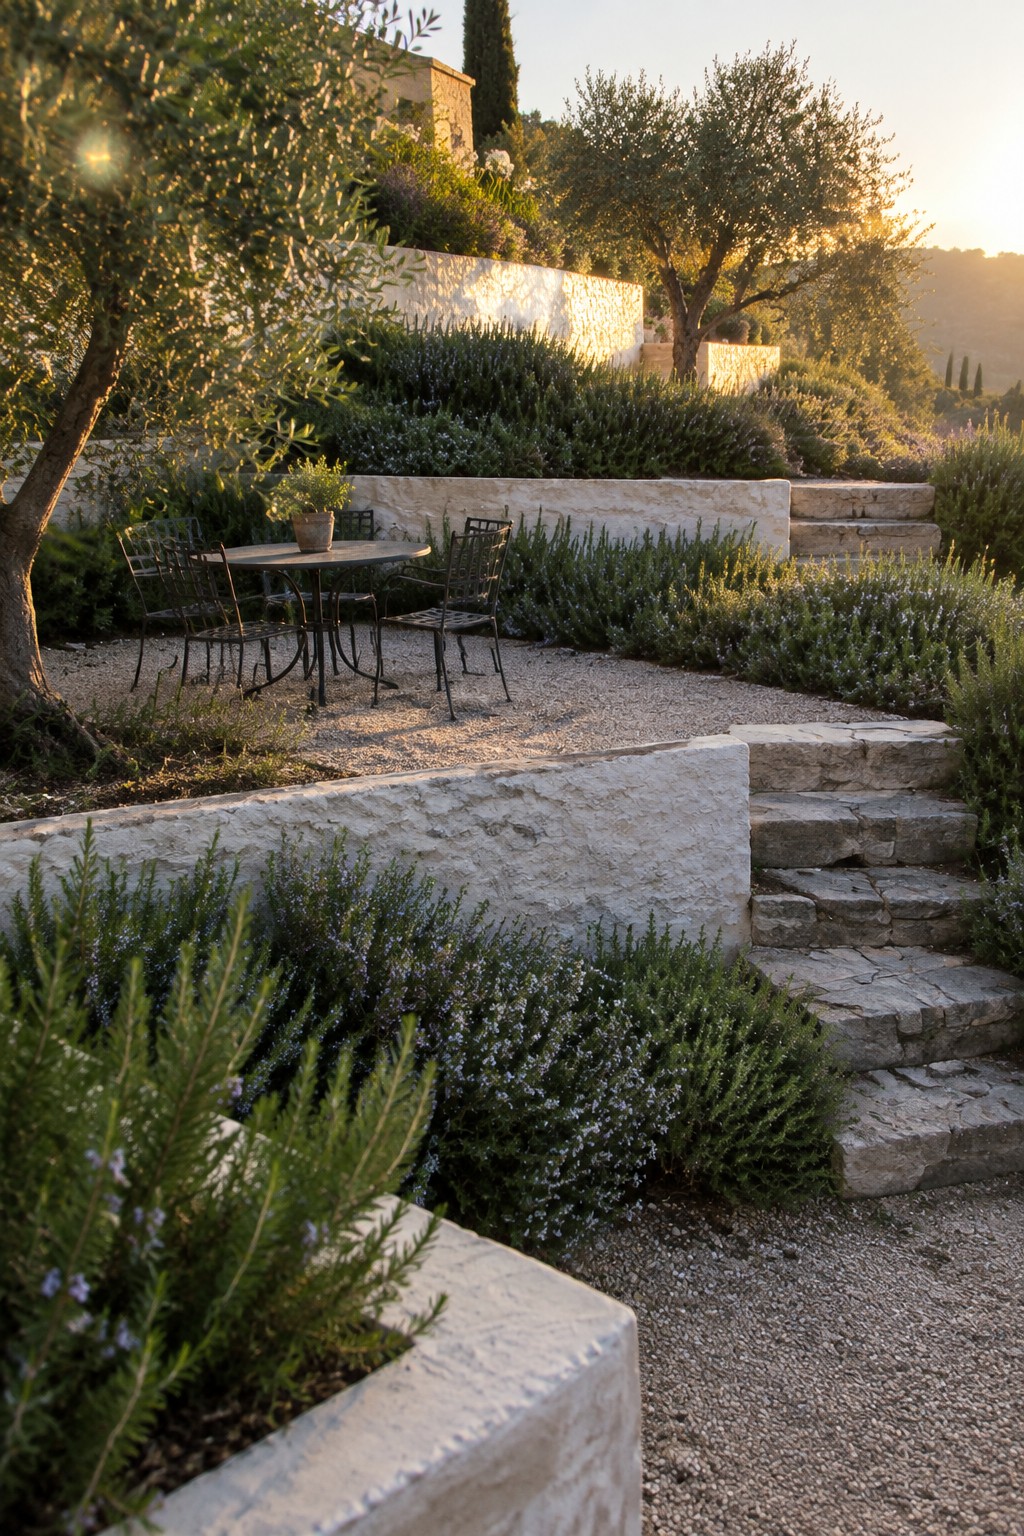
Low stone walls give you a simple way to build layers into a garden. They hold the soil at different heights so shorter plants sit in front and taller ones rise behind them, which adds depth without needing a big space.
This works especially well on gentle slopes or flat areas that need more structure. Use the same stone for steps or paths to keep everything connected, and let the plants grow a little loose over the edges.
Raised Beds For Layered Planting
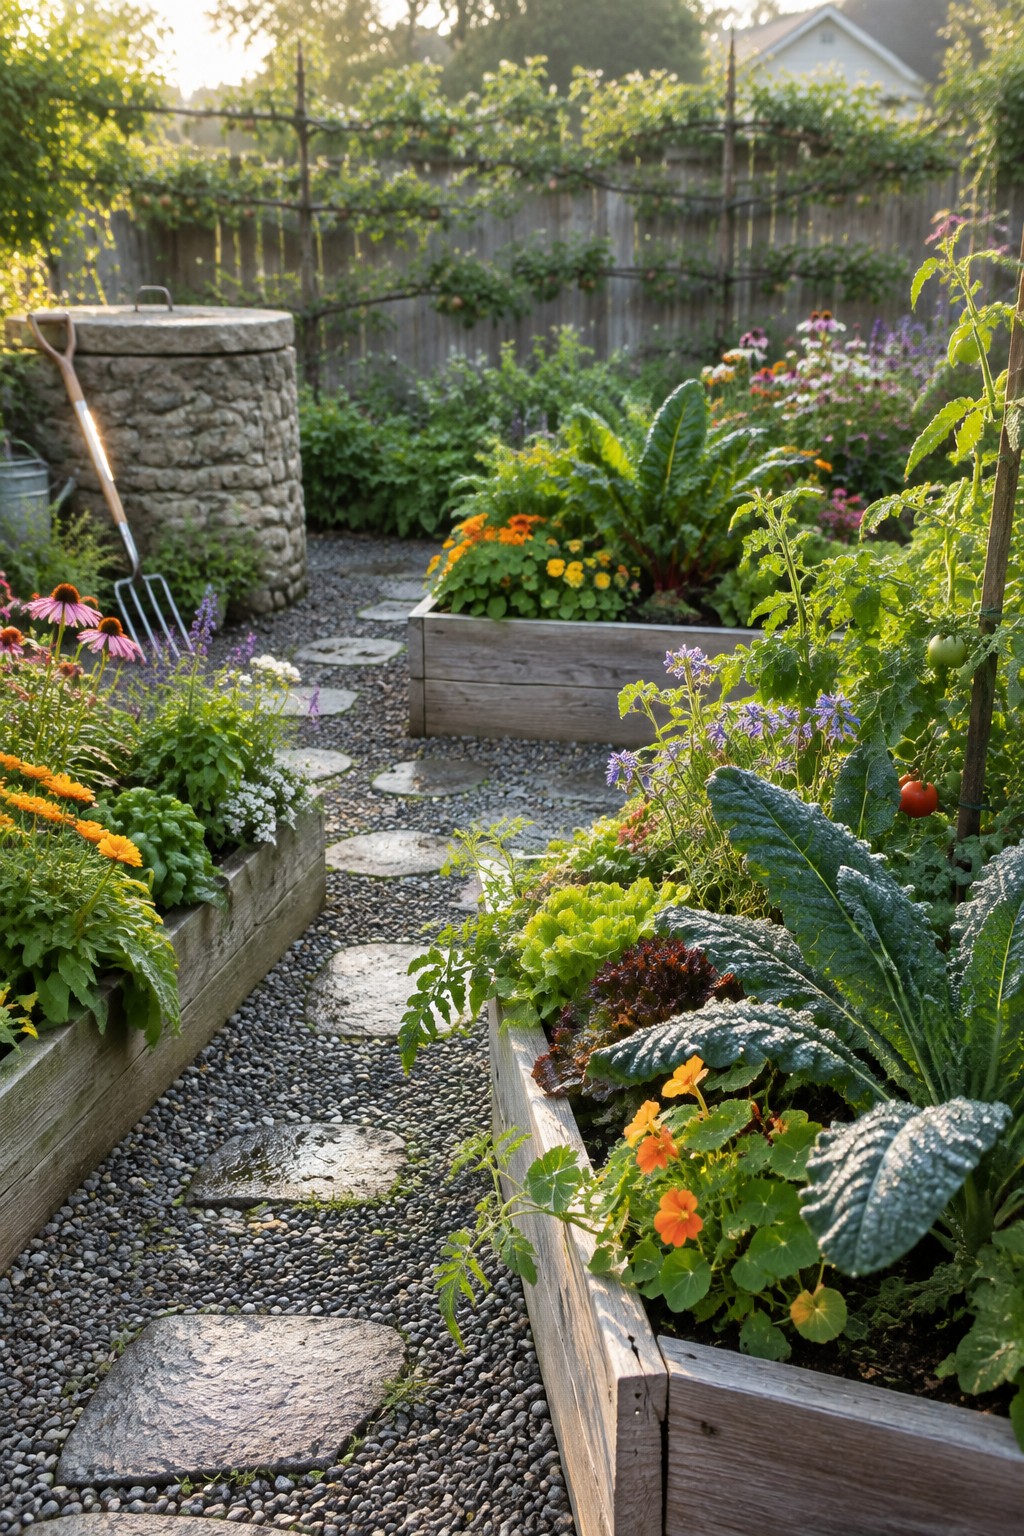
Raised beds work well when you want to layer plants by height and type without the whole garden looking messy. The wooden frames keep everything contained while letting taller vegetables and flowers sit behind shorter ones along the edges.
This setup suits smaller yards or anyone who wants easy access for weeding and harvesting. Gravel paths with stepping stones help keep the beds from getting compacted and make it simple to move between rows even after rain.
Layered Flower Beds in Raised Planters
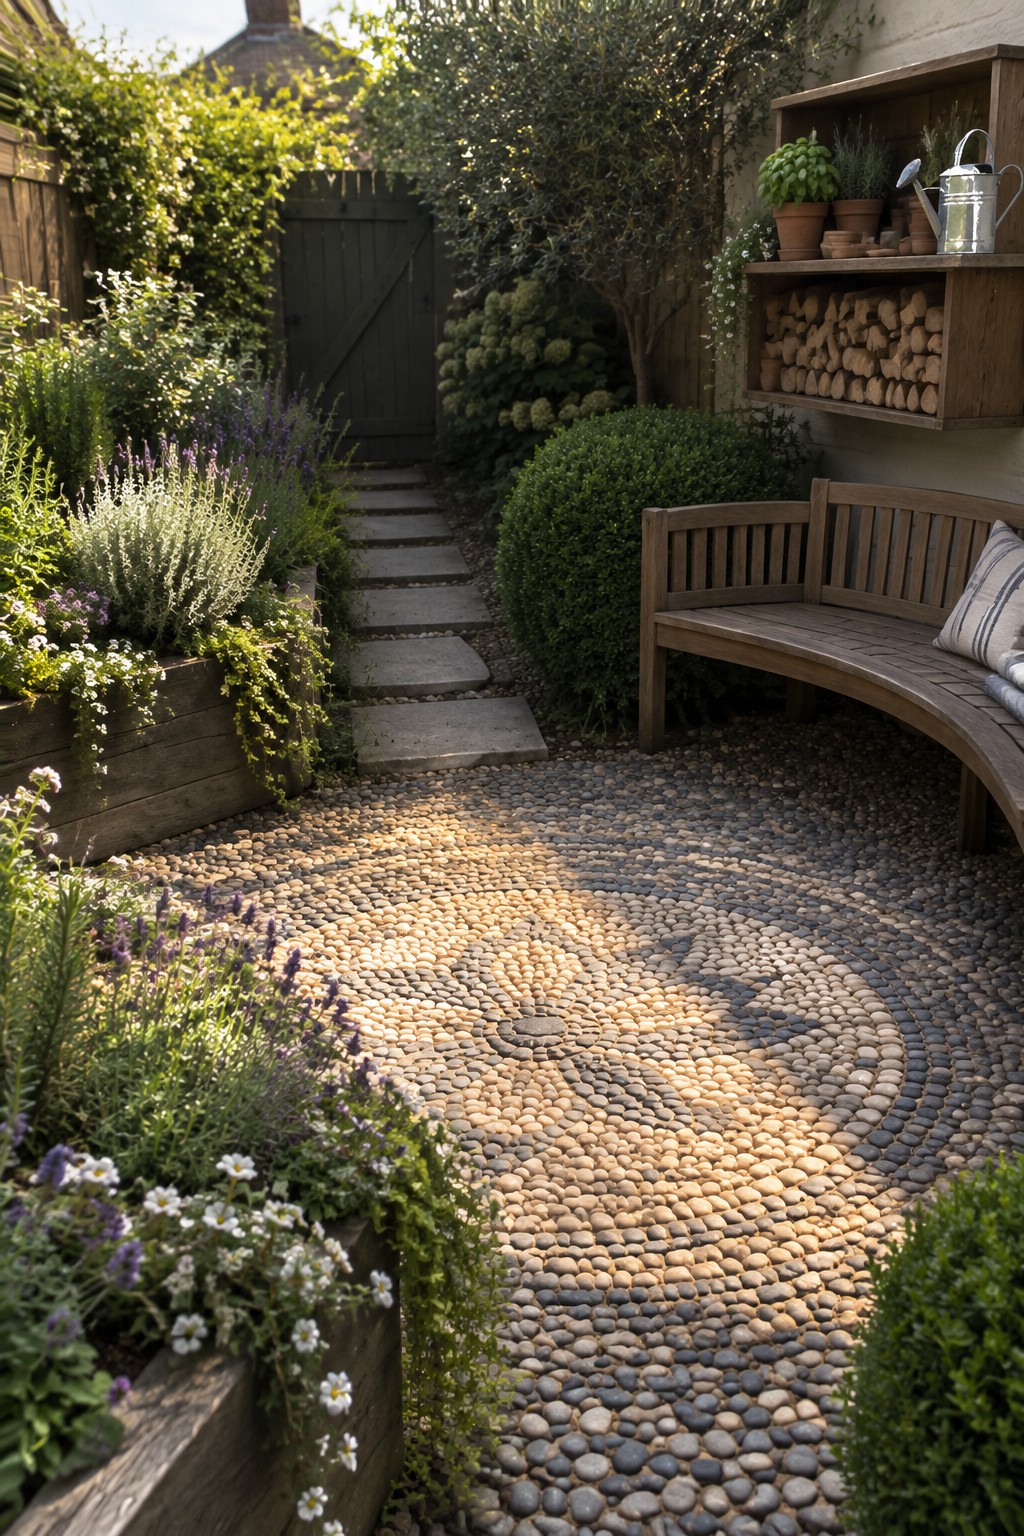
Raised beds give you a simple way to build layers without a lot of extra work. You can place taller plants at the back, mid-height flowers in the middle, and trailing ones along the edges so everything shows at once. This setup keeps the beds neat and makes the path feel more enclosed and welcoming.
Wood works well for this because it ages nicely and blends into the garden over time. Try it along a walkway or near a seating area where you want some softness but still need clear lines. Just make sure the beds get enough sun for the mix of plants you choose.
Frequently Asked Questions
Q: Can I try layered flower beds if my backyard gets mostly shade?
A: Choose plants that thrive without much sun like hostas on the lower level and taller astilbes behind them. They fill out nicely and keep the tiers looking full. Add mulch to hold in moisture.
Q: How do I stop the shorter plants from getting crowded out over time?
A: Space everything with room to grow right from the start. Check the beds monthly and pull a few plants if one type spreads too fast.
Q: Do these beds take a ton of extra work once they are planted?
A: Water deeply once a week and pull weeds as you notice them. The layered design actually shades the soil so fewer weeds pop up. Refresh the mulch each spring to keep it easy.
