

I’ve noticed how daylilies along garden pathways catch your attention first, repeating their cheerful blooms year after year to frame the whole layout. They fit so naturally into planting structures because they spread just enough to soften edges and fill borders without overwhelming the design. In my backyard, I planted a drift of them edging the lawn, and they’ve shaped that transition space better than I expected as they’ve thickened up. These setups often succeed when they layer with low growers upfront and taller ones behind, creating depth that draws people through the yard over time. A couple of the simpler ones here are worth sketching out for your own spots.
Brick Paths Lined with Daylilies
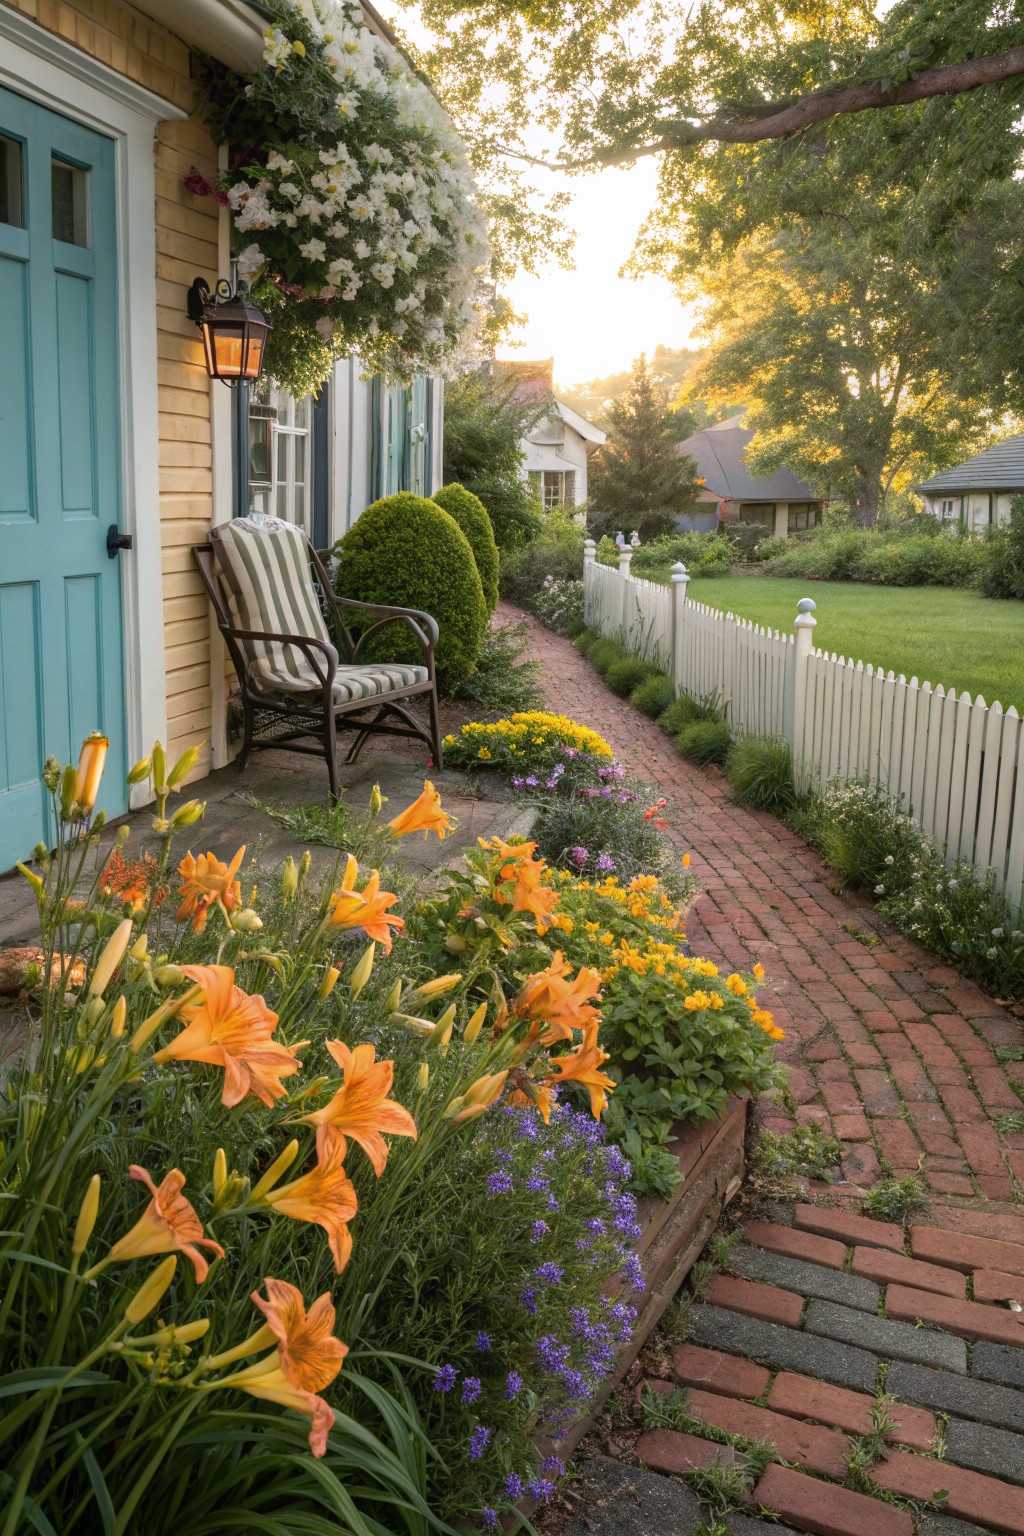
One easy landscaping idea is planting daylilies right along a brick walkway like this one. The orange blooms fill in thick and stand out against the warm brick tones. It turns a plain path into something cheerful that guides folks straight to your door, and since daylilies come back reliably every year, you get color without replanting.
This setup fits older homes with front porches or cottage gardens best. Tuck the plants into beds on both sides, keeping the path clear for walking. Give them sun and decent soil, and watch them spread just enough to look full. Trim spent flowers if you want, but mostly they handle themselves.
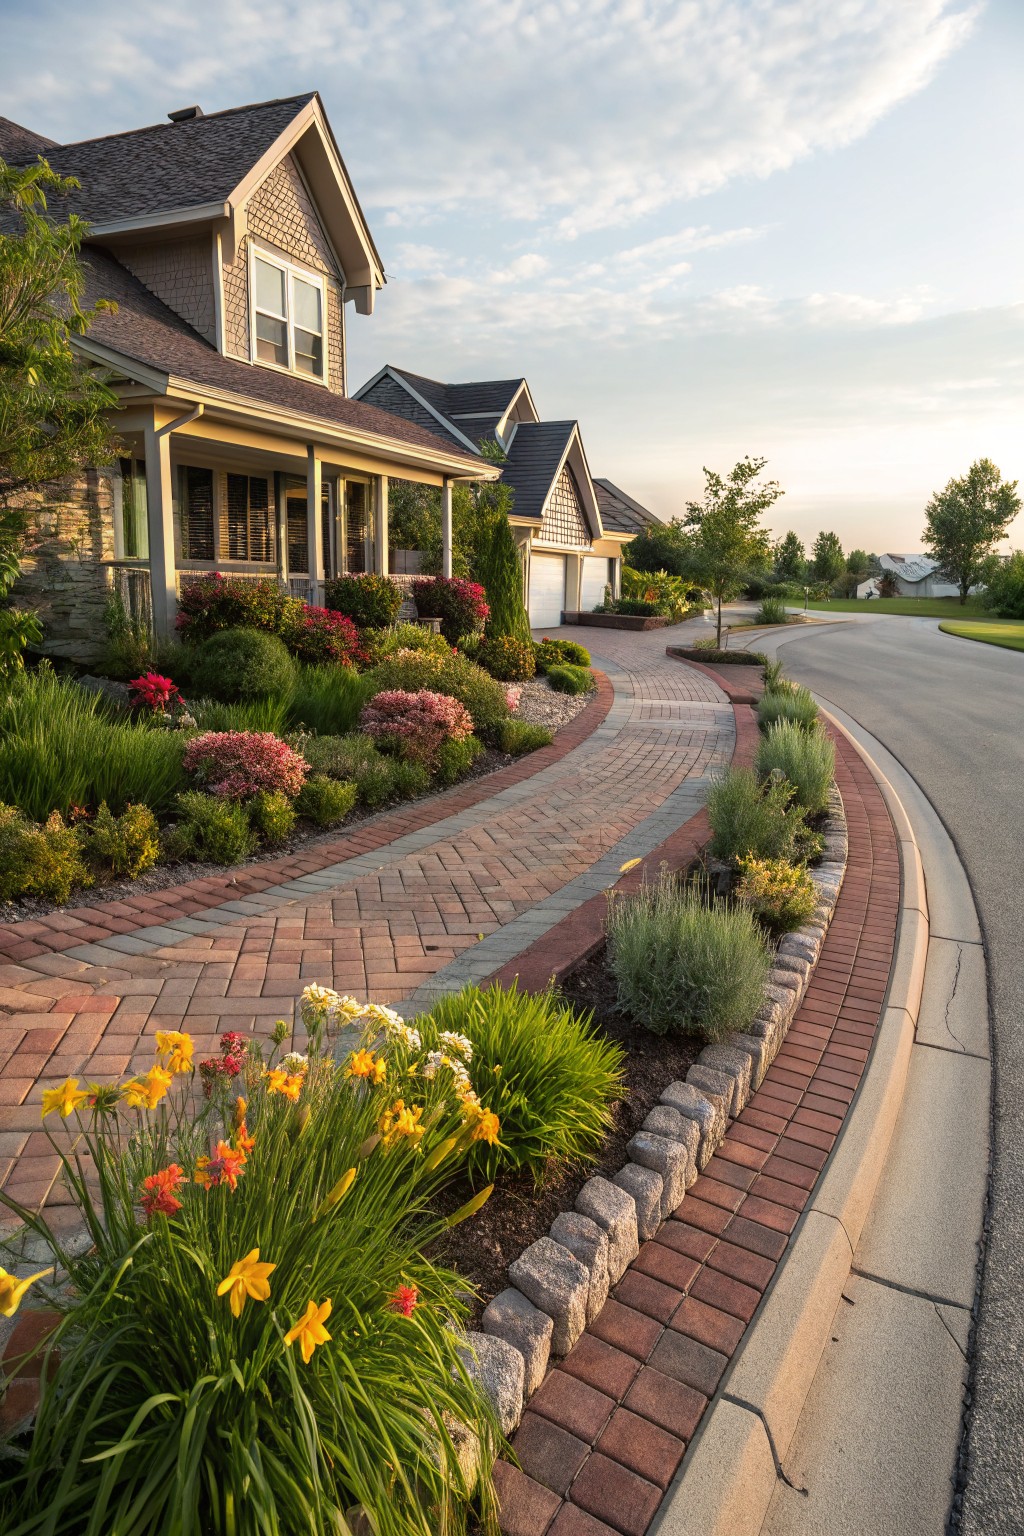
Daylilies in Curved Stone Beds
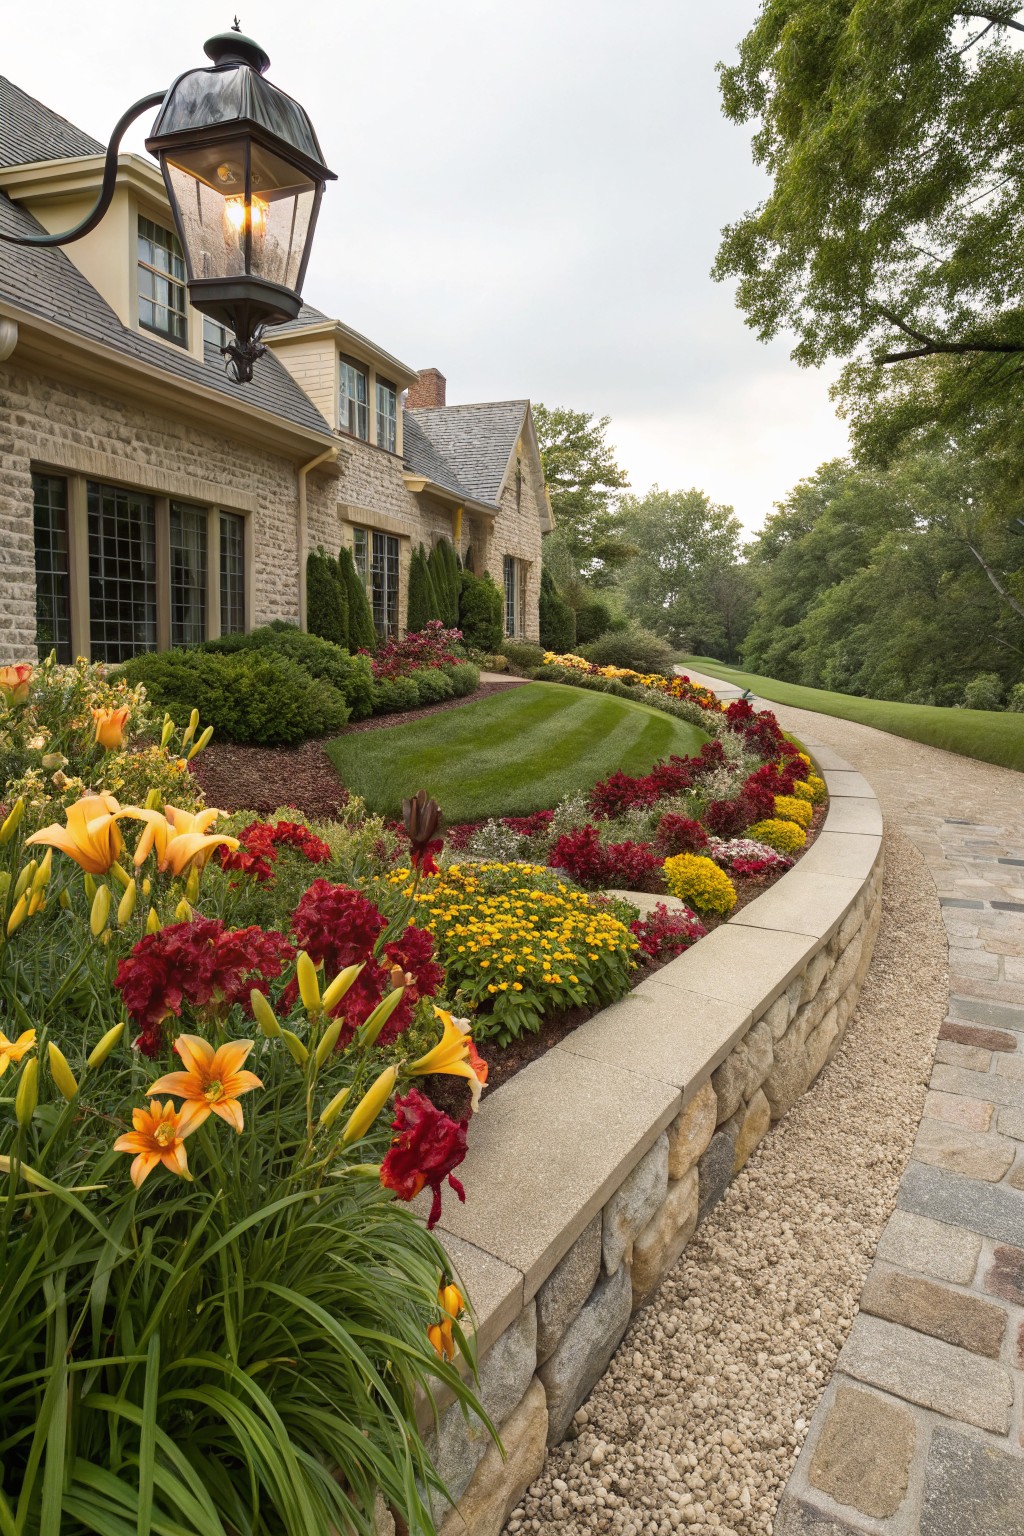
One simple way to add cheer to your yard is planting daylilies in raised beds edged with natural stone. Here the flowers fill out a curving wall in yellows, oranges, and reds. That bold mix repeats every summer. It pulls the eye along the path without overwhelming the space.
Try this along a driveway or walkway near the house. The stone ties right into the architecture. Go for full sun spots and a variety of bloom colors. Keep the beds mounded a bit for better drainage… and watch how it softens hard edges year after year.
Daylily Borders Along a Garden Path
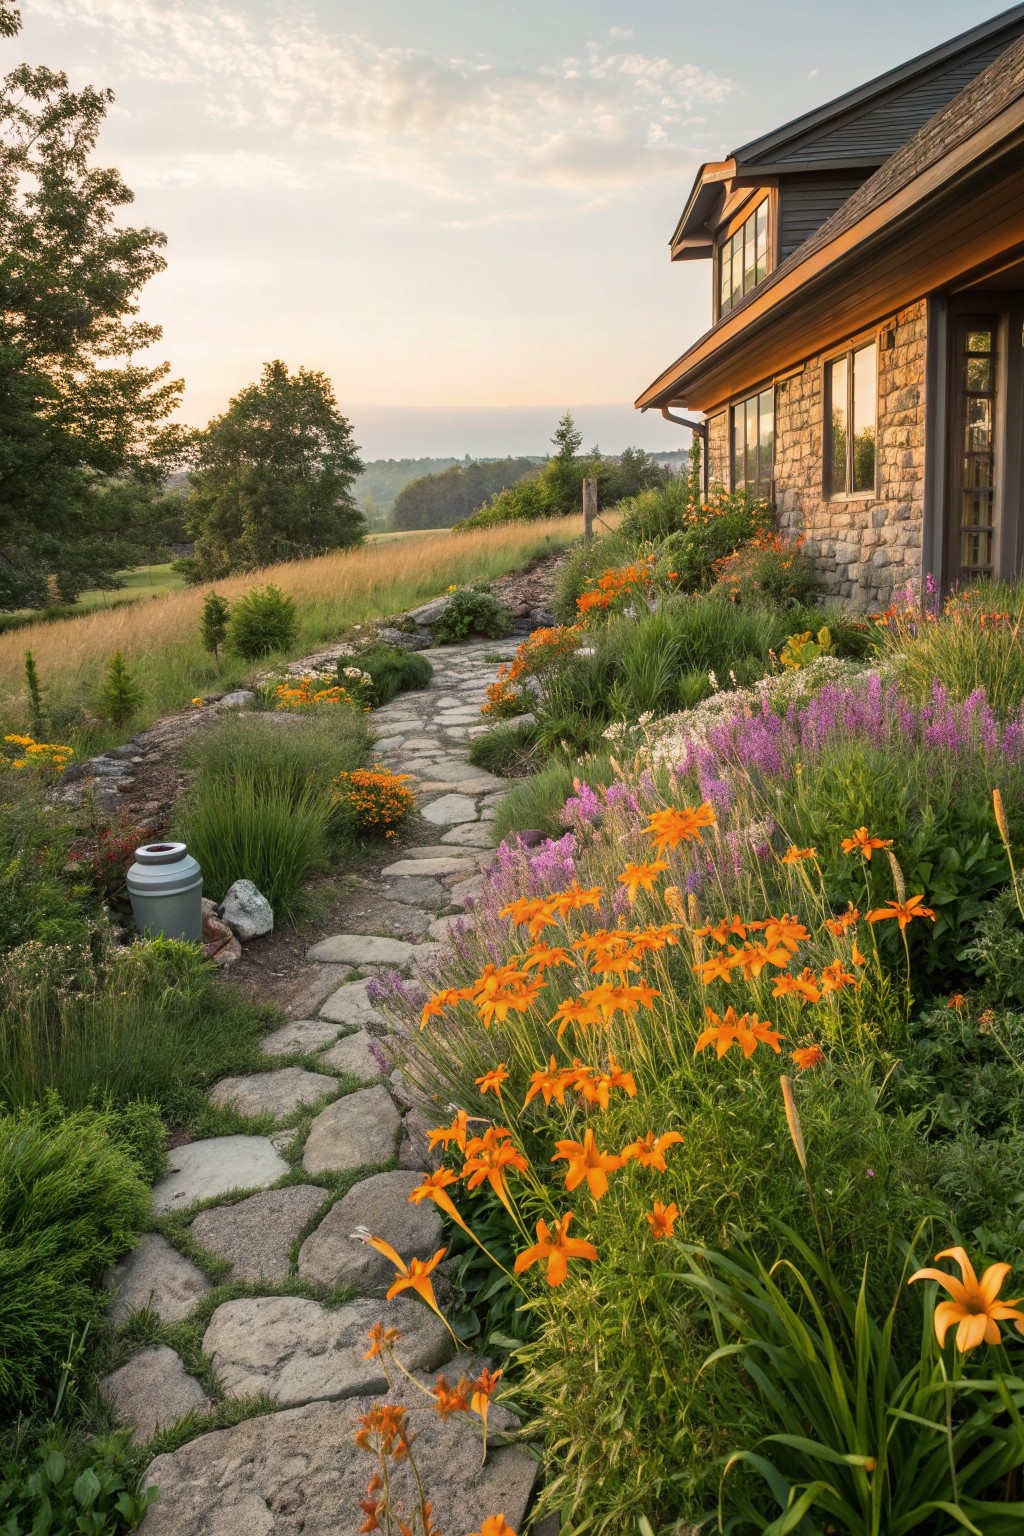
One straightforward way to use daylilies is to plant them in thick borders right along a stone path. This setup shows how the bright orange blooms pop against the gray stones and mix nicely with taller grasses and purple flowers nearby. It makes the walk to your house feel lively and pulls people right in without much upkeep, since daylilies come back strong each year.
This works best in a side yard or leading up to a back door on a home with some natural slope. Pick a rugged flagstone path to match, and space the daylilies about 18 inches apart so they fill in over time. Just keep the bed mulched to cut down on weeds, and it stays pretty much hands-off after the first season.
Daylilies Edging a Meadow Path
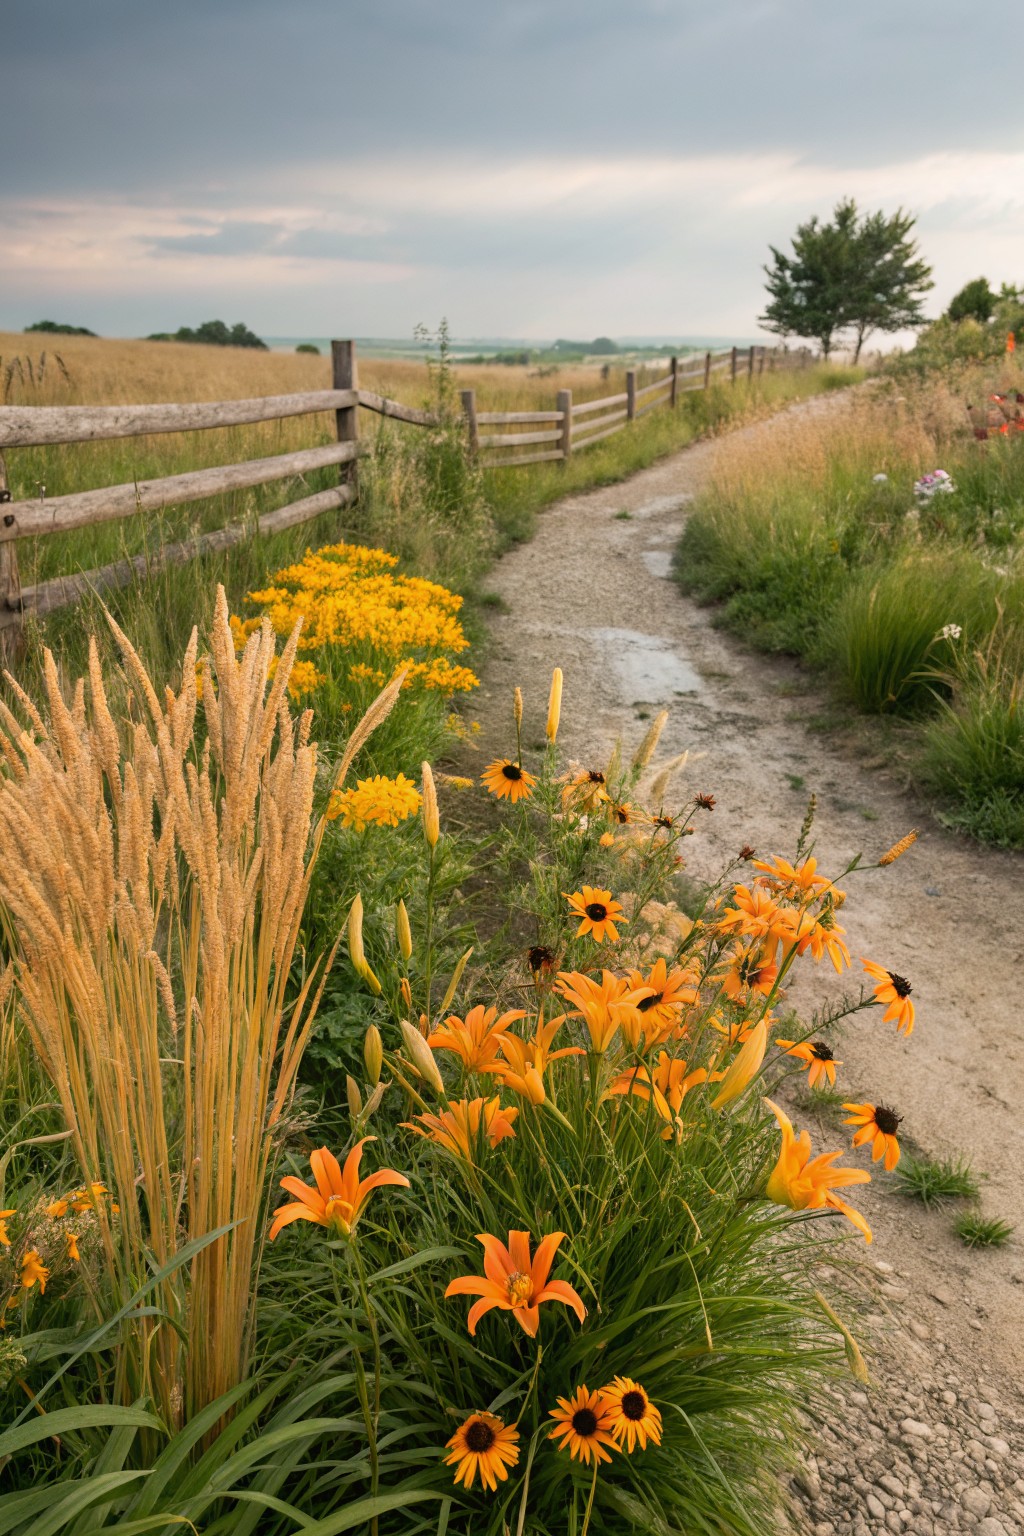
One easy way to add cheer to a backyard path is planting daylilies right along the edges. Mix in some tall grasses and black-eyed Susans like you see here, and you get this natural flow of orange and yellow blooms that pop against a simple dirt trail. It keeps things wild but organized, and since daylilies come back strong every year, you don’t have to fuss much.
This works best in bigger yards or country-style gardens where you want low upkeep. Just dig in along an existing path, space the plants so they fill out without crowding, and let them spill over a bit. Suits older homes with open land… watch for too much shade though, as daylilies need sun to really shine.
Daylilies in Curved Brick Beds
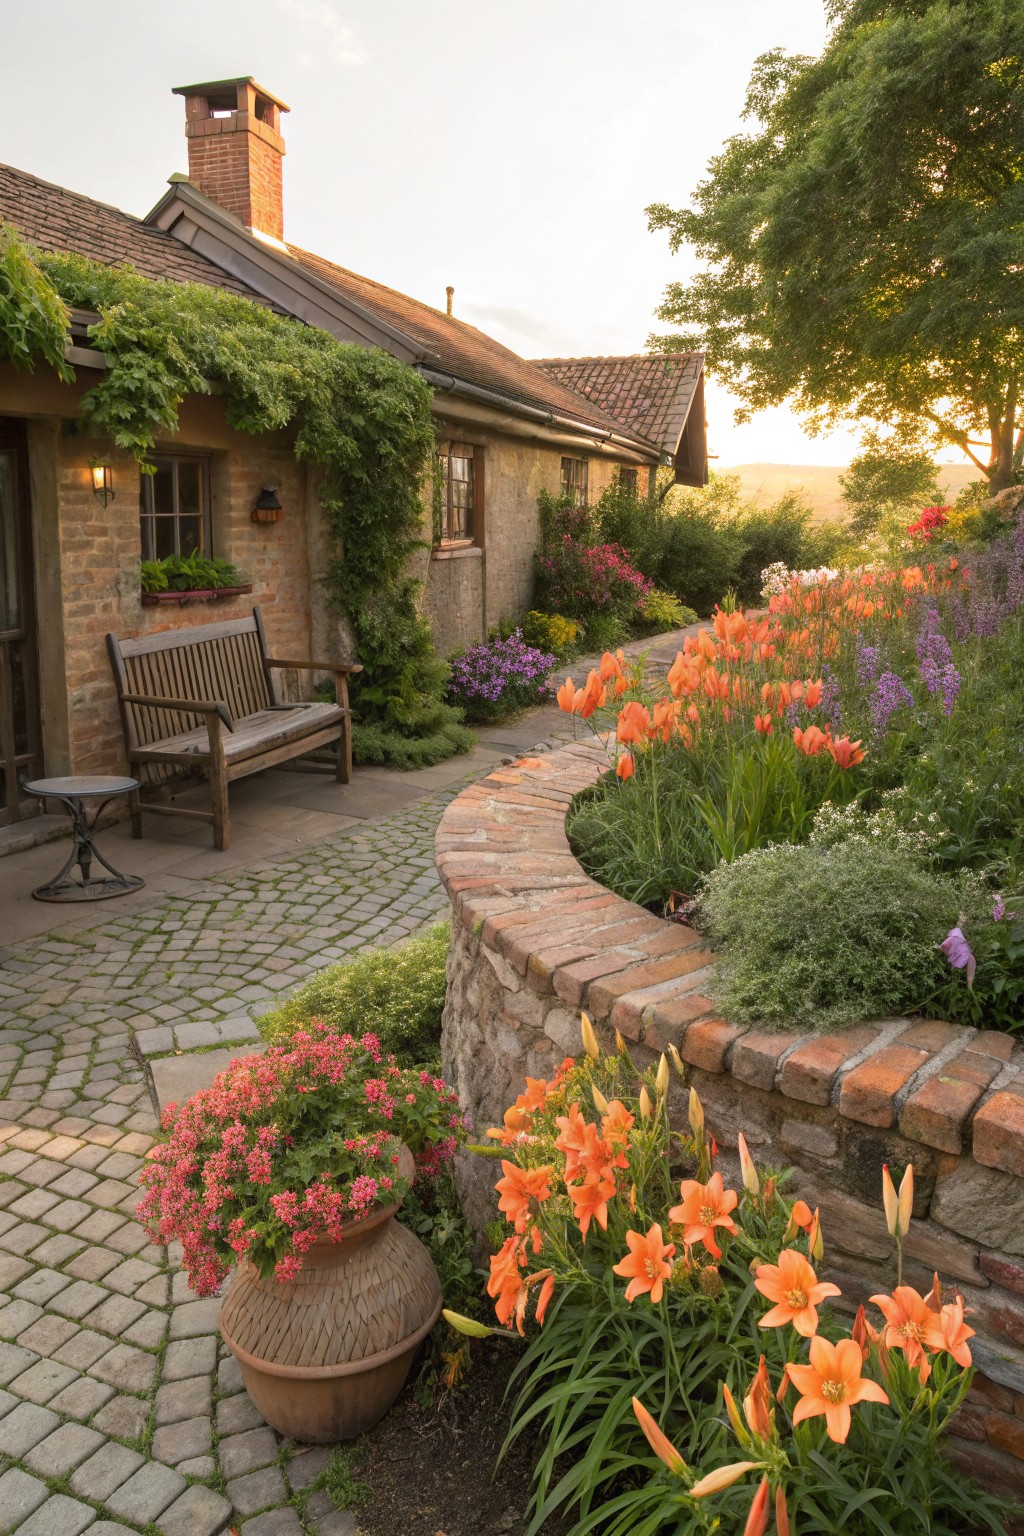
Planting daylilies in curved beds edged with brick gives your garden a soft, flowing look right up against the house. The orange blooms spill over the low wall here, mixing with other flowers along a stone path. It ties the planting to the architecture without feeling stiff. People like how it makes a plain walkway into something pretty and lived-in.
This works best on smaller patios or entry paths where you want color that returns yearly. Older brick homes take to it naturally, but it fits any casual yard. Keep the curves gentle to match the path, and thin out extras now and then. Daylilies handle sun fine, so pick a spot with good light.
Daylilies Lining a Garden Path
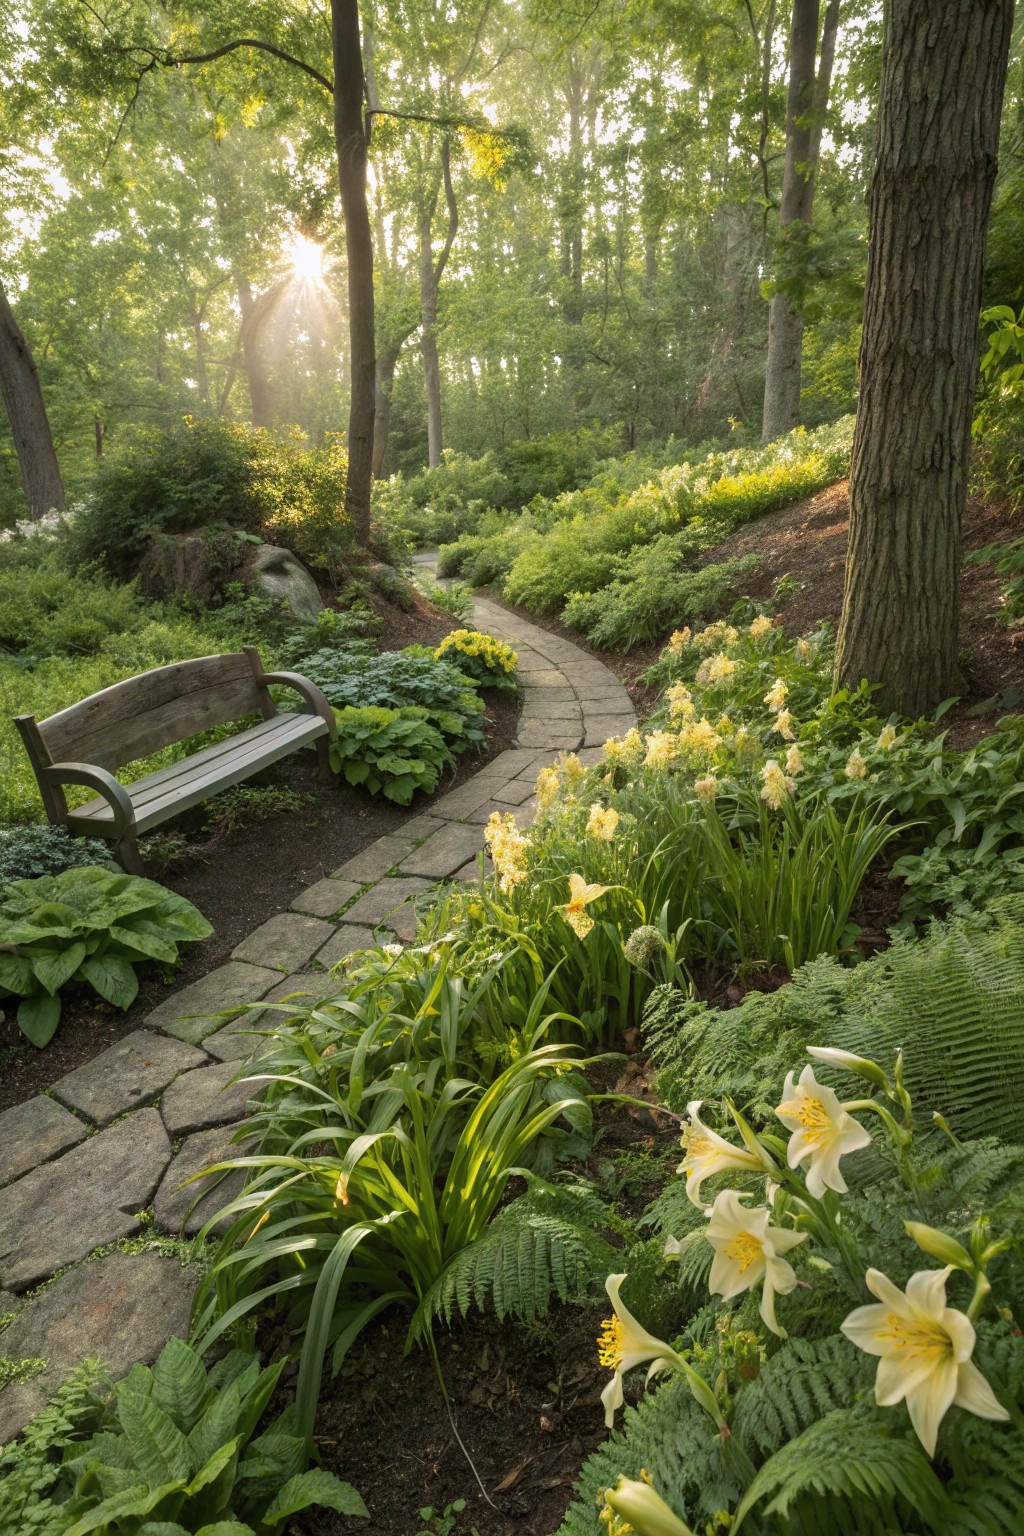
One simple way to work daylilies into your yard is lining them along a winding stone path. The yellow flowers stand out nice against ferns and hostas, bringing cheer that pops back up every spring without fuss. That path pulls you right in for a little walk.
Try this in shadier spots under trees, where daylilies do well with some dappled light. Tuck in low ferns around the edges and set a plain wooden bench nearby. It fits backyard gardens best… keeps things easy and green all season.
Poolside Daylilies in Concrete Planters
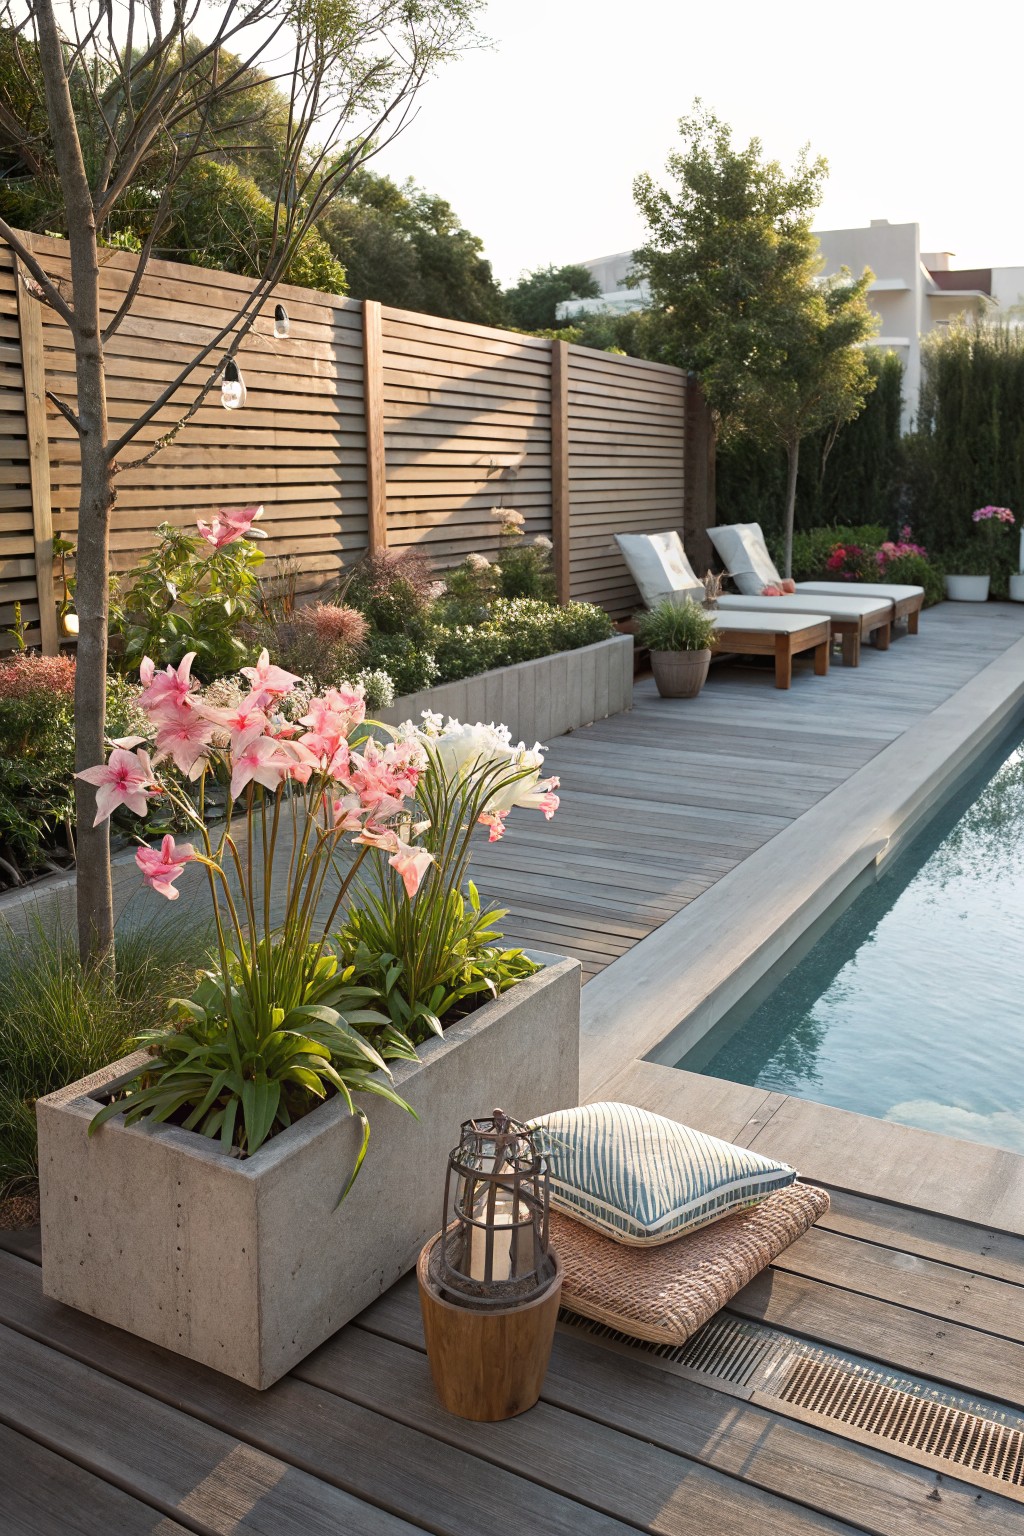
One simple way to add cheer to a pool deck is filling big concrete planters with daylilies right along the edge. Those pink blooms stand tall against the wood decking and blue water. They come back every year without much fuss, giving reliable color where you relax most.
Put these planters in modern or clean-lined outdoor spots, like next to loungers or a fire pit area. The concrete keeps things simple and sturdy. Skip tiny pots, though. Go oversized so the plants look bold, not lost.
Daylilies Lining a Picket Fence
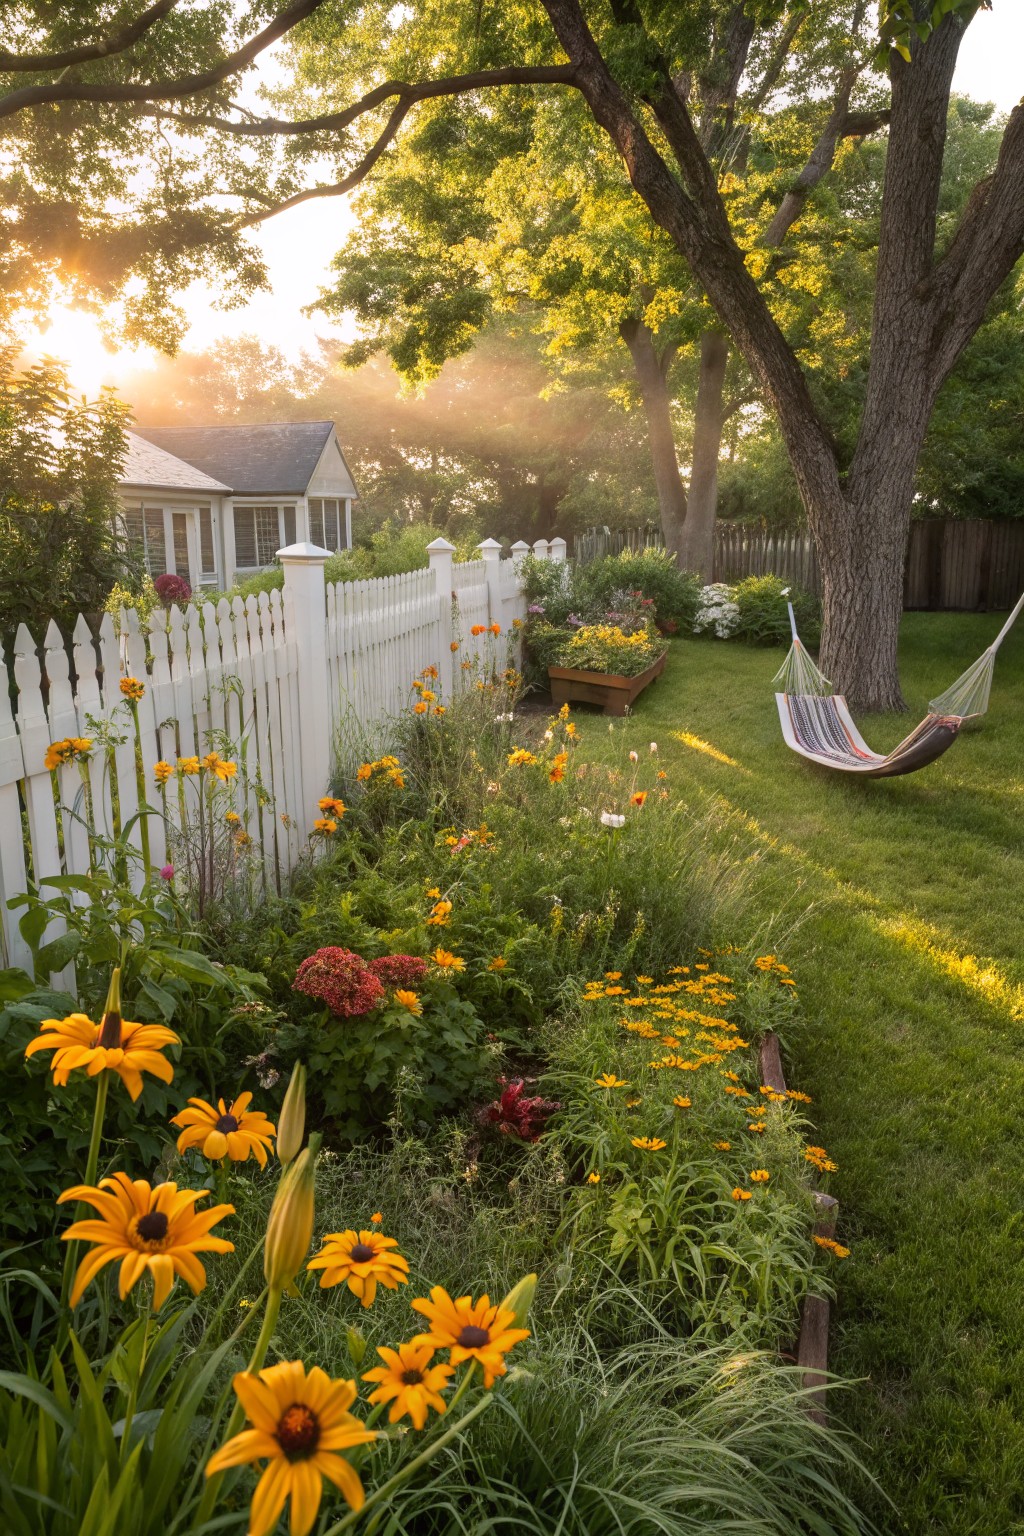
A simple row of daylilies running along the base of a fence makes for easy color that pops every summer. These tough perennials spread just enough to fill in gaps without taking over, and their bright orange flowers hold up through heat and dry spells. That classic white picket fence setup keeps it all looking tidy and cottage-like.
Go for this in full-sun spots next to paths or yards where you want low upkeep. Tuck in a few companion plants like coneflowers if you like more mix, but daylilies do most of the work on their own. Suits older homes or starter gardens… just divide the clumps every few years to keep them blooming strong.
Poolside Daylily Borders
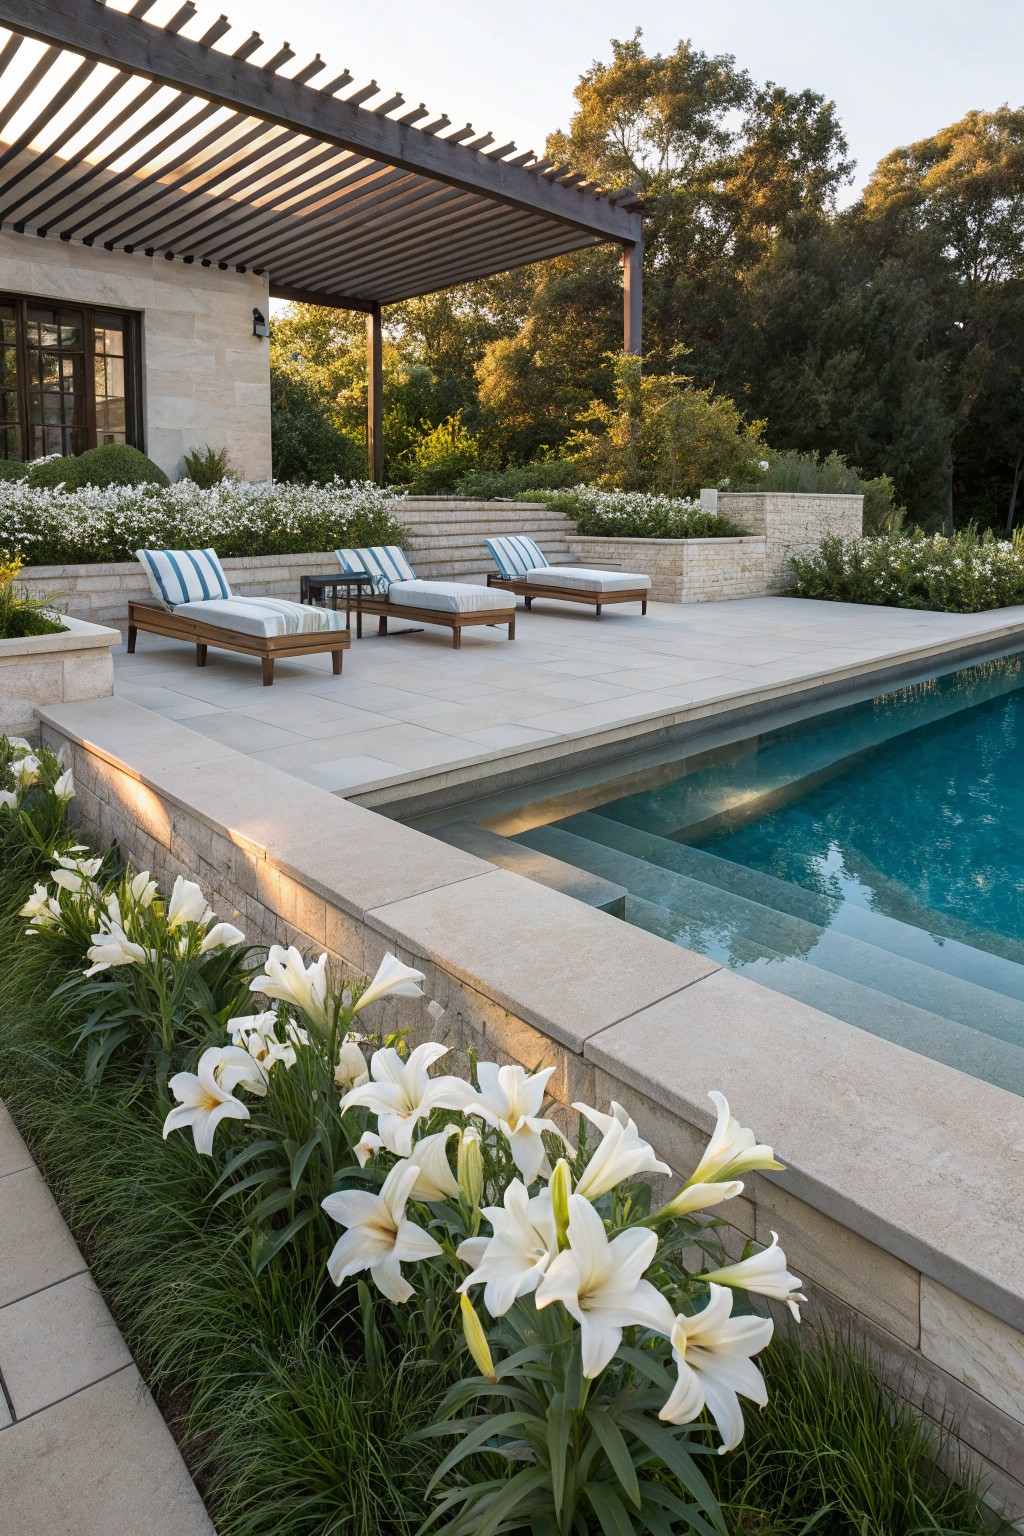
White daylilies make a simple border along pool edges like you see here with those clean stone walls. They hug the hard lines of the terrace and pool without overwhelming the space. The flowers stand out against the blue water and light pavers, keeping things fresh all summer.
Try this on a sunny terrace or deck where you want some green without much upkeep. They come back reliably each year, so plant a single row tight to the edge. Works best in warmer spots, but watch for too much shade from nearby trees.
Stone Pathways Edged in Daylilies

A simple stone path edged with clumps of daylilies makes a backyard feel put together without much fuss. Those bright orange blooms hug the edges right up to a built-in oven, pulling your eye along to the seating area nearby. It works because daylilies come back reliably each year, filling in the spots with color that softens all that hard stone.
Plant them in loose groups along both sides of the path, maybe two feet wide or so. This setup fits most any backyard patio with a fire feature or dining spot. Keep the beds mulched to cut down on weeding, and they handle some shade from nearby trees just fine.
Balcony Gardens Filled with Daylilies
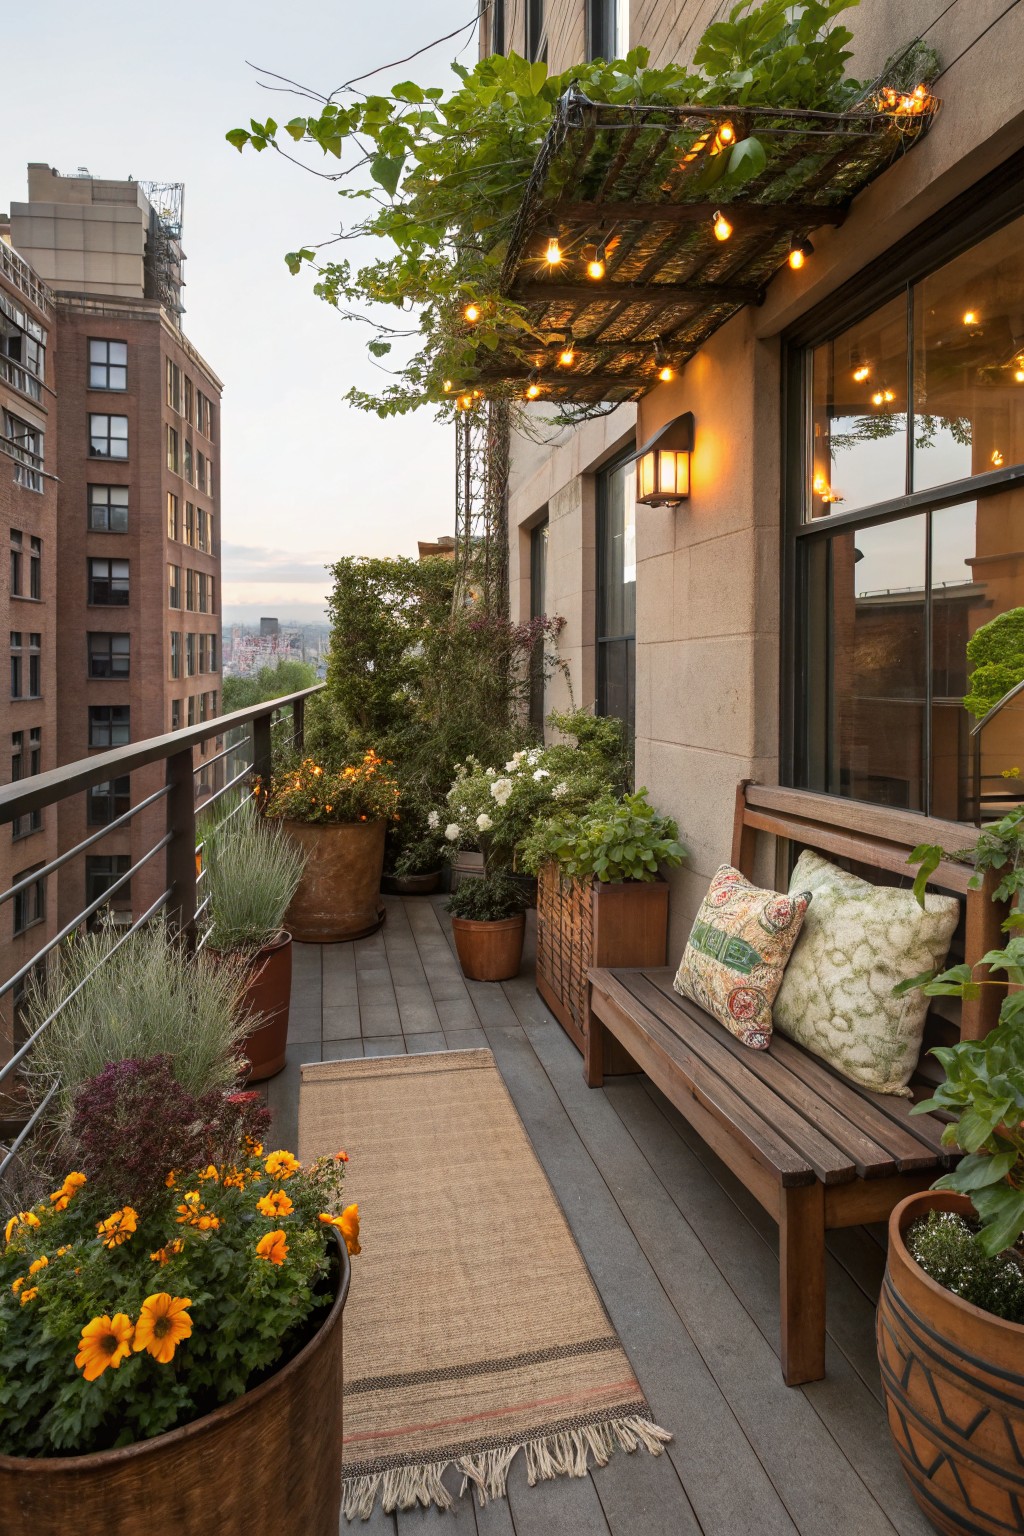
Daylilies do well in pots, and this balcony setup makes great use of them. The big orange blooms stand out in oversized containers clustered around the seating area. They add reliable color that returns each year, mixing nicely with other plants like the trailing vines overhead.
Try this on any urban balcony or small terrace where ground planting isn’t an option. Tuck the pots along the edges and near the bench for easy access. Go for sturdy ones that hold moisture, since daylilies like consistent water but hate soggy roots.
Daylilies Along Entry Steps
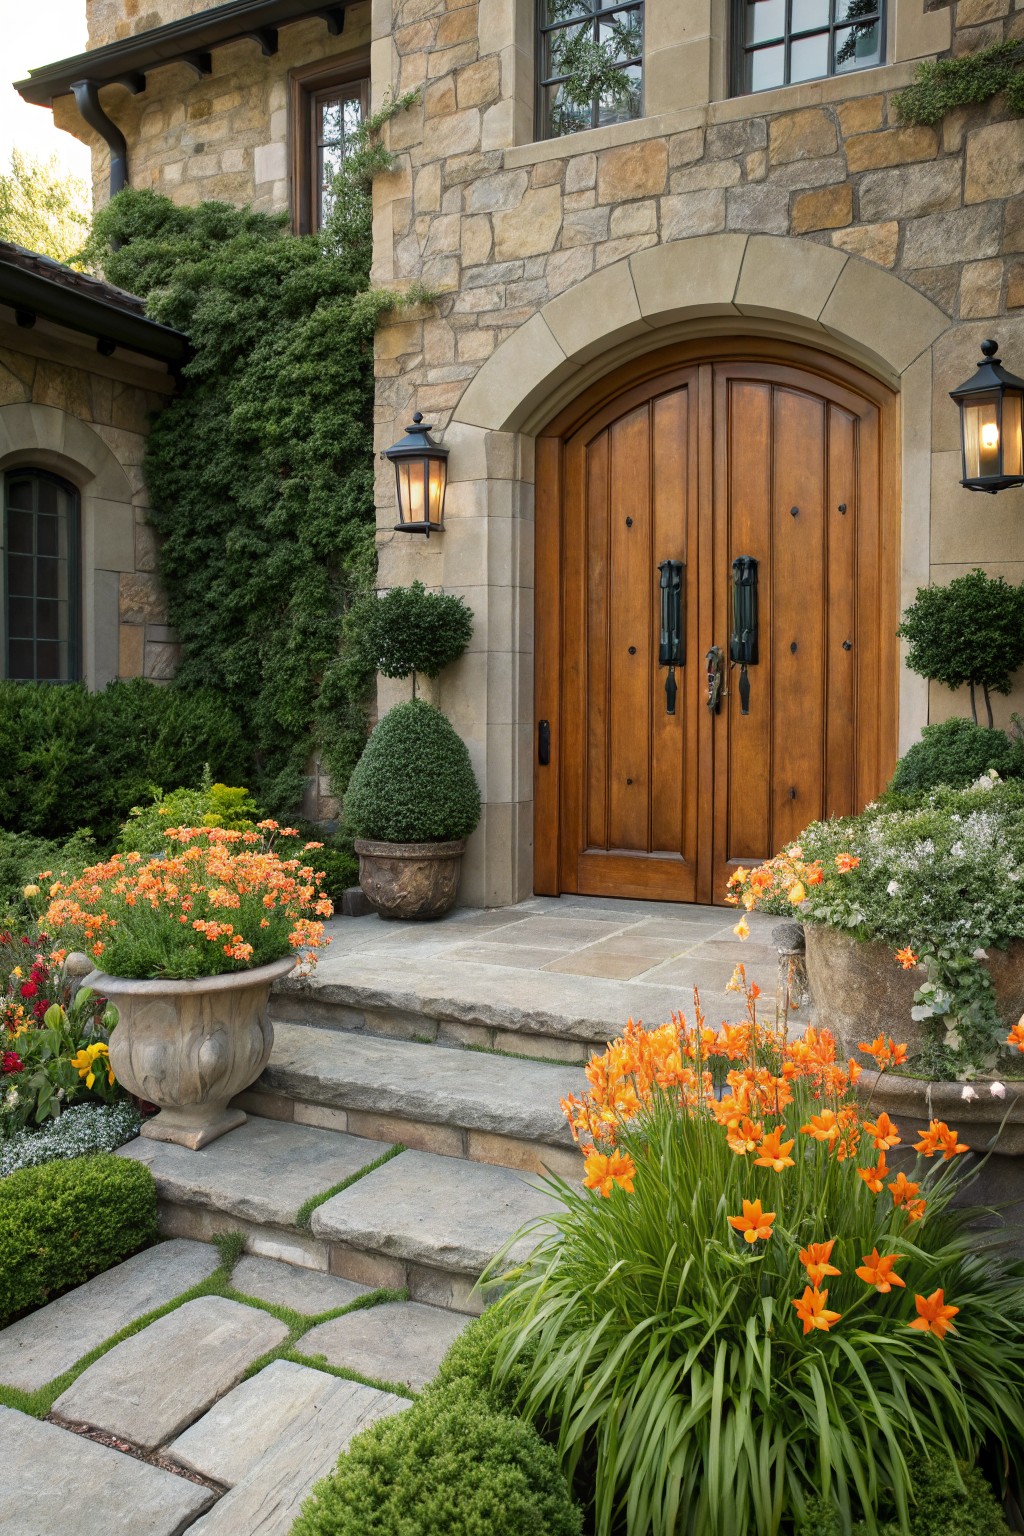
One simple way to brighten a front entrance is planting daylilies right along the steps. Here, clusters of orange blooms spill out from large pots and low beds, guiding the eye up to the door. They soften the heavy stone architecture without much effort. And since daylilies return reliably every year, you get that cheerful color season after season.
Try this on any home with a few steps to the door. Tuck them into corners or line the edges, mixing in a pot or two for height. It suits traditional stone or stucco houses best. Just keep the beds mulched to cut down on weeding.
Daylilies Along a Rock-Lined Stream
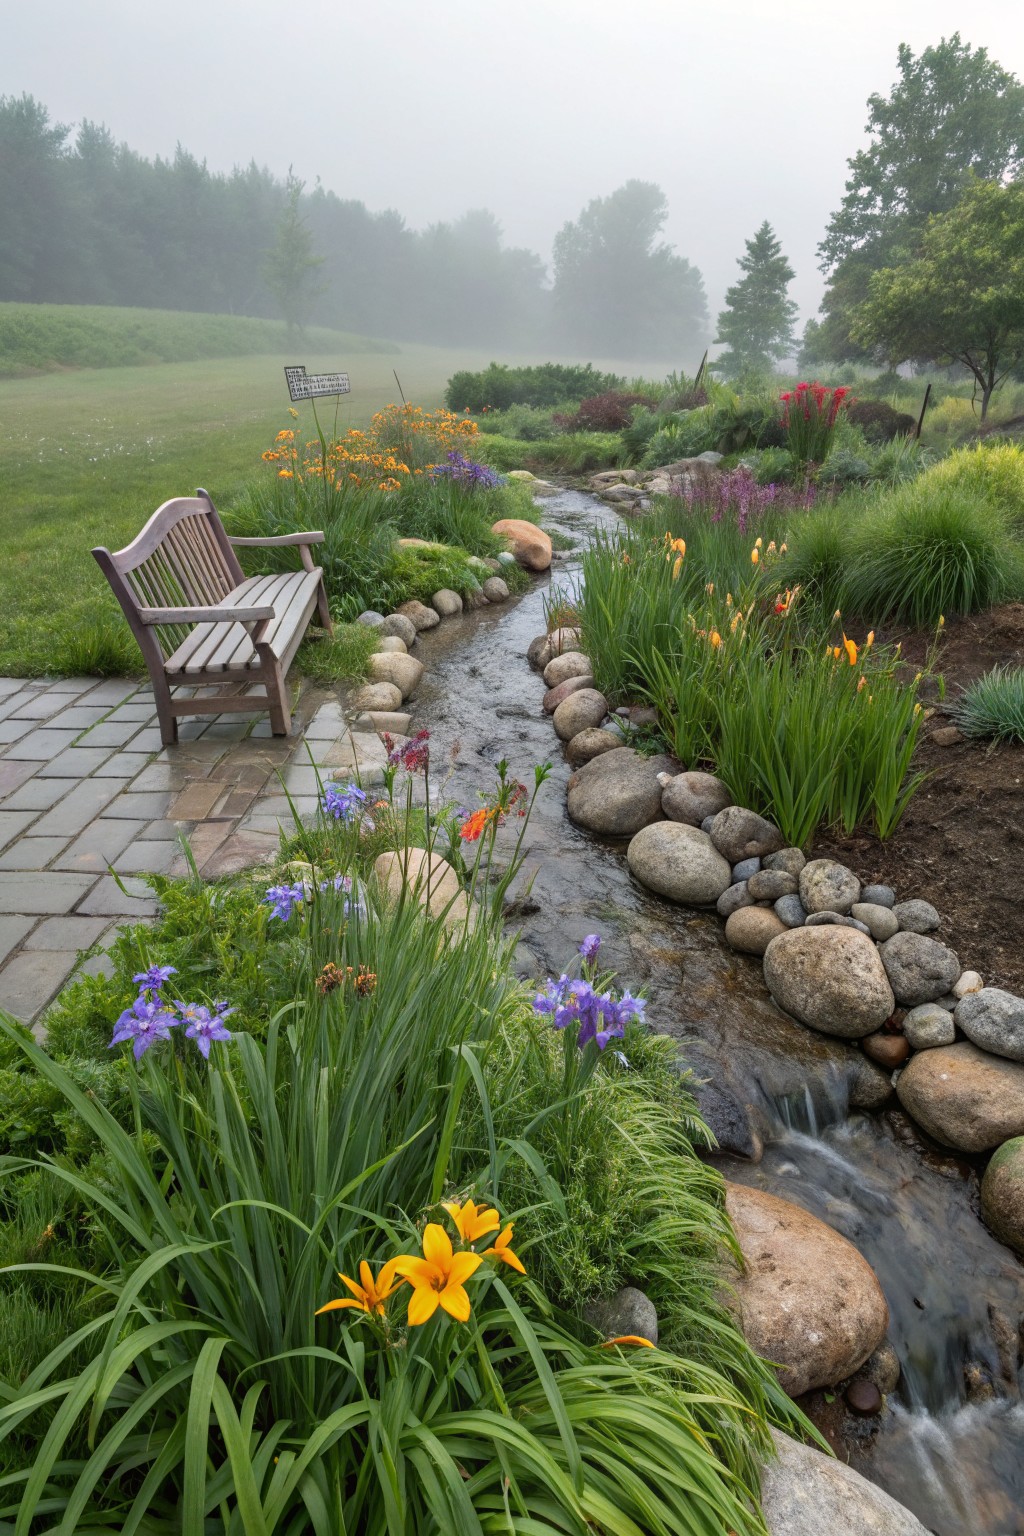
A simple stream edged with boulders and planted with daylilies makes a garden feel alive and easy. The yellow and orange flowers hug the water’s edge, repeating their cheer year after year without fuss. That flow from the stream pulls your eye right through the plants, and it keeps things looking full even when other spots fade.
Put this in a side yard or along a path where you want low upkeep but steady color. Grab smooth fieldstones for the borders, tuck in tough daylilies that take full sun, and add a recirculating pump for gentle sound. It fits cottage-style homes or any yard with a slope to work with… just watch the water doesn’t erode the banks over time.
Edging Pathways with Daylilies
One easy landscaping move is planting daylilies right along the edge of your walkway. They give reliable color every summer without much fuss, and the way they hug the curve here makes the path feel more welcoming. Those yellow and orange blooms pop nicely against brick pavers, guiding folks straight to the door.
Tuck them into beds next to the path with some low shrubs behind for structure. This setup suits driveways or front walks on regular lots. Just keep the soil well-drained, and they’ll spread a bit on their own over time.
Line Paths with Flowering Perennials
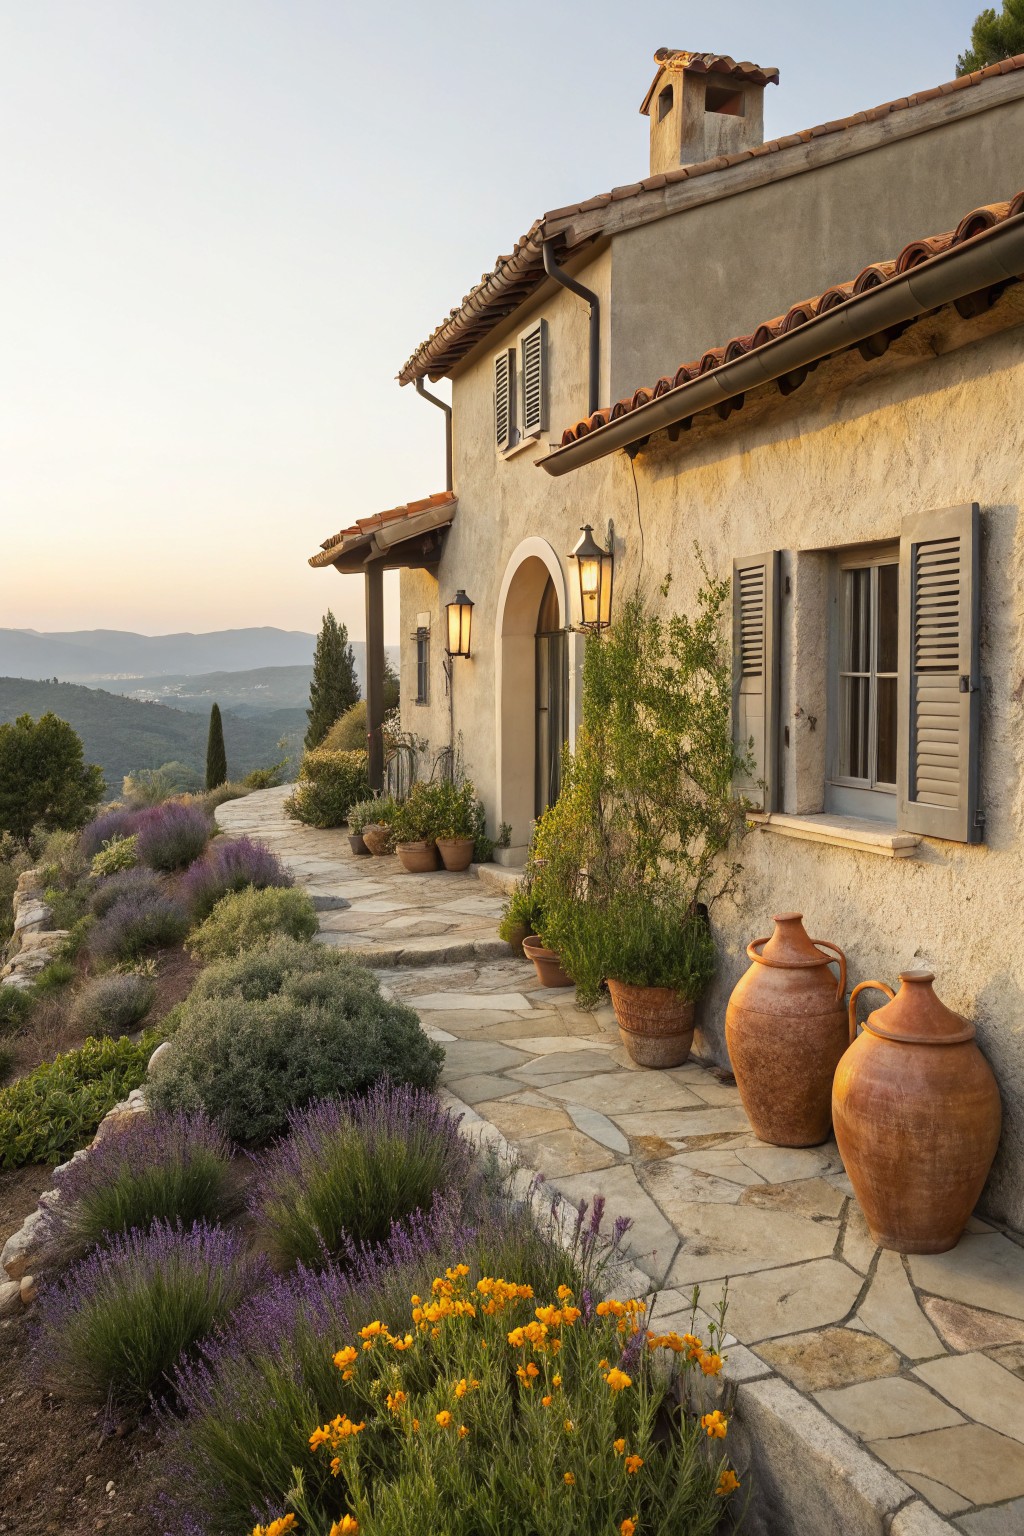
A stone walkway like this one draws you right up to the door. It’s edged with low clumps of lavender and those big terracotta pots add some height without much fuss. Swap in daylilies for the same effect. They bloom bright every year and fill out the beds nicely, making the path feel alive and easy on the eyes.
Plant daylilies in loose groups along both sides of the path, maybe mix in a few pots near the house for bigger impact. This works best on a slope or entry approach where you want low upkeep but steady color. Keep the beds mulched to cut down on weeding.
Daylilies in Barrel Planters by the Path
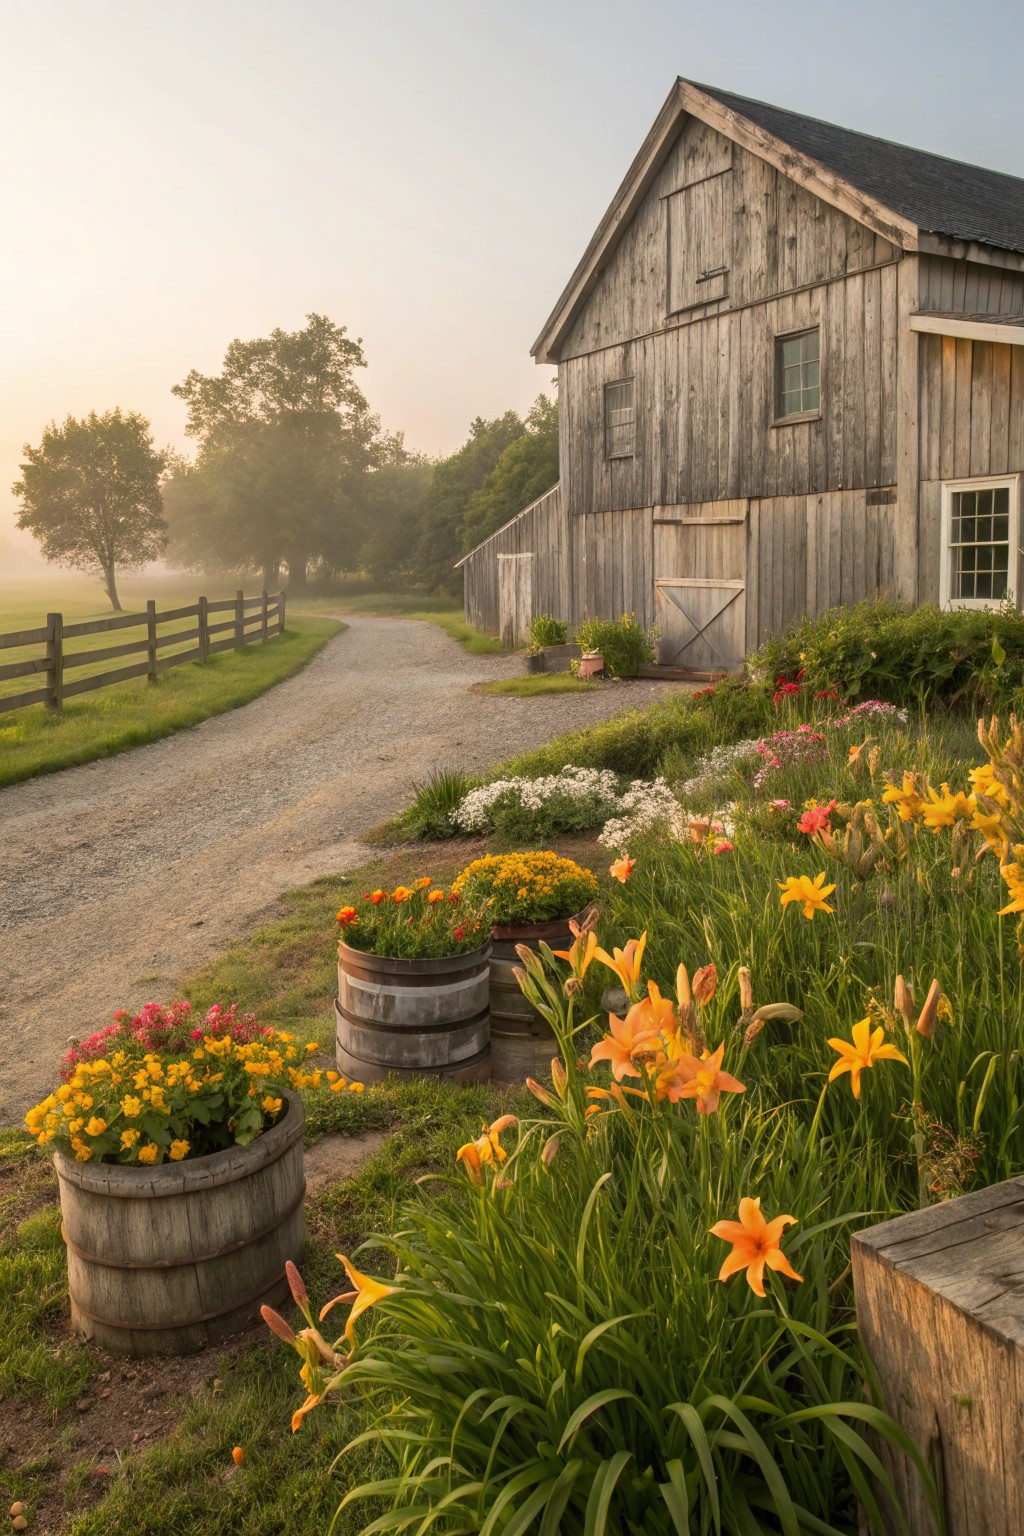
Old whiskey barrels make sturdy planters for daylilies, and placing a few right along your gravel driveway path works wonders for a welcoming front yard. Here, the bright orange blooms spill out next to the barn’s weathered siding, picking up on that rustic vibe without much fuss. It’s a simple way to add reliable summer color that ties the house to the garden.
This idea fits older farmhouses or cabins best, where you want curb appeal that doesn’t need replanting each year. Grab some used barrels from a local supplier, drill drainage holes, fill with soil, and tuck in daylilies. Keep them in full sun, and they’ll multiply on their own. Watch the path traffic though… too much wear might compact the soil nearby.
Daylilies Against Slatted Privacy Fences
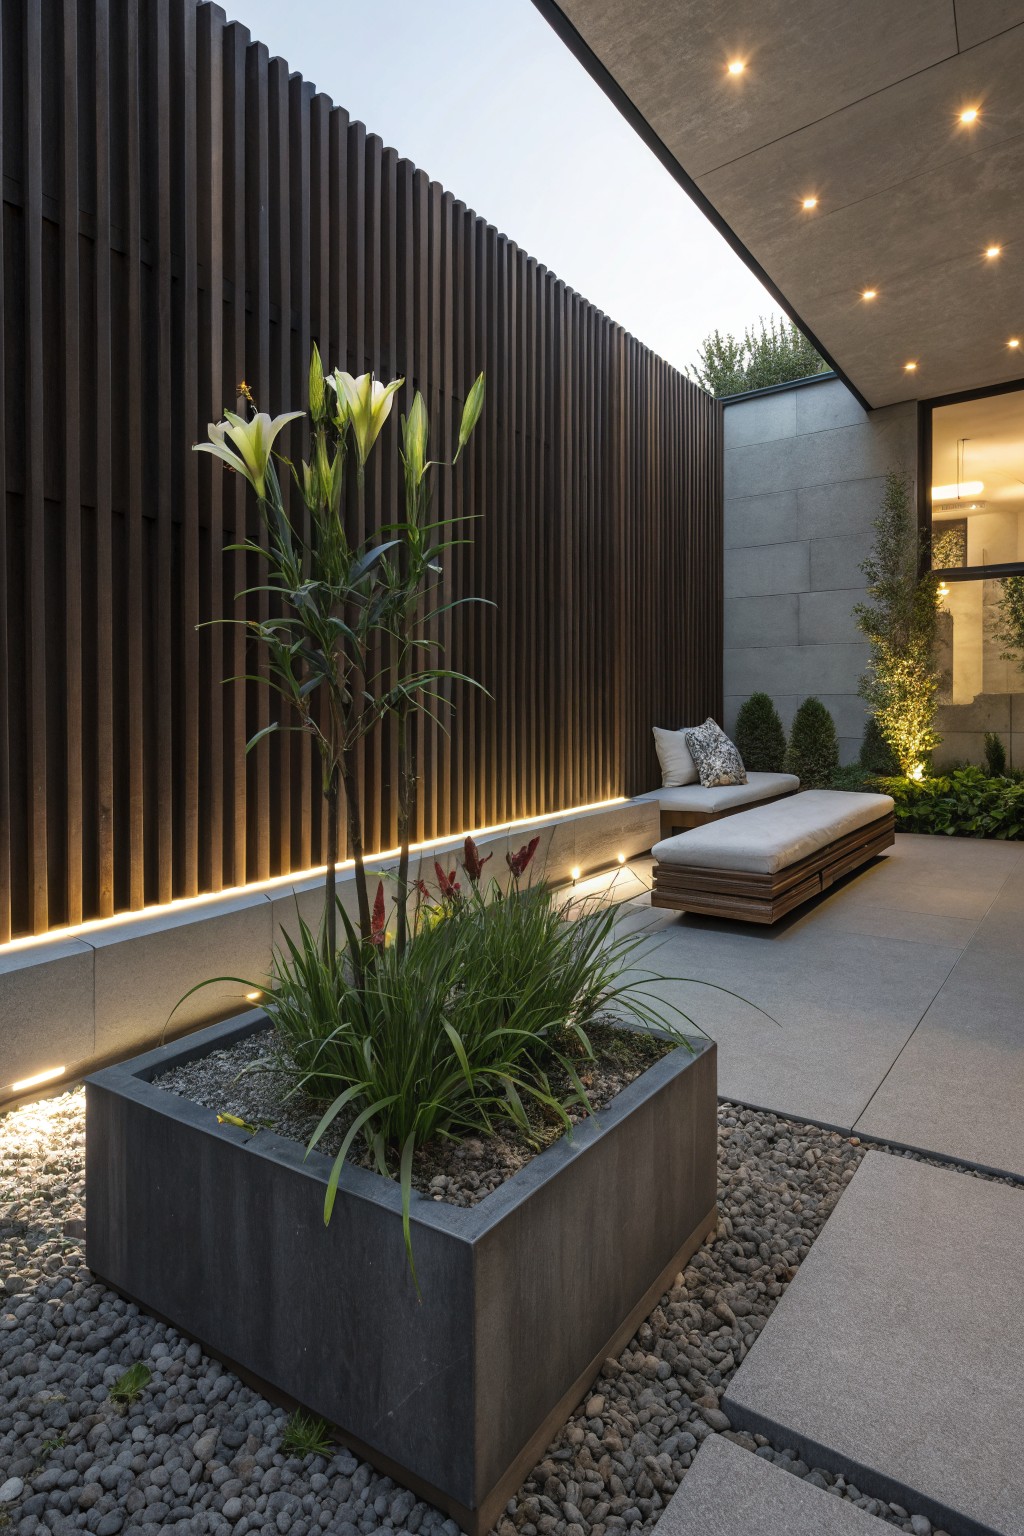
Planting tall daylilies right in front of a dark slatted wood fence gives you instant height and bright color in tight outdoor spots. The white blooms pop against the blackish wood, and the vertical lines of the fence match the upright stems of the flowers. It’s a low-fuss way to fill a backdrop that returns strong each summer.
This setup fits small patios or courtyards where you want screening without crowding the seating area. Tuck in a simple bench nearby, like on the concrete pavers, and let the plants do the work. Just keep the soil well-drained so the daylilies thrive year after year.
Daylilies in Raised Beds Along Garden Paths
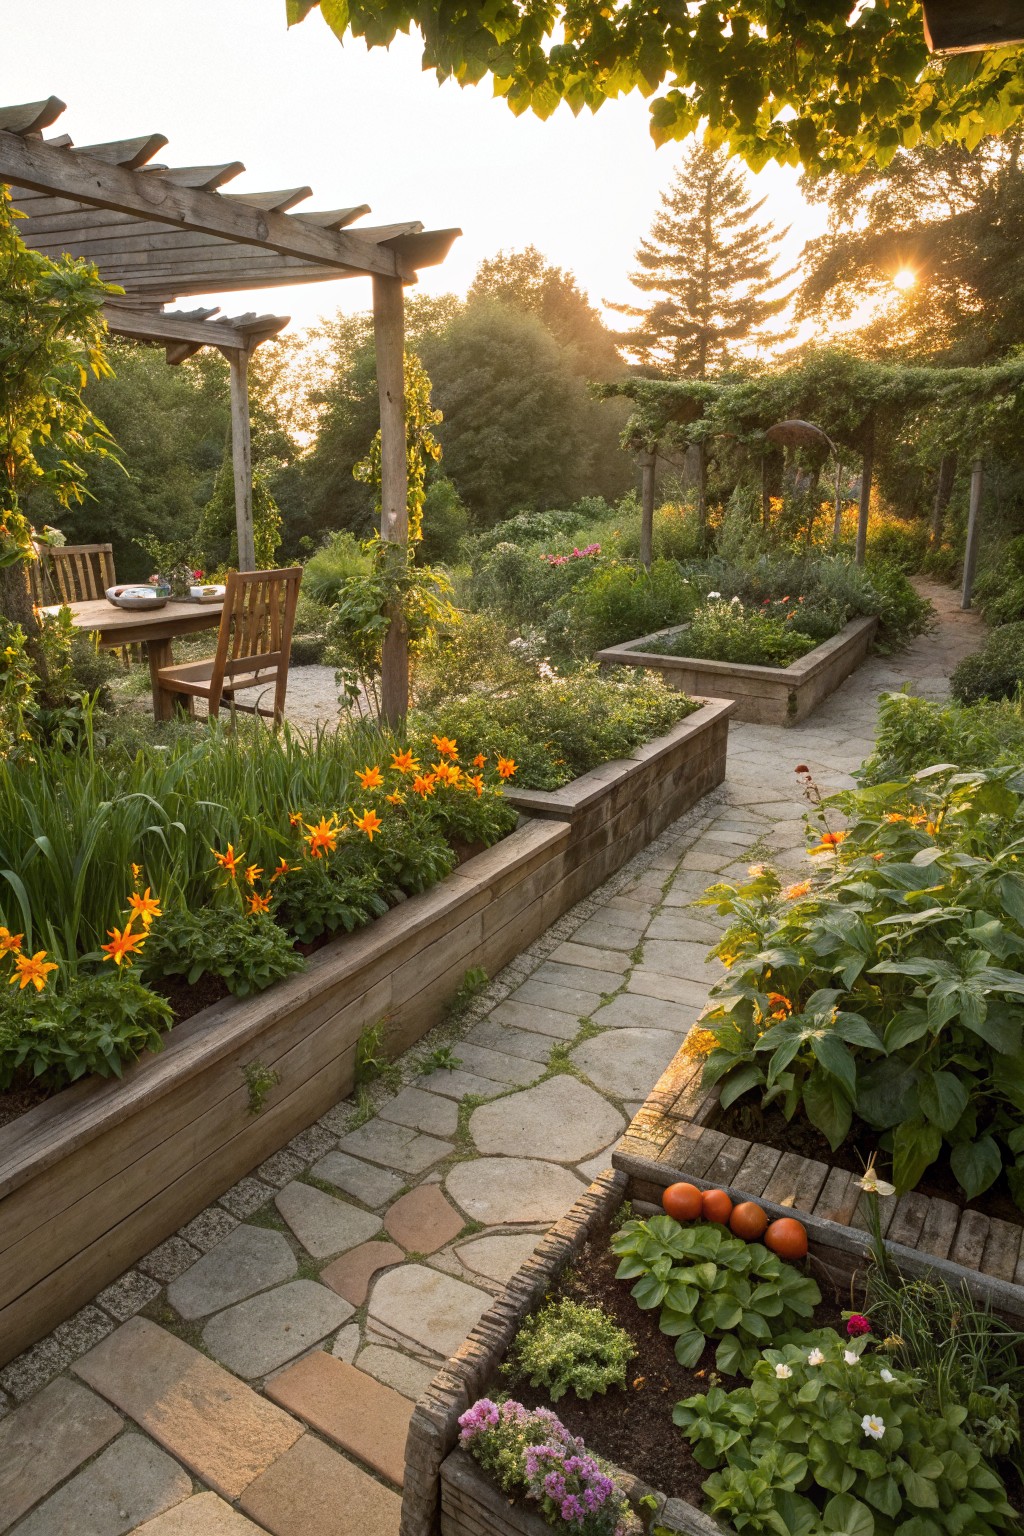
One simple way to add cheer to your garden is planting daylilies in raised wooden beds right along the paths. Those bright orange blooms pop against the stone walkway and make the whole space feel structured and inviting. The raised edges keep everything neat, and since daylilies come back every year, you get color without much fuss.
This setup works great in backyard gardens where you want to mix flowers with veggies or herbs. Place the beds on either side of a winding path leading to a seating spot under a pergola, like here. It suits cottage-style yards or even sloped spots for better drainage. Just treat the wood to last longer, and keep paths clear for easy walking.
Frequently Asked Questions
Q: When’s the best time to plant daylilies for my landscaping beds?
A: Spring or early fall gives roots time to settle before heat or frost hits.
Plant the crowns just one inch below soil so they push up strong shoots right away.
Q: Do daylilies spread too fast and crowd out other plants?
A: They form clumps that grow steadily but not aggressively.
Dig and divide every three years to keep space open for neighbors.
Q: How do I get daylilies to bloom nonstop through summer?
A: Snap off faded flowers daily to spark new buds.
Water deeply once a week if rain skips out… that keeps the show going.
Q: What if deer munch on my new daylily plantings?
A: Mix dish soap with water and hot sauce for a spray that sticks around after rain.
Reapply weekly and watch those nibblers turn up their noses.