
Ever looked at your lawn and noticed those pesky bare spots? You’re not alone. Many homeowners face this common issue, and it can be frustrating when all you want is a lush, green yard. Those patches not only detract from your lawn’s beauty but can also invite weeds and pests.
Key Takeaways
- Identify Causes: Recognize common causes of bare spots, such as poor soil quality, inadequate watering, foot traffic, pests, and shade.
- Prepare the Area: Clear debris and weeds, test and amend soil quality, and loosen the soil to create an optimal environment for grass growth.
- Choose the Right Grass Seed: Select grass species that suit your local climate, sunlight exposure, and traffic levels for effective patching.
- Follow Proper Seeding Techniques: Time your seeding correctly, ensure even distribution, and keep the soil moist to promote seed germination.
- Care for New Grass: Fertilize 4-6 weeks after seeding, maintain proper mowing height, and monitor for weeds to ensure healthy growth.
Understanding Bare Spots in Your Lawn
Bare spots in your lawn can be bothersome and frustrating for homeowners. These areas not only detract from your yard’s beauty but also invite weeds and pests. Understanding the causes and signs of bare spots helps you address them effectively.
Common Causes of Bare Spots
- Poor Soil Quality: Nutrient-deficient or compacted soil often hampers grass growth. Testing the soil can reveal its pH and nutrient levels.
- Inadequate Watering: Lawns need consistent moisture. Overwatering or underwatering leads to stressed grass that can’t compete with weeds.
- Foot Traffic: High foot traffic can crush grass and soil, resulting in bare patches. Consider adding pathways to minimize this issue.
- Pests and Diseases: Grubs, fungal infections, and other pests can weaken grass, creating bare spots. Regular monitoring can help catch these problems early.
- Shaded Areas: Grass struggles in areas with limited sunlight. Assess the sun exposure throughout your yard to determine which species thrives best.
- Visible Soil: If you see soil instead of grass, that’s a clear indication of a bare spot.
- Stunted Grass Growth: Grass that looks unhealthy or patchy signals potential bare areas. This could mean the grass is struggling to compete with surrounding weeds.
- Weeds: An influx of weeds in certain areas often indicates that grass is failing to grow. Weeds can quickly overtake bare spots since they require less care.
- Dirt Mounds: Small mounds of soil might signify pest activity. If you notice this, checking for pests like grubs can be beneficial.
Preparing the Area for Grass Growth
Preparing the area properly encourages healthy grass growth in bare spots. Start by addressing any obstacles that hinder growth.
Recommended Products
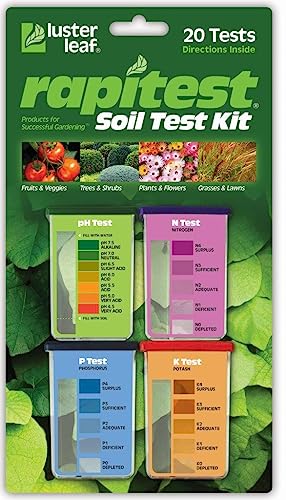
Quick, at home results for Soil pH, Nitrogen, Phosphorous and Potash Innovative and inexpensive soil test kit features an easy-to-use capsule system and patented color comparators

How to Accurately Test Garden's Soil pH? Many growers do not able to use the correct tools and methods to obtain accurate soil ph values; NewTest soil ph test kit includes upgraded soil ph test strips, measuring cylinders, and instructions for professional testing methods; it allows even beginners to easily and accurately obtain soil ph values

Accurate Soil pH Testing: Dewildetradingco Soil pH Test Strips offer measurements of soil pH levels (pH 3.5-9). As an essential tool for every gardener and grower, these test strips help determine the optimal pH for various plants, such as outdoor plants, indoor plants, gardens, grass lawns, fruit trees, flowers, vegetables, and forest shrubs.
Clearing Debris and Weeds
Clear all debris and weeds from the bare spots. Use a rake to remove sticks, leaves, and dead grass. Pull weeds gently to ensure you get the roots, preventing regrowth. If needed, apply a natural weed killer to manage stubborn weeds. A clean surface reduces competition for nutrients and sunlight, allowing new grass to thrive.
Soil Testing and Preparation
Test the soil for pH and nutrient levels. A soil test kit typically provides results within a few days. Aim for a pH between 6 and 7, optimal for most grass types. If the soil’s too acidic or alkaline, amend it with lime or sulfur as needed.
Prepare the soil by loosening it with a garden fork or tiller to a depth of about 2-4 inches. Break up large clumps and remove rocks and debris. Incorporate organic material like compost to improve soil structure and add nutrients. A well-prepared soil bed promotes strong roots and robust grass growth.
Choosing the Right Grass Seed
Selecting the appropriate grass seed is crucial for filling bare spots effectively. The right choice ensures robust growth matching your lawn’s conditions.
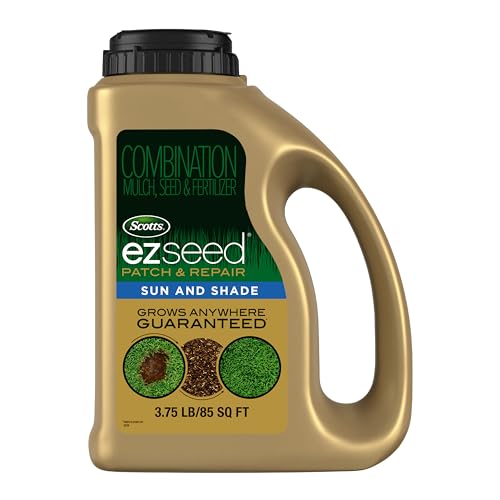
Recommended Products
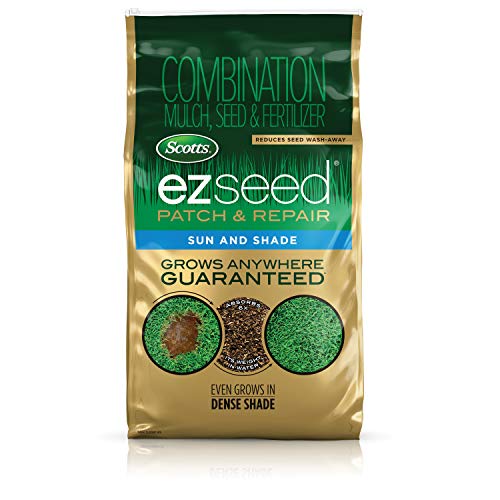
Patch and Repair: Scotts EZ Seed Patch & Repair Sun and Shade is a revolutionary grass seeding product designed to fill in bare spots and repair lawn damage

Suitable for establishing new lawns, overseeding existing turf, and repairing damaged lawn areas

Kentucky 31 Tall Fescue is the original turf for your home
Types of Grass Suitable for Bare Spots
- Perennial Ryegrass: Ideal for quick patches, it germinates within 5 to 10 days, providing rapid cover. This grass thrives in cool-season areas and tolerates light foot traffic.
- Kentucky Bluegrass: Known for its lush appearance, it spreads through underground rhizomes. It’s best for moderate to low traffic and requires full sun.
- Tall Fescue: This drought-resistant grass works well in transitional zones. It features deep roots and adapts to varying temperatures, making it versatile.
- Bermudagrass: Suitable for warm climates, it flourishes in sunny areas. Its aggressive growth quickly fills in bare patches but may not tolerate cold winters.
- Climate: Determine your region’s climate. Choose cool-season grasses for colder areas and warm-season grasses for warmer regions.
- Sunlight: Assess the sunlight levels in bare spots. Some grasses require full sun, while others perform well in shade.
- Soil Type: Test your soil to ensure it supports grass growth. Clay, sandy, or loamy soils have different seed preferences.
- Foot Traffic: Consider traffic levels in your lawn. High-traffic areas benefit from durable grasses like Perennial Ryegrass or Bermudagrass, while low-traffic zones can handle more delicate varieties.
- Maintenance Level: Decide how much maintenance you’re willing to commit. Low-maintenance options, like Tall Fescue, require less watering and mowing.
By evaluating these factors, you can select the best grass seed to restore the beauty of your lawn.
Steps to Grow Grass in Bare Spots
Growing grass in bare spots involves a few straightforward steps. Follow these methods to restore those areas effectively.
Recommended Products

Fill bare spots and thin areas of your lawn

Scotts PatchMaster Lawn Repair Mix Sun + Shade Mix combines grass seed, mulch, and fertilizer to provide all-in-one bare spot repair for your yard
WHEN TO APPLY : This lawn seed mix of Kentucky bluegrass seed, perennial ryegrass, and fine fescue grass seed germinates best when daytime temperatures are between 60°F and 80°F with no danger of frost
Seeding Techniques
- Choose the Right Time: Seed during the optimal season for your grass type. Early spring or early fall is typically best for cool-season grasses, while late spring to early summer suits warm-season grass.
- Spread Seed Evenly: Use a broadcast spreader or a hand-held spreader to apply the grass seed. Aim for a seed rate that matches the product’s guidelines. This ensures even coverage without overcrowding.
- Press the Seeds: Lightly rake the area after seeding to ensure good seed-to-soil contact. You can also use a roller to press the seeds down gently, but avoid compacting the soil too much.
- Cover the Seeds: If you prefer, add a thin layer of topsoil or compost over the seeds. This helps retain moisture and protects the seeds from birds.
- Water Right After Seeding: Immediately water the area after planting the seeds. Use a fine mist spray to avoid washing away the seeds.
- Keep the Soil Moist: Water the bare spots frequently, especially during germination. Aim for light watering 1 to 2 times per day, adjusting based on rainfall and temperature.
- Avoid Overwatering: Monitor the area for signs of excess moisture, such as pooling water. Reduce watering frequency if the soil remains soggy for long periods.
- Mow at the Right Height: Once the grass reaches 3 to 4 inches, mow it down to about 2 to 3 inches. This encourages strong growth but helps maintain health by not cutting too short.
- Fertilize Appropriately: Apply a starter fertilizer about 4 to 6 weeks after seeding. Choose a slow-release product to promote steady growth over time.
- Watch for Weeds: Keep an eye on weed growth in the newly seeded areas. Hand-pull any weeds you see to reduce competition for nutrients.
Post-Growth Care
Once grass starts germinating in bare spots, ongoing care ensures its healthy growth. Focus on fertilizing and maintaining your new grass for optimal results.
Fertilizing Your New Grass
Fertilize new grass about 4 to 6 weeks after seeding. Use a starter fertilizer that contains a higher phosphorus content to encourage root development. Follow the package instructions to determine the appropriate amount for your lawn size. Apply the fertilizer evenly across the area using a broadcast spreader. Water the lawn after fertilization to help the nutrients penetrate the soil.
Mowing and Maintenance Tips
Mow your new grass when it reaches 3 to 4 inches tall. Set your mower to a height of 2 to 3 inches. This encourages lateral growth and helps the grass establish a denser turf. Avoid cutting more than one-third of the grass height in a single mowing to minimize stress.
Keep the soil consistently moist, especially during dry spells. Water deeply but infrequently, about once or twice a week, providing around 1 to 1.5 inches of water each time. Check soil moisture by sticking your finger an inch into the ground; if it feels dry, it’s time to water.
Monitor the area for weeds. If they appear, hand-pull them to prevent competition for nutrients. Be cautious when using herbicides, as young grass may be sensitive. Always read labels and follow instructions carefully.
By following these guidelines, you’re setting the stage for a lush, green lawn in no time.
Conclusion
Taking care of those bare spots in your lawn doesn’t have to be a daunting task. With a bit of preparation and the right approach you can transform those patches into vibrant green areas that enhance your yard’s beauty. Remember to choose the right grass seed for your specific conditions and keep an eye on watering and fertilization as your grass establishes itself.
As you nurture your lawn back to health don’t forget to enjoy the process. Watching your hard work pay off with a lush lawn is incredibly rewarding. So grab your gardening tools and get started on creating the lawn of your dreams!
Frequently Asked Questions
What are the common causes of bare spots in lawns?
Bare spots in lawns can be caused by several factors, including poor soil quality, inadequate watering, high foot traffic, pests, diseases, and shaded areas. Identifying the underlying cause is crucial for effective lawn restoration.
How can I identify bare spots in my lawn?
Signs of bare spots include visible soil, stunted grass growth, an influx of weeds, and dirt mounds indicating pest activity. Regularly inspecting your lawn will help you spot these issues sooner.
How do I prepare my lawn for seeding bare spots?
To prepare for seeding, clear debris and weeds, rake the area to remove dead grass and loosen the soil, and test the soil’s pH and nutrient levels. A clean, amended surface offers the best conditions for new grass growth.
What type of grass seed should I choose for bare spots?
Select grass seed based on your lawn’s conditions. For quick patches, Perennial Ryegrass works well, while Kentucky Bluegrass offers a lush look. Tall Fescue is great for drought areas, and Bermudagrass thrives in warm climates.
When is the best time to seed bare spots in my lawn?
The optimal time to seed depends on the grass type. Cool-season grasses, like Kentucky Bluegrass, are best seeded in early spring or fall, while warm-season grasses, like Bermudagrass, should be seeded in late spring or early summer.
How should I water new grass after seeding?
Water the newly seeded area immediately after planting and keep the soil consistently moist during germination. Be cautious not to overwater, as this can lead to shallow root growth and disease.
What should I do after my grass starts growing?
Once the grass reaches 3 to 4 inches, mow it to a height of 2 to 3 inches. Fertilize with a starter fertilizer 4 to 6 weeks after seeding and monitor for weeds, pulling them as necessary to encourage healthy growth.