

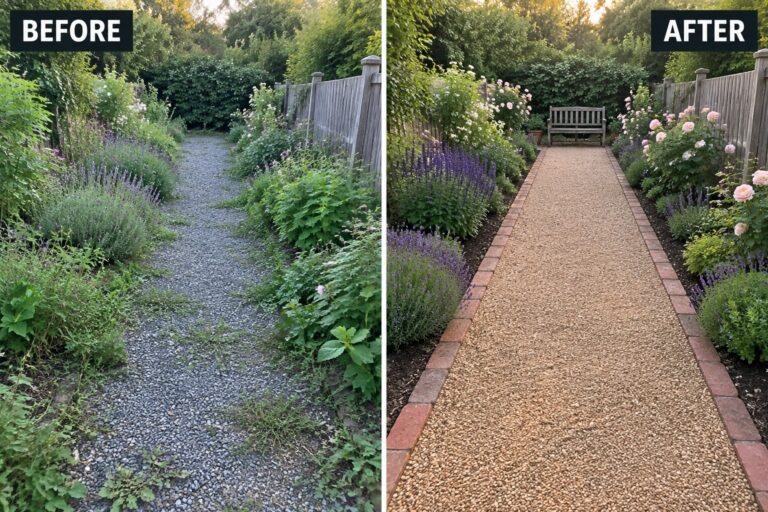
I often notice how garden beds lose their shape when the paths through them start to sink or spread into the soil.
Choosing the right gravel size has made a bigger difference for me than I expected because it stays put better around the plants.
One change I would test first is edging the beds with something low and simple to keep the gravel contained.
Defined paths give the whole area a clearer layout so the plants stand out instead of blending into a mess of weeds and loose stones.
Those adjustments make the space feel looked after.
Define A Gravel Path With Brick Edging
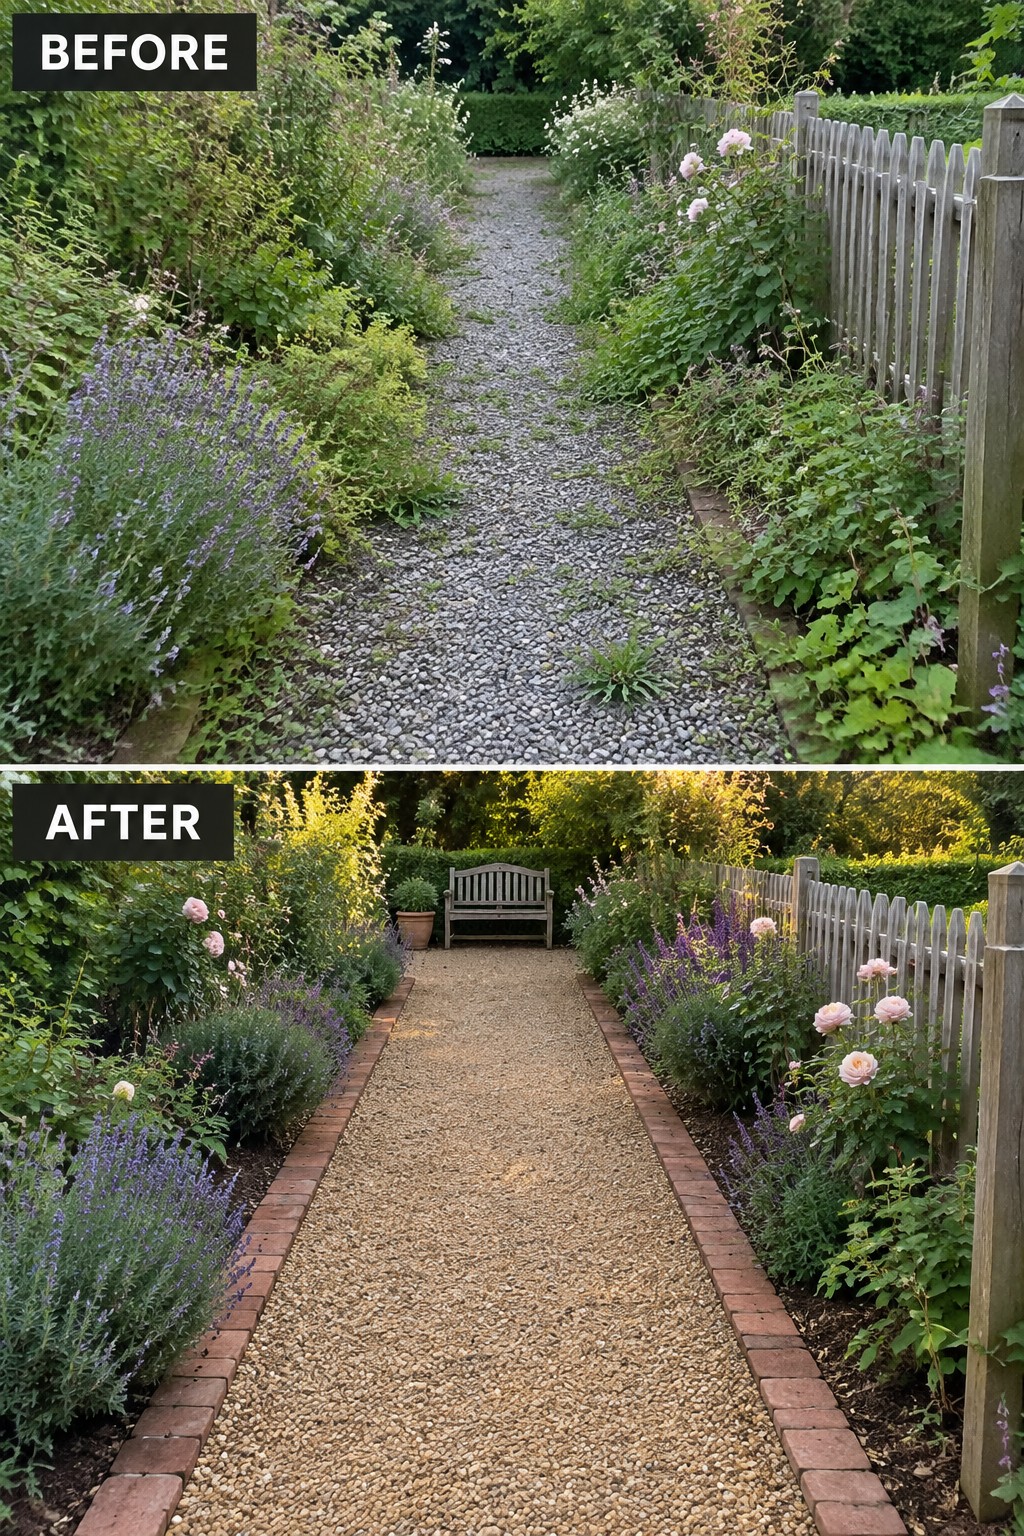
Adding edging is one of the most practical ways to fix a gravel path that feels messy. The before photo shows loose gravel with plants creeping in from both sides. Once the brick border was added the path stayed contained and the garden beds on either side became much easier to manage.
This idea works best in narrow side gardens or long backyards where the path runs between planting areas. Lay the edging first so the gravel stays in place, then tidy the borders and add a simple focal point at the end if there is room. It keeps the stones from scattering and gives the whole space a more finished look without major construction.
Add Stepping Stones To A Gravel Path
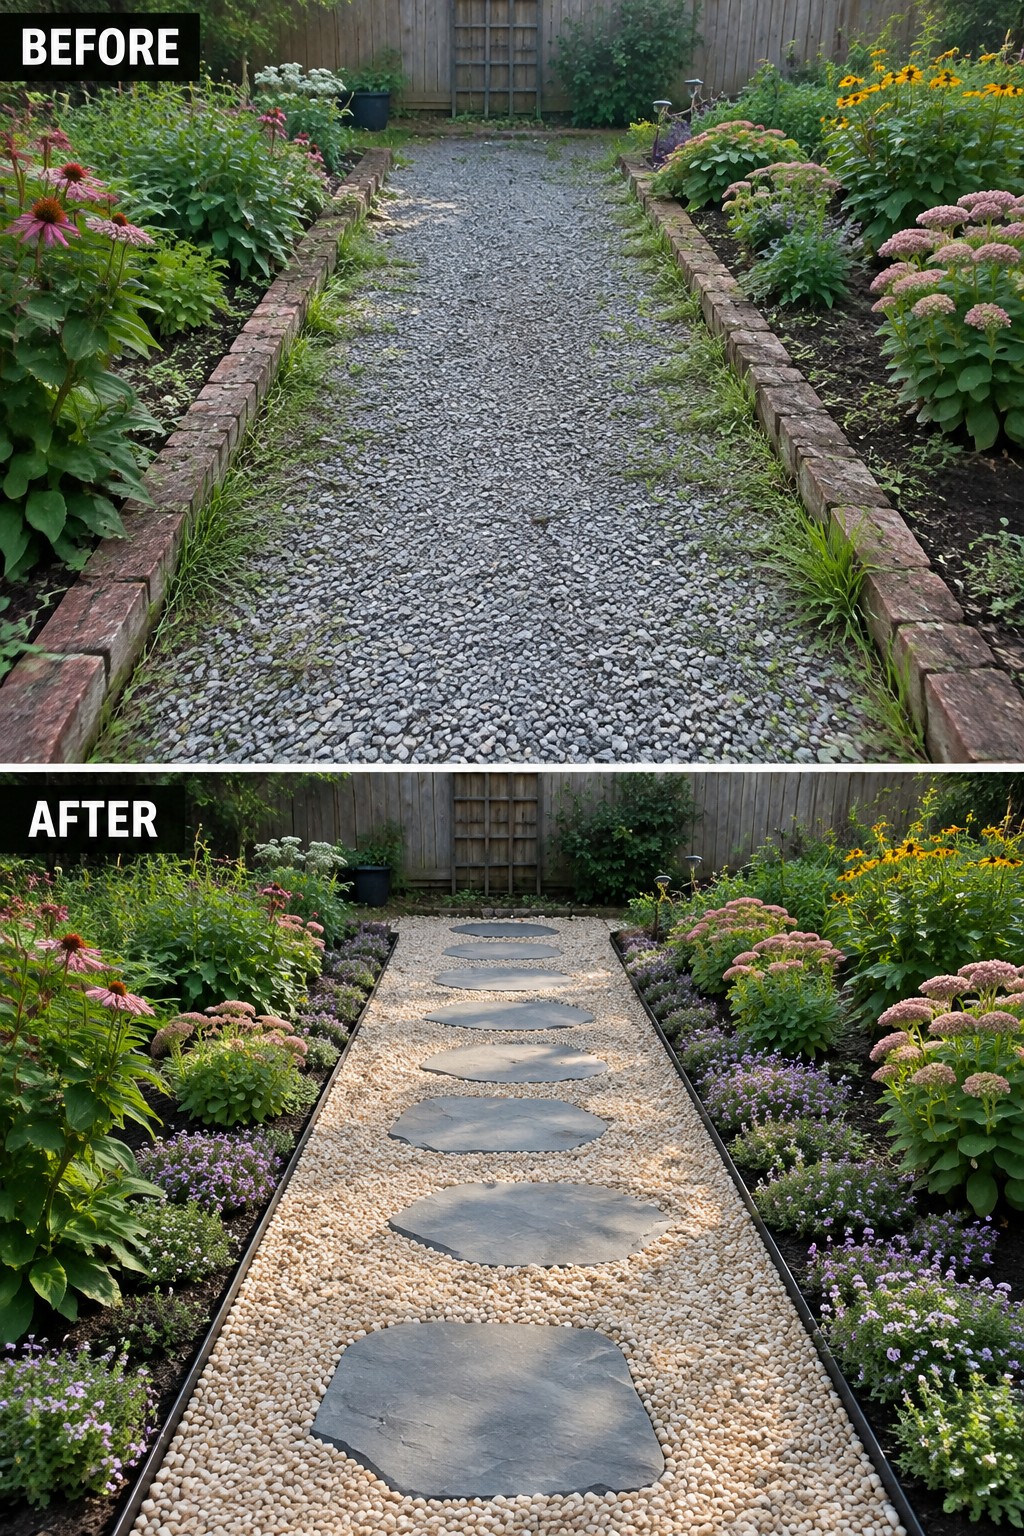
A plain gravel path often feels unfinished because there is no clear place to step. Adding a row of large stepping stones down the center gives the path a defined route and makes it much easier to walk on without sinking into loose gravel.
This approach works well in garden beds where you want to keep the casual look of gravel but need something more practical. Use stones that are wide enough for comfortable footing and set them in a fresh layer of gravel so the path feels intentional rather than just a strip of stones between plants.
Add Curves To A Gravel Path

A straight gravel path between two long beds can feel flat and a bit forgotten. Giving the path a gentle curve and adding clean edging turns the same space into something that feels planned and easier to walk through. The beds now sit neatly against the path instead of spilling over it.
This idea works best in a long, narrow garden where a straight line starts to feel repetitive. Use a hose or rope to test the curve first, then add edging before you fill the beds. Low hedges help hold the shape while flowers add color without crowding the path.
Define Garden Paths With Gravel And Stepping Stones
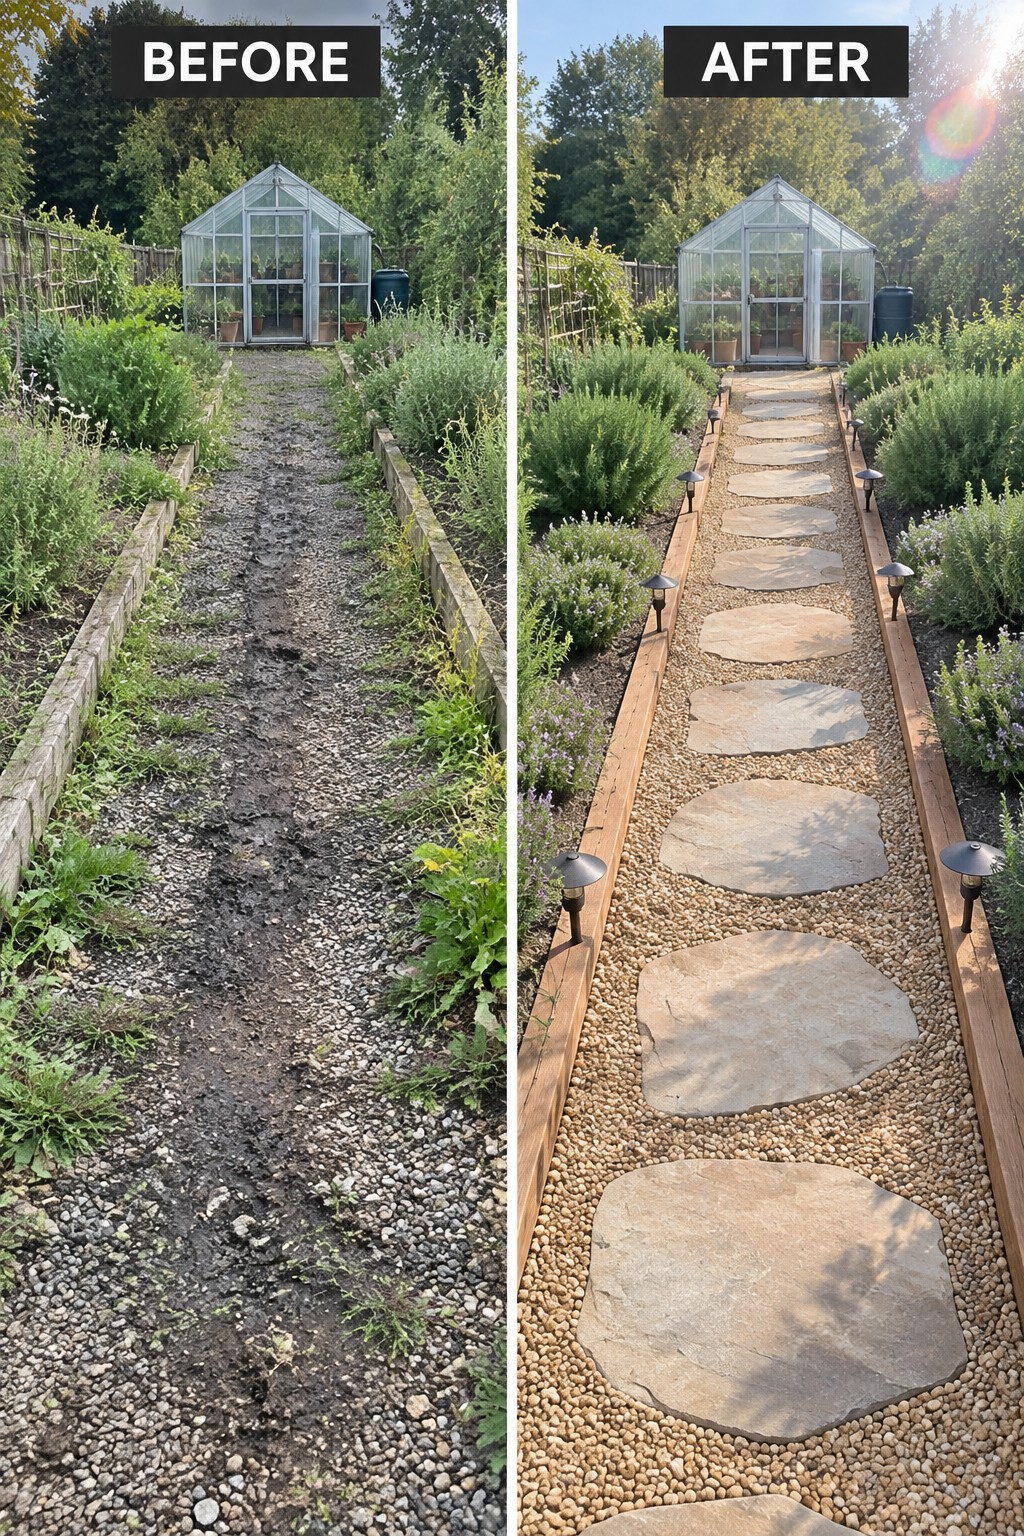
A muddy track between garden beds makes the whole space feel unfinished and hard to walk through. Laying down gravel with stepping stones creates a firm, level route that keeps feet clean and gives the beds on either side a clear boundary.
This idea suits long narrow gardens or side paths where you need regular access. Start with basic edging to hold the gravel in place, then choose stones that sit flat and leave enough room to move between them.
Define A Gravel Path With Stone Borders

Adding a simple border on each side turns a basic gravel path into something that feels more intentional. The original path ran between the beds with only thin metal strips for edges, but the updated version uses a line of dark pebbles to frame the gravel and separate it from the planted areas. This one change gives the whole layout a cleaner shape.
This idea works best in small to medium yards where the path is straight and you want it to read as a clear walkway rather than just leftover space. Lay the border material first, then choose gravel that contrasts with the edging so the lines stay visible even after plants fill in.
Add Edging And Mulch To Clean Up A Gravel Path
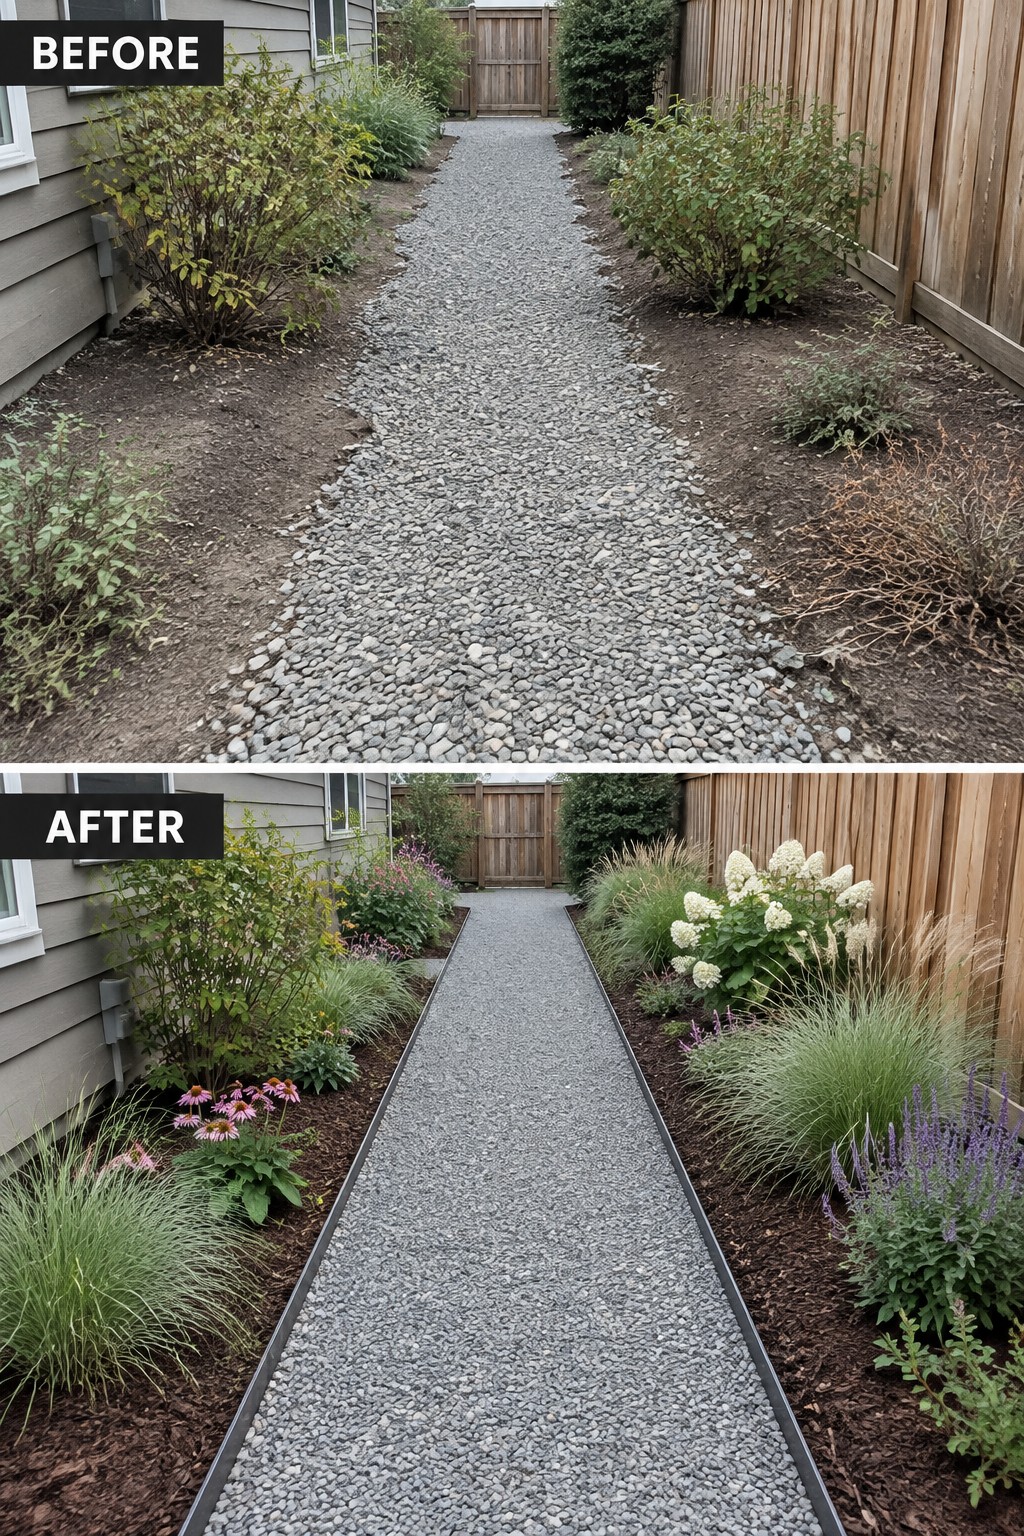
The biggest shift here comes from adding a simple metal edge along both sides of the gravel. That one change turns a loose, wandering path into something that feels intentional. Mulch in the beds replaces bare dirt and weeds, which keeps the whole area looking tidy even when the plants are still filling in.
This approach works well on narrow side yards or anywhere a path runs between a house and a fence. Start with the edging first, then lay down a thick layer of mulch before planting. It keeps gravel from spilling into the beds and makes future weeding much easier.
Edge A Gravel Path With Stone Pavers

A rough log border can make a gravel path feel messy and unfinished. Switching to flat stone pavers creates a clean, lasting edge that keeps the gravel contained and gives the whole walkway better structure.
This approach works well along garden beds in shady or wooded yards. Lay the pavers first to set the shape, then add simple plants like hostas and ferns along the edge to soften the line without crowding the path.
Add Retaining Walls To Hold A Gravel Path On A Slope
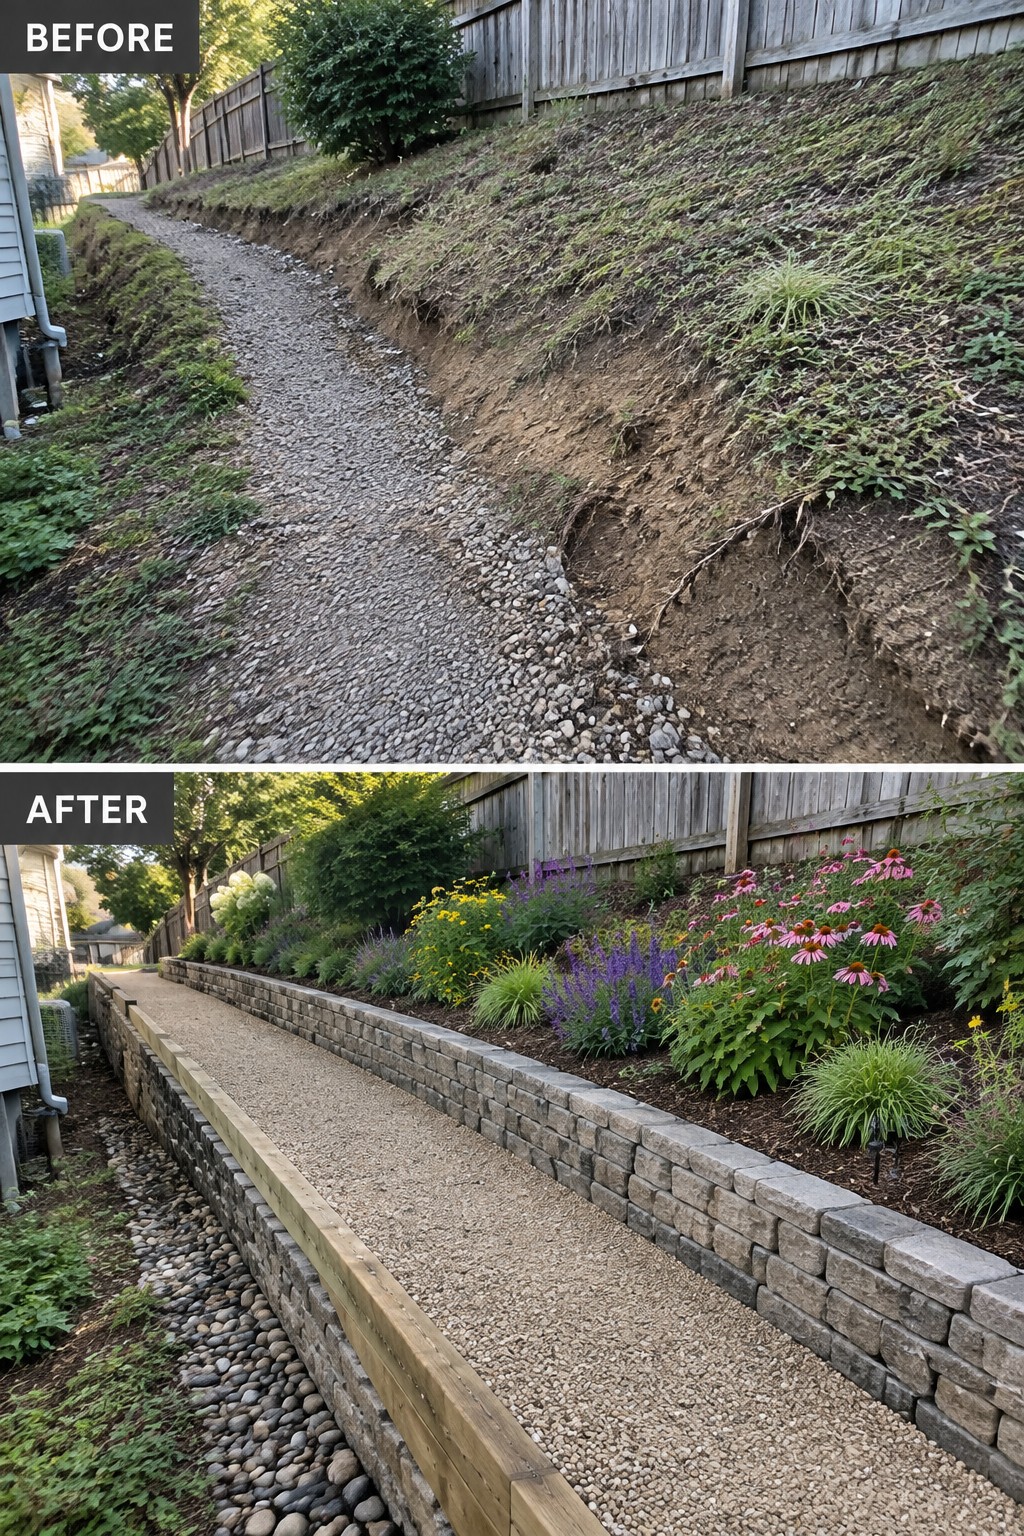
A sloped gravel path often ends up washing out and spreading into the surrounding soil. Adding low stone retaining walls along both sides keeps the gravel in place and creates flat planting beds that stay put instead of sliding downhill.
This idea works best on yards with noticeable grade changes where you want a usable path without constant raking and repairs. Build the walls first to set clear boundaries, then add soil, mulch, and plants behind them. The walls do the heavy work of preventing erosion while the beds give you room to grow without fighting the slope.
Add Lighting To Define A Gravel Garden Path

Adding low lights along a gravel path gives the whole garden a clearer shape once the sun drops. The before photo shows a simple walkway that disappears into the plants at dusk. After the lights were added the same path feels finished and much easier to use in the evening.
This works best on any yard that already has a main route through the beds. Start with a few solar or low-voltage lights spaced evenly along both edges. Keep the fixtures short so they highlight the ground and plants without creating glare.
Add Pavers To Give A Gravel Path More Structure
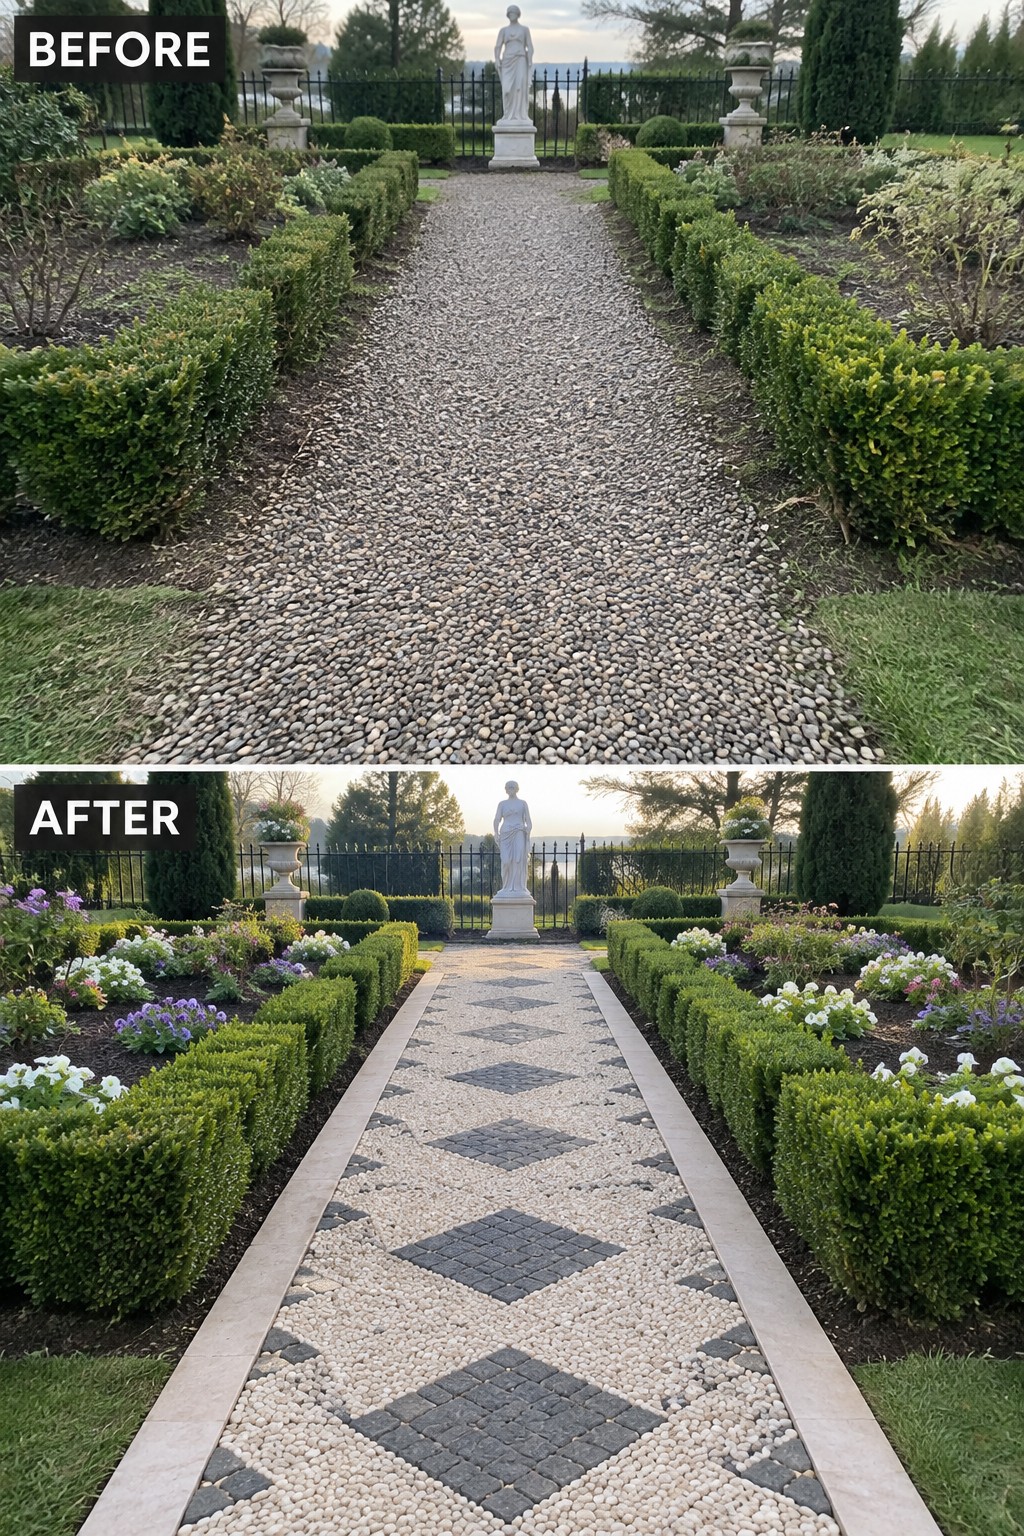
A plain gravel path often looks unfinished once the beds on either side are cleaned up. Placing a simple row of dark pavers down the center adds just enough pattern and definition to keep the gravel in place and make the walkway feel intentional.
This approach suits long garden paths where full paving would feel too formal. Lay the pavers first in a repeating shape, then fill around them with gravel. The contrast keeps the casual texture while stopping the path from looking like a simple strip of stone.
Stabilize Gravel Paths With A Grid System
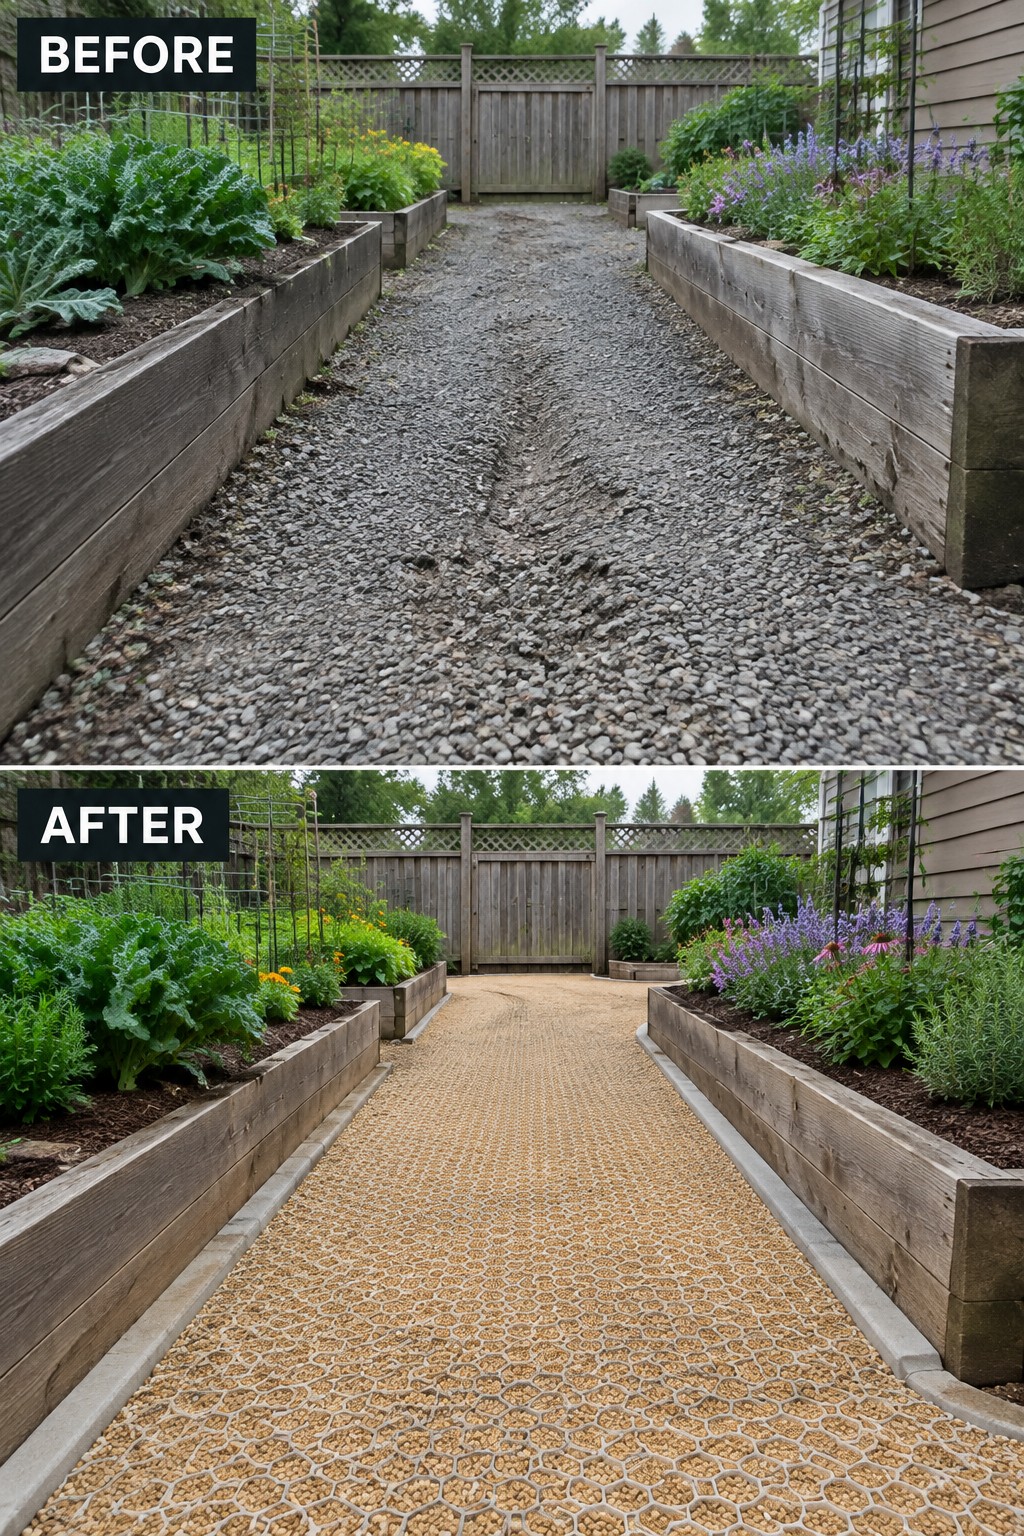
A loose gravel path between garden beds often develops deep ruts and bare spots after a season or two of use. Installing a simple honeycomb grid underneath holds the stones in place, keeps the surface even, and stops the middle from wearing down to mud.
This approach suits any yard with raised beds and gravel walkways. Lay the grid over a compacted base, fill it with gravel, and the path stays tidy with far less maintenance. It also makes walking easier and keeps the edges of the beds looking intentional rather than messy.
Set Pavers In Gravel For A Clearer Path
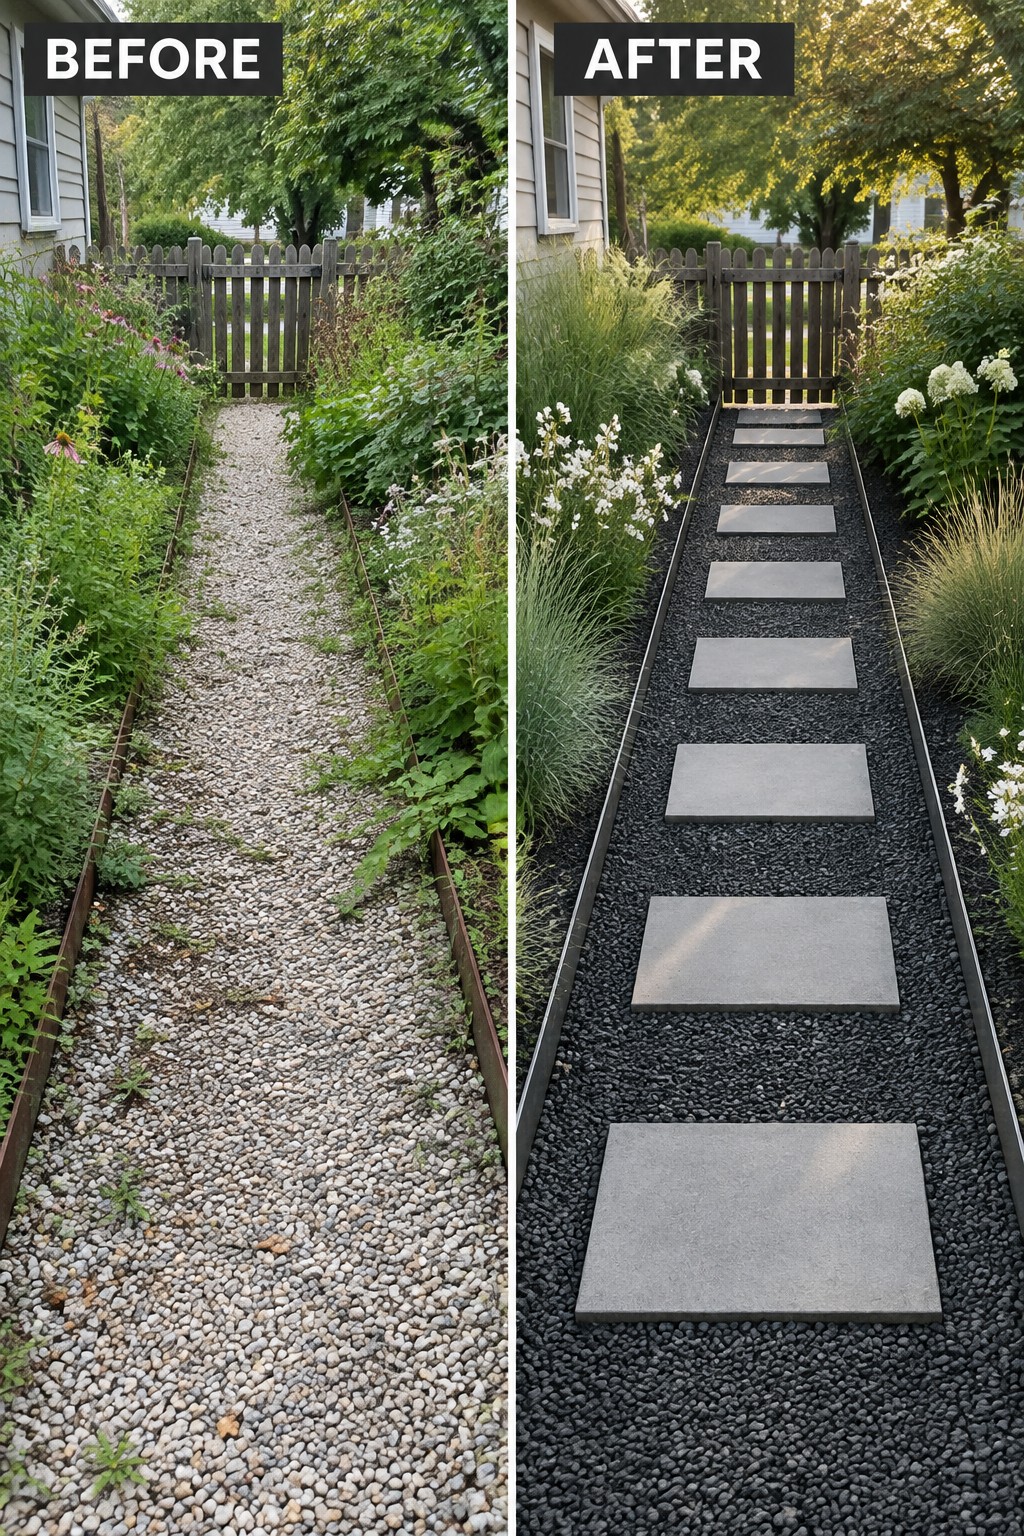
A loose gravel path often ends up looking messy once plants start creeping in from the sides. Switching to dark gravel with large pavers set in a straight line gives the walkway real shape and makes it much easier to follow. The pavers also keep feet out of the gravel, which helps on wet days.
This approach suits narrow side yards or long strips between garden beds where you want a simple walking route without a full patio. Lay the pavers first so the spacing feels comfortable to step on, then fill around them with gravel that contrasts in color. Keep the edges tight so grass and ground cover do not spill back onto the path.
Add Boardwalks Over Gravel For Better Drainage
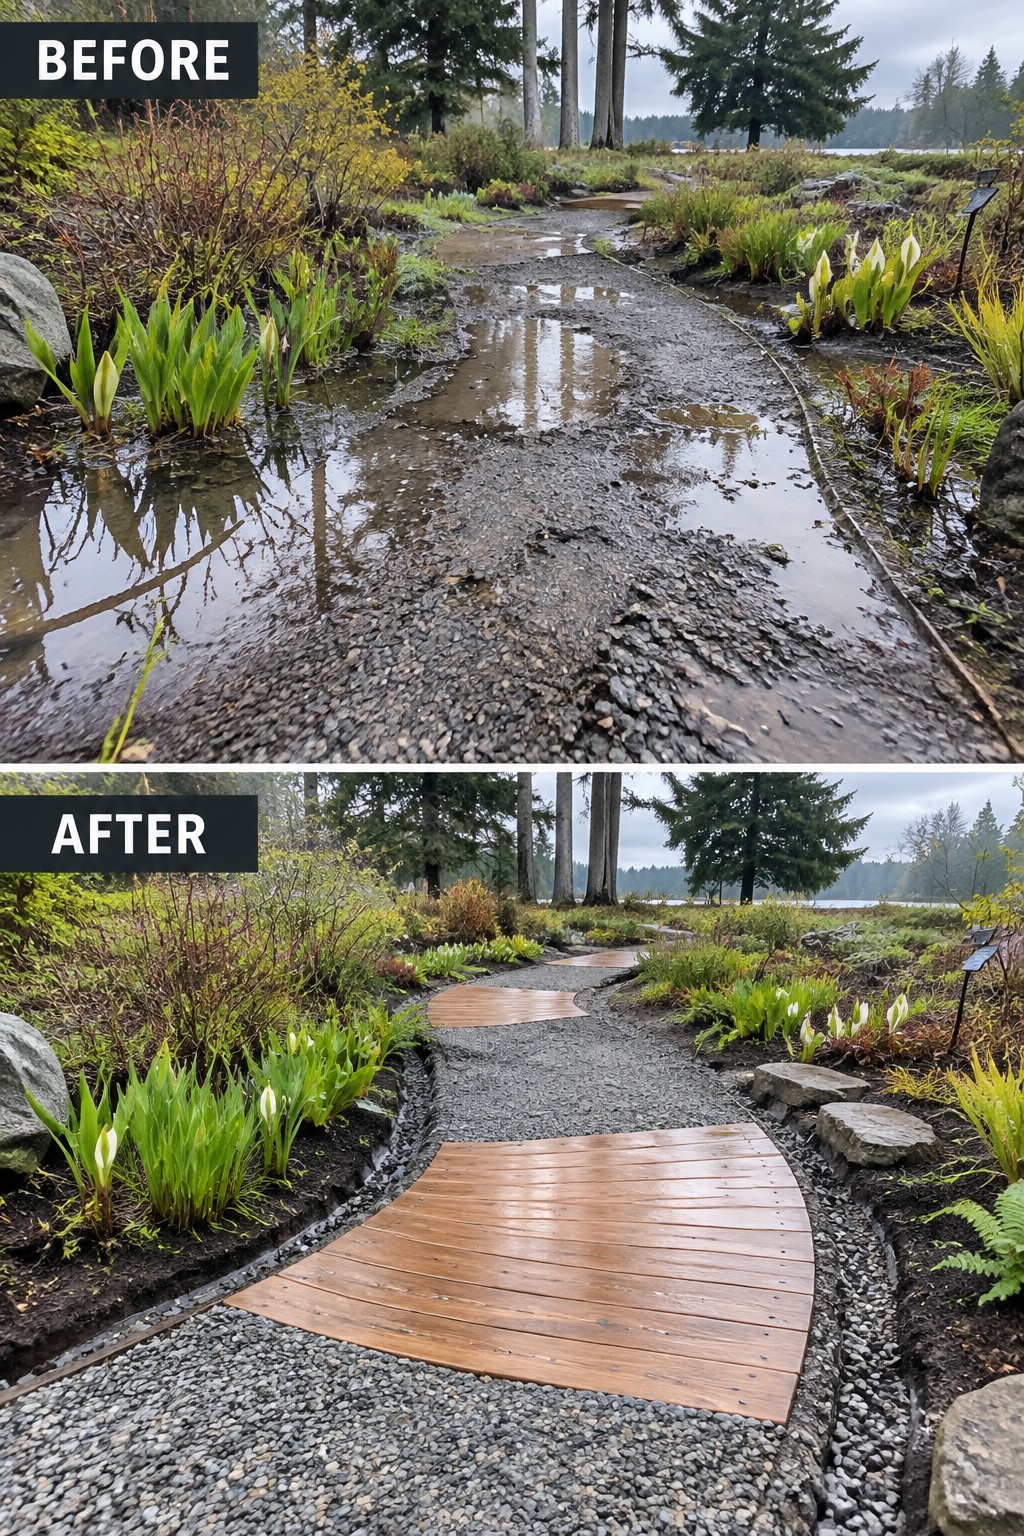
A wet gravel path often turns into a muddy mess after rain, which makes walking through the garden frustrating. Adding raised wooden boardwalks over the worst sections solves this by giving people a dry surface to step on while still keeping the gravel look in between. The curves in the wood also help guide the eye and break up long stretches of gravel.
This approach works well in any garden bed area that collects water or sees regular foot traffic. Start by identifying the lowest or most flooded spots, then lay the boardwalks only where they are needed rather than covering the entire path. It keeps the project simple and leaves room for plants along the edges.
Add Stone Edging To Define A Gravel Path

A plain gravel path often looks unfinished when it just sits between open soil and scattered plants. Adding a low stone border on both sides gives the path a clear edge and turns the surrounding space into proper garden beds that feel intentional.
This idea works best on straight or gently curving walks where you want structure without adding height or cost. Lay the edging first so the beds stay neat, then plant in layers with taller climbers on simple supports and lower perennials along the front to keep the path open and easy to use.
Add Mosaic Stepping Stones To A Gravel Path
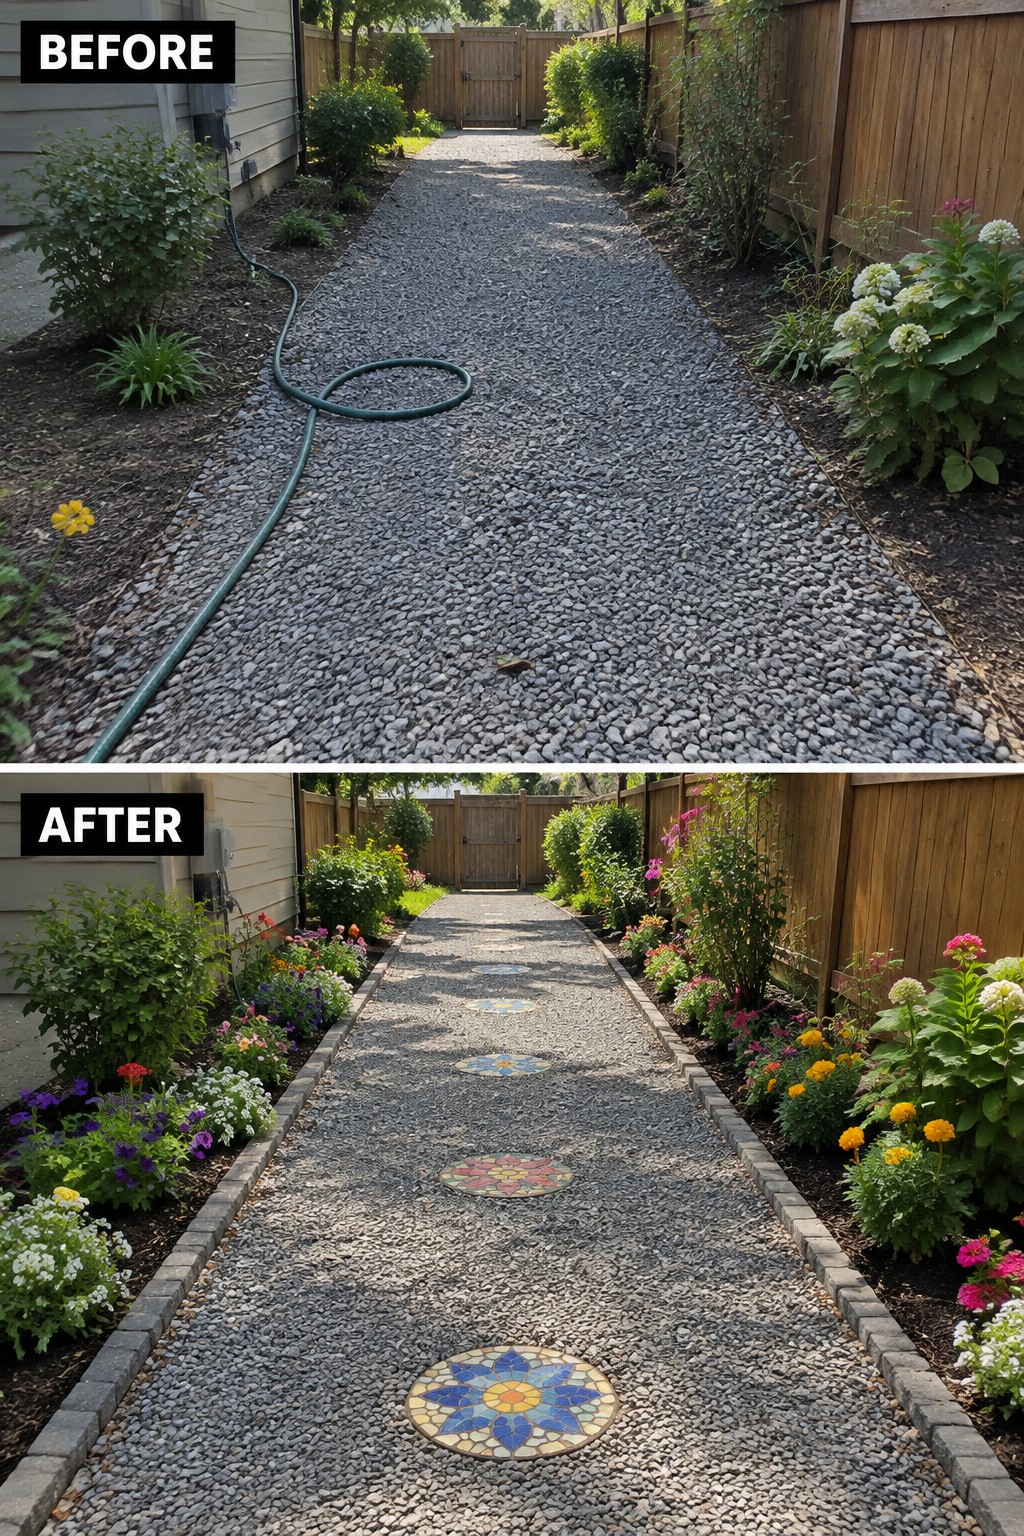
A plain gravel path can start to feel dull once the novelty wears off. Adding a row of mosaic stepping stones gives the eye places to rest and breaks up the long stretch of gravel without losing the simple, low-maintenance surface. The side beds also got a clear border and fuller planting, which keeps the gravel from looking like it just runs into the dirt.
This approach suits any straight or gently curving gravel walkway that needs more personality. Choose pavers rated for outdoor use and set them level with the gravel so they stay easy to walk on. Keep the planting simple at first, then add more color once the beds are established. The stones do most of the visual work while the borders keep everything tidy.
Define A Gravel Path With Edged Garden Beds
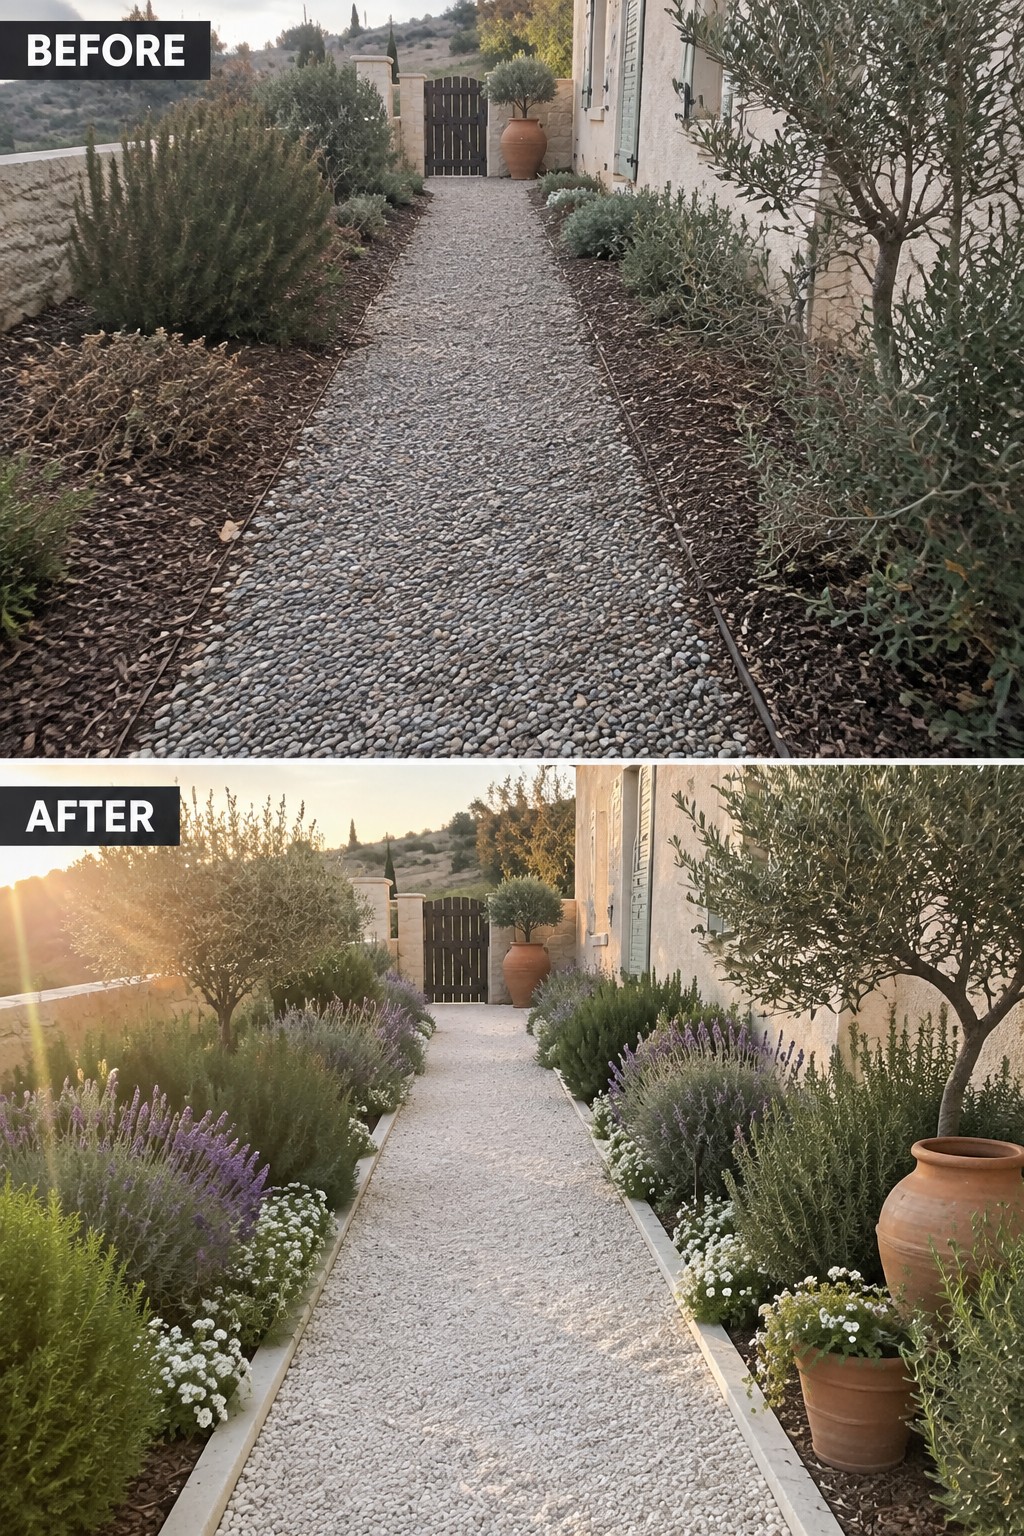
A gravel path often looks unfinished when the edges are loose and the beds beside it lack any clear shape. Adding a simple stone edge on both sides turns the same path into something that feels planned and easy to maintain. The planting can then stay low and full without spilling onto the gravel.
This idea works best in sunny gardens where you want structure without high upkeep. Install the edging first so the beds have a firm outline, then fill them with a mix of evergreen shrubs and flowering plants that repeat along the length. Leave enough room between the edge and the path so people can walk comfortably.
Define A Gravel Path With Raised Garden Beds

Raised beds give a gravel path real structure when the surrounding garden starts to feel wild. In the before photo the beds were low and the vines had taken over, but the after shows how taller wooden sides keep everything contained while still letting the gravel do its job as a simple walkway.
This works best in long narrow spaces where you need both planting room and a clear route through. Use the same wood tone for the beds on both sides so the path feels intentional, and keep the plantings mixed in height so nothing blocks the way.
Create Neat Garden Borders Along A Gravel Path

The biggest shift in this garden is how the path edges went from ragged grass and sprawling shrubs to neat, contained beds. A low stone border holds everything in place and gives the lavender and roses a clear home right along the gravel. The result feels much more planned without losing the casual feel of the path itself.
This approach works best when your path already functions well but the sides look neglected. Lay the edging first to set the shape, then plant in layers so nothing spills onto the gravel. It suits smaller gardens or side yards where you want structure without adding new hardscaping.
Give A Gravel Path More Structure With Pavers

A plain gravel path can start to feel flat and unfinished when it runs between garden beds for a long stretch. Adding sections of brick pavers breaks up the length, creates a clear walking surface, and gives the whole area a more settled look without losing the casual feel of gravel.
This approach suits narrow side yards or backyard gardens where the path needs to feel intentional rather than leftover space. Keep the pattern simple, match the brick color to any nearby structures, and focus on solid edging first so the materials stay in place over time.
Add Arches Over A Gravel Path To Create Structure

A plain gravel path can feel a bit exposed and unfinished when it just runs between basic posts. Adding a row of arches gives the path a clear shape and turns it into something you actually want to walk through. The before shows open posts with scattered planting, while the after uses the same path but frames it with climbing roses and simple string lights.
This works best in yards that already have a long path or a straight route between garden beds. Put up the arches first, then let the vines fill in over a season or two. Keep the planting underneath fairly low so the path stays easy to walk and the arches remain the main feature.
Add Stone Edging To Shape A Loose Gravel Path
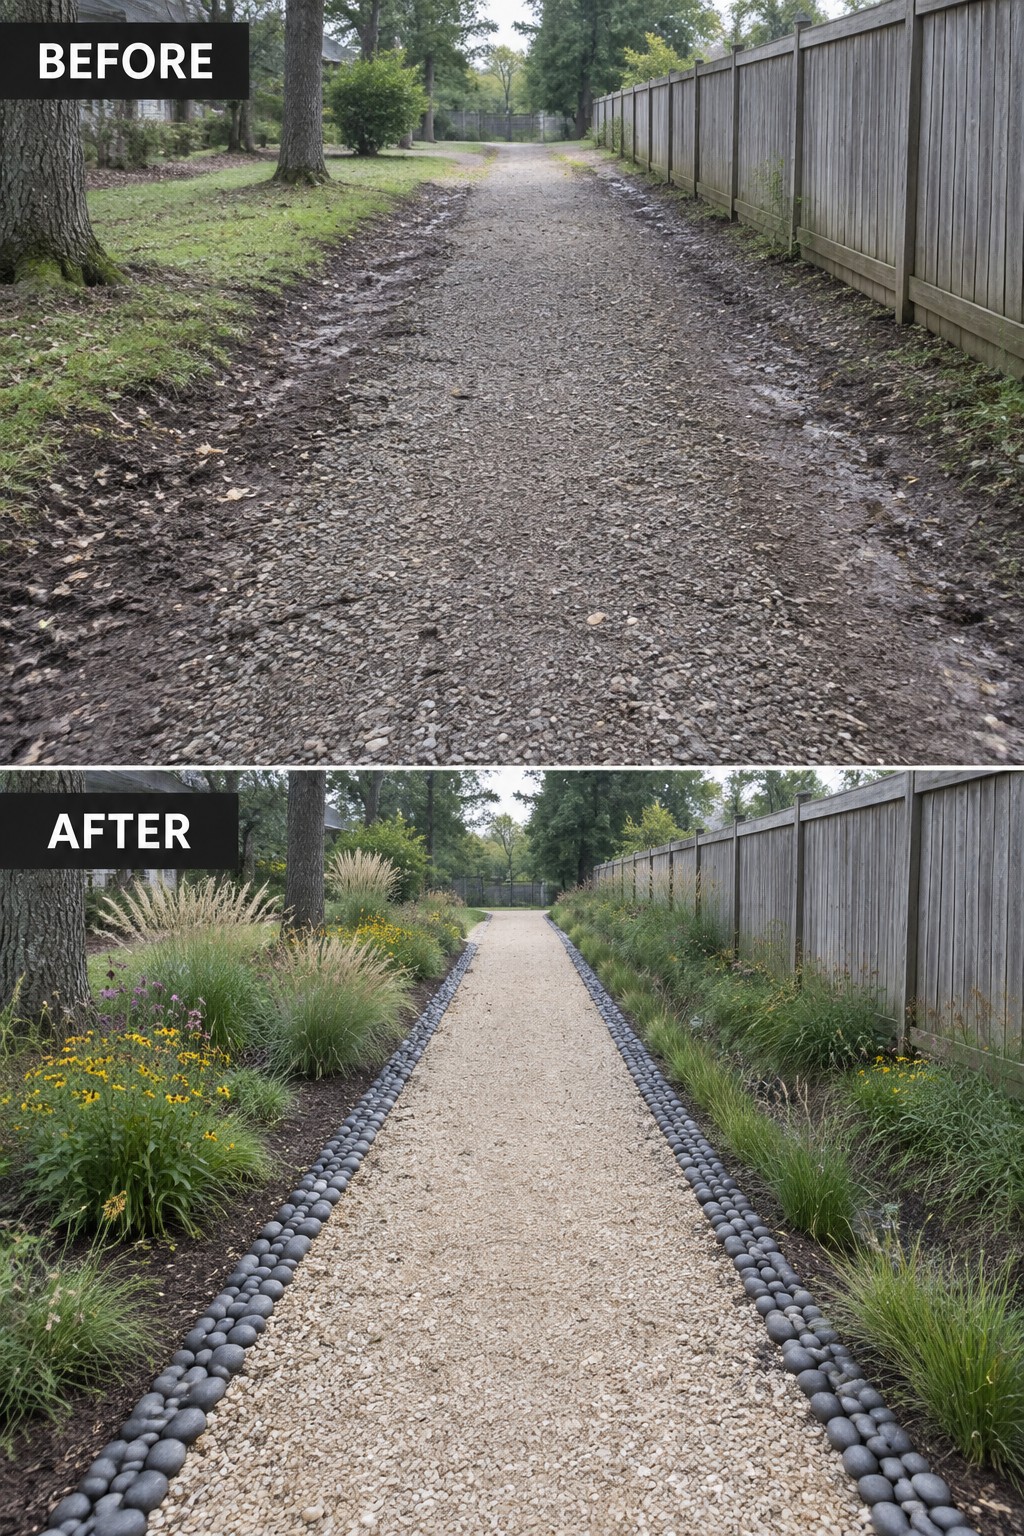
A gravel path often starts to spread and look messy once it loses any clear edge. In this case the simple addition of a low stone border kept the gravel contained, created a clean line, and gave the garden beds on each side a place to stop. That one change turned an uneven track into a walkway that feels intentional instead of accidental.
This approach works best along side yards or between a fence and existing trees where you want a path but do not want to install full paving. Lay the edging first so the gravel stays put, then plant the beds right up to the stones. Low grasses and yellow flowers like the ones shown here soften the line without crowding the walkway.
Frequently Asked Questions
Q: How do I stop weeds from coming up through the gravel? A: Start with landscape fabric under the gravel. Spread it out flat before you pour anything on top. This blocks most seeds from reaching soil.
Q: What depth works best for these paths? A: Go for at least two inches deep. That gives enough coverage to hide the ground and stay in place. Shallower layers tend to shift too easily.
Q: Can heavy rain wash the gravel around? A: Pick a gravel with some angular edges. Those lock together better than round stones. Add a slight slope to the path if your yard drains poorly.
Q: Do I need to edge the path somehow? A: Yes, simple borders like bricks keep everything contained. They stop gravel from spilling into your garden beds.
