

I often find that flower beds lose definition when there is no clear edge to hold the soil and plants in place.
Mulch alone can only do so much if the border is missing, so I usually start there when tidying up an area.
Simple borders make the whole space feel more finished.
Once the edges are set, spreading mulch becomes an easy next step that protects the soil and reduces weeds.
I keep photos of the versions that worked well so I can try them again in other parts of the yard.
Refresh Flower Beds With Fresh Mulch
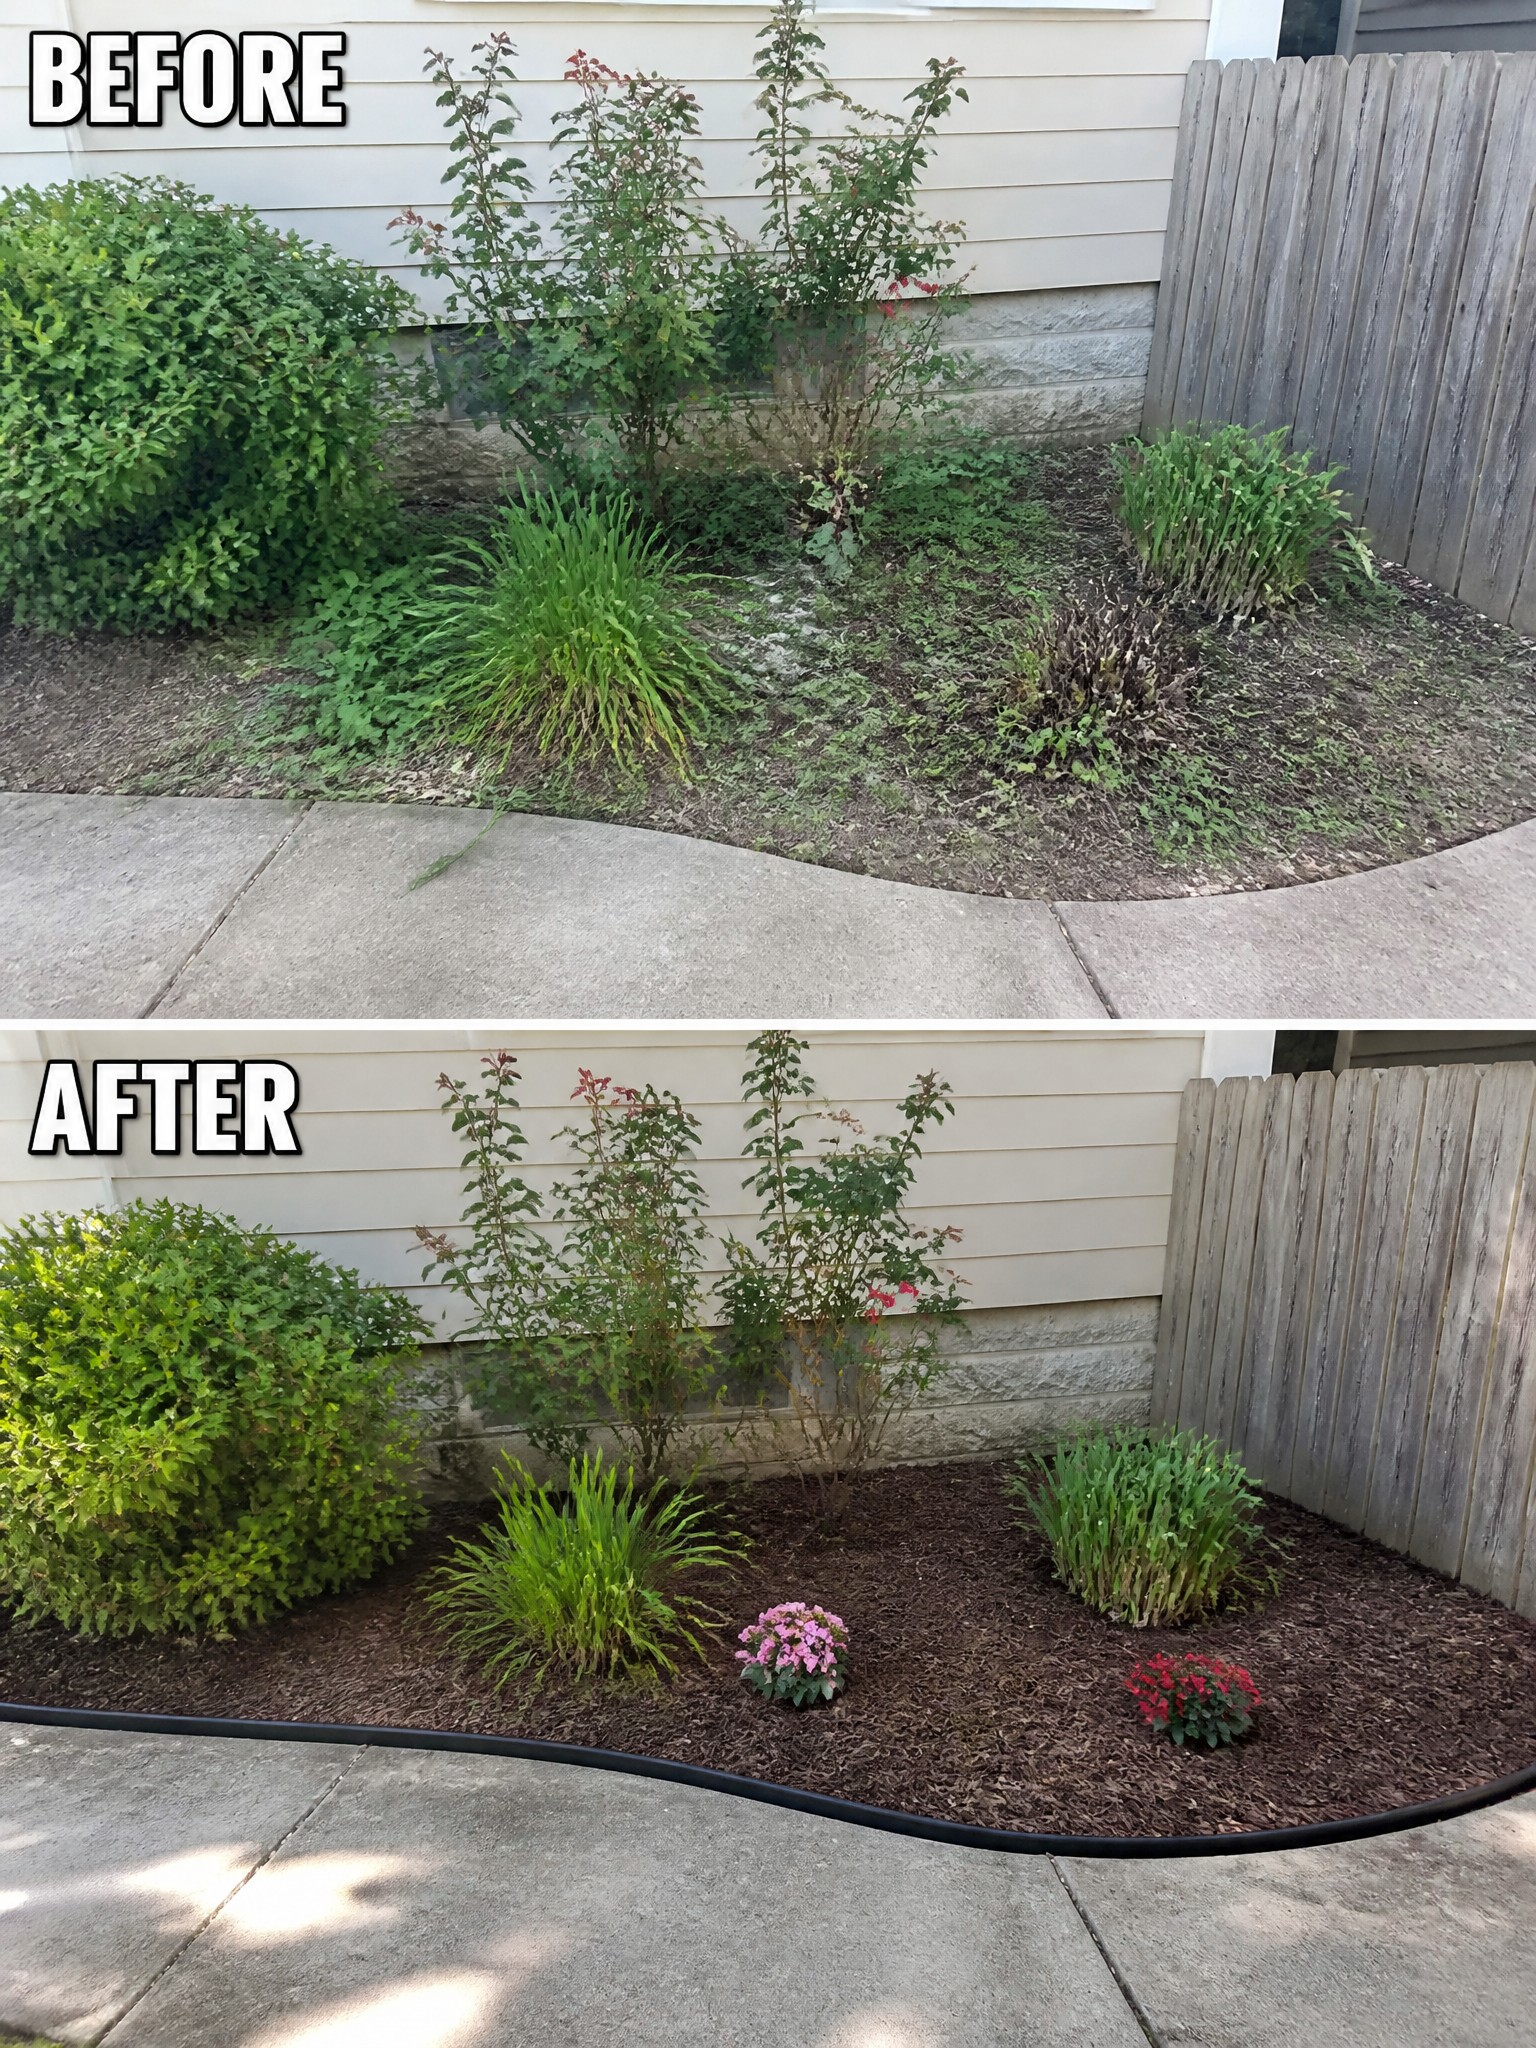
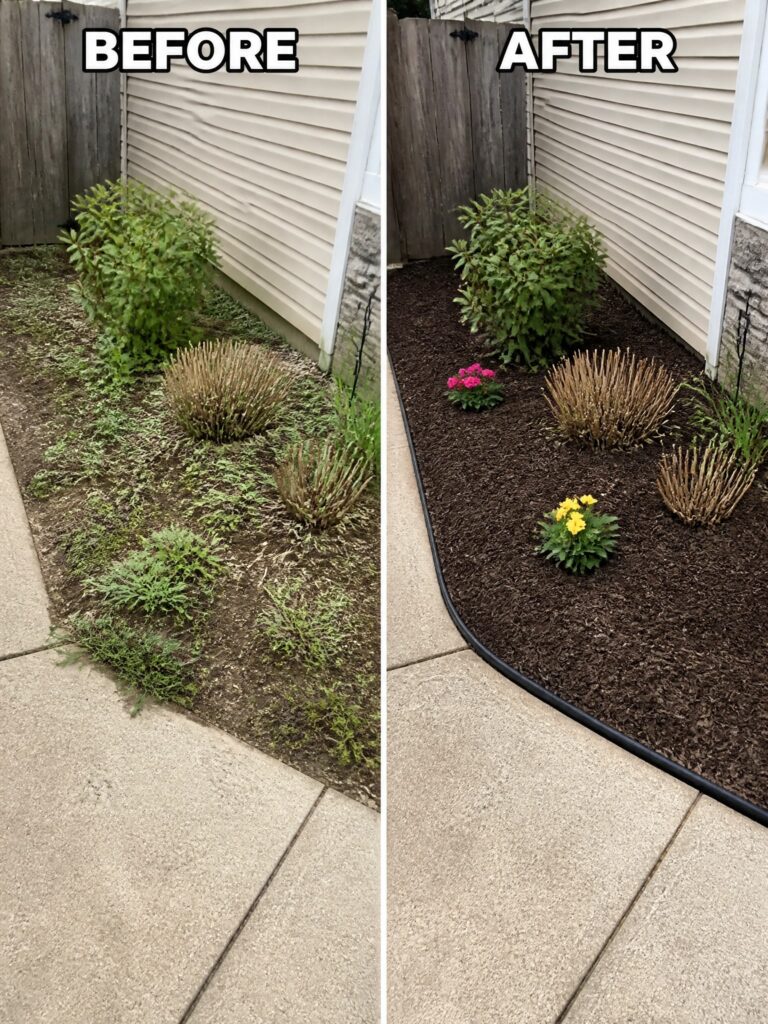
A messy bed next to the house can drag down the whole yard even if the plants are still alive. In this case the before photo shows patchy growth and thin ground cover that made the area look neglected. The after photo shows how a layer of dark mulch pulled everything together and gave the bed a finished edge along the walkway.
This approach works well on small beds where you want quick results without replanting everything. Start by clearing weeds and trimming back what is worth keeping. Then spread mulch a few inches deep and add a couple of small flowering plants for color if the bed feels too bare. It keeps the space looking neat through the seasons and makes future weeding easier.
Define Flower Beds With Simple Edging And Mulch
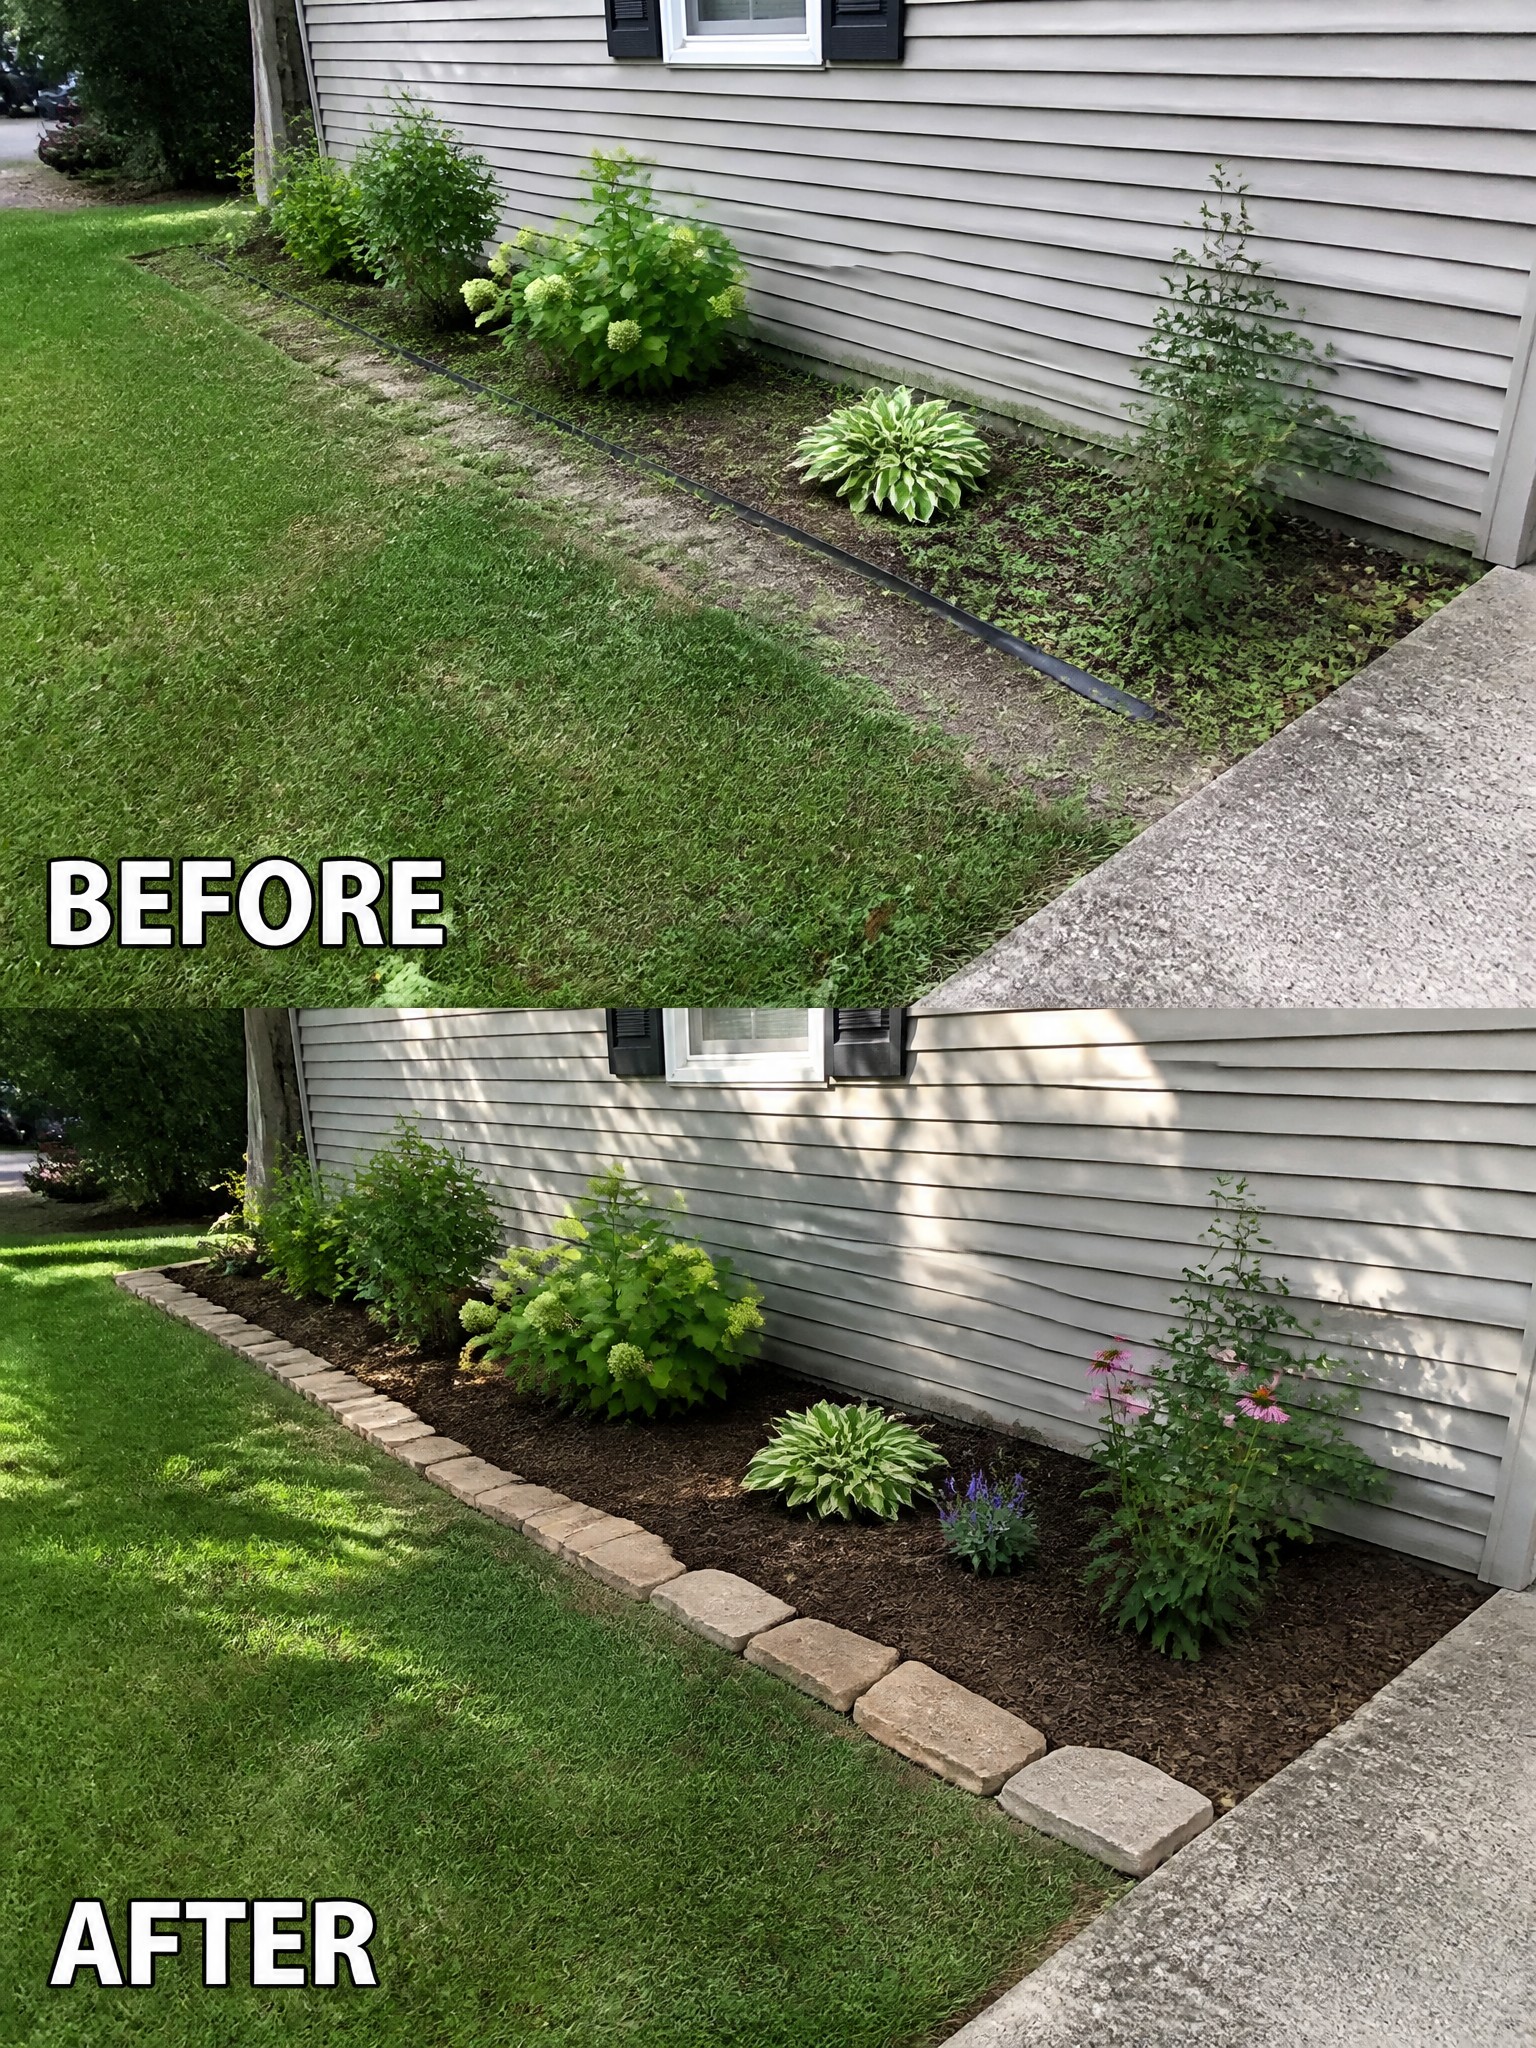
A plain strip of ground along the house often ends up looking messy because there is no clear edge to hold the plants and soil in place. Adding a low stone border and a layer of mulch gives the bed a finished shape and keeps everything from spilling onto the lawn.
This approach works best on narrow beds next to foundations or walkways. Lay the edging first so the line stays straight, then spread mulch a few inches deep to cover the soil and reduce weeds. The result stays neat with very little ongoing work.
Shape Flower Beds With Mulch And Edging
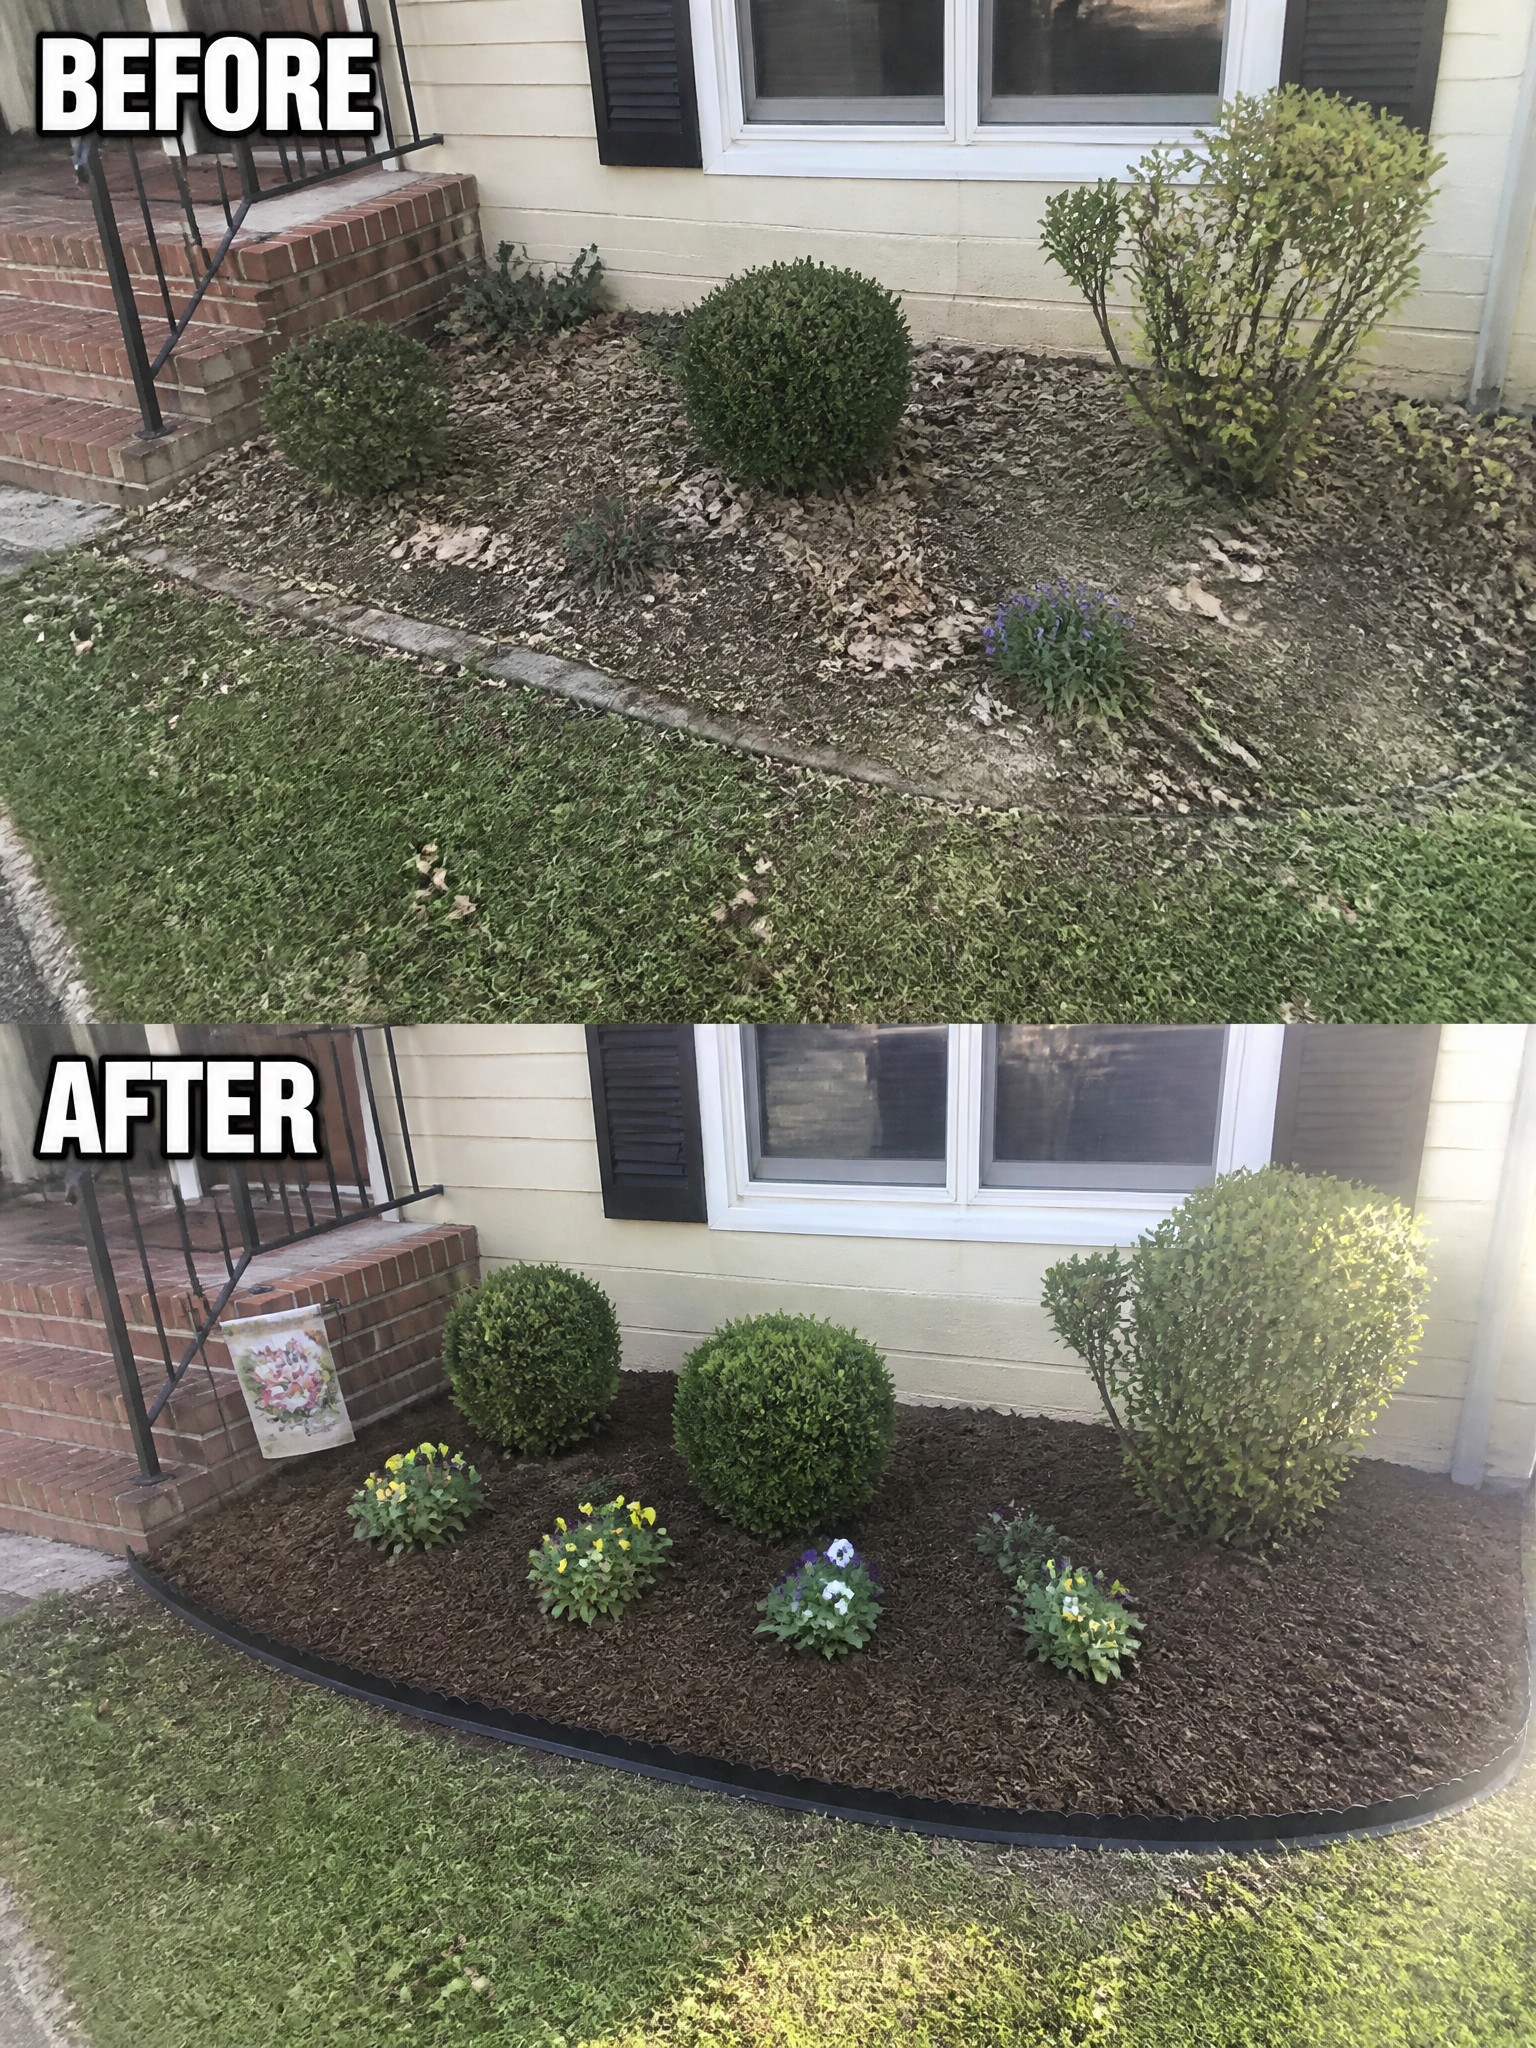
Adding a border and fresh mulch gives the planting area a clear shape and makes the whole front look more cared for. The before photo shows scattered leaves and no real edge, while the after shows how a simple black border and dark mulch pull everything together into one neat bed.
This idea works best along the front of a house where the beds sit right next to the lawn. Lay the edging first to hold the shape, then spread mulch thick enough to cover the soil and cut down on weeds. It keeps the look simple and makes future planting easier.
Define Foundation Beds With Mulch And Borders
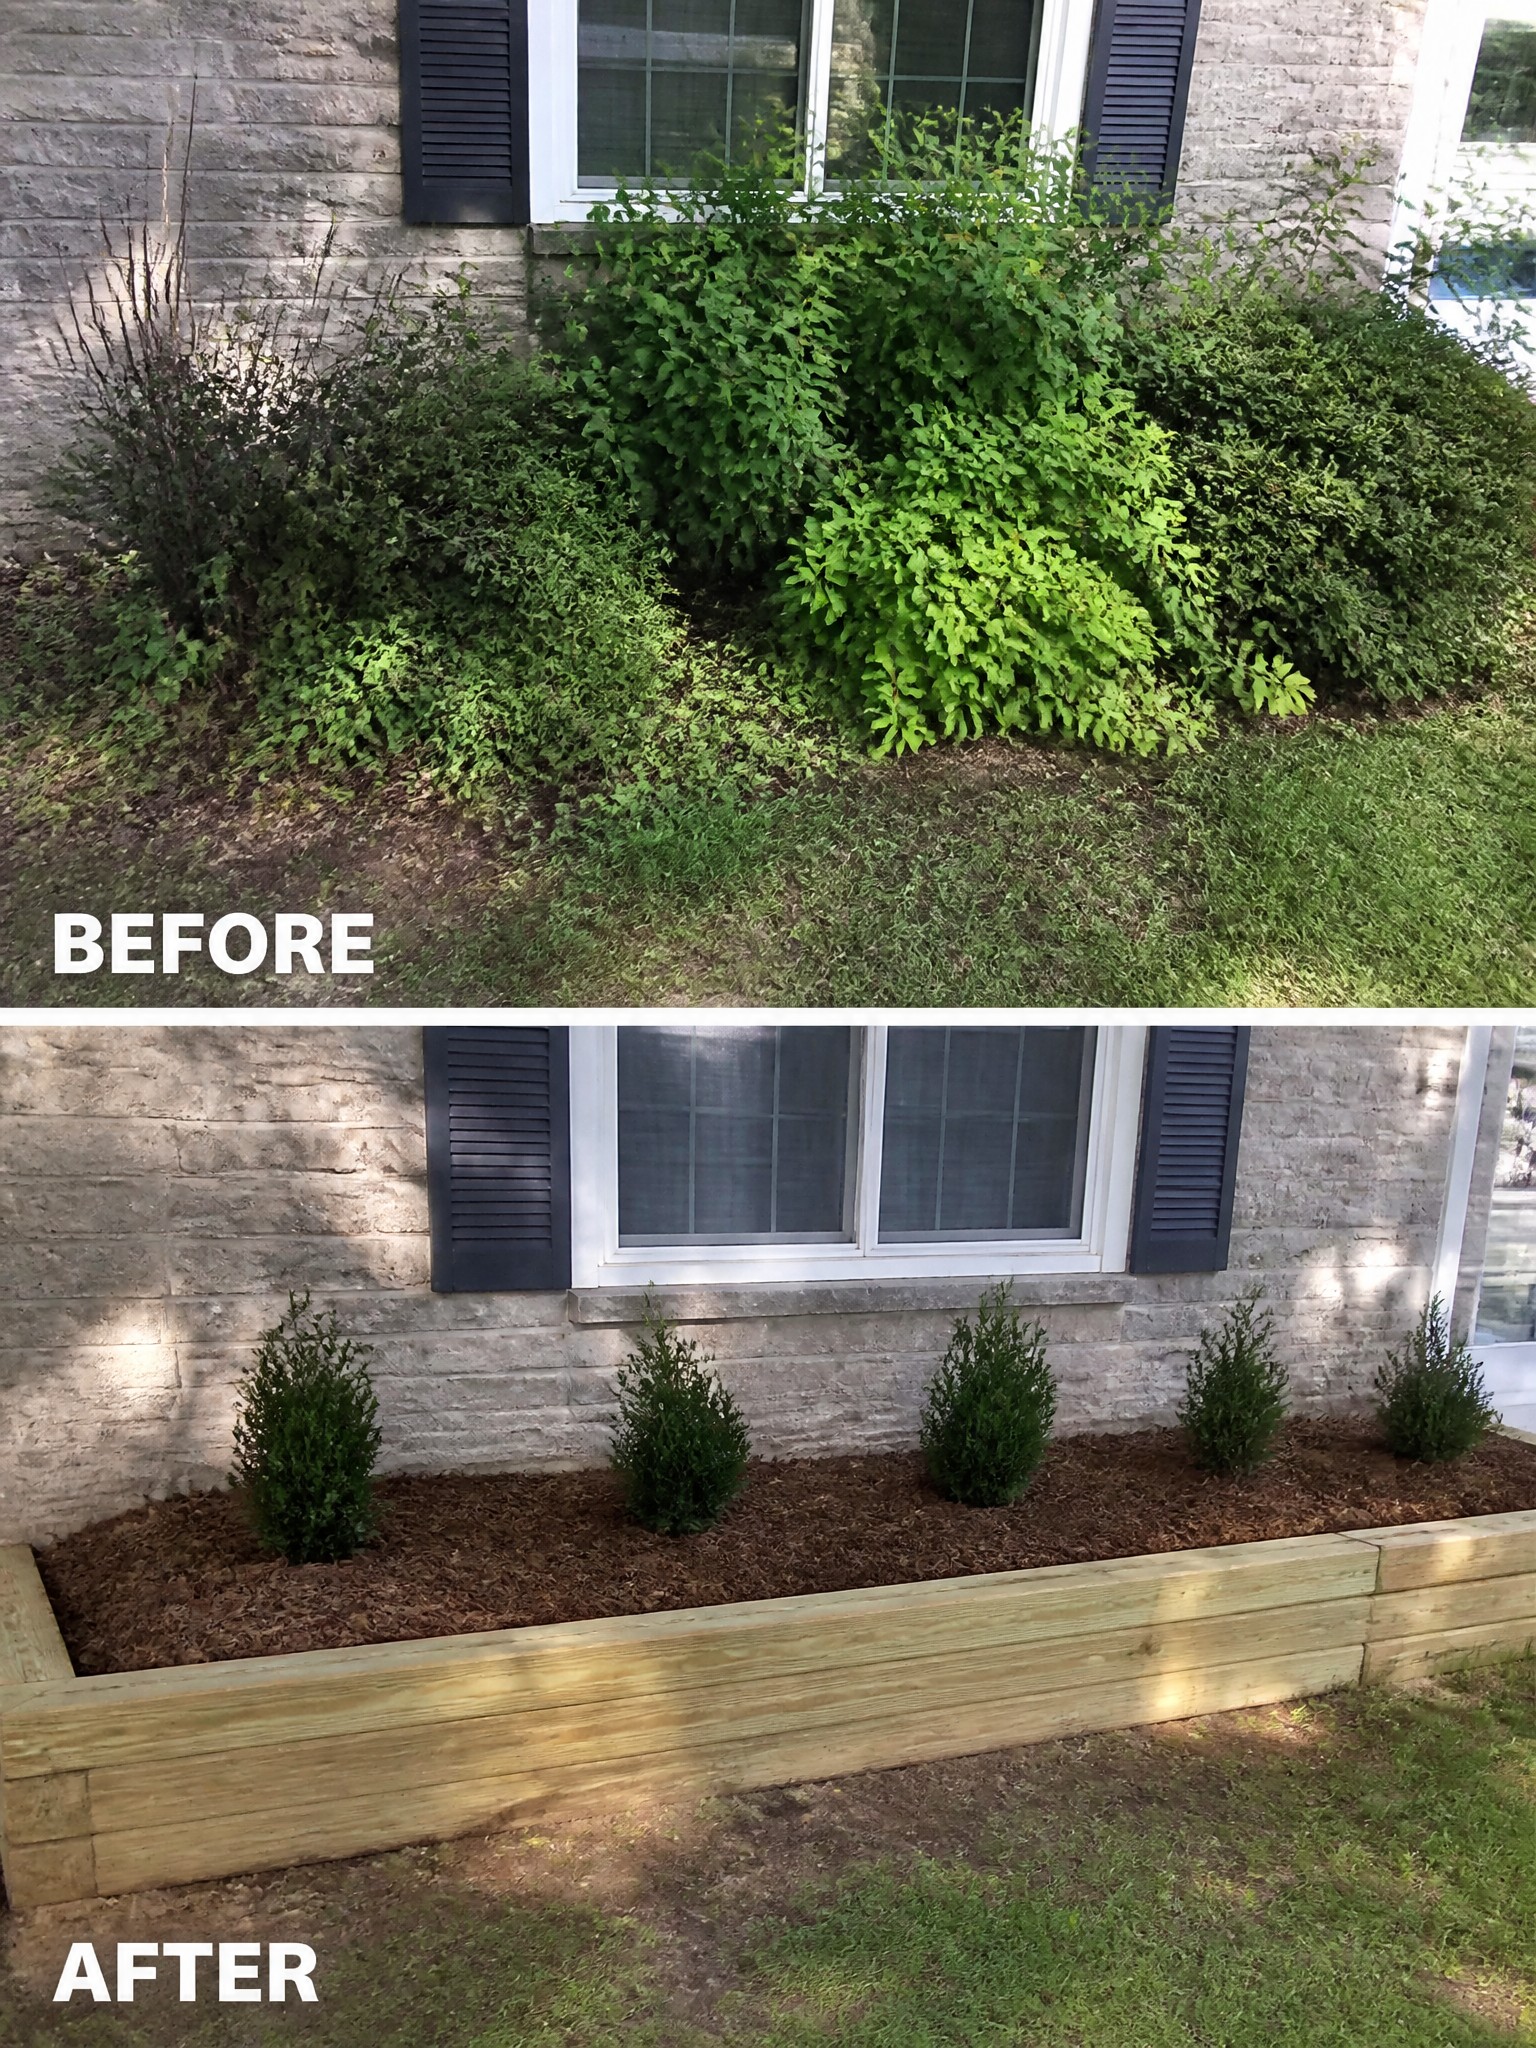
Overgrown shrubs and weeds right against the house can make the whole front look neglected. In this case the fix was simple. The messy plants were pulled out, a wooden border was added to hold everything in place, and fresh mulch was spread to keep the beds looking neat and contained.
This approach works well along any house foundation where plants have gotten out of hand. Start by clearing the area completely, then install a basic border to give the bed a clear shape. Mulch fills in the rest and cuts down on weeds. It is an easy first step before adding more plants or lighting.
Define Flower Beds With Borders And Mulch
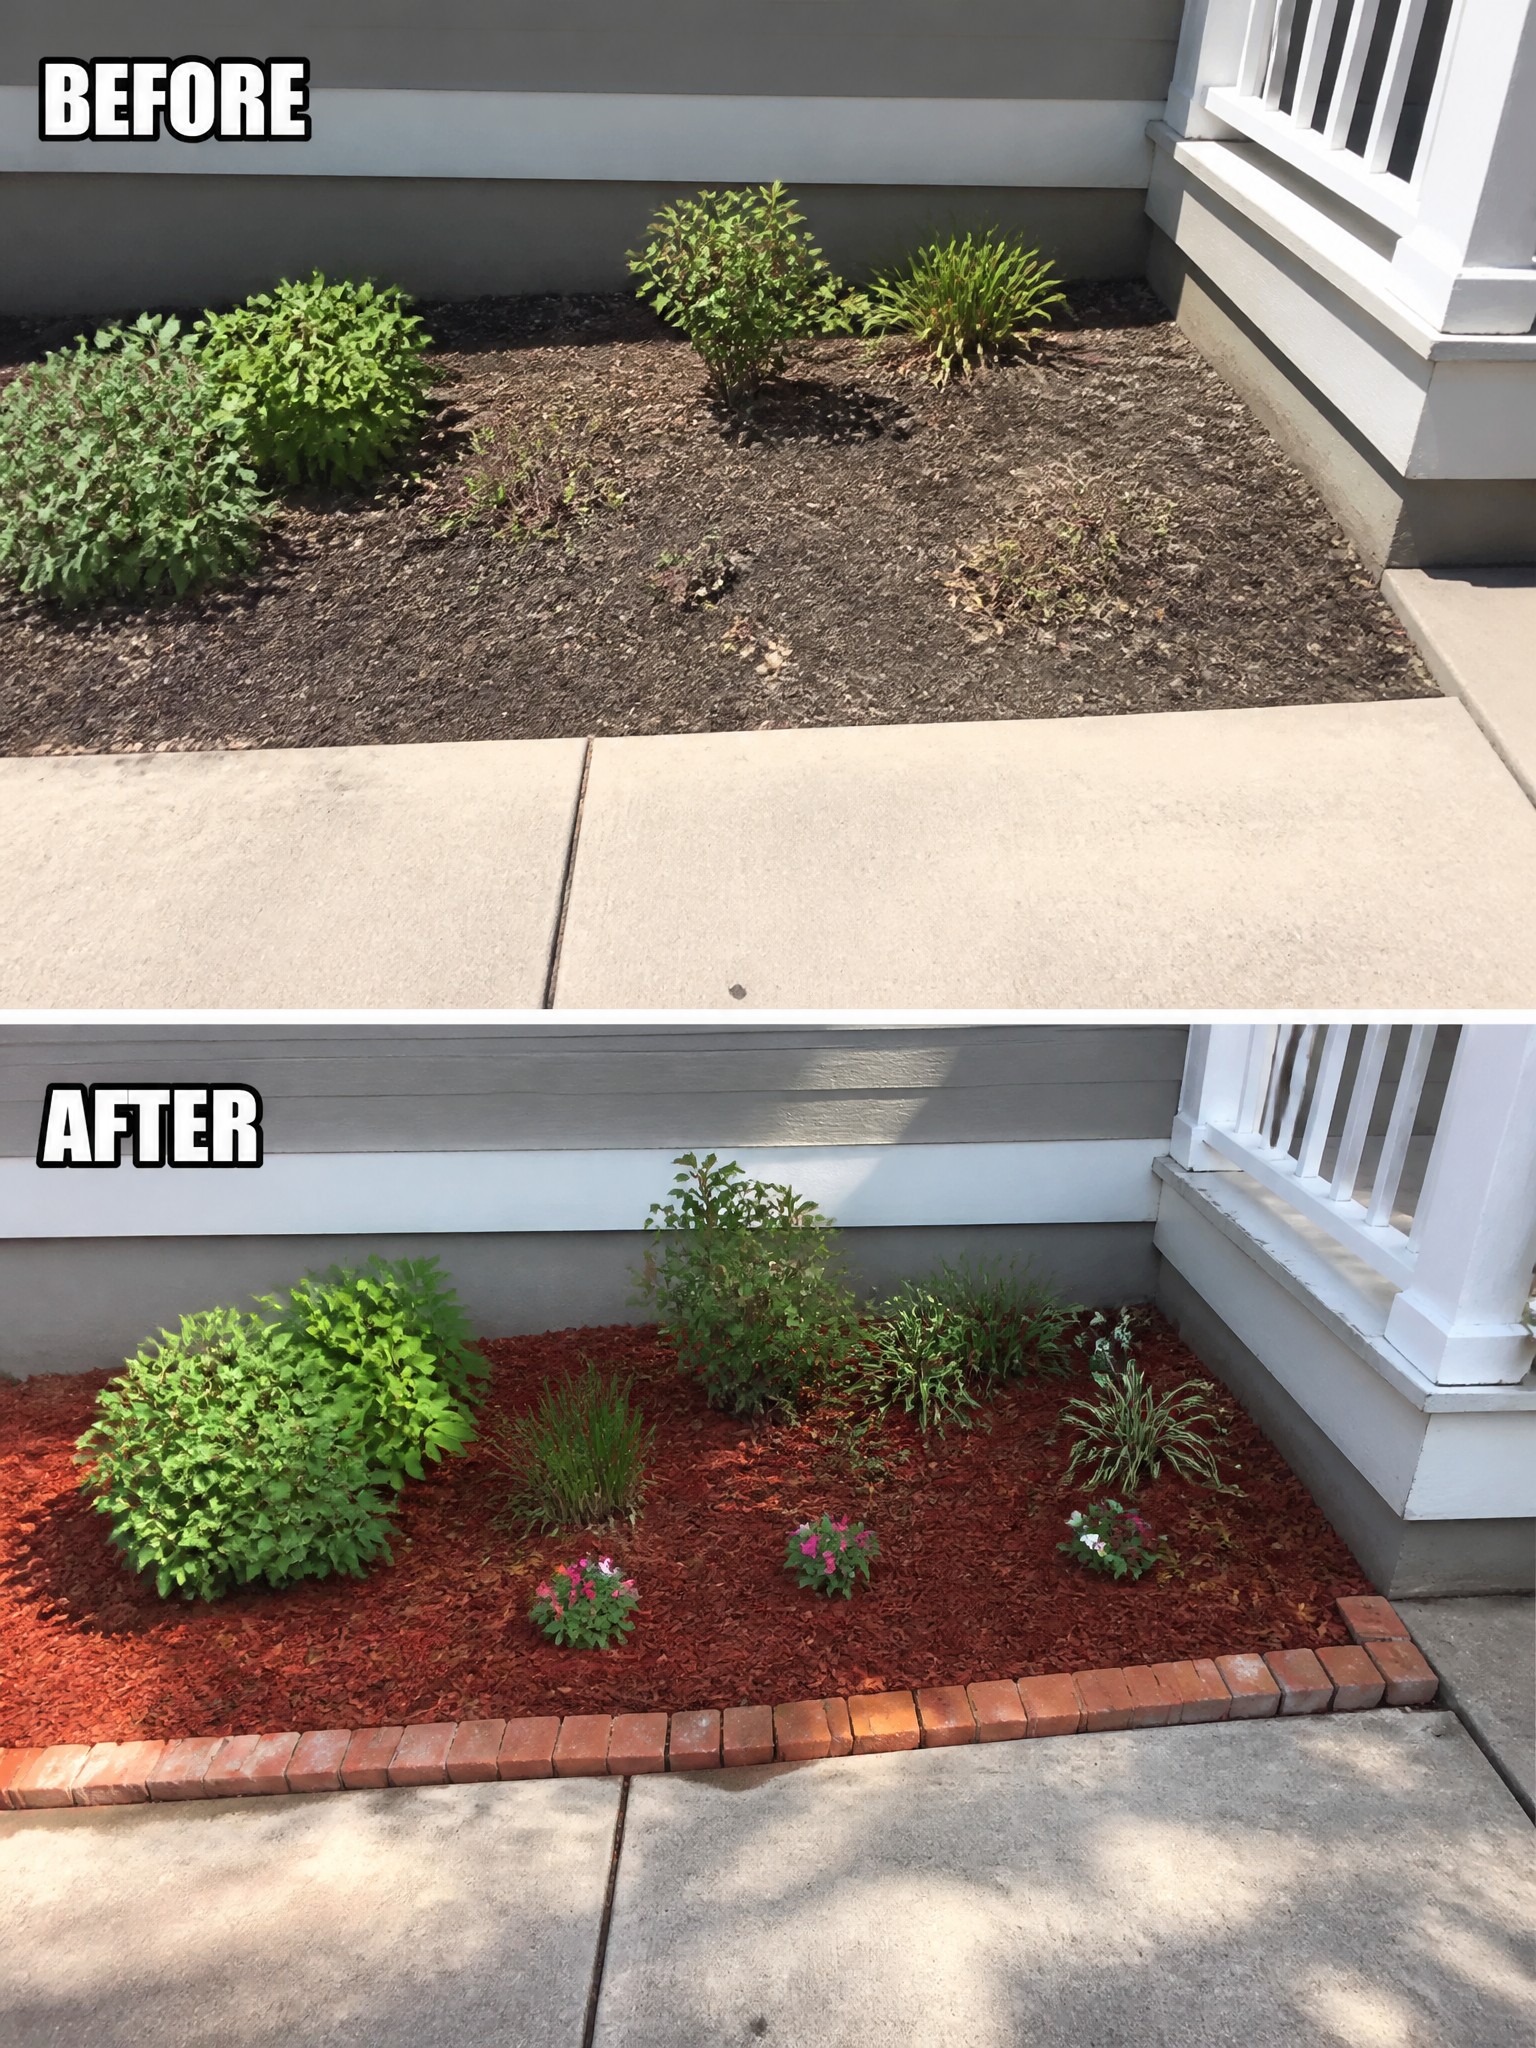
One simple way to refresh a tired flower bed is to add a clear border and a fresh layer of mulch. The before image shows scattered plants and uneven ground cover, while the after shows a straight brick edge and consistent red mulch that makes the bed look finished.
This idea works best along the front of a house or beside a walkway where you want a tidy appearance without major changes. Start by straightening the edges, set the border in place, then spread mulch around the plants you already have. It helps control weeds and gives the area a more planned look with very little cost.
Add Defined Borders And Mulch To A Narrow Strip
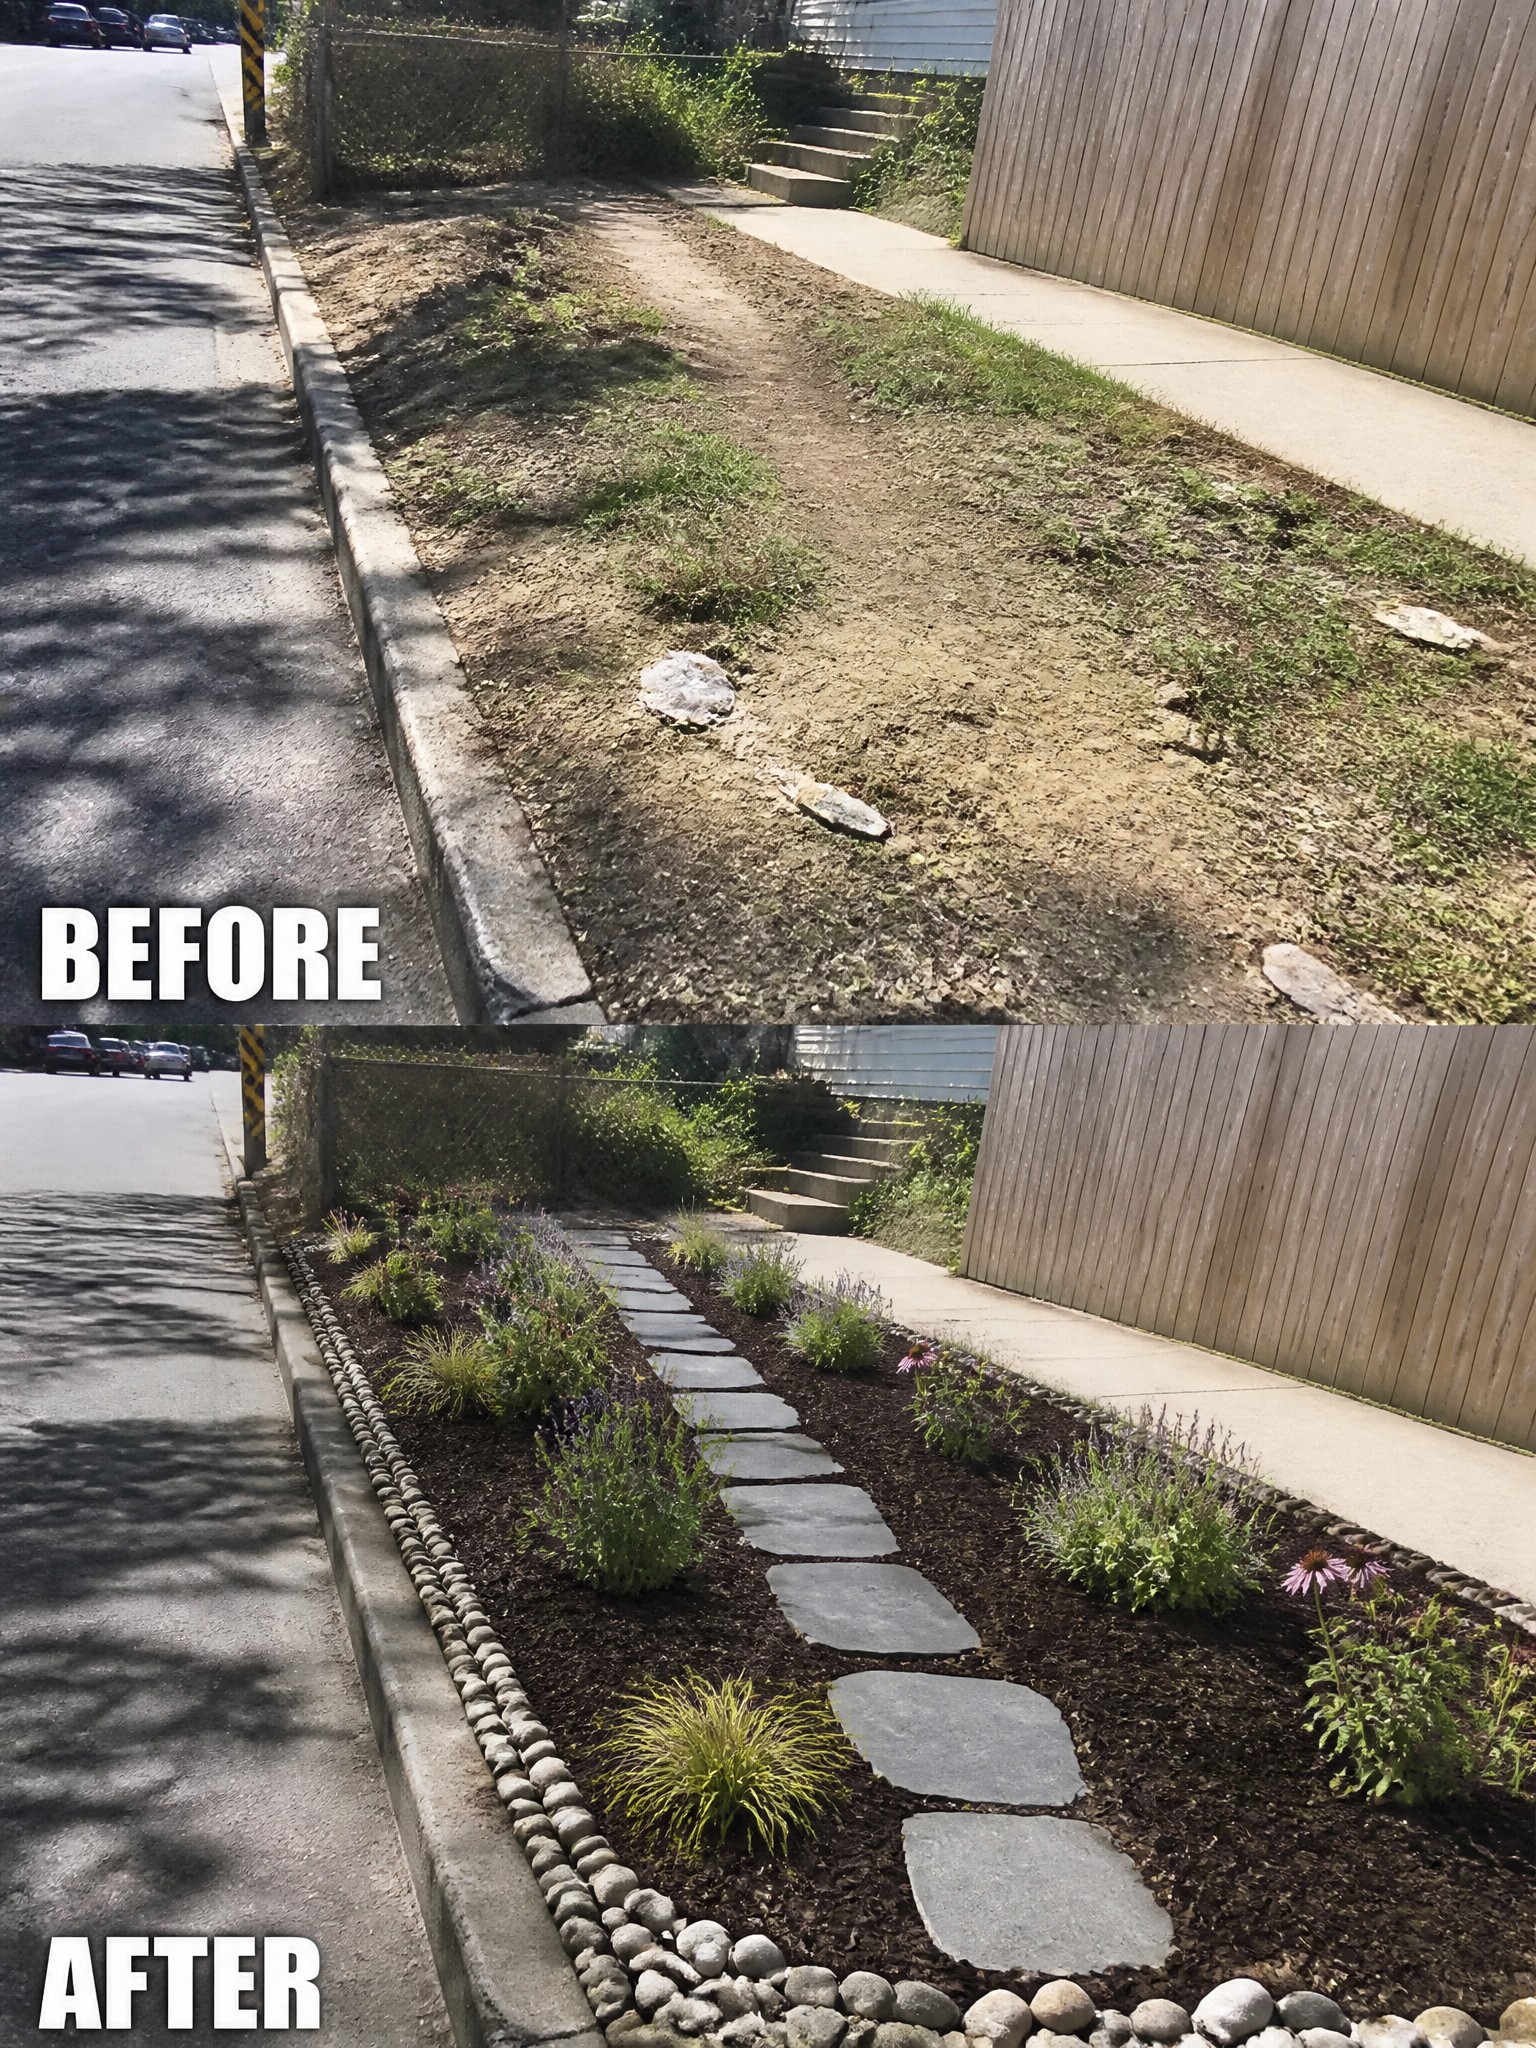
A weedy dirt strip next to a sidewalk often looks messy because it has no clear edges. Adding rock borders and a layer of mulch instantly gives the area shape and keeps the planting contained. The stepping stones also make the space feel more intentional instead of just leftover ground.
This approach works well along driveways, side yards, or fence lines where space is limited. Start by laying out the border first so the mulch stays in place, then choose low plants that can handle the sun exposure in that spot.
Add A Mulched Flower Bed Along A Fence Line

A bare dirt strip next to a fence often looks unfinished and collects weeds quickly. Adding a simple border, mulch, and a few plants gives the area clear shape and keeps the base of the fence looking tidy instead of neglected.
This works best in long side yards or back fence lines where you want low maintenance rather than a full garden. Use a flexible edging to hold the mulch in place, keep the bed narrow enough for easy mowing on the lawn side, and choose plants that match the light conditions along the fence.
Create Defined Flower Beds With Mulch And A Border
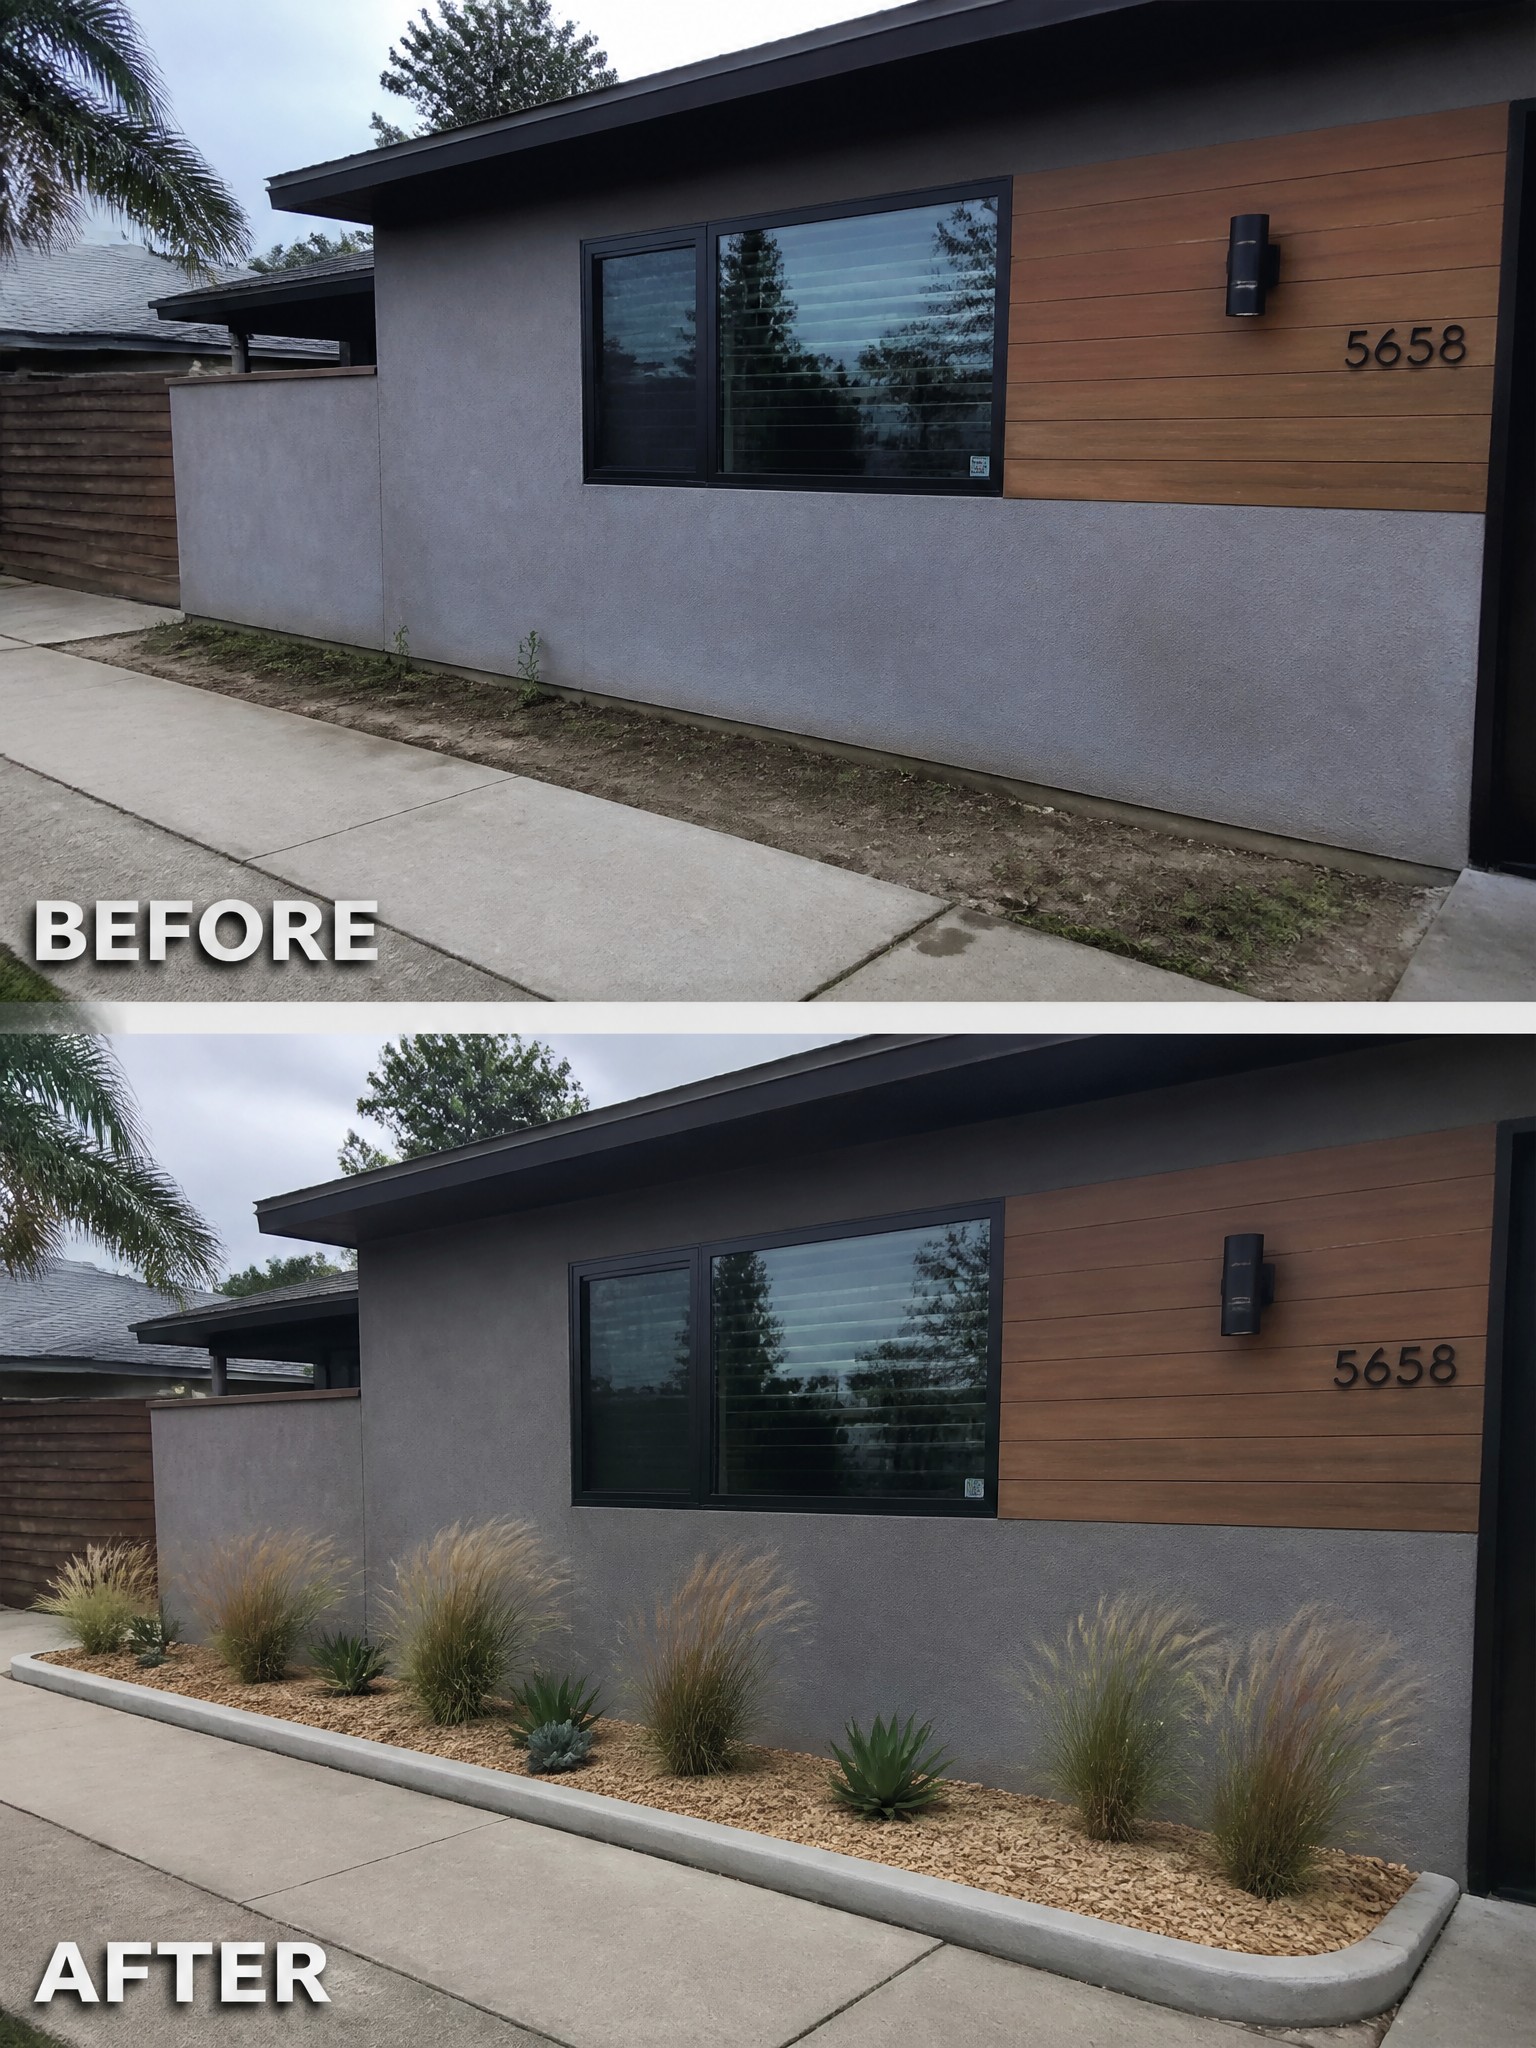
A bare strip of dirt along the foundation makes the front of a house look unfinished. Adding a low concrete border and filling the bed with mulch gives the whole area a settled, intentional look. The plants stay contained and the mulch keeps weeds down while giving the bed a uniform surface.
This approach works well on any house with a long blank wall facing the street or sidewalk. Keep the bed narrow enough to leave room for walking, and choose plants that stay low so they do not block windows. Start with the border and mulch first, then add plants a few at a time so the bed does not feel crowded right away.
Add Terraces To A Sloped Yard
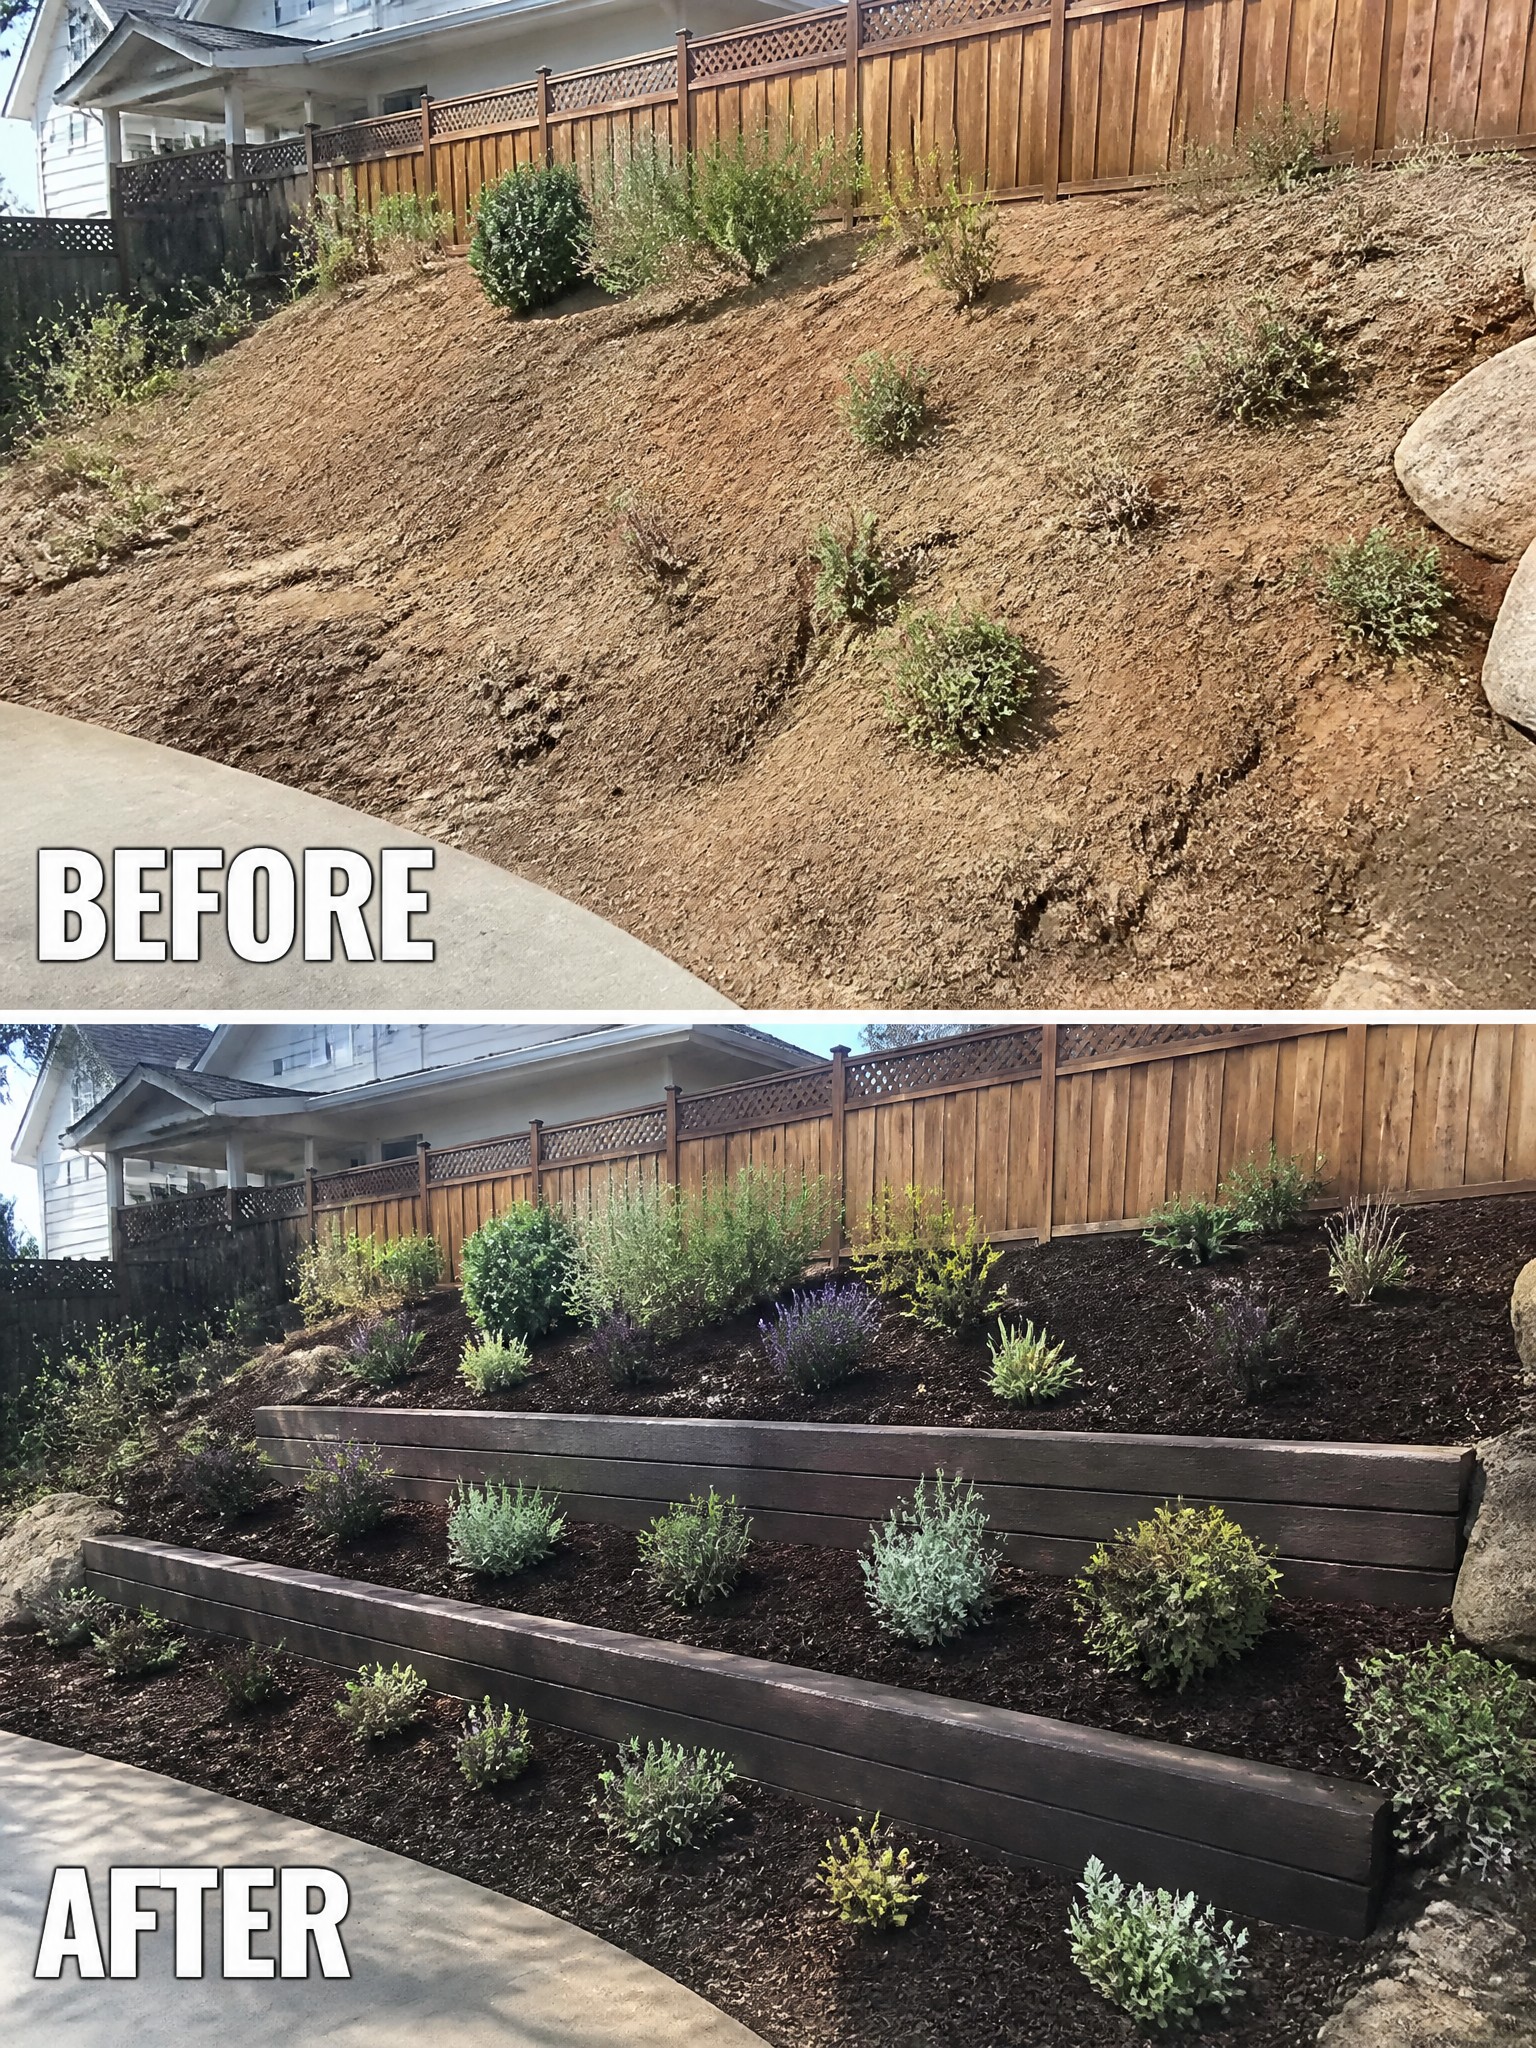
A bare dirt slope often leads to erosion and looks unfinished. Adding wood borders to form simple terraces breaks the hill into manageable levels, holds the soil in place, and creates space for planting without constant runoff.
This approach works well on any home with a noticeable grade. Use pressure-treated lumber for the borders, backfill each level, and cover the soil with mulch. Keep the beds narrow enough to reach from either side so maintenance stays easy.
Define Tree Areas With Mulch And A Border
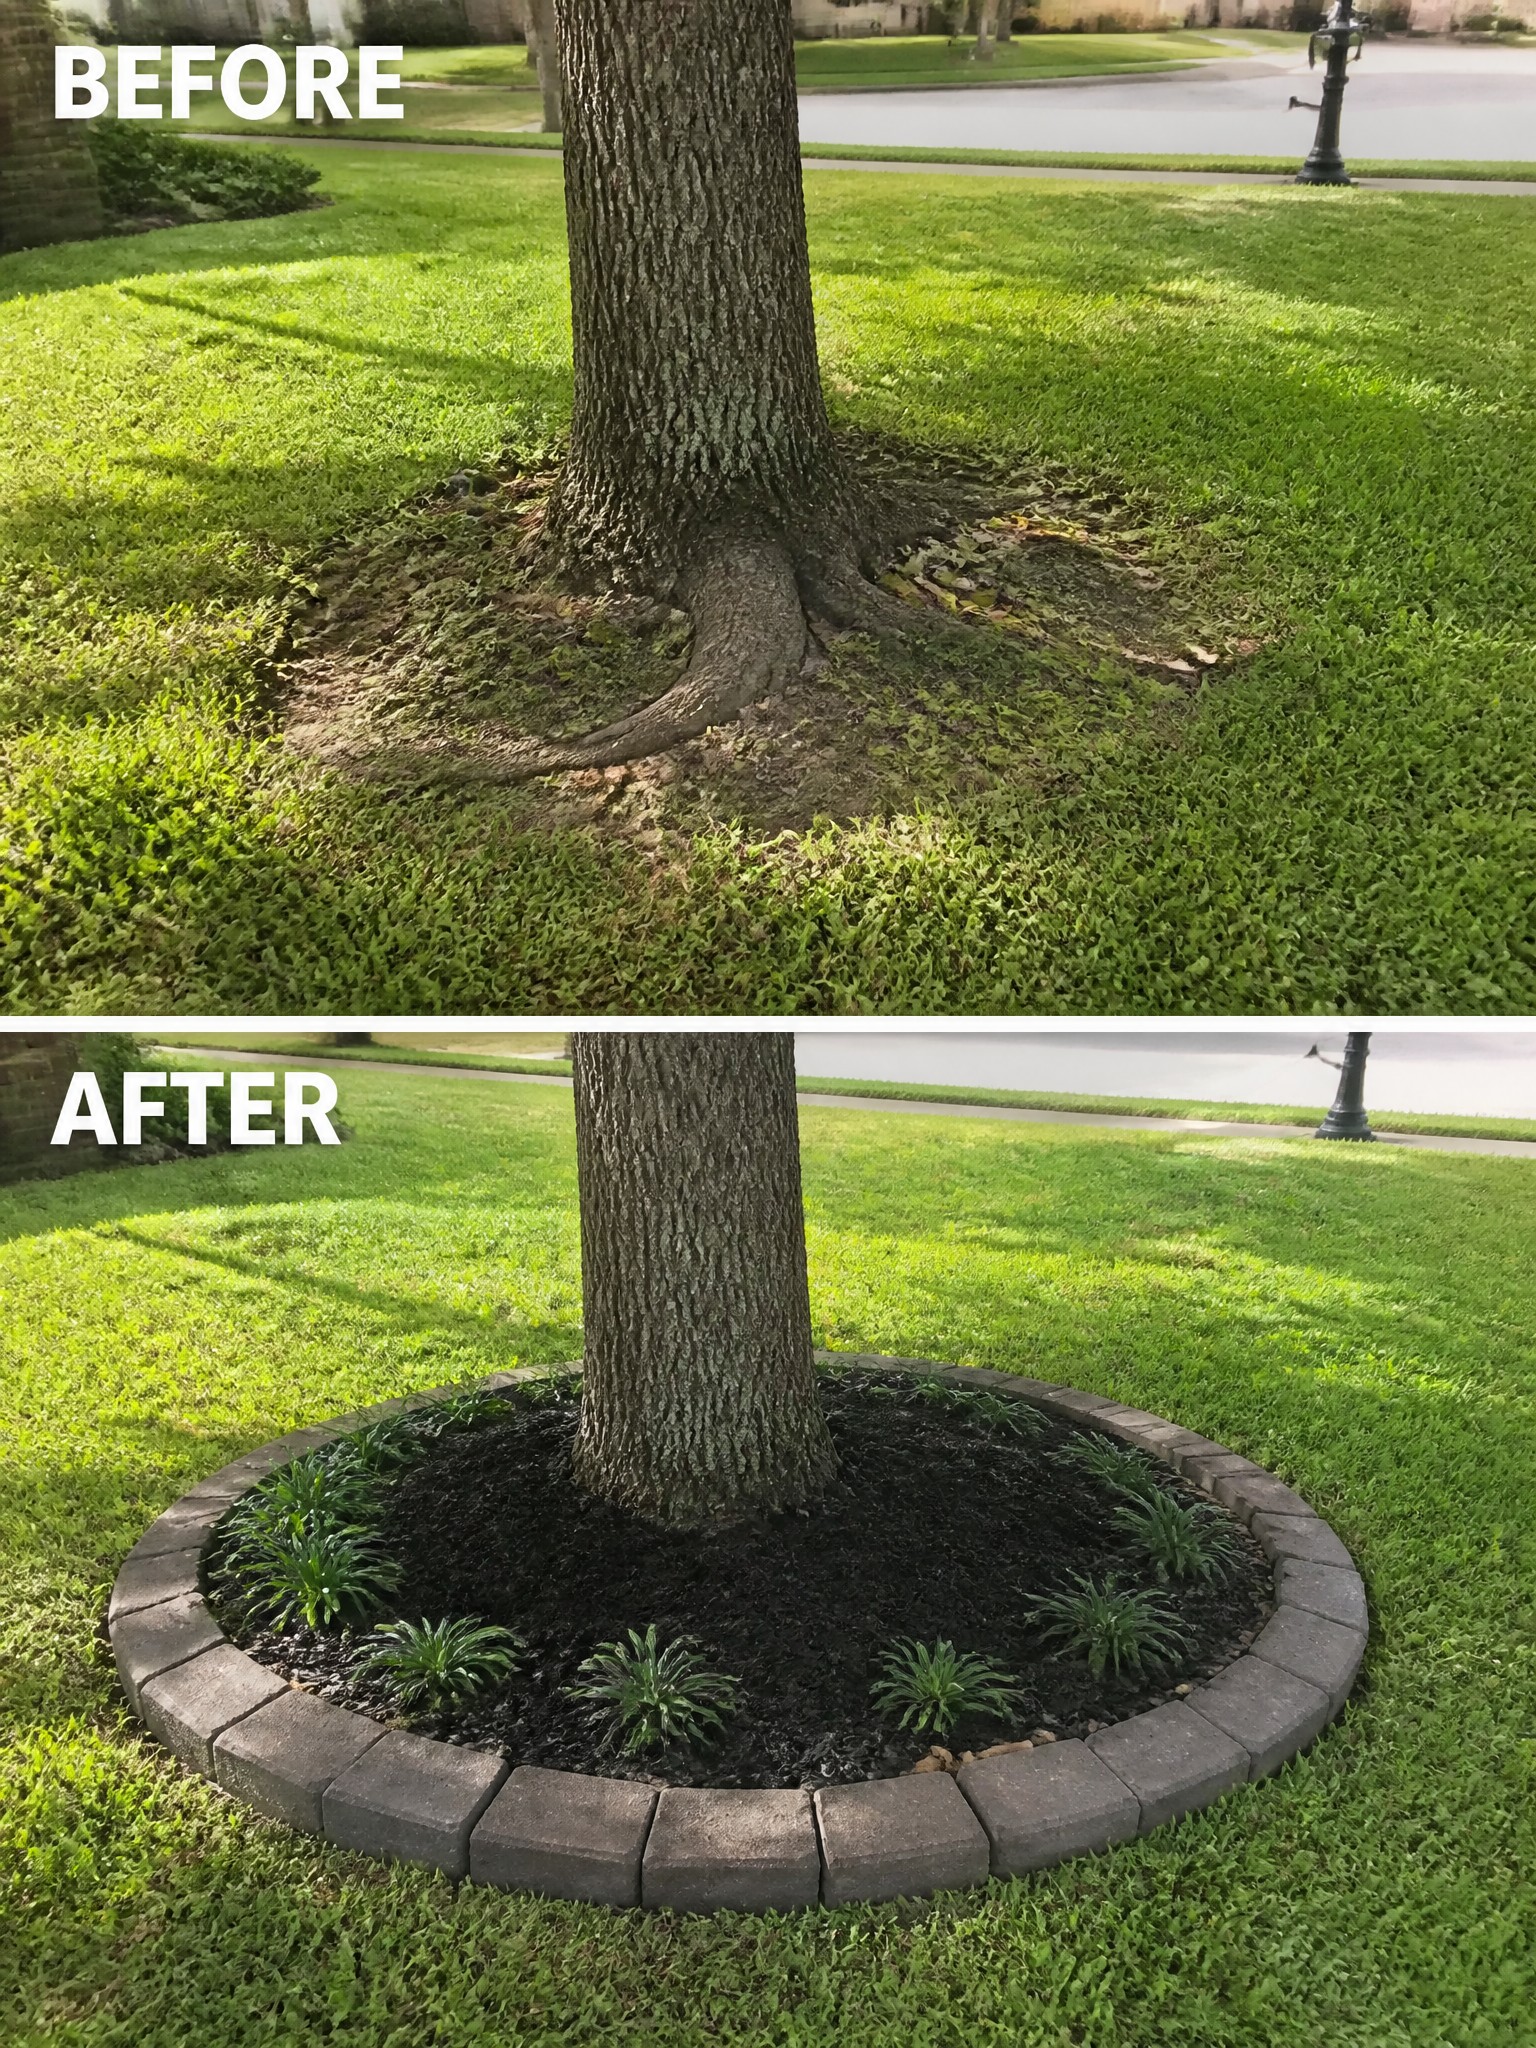
The change here is straightforward. Instead of grass growing right up to the trunk, a simple circular border was added and the inside was filled with mulch and a few small plants. This keeps the area around the tree looking tidy and stops the mower from bumping into the roots.
This idea works well in any front or side yard where trees sit in the middle of the lawn. Start with a basic edging material that matches your other hardscaping, then add mulch thick enough to cover the soil. It keeps the bed looking neat without a lot of extra planting or cost.
Add Stone Borders To Define Your Flower Beds
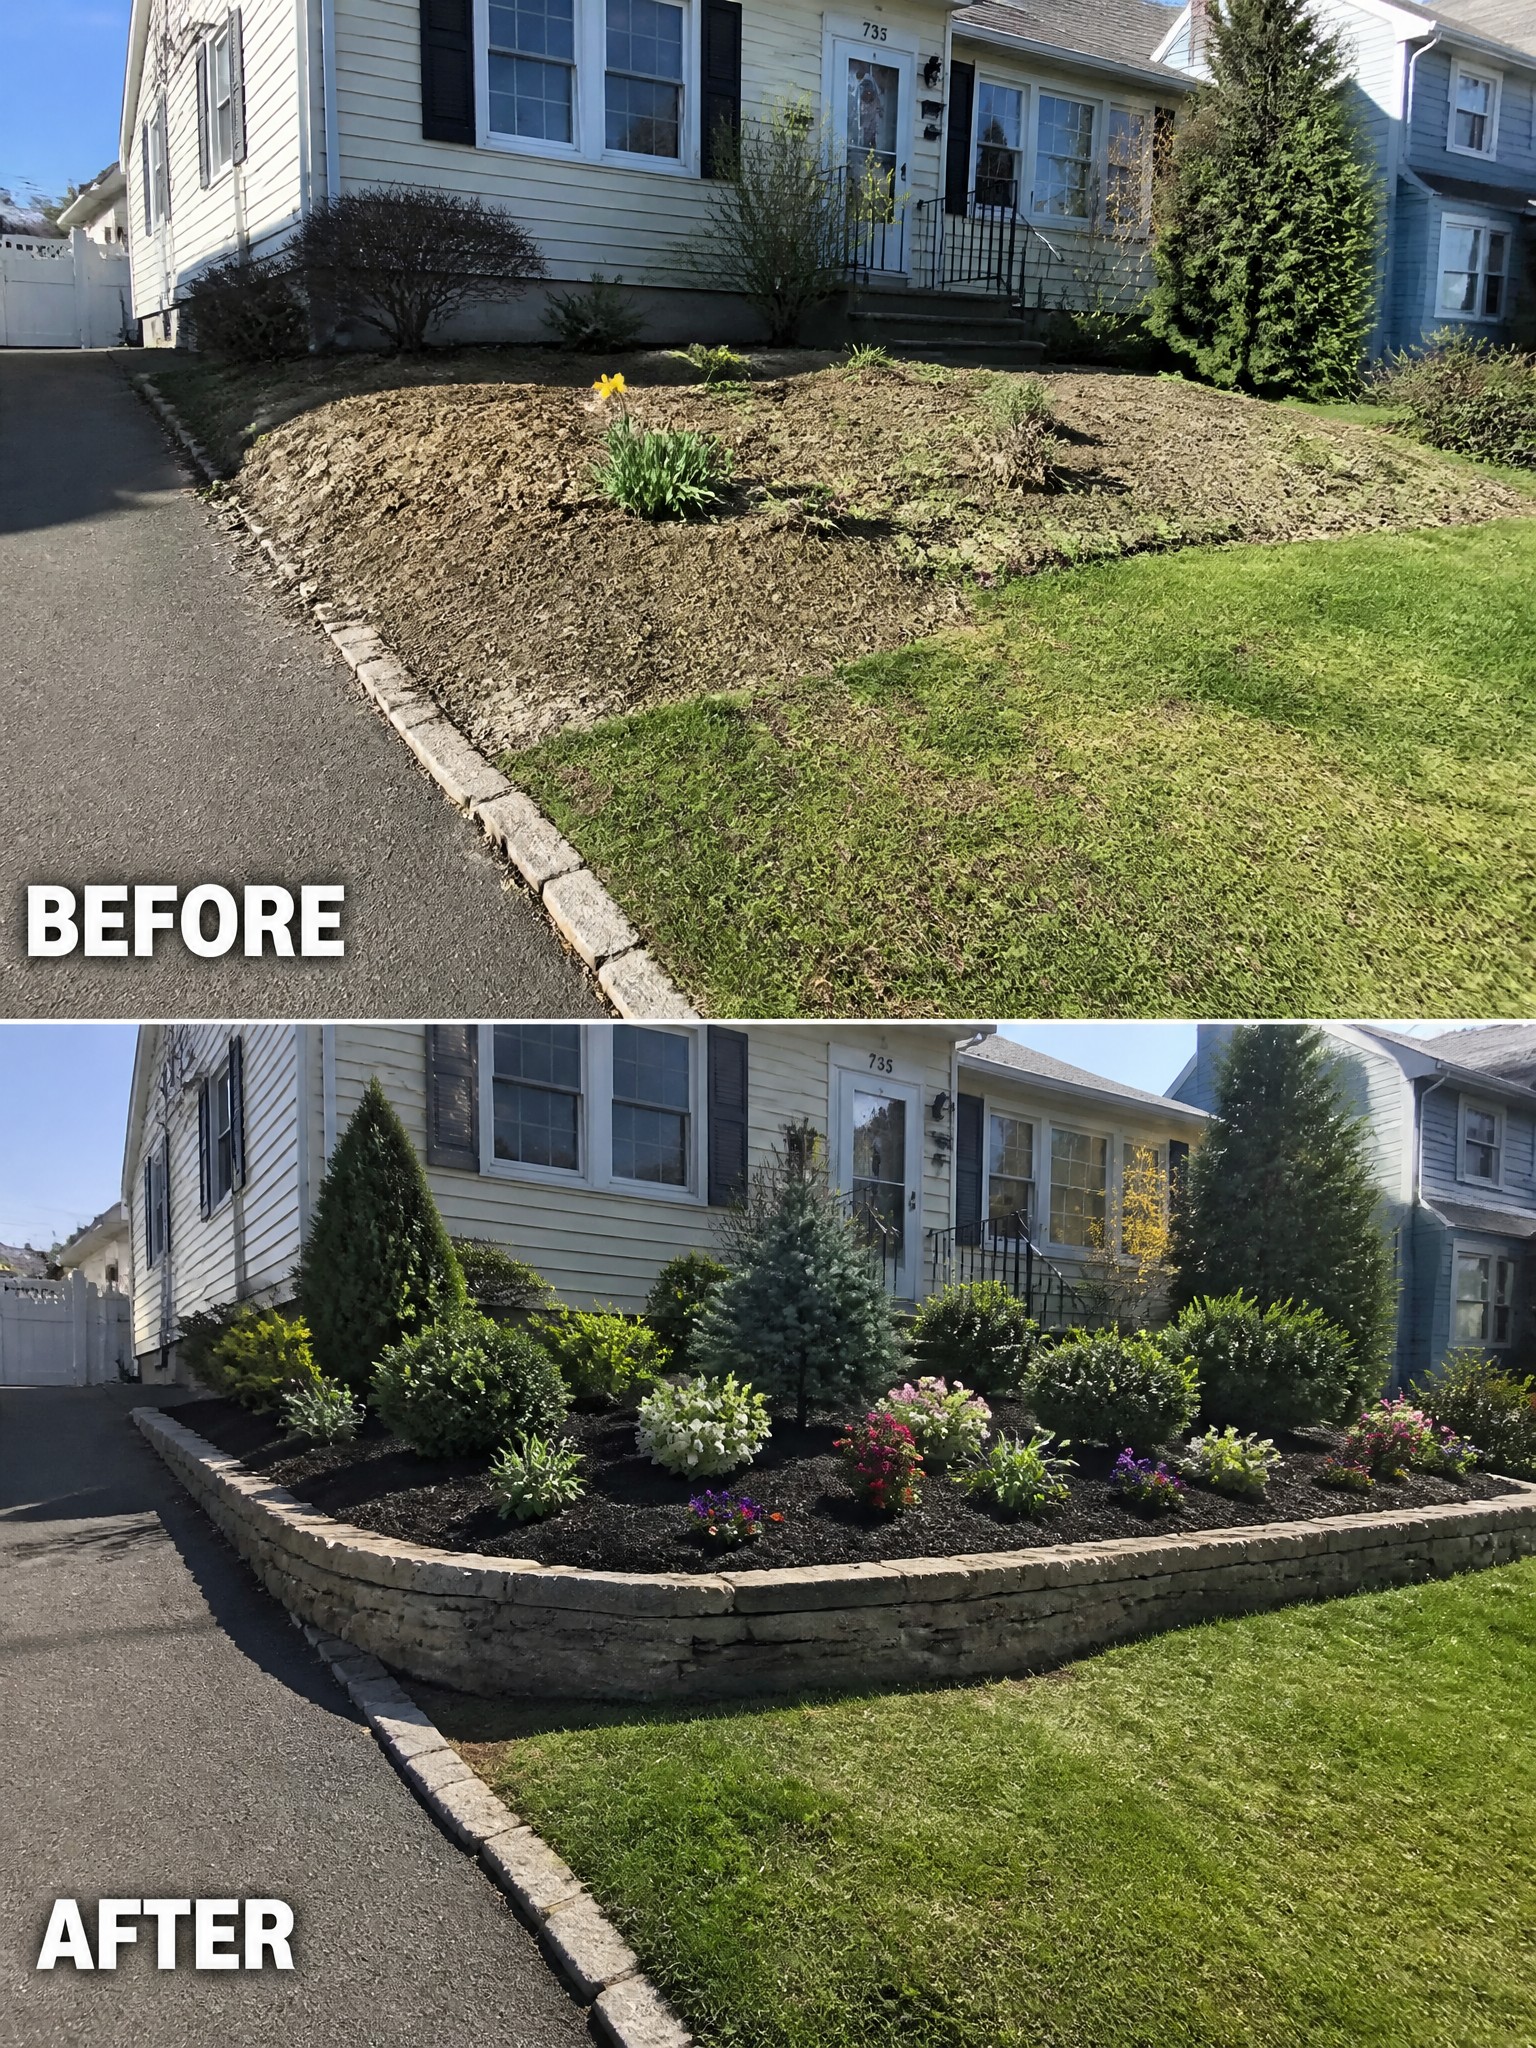
A sloped section of yard next to the driveway often ends up looking messy because the grass and soil keep sliding or mixing together. Adding a low stone border turns that area into a contained bed that holds mulch and plants in place without constant cleanup.
This idea works best on homes where the front yard meets a driveway or sidewalk at an angle. Build the border first so the bed has a clear edge, then add mulch to keep weeds down and make the plants stand out. The same approach helps even small yards feel more organized without needing a full redesign.
Create Defined Garden Beds With Mulch And Edging
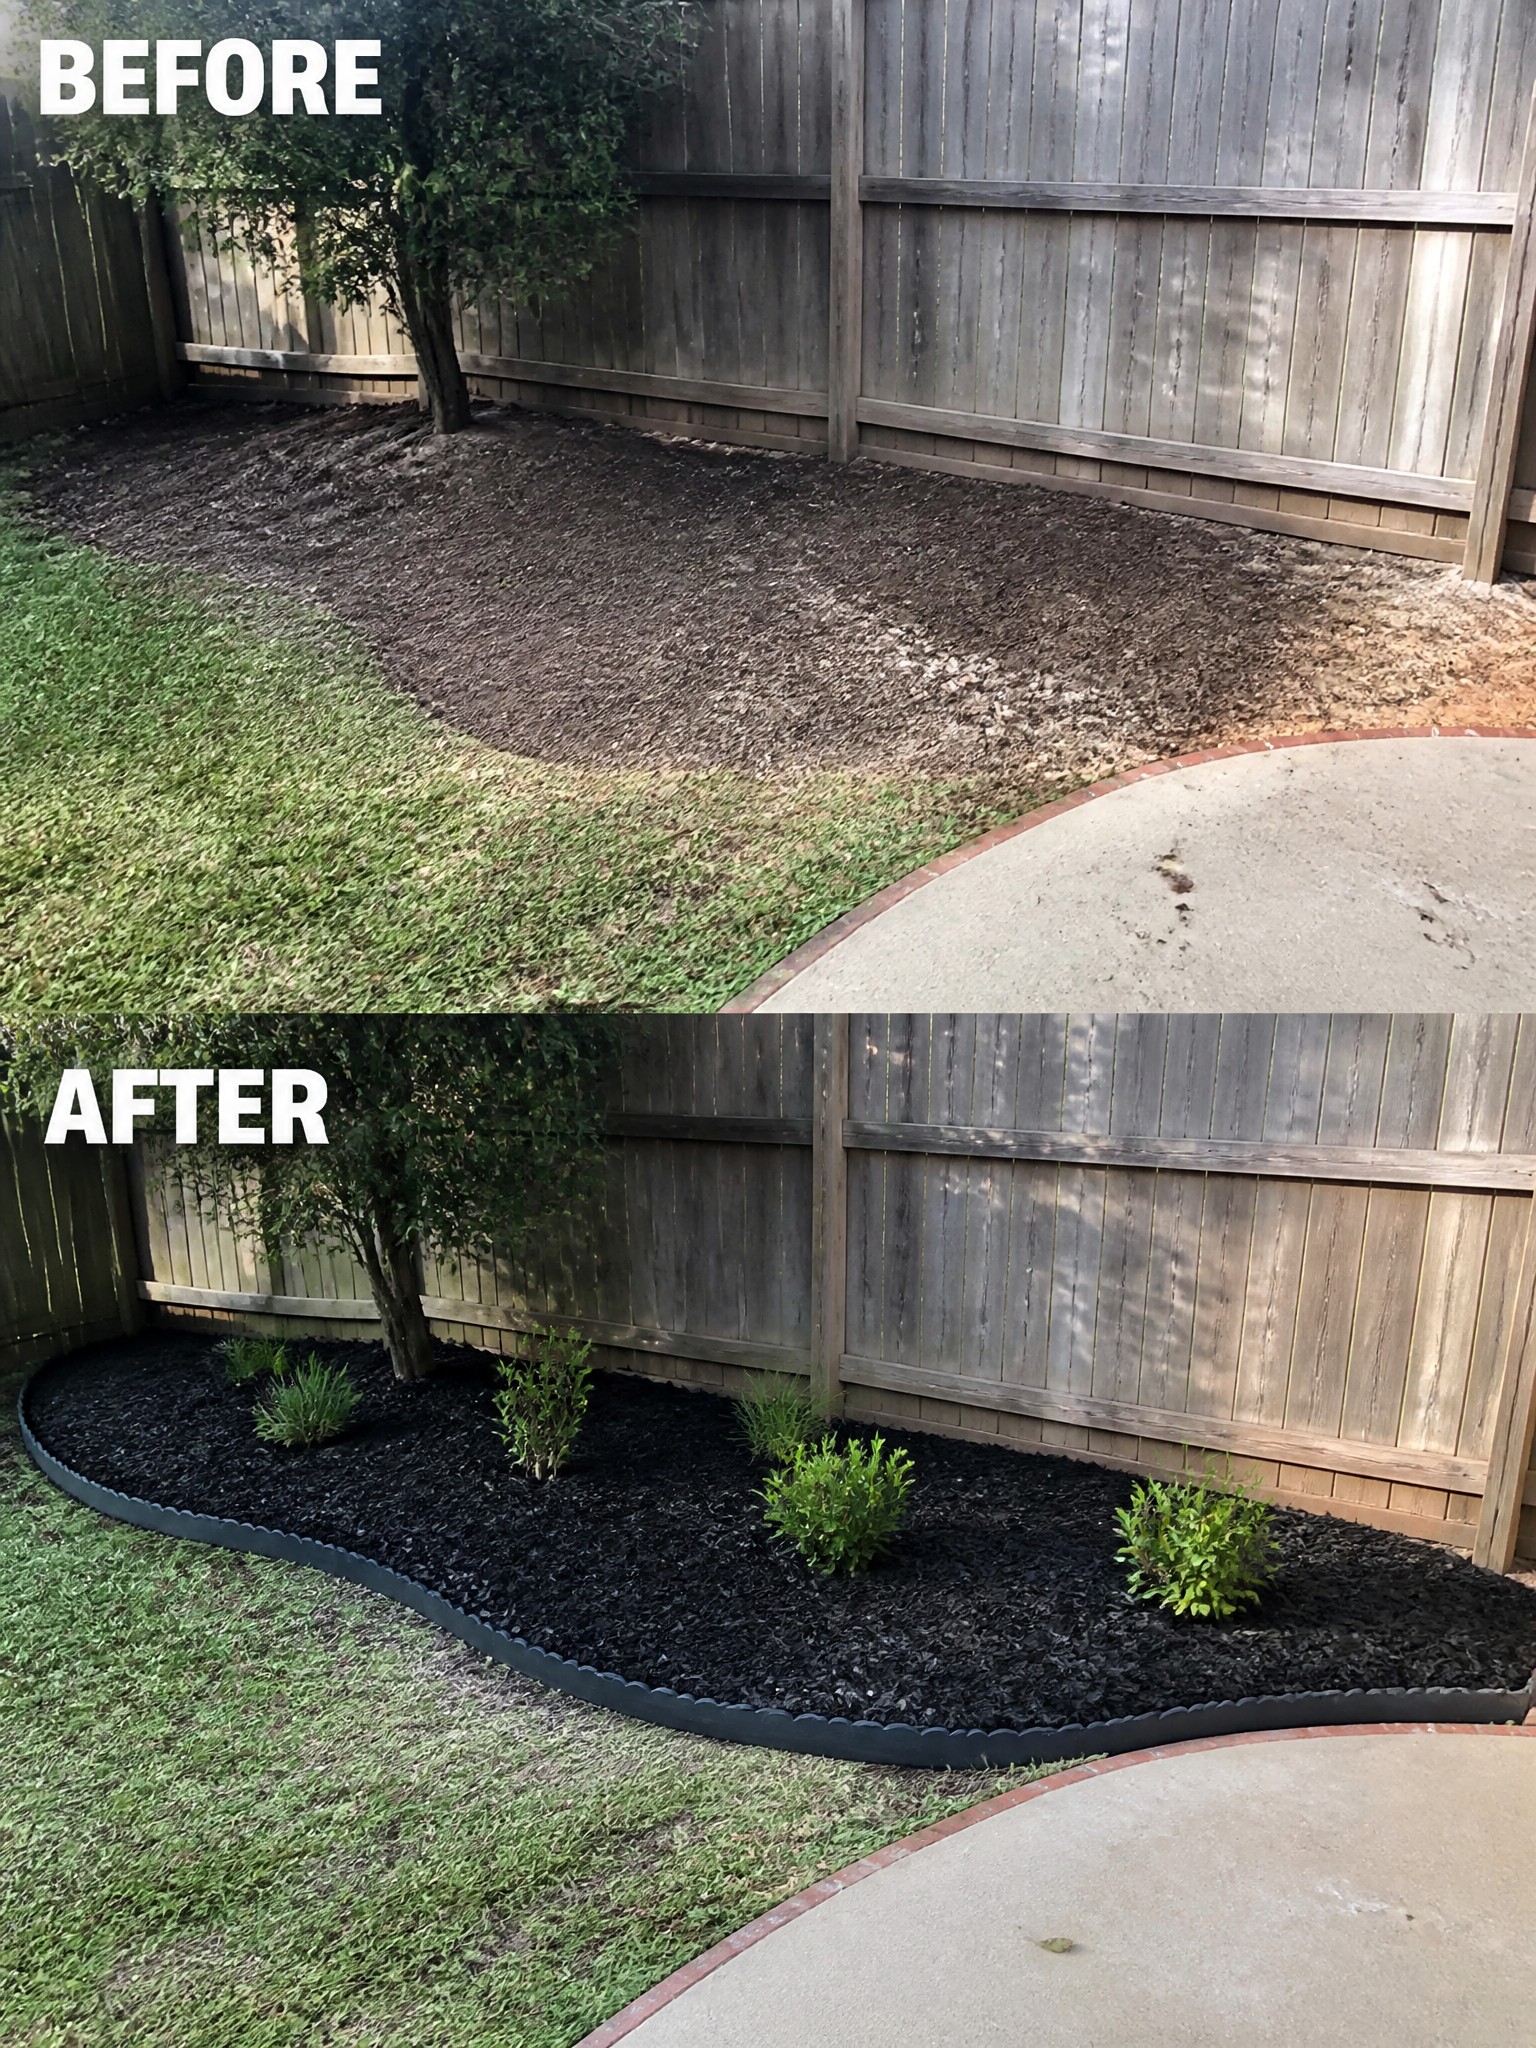
A bare stretch of dirt next to the lawn often looks unfinished and hard to maintain. Adding a simple border and a layer of dark mulch gives the space a clear shape, keeps the grass from creeping in, and sets up a spot for shrubs without much extra work.
This idea works best along fences or house walls where you want a low-maintenance strip that still looks planned. Lay the edging first to hold the shape, spread the mulch thick enough to block weeds, and keep the planting simple with a few shrubs spaced out. It is an easy way to make a small yard feel more organized without adding new structures.
Clean Up Overgrown Strips With Edging And Mulch
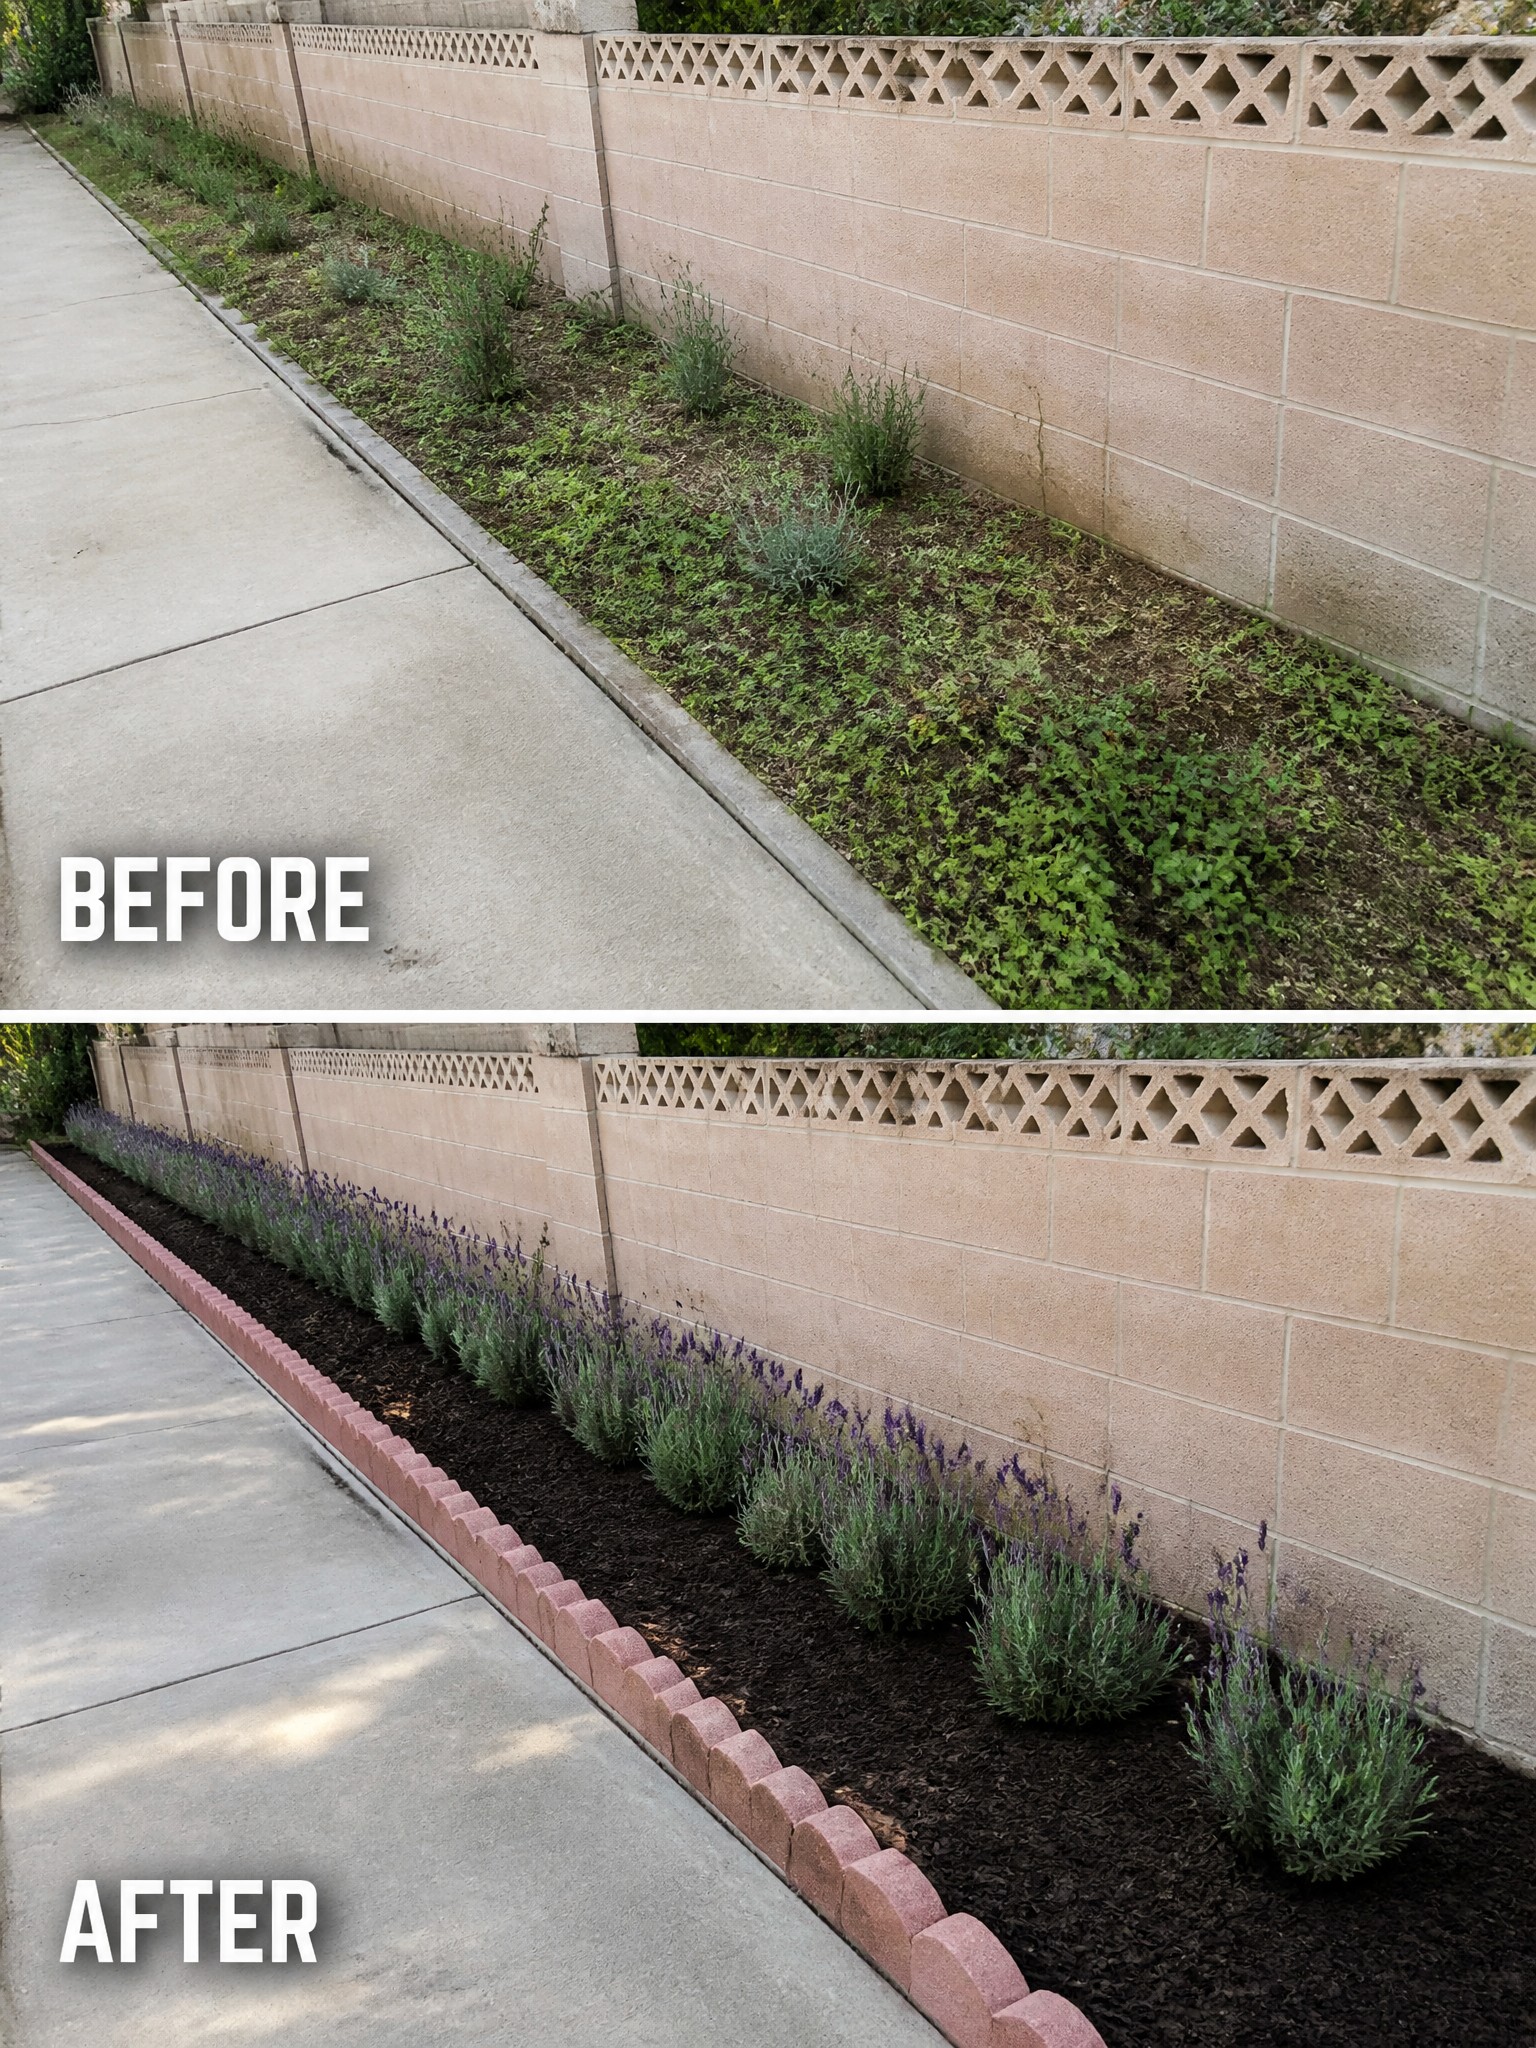
A narrow strip of weeds next to a path often looks worse than it needs to. Adding a simple border and a layer of mulch turns the same space into a clear garden bed that stays neat with less work. The lavender planted in the fresh mulch gives the area structure and color without crowding the walkway.
This approach works well along sidewalks, driveways, or fence lines where space is tight. Start by removing the worst of the weeds, then set the edging and spread mulch thick enough to block new growth. The result looks finished even when the plants are still small.
Define Flower Beds With Mulch And Edging
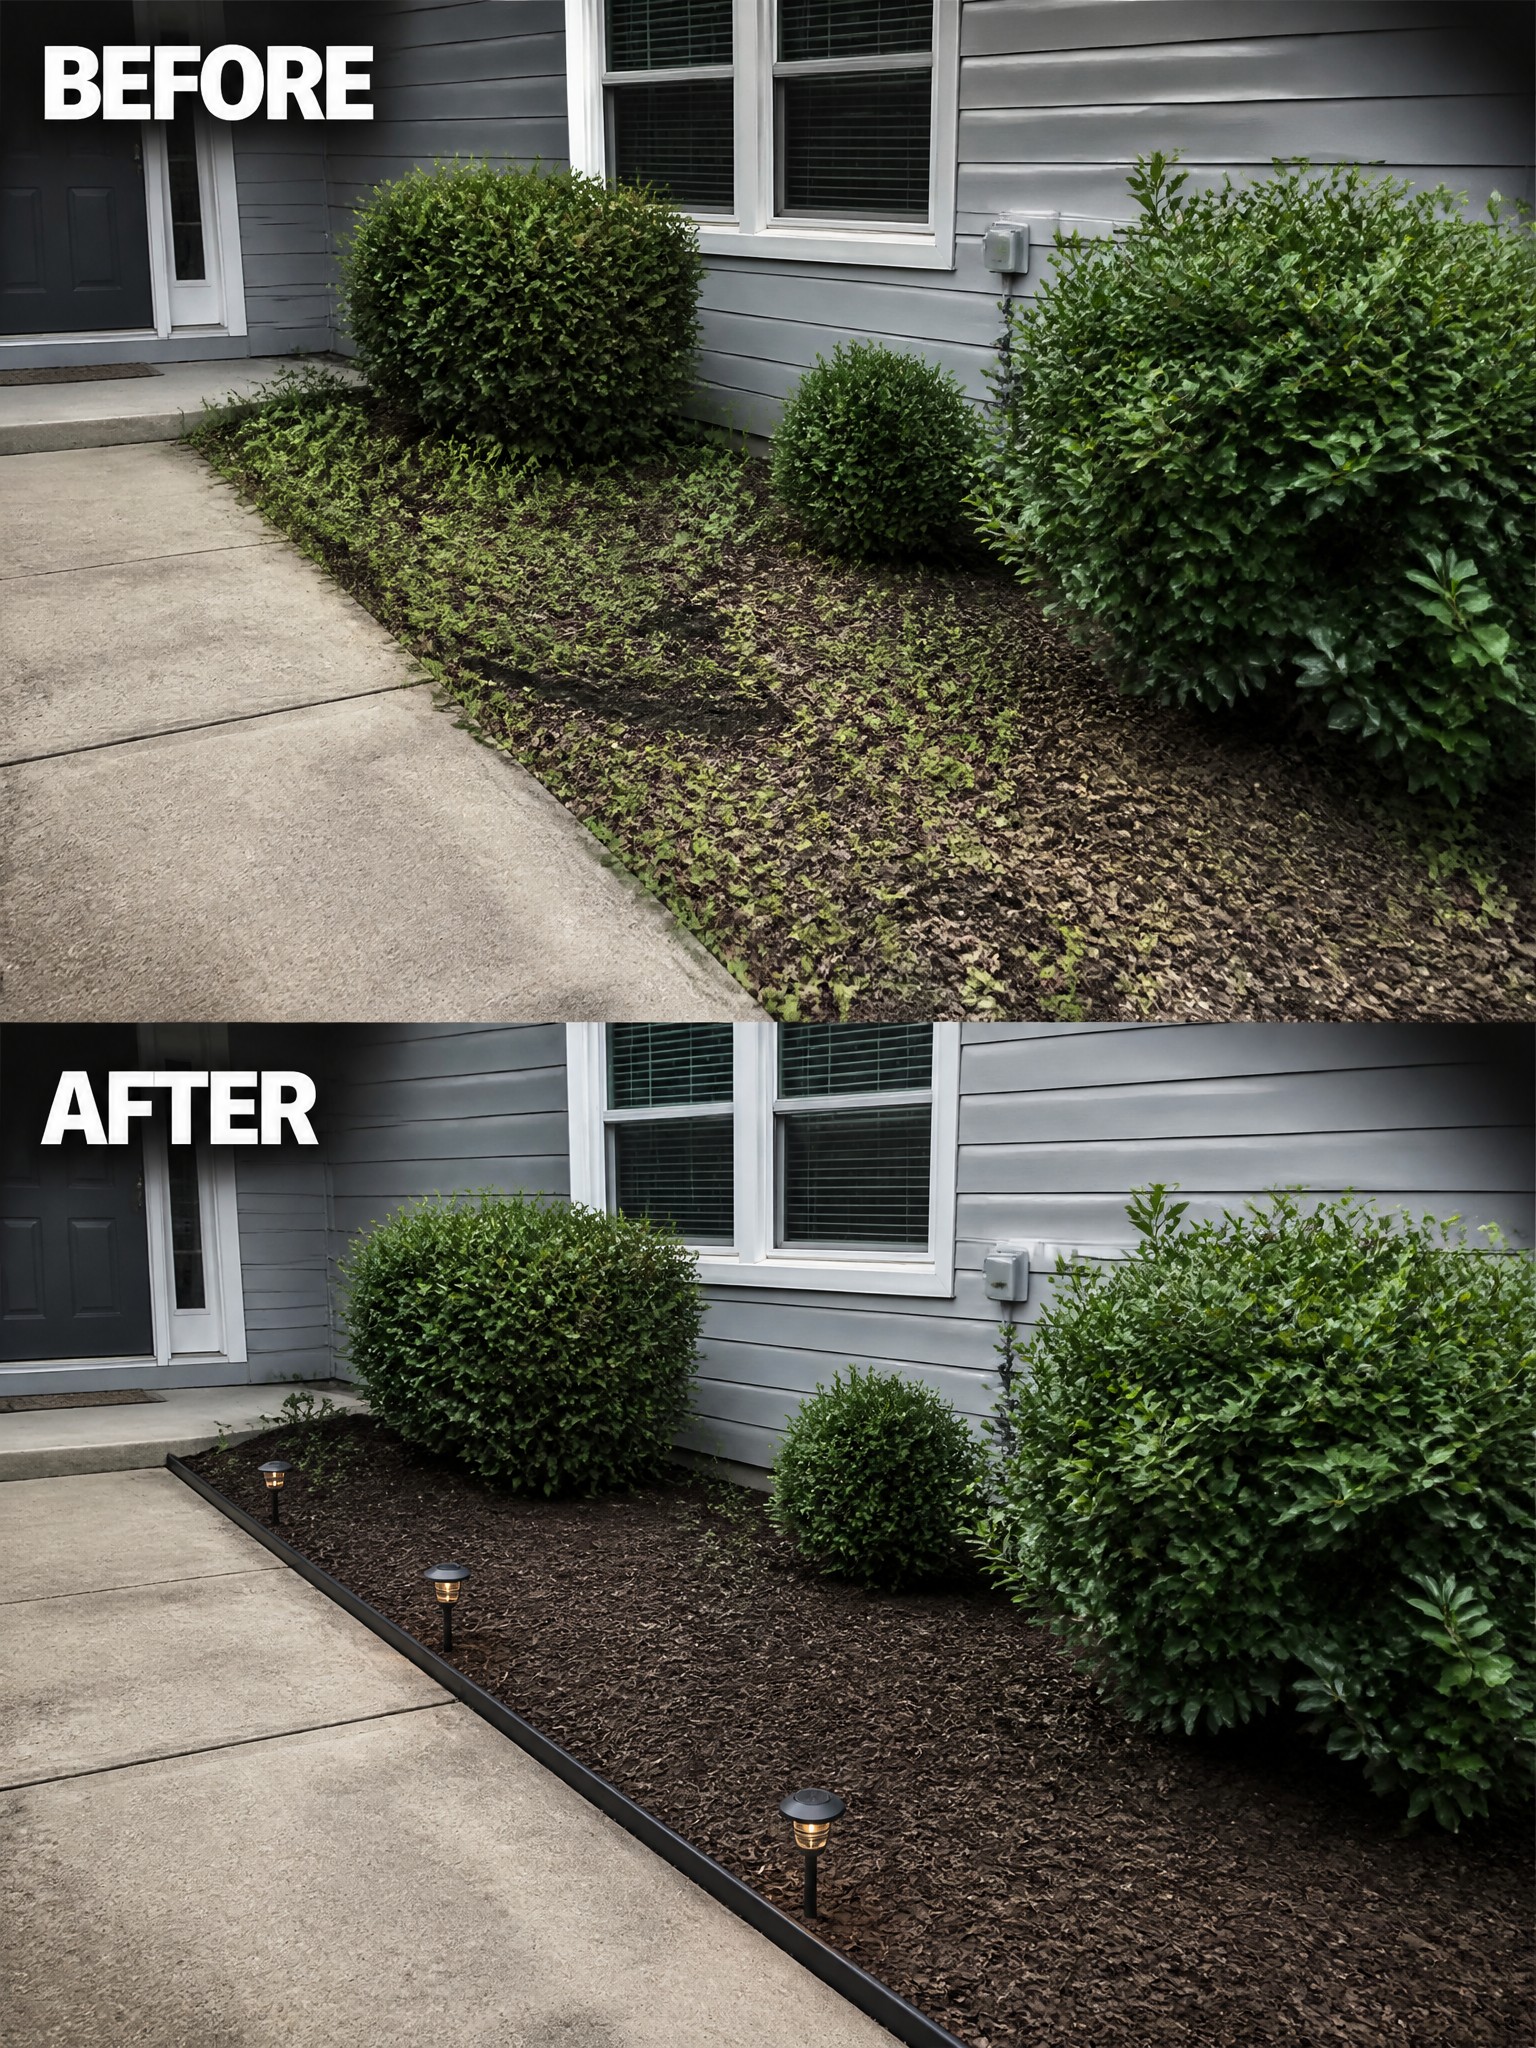
Many older homes end up with weedy strips along the foundation that make the whole front look neglected. A simple border and fresh mulch can turn that mess into a clean, tidy bed without much cost or effort. The dark mulch also helps the shrubs stand out and keeps the soil from washing away.
This idea works best on narrow beds next to the house where you want low maintenance. Clear the old growth first, put in a basic edging to hold everything in place, then spread mulch a few inches deep. Adding a couple of solar lights along the edge gives a little extra definition at night without needing wiring.
Define Overgrown Beds With Mulch And A Border
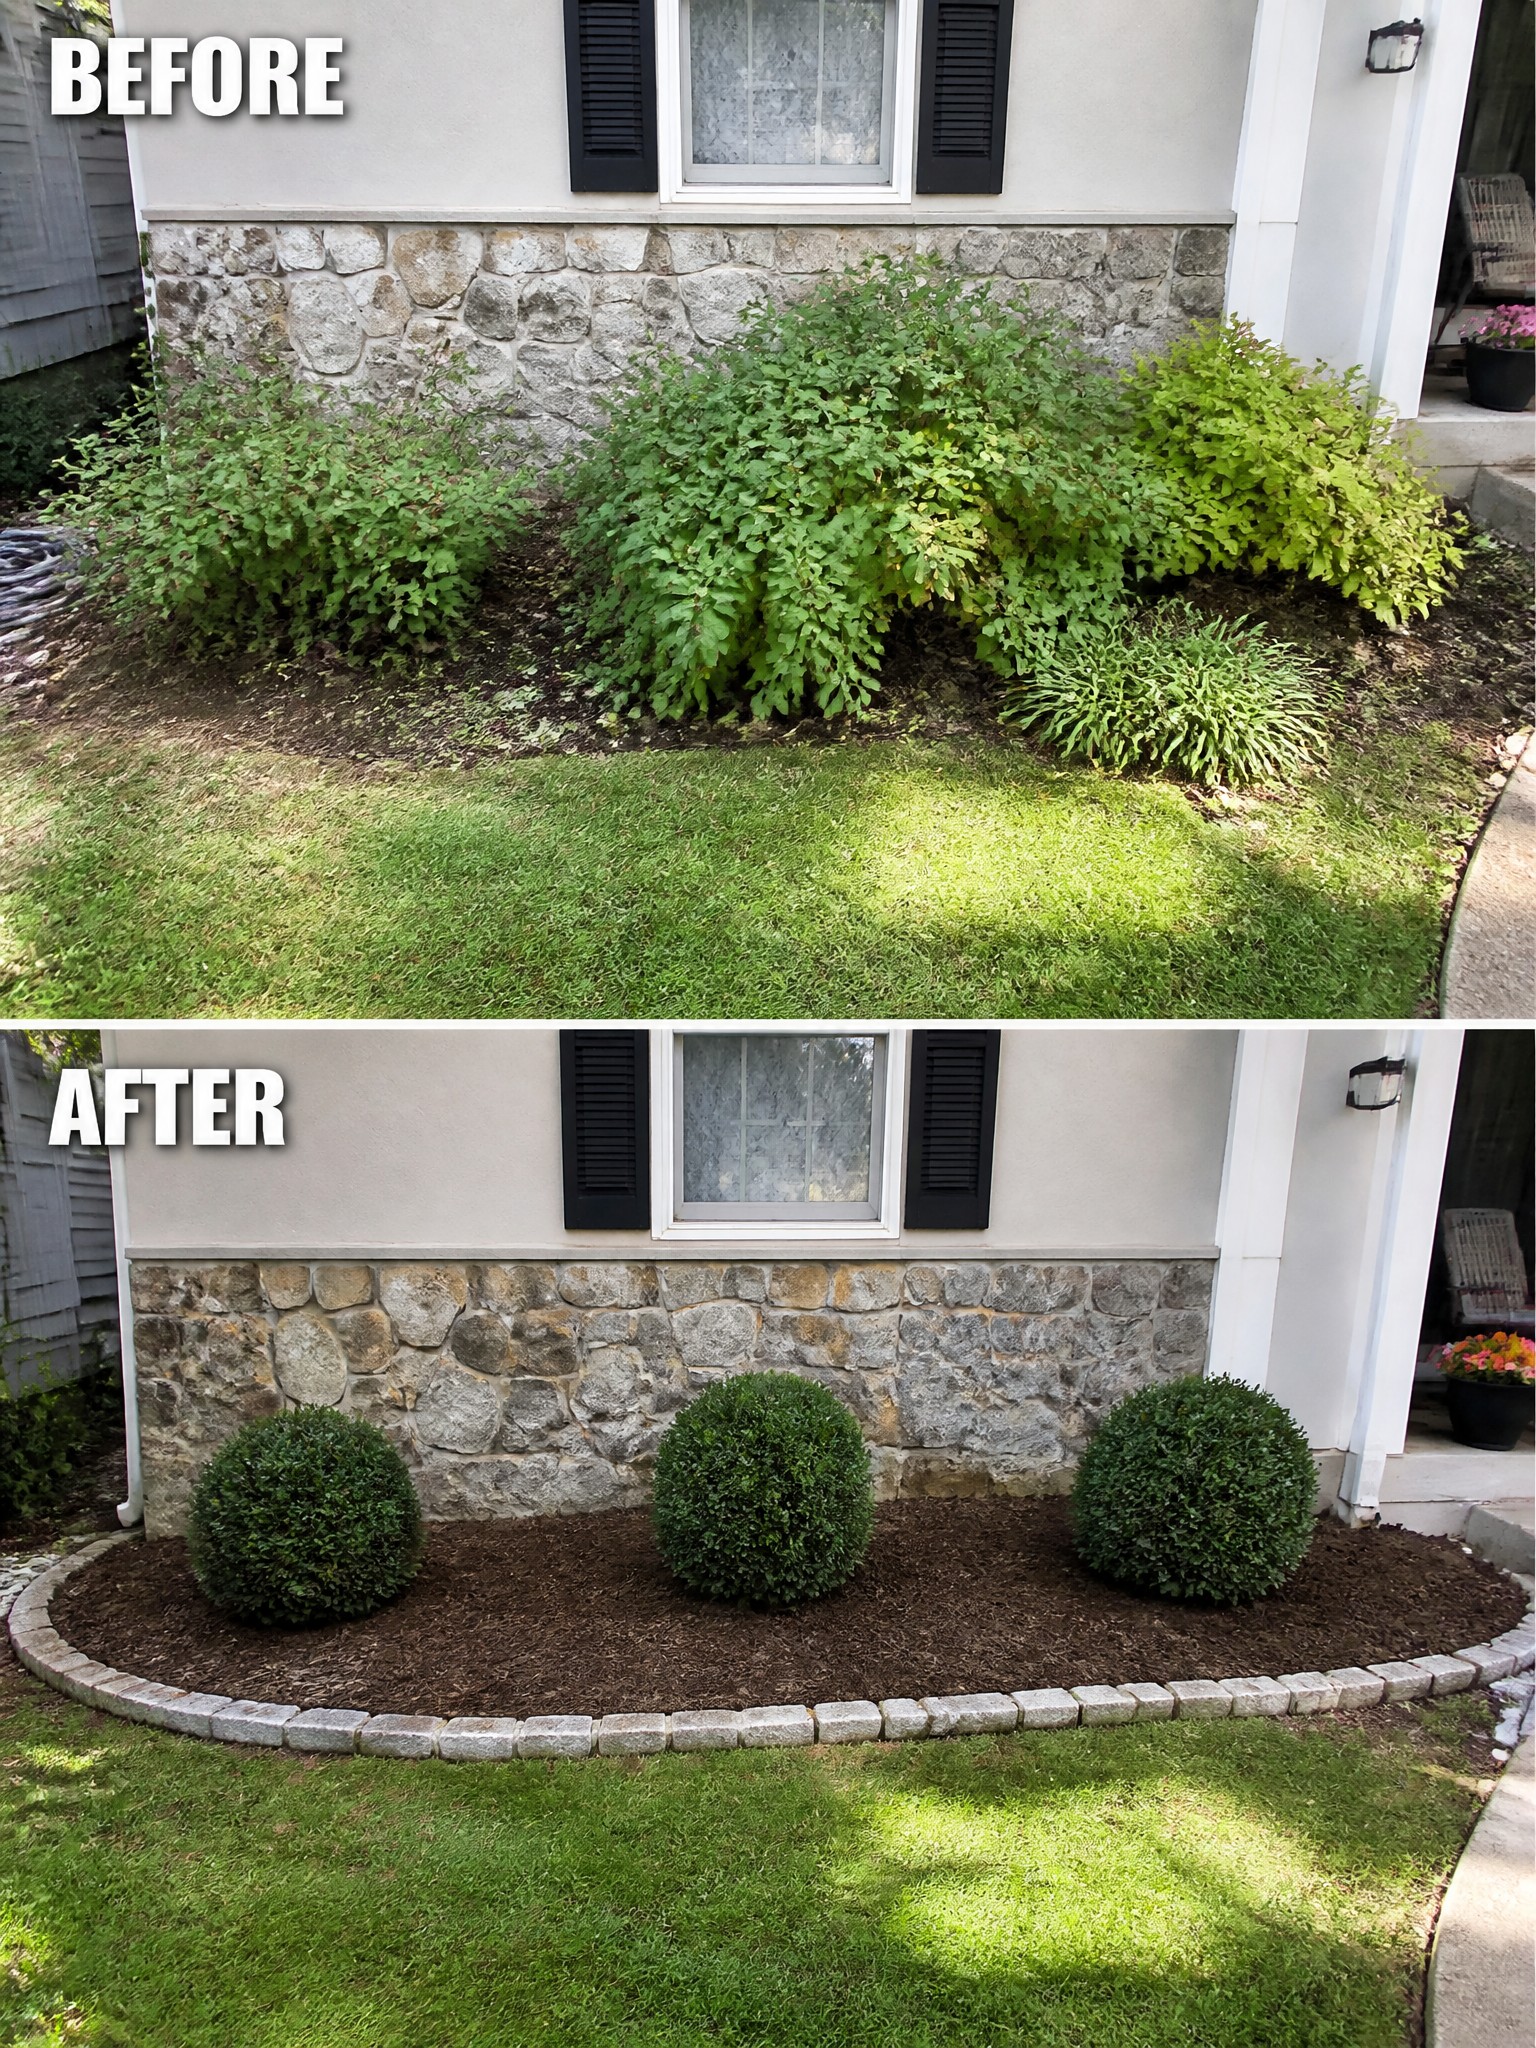
Clearing out the messy shrubs first made room for a much cleaner layout. The new bed uses mulch to cover the soil and a low stone border to hold everything in place, which keeps the planting neat and stops grass from creeping in.
This approach works well along a foundation where you want simple structure without a lot of maintenance. Start by removing the old growth, add a border that follows the curve of the house, then spread mulch and set a few rounded shrubs inside. It keeps the area looking tidy year after year.
Define Flower Beds With Borders And Mulch
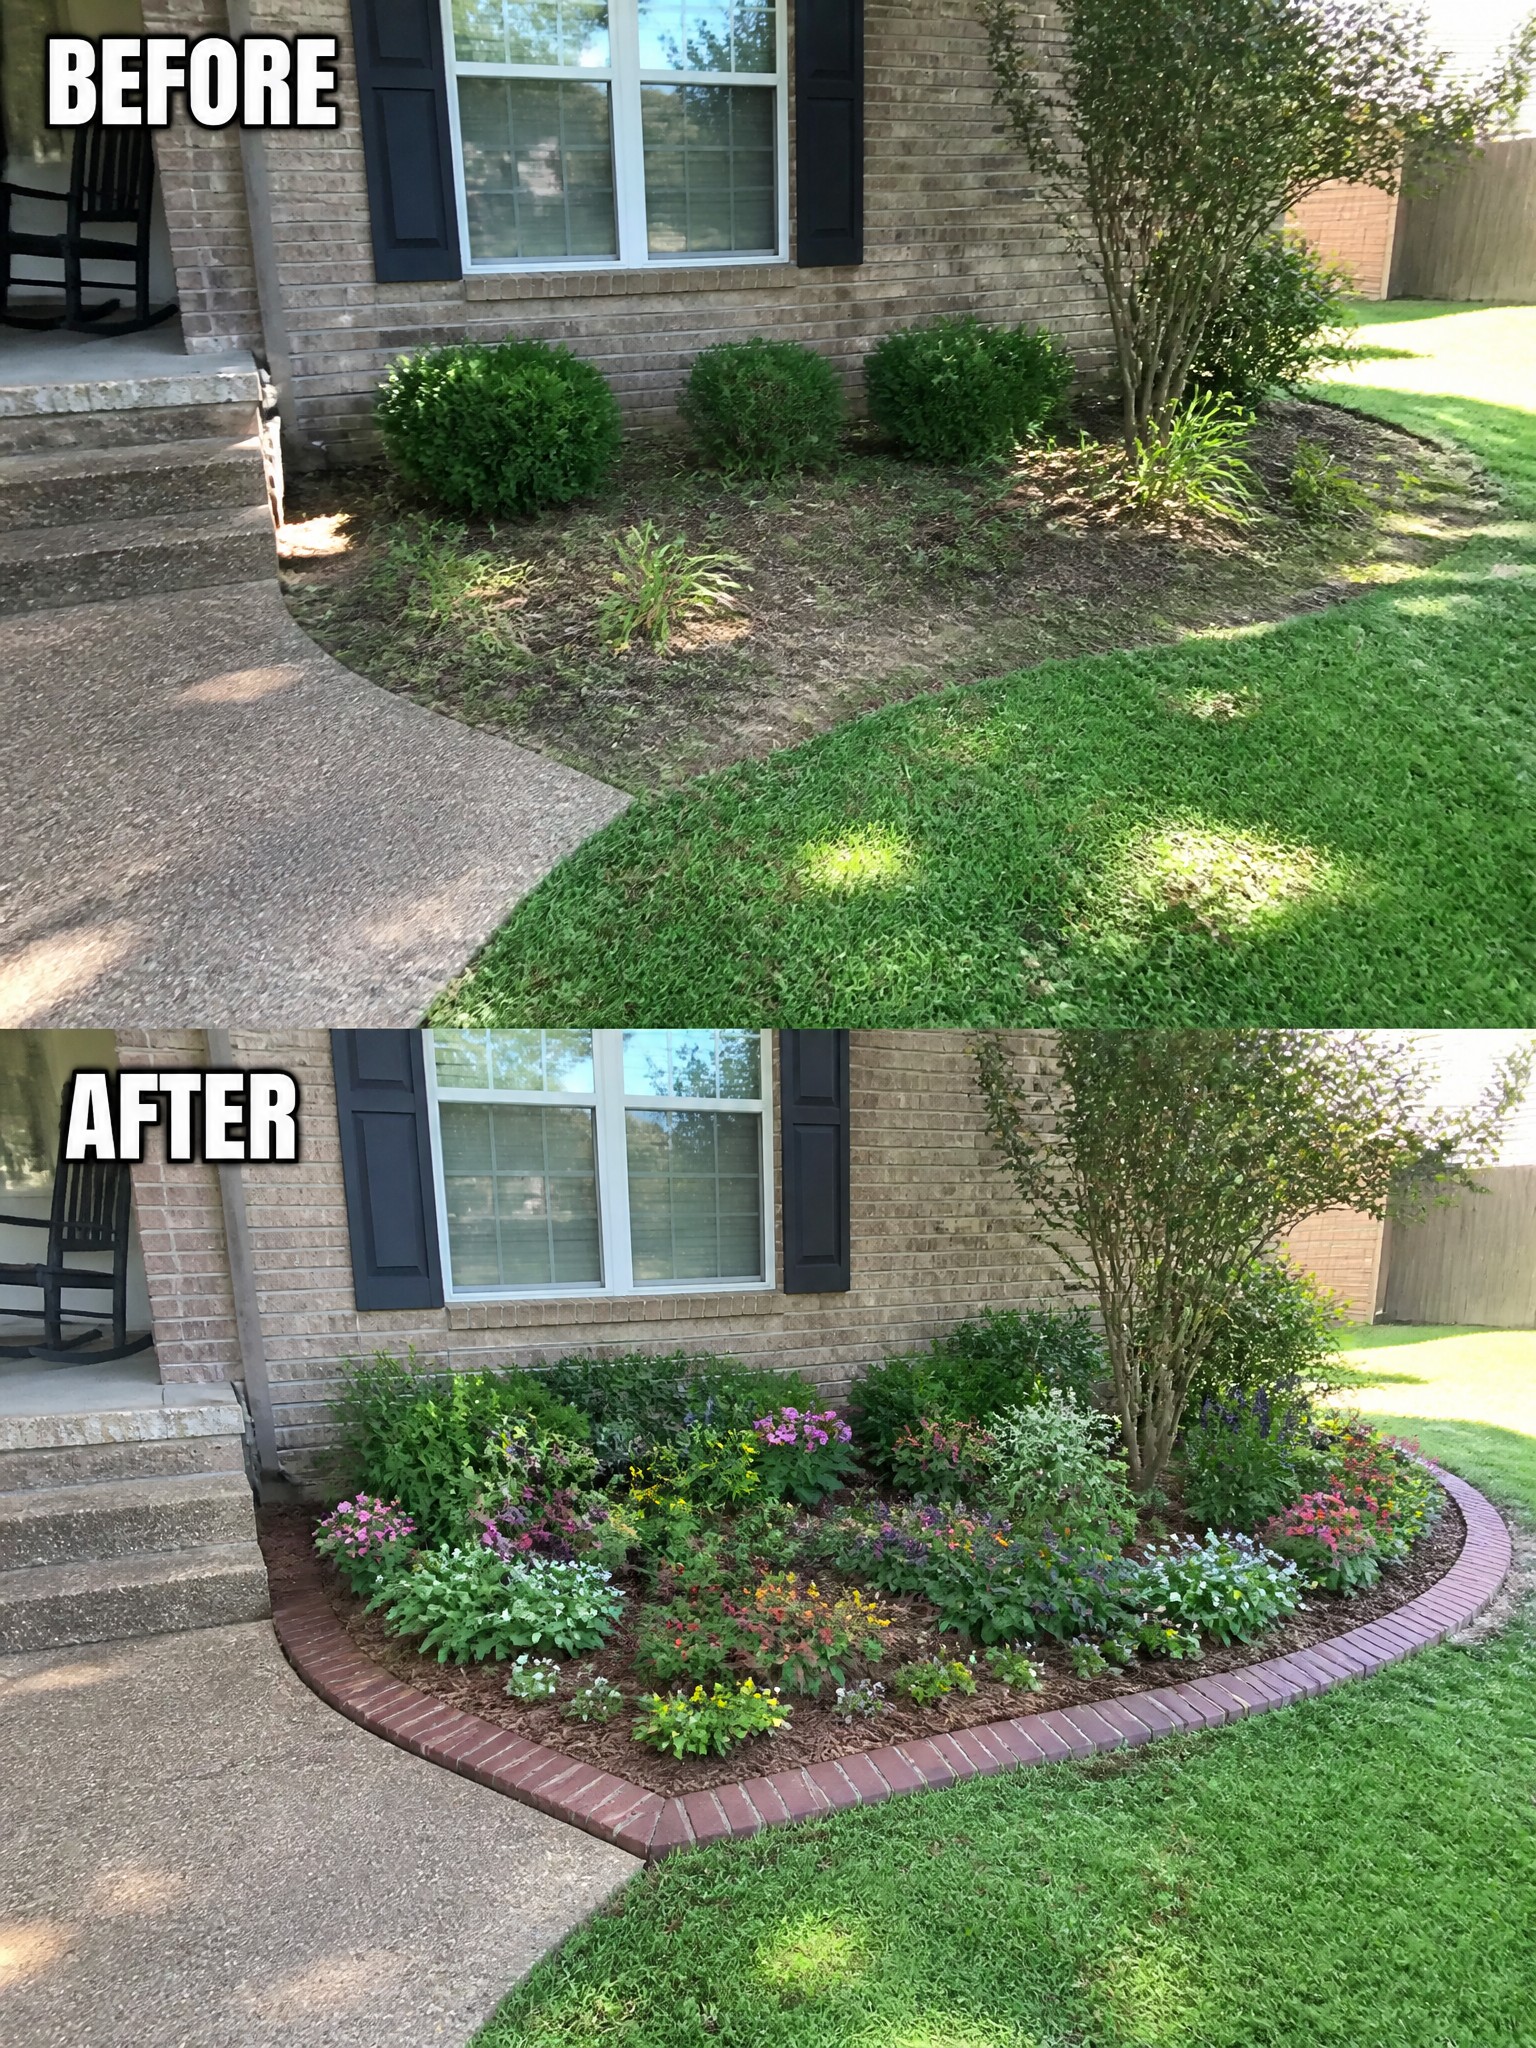
A simple border and fresh mulch can turn a messy strip of ground into a clear garden bed. The before photo shows an uneven edge with weeds and scattered shrubs. Adding a low brick border gives the bed a finished shape while the mulch helps hold everything in place and cuts down on weeds.
This idea works best along the front of a house where you want the planting to look neat without spending a lot. Lay the border first so the curve stays consistent, then spread mulch before adding plants. It keeps the bed looking tidy even as the flowers fill in over time.
Define Foundation Beds With Borders And Gravel
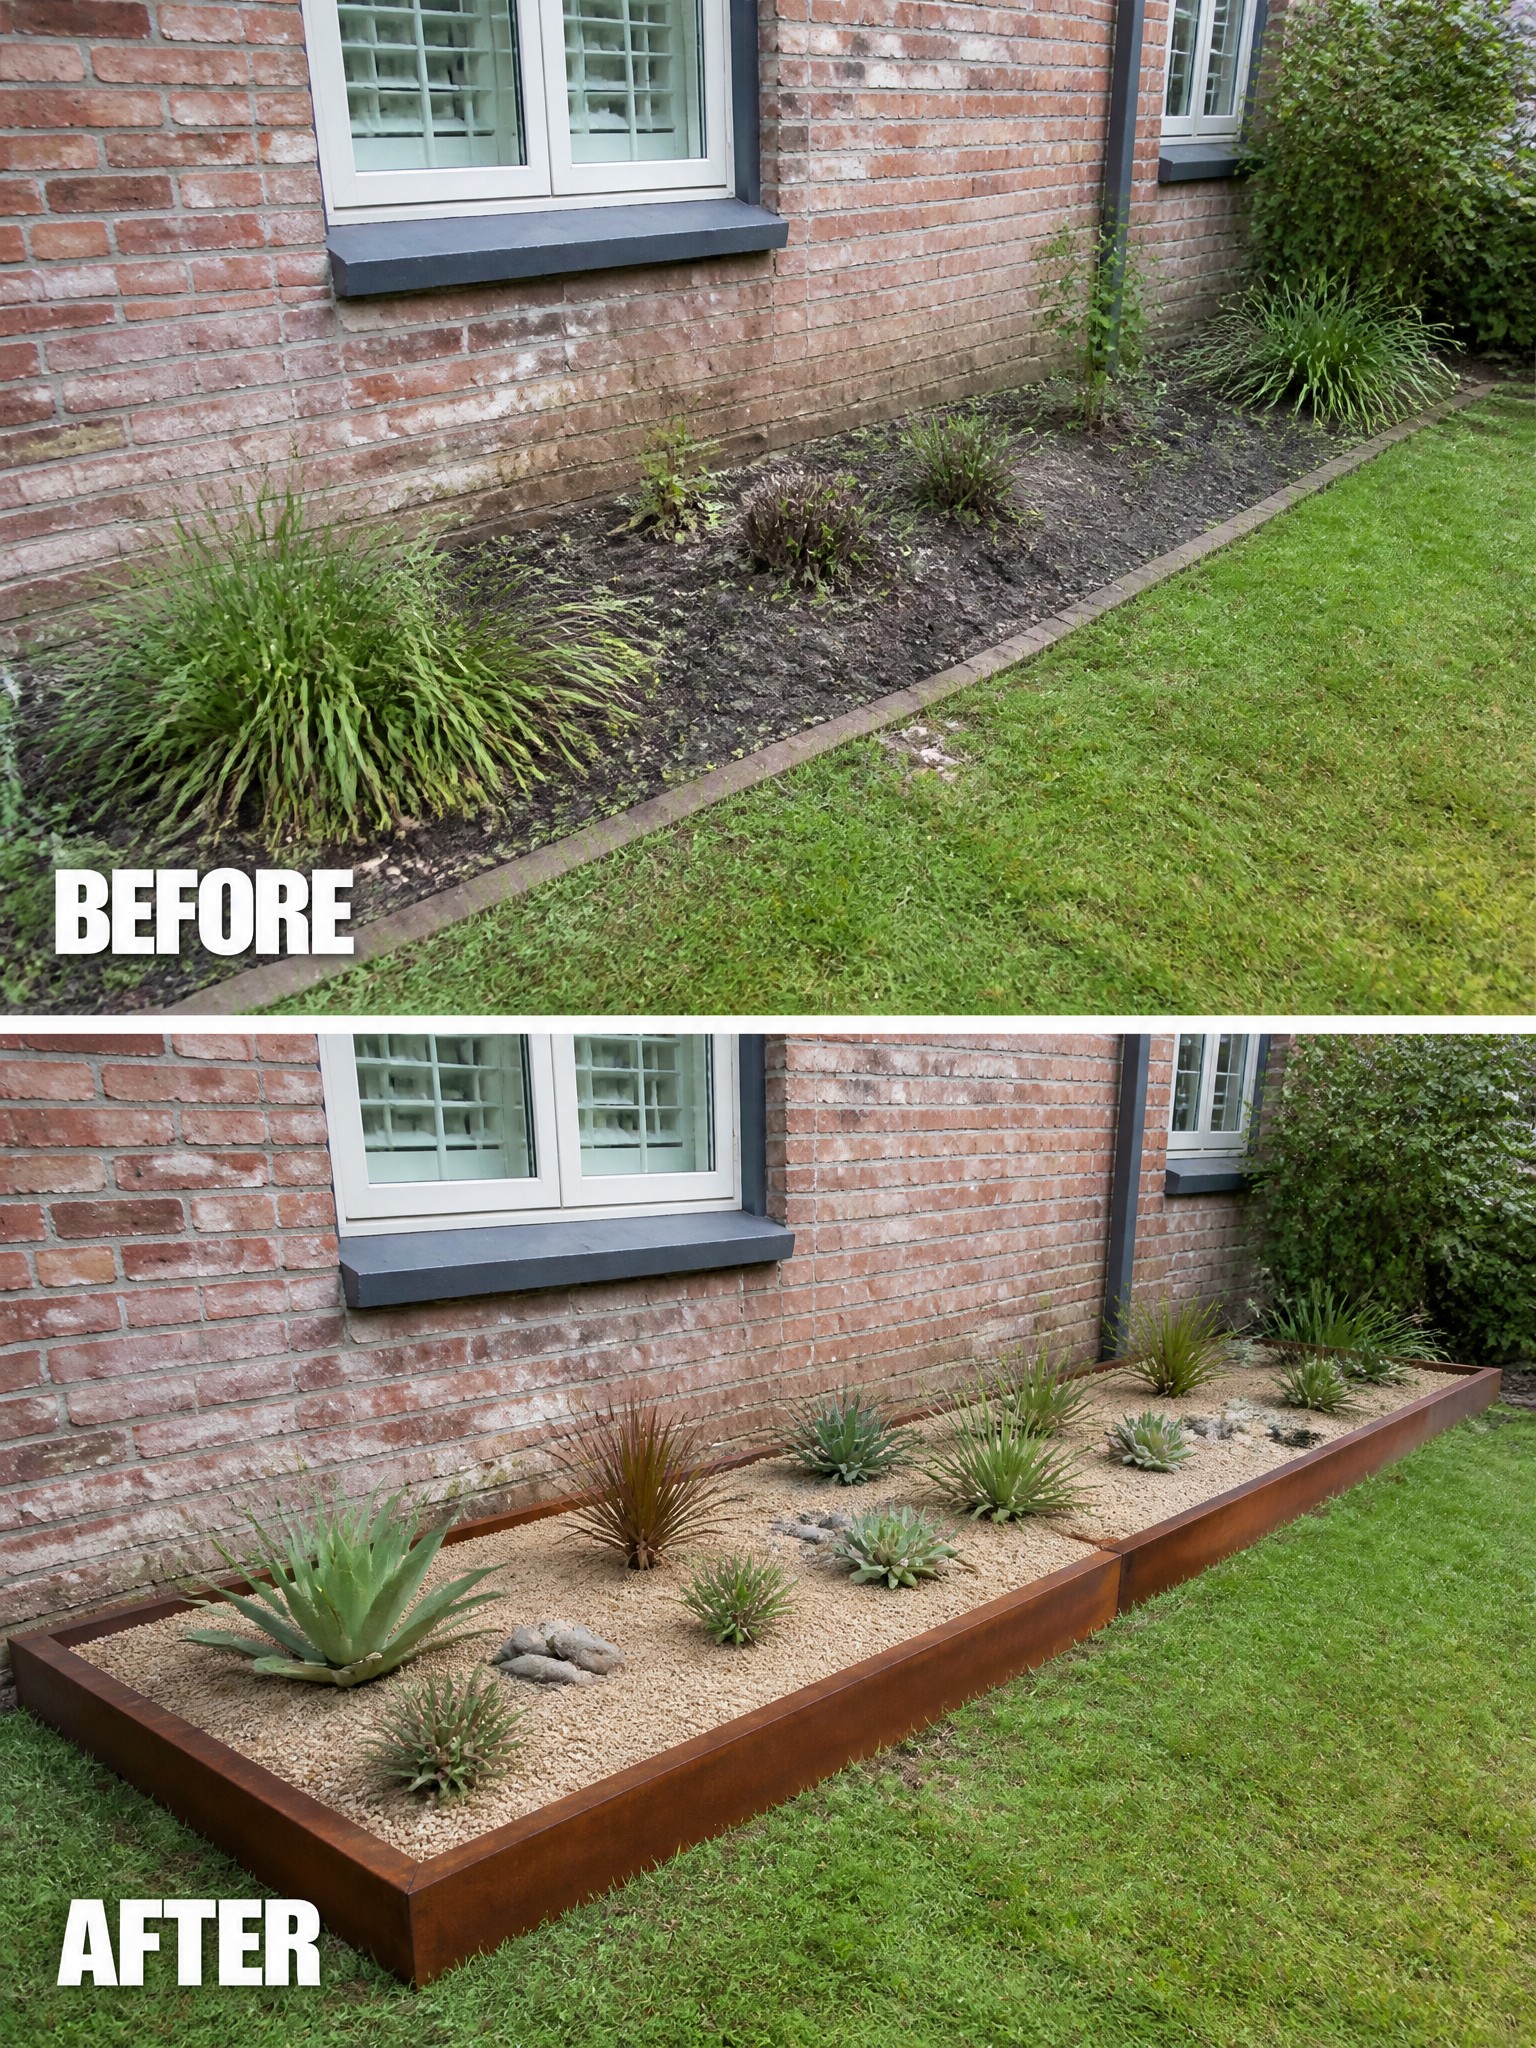
A messy strip of dirt and random plants along the house can make the whole side of the yard look neglected. Adding a simple metal border and filling the bed with gravel gives the area clean edges and makes the planting look intentional instead of scattered.
This approach works well along brick walls or any straight foundation where you want low maintenance. Start by clearing the old growth, set the border at the right height, and space out a few hardy plants before adding the gravel. It keeps the bed looking neat without constant weeding or mowing right up against the house.
Refresh A Flower Bed With Mulch And A Simple Border
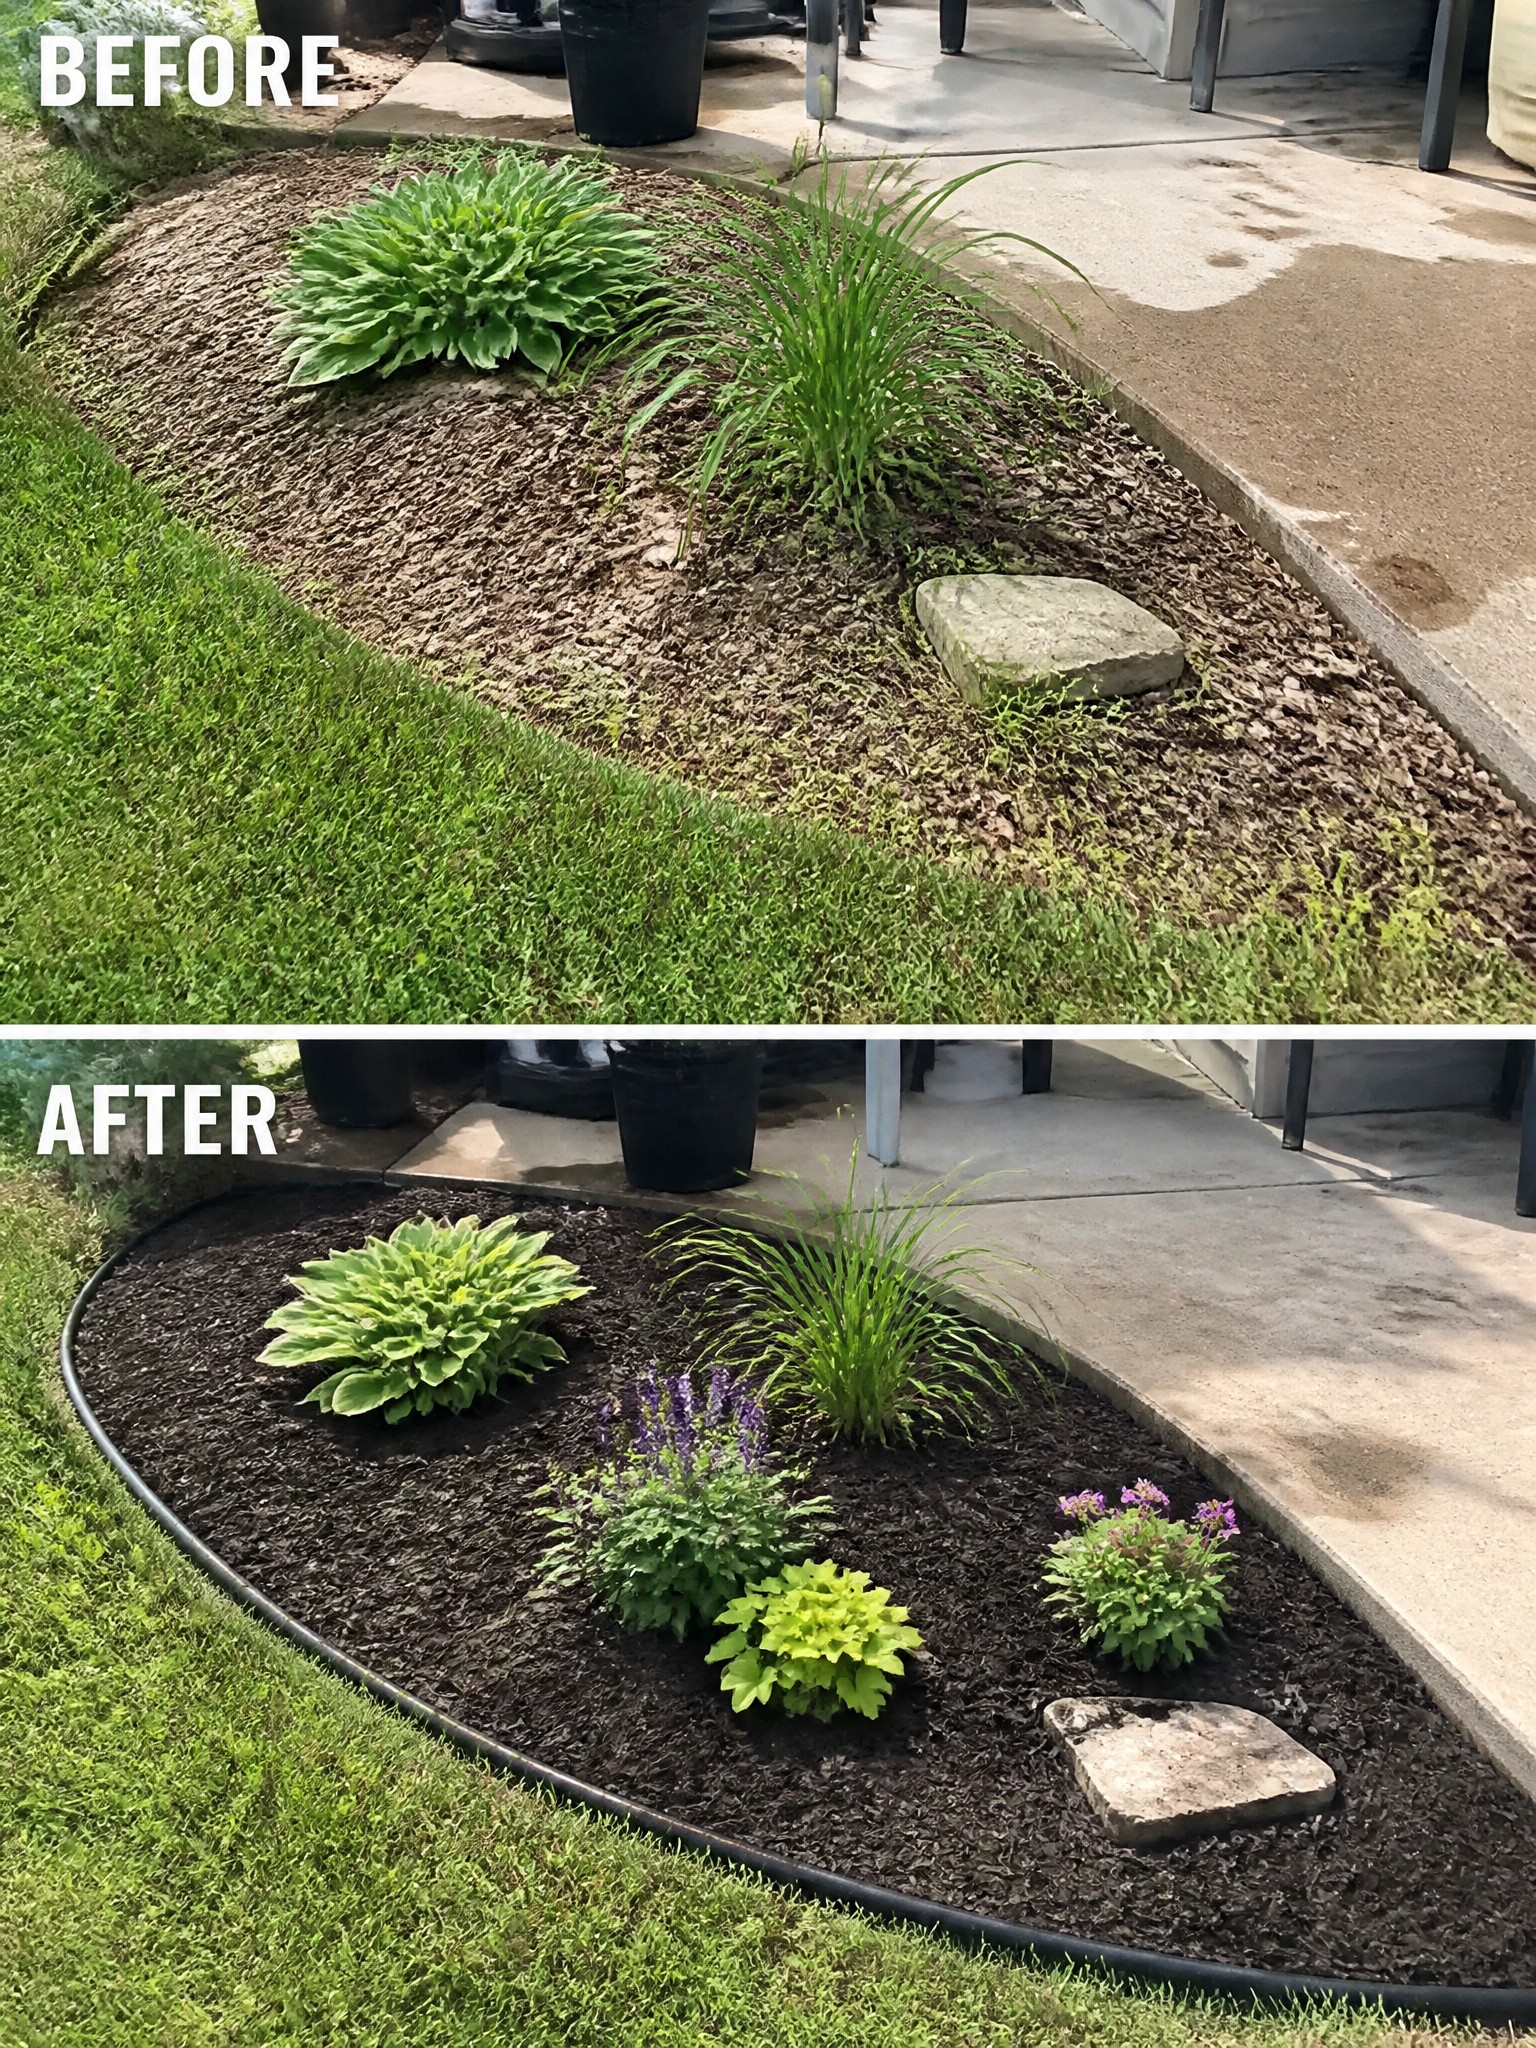
The main change here is adding a clear black border and fresh dark mulch around the plants. This stops the bed from blending into the lawn and gives it a neat, contained shape that holds up better over time.
This approach works best in small areas next to paths or patios. Put the border in first so the mulch stays put, then fill in with a few plants that suit the light and soil. Keep the planting simple so the bed stays easy to maintain.
Define Flower Beds With Mulch And Edging
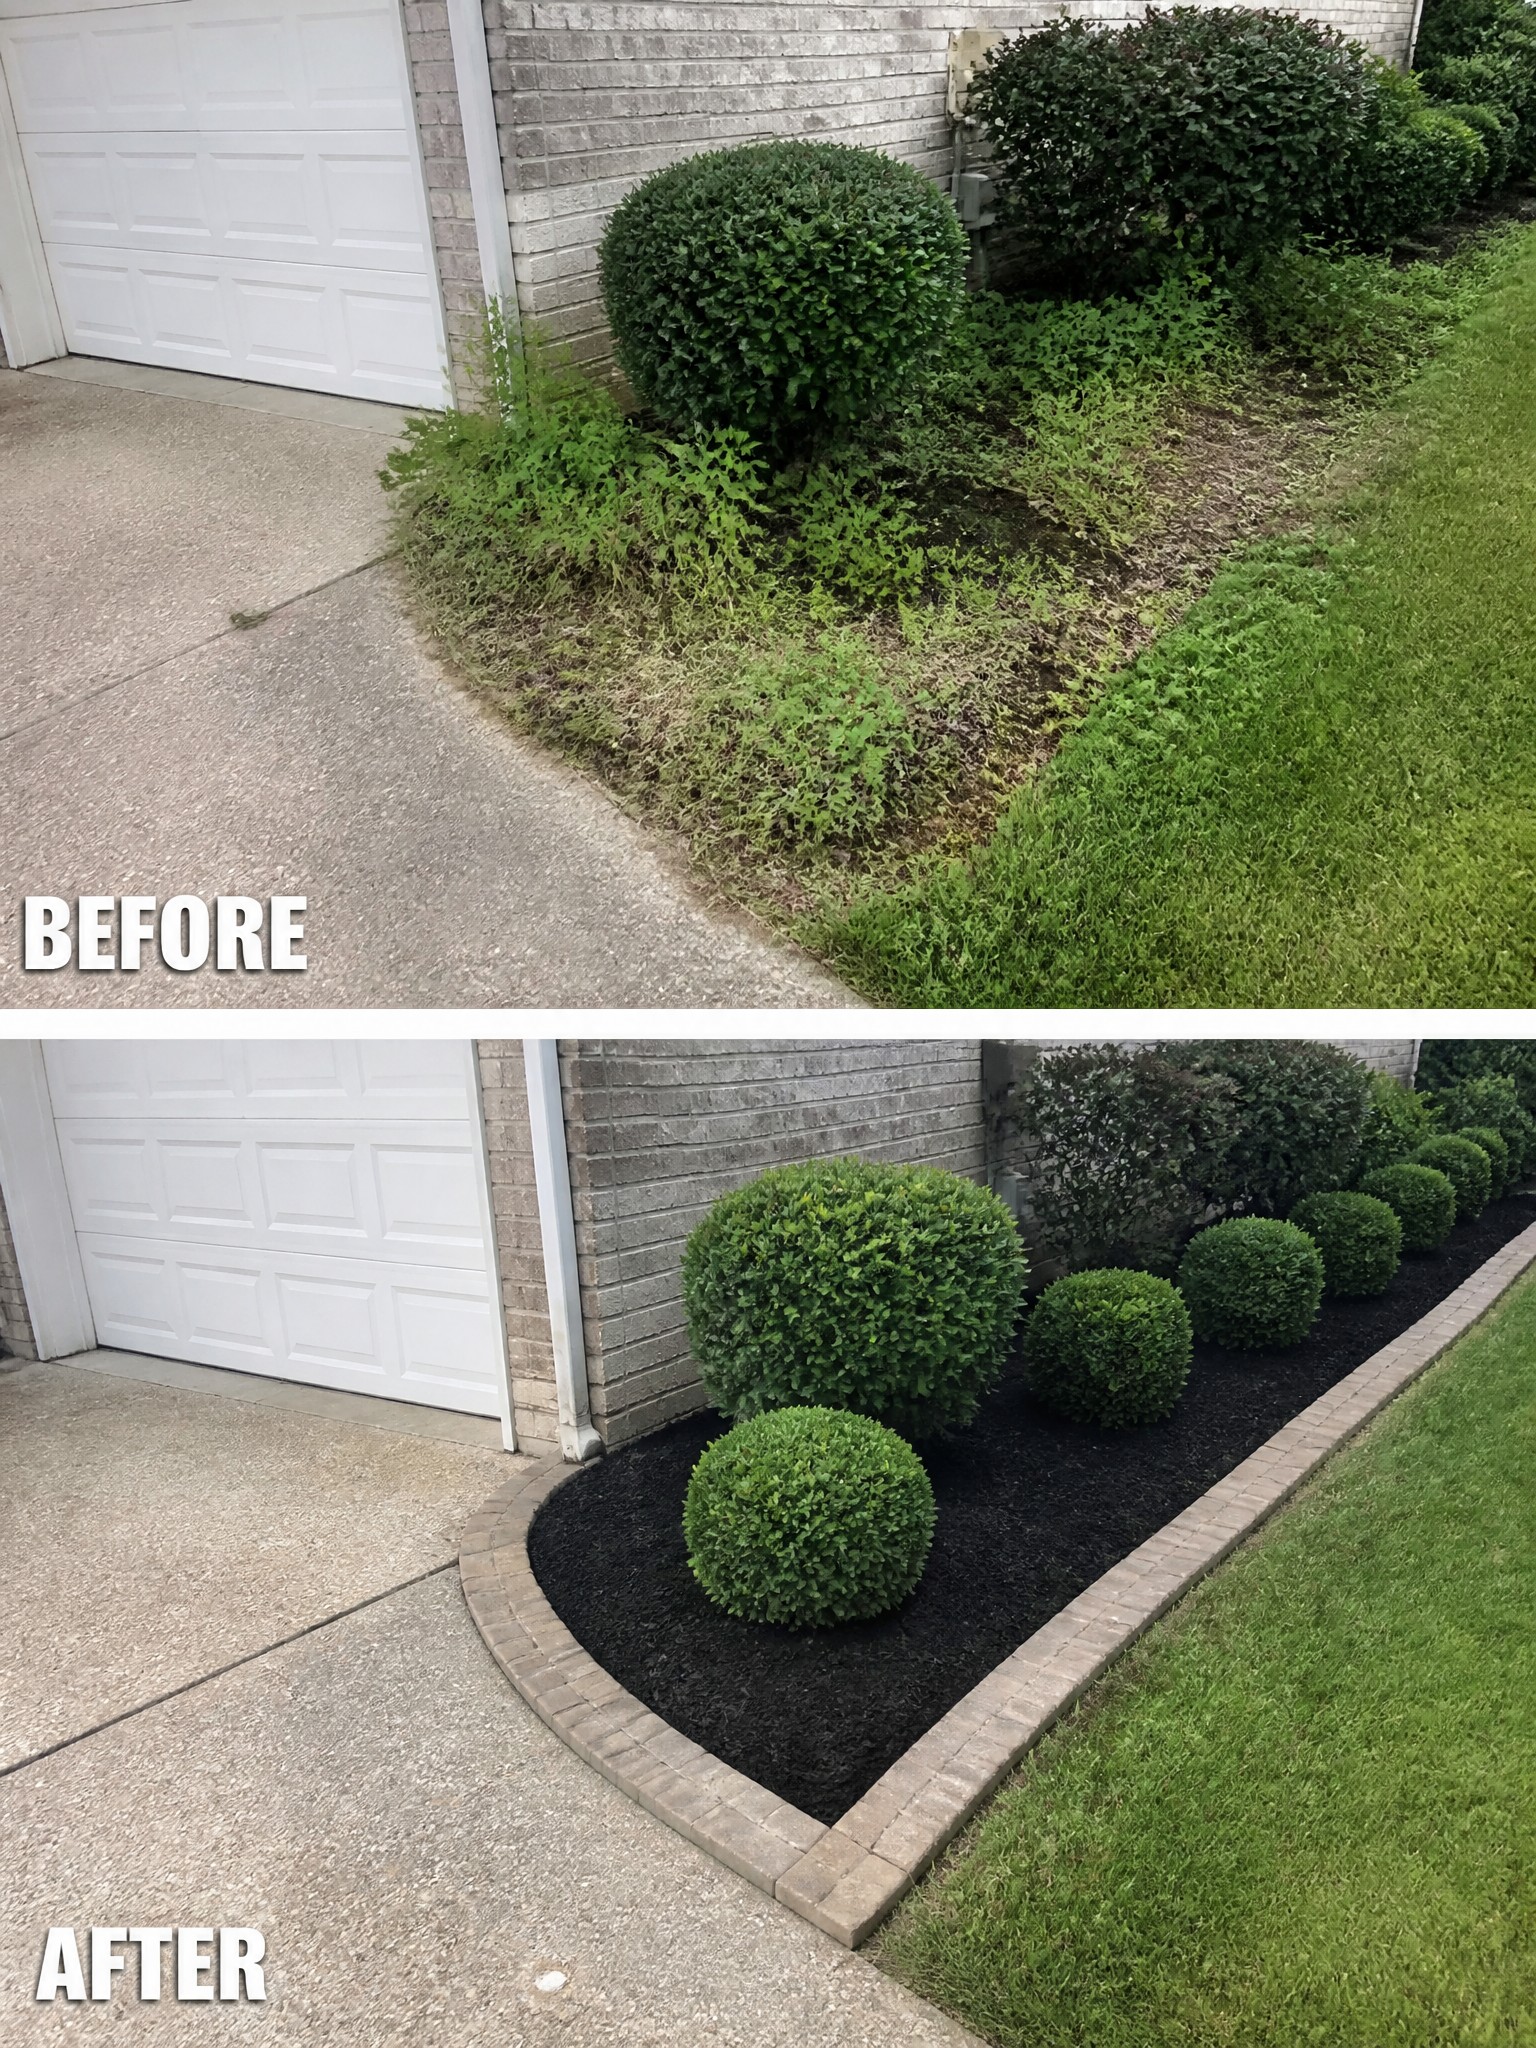
Clearing weeds first and then adding a simple border with fresh mulch turns a messy strip of ground into something that looks intentional. The before photo shows weeds creeping onto the driveway and around the shrubs, while the after shows the same area with a clean edge and dark mulch that keeps everything contained.
This idea works best along driveways or house foundations where plants need a clear boundary. Start by removing the overgrowth, then install a basic border like bricks or pavers before spreading the mulch. It keeps the beds looking neat with very little ongoing work.
Add Defined Borders Around Trees For A Neat Yard
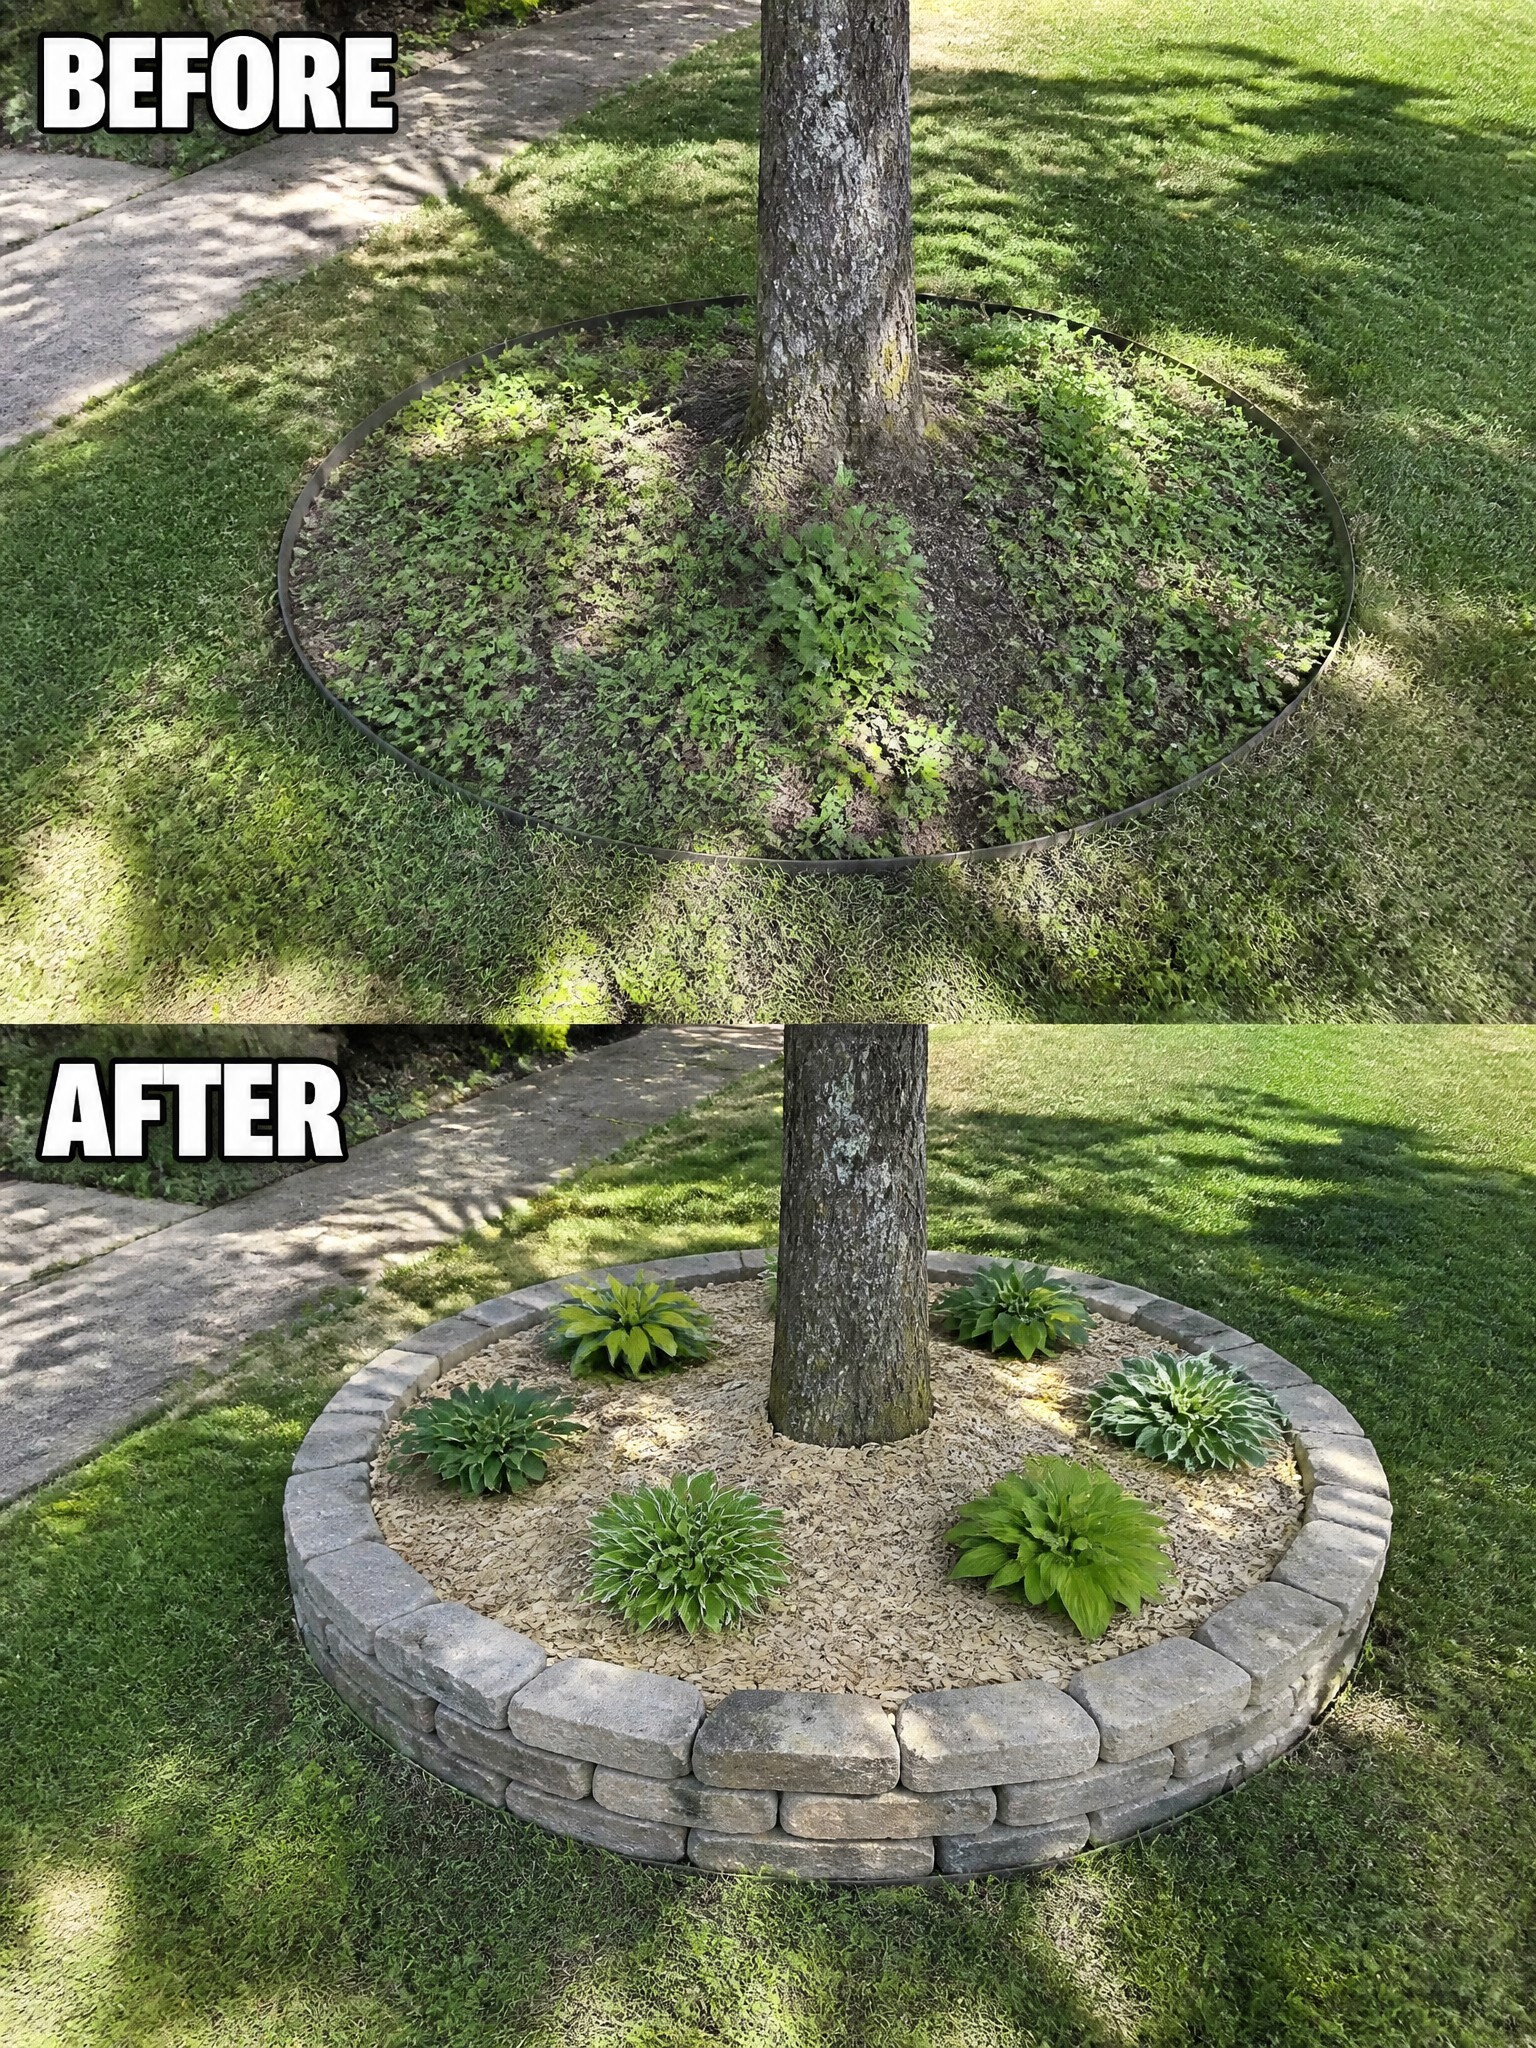
A thin metal ring around a tree often fails once weeds move in and the mulch thins out. Replacing it with a low stacked-stone border and fresh wood chips gives the tree a clear, finished edge that stays tidy longer.
This approach suits any yard with mature trees set in lawn. Start by removing the weeds, set the border at a comfortable height for mowing around, then mulch and add a few simple shade plants. Keep the bed wide enough for the tree roots but not so large that it interrupts the flow of the grass.
Add Simple Borders And Mulch To Shape Flower Beds
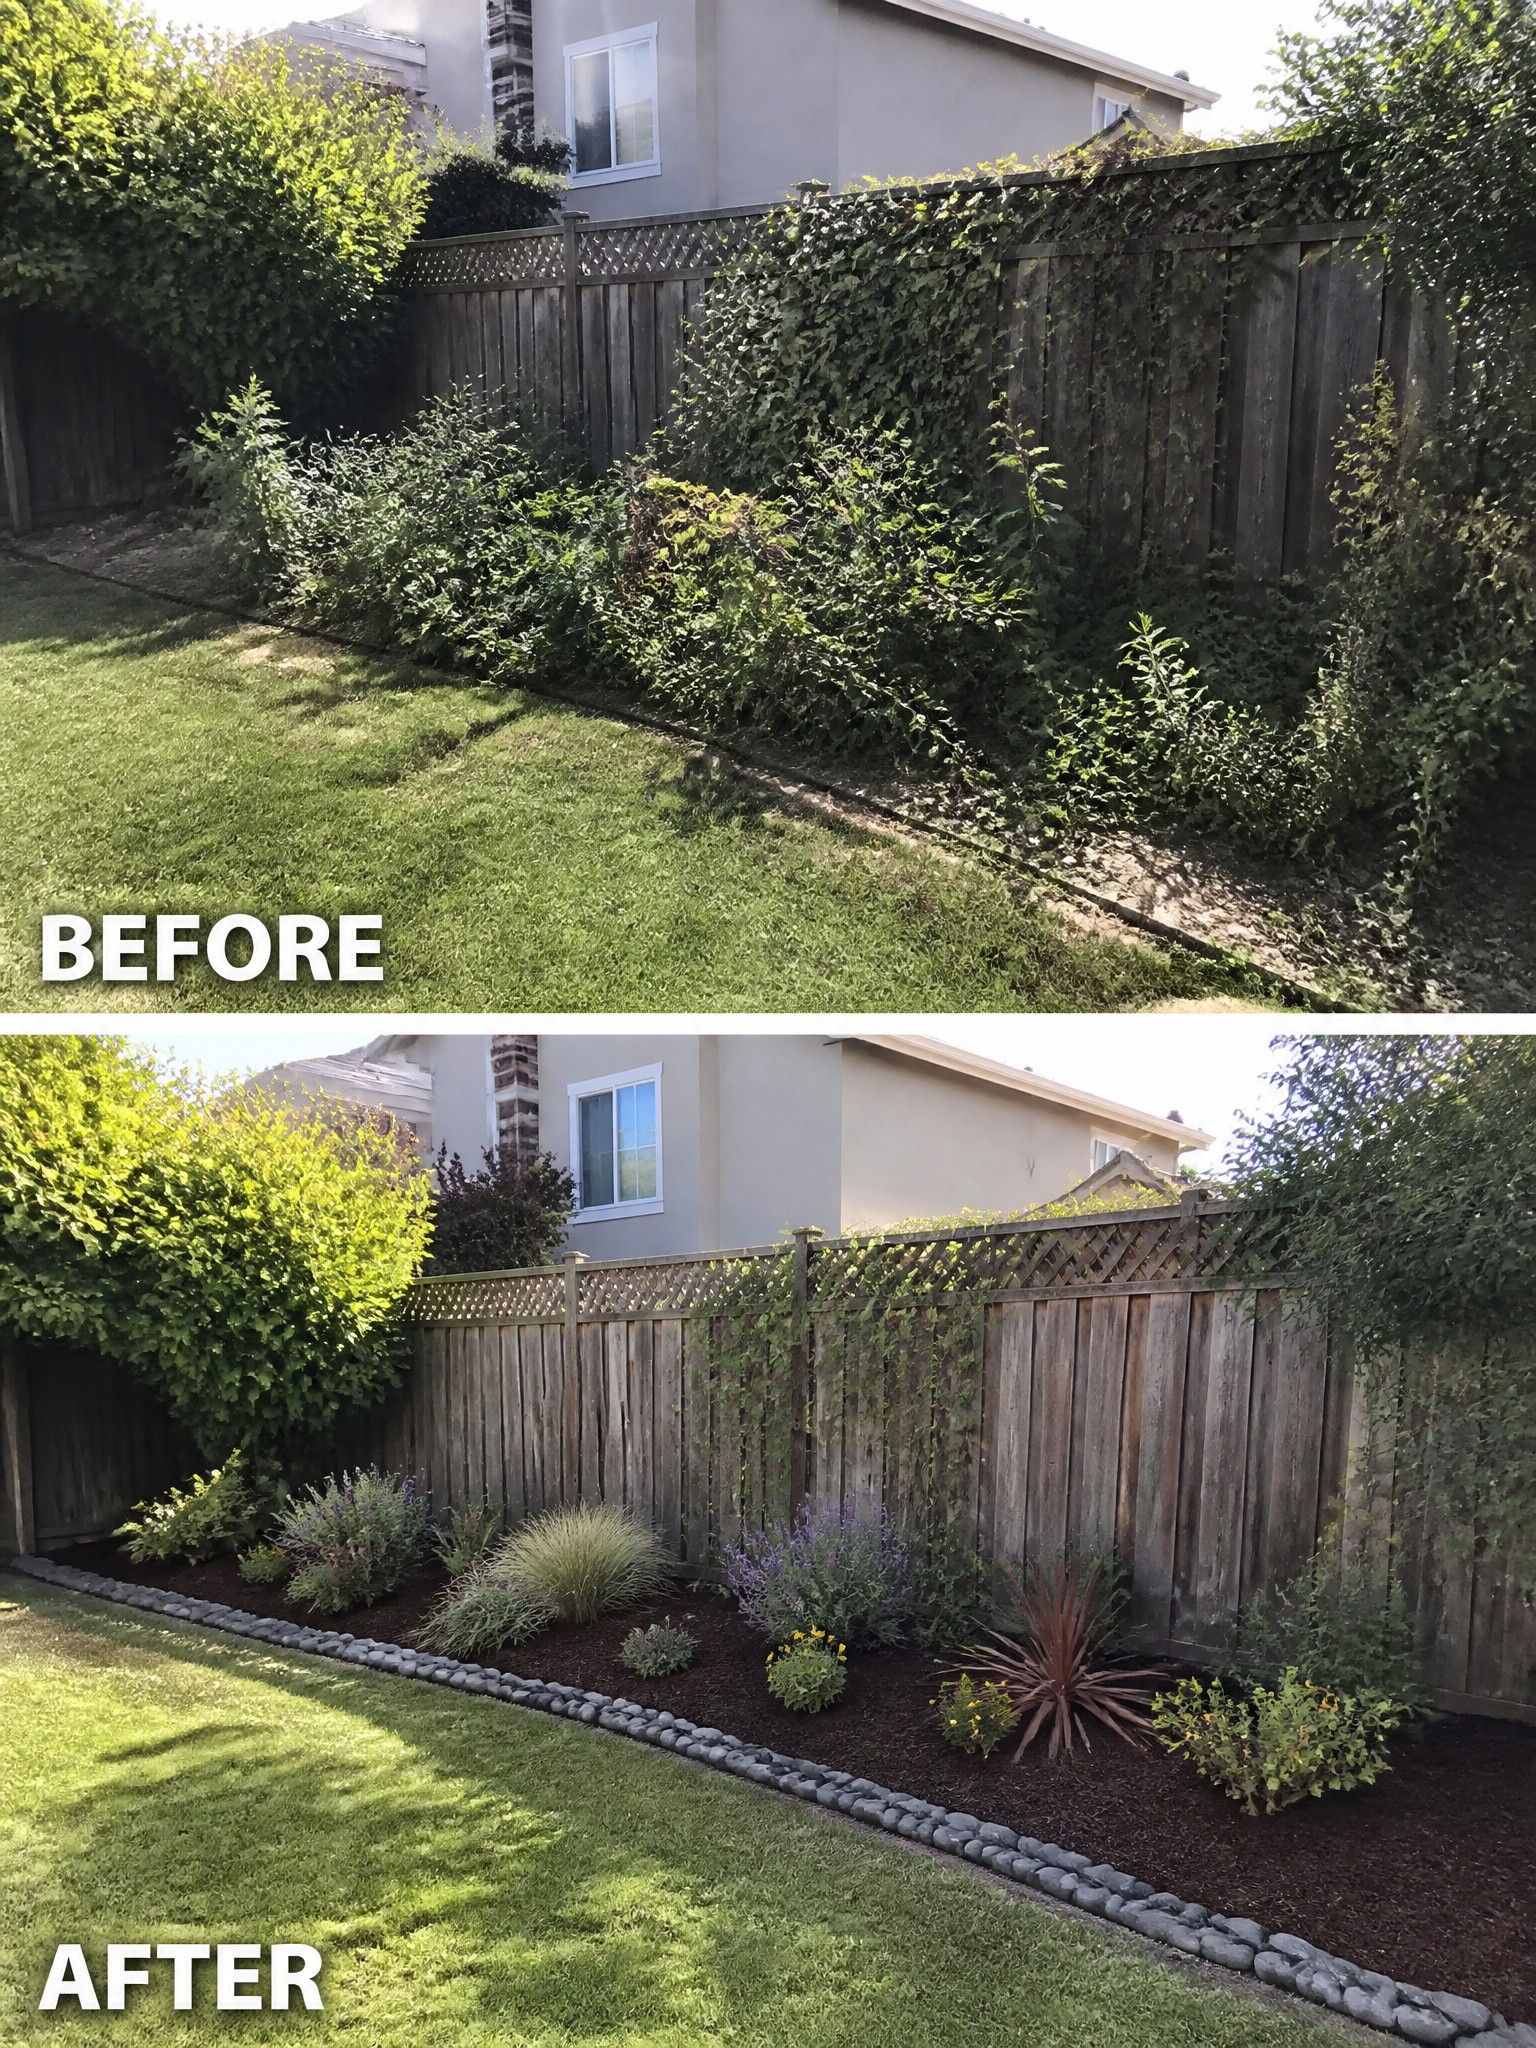
An overgrown strip along a fence often looks messy because there is no clear edge between the lawn and the planting area. Adding a rock border and a layer of mulch creates that separation right away and makes the whole side of the yard feel more intentional.
This approach works best along fences or property lines where plants tend to sprawl. Start by clearing the worst of the weeds, lay down a simple edging material, then mulch and plant in groups rather than scattering plants at random. The result stays neat with far less weekly trimming.
Frequently Asked Questions
Q: How thick should I spread the mulch when redoing a flower bed?
A: Aim for about three inches deep over the whole area. That amount blocks weeds well while still letting rain soak down to the roots.
Q: Should I dig out the old edging before switching to a new border?
A: Pull up the old stuff first so the new border sits flat and straight. Trying to layer over it often leaves gaps where mulch leaks out later.
Q: What if weeds start popping up through the mulch after a month or two?
A: Spot treat them by hand right away instead of waiting. A quick pull now keeps the bed looking clean without needing a full redo.
