

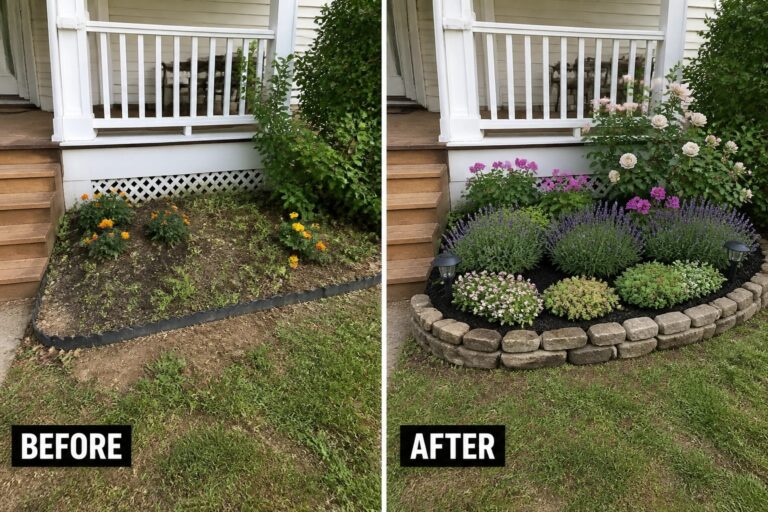
Many gardens end up looking scattered because the beds lack any real boundary and the plants all sit at the same height.
Stone edging keeps soil and mulch from washing out while layered planting adds depth that holds up better as things grow in.
I tend to focus on the edging first.
It gives the area a settled shape that makes choosing and placing new plants much simpler later on.
A few of these combinations with low borders and staggered heights are the ones I would test in my own yard before trying anything more involved.
Use Stone Edging To Shape A Flower Bed
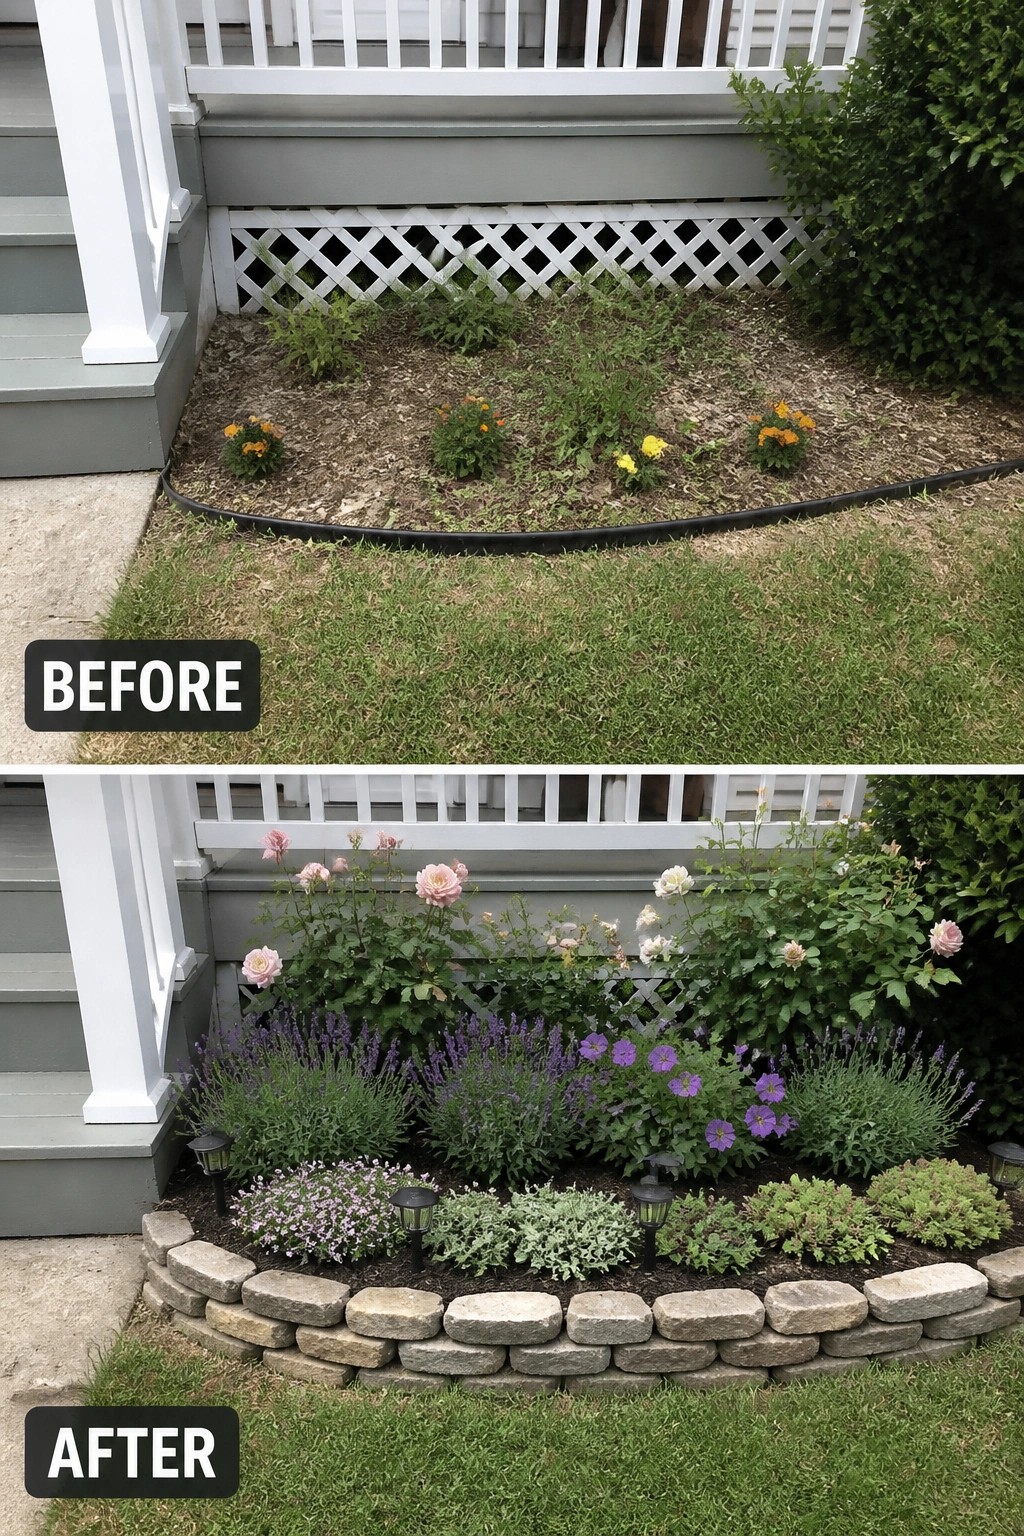
A messy strip of weeds and scattered flowers along the foundation looks unplanned. Adding a low stone border creates a clear edge that turns the area into an actual garden bed instead of just leftover ground.
This approach works best along the front or side of a house where the bed needs to feel contained. Lay the stones first so the shape stays consistent, then fill in with plants in different heights and textures to keep the bed looking full without crowding.
Add Stone Edging To Define Garden Beds
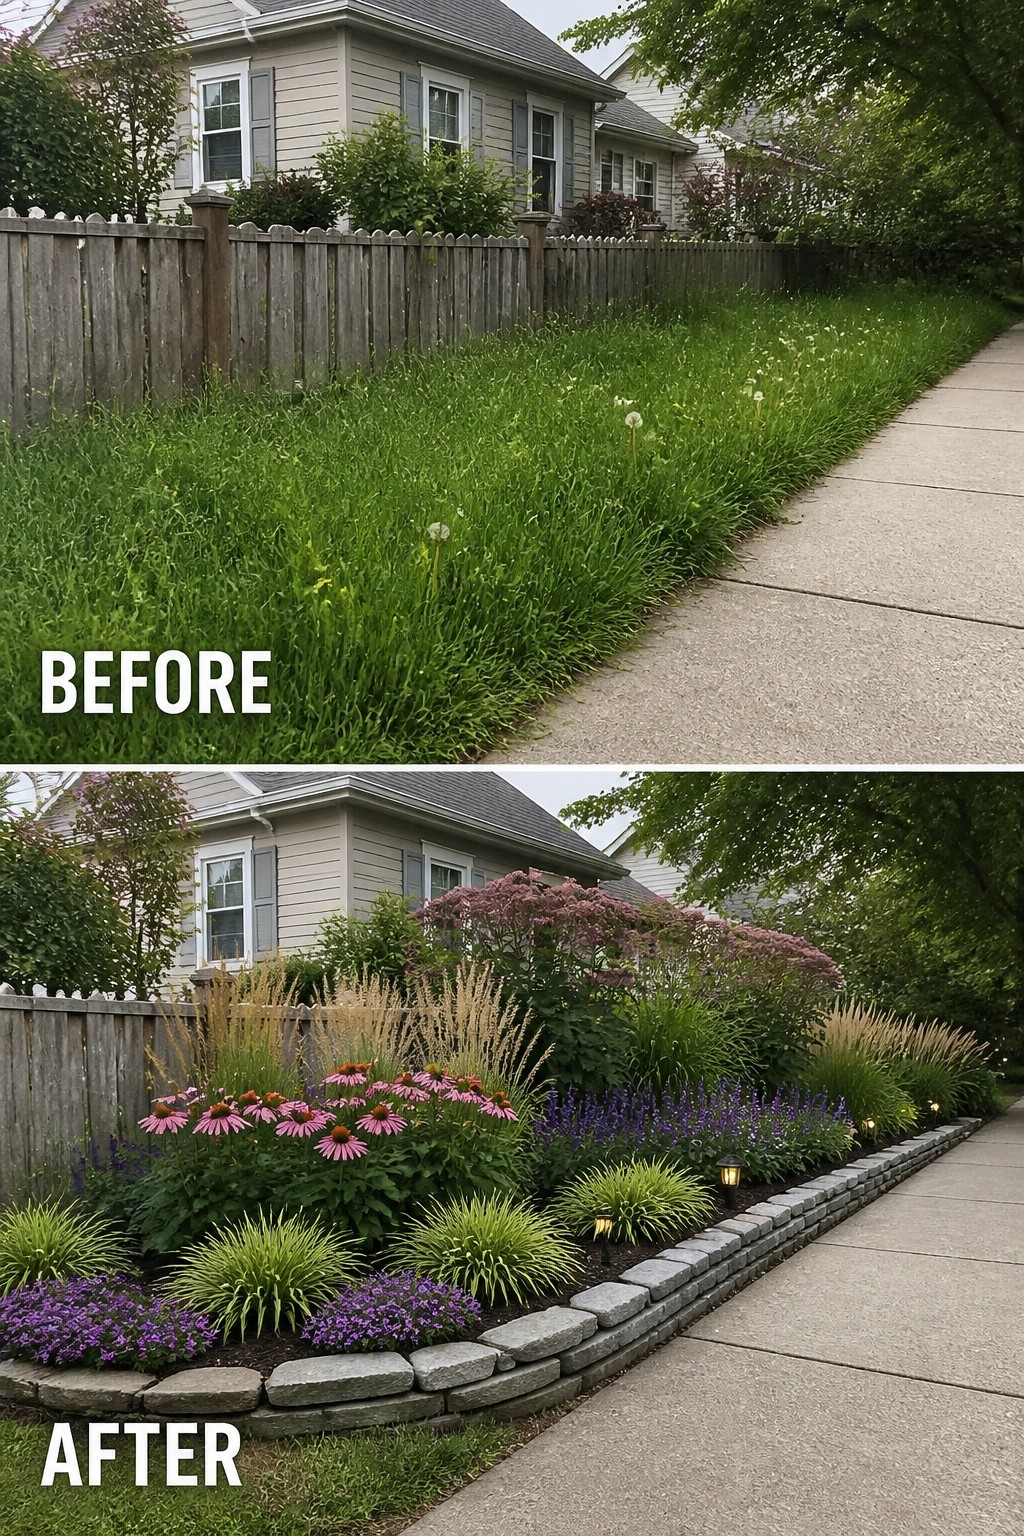
The biggest change here is replacing a strip of tall, weedy grass with a clear border made of stacked stone. Once the edge is set, the space becomes a proper planting area instead of just an extension of the lawn. The stone keeps mulch in place and makes mowing along the sidewalk much simpler.
This approach works well along fences, driveways, or side paths where grass tends to creep. Mark the bed shape first, then set the stones level before adding soil and plants. Keep the bed width reasonable so it stays easy to reach for weeding and watering.
Define A Path With Stone Edging And Layered Plants
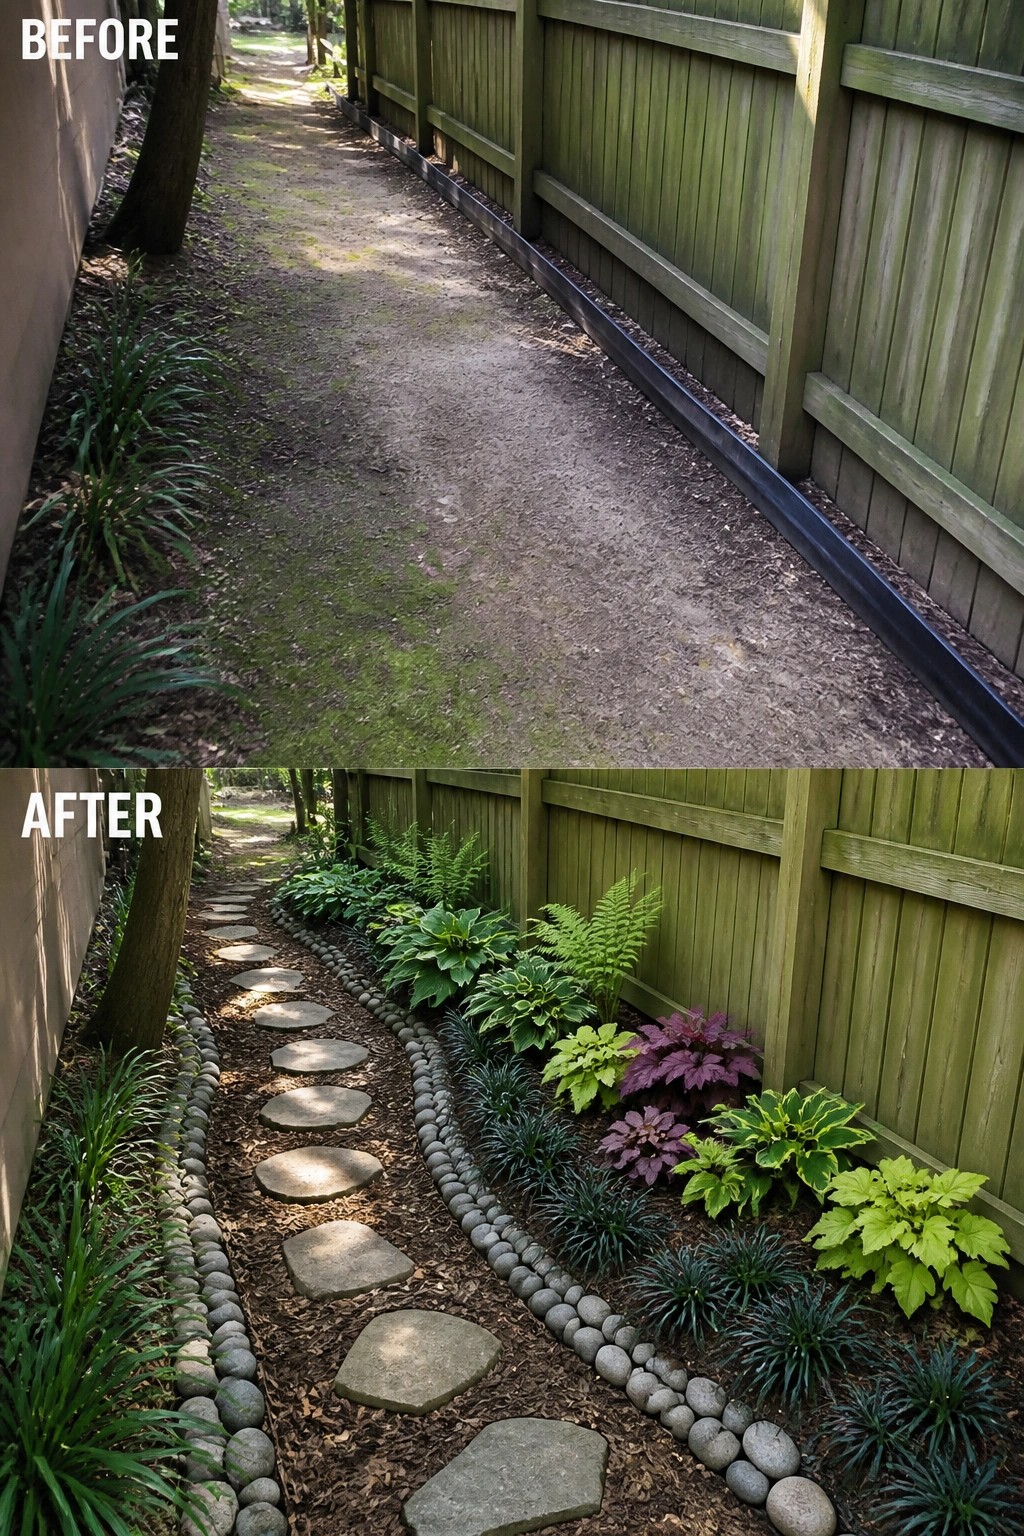
A plain dirt path next to a fence can feel unfinished and hard to maintain. Adding a simple stone border on both sides gives the path clear shape and creates space for planting beds that stay neat over time.
This idea works especially well in narrow side yards or along property lines. Lay the edging first to set the layout, then fill the beds with mulch and a few groups of plants in different heights. The result keeps the path easy to walk while making the whole area look more cared for.
Build Tiered Beds With Stone Retaining Walls
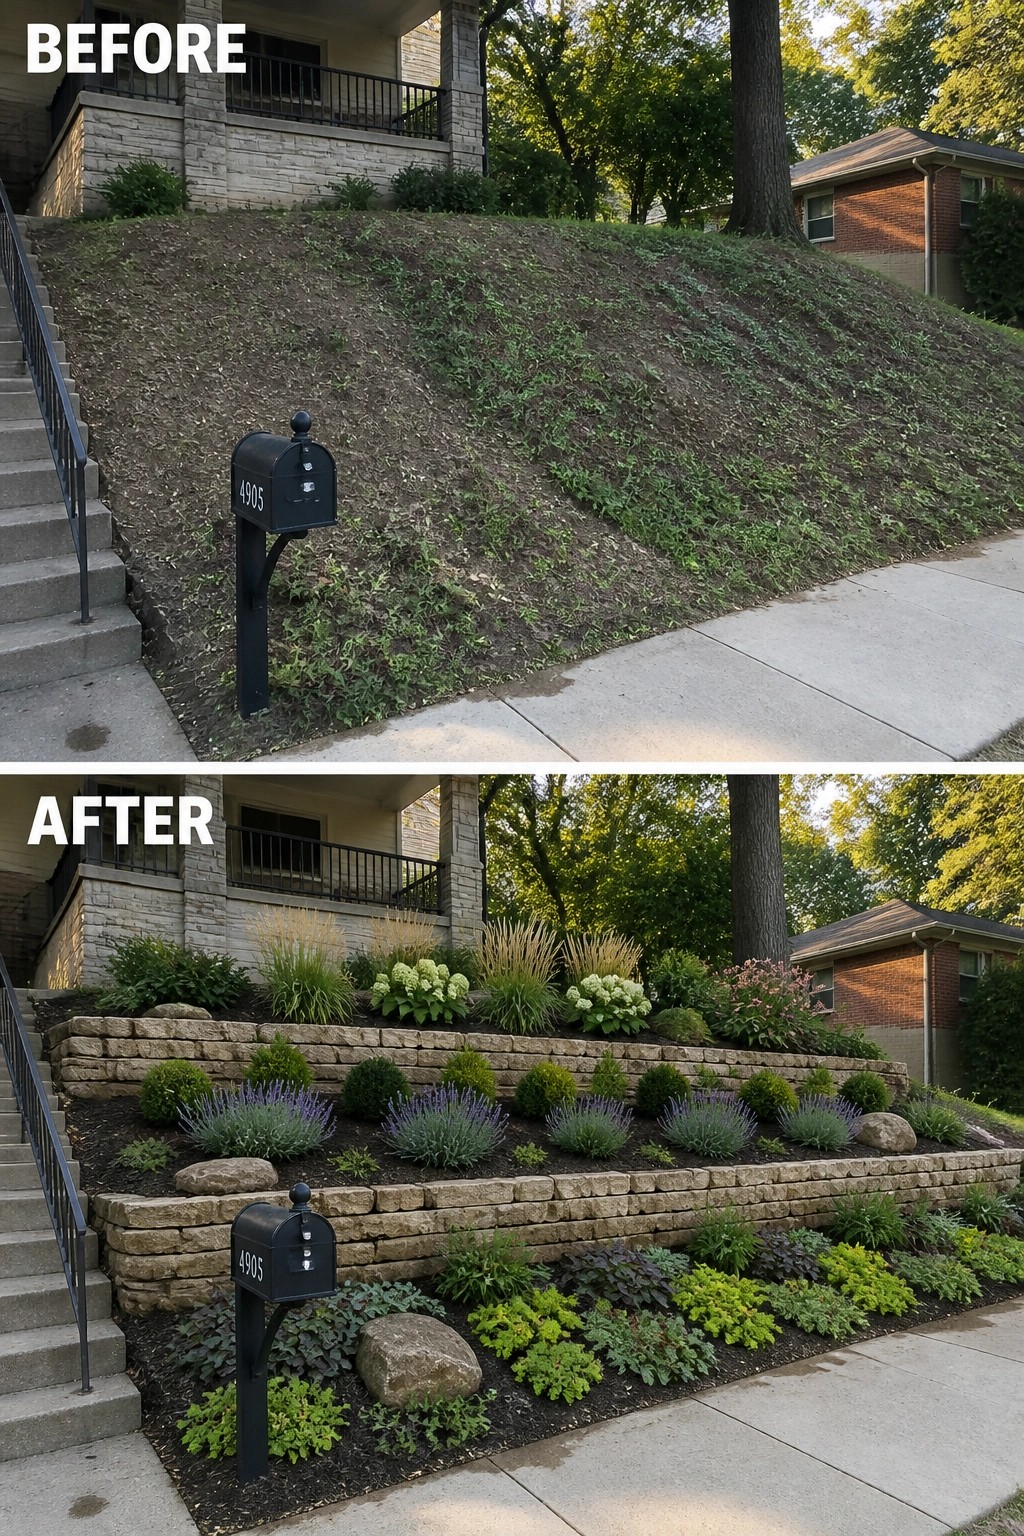
A steep, bare slope is hard to plant and even harder to maintain. Adding low stone retaining walls breaks the hill into level beds that hold soil and give plants a place to grow. The result turns weedy ground into a series of clean, planted terraces that stay neat without constant mowing or sliding mulch.
This approach works best on front or side yards where the slope runs toward the street. Start with the lowest wall first, then stack the next level a few feet back. Choose plants in layers, with taller ones near the back of each bed and shorter ground covers along the front edge, so the whole slope reads as one planned garden instead of scattered patches.
Define Flower Beds With Stone Edging
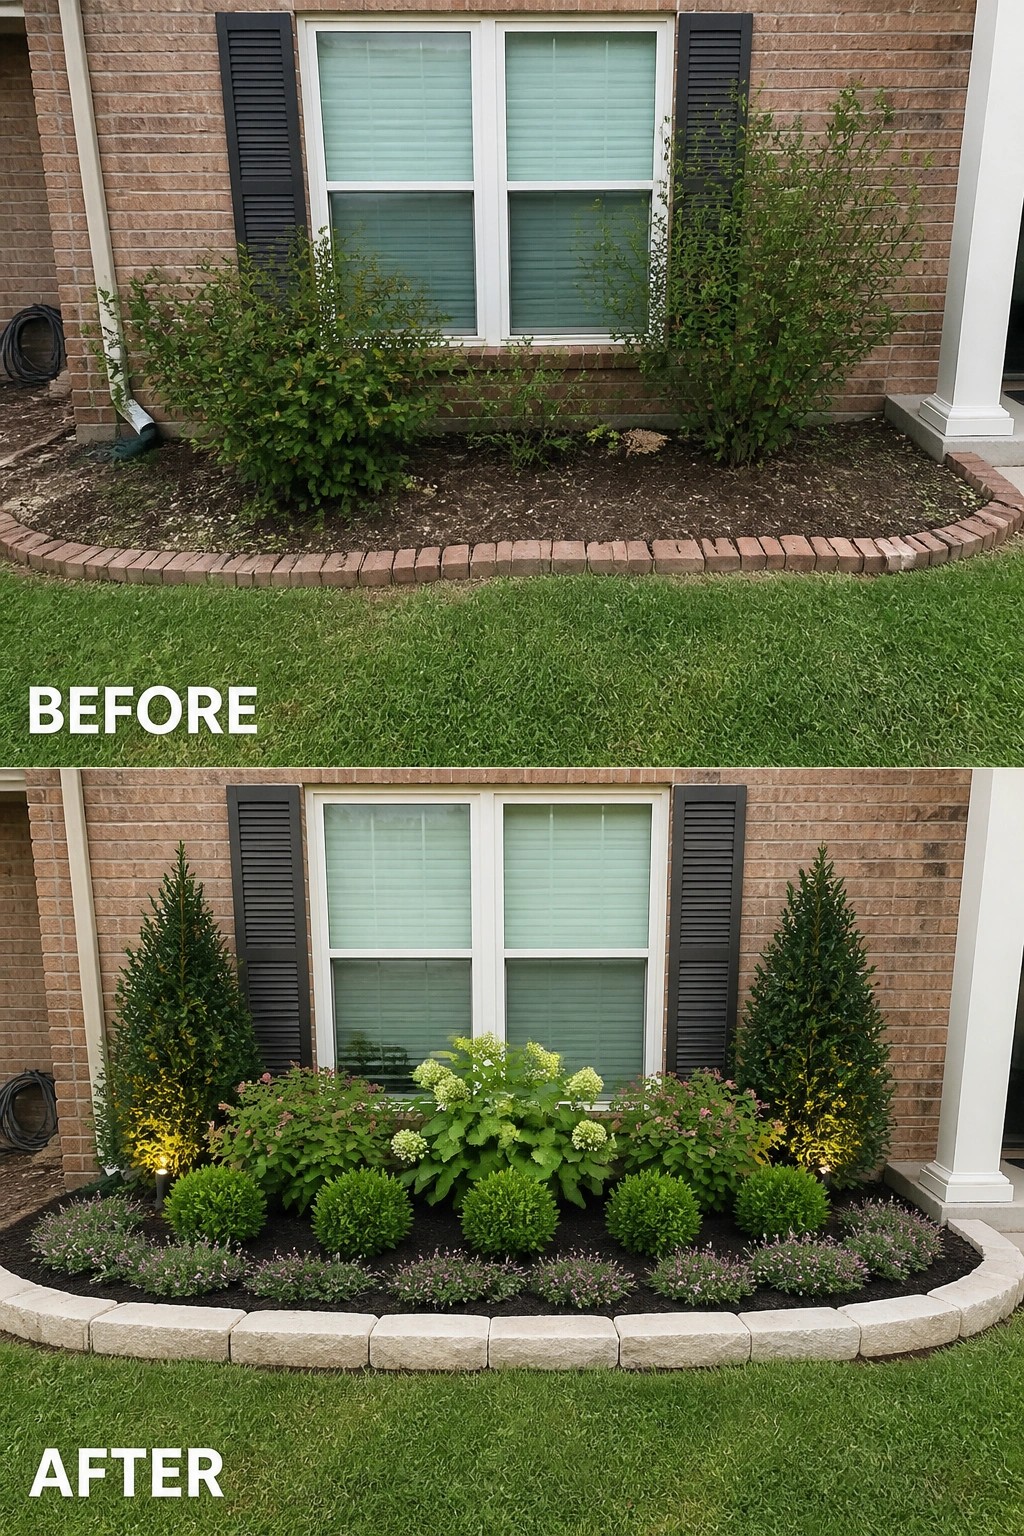
One simple way to improve a front bed is to add a clear stone edge and fresh mulch. The loose brick border and scattered shrubs gave the area a messy look, while the new edging and layered plants create a much cleaner outline that holds everything in place.
This idea works best on homes where the beds already exist but lack structure. Clean out old growth first, set the edging level with the lawn, then fill with mulch before adding plants in different heights. It keeps the bed looking planned without needing major changes to the house itself.
Define Your Garden Bed With Stone Edging
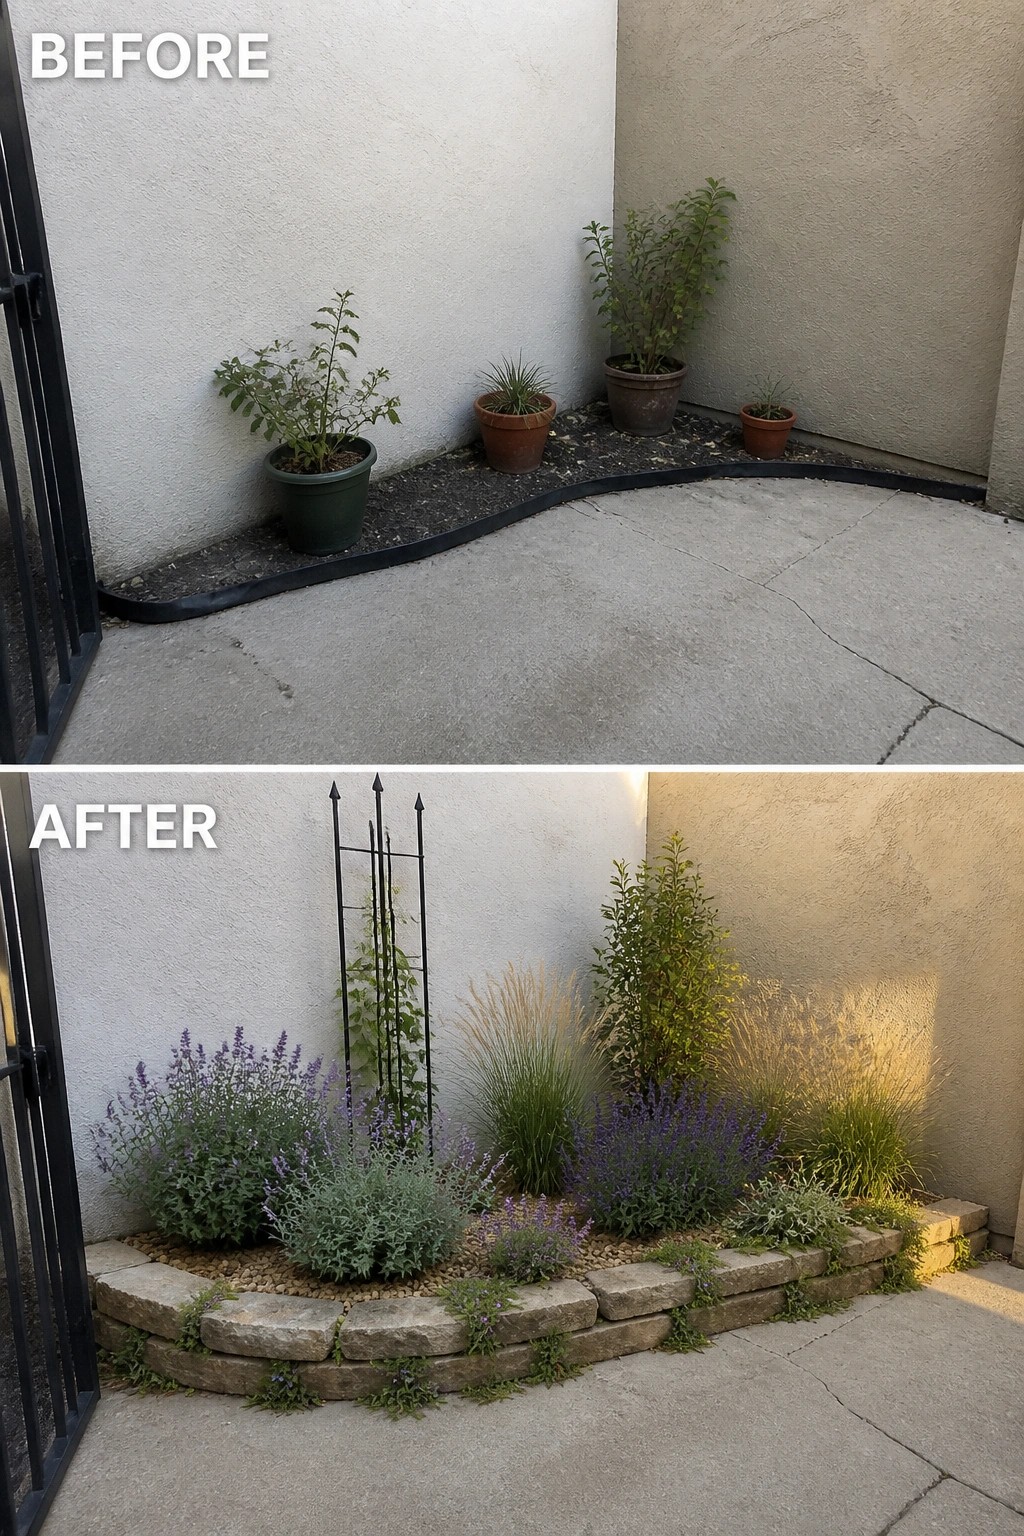
A bare strip of ground next to a concrete patio often looks unfinished. Adding a low stone border gives the space a clear shape and turns scattered pots into one planted area that feels intentional. The curved edge in this example keeps the bed from looking random while still following the natural line of the wall.
This approach works well in small side yards or corners where you want planting without losing walking space. Start with the edging first, then fill in with a few layers of plants at different heights. Gravel or mulch inside the border keeps the look tidy and cuts down on weeds.
Shape Tree Beds With Stone Edging
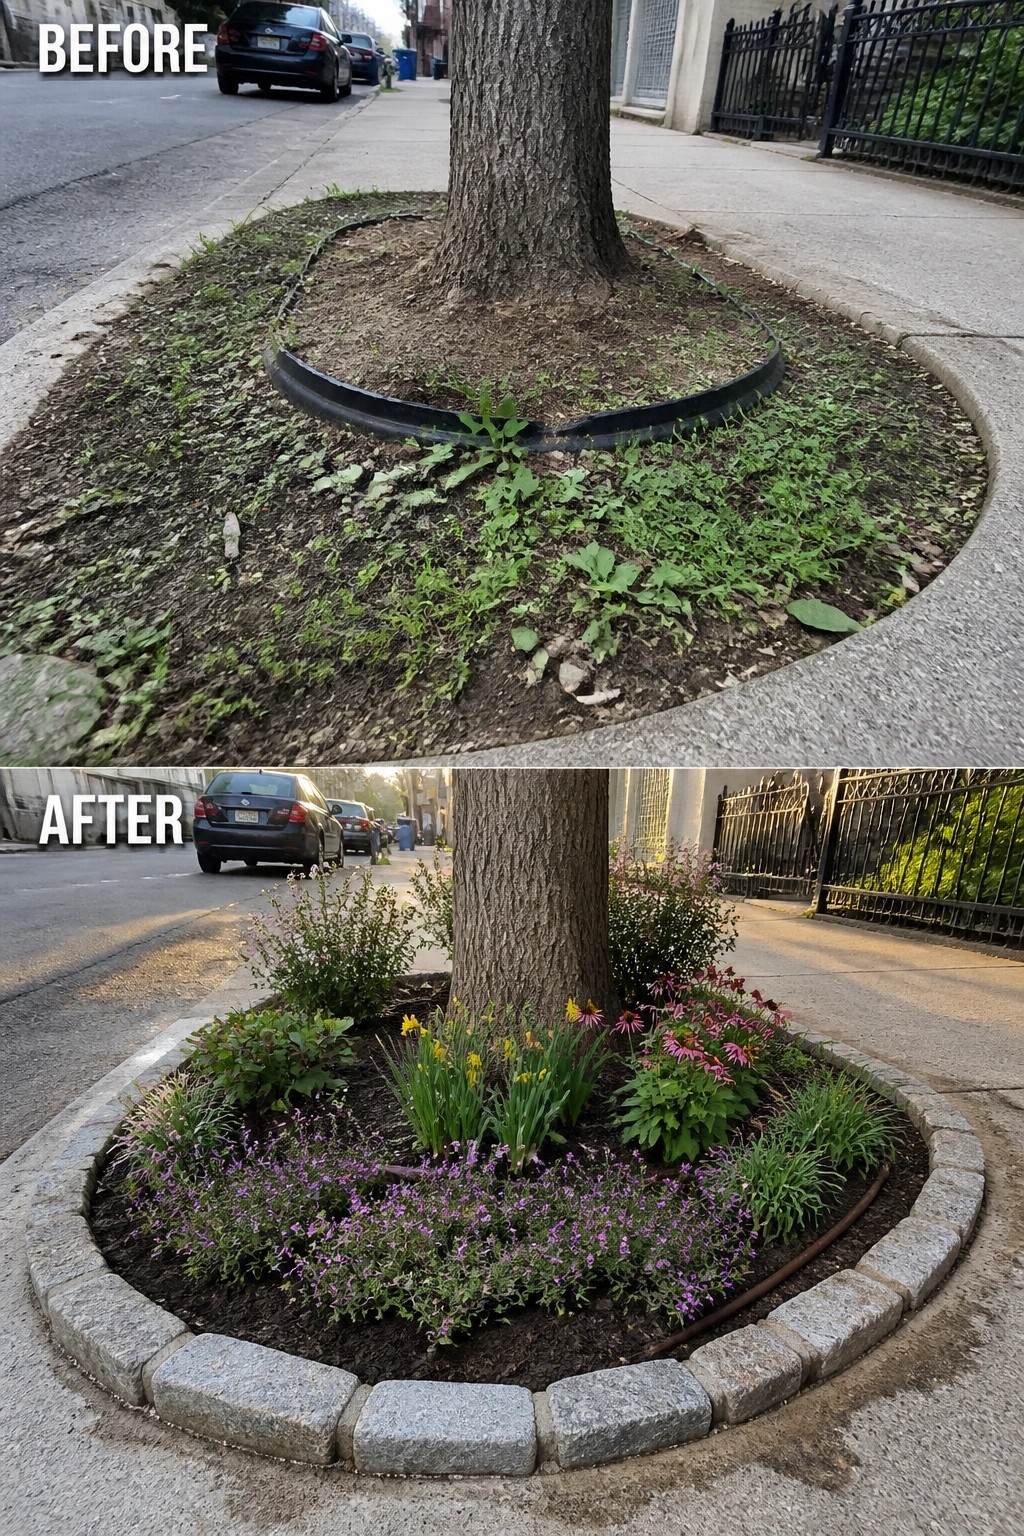
A bare or weedy spot around a tree often looks messy because nothing holds the soil in place. Adding a low stone border fixes that right away by creating a clear shape and keeping mulch or soil from spilling onto the sidewalk. The simple change turns an ignored patch into something that looks planned.
This works best along streets or in small front areas where space is tight. Start with the edging so the bed has a firm outline, then add a few layers of plants that stay low near the tree and grow a bit taller toward the edges. It keeps roots safe while making the whole spot easier to care for over time.
Define Flower Beds With Edging And Layered Plants
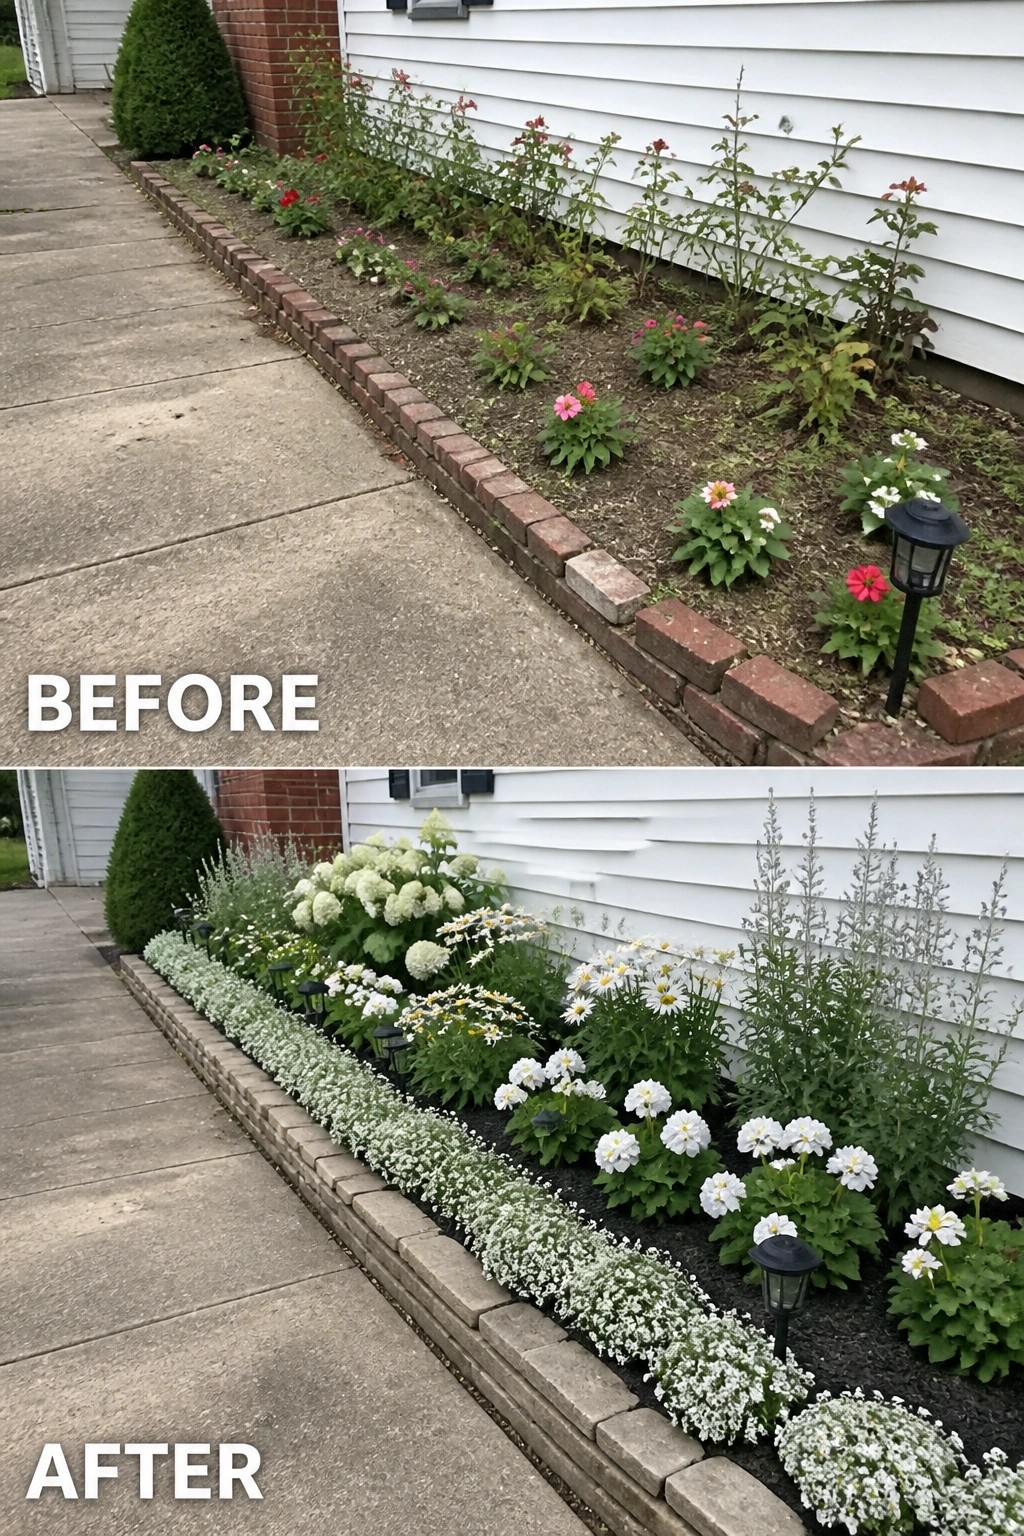
The before photo shows a scattered row of plants along the house with loose bricks that did not hold a clean line. In the after photo the bed has a solid stone edge, fresh mulch, and plants arranged by height so the whole strip looks intentional instead of weedy. That simple framing turns a neglected strip into something that actually reads as a garden.
This approach works well along a walkway or foundation where space is narrow. Start by resetting or adding edging to mark the bed clearly, then fill in with a low front layer, a mid layer of flowers, and taller plants at the back. Keep the plant colors limited so the bed stays calm rather than busy. The same steps can tidy up any straight border that has outgrown its original shape.
Define A Driveway Edge With Stone Edging
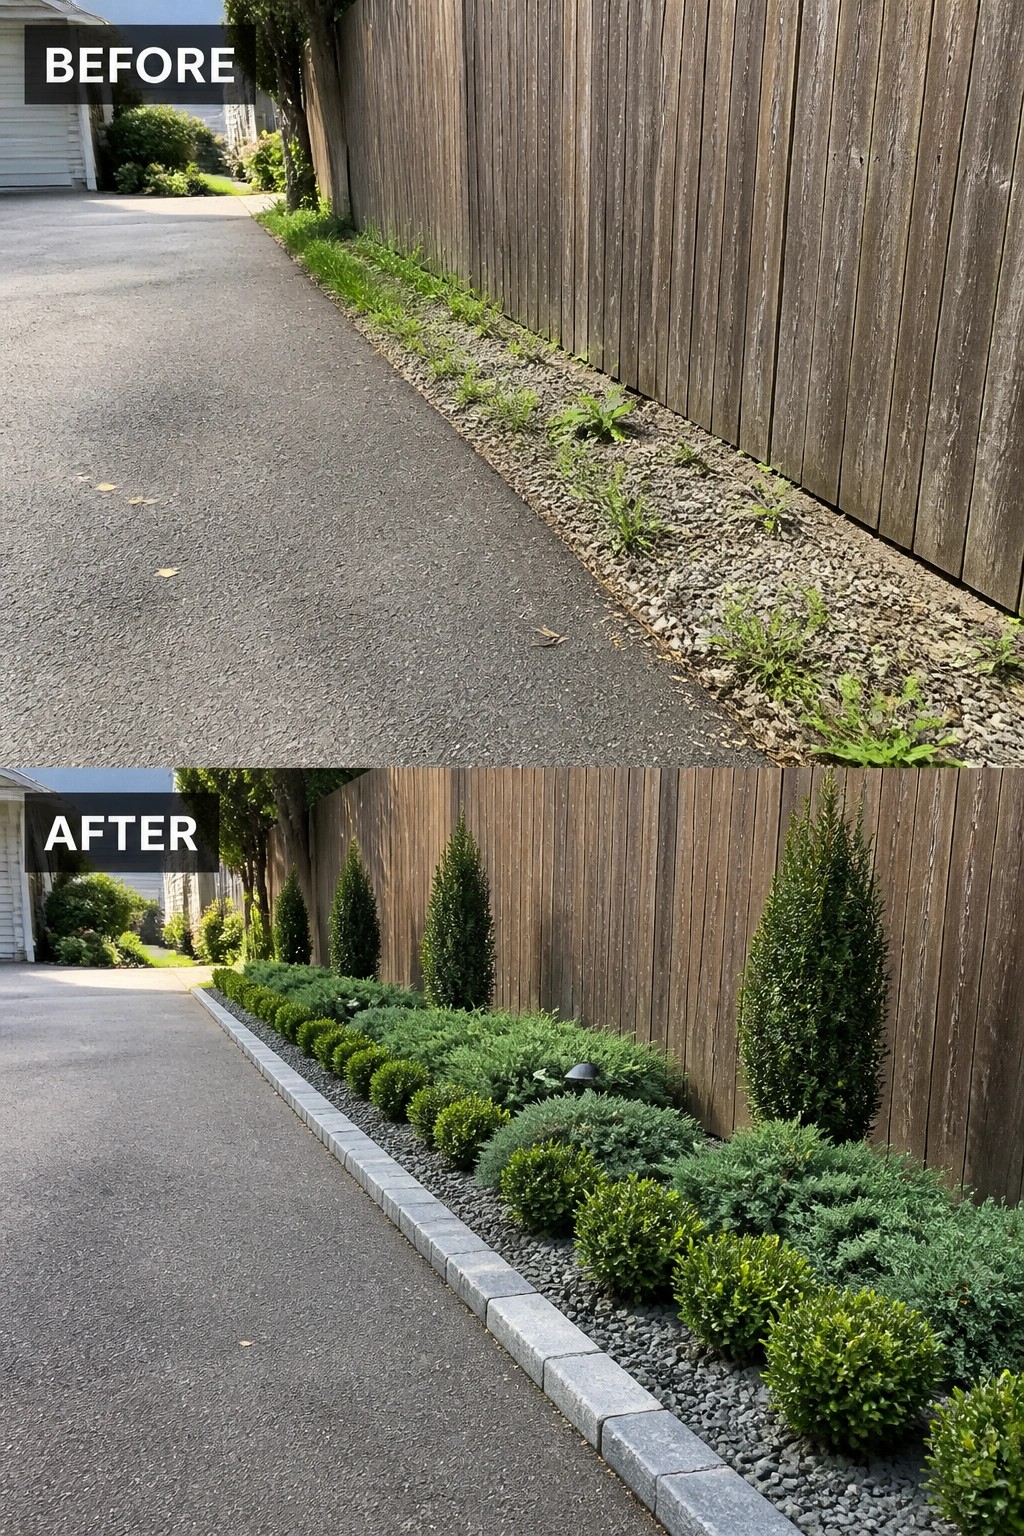
Adding a simple stone edge turns a messy strip of gravel and weeds into a proper garden bed. The before view shows loose gravel running right up to the fence with no real boundary. Once the edging went in, the bed gained clear shape and the gravel stayed contained instead of spilling onto the driveway.
This idea suits long fence lines or narrow side yards where you need order without crowding the space. Lay the edging first so the shape stays consistent, then plant low shrubs in front and taller evergreens behind for layers. The result looks planned even if you keep the plant list short.
Create Clear Flower Beds Using Stone Edging
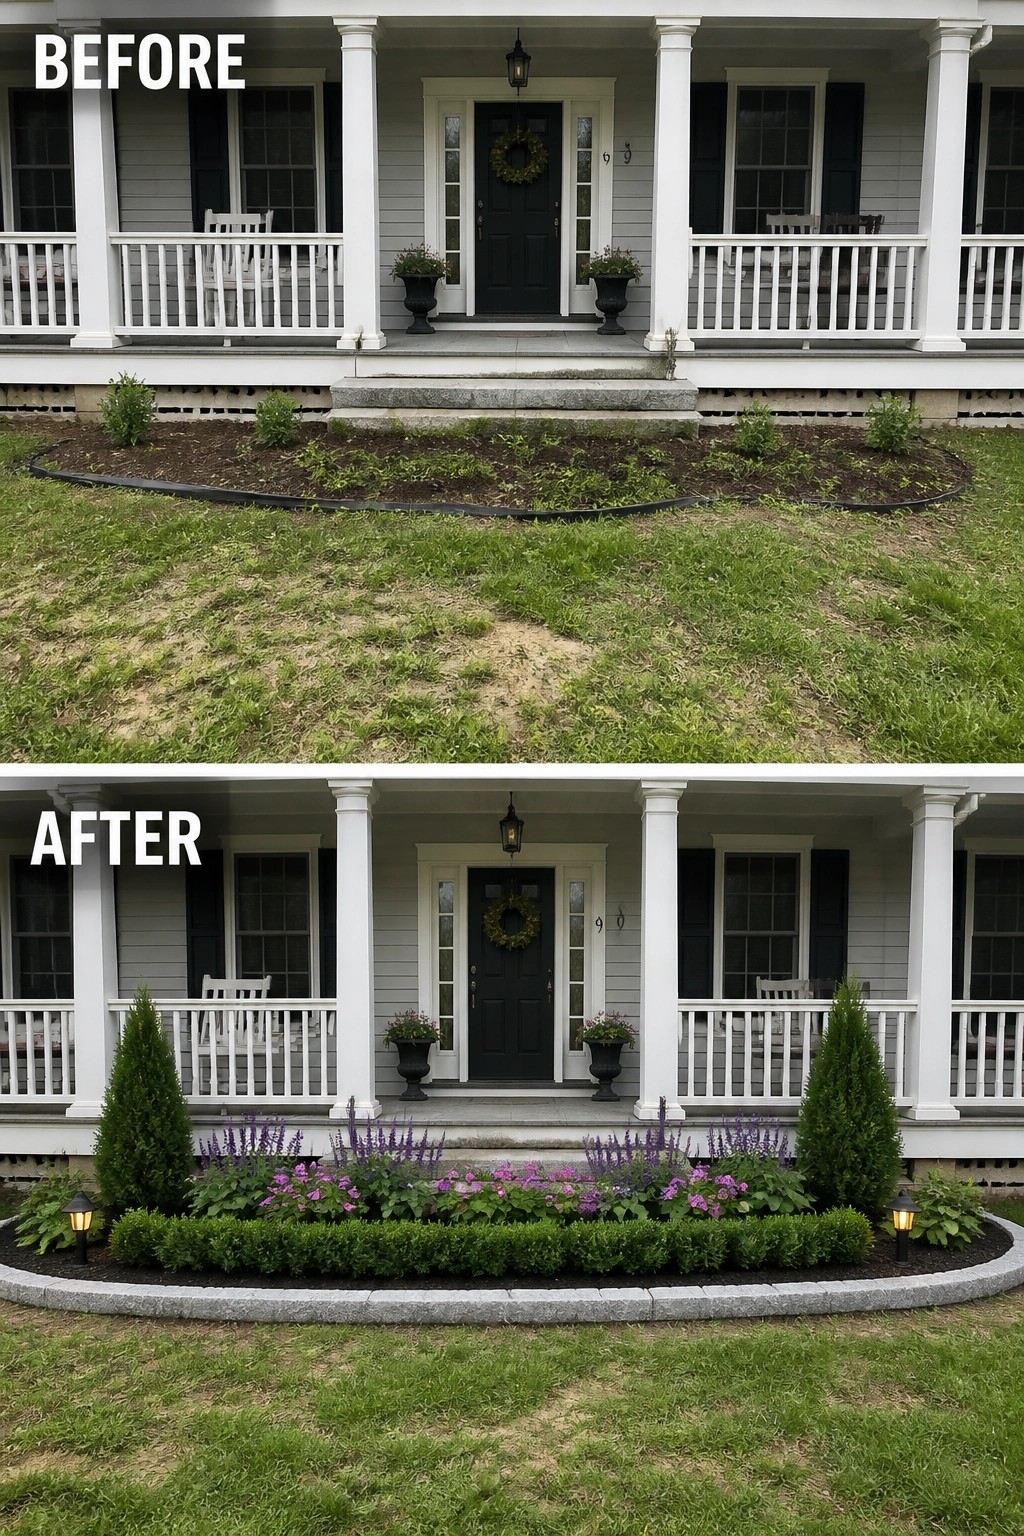
A bare stretch of ground in front of the porch can look unfinished even when the house itself is in good shape. Adding a simple stone border turns that open area into a proper bed. The curved edge keeps the lawn from creeping in and gives the space a settled look right away.
This approach works well on any front yard where the planting area feels loose or patchy. Start with the edging first so the shape is set, then fill in with a mix of low shrubs at the corners and flowering plants along the front. The result feels planned without needing a full redesign.
Add Stone Edging To Shape A Flower Bed
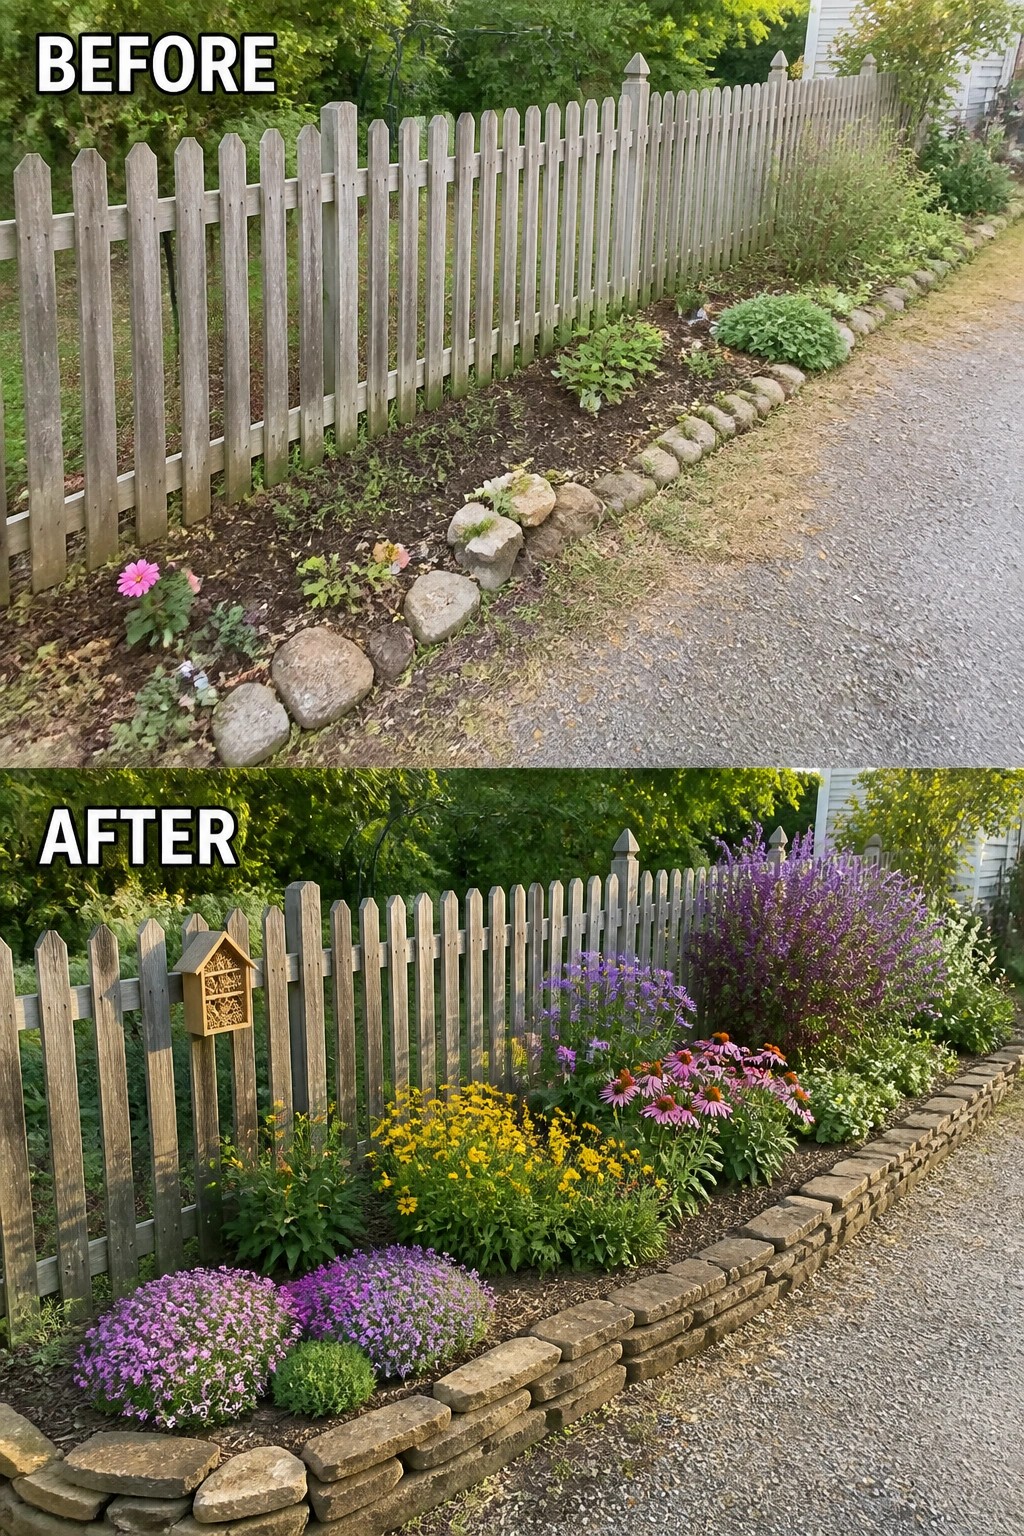
A narrow strip along a fence often ends up looking scattered when plants are just dropped in without a clear edge. The change here comes from adding a low stone border that runs the full length and then filling the bed with plants in different heights and bloom times. That single step turns a weedy patch into something that looks intentional instead of accidental.
This approach works well along driveways, side yards, or fence lines where the space is long and thin. Start by setting the stones first so the bed has a hard outline, then plant in layers with taller flowers toward the back and lower spreading ones in front. The edging keeps mulch and soil from spilling onto the path and makes weeding simpler later on.
Add Stone Edging To Give A Flower Bed Structure
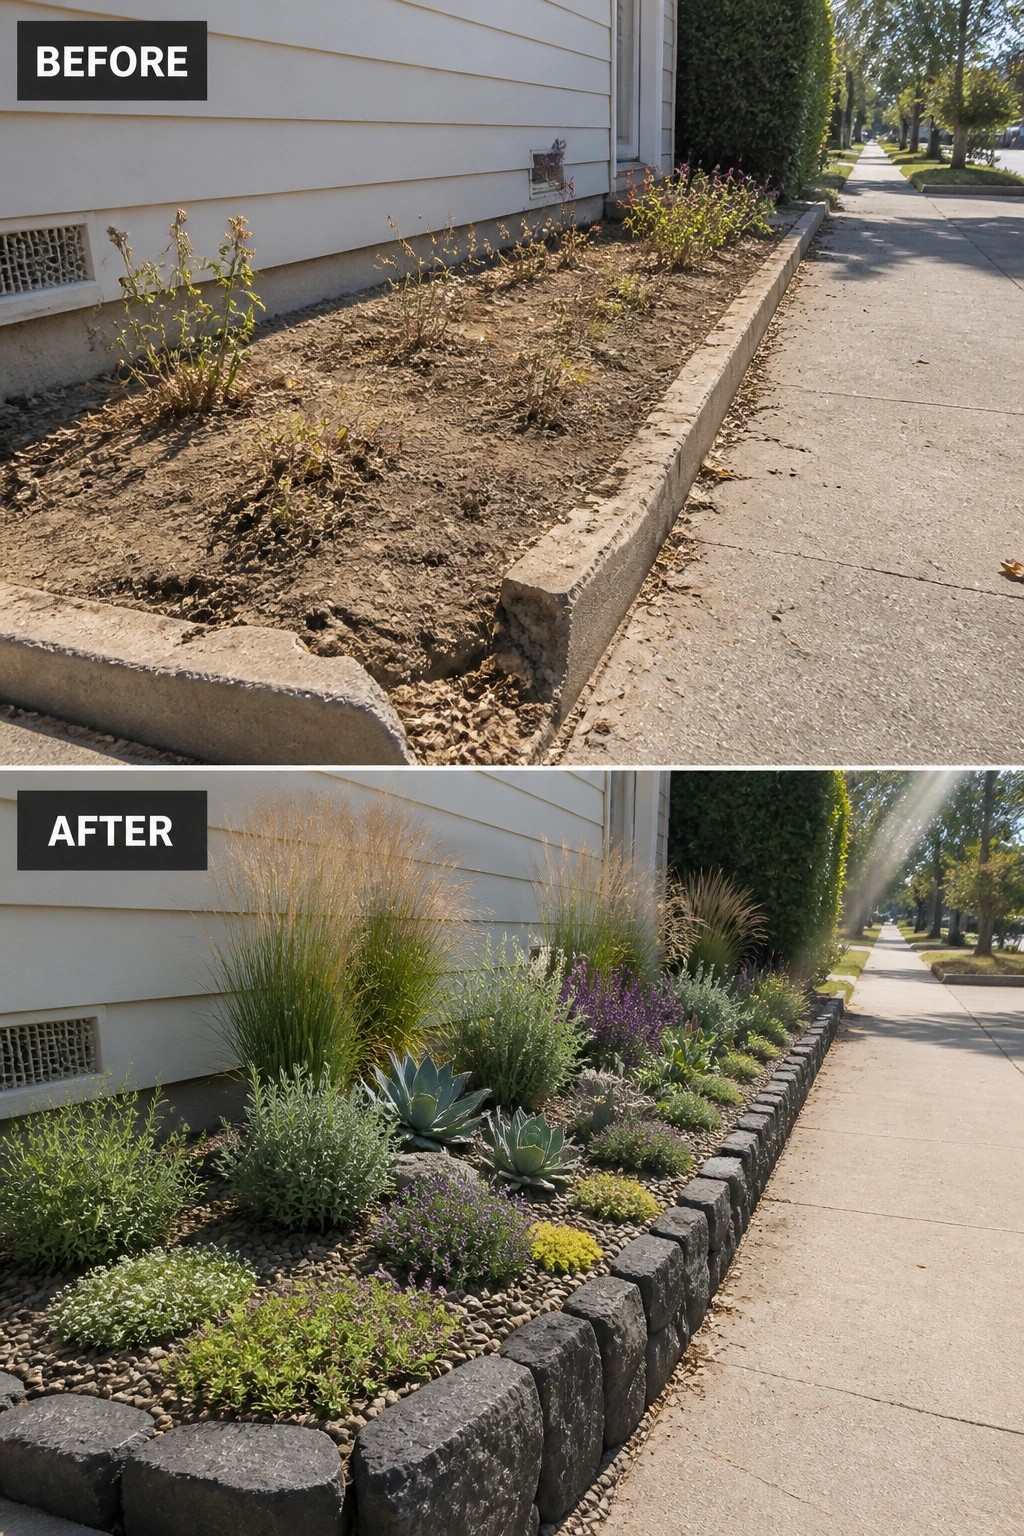
A bare strip of dirt along the foundation looks unfinished and collects weeds fast. Adding a low stone border creates a clear edge that keeps soil and plants in place while making the whole bed look intentional instead of leftover space.
This approach works best on narrow strips next to the house or sidewalk. Start with the edging first, then fill in with a mix of heights and textures so nothing feels too sparse. The gravel layer on top helps control weeds and gives the bed a finished look without much extra work.
Define A Messy Border With Stone Edging
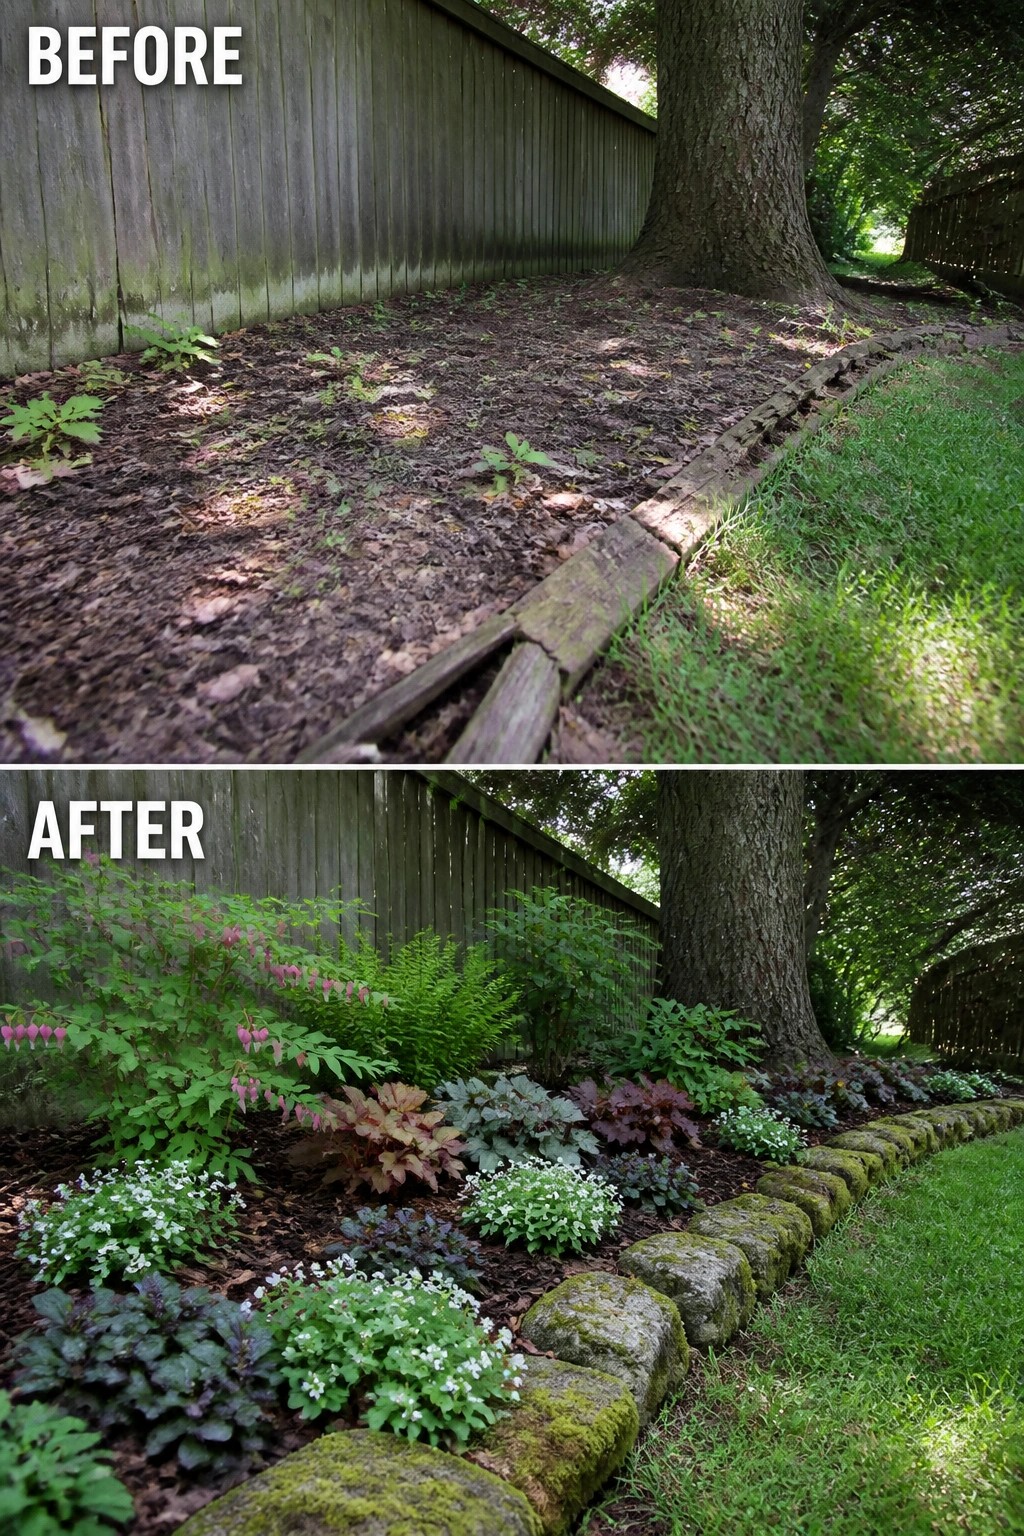
The main improvement comes from replacing the broken wooden border with a solid line of stones. Once the leaves and debris are cleared away, the edging gives the narrow strip a clear shape and turns scattered dirt into an actual garden bed.
This idea works best along fences or under large trees where the ground tends to collect mess. Lay the edging first to set the boundary, then plant in layers so shorter flowers sit in front and taller ones fill the back. Keep the bed narrow enough to reach from the lawn side without stepping on plants.
Define The Front Beds With Stone Edging
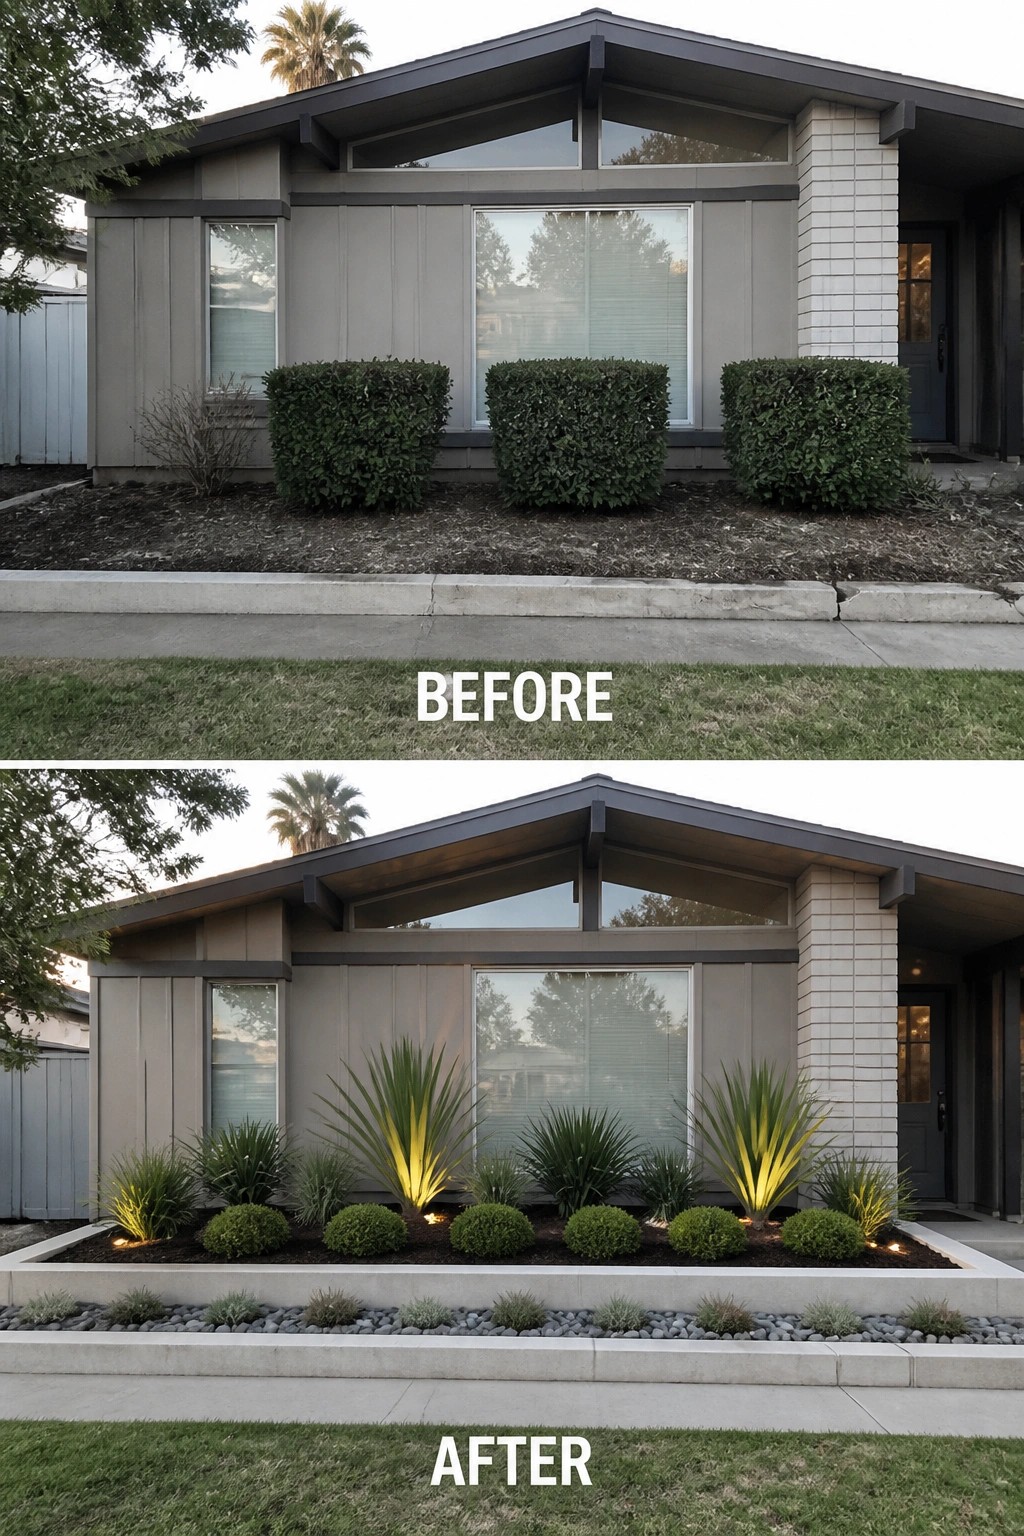
The before photo shows a flat row of shrubs sitting right against the house with no clear boundary. Adding a low concrete edge, a gravel strip, and a raised planting bed instantly gives the front a finished look. The layered plants and small uplights then turn a plain strip of dirt into something that actually frames the house.
This approach works well on ranch homes or any house with a wide foundation wall. Start by cleaning up the old shrubs and marking a simple straight edge. Keep the plant mix simple, using one or two taller accents and lower rounded shrubs so nothing blocks the windows. The edging and gravel keep mulch in place and make mowing easier along the curb.
Define Flower Beds With Stone Edging
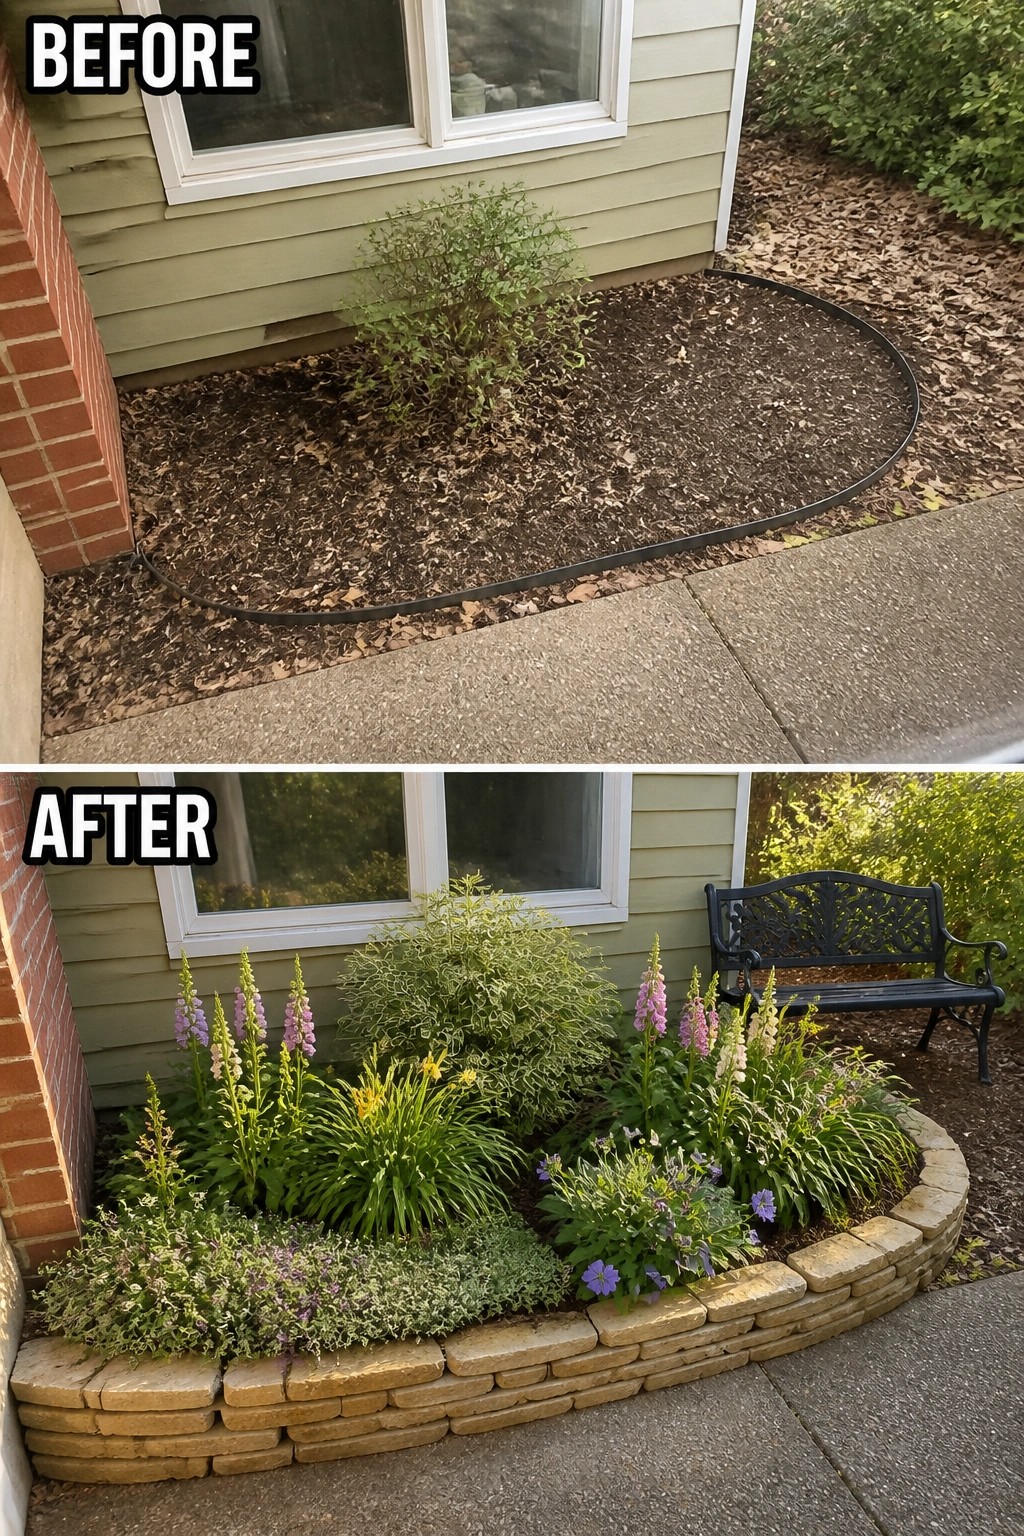
A simple stone border can turn a plain strip of mulch into a real garden bed. In this case the curved edge keeps everything contained and gives the plants a clear space to grow instead of spreading into the lawn or walkway.
This approach works best along a house foundation or in small side yards where you want structure without a big project. Lay the stones first so the bed has a firm shape, then fill it with plants in different heights and textures so nothing looks too flat or scattered.
Give Flower Beds Clean Lines With Stone Edging
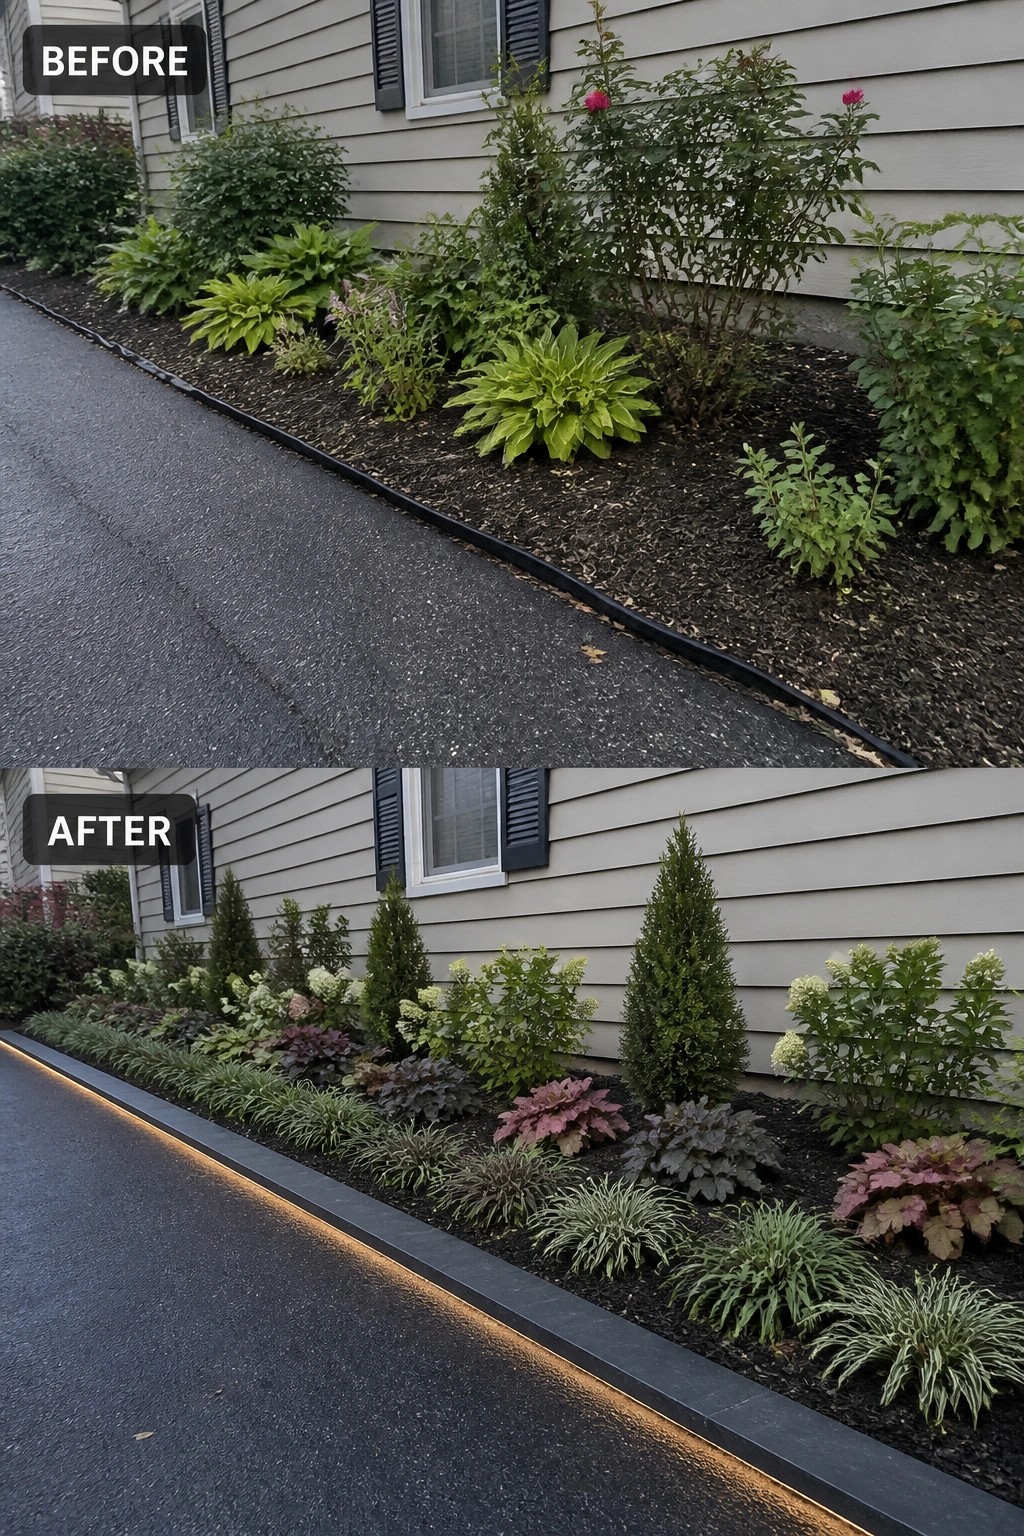
The before photo shows plants spilling in every direction with no real shape. Once a low stone edge was added and the plants were rearranged by height and color, the bed suddenly looked intentional instead of messy.
This idea works best along driveways or house walls where space is narrow. Put the edging in first so the bed has a clear border, then choose a few repeating plant shapes rather than too many different ones.
Add Stone Terraces To A Steep Slope
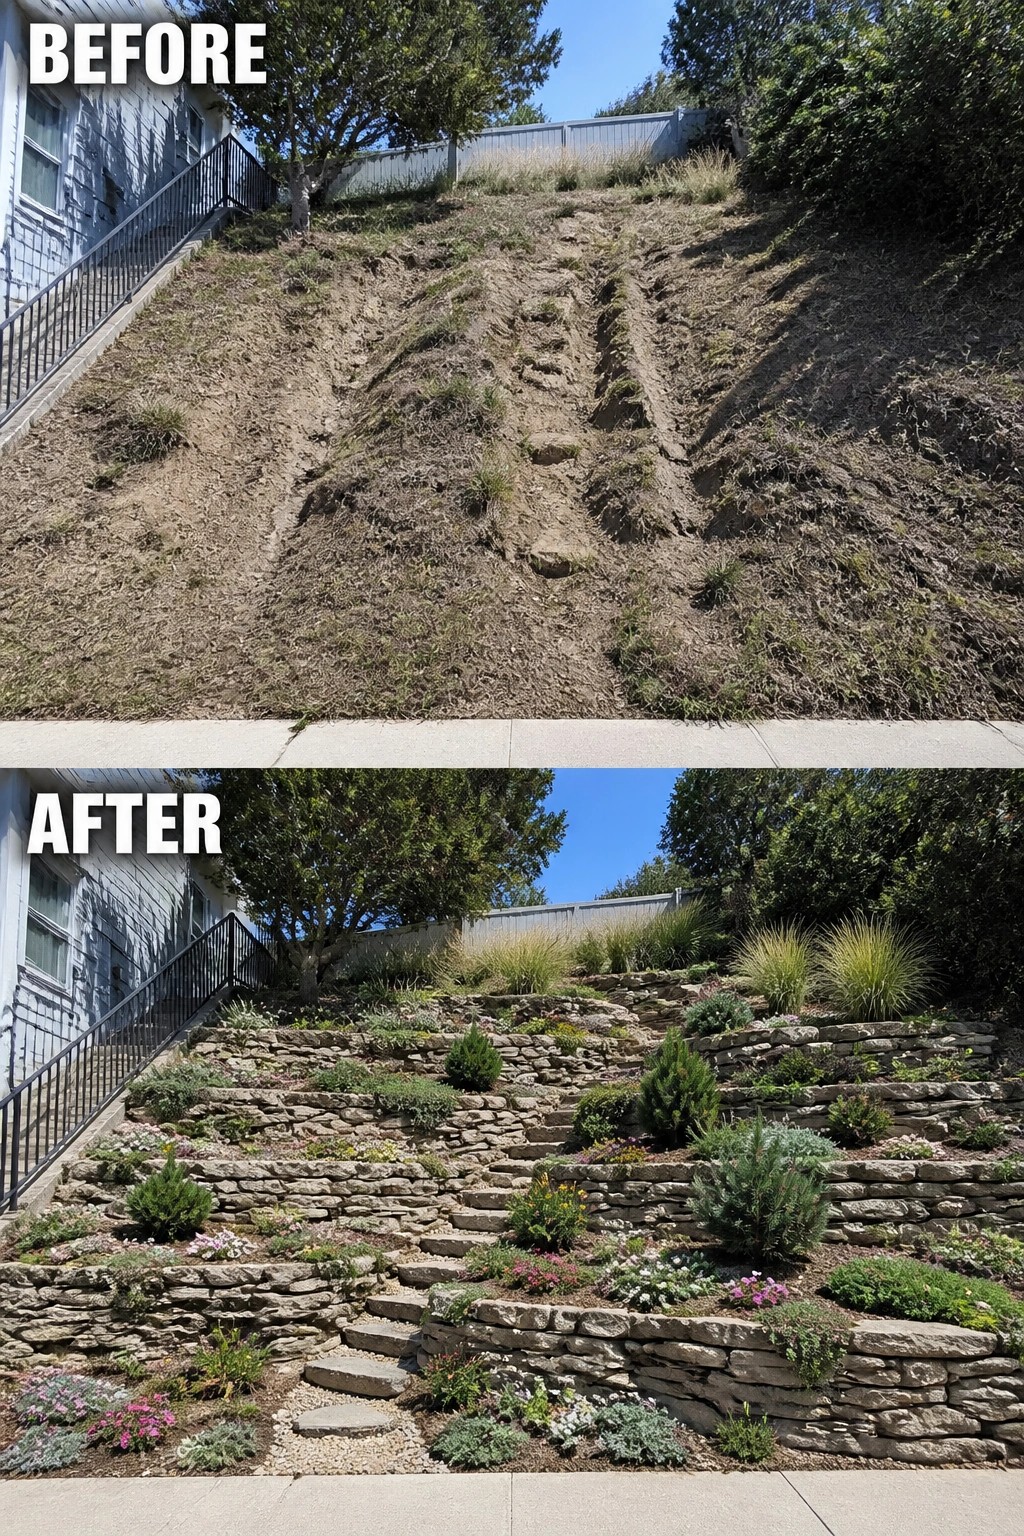
A bare, sliding hillside is hard to plant and even harder to maintain. Adding low stone retaining walls turns the slope into a series of flat beds that hold soil and water in place. The change is simple but effective. Once the walls are in, you can plant in clear rows instead of fighting erosion every season.
This approach works best on yards with noticeable grade changes where a flat lawn is not practical. Start with the walls and basic soil work before worrying about specific plants. Keep the beds narrow enough to reach across for weeding, and repeat the same stone style so the whole hillside reads as one planned area rather than scattered patches.
Use Stone Edging To Give A Patio A Finished Border
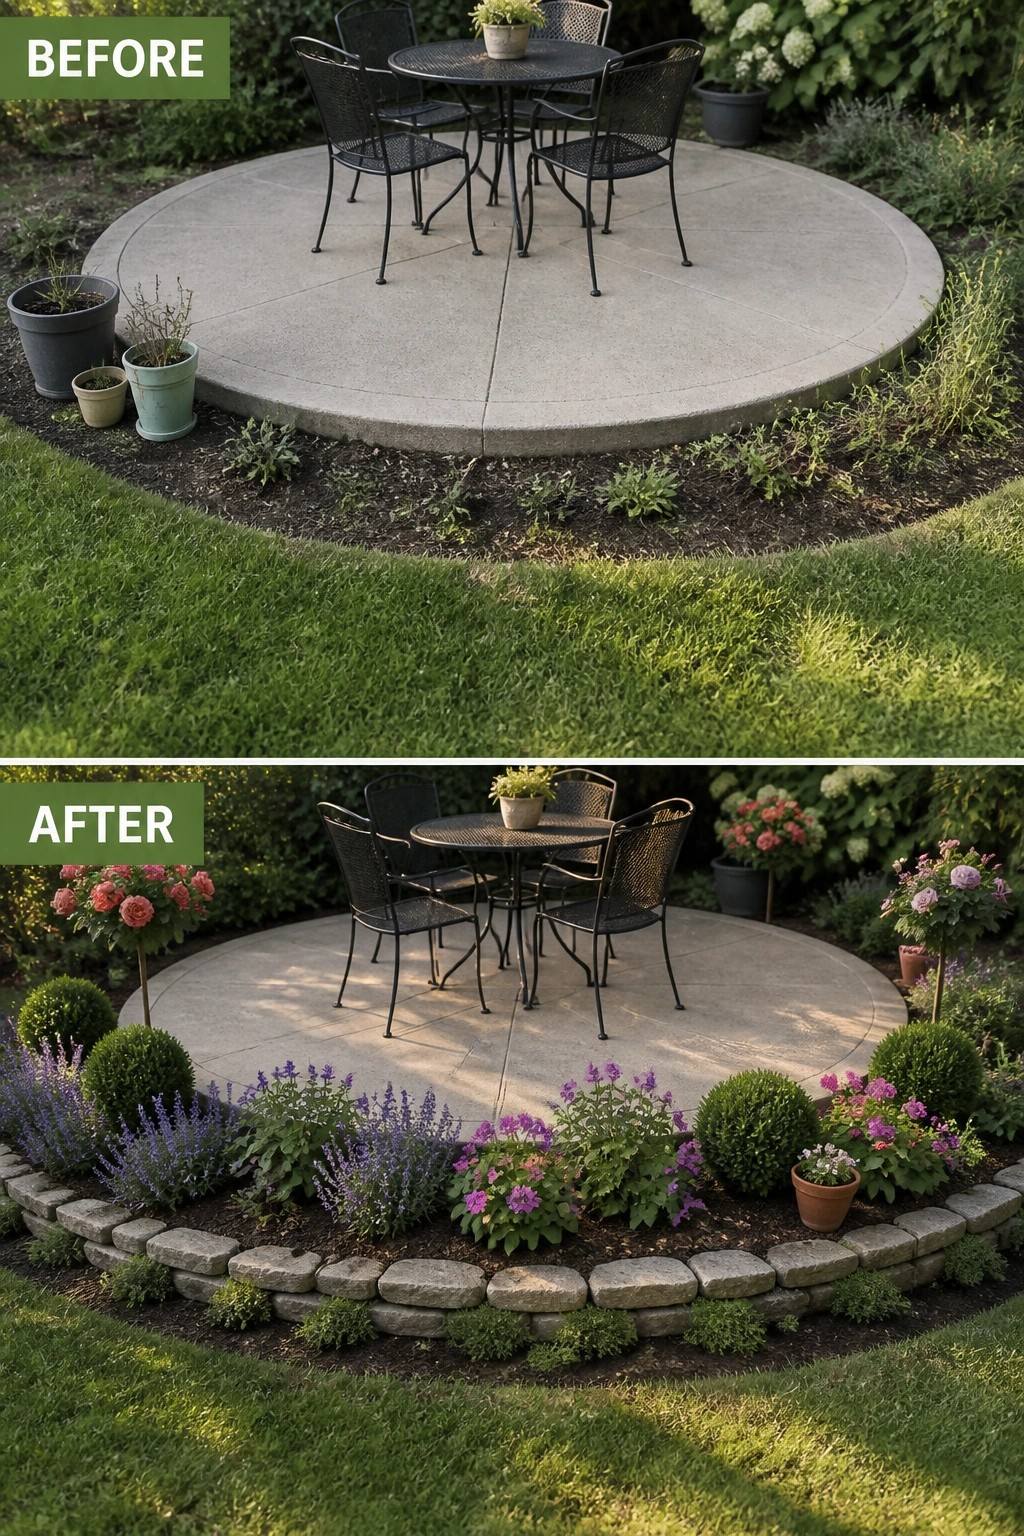
The round concrete pad sat right against the grass and dirt with no clear line before. Adding a low stone border created a clean curve that holds everything in place and makes the seating area feel separate from the lawn.
This idea works best when you already have a patio or pad but want the surrounding space to look intentional. Lay the edging first to define the bed shape, then fill it with a few layers of plants that stay in scale with the space. It keeps the focus on the table and chairs while giving the whole yard a tidier look without major construction.
Define Flower Beds With Stone Edging
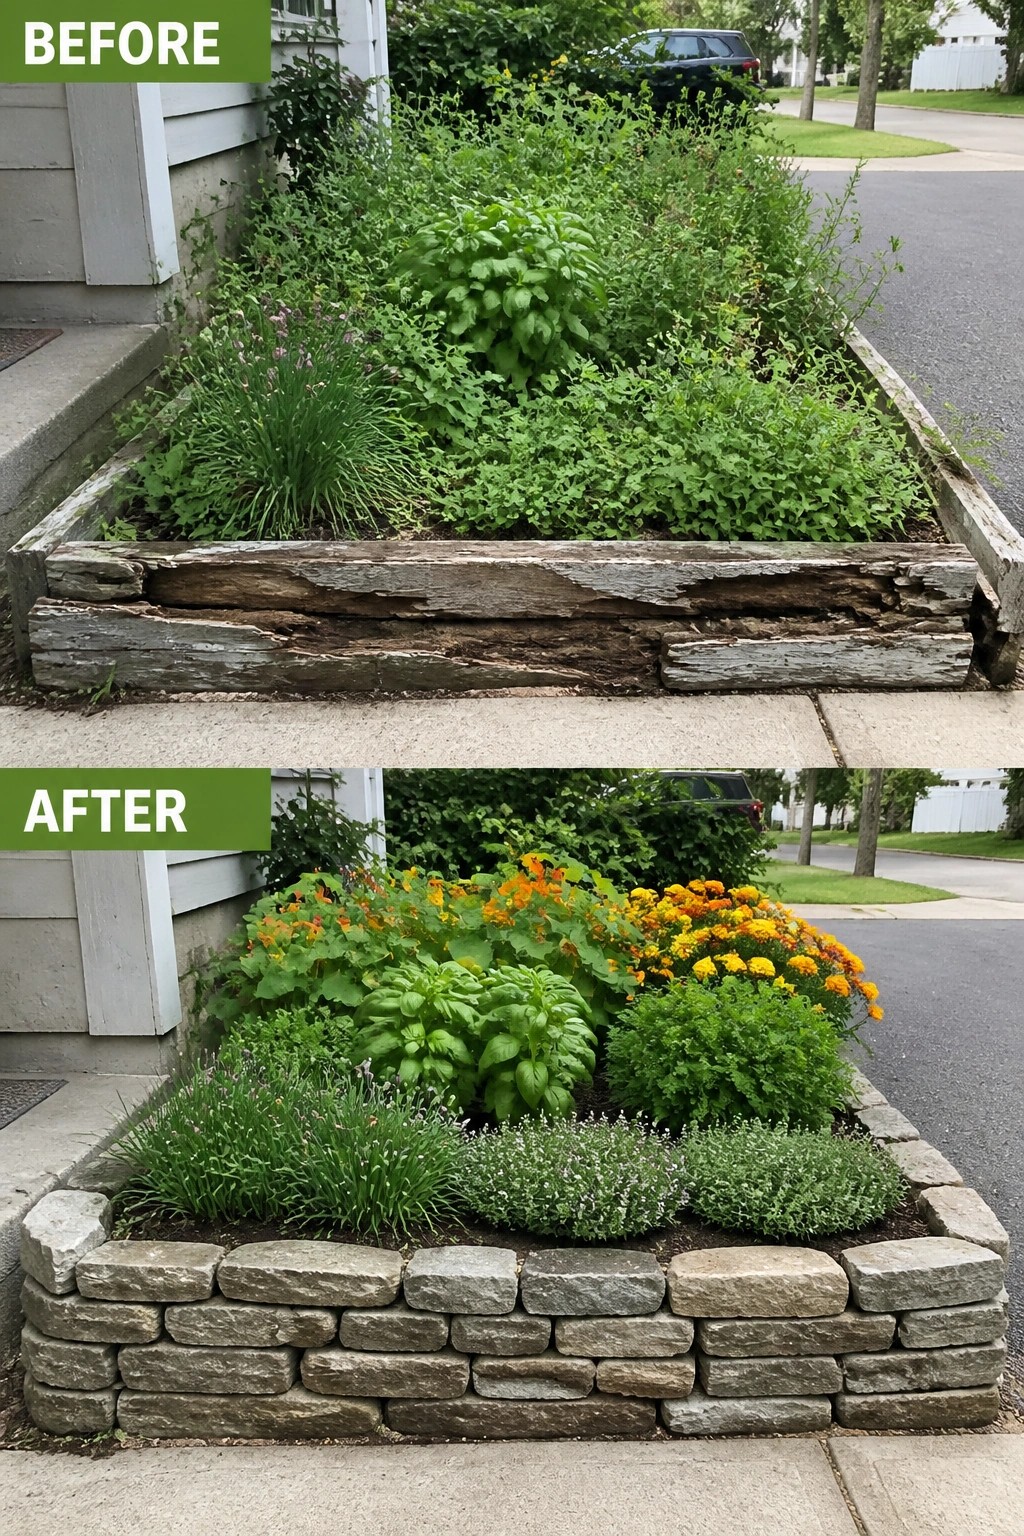
Swapping old wooden borders for stacked stone gives a garden bed a solid frame that holds everything in place. The new edging stops the soil from spilling onto the sidewalk and creates a clean line that makes the plants look more organized right away.
This idea works best along walkways or house foundations where you want something that lasts without much upkeep. Clear out the old wood first, then stack the stones level before adding plants in layers. Keep taller flowers toward the back and lower ones along the front so the bed stays full but easy to walk past.
Define A Narrow Strip With Stone Edging
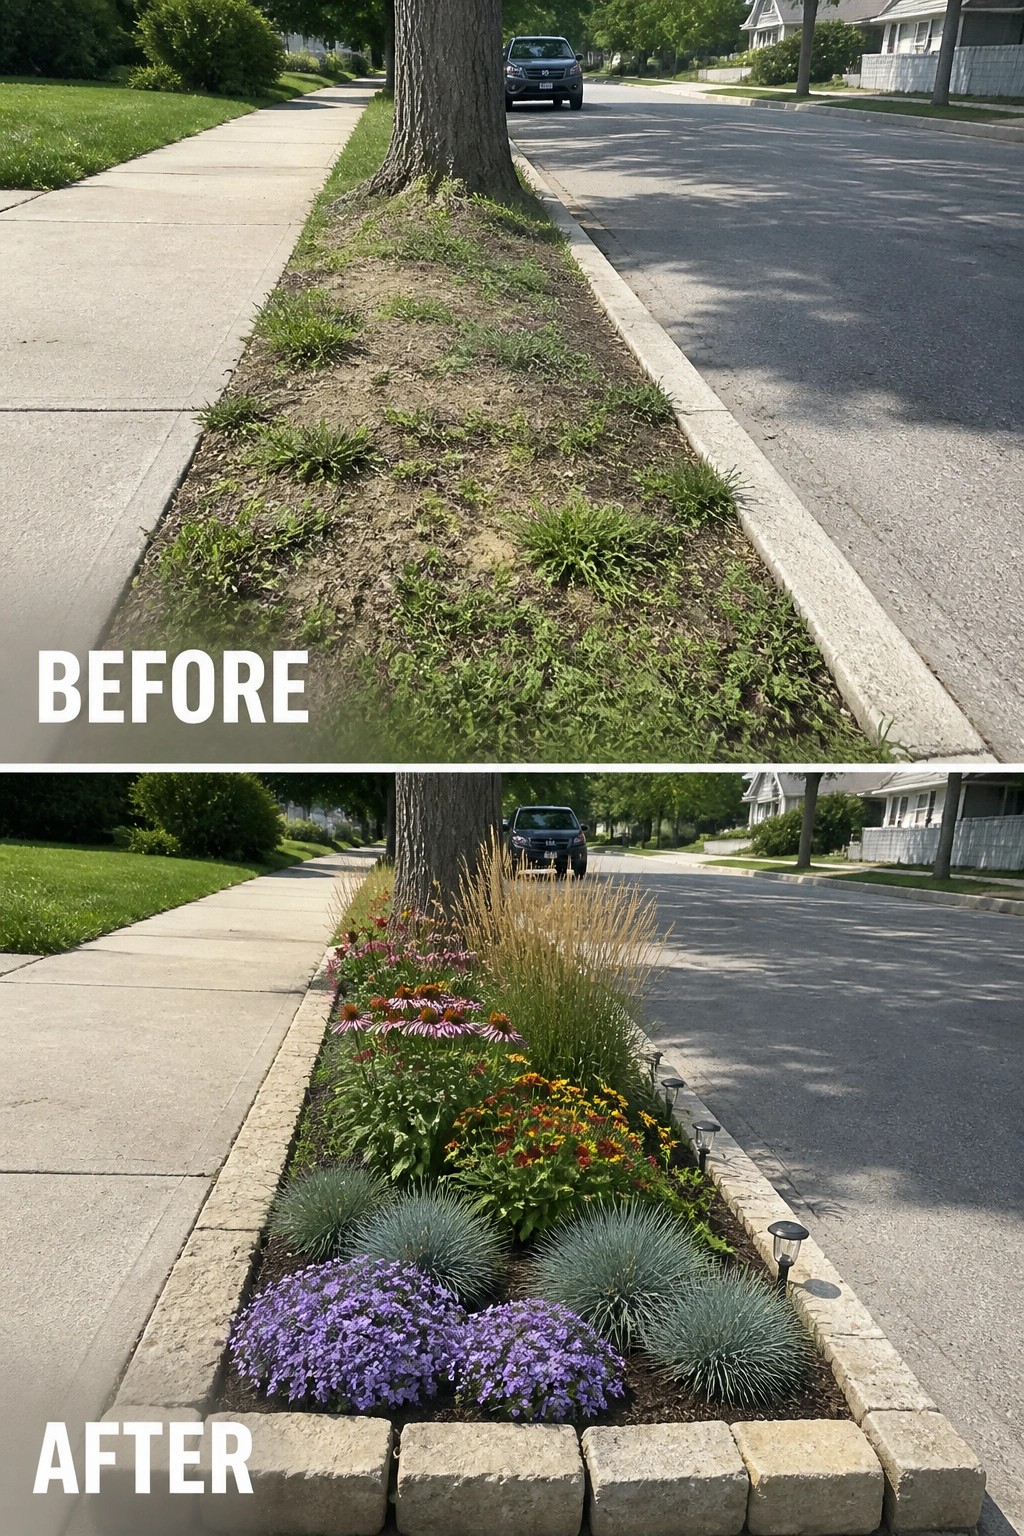
The main change here is the addition of stone edging along the curb. That single step turns a weedy, uneven strip into a contained planting bed that looks intentional instead of neglected.
This approach works especially well along sidewalks and streets where space is limited. Clean out the weeds first, set the edging blocks to hold the soil, then fill the bed with a few layers of plants in different heights and colors.
Define Flower Beds With Stone Edging
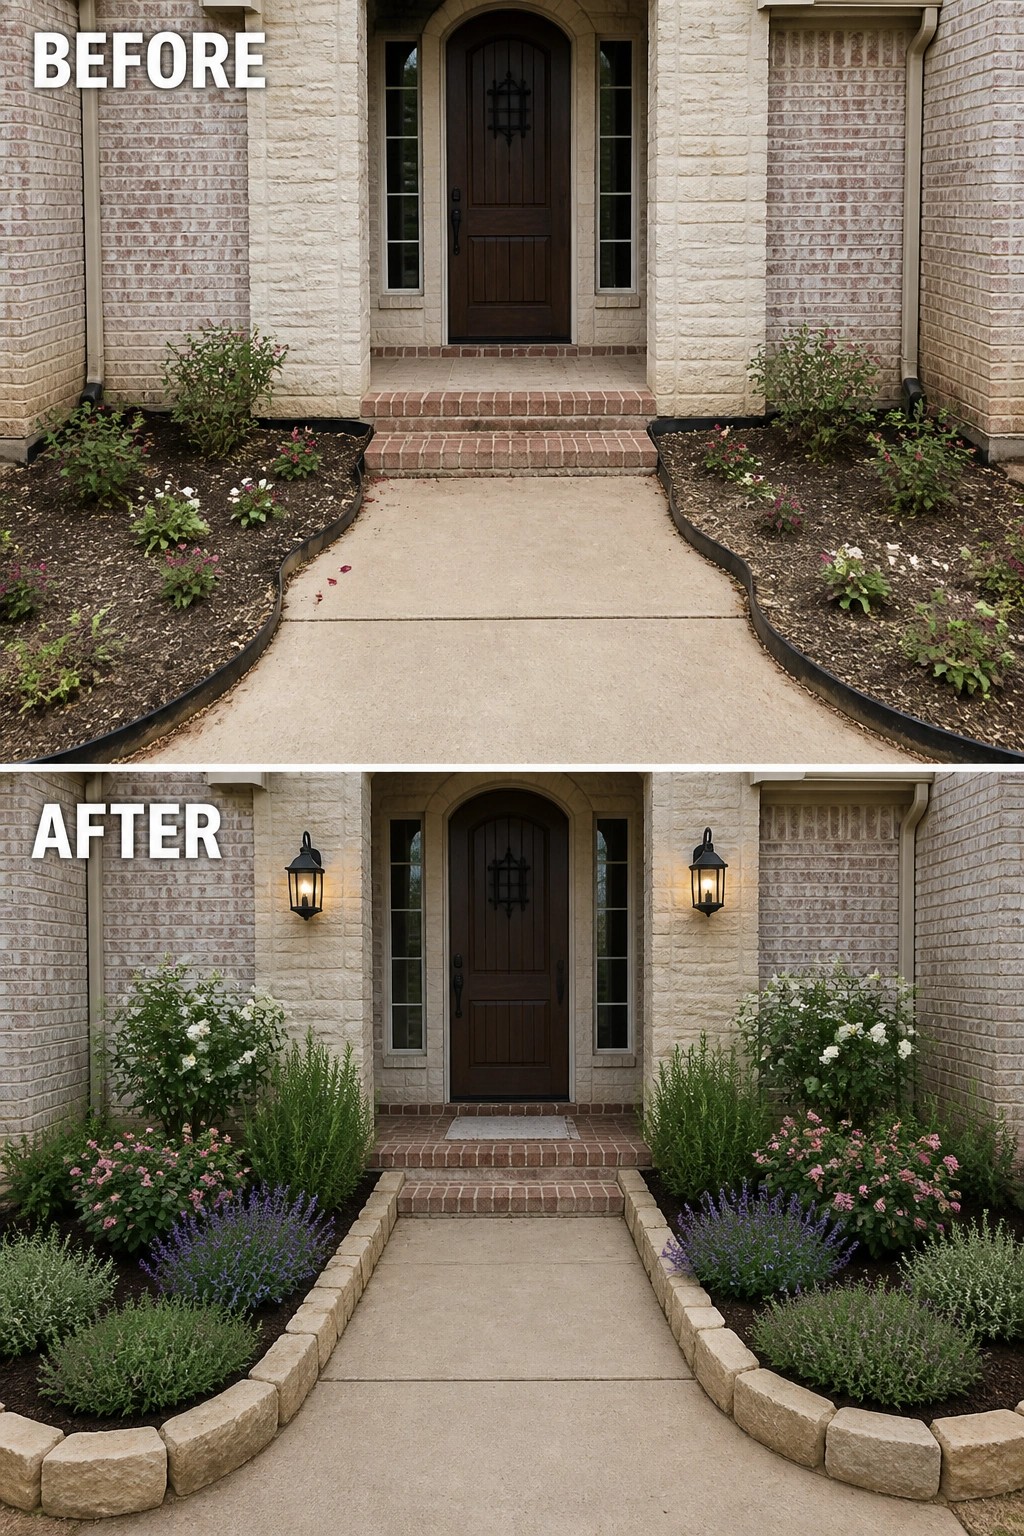
The before photo shows loose, uneven beds that make the walkway feel unfinished. The after uses simple stacked stone to create firm borders that hold everything in place and give the beds a clear shape. That one change turns scattered plants into something that looks planned.
Stone edging works best on houses with brick or stone fronts because it picks up the same materials. Lay out the curve or line first, then stack the blocks so they sit level. Keep the planting in layers, with taller shrubs toward the house and lower plants along the edge, so the beds stay neat without constant trimming.
Define Garden Beds With Stone Edging
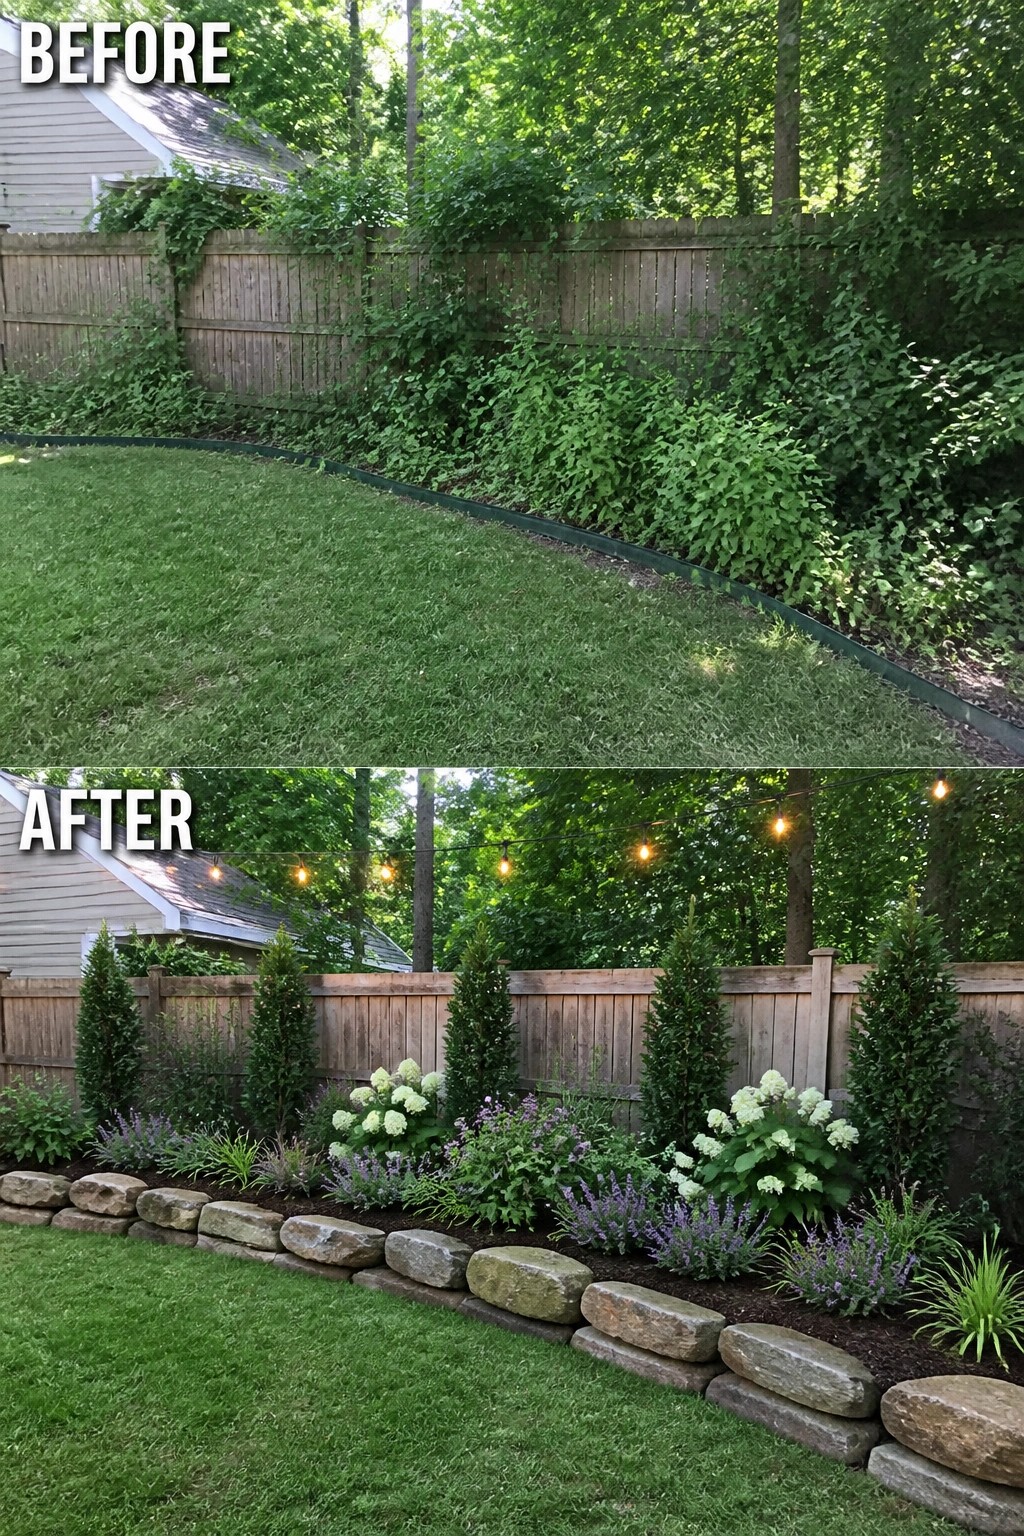
Clearing the heavy overgrowth along the fence and adding a low stone border turns a loose lawn edge into a clear planting area. The stones give the beds a firm shape that keeps the grass from creeping in and makes the whole border look intentional instead of accidental.
This idea works best along fences or property lines where you want planting without giving up lawn space. Lay the edging first so the beds stay consistent, then fill them with taller evergreens in the back and lower perennials in front. The simple border keeps the planting from looking scattered as it fills in.
Define A Plain Border With Stone Edging
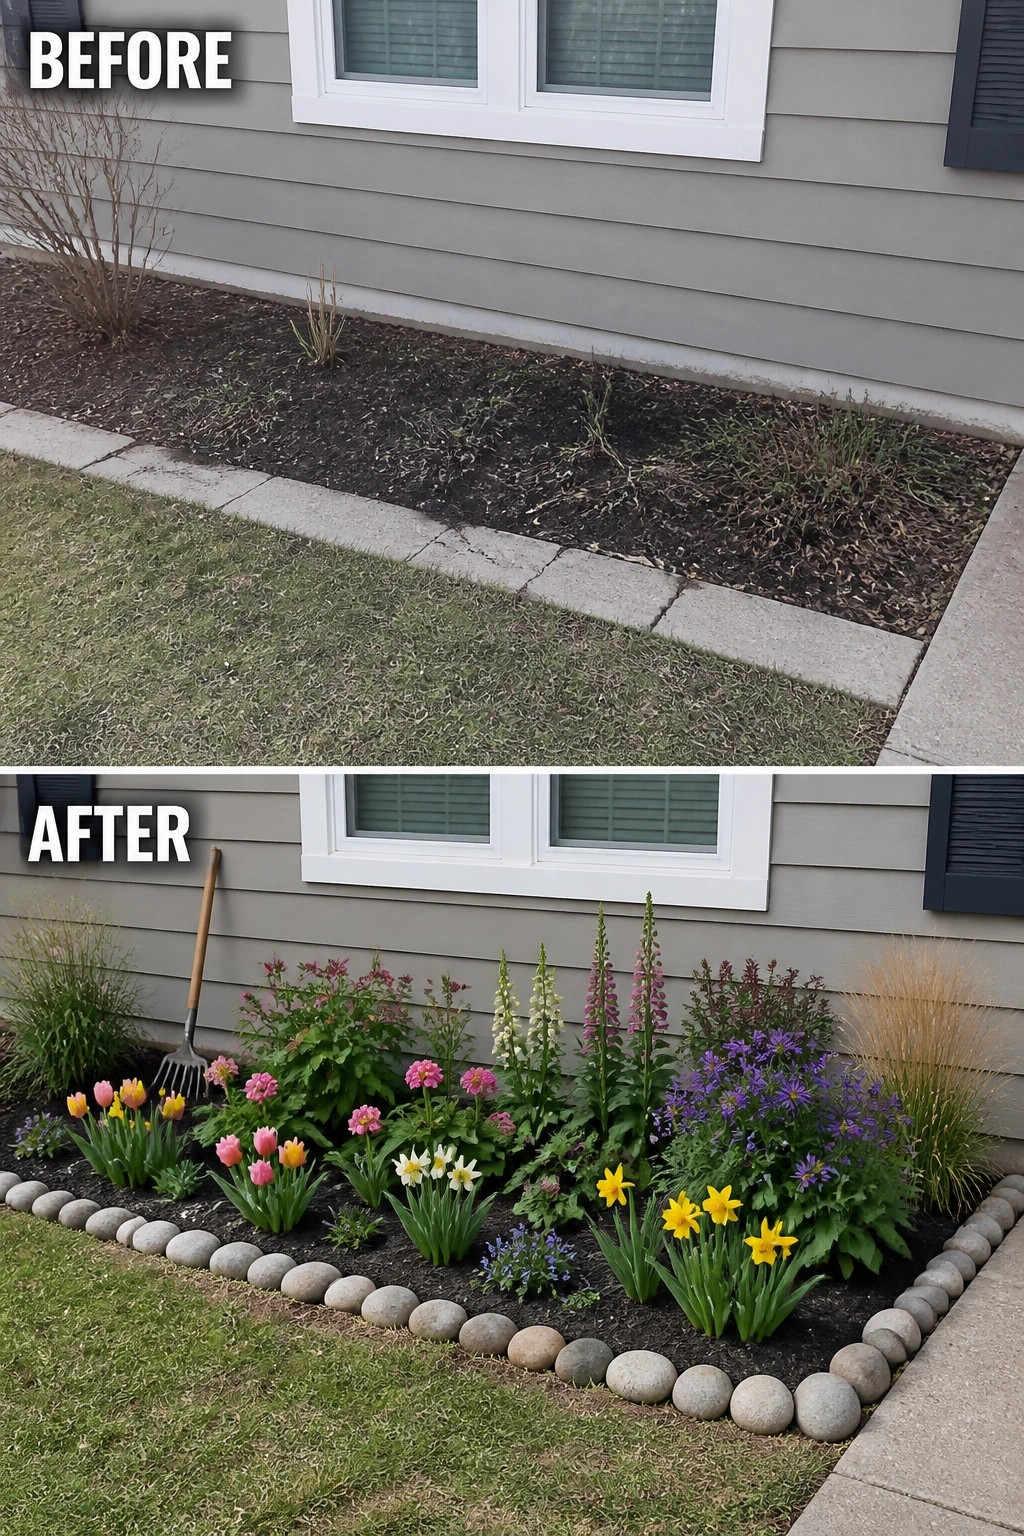
A bare strip of mulch along the house often looks neglected after a season or two. Adding a simple line of stones gives the bed a clear shape, and filling it with plants in different heights turns the whole area into something that looks intentional instead of leftover space.
This approach works well on narrow strips between the lawn and the foundation. Start by cleaning out the weeds, then lay the stones first so you can see the final size before planting. Keep the tallest plants toward the back and mix in a few lower ones in front so the bed still feels open from the yard.
Frequently Asked Questions
Q: How do I stop weeds from popping up between the stones over time? A: Lay down a solid weed barrier fabric before you set the stones in place. Then tuck the edges under the soil so nothing creeps in from the sides.
Q: Which plants should go in the middle layer to keep the bed full without crowding the front ones? A: Pick mid-height perennials like daylilies or salvia that spread a bit but stay under two feet. Space them so the taller back plants still get light and the front edging stays visible.
Q: What happens if my yard has heavy clay soil under the flower bed? A: Mix in some compost when you prep the area so water drains better around the roots. The stones will still hold everything together once the plants take hold.
