


Gardens tend to look a little scattered when the flower beds lack any defined shape or separation from the lawn.
I have found that focusing on the structure first usually helps everything else fall into place without needing a complete overhaul.
Edging makes a real difference.
It keeps the beds looking intentional and cuts down on weeding time over the seasons.
Some of the layout ideas here seem worth trying out to see how they fit a specific space.
Edge And Mulch Flower Beds For A Cleaner Look

The main change here is turning a weedy, uneven patch into a tidy bed by adding a clear metal edge and a fresh layer of mulch. This simple step removes the scattered look and gives the plants a defined space to grow without the grass creeping in.
This approach works well in small side yards or along fences where the bed needs to feel intentional rather than leftover. Start by pulling the weeds and leveling the soil, then install the edging before spreading mulch. It keeps maintenance lower and makes the whole area look planned without adding more plants right away.
Add Tiered Beds To A Sloped Yard

A bare, uneven slope is difficult to plant and easy to neglect. The change here comes from installing simple timber retaining planters that step down the hill and create flat planting zones where the ground used to wash away.
This idea suits homes with moderate slopes where full regrading feels too heavy. Keep the frames low enough to build yourself, use pressure-treated or cedar boards, and backfill with good soil before planting. The result is easier weeding, better water control, and a garden that actually gets used.
Add Edging To Shape Up Your Flower Beds

One of the easiest ways to fix a scattered garden bed is to add simple edging that sets a clear boundary. The before photo shows plants spreading into the lawn with no real shape, while the after shows how a low brick border keeps everything contained and makes the bed look planned instead of random.
This idea works best along the front of a house or any place where lawn and planting areas meet. Choose edging that matches the style of your home, keep the plants grouped in clusters rather than dotted around, and use mulch inside the border to hold down weeds. The result is a garden that feels organized without needing a full redesign.
Create Defined Garden Beds Along Property Lines

A long strip of dirt next to a fence often ends up looking messy because it has no clear edge or purpose. Turning that space into planted beds with mulch gives the whole side of the yard a finished look and keeps the lawn from running straight into the fence.
This works best on narrow side yards or back fence lines where you want some planting without losing open grass. Lay a straight edge first, add a good layer of mulch, and use a simple mix of taller shrubs behind shorter flowers so the bed stays neat and easy to care for over time.
Create Clear Garden Beds With Edging And A Path
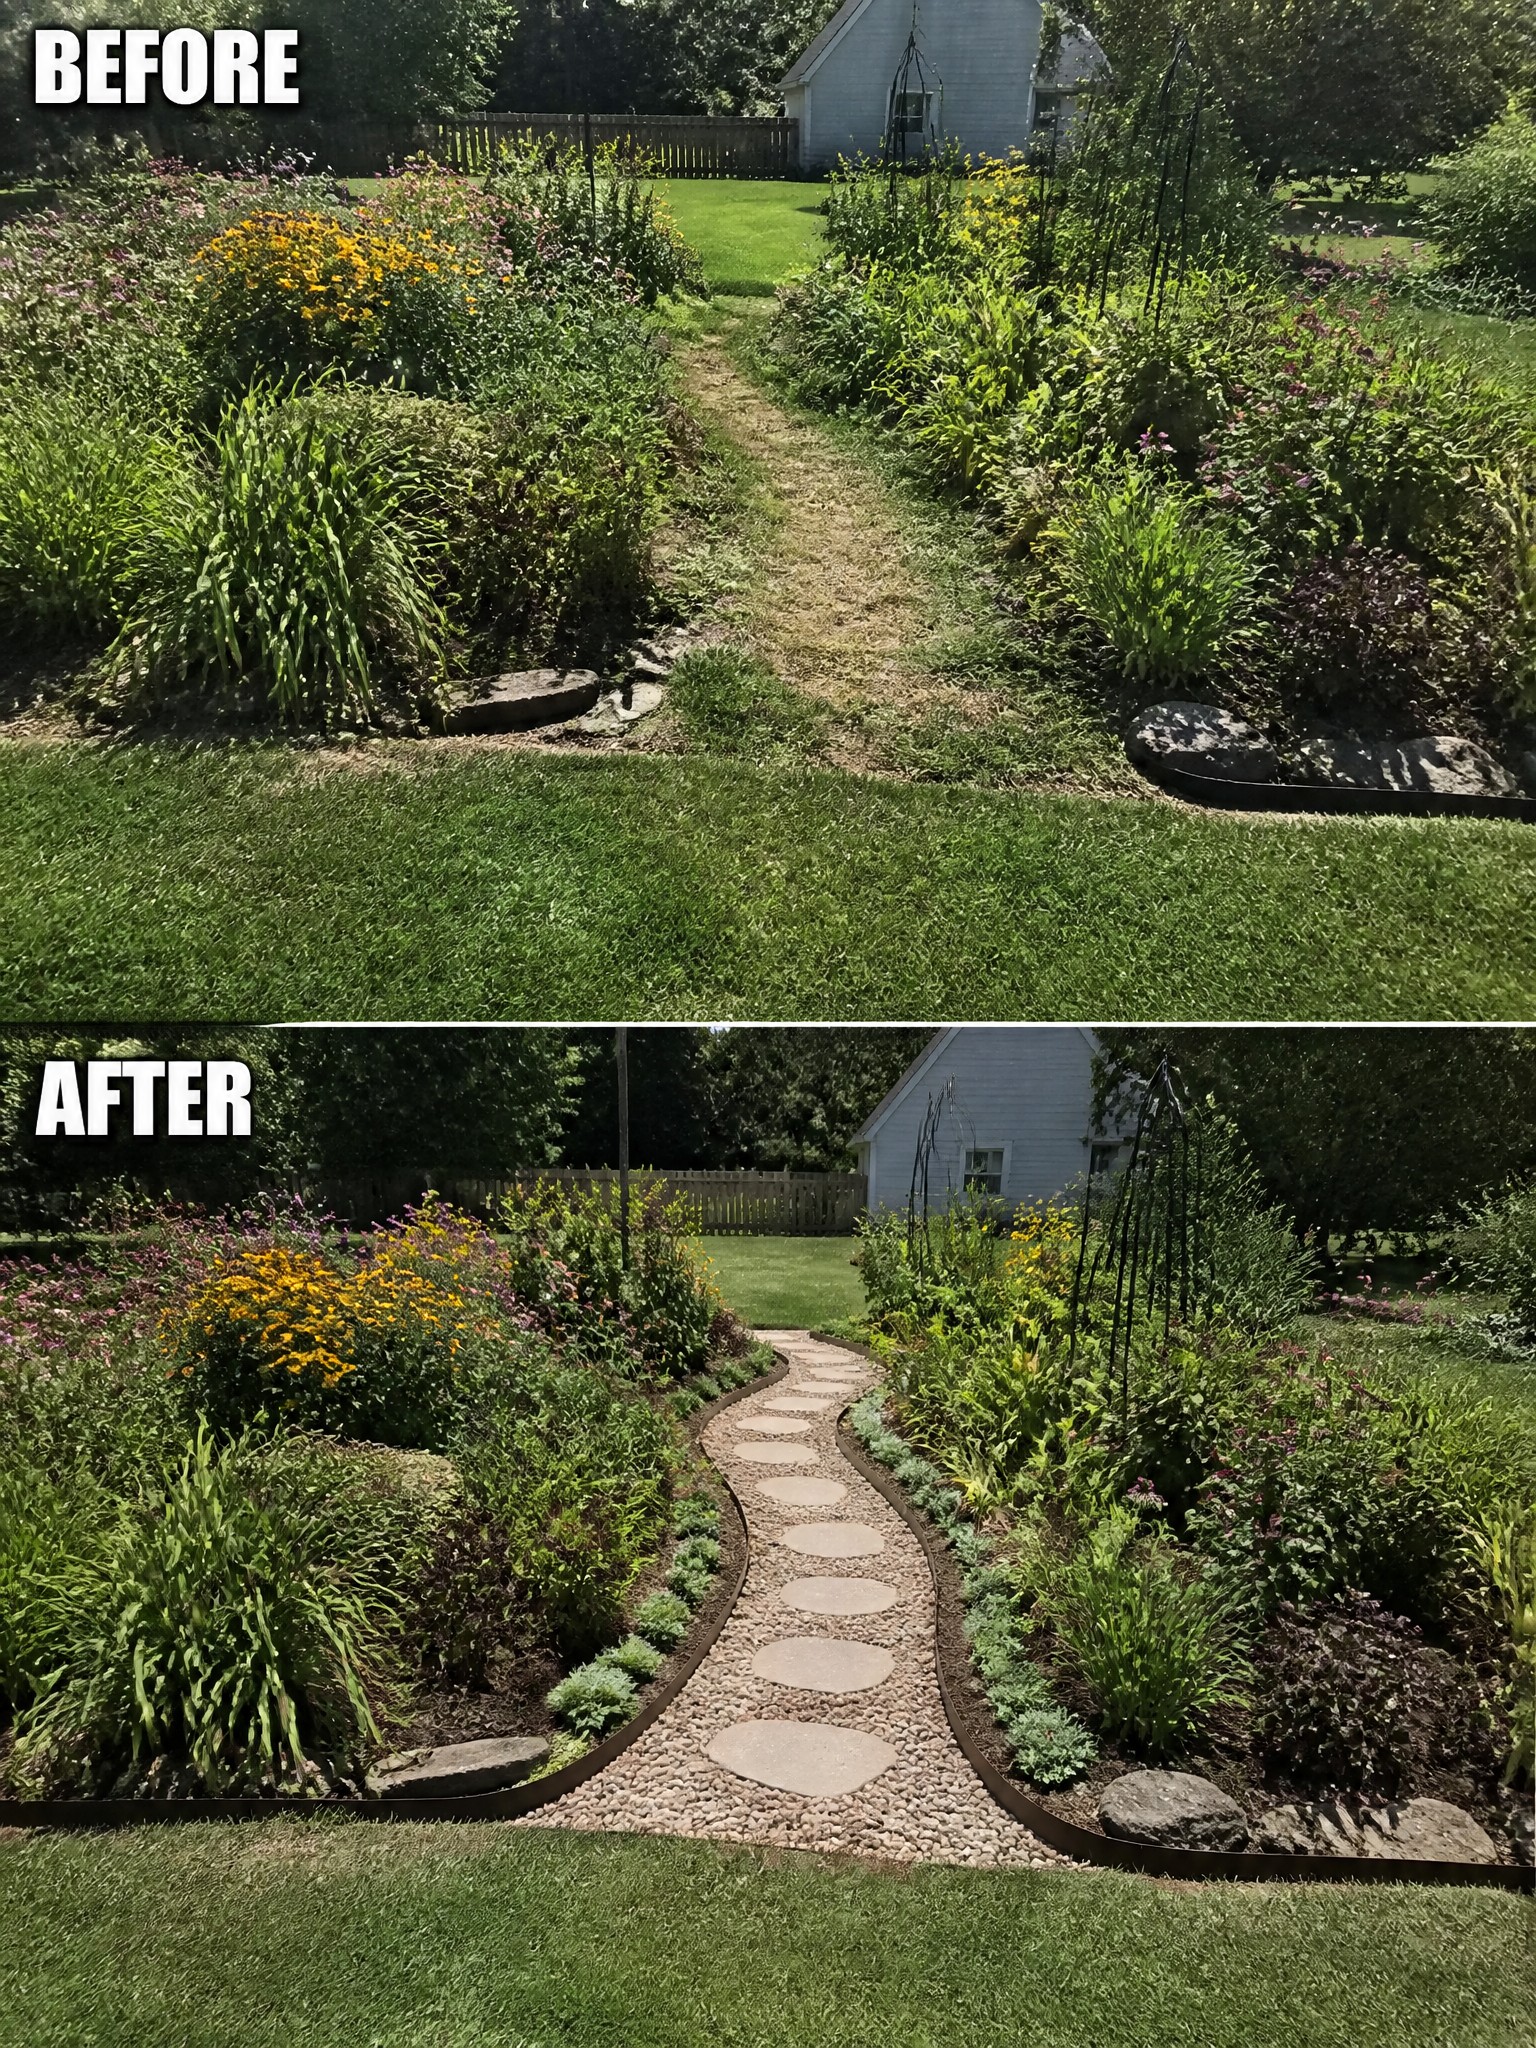
The main change here is the addition of metal edging along both sides of the path. That simple border keeps the plants contained, stops grass from creeping in, and gives the whole area a much neater shape than the loose, ragged edges in the before photo. The gravel path with stepping stones also replaces the old dirt track and makes the walkway feel intentional instead of just a worn spot through the plants.
This approach works well in any side yard or narrow garden where beds tend to sprawl. Start by deciding the final shape of each bed, then install the edging before you plant or mulch. The path can be gravel, decomposed granite, or pavers as long as it stays level and wide enough to walk comfortably. Once the edges are set, the beds become much easier to maintain and the whole garden feels more planned.
Define Flower Beds With A Simple Stone Border
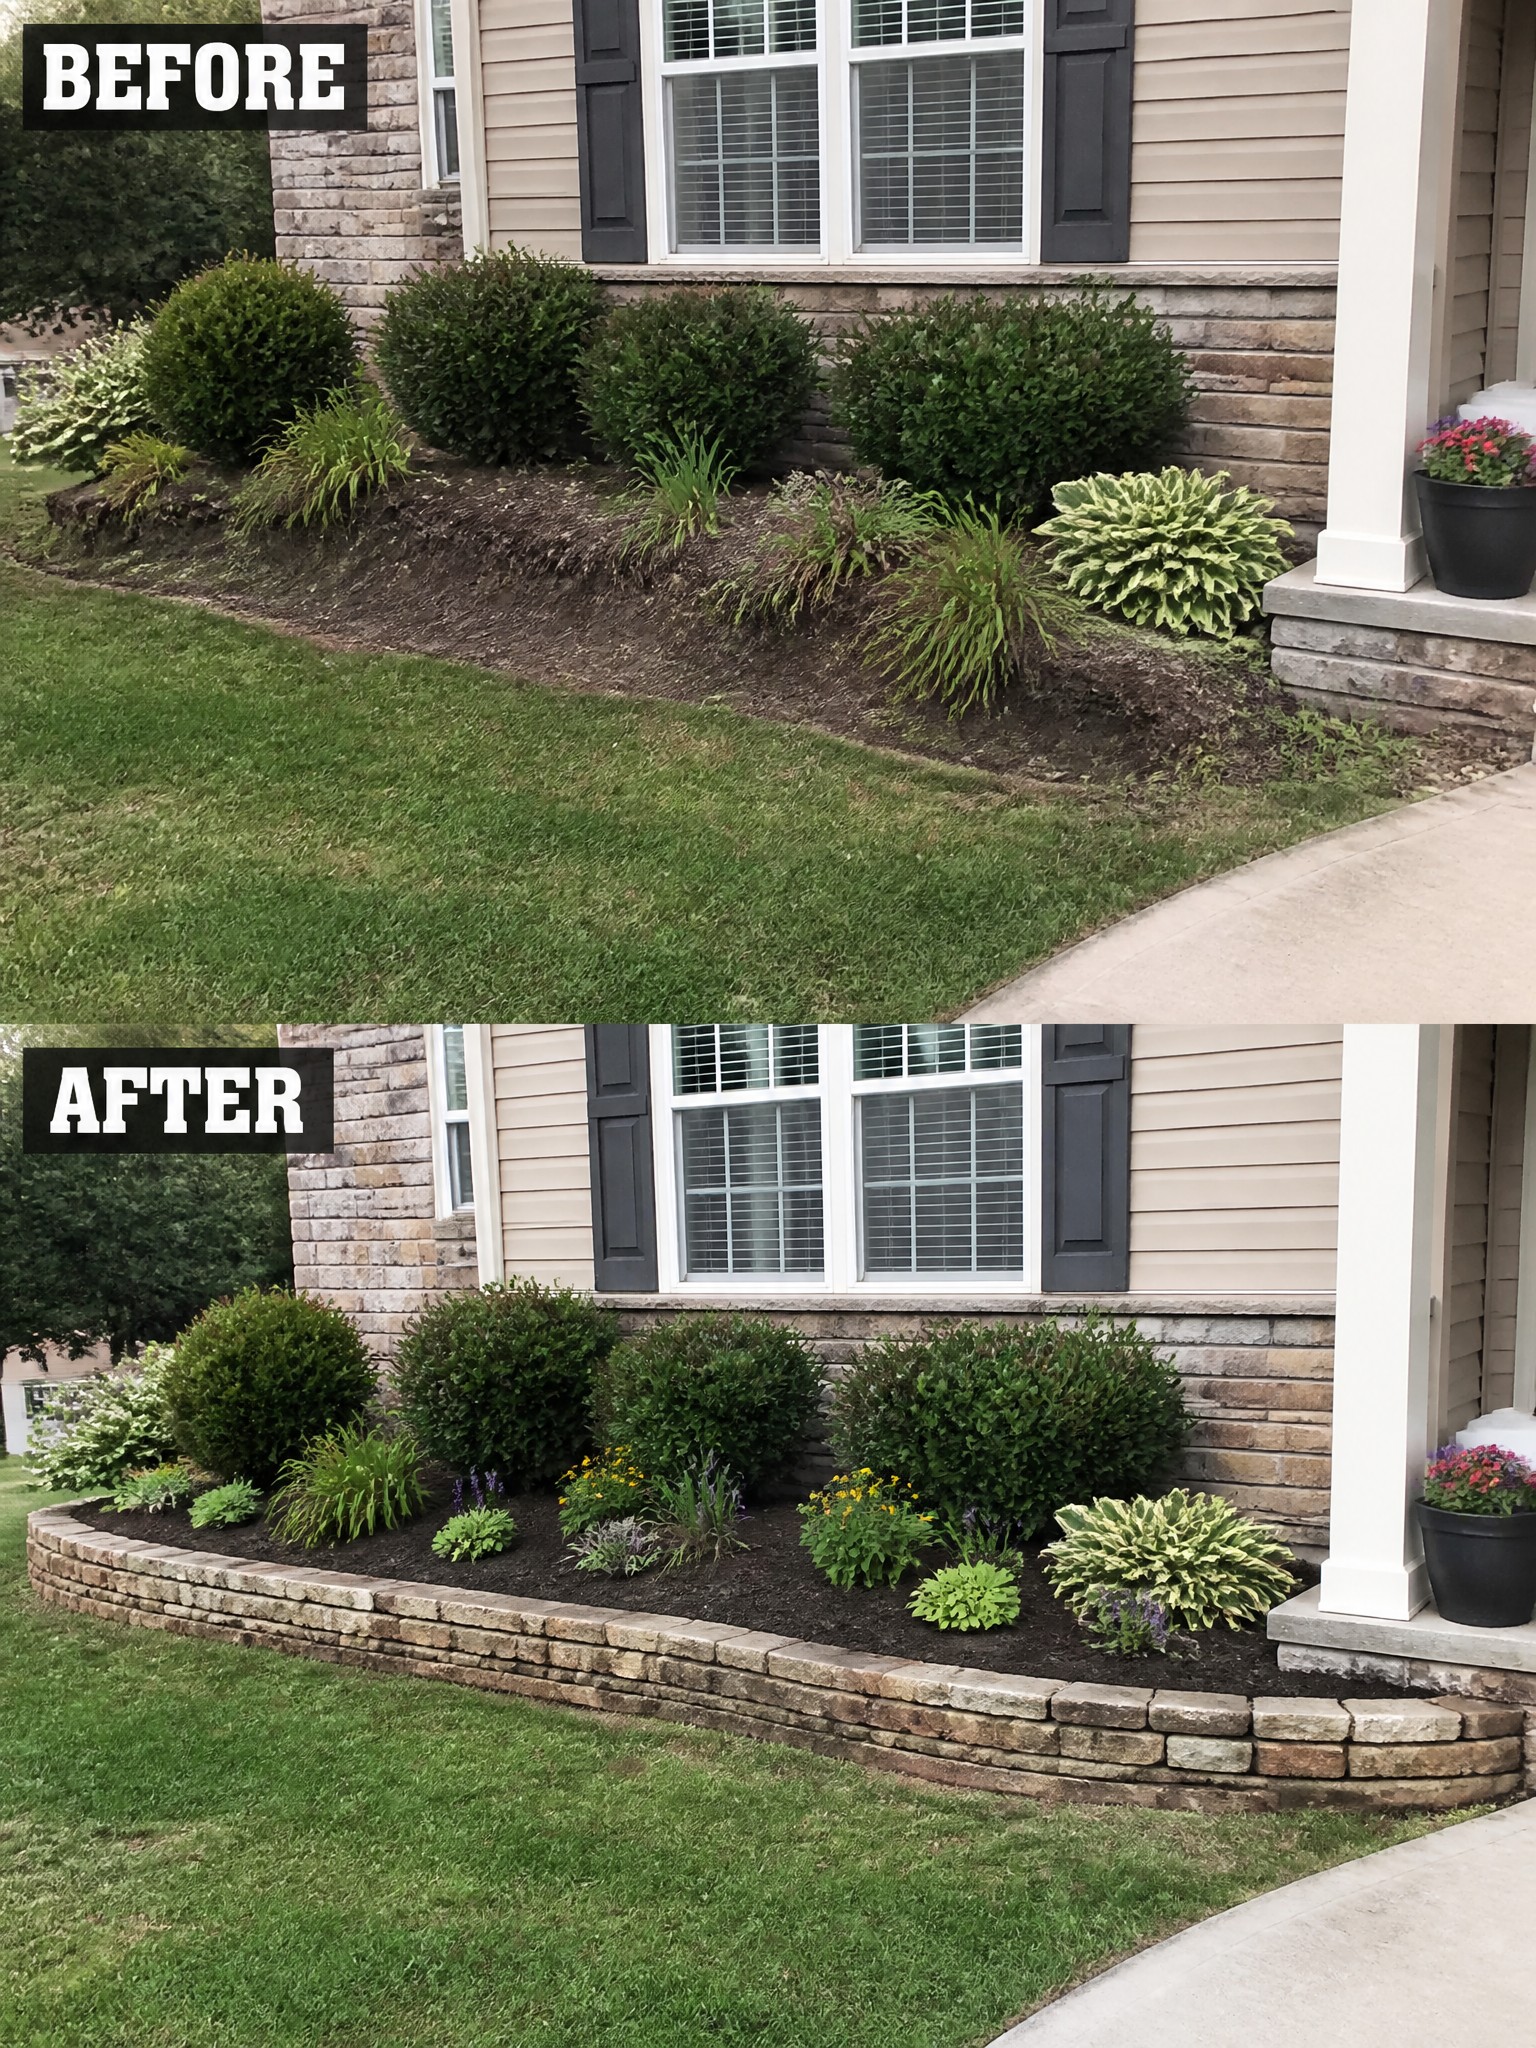
Adding a low stone border turns a loose planting area into a clear flower bed. The before photo shows plants scattered along an uneven slope with no real edge, while the after shows a contained bed that looks deliberate and much easier to care for.
This idea works best along the front of a house where the garden meets the lawn. Mark the shape first, set the edging, then add mulch and plants so the bed stays tidy and the grass does not creep in.
Add Structure To An Overgrown Border
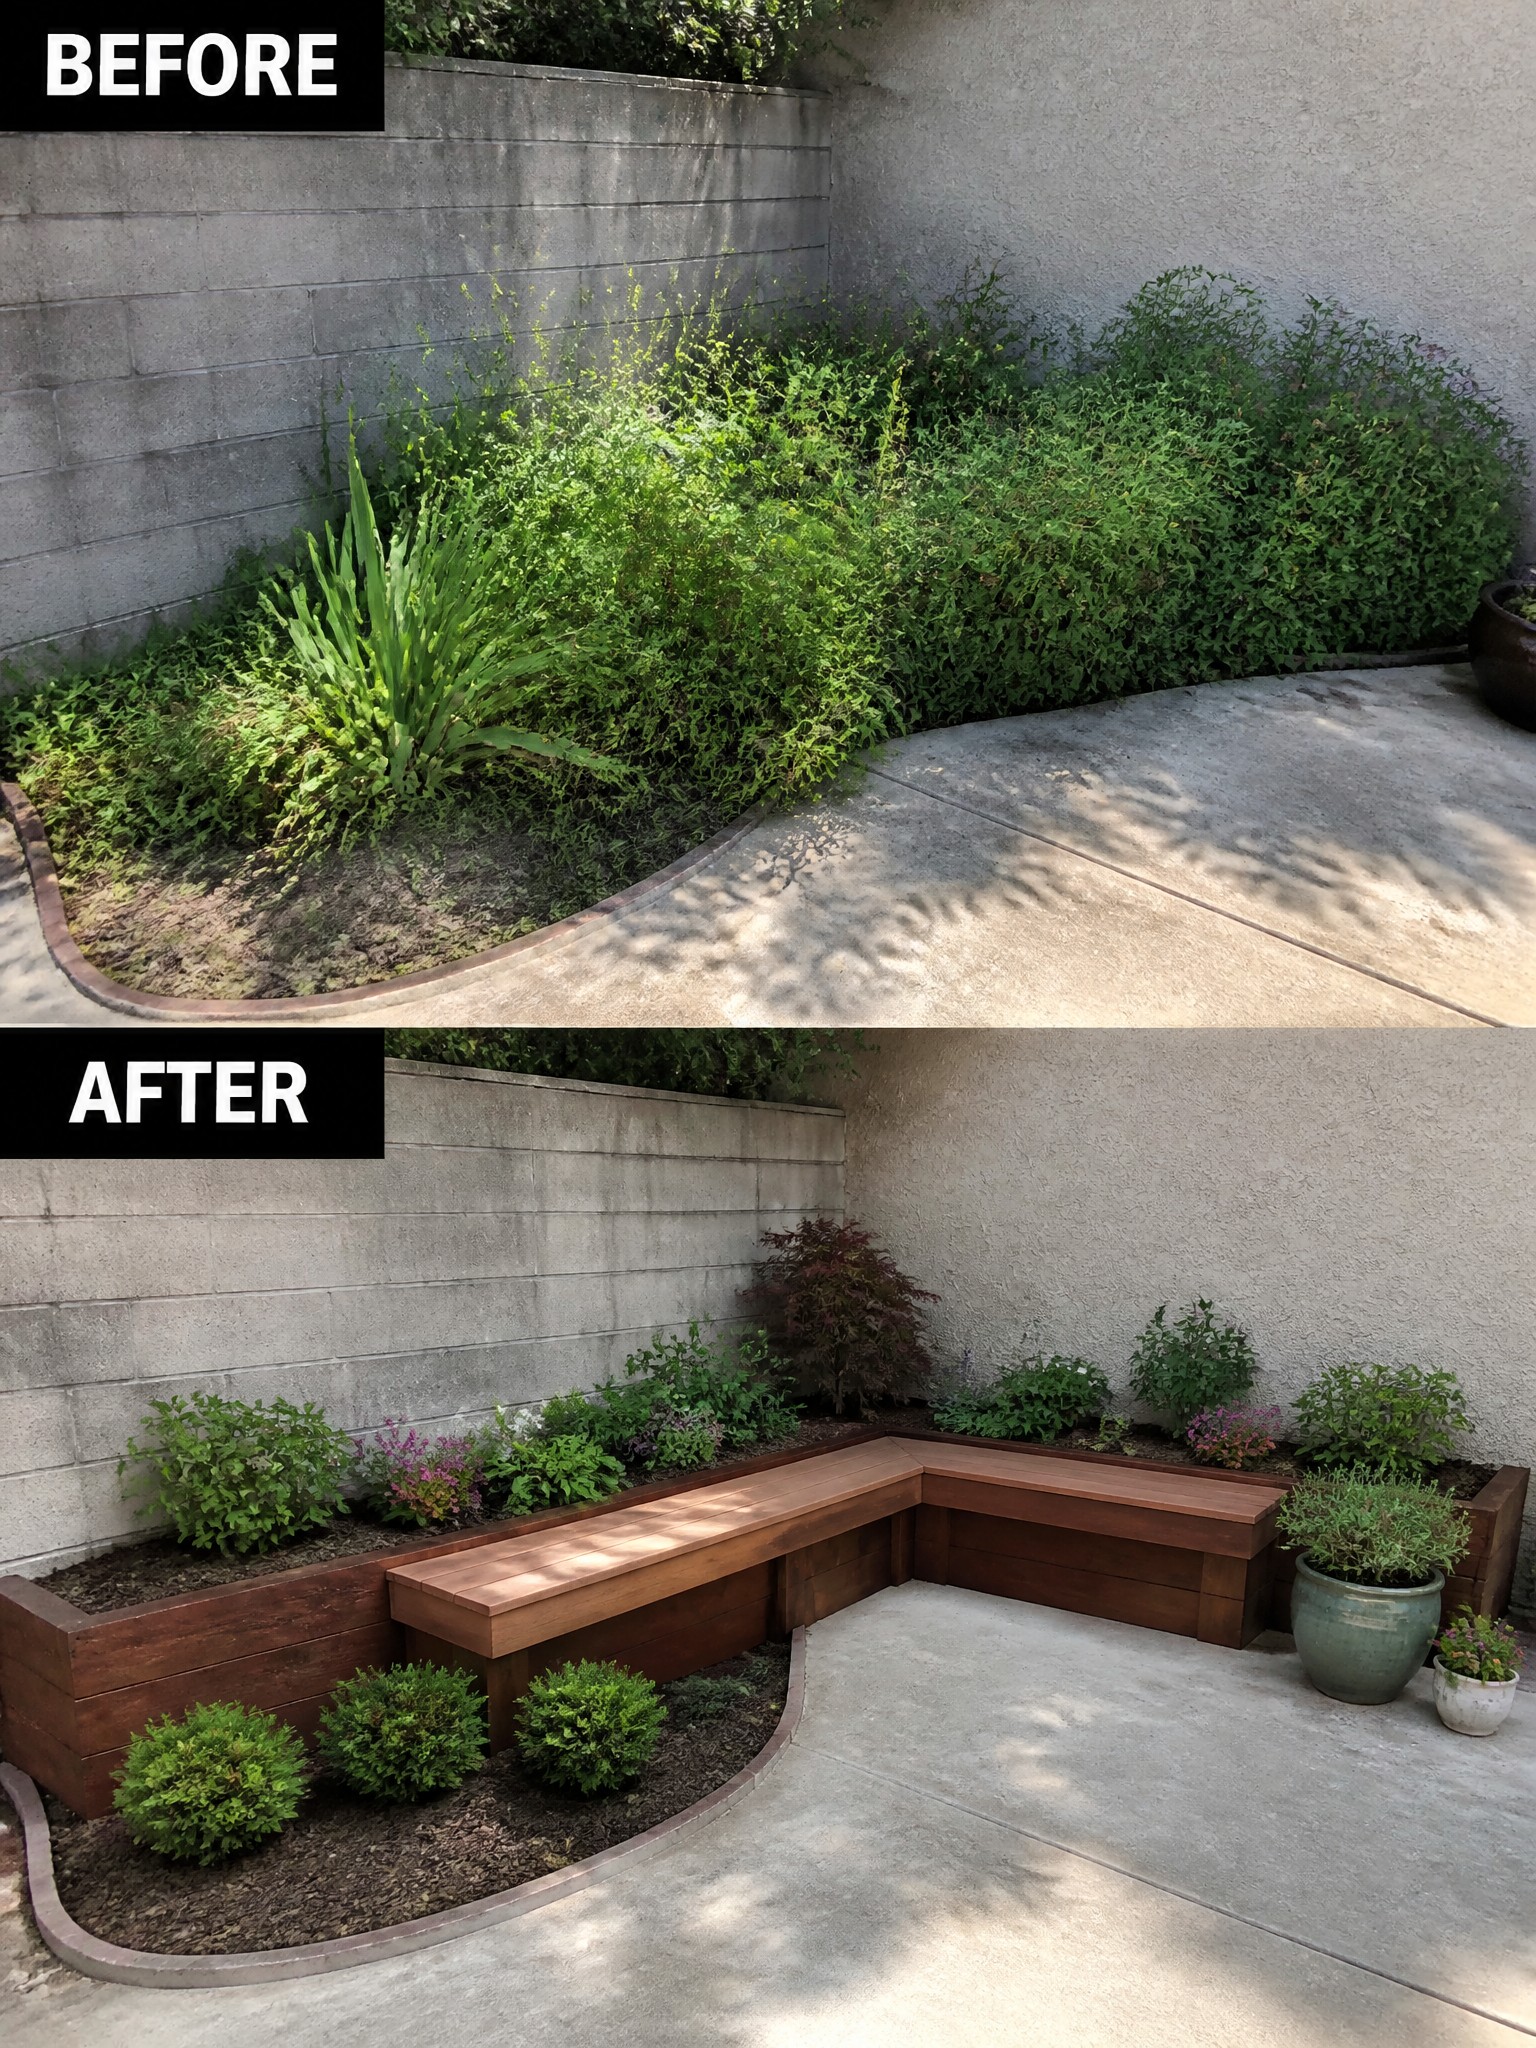
An overgrown strip of plants along a wall can quickly turn into a messy border that feels neglected. In this case the fix was simple. Raised wooden beds were added to contain the planting, mulch was spread for a clean finish, and a built-in bench was placed along the front to give the space a clear purpose.
This approach works well in narrow side yards or corners where plants tend to sprawl. Start by clearing the old growth, then build or buy raised beds that fit the space. Keep the planting simple and repeat a few plant types rather than mixing too many. The bench adds seating without taking up extra room and helps keep the area looking intentional.
Add Structure To An Overgrown Backyard
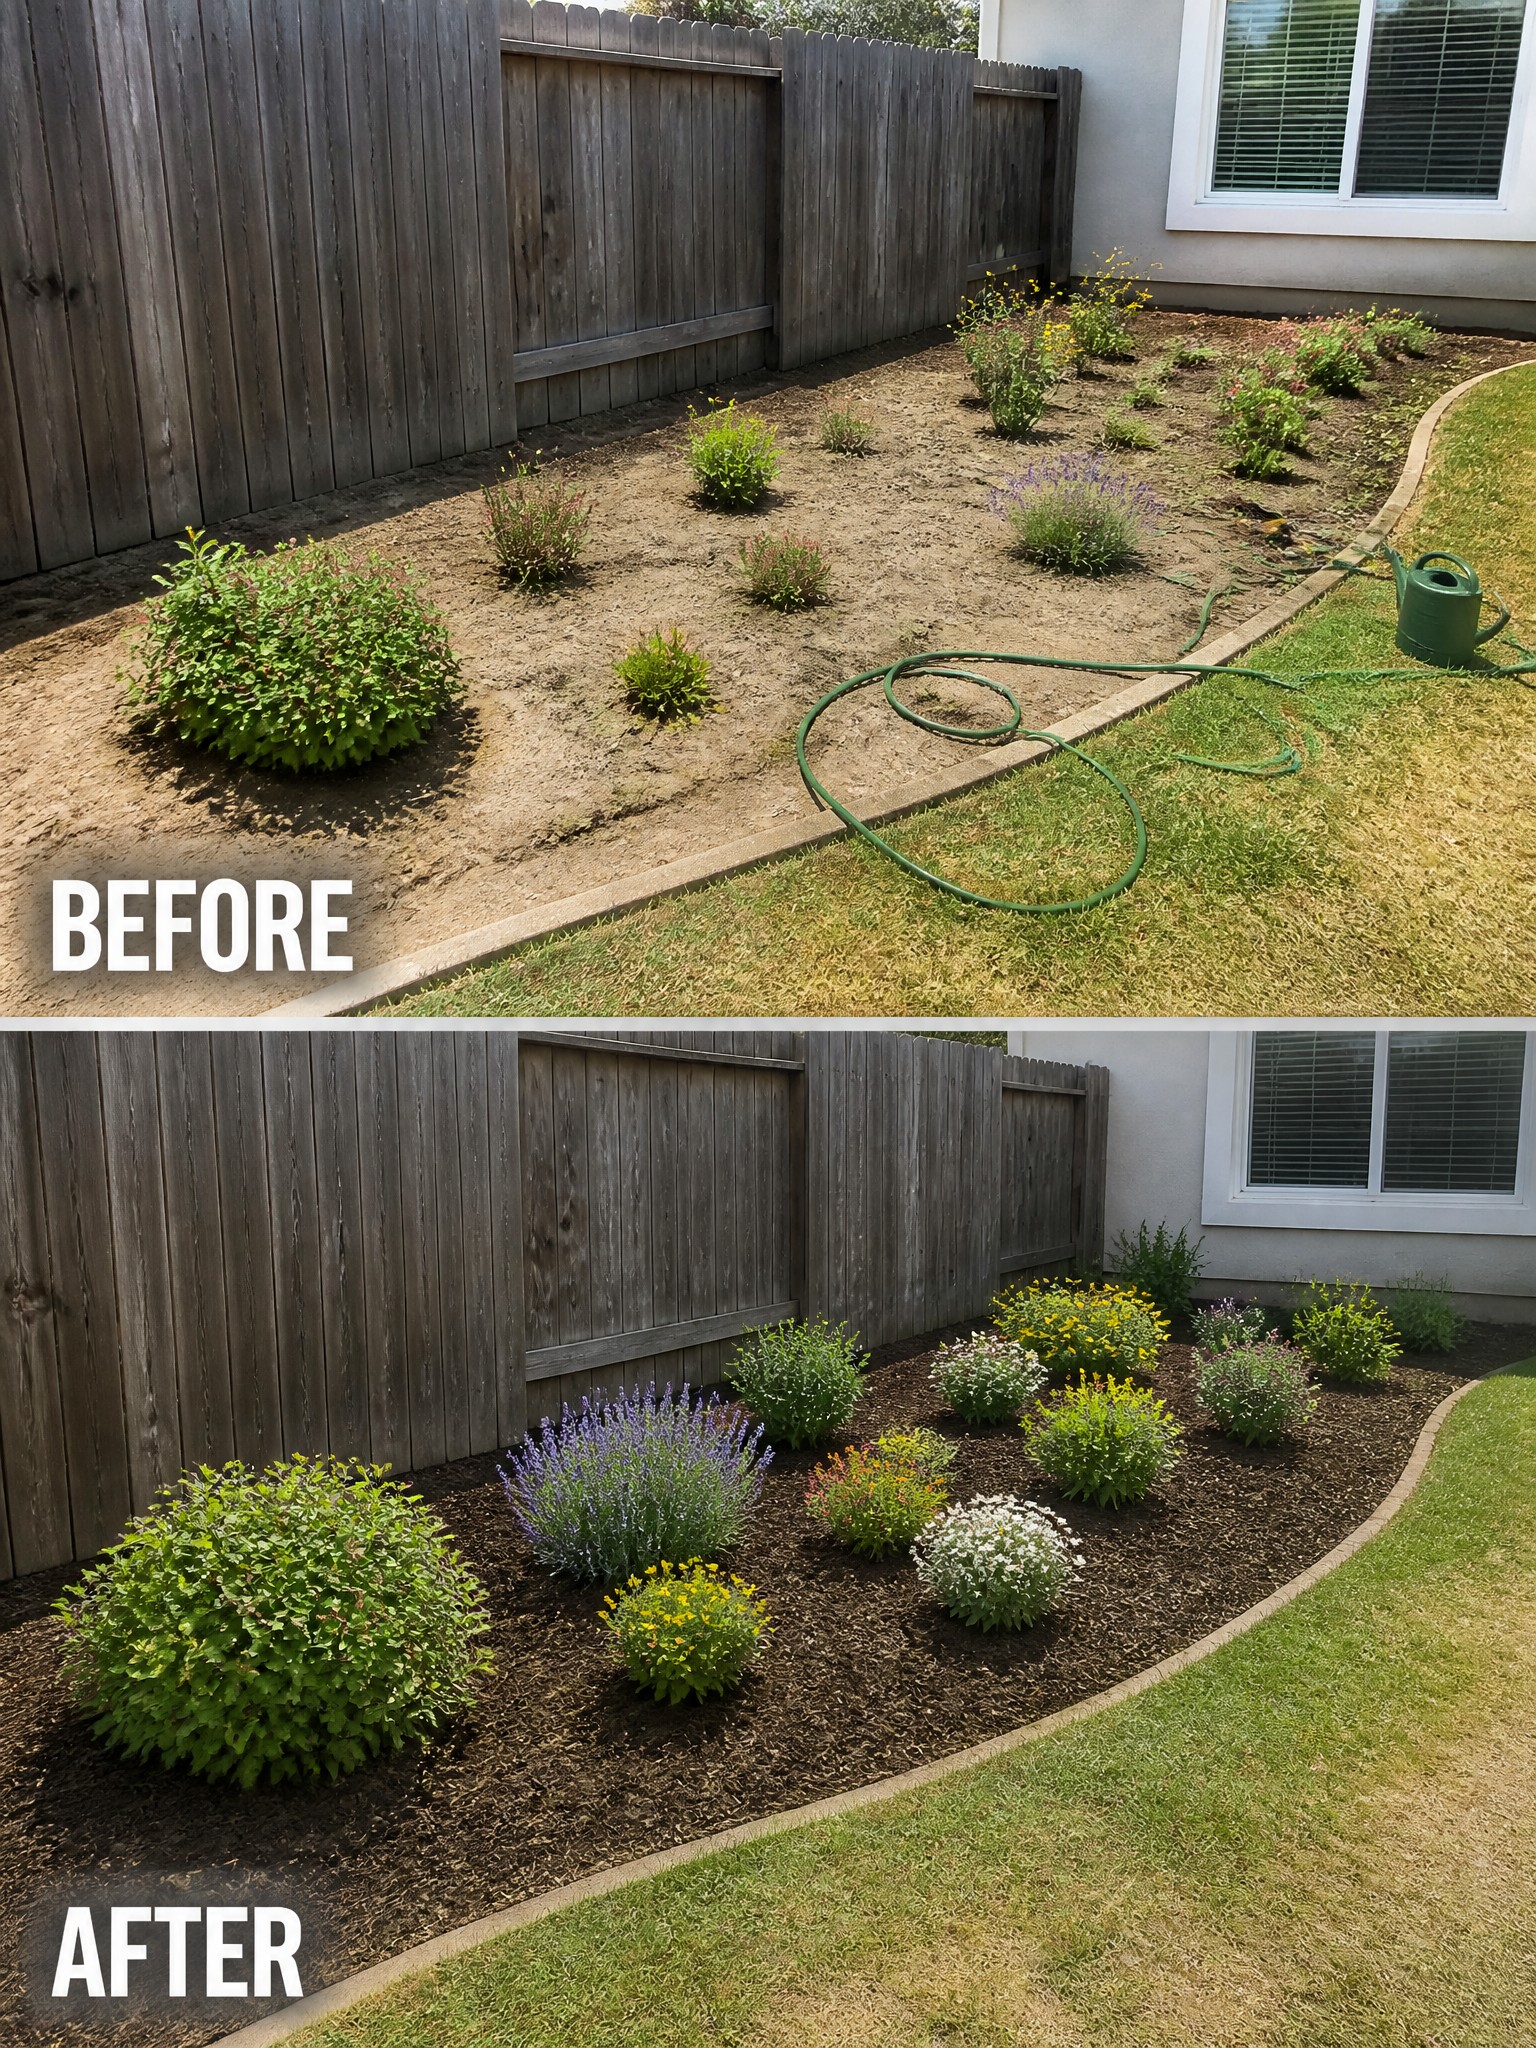
One of the easiest ways to improve a messy side yard is to turn scattered plants on bare dirt into a single defined bed. The before photo shows plants placed randomly with no clear edge, while the after photo shows the same area cleaned up, edged neatly, and covered in dark mulch so everything reads as one planned space.
This idea works best along fences or property lines where you want the garden to look intentional without adding hardscaping. Clear the weeds first, group plants by height and color, then add mulch to hold the soil in place and cut down on future weeding.
Define Flower Beds With Clear Structure
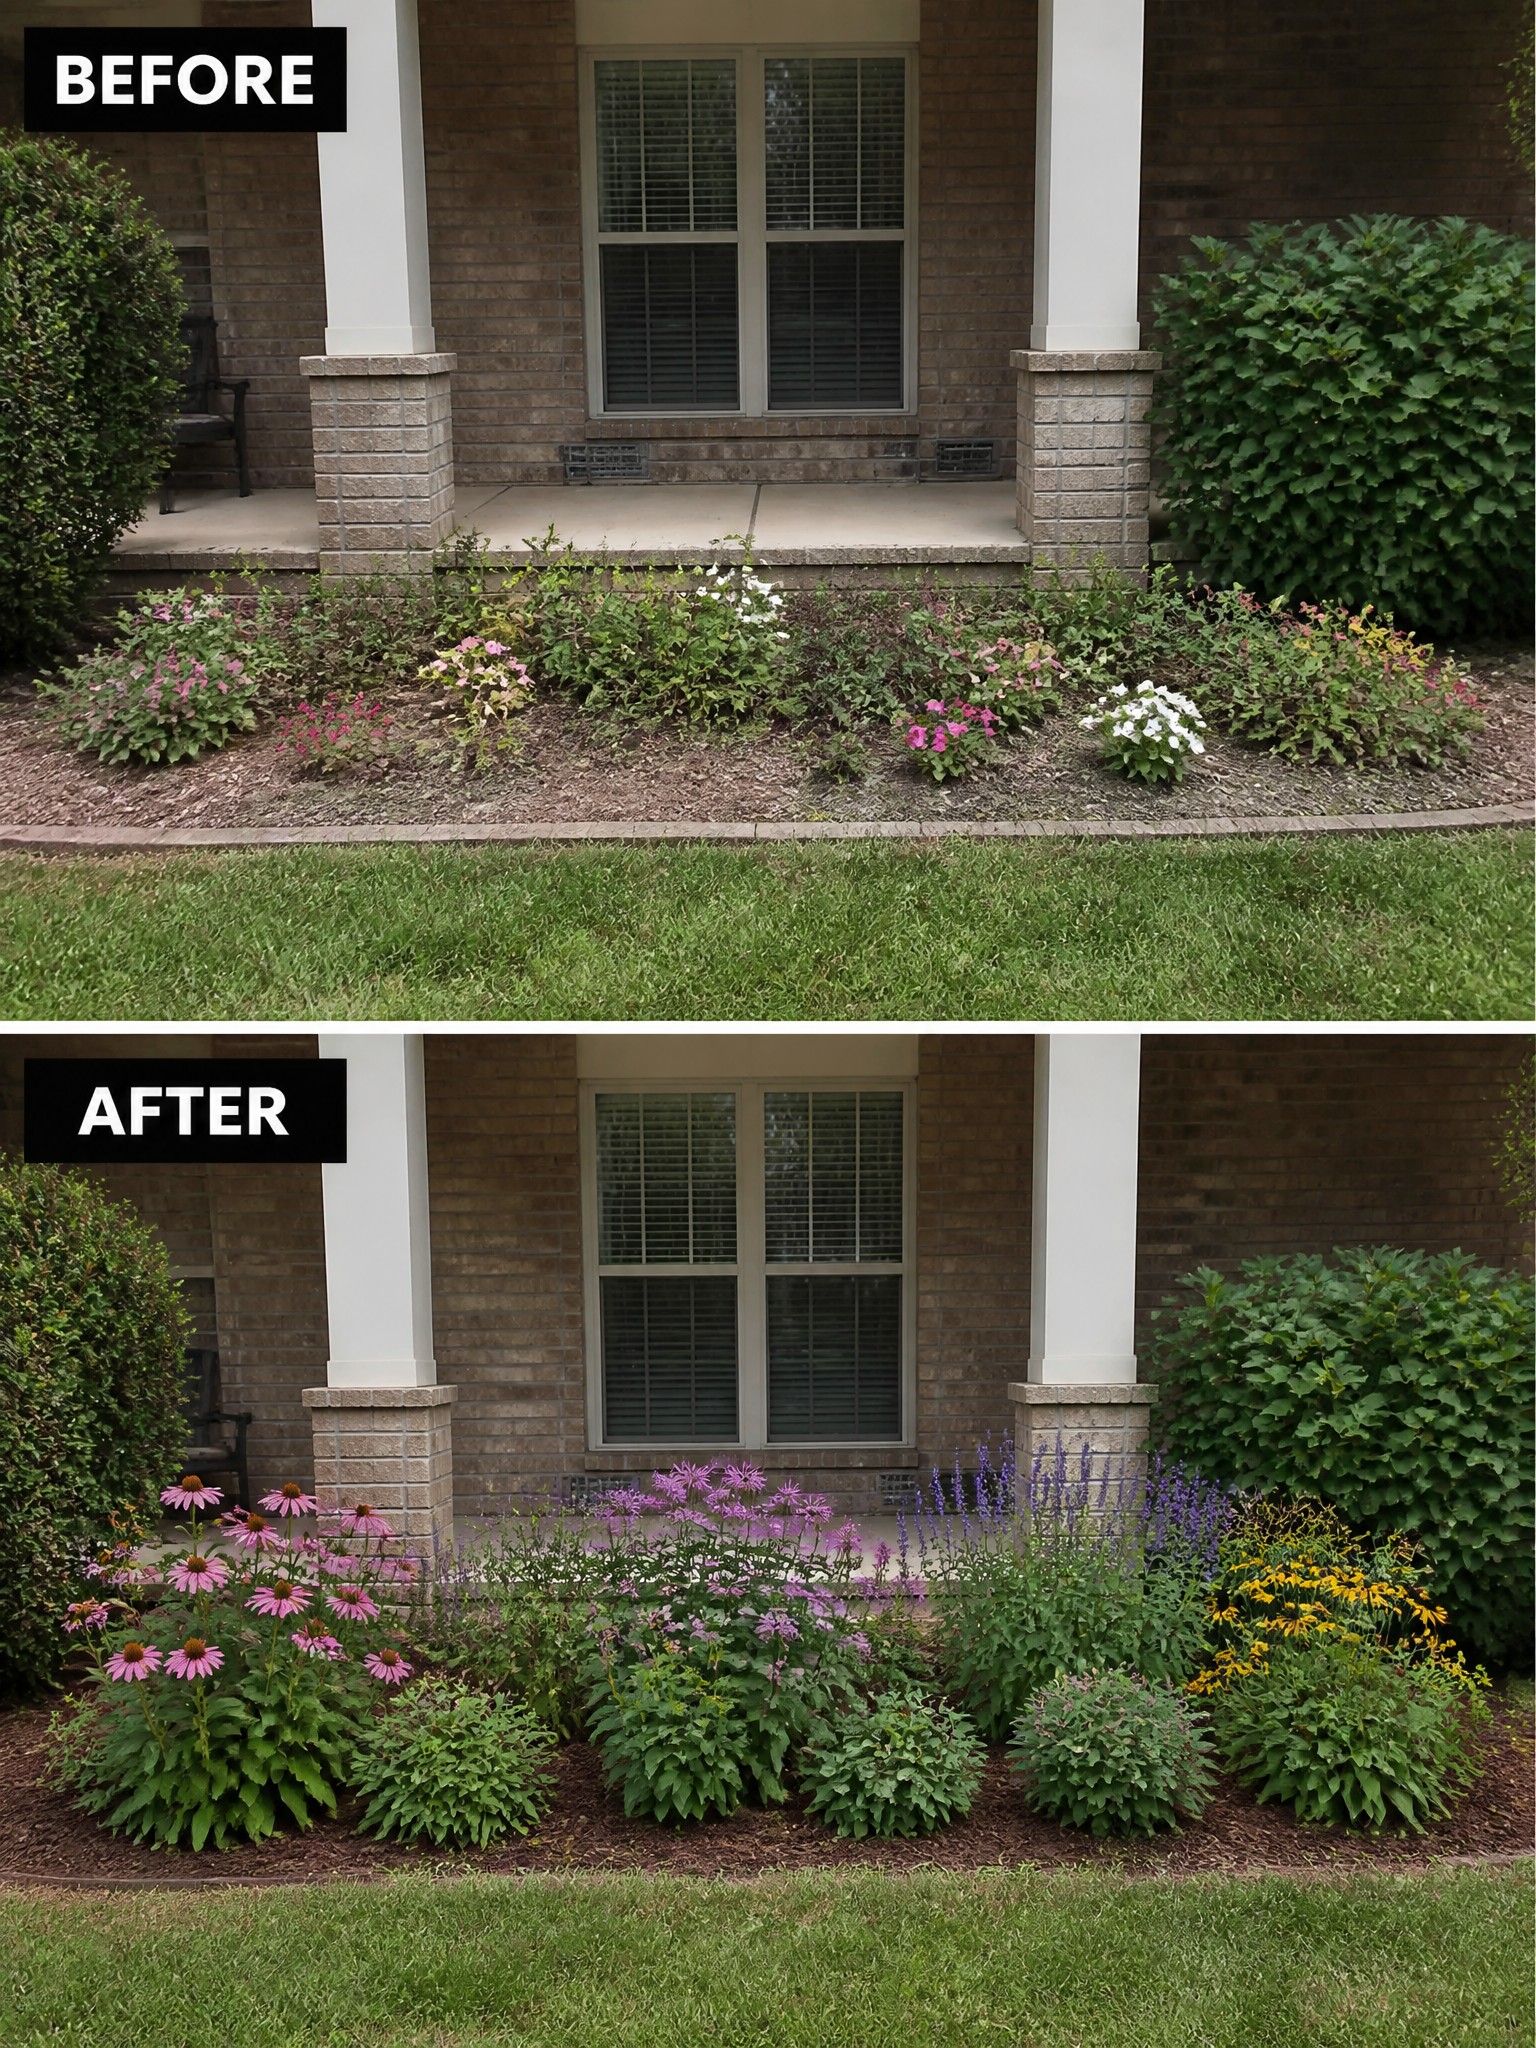
One simple change that improves the look of a front yard is giving flower beds better structure. The scattered plants and bare soil in the before view made the area feel messy, while grouping similar plants together and adding a layer of mulch created a much cleaner line along the house.
This idea works best when you start with cleanup and then plant in clusters instead of spreading things out. It keeps the bed looking organized even after a season of growth and makes routine weeding easier. Use it along the front of a house or any visible bed where you want a tidy result without constant work.
Add Structure To A Narrow Border
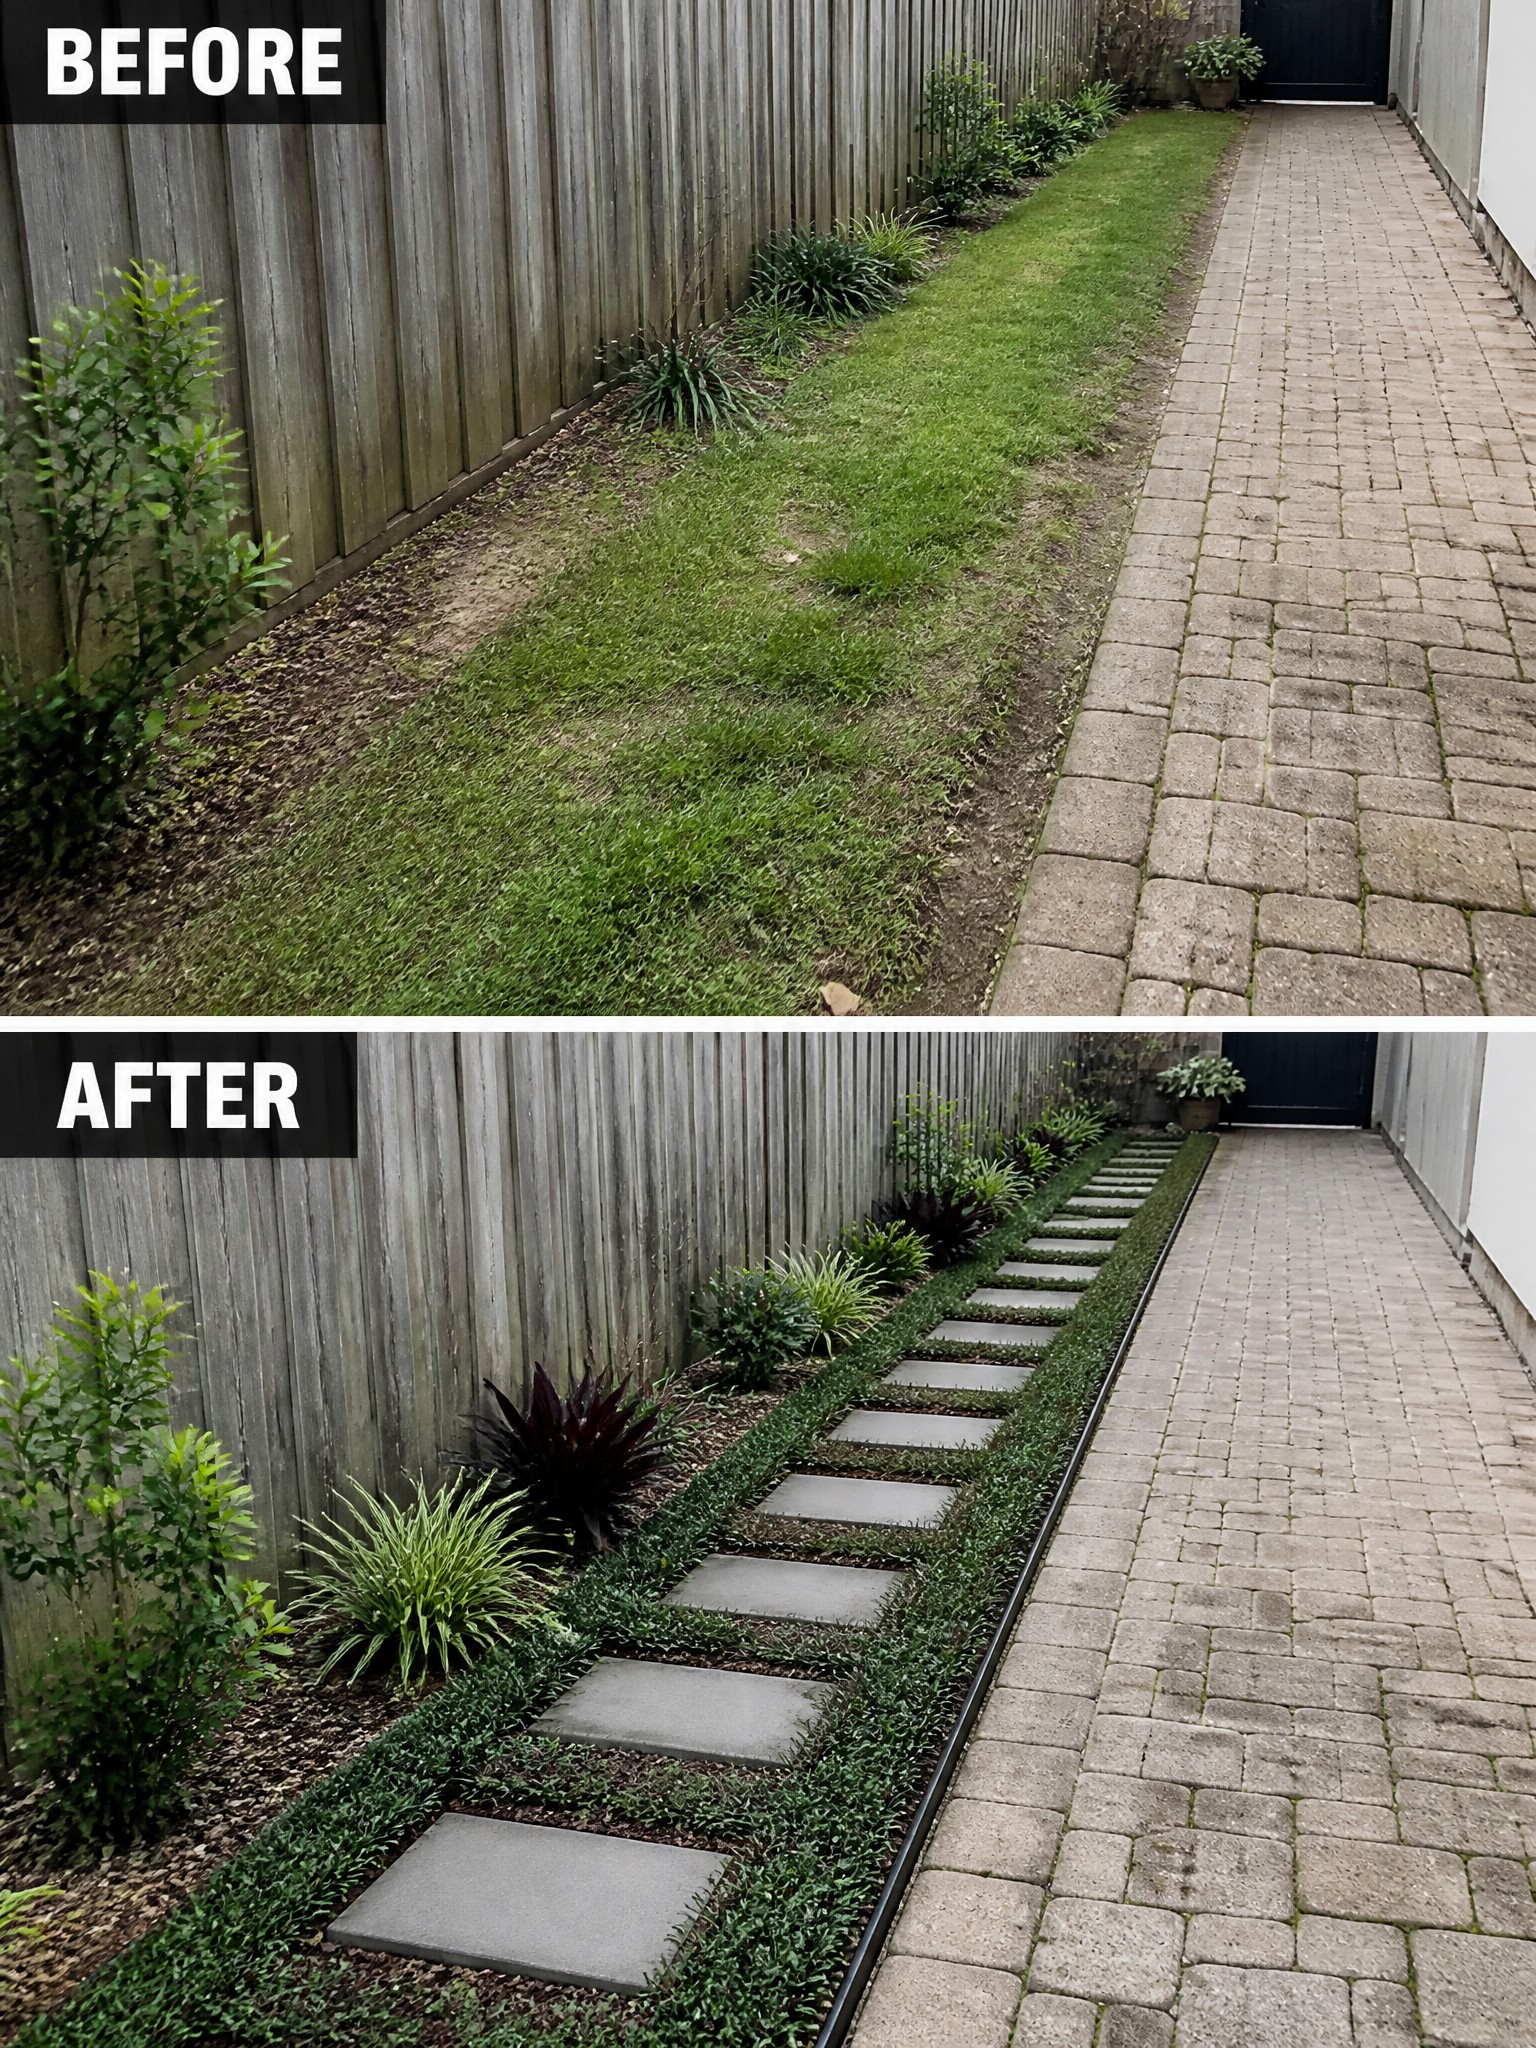
A long strip of grass beside a fence or path often turns patchy and hard to care for. Placing a line of stepping stones with a clean edge turns the same space into a proper garden bed that stays neat and easy to reach.
This idea suits side yards and narrow areas where mowing is awkward. Clear the grass first, set a simple border, and space the stones so you can step in to weed or plant without trampling the soil. The result feels planned and keeps the bed from spreading into the path.
Add Structure To A Neglected Garden Border

The biggest change here is how the border went from scattered plants and bare dirt to a clean gravel bed with grouped succulents, grasses, and a few rocks. That simple shift gives the whole area a finished look instead of feeling like random growth along the fence.
This idea works well along house foundations or side yards where plants tend to spread out. Start by laying down edging and a base layer of gravel, then plant in clusters rather than spacing everything evenly. It keeps maintenance low and makes the space look planned without needing a full redesign.
Use Tiered Beds To Give Flower Gardens Clear Structure

The main change here was replacing a single overgrown bed with three stacked wooden tiers that step up from the stone border. This simple addition turned a jumbled mix of plants into separate rows where each level gets its own space and height.
Tiered beds work well along a curved edge like this one because they keep everything from spilling forward while still following the shape of the yard. Start with the base level, then add one or two more only if the slope or space allows it. Keep the top rows narrower so the whole bed stays easy to reach and does not feel crowded.
Add Structure To Foundation Plantings
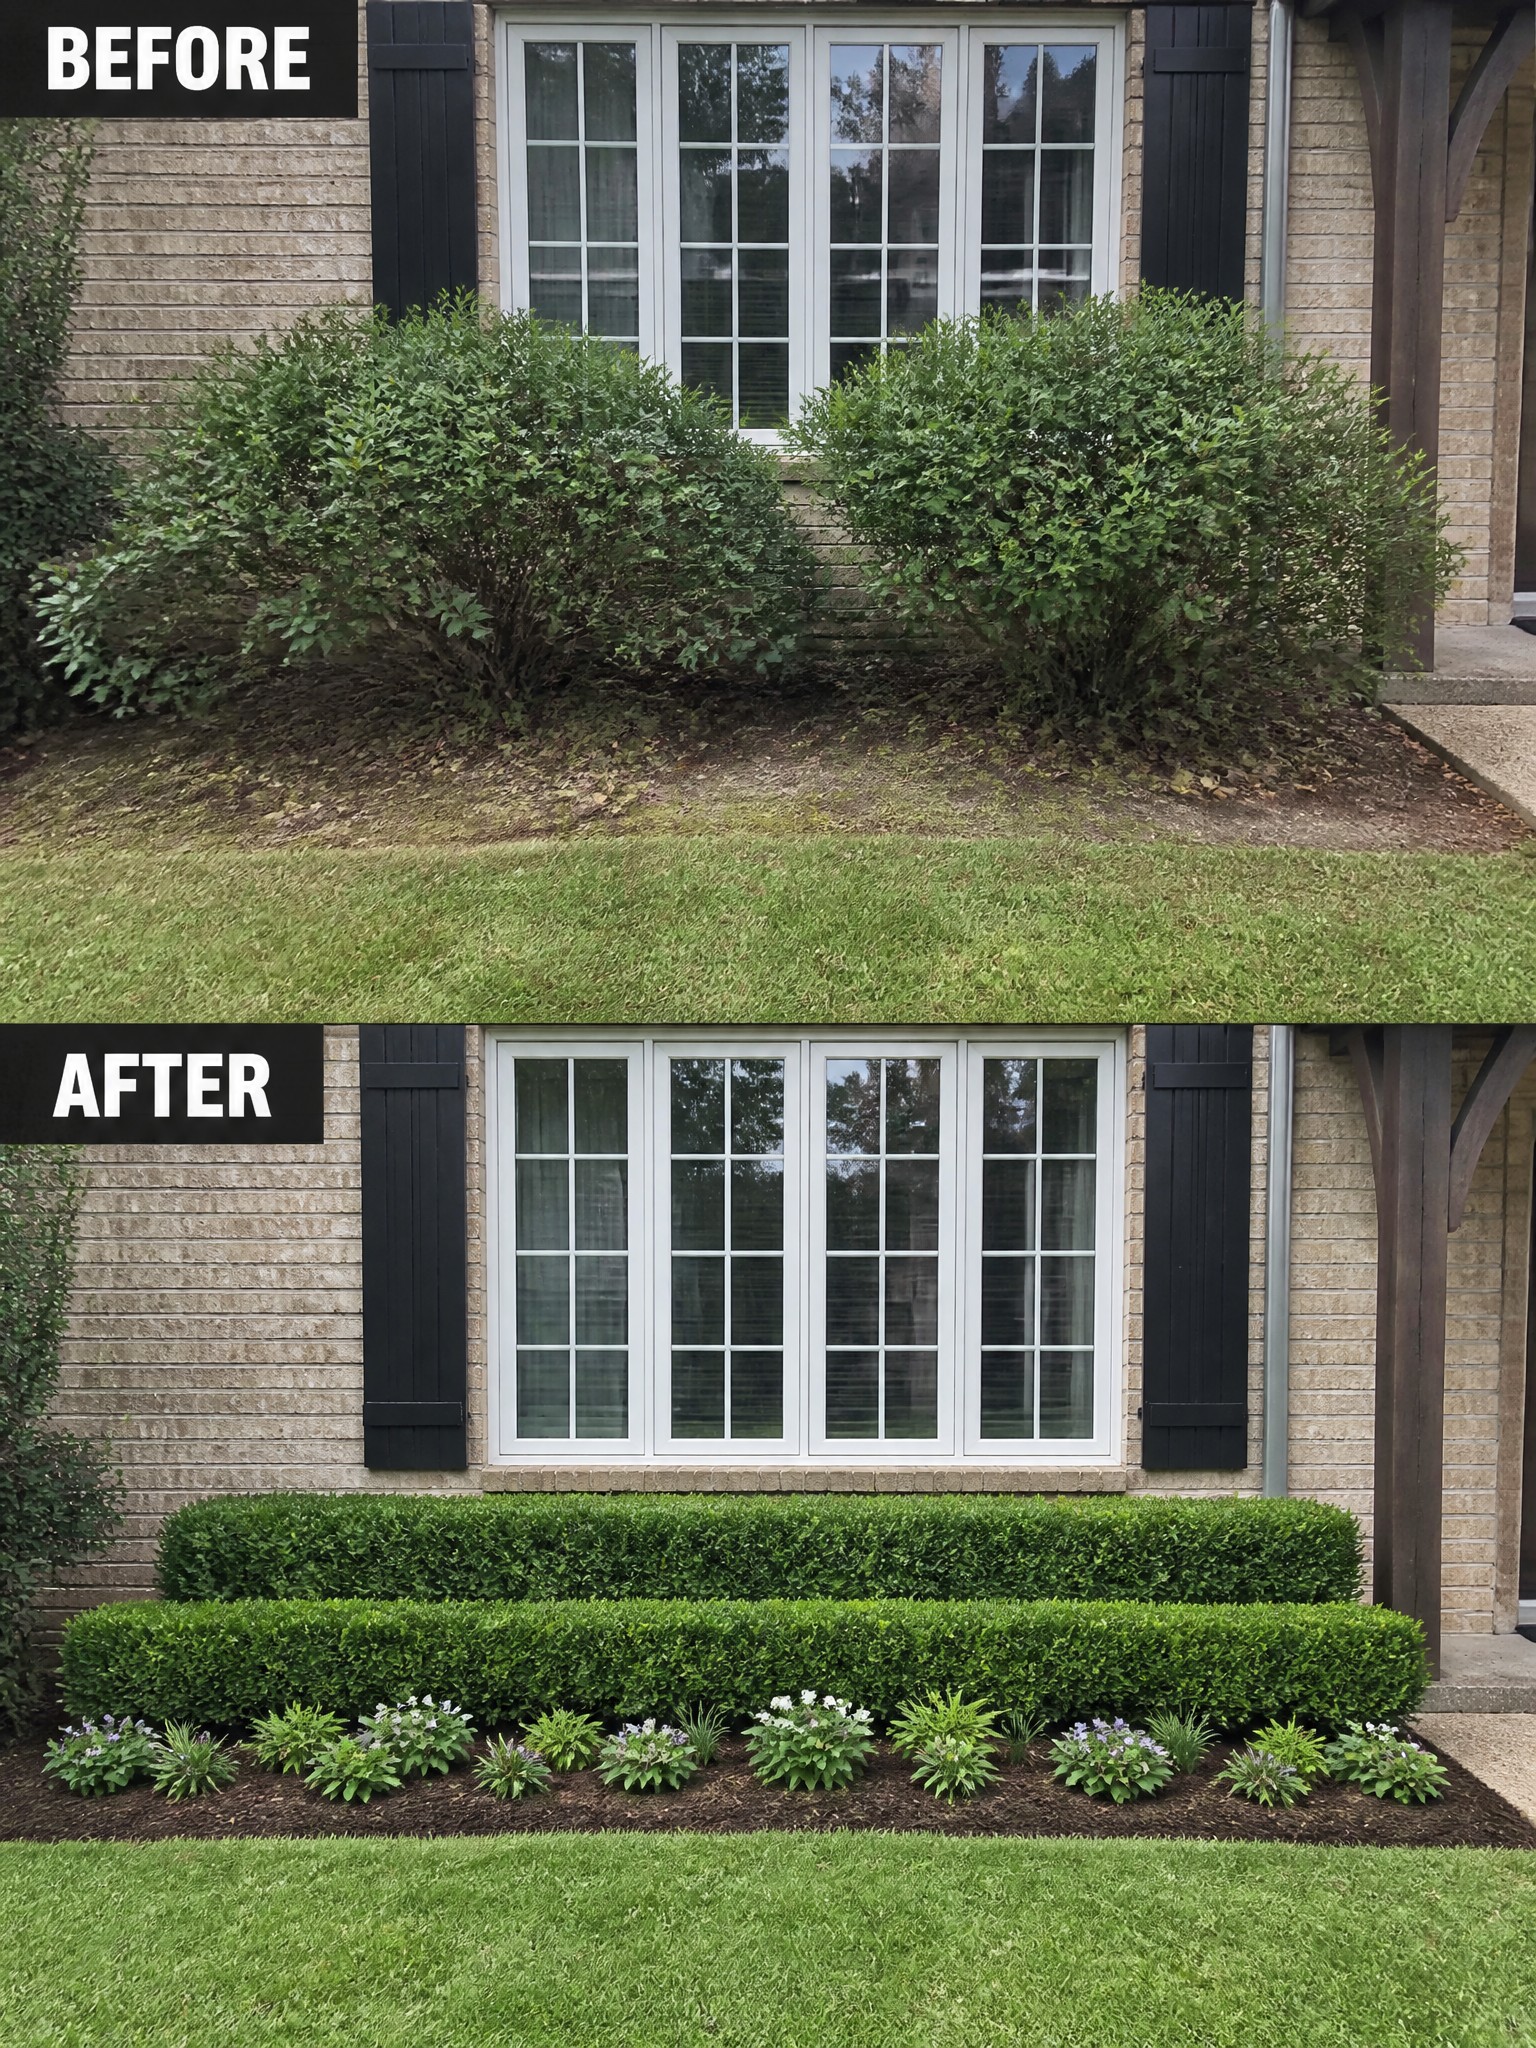
The before photo shows tall, wild shrubs that had grown uneven and messy right under the window. In the after photo those were replaced with a straight row of low, trimmed hedges and a narrow flower border in front. The change gives the whole front a much cleaner look without blocking light or making the area feel crowded.
This works well on houses where the foundation plants have gotten out of hand. Start by removing the largest shrubs first, then set a simple hedge line that follows the house wall. Keep the bed narrow so it stays easy to maintain, and use the front row for smaller perennials that add color without much height.
Add A Trellis To Give Flower Beds Vertical Structure

A trellis turns a plain strip of ground into a more organized planting area by giving vines a place to climb instead of spreading across the wall. The change from bare dirt and random growth to a grid-supported planting makes the bed feel intentional and easier to maintain.
This idea works best along house walls or fences where you want height without taking up much ground space. Pick a sturdy wood or metal grid, set it a few inches from the siding for airflow, and keep the bed edging simple so the focus stays on the plants.
Organize Flower Beds With Simple Color Rows

One easy way to make a flower bed feel more organized is to group plants into clear color sections rather than mixing them all together. The scattered look in the before photo gives way to neat rows of single colors in the after, which instantly makes the bed look intentional and easier to maintain.
This idea works especially well along the front of a house where you want a tidy appearance from the street. Choose three or four colors that sit well next to each other, then plant each color in its own block. Keep the rows simple and even so the bed stays readable as you add more plants over time.
Define Garden Paths With Stepping Stones
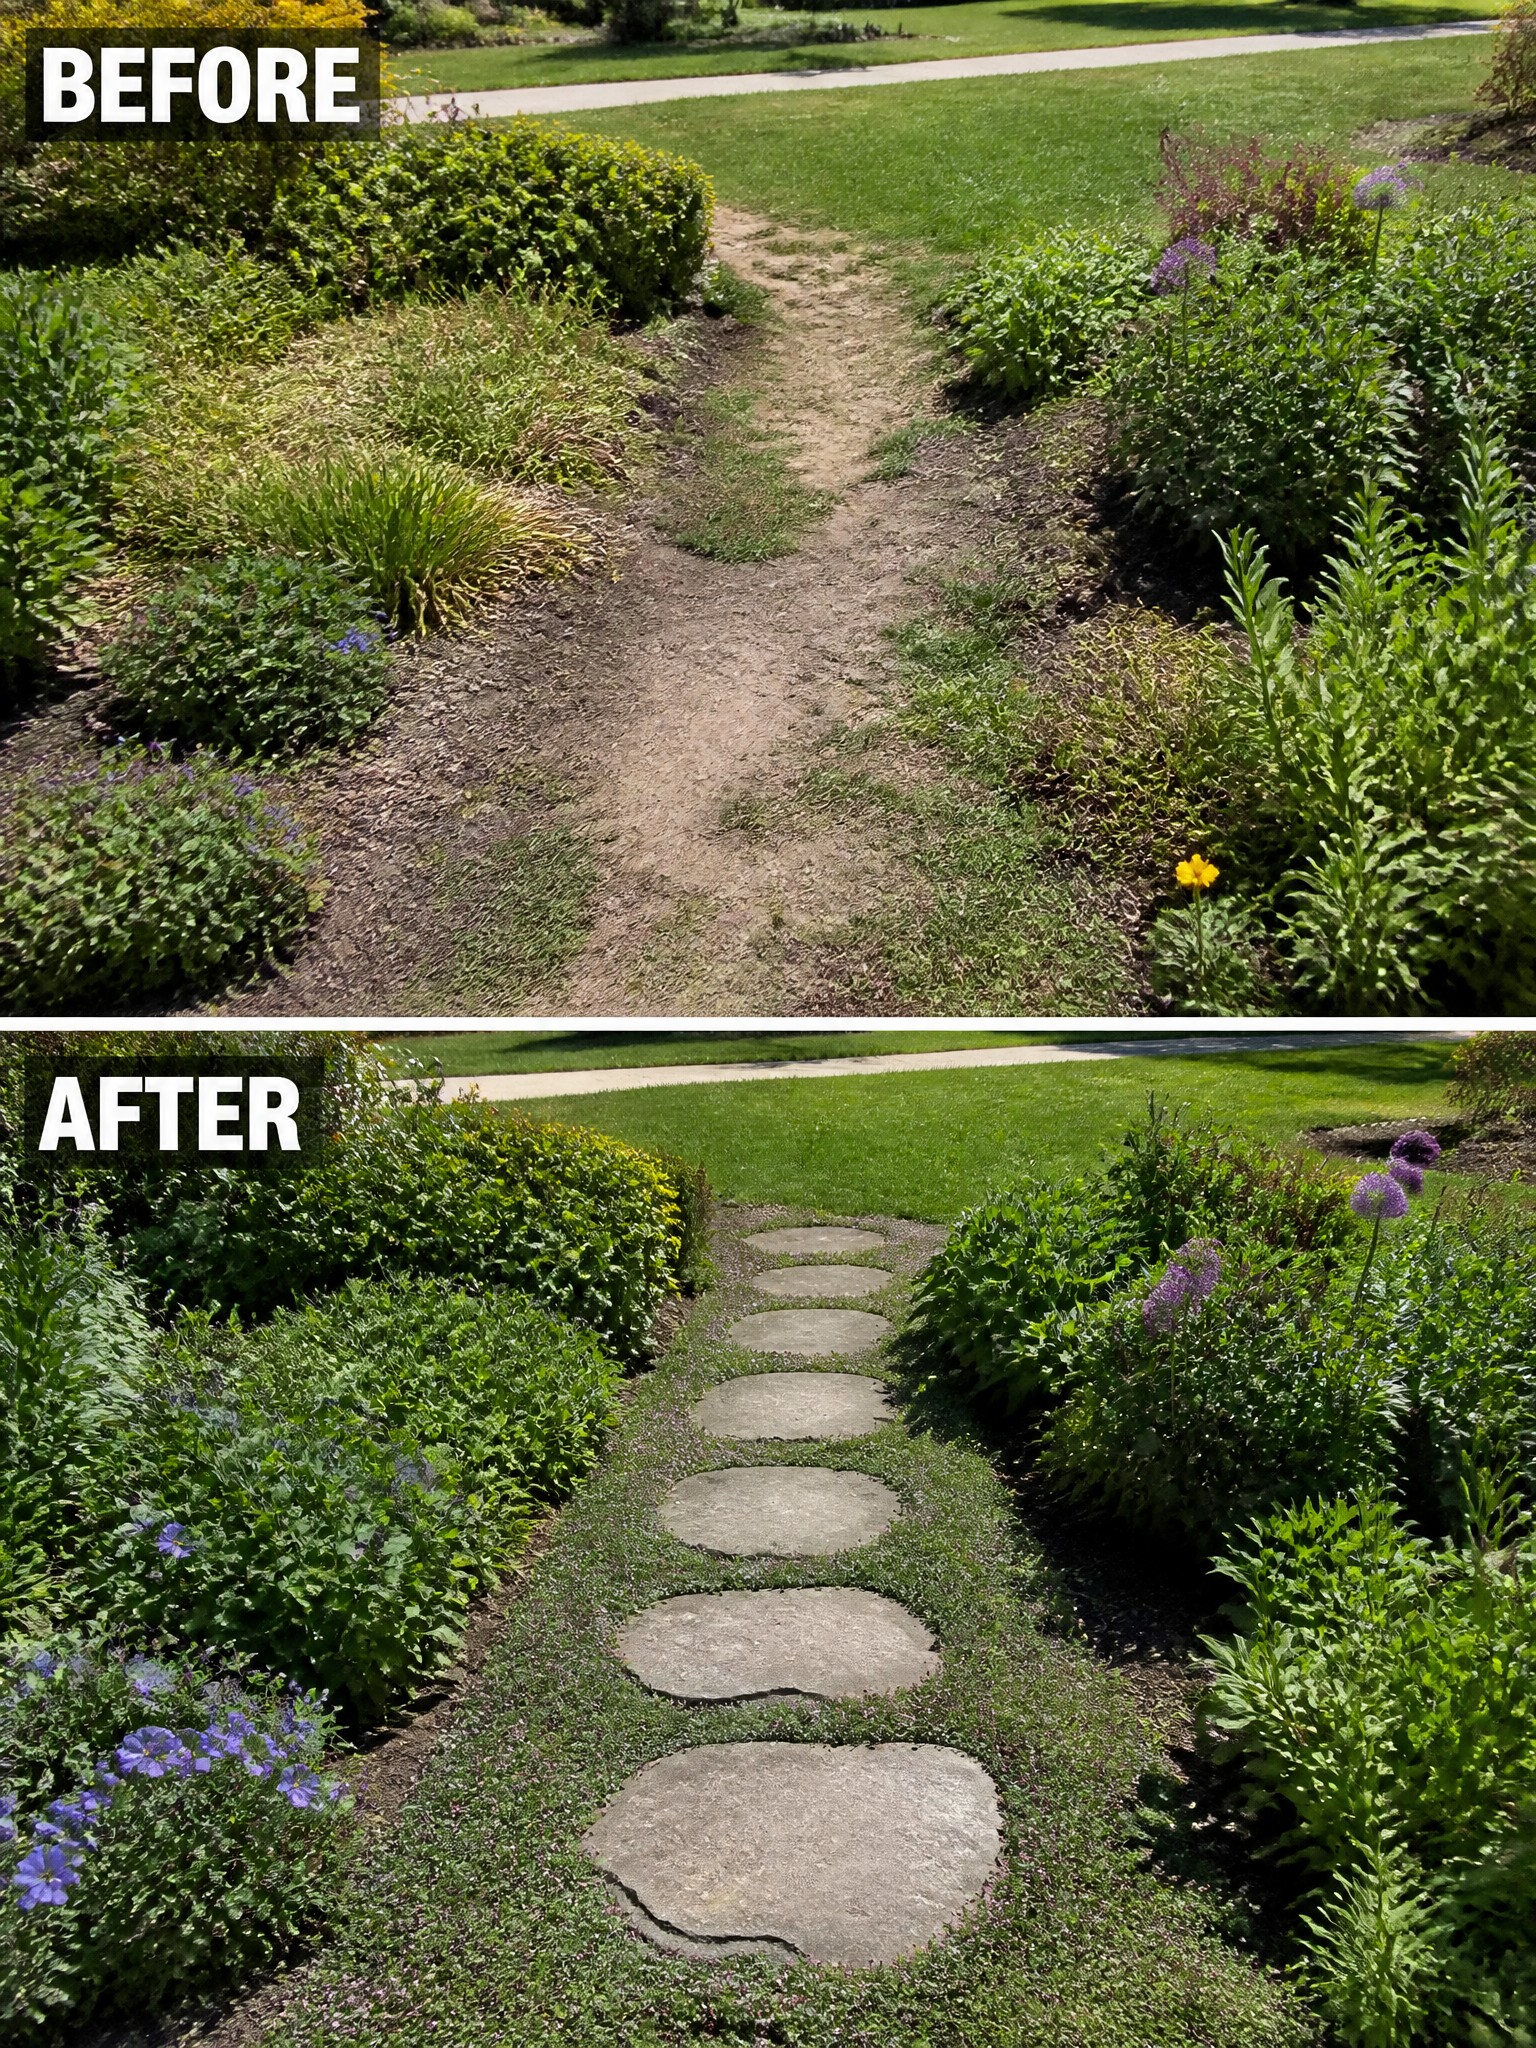
A dirt path through the garden quickly becomes a mess once plants grow in from the sides. Adding stepping stones gives the path a firm shape and keeps the surrounding beds from spilling over.
This idea works best in areas where you need a simple walking route but do not want to install a full walkway. Place the stones on a level base of gravel or sand so they stay steady, and keep the planting low along the edges so the path stays easy to follow.
Shape Soggy Spots Into Structured Garden Beds

A muddy strip along the house foundation often turns into a problem area after rain. The before photo shows water pooling right next to the siding with no clear edge between the lawn and the planting zone. The after photo shows the same spot turned into a contained bed using gravel, larger rocks, and mulch. This simple change gives the water a place to move while keeping the soil and plants in place.
This approach works well on any side of the house where downspouts empty or where the ground stays damp. Start by clearing the mud and setting a clean border with rocks or edging before you add plants. The bed does not need to be wide. A narrow, well-defined strip keeps the lawn looking neat and stops water from sitting against the foundation.
Use Landscape Lighting To Shape Flower Beds

Adding a few well-placed lights can turn a dark, flat garden edge into something that feels planned and easy to follow. In the before photo the beds sit in shadow with only one small light on a bush, while the after version uses path lights and uplights to mark the curve of the bed and pull attention to the plants.
This approach works best along the front of a house where the beds run beside a walkway. Start with simple solar or low-voltage lights along the edge, then add one or two uplights on larger shrubs. Keep the number of fixtures low so the beds still look natural instead of overdone.
Shape Overgrown Beds Into Defined Flower Borders
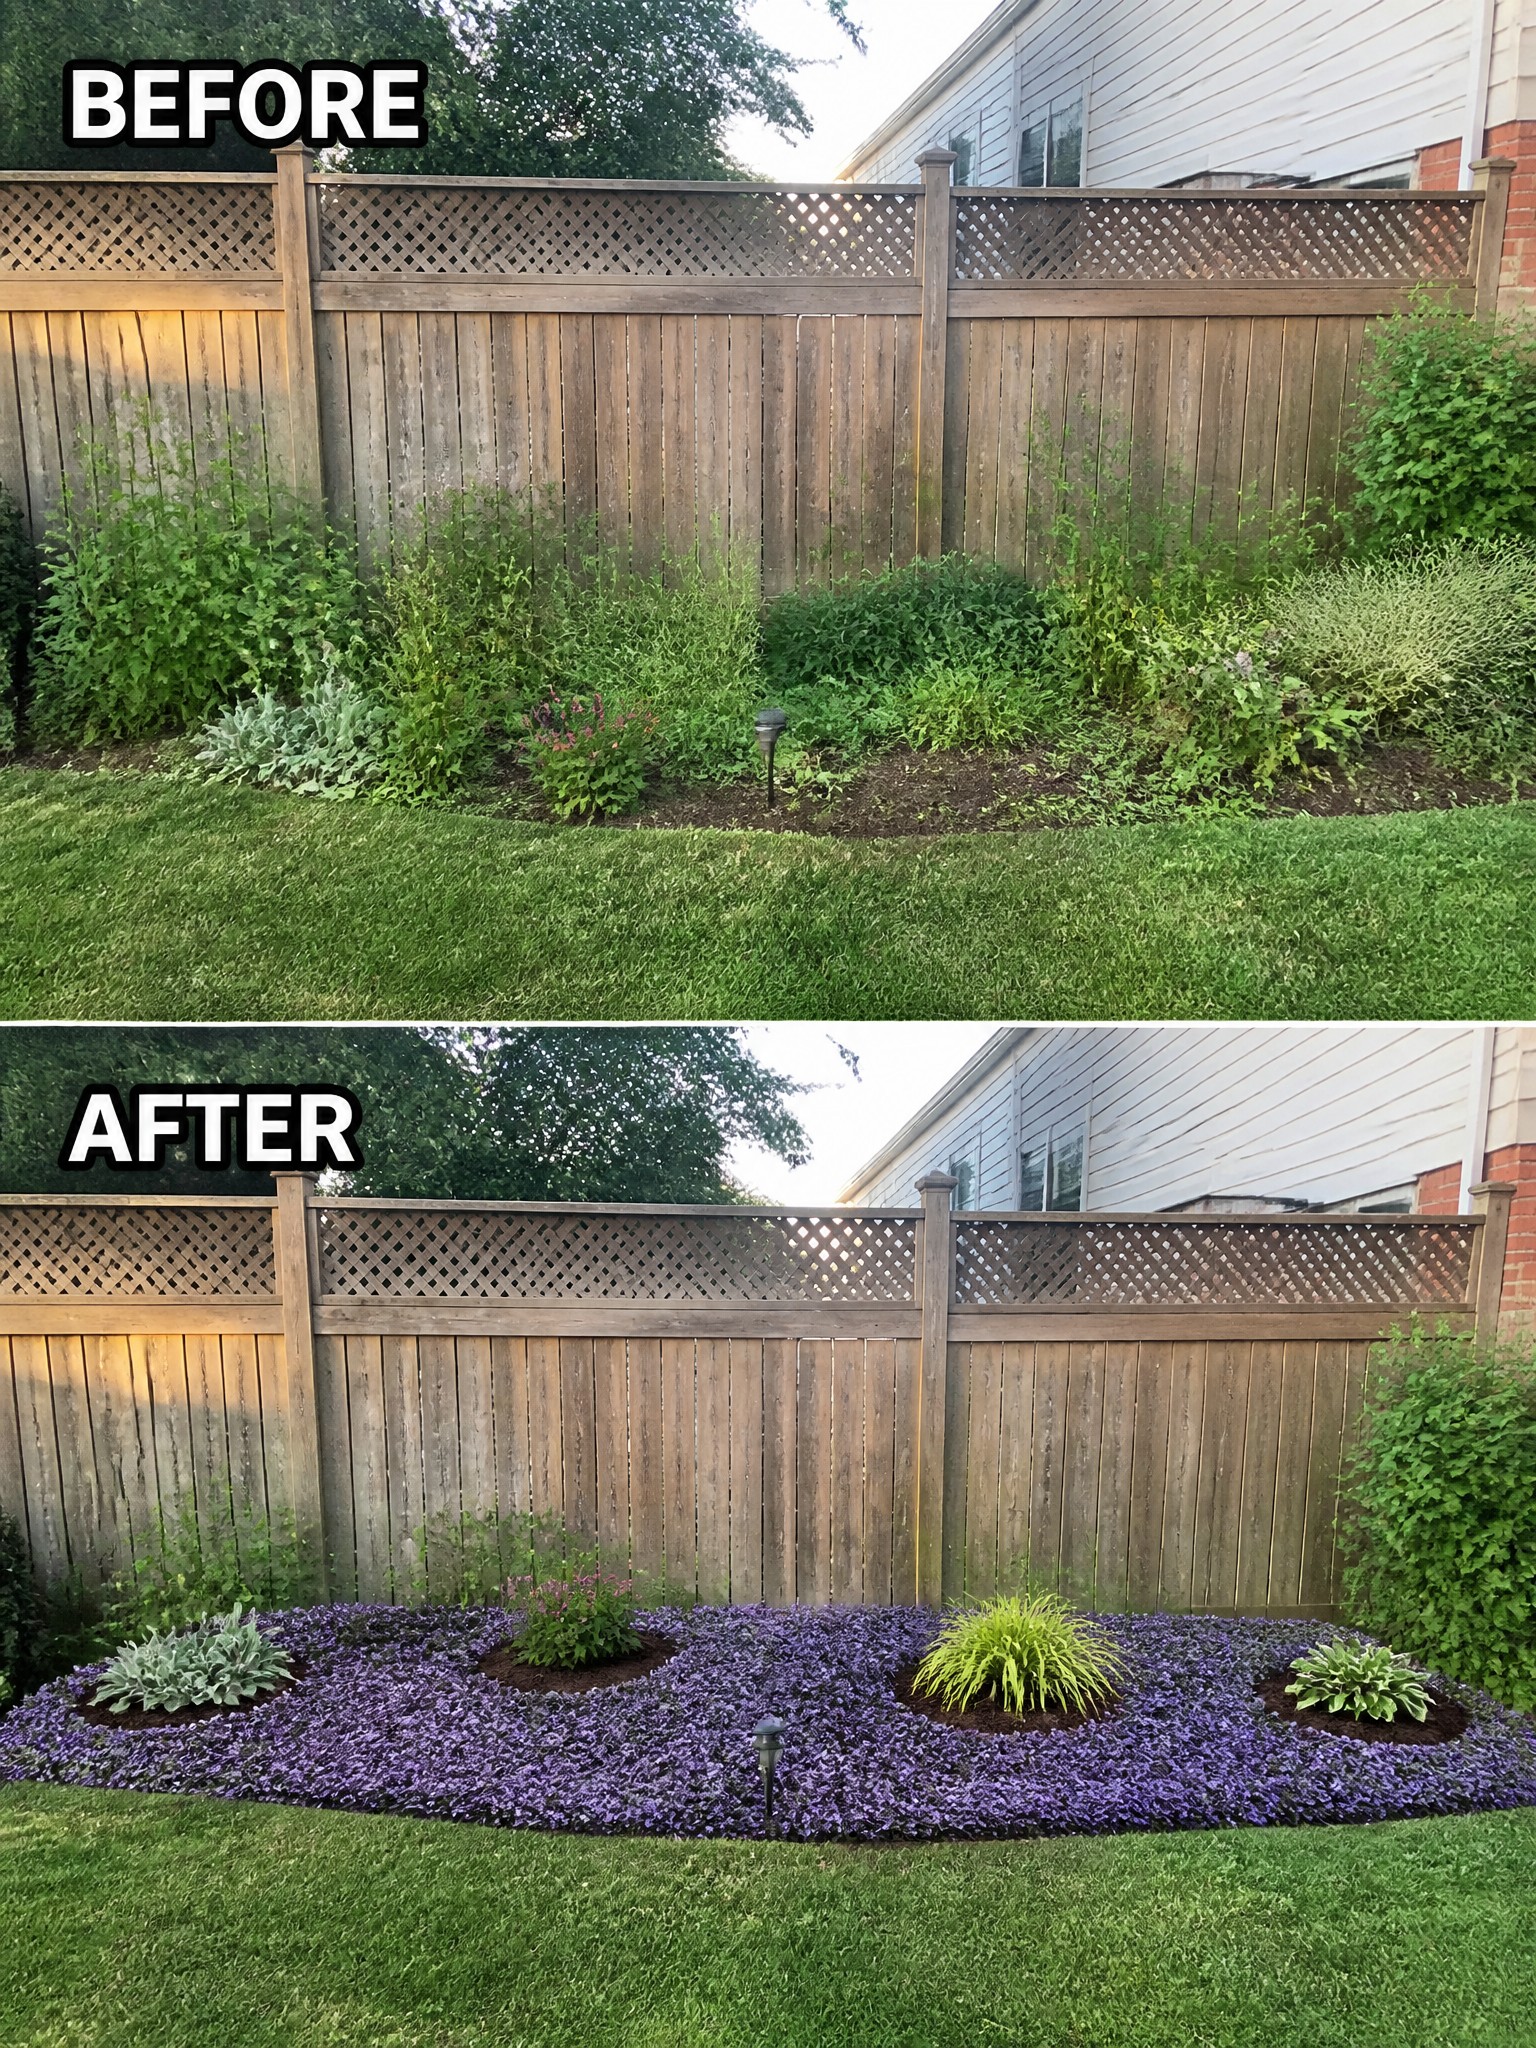
A simple way to organize a garden is to give the beds a clear shape instead of letting plants spread in every direction. Here the messy strip along the fence was cleared and replaced with a smooth oval of low purple ground cover and a few larger plants set in small mulch pockets. The result looks planned and keeps weeds down.
This idea works best along fences or property edges where growth gets out of hand. Clear the area first, spread mulch thickly, and choose spreading plants that fill in fast. It turns a neglected strip into something that looks intentional without extra hardscaping.
Frequently Asked Questions
Q: How do I keep the beds organized after the first year?
A: Mulch helps a lot by blocking new weeds. Pull stray plants early before they spread. Check the beds each season and move anything that grows too big.
Q: What size should new flower beds be?
A: Keep them narrow enough to reach the middle from both sides. This makes weeding and watering easy without stepping on plants.
Q: Is it worth adding labels to the plants?
A: Small tags help you remember what is where. They also guide you when dividing clumps later. Skip anything fancy and use simple stakes.
