

Many gardens end up looking scattered when the beds have no real border and the soil stays exposed between plants.
Mulch and edging handle both the appearance and the practical side of keeping weeds down and water in place.
I usually try edging first in my own yard because it immediately shows where the layout needs adjustment.
Those steps add up over a season or two and make the space feel more settled without constant extra work.
The ideas worth trying are the ones that focus on steady improvements like these rather than quick fixes.
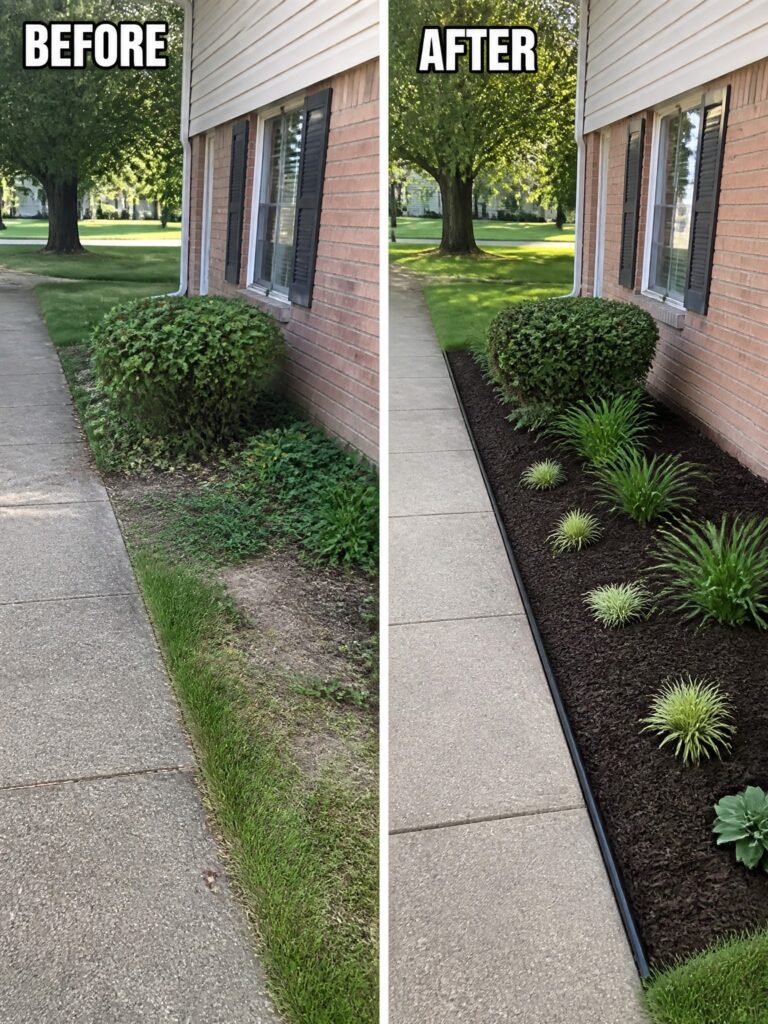
Tidy Up An Overgrown Border With Mulch And Edging
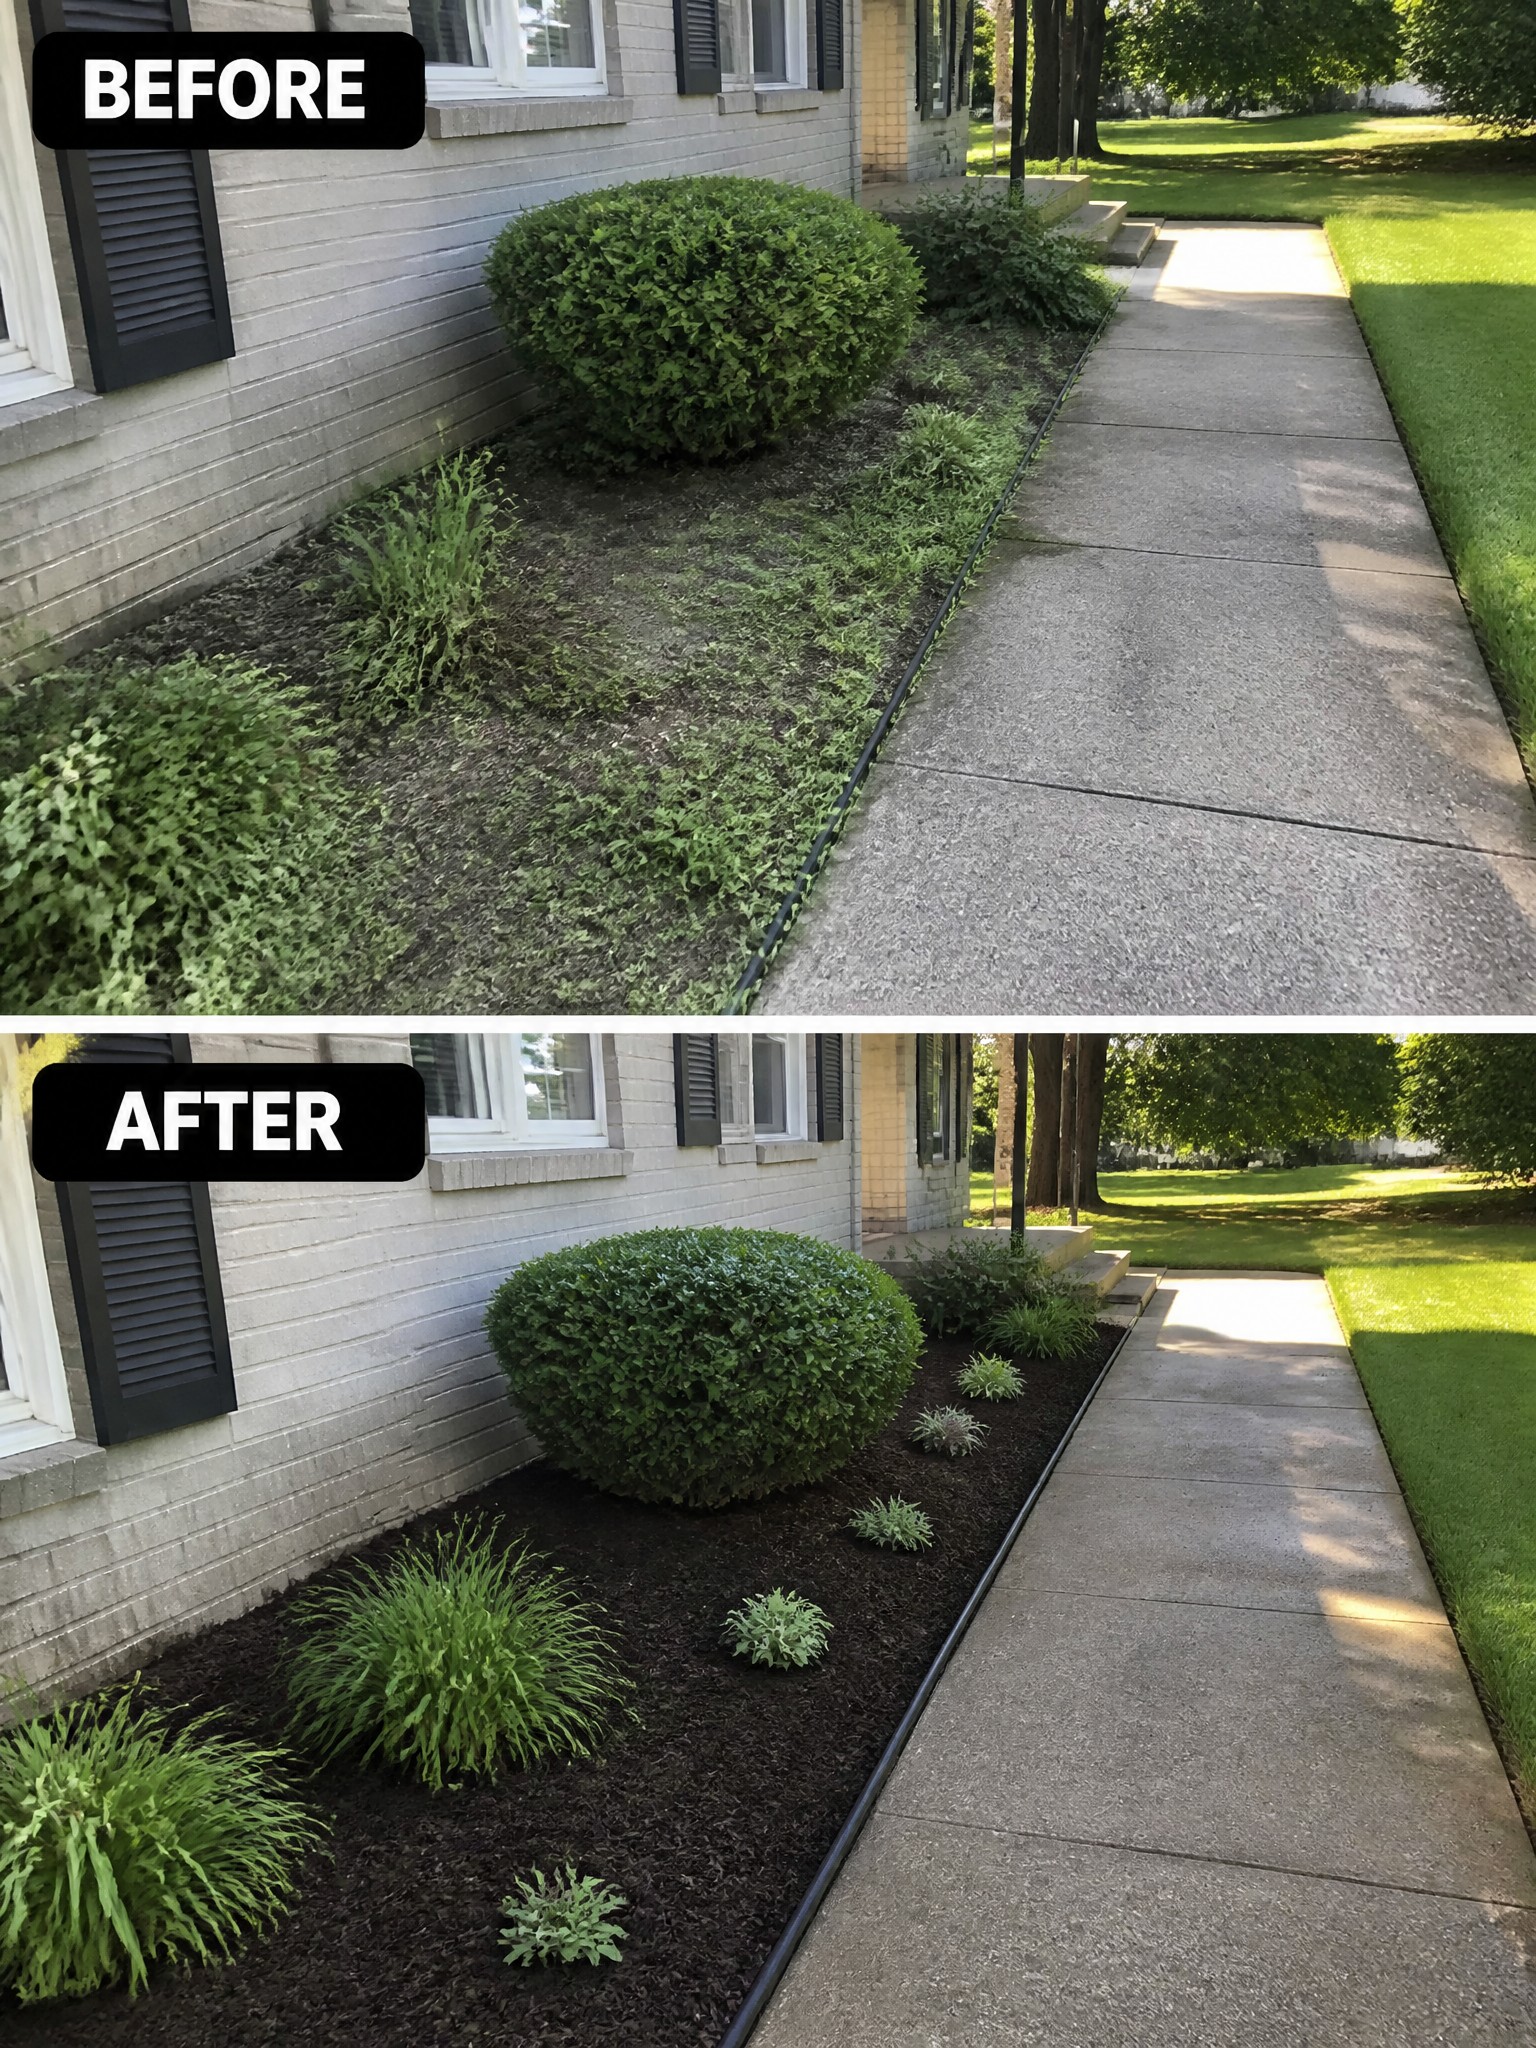
The biggest difference here is the shift from a weedy, uneven strip of ground to a clear, mulched bed with a sharp edge. That simple change makes the whole side of the house look cared for without adding new plants or structures.
This approach works well along walkways where you want low upkeep and a finished look. Start by pulling the worst weeds and laying down a solid edging material, then add a few inches of mulch to keep the bed looking neat through the seasons. It suits older homes with long foundation borders that have gotten away from you.
Create Defined Beds Around Trees With Mulch And Edging
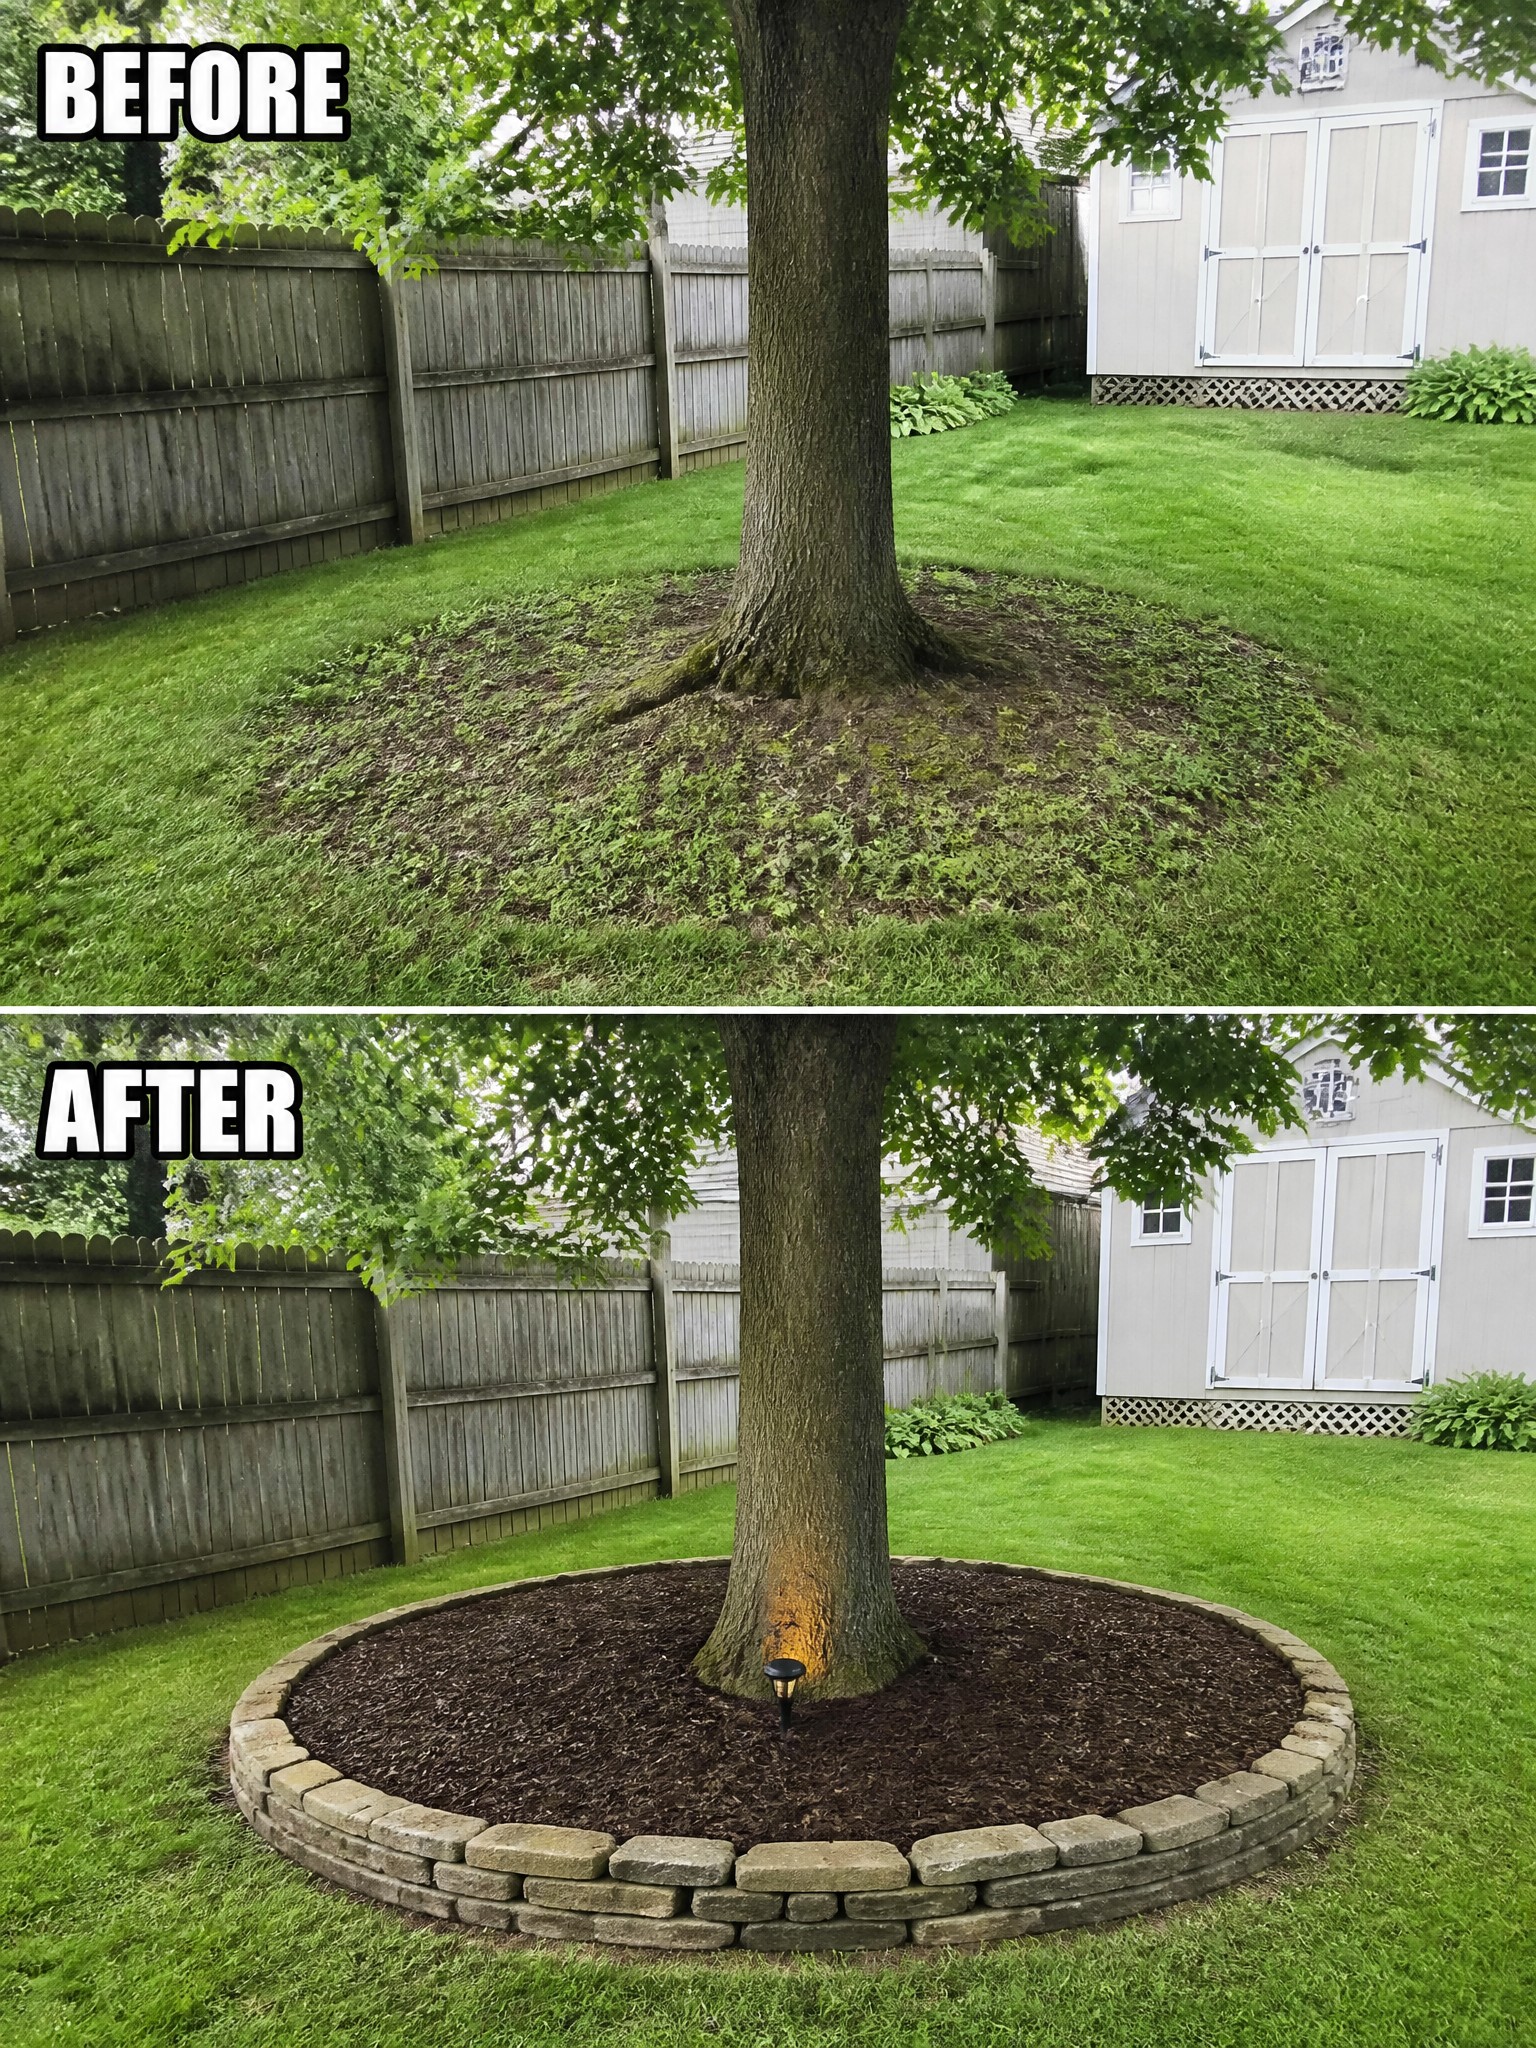
Clearing the messy growth right at the base of a tree and adding a ring of mulch with a simple stone edge makes the whole yard feel more intentional. The before photo shows a weedy patch that blends into the lawn, while the after shows a clean, contained circle that separates the tree from the grass without much effort.
This approach works best in yards where trees sit in open lawn areas. Start by cutting a clean circle, lay down landscape fabric if weeds are heavy, then add mulch a few inches deep. The edging keeps everything in place and makes mowing easier around the bed.
Define Your Lawn Edge With Brick Edging
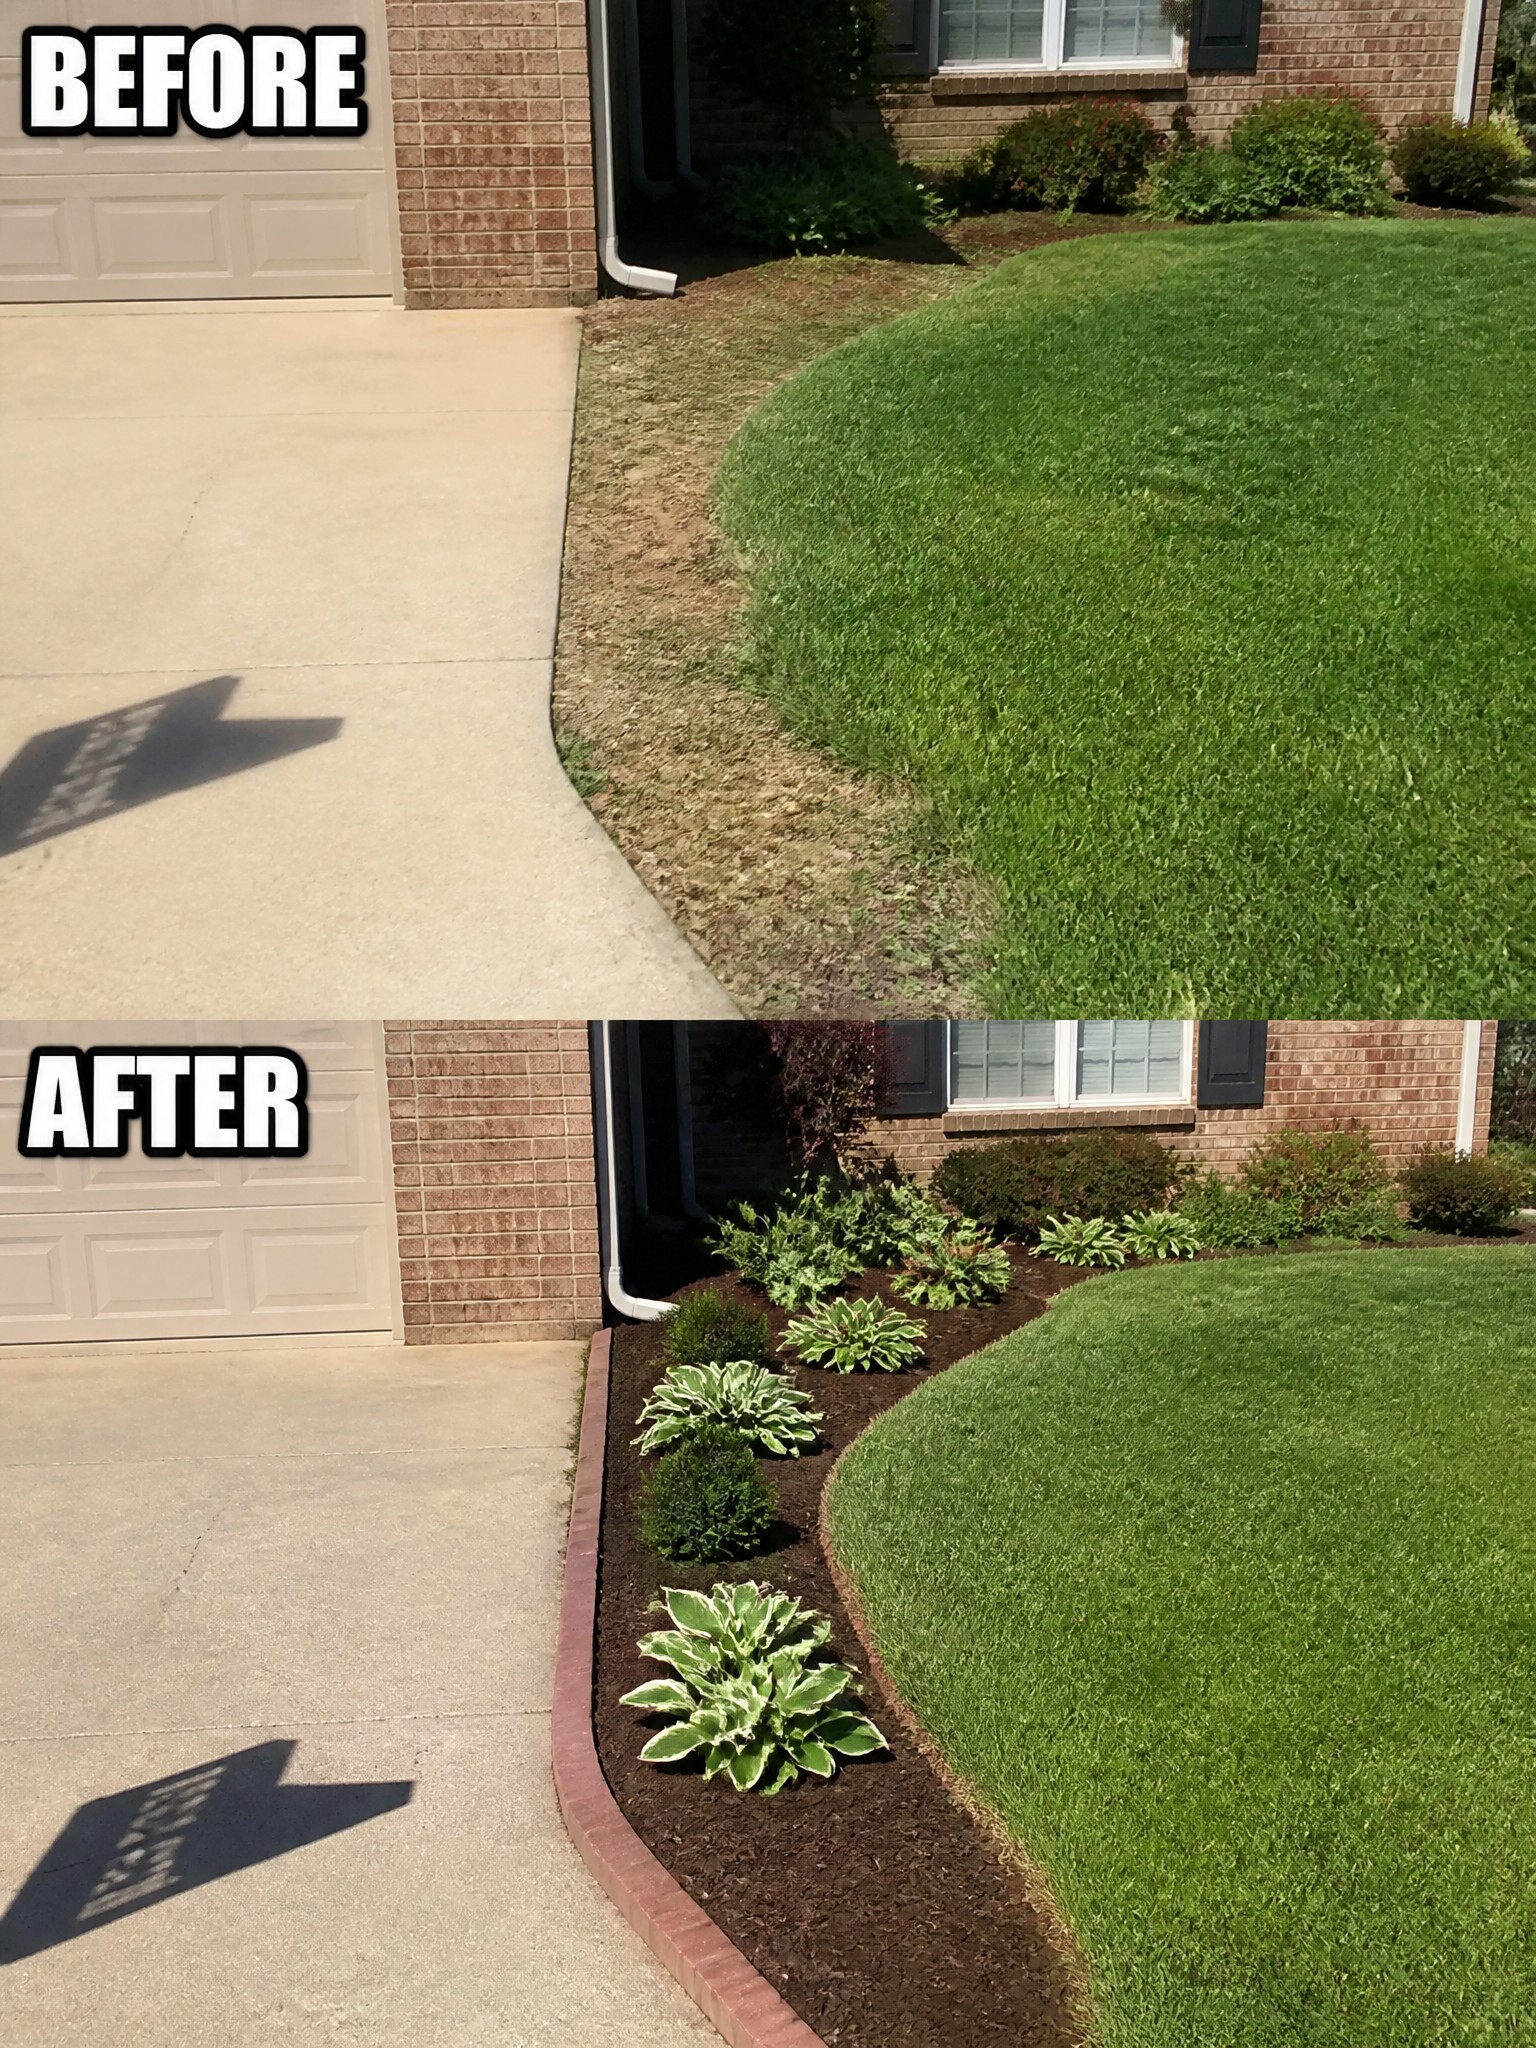
The bare strip of dirt next to the driveway looked messy and unfinished. Adding a low brick border created a clear curve and turned that space into a proper garden bed filled with mulch and hostas.
This idea works best along driveways or front walks where the lawn meets hard surfaces. Lay out the curve first with a hose to get the shape right, then set the edging and spread mulch. It keeps the lawn looking tidy and gives you a simple place to add a few plants without overcomplicating the yard.
Add Defined Garden Beds With Mulch And Edging
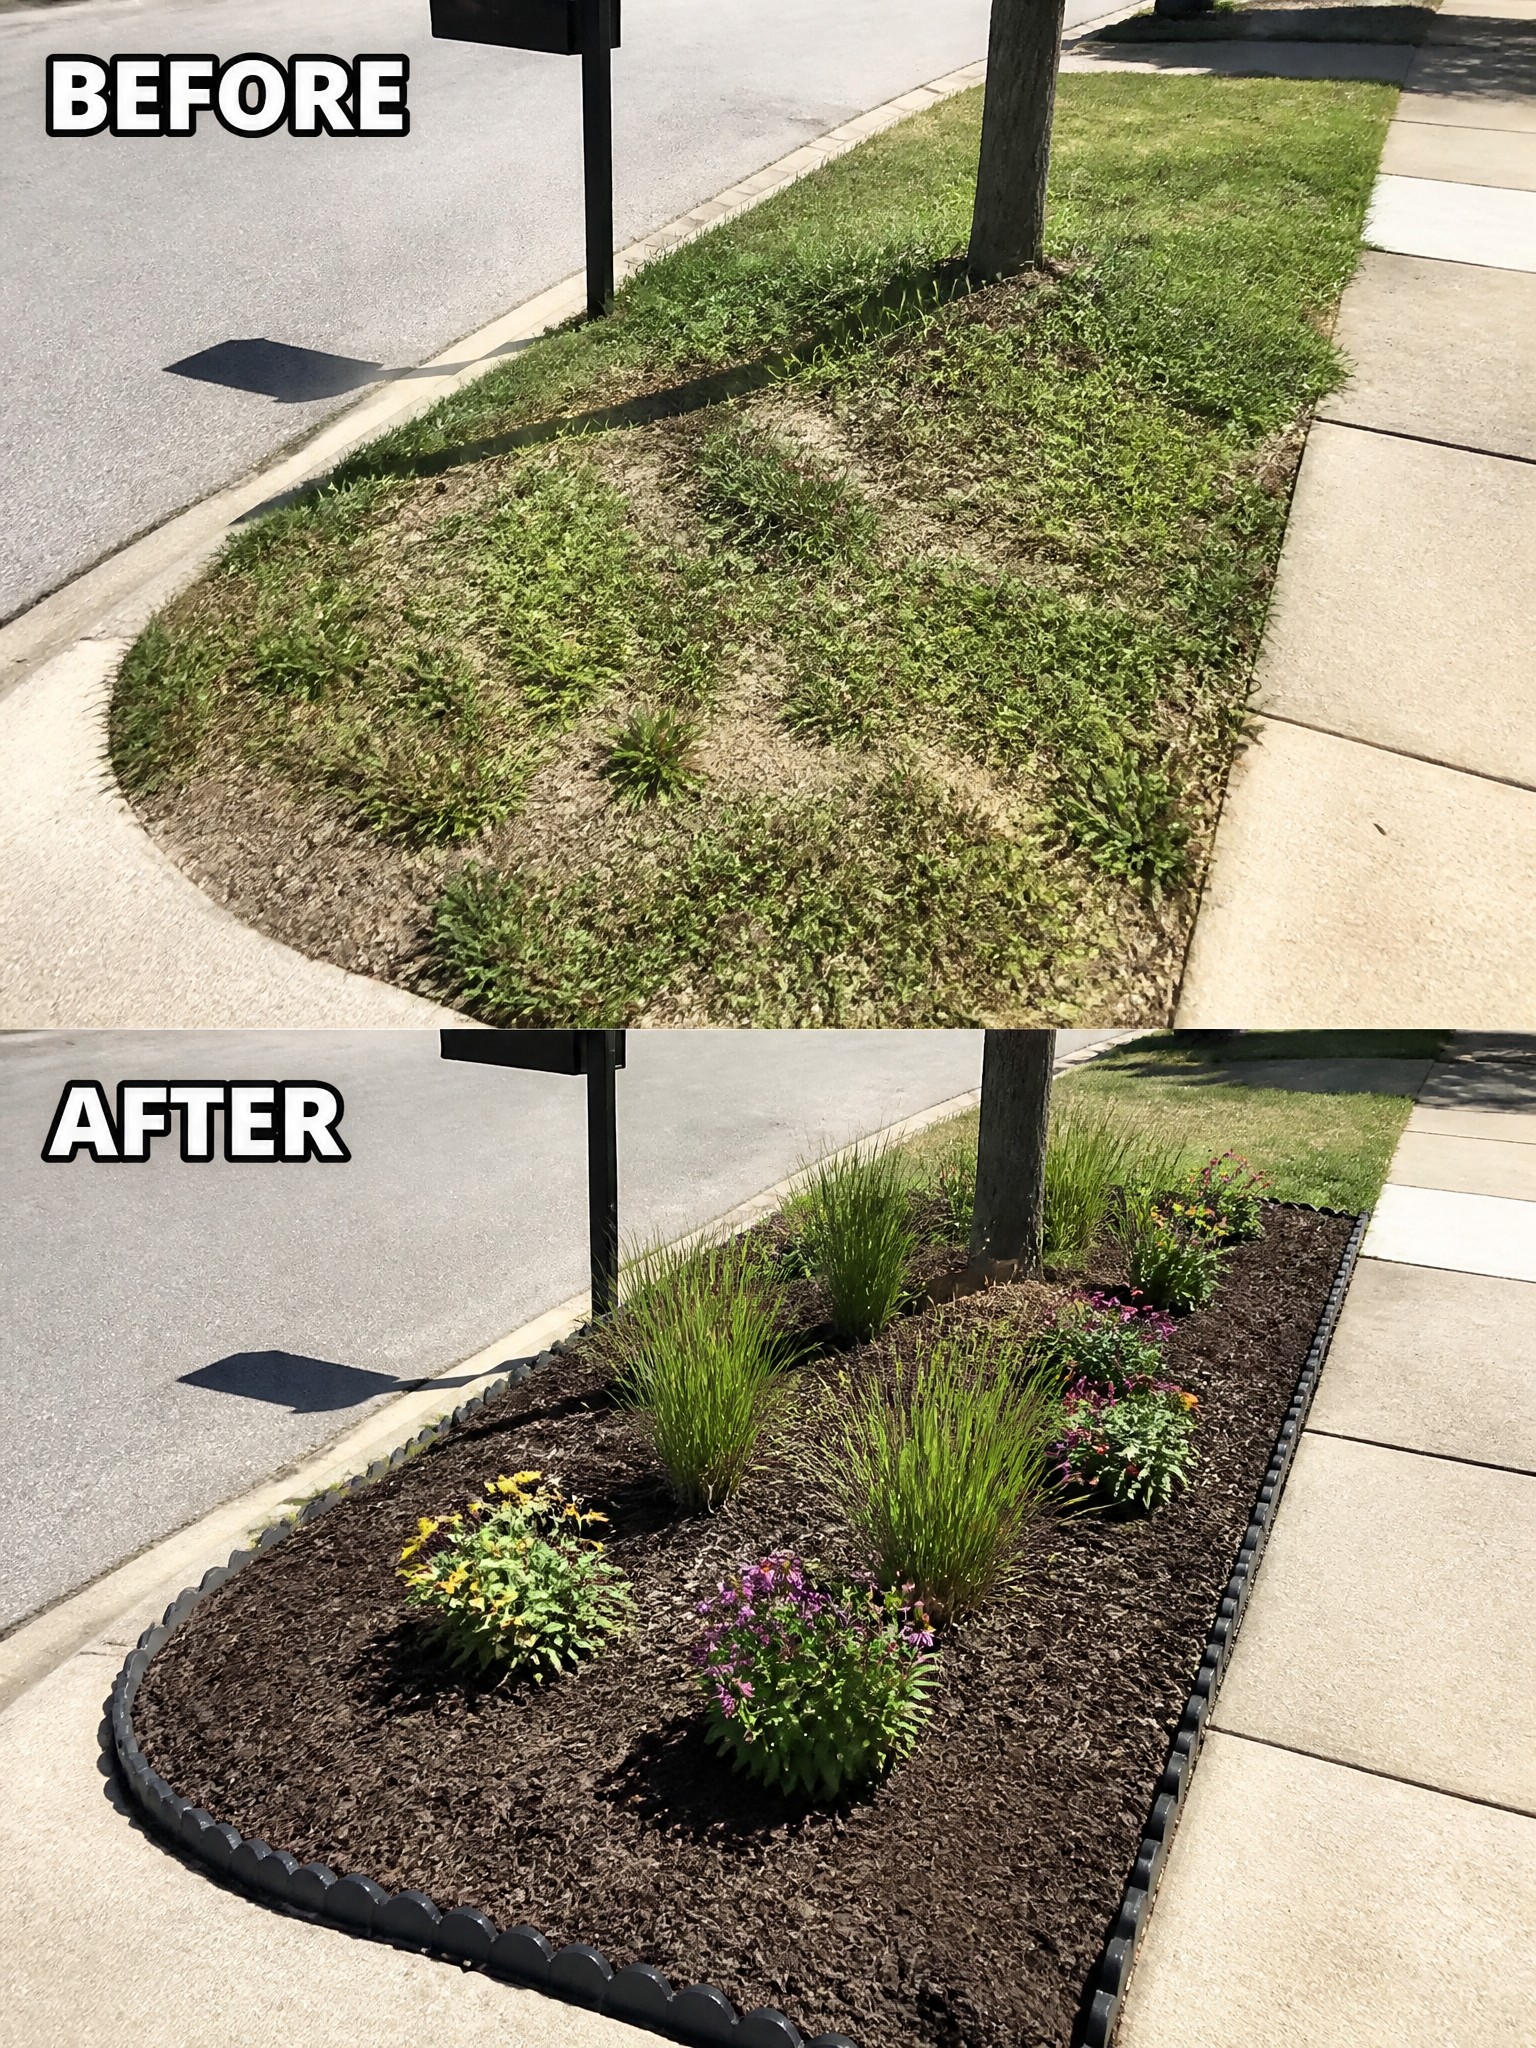
Many yards have narrow strips of grass that are difficult to mow and always end up looking patchy. Adding a mulched bed with a clear edge turns that space into something simple to care for and much neater.
Lay the edging first to set the shape, then spread mulch and plant a few low-maintenance plants inside the border. This approach works especially well along sidewalks or near mailboxes where you want the yard to look finished without constant upkeep.
Add Defined Borders With Mulch And Edging
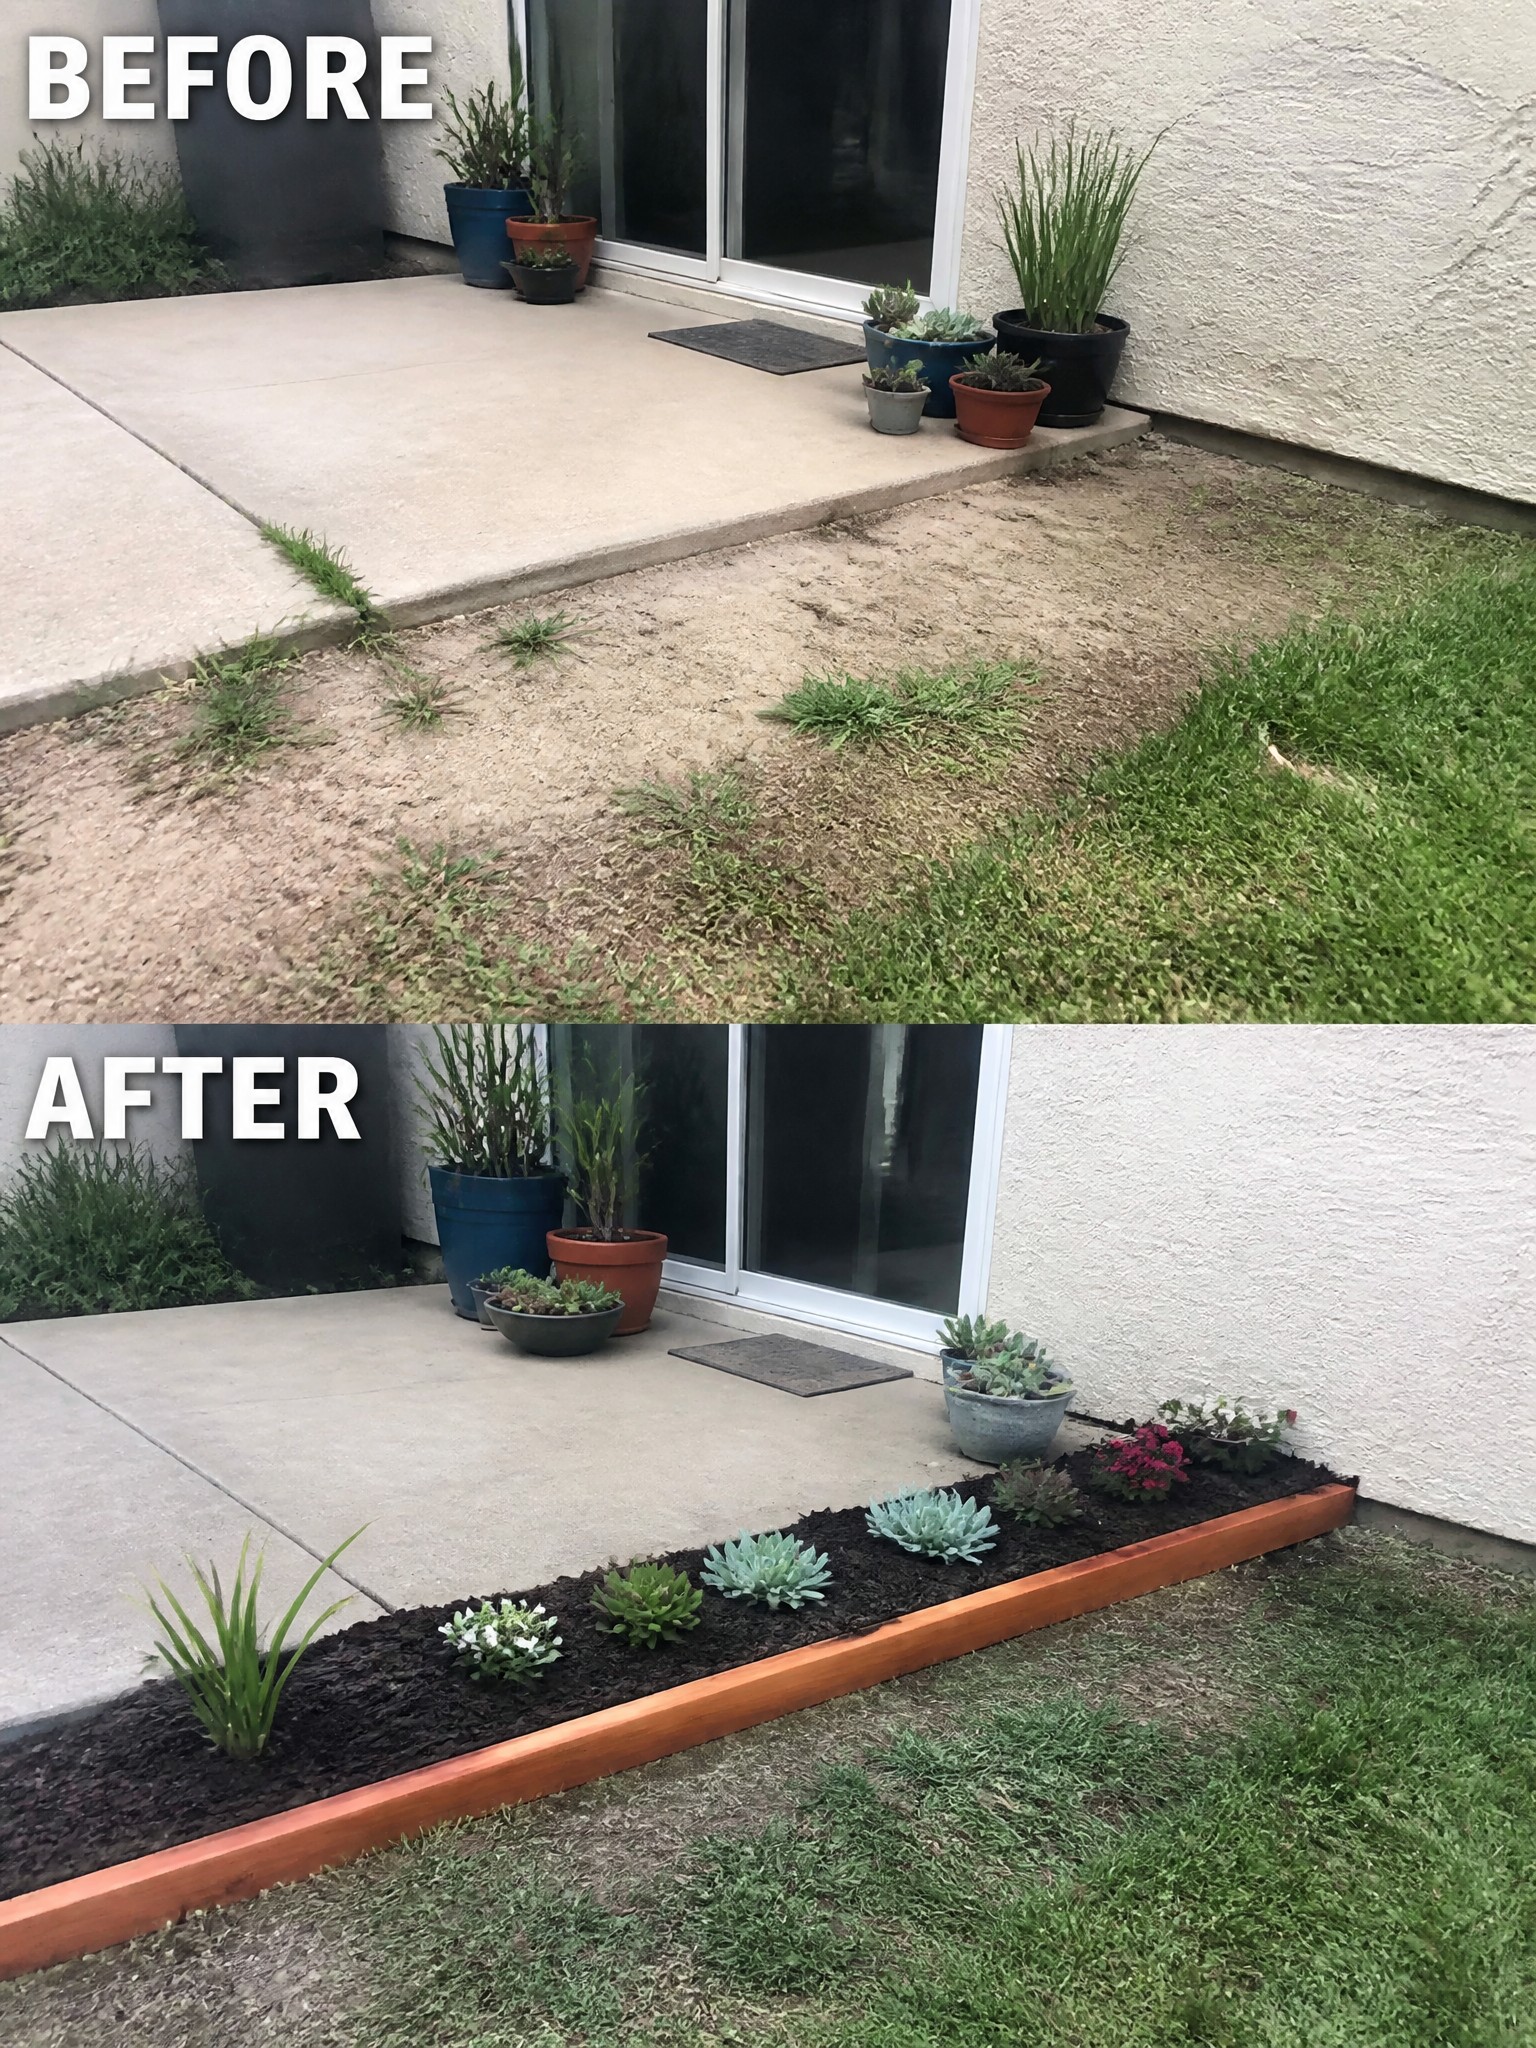
A bare strip of dirt next to a patio often looks messy because it has no clear edge. Adding a simple wooden border and filling the bed with mulch turns that neglected space into a tidy planting area that separates the lawn from the house.
This approach works well along the foundation of a home or beside a concrete patio where grass struggles to grow. Start by cleaning out the weeds, lay down edging to hold the shape, then add a few inches of mulch before planting. The result stays low maintenance and gives the whole side of the yard a finished look without major construction.
Define A Narrow Side Yard With Stepping Stones And Mulch
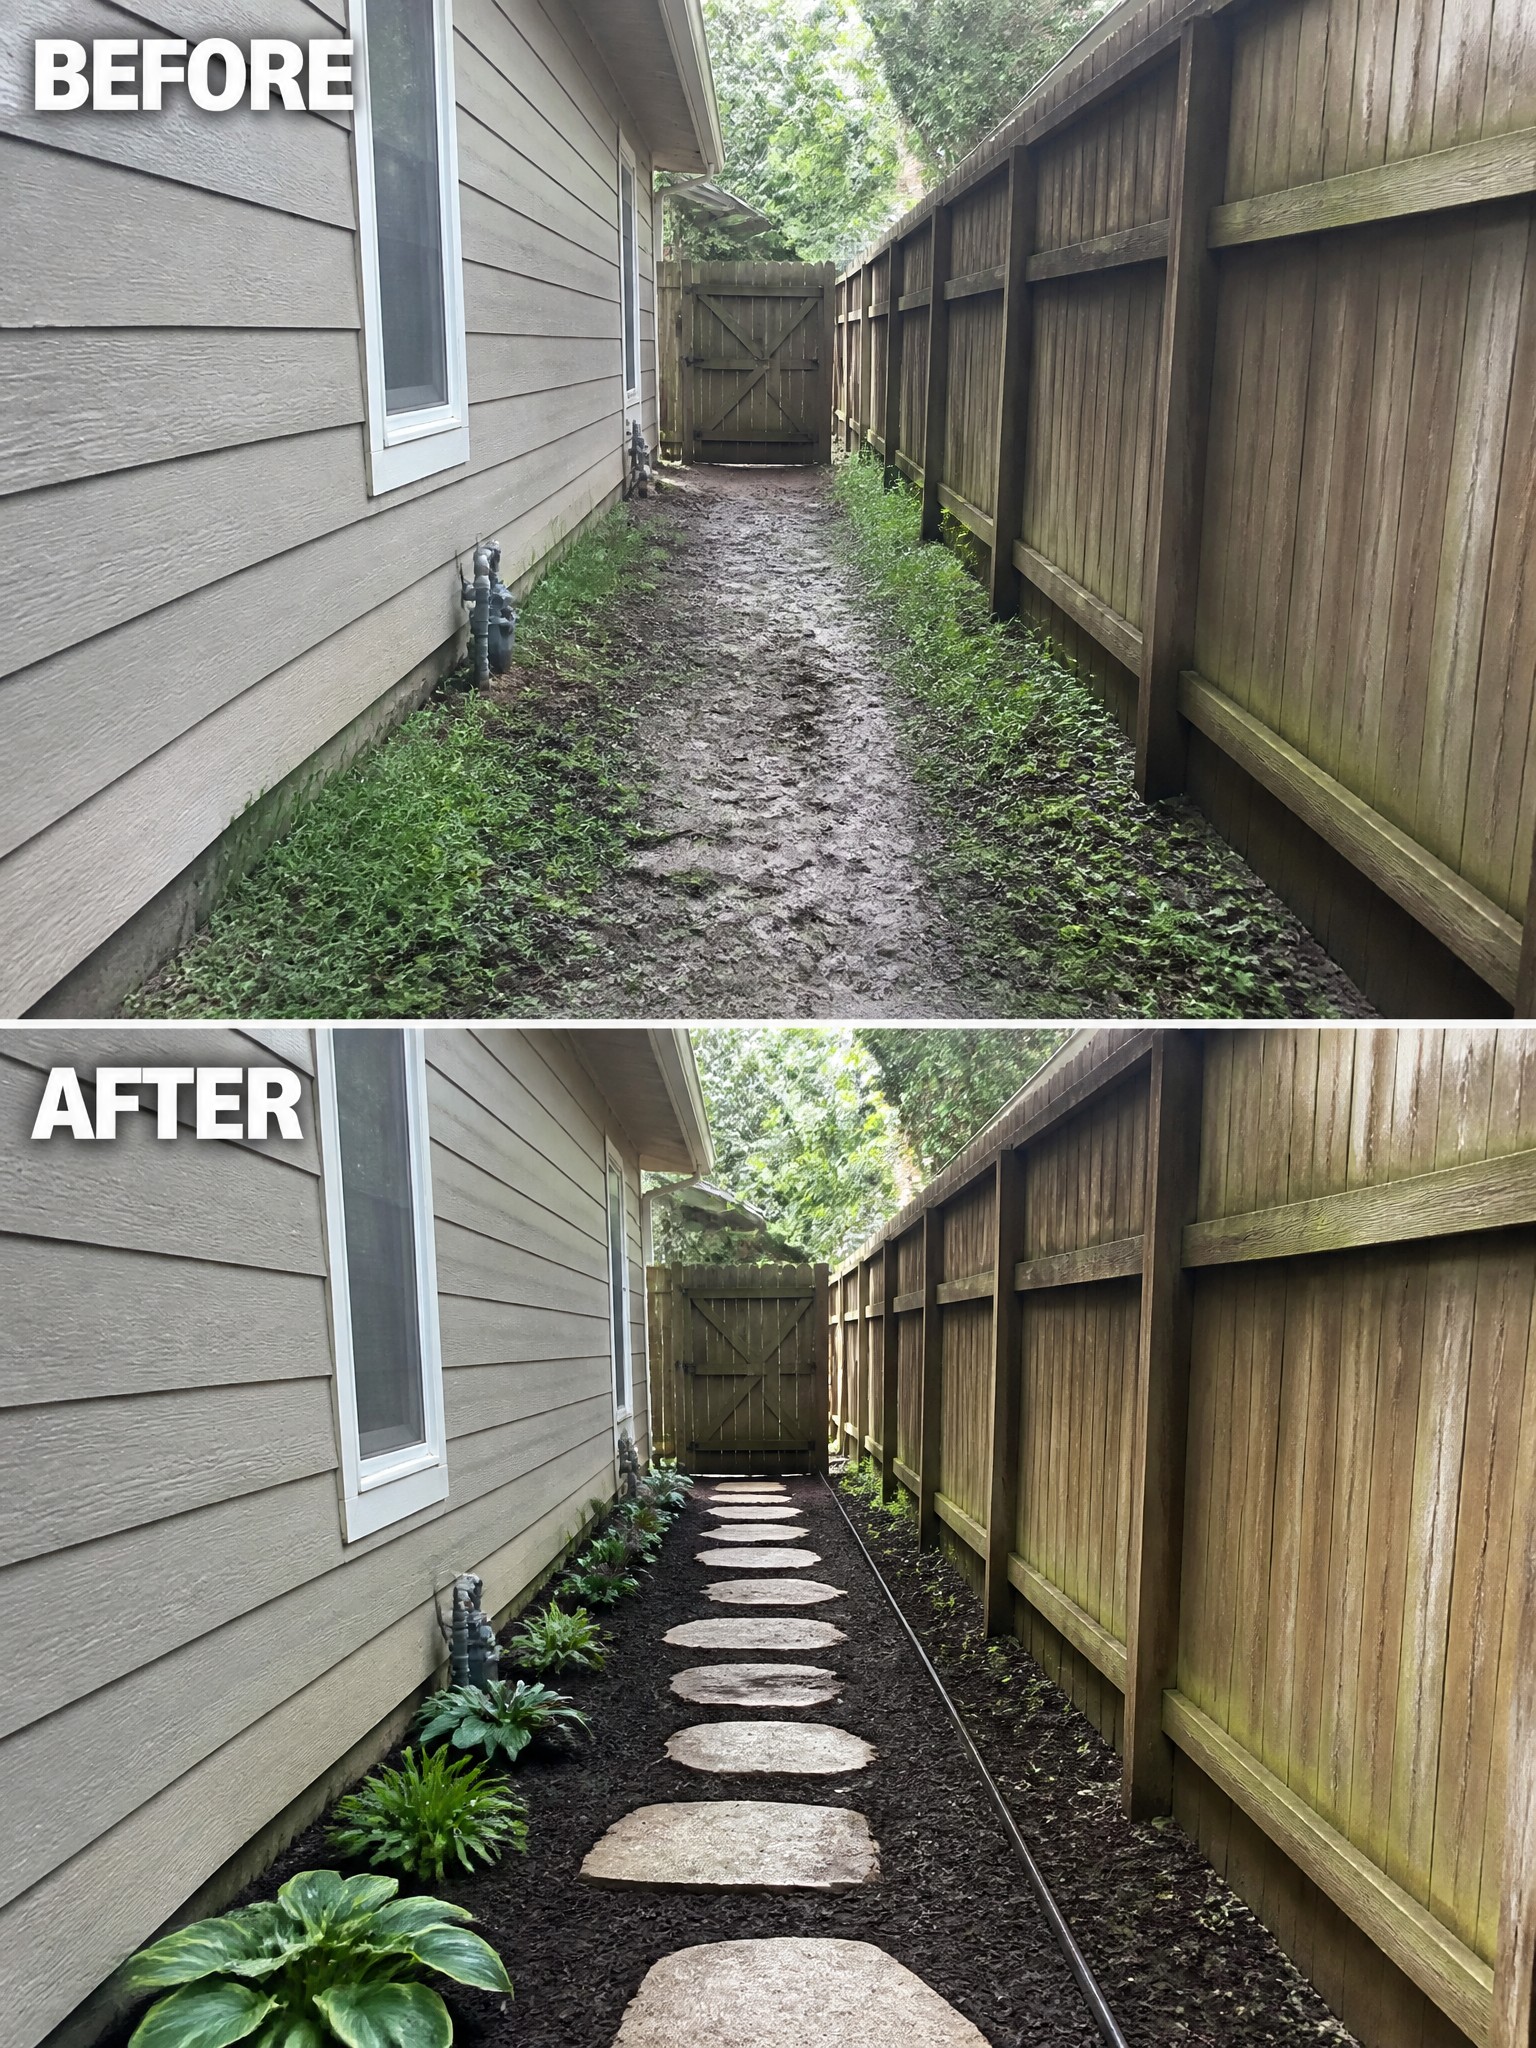
A narrow side yard between the house and fence often becomes a weedy, muddy strip that feels forgotten. Laying stepping stones in a straight line through fresh mulch turns the space into a clear walkway and stops the ground from turning into a mess every time it rains.
This idea works best in tight areas where a full patio would feel cramped. Start by clearing the weeds, then place the stones with enough space for easy steps. Mulch keeps the beds looking neat and helps control growth along the edges.
Define The Front Entry With Edging And Mulch
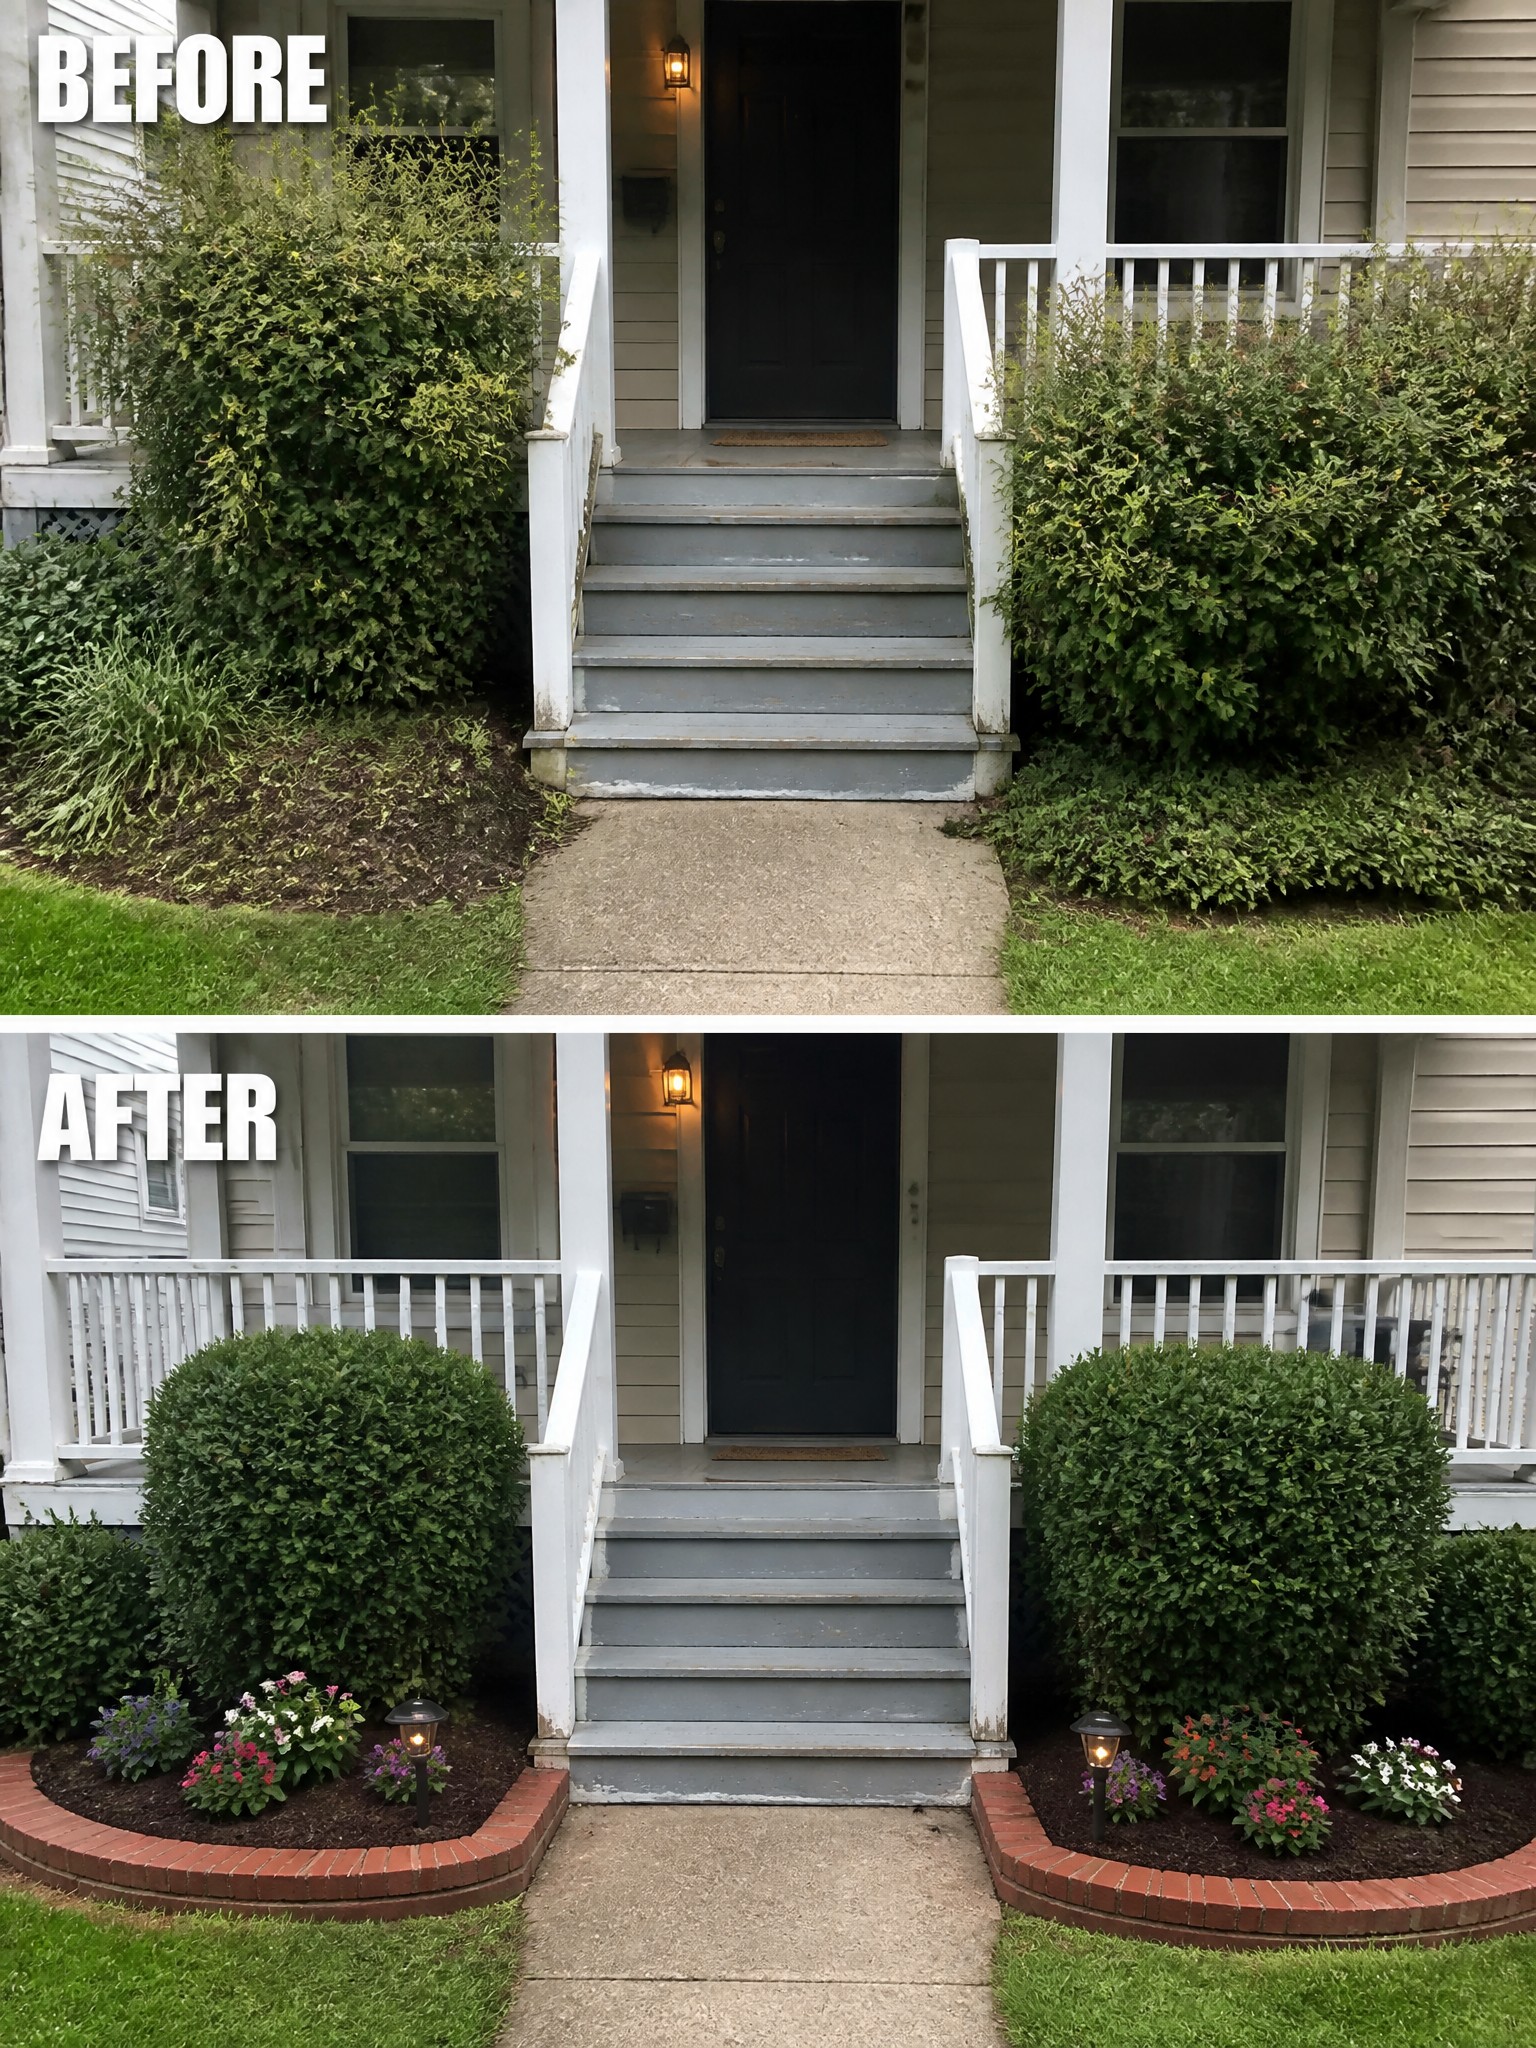
One of the easiest ways to clean up a front entrance is to give the planting areas a clear border. The before view shows shrubs that had grown out of control with no real edge, leaving the ground looking patchy and unfinished. Brick edging combined with a fresh layer of mulch pulls everything together and makes the beds look planned.
This idea works especially well on smaller front yards or entry plantings where you want structure without a big overhaul. Cut the largest shrubs back into simple rounded shapes first, then add the edging and mulch. Keep the new plants low and repeat a few colors so the beds stay easy to maintain.
Add Edging To Clean Up The Fence Line
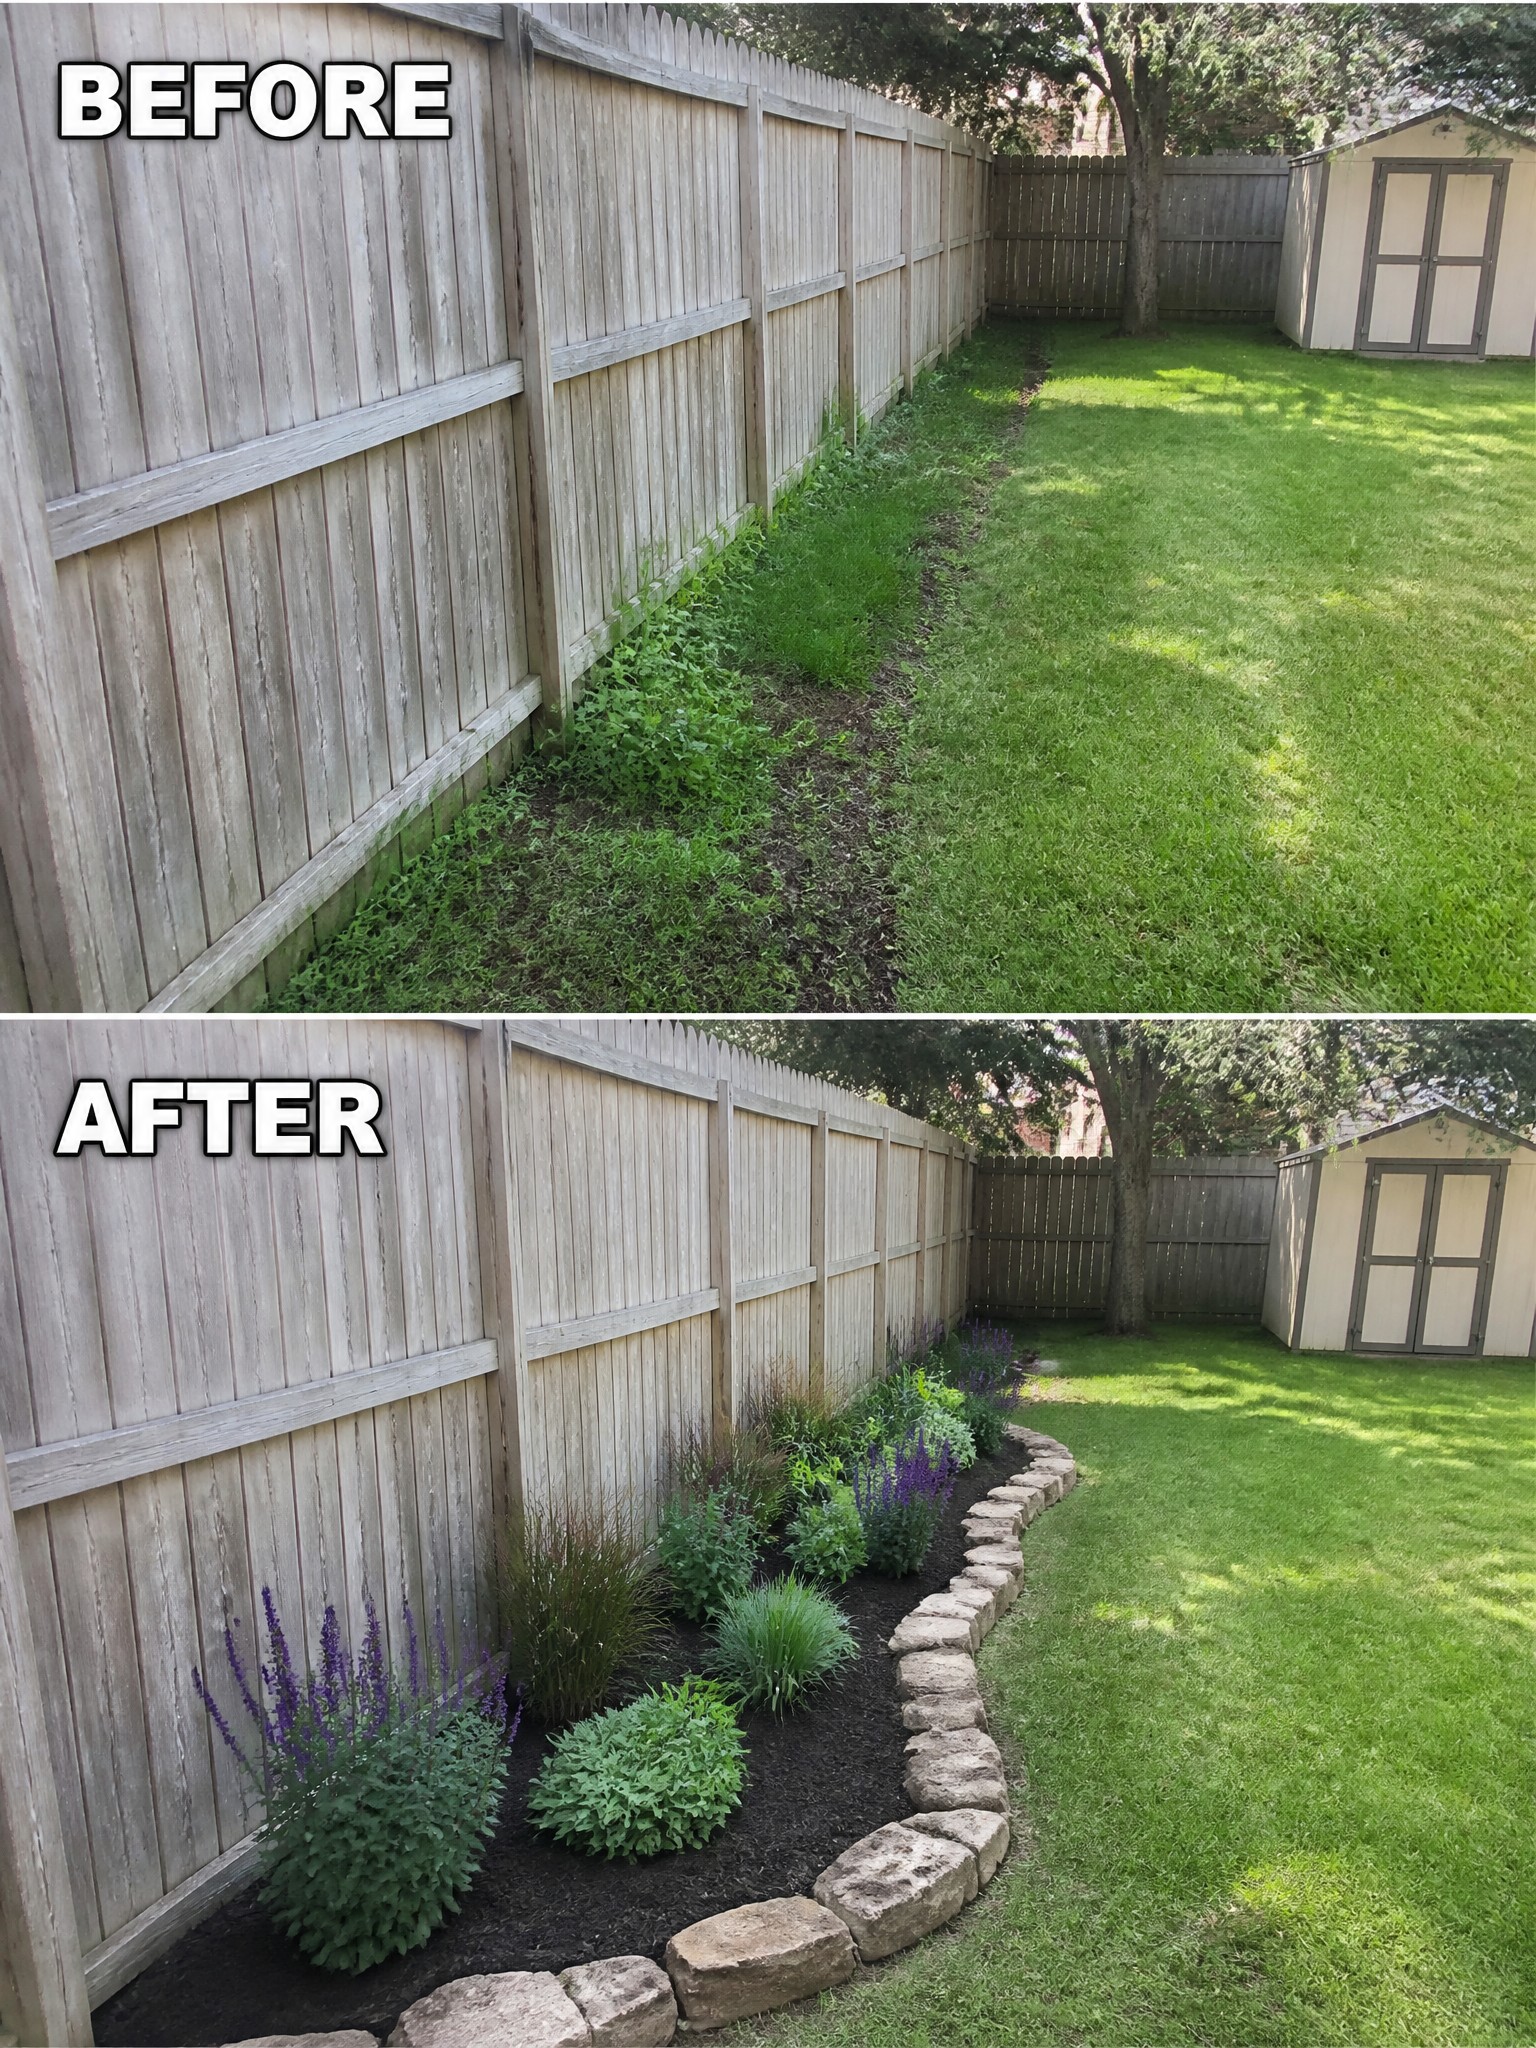
A long fence often leaves an awkward strip of grass that turns weedy and hard to mow. Adding a simple stone border and mulched bed turns that messy strip into a clear garden area that stays neat with far less work.
This approach works well along any straight fence or property line where the lawn meets the wood. Clear the weeds first, lay down edging that follows the fence, then fill the bed with mulch and a few easy plants. The result keeps the lawn looking intentional without needing a full redesign.
Clean Up Foundation Beds With Mulch And Edging
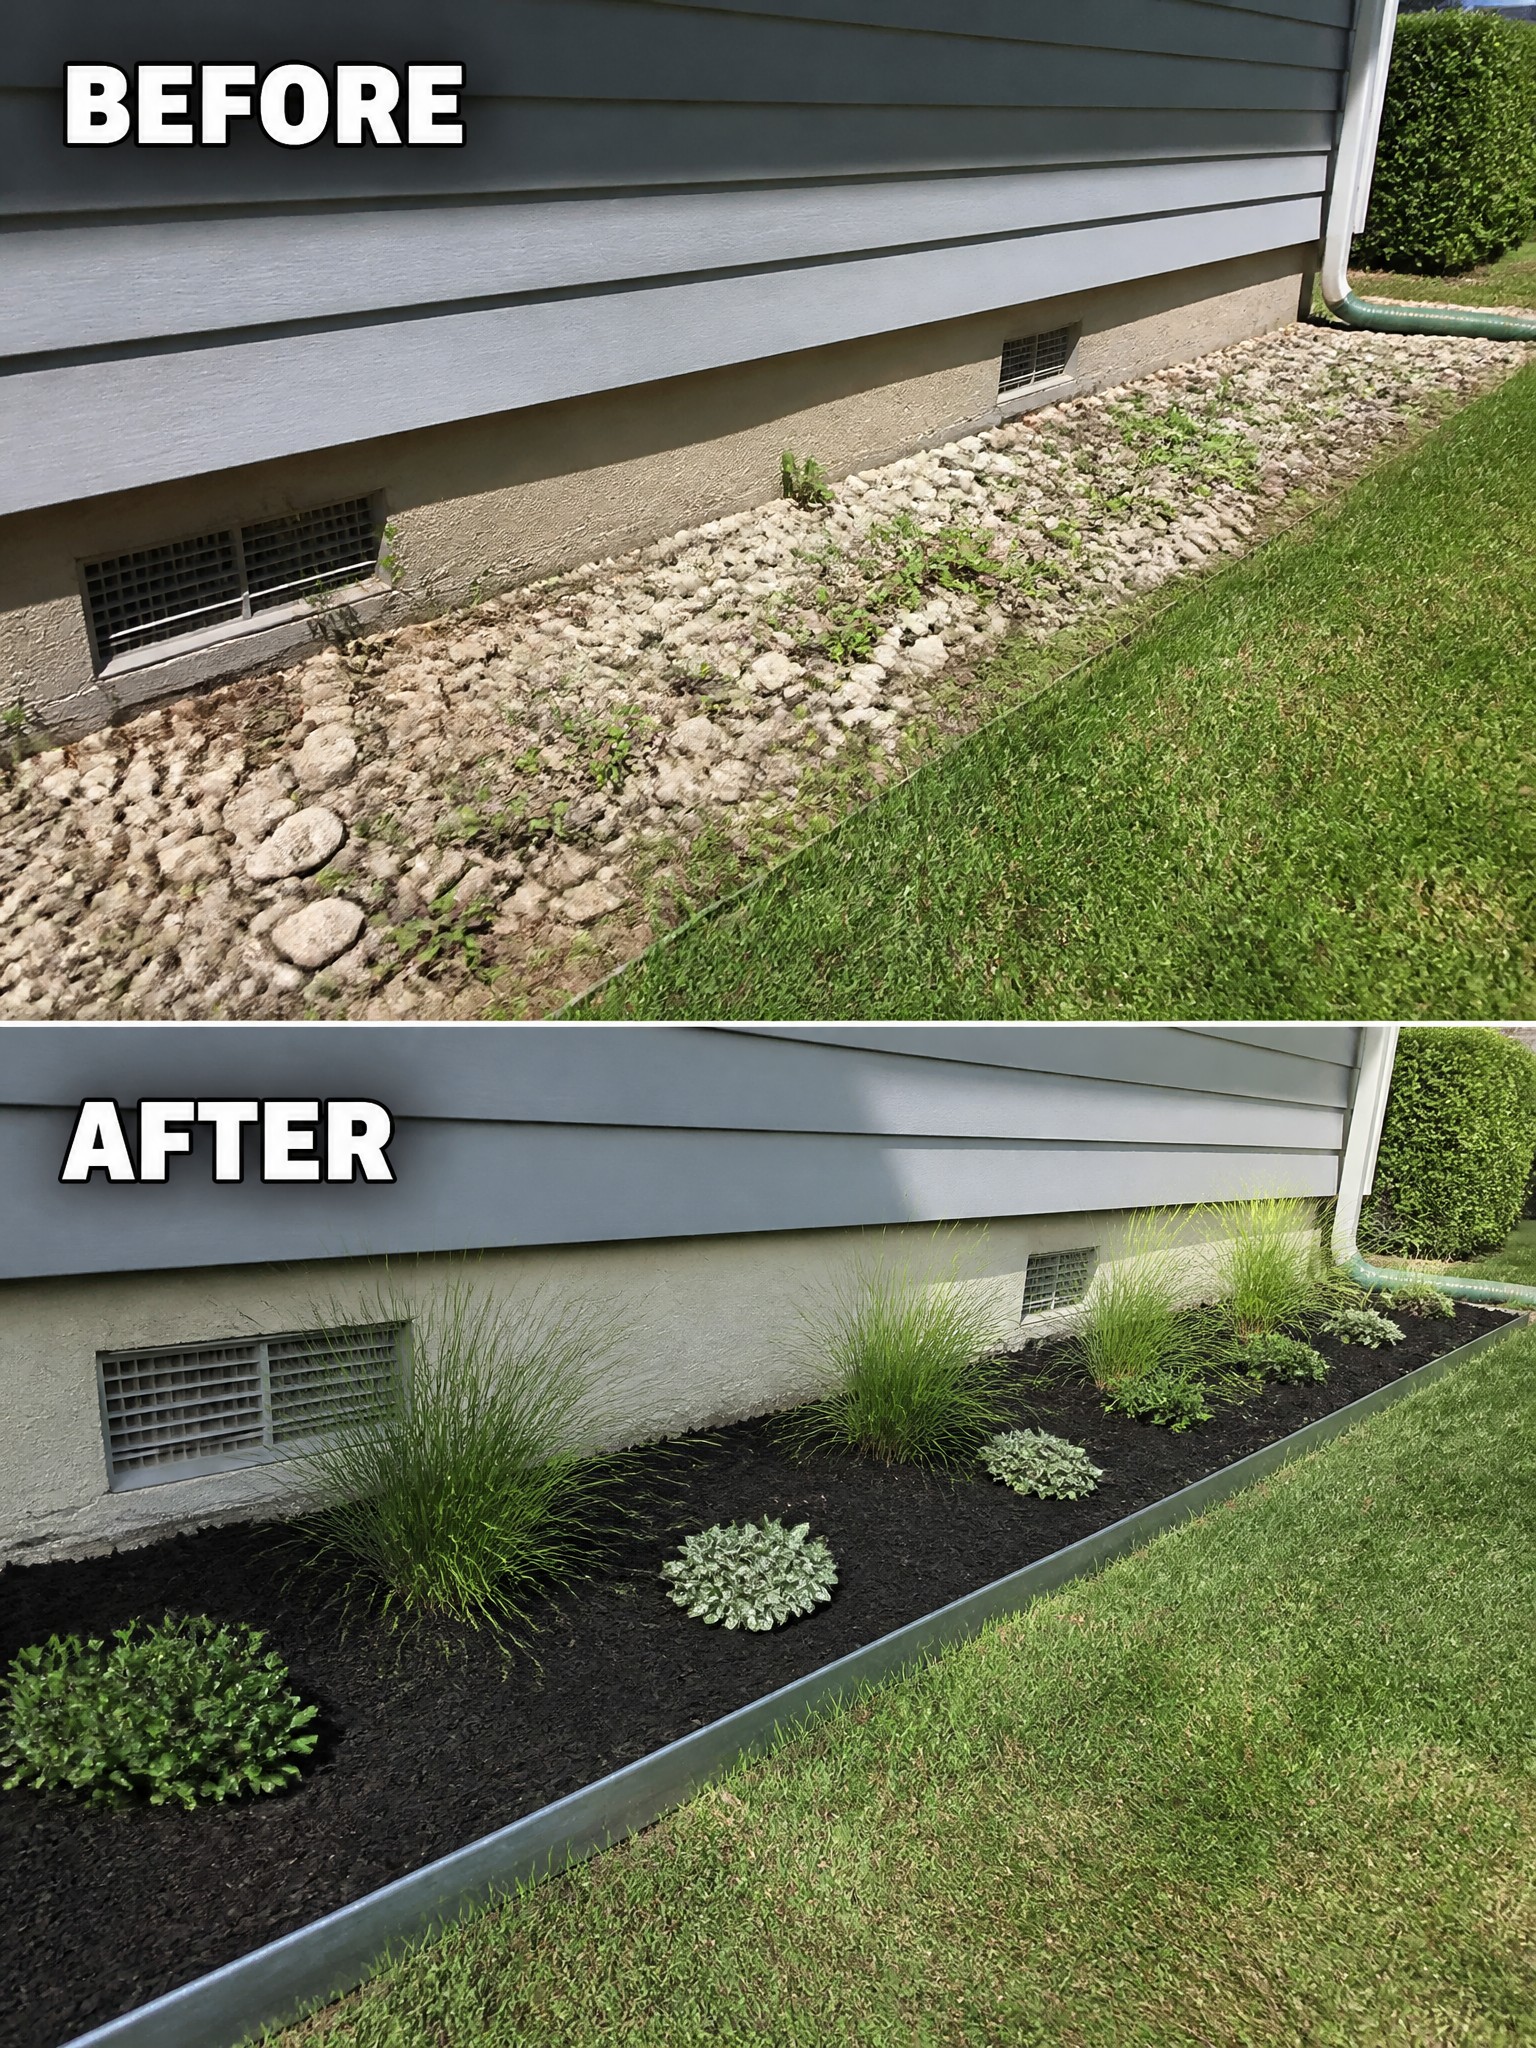
A messy strip of gravel and weeds along the house can make the whole side of the yard look neglected. Adding metal edging to create a clear border, then filling the bed with mulch and a few simple plants, turns that strip into something neat and intentional without much cost.
This approach works well on any home where the foundation meets the lawn. Start by removing the old gravel and weeds, then set the edging so it sits slightly above the grass line. Mulch keeps the soil from washing out and cuts down on new weeds, while the edging makes mowing easier and keeps the bed looking tidy year after year.
Use Mulch And Edging To Shape Up Garden Beds
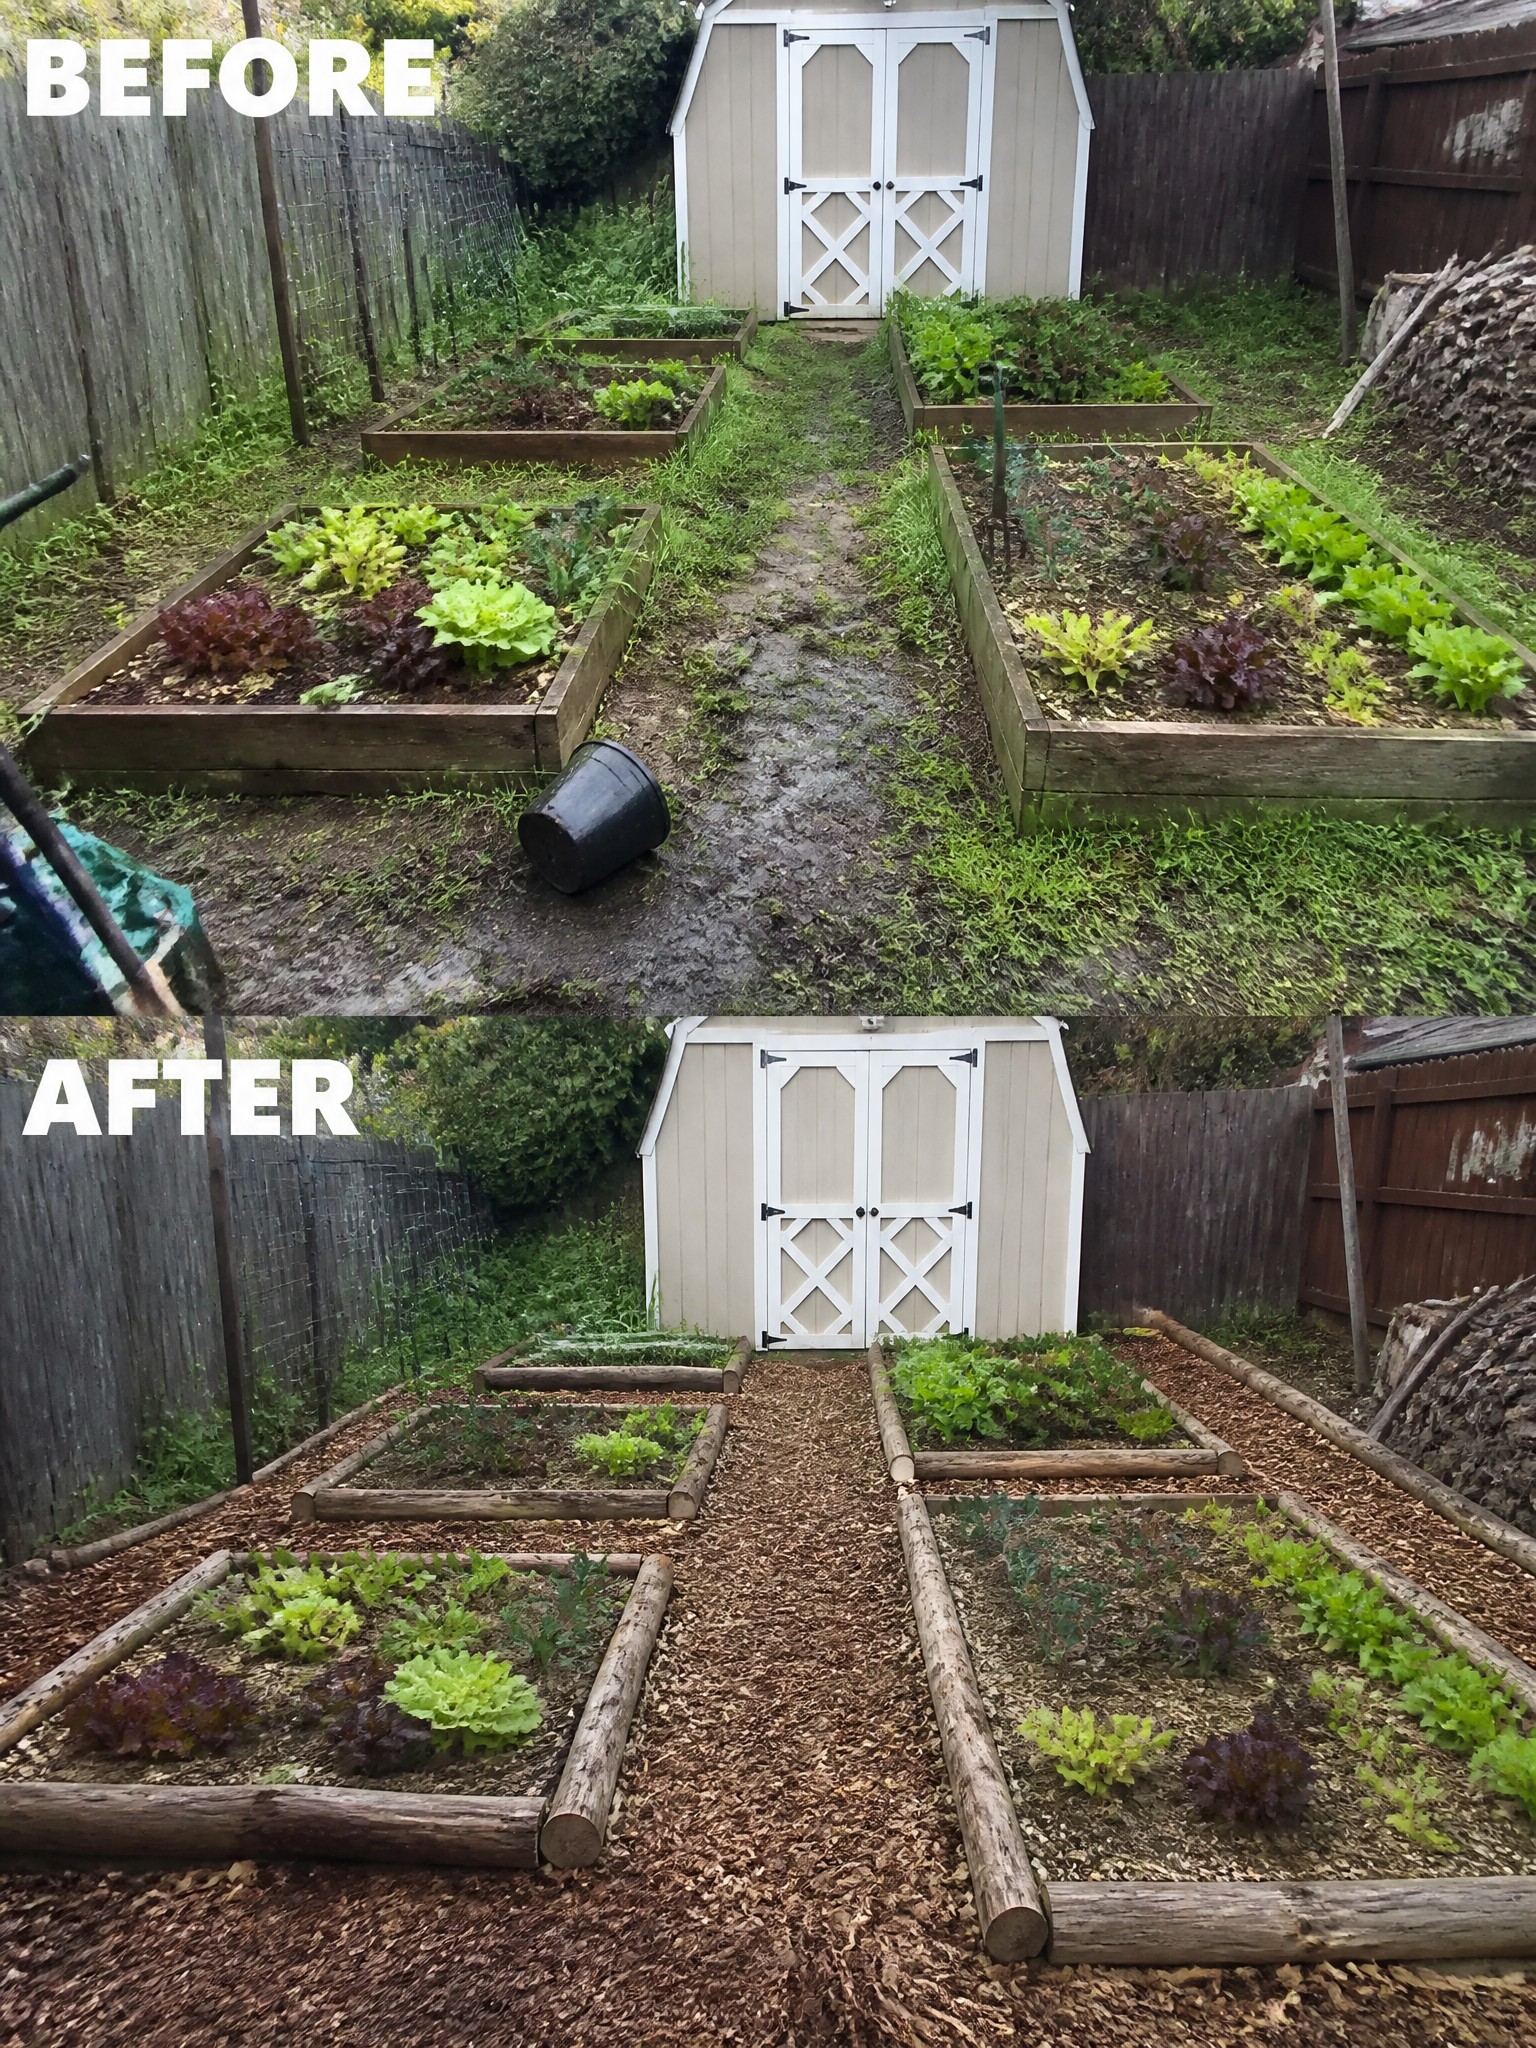
The before photo shows raised beds sitting in a muddy, overgrown space with no clear lines between the planting areas and the paths. Adding a layer of wood chip mulch and simple log edging creates defined beds that look intentional and much easier to maintain. The mulch also helps keep weeds down and gives the whole garden a finished appearance without spending much.
This approach works well in small backyards or side gardens where the beds need more structure. Start by clearing the weeds and leveling the ground, then lay down the edging first so the mulch stays in place. It suits homes that already have basic raised beds but need a low-cost way to make the layout feel planned rather than scattered.
Define A Fire Pit Area With Edging And Mulch
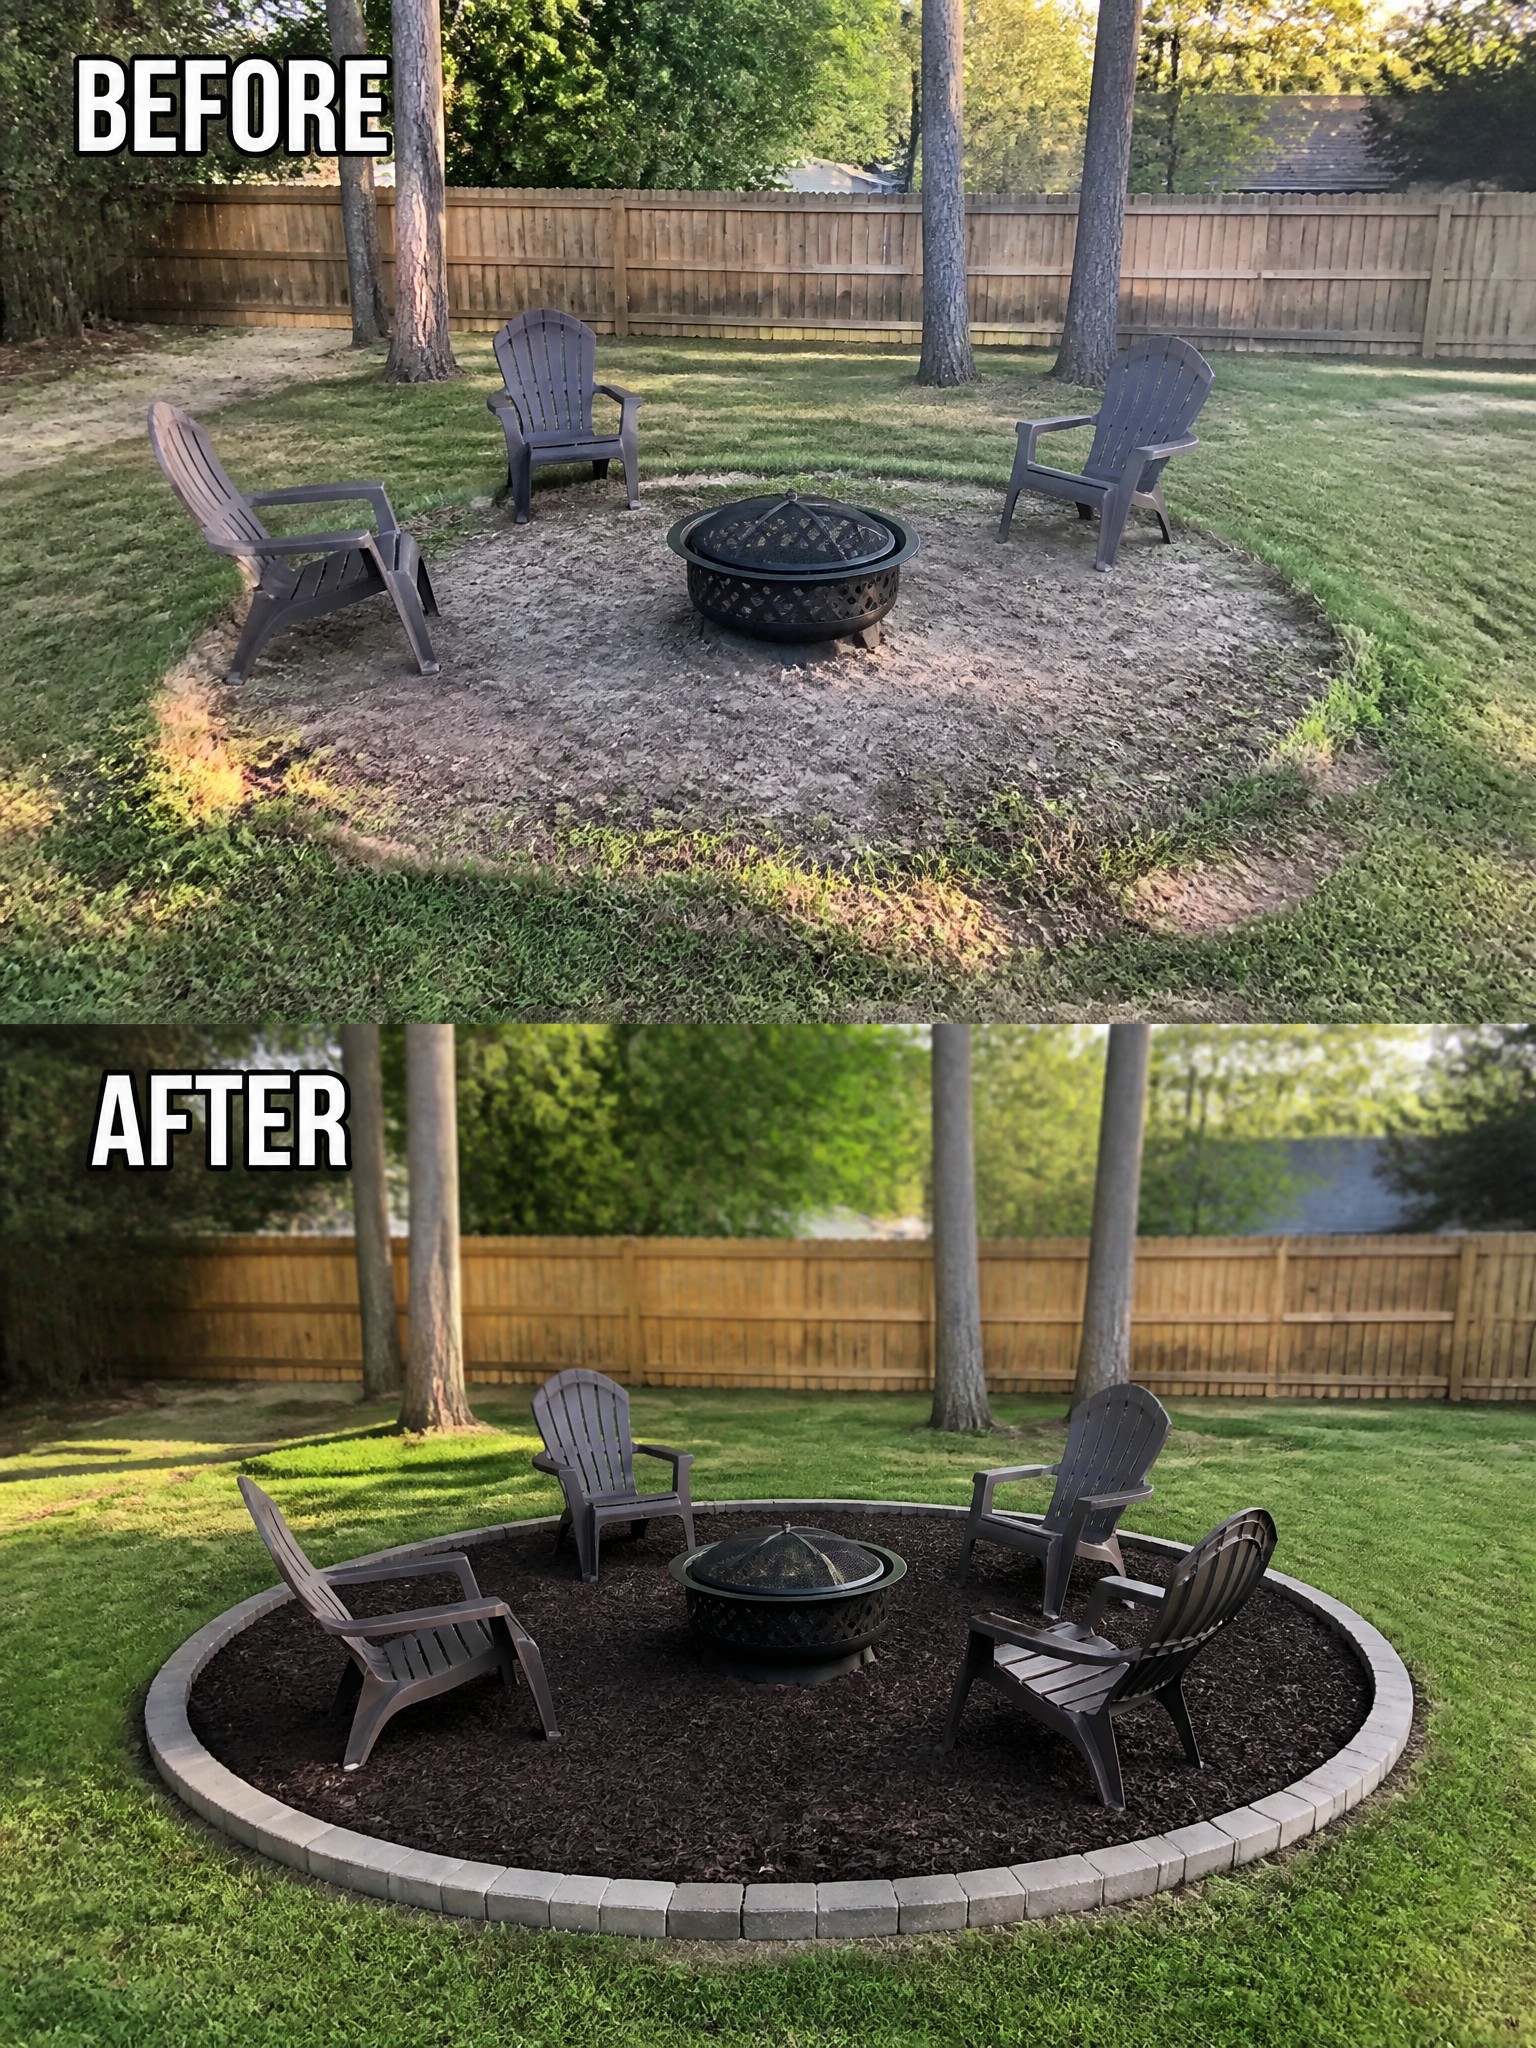
Adding a simple border turns a bare patch of dirt into a clear, usable space. The before photo shows the fire pit sitting in the middle of an uneven grass edge with no real separation. Once the stone edging went in and the area was filled with dark mulch, the circle became intentional and much easier to maintain.
This approach works best in backyards where the fire pit already has seating but needs better definition. Keep the edging low so it does not block movement, and use mulch that contrasts with the lawn to make the shape stand out. It is an affordable way to make the area feel finished without changing the furniture or adding new structures.
Turn An Overgrown Slope Into Terraced Beds
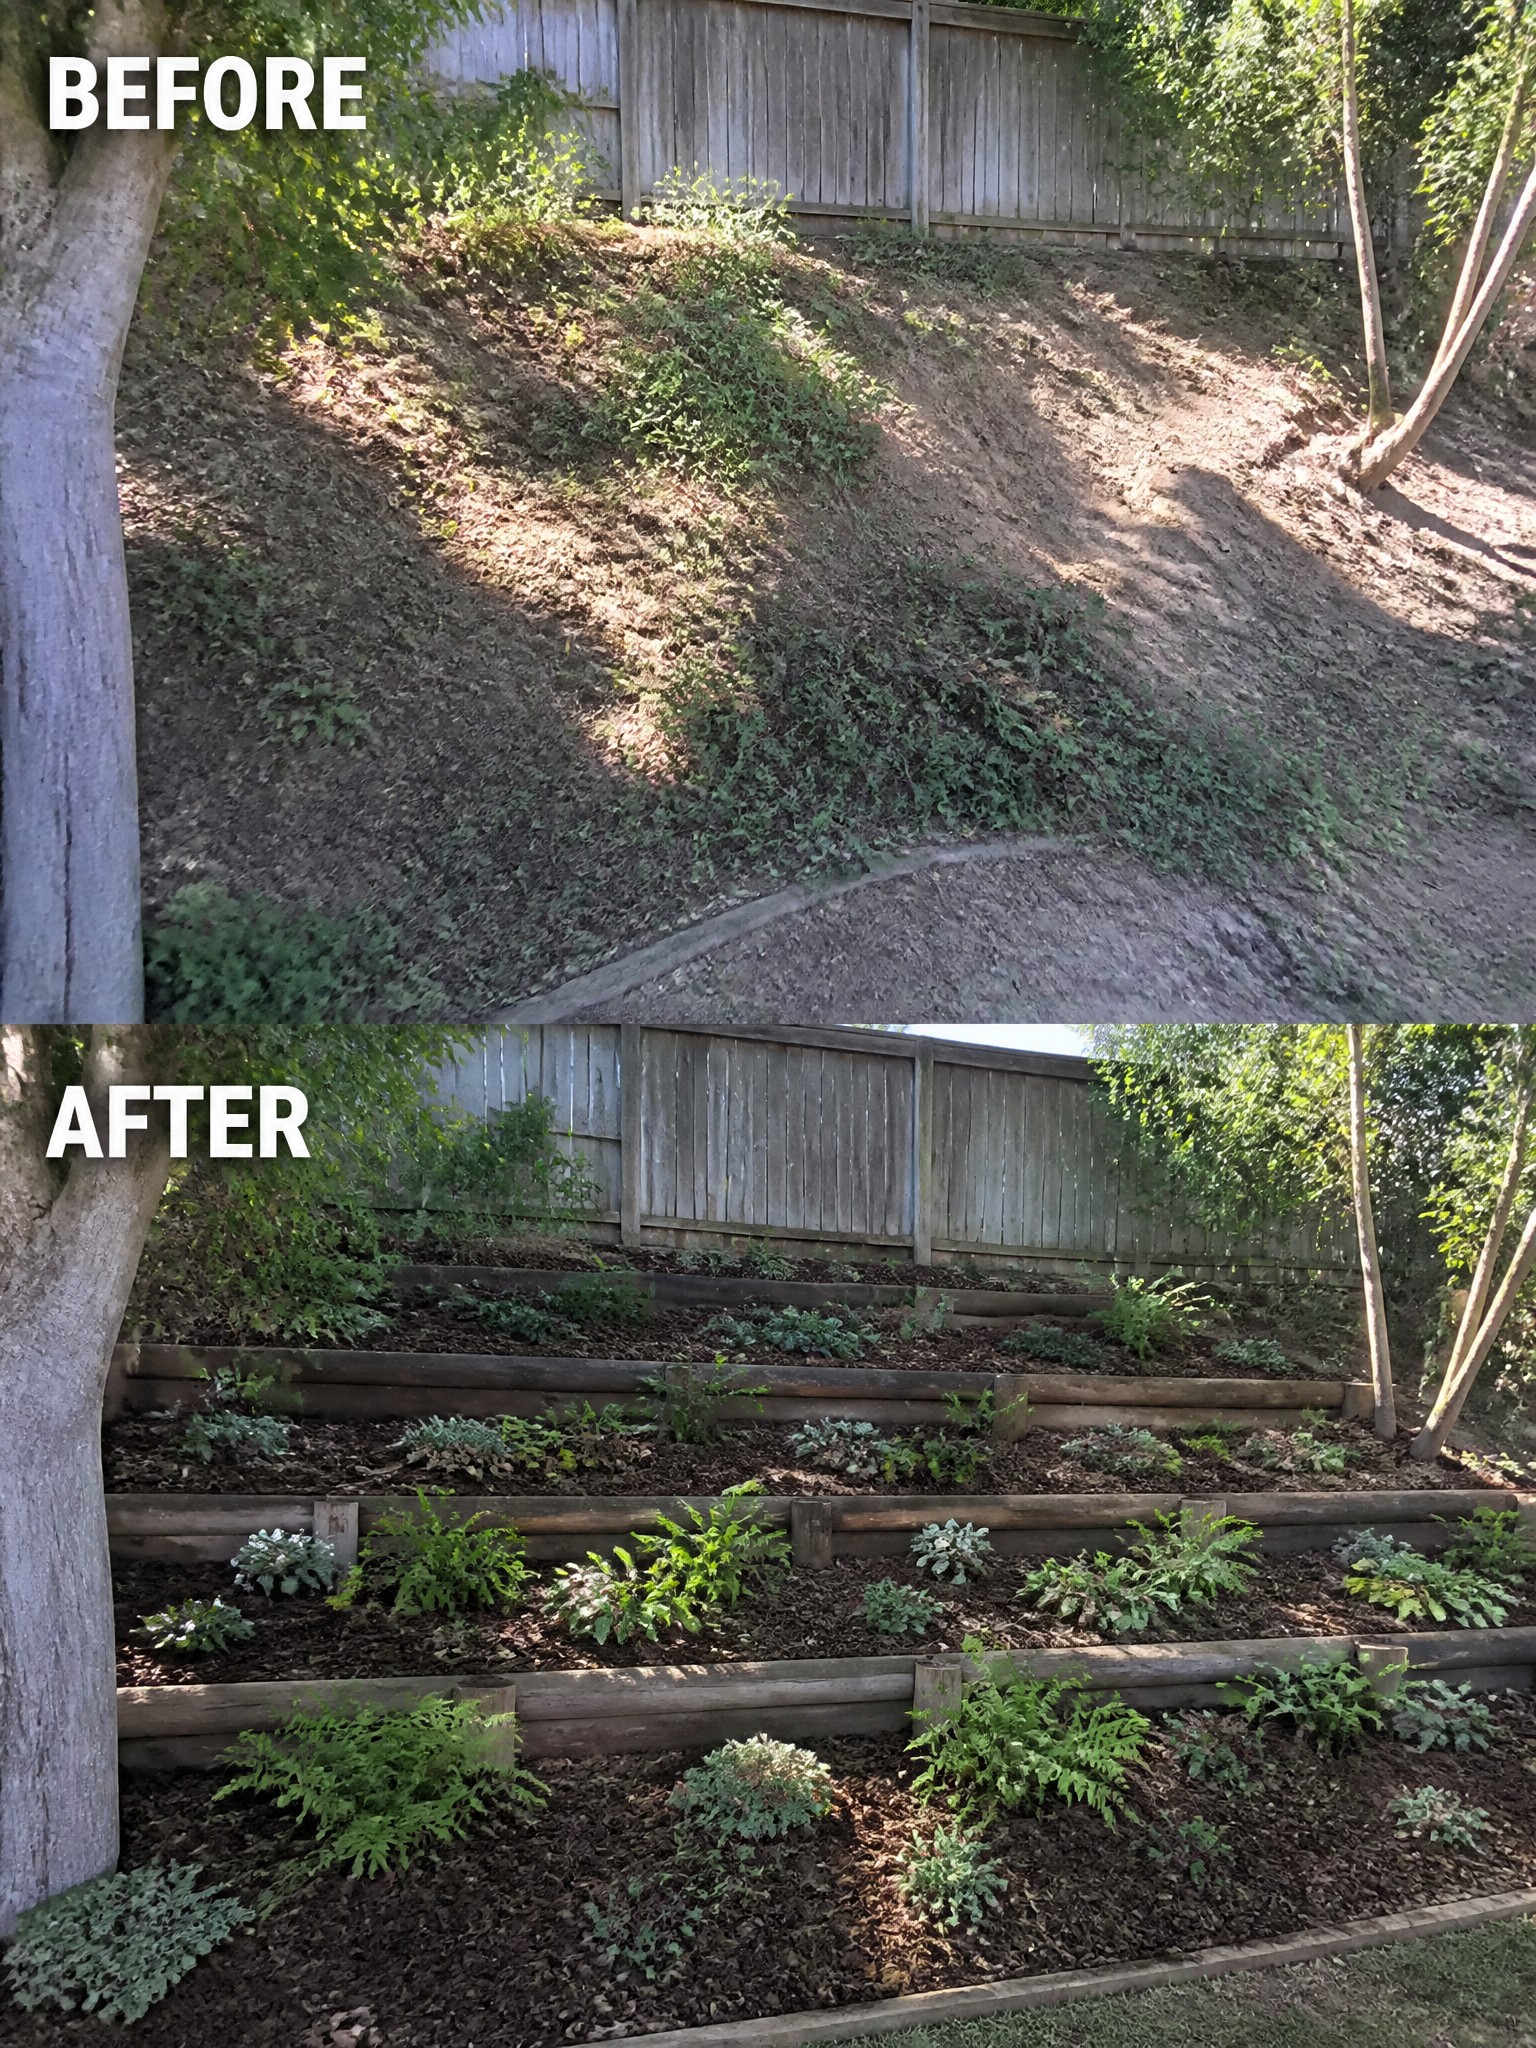
Adding simple wood edging turned a weedy, hard-to-manage slope into a series of level garden beds. The logs hold the soil and create clear planting zones that make the area look intentional instead of neglected.
This idea works on any sloped yard where you want more planting space without big construction. Clear the overgrowth first, then set the edging along the natural contours of the hill. Mulch the beds to control weeds and keep the look clean. It suits homes with hilly lots that need practical, low-cost garden solutions.
Add Edging And Mulch To Define A Small Bed
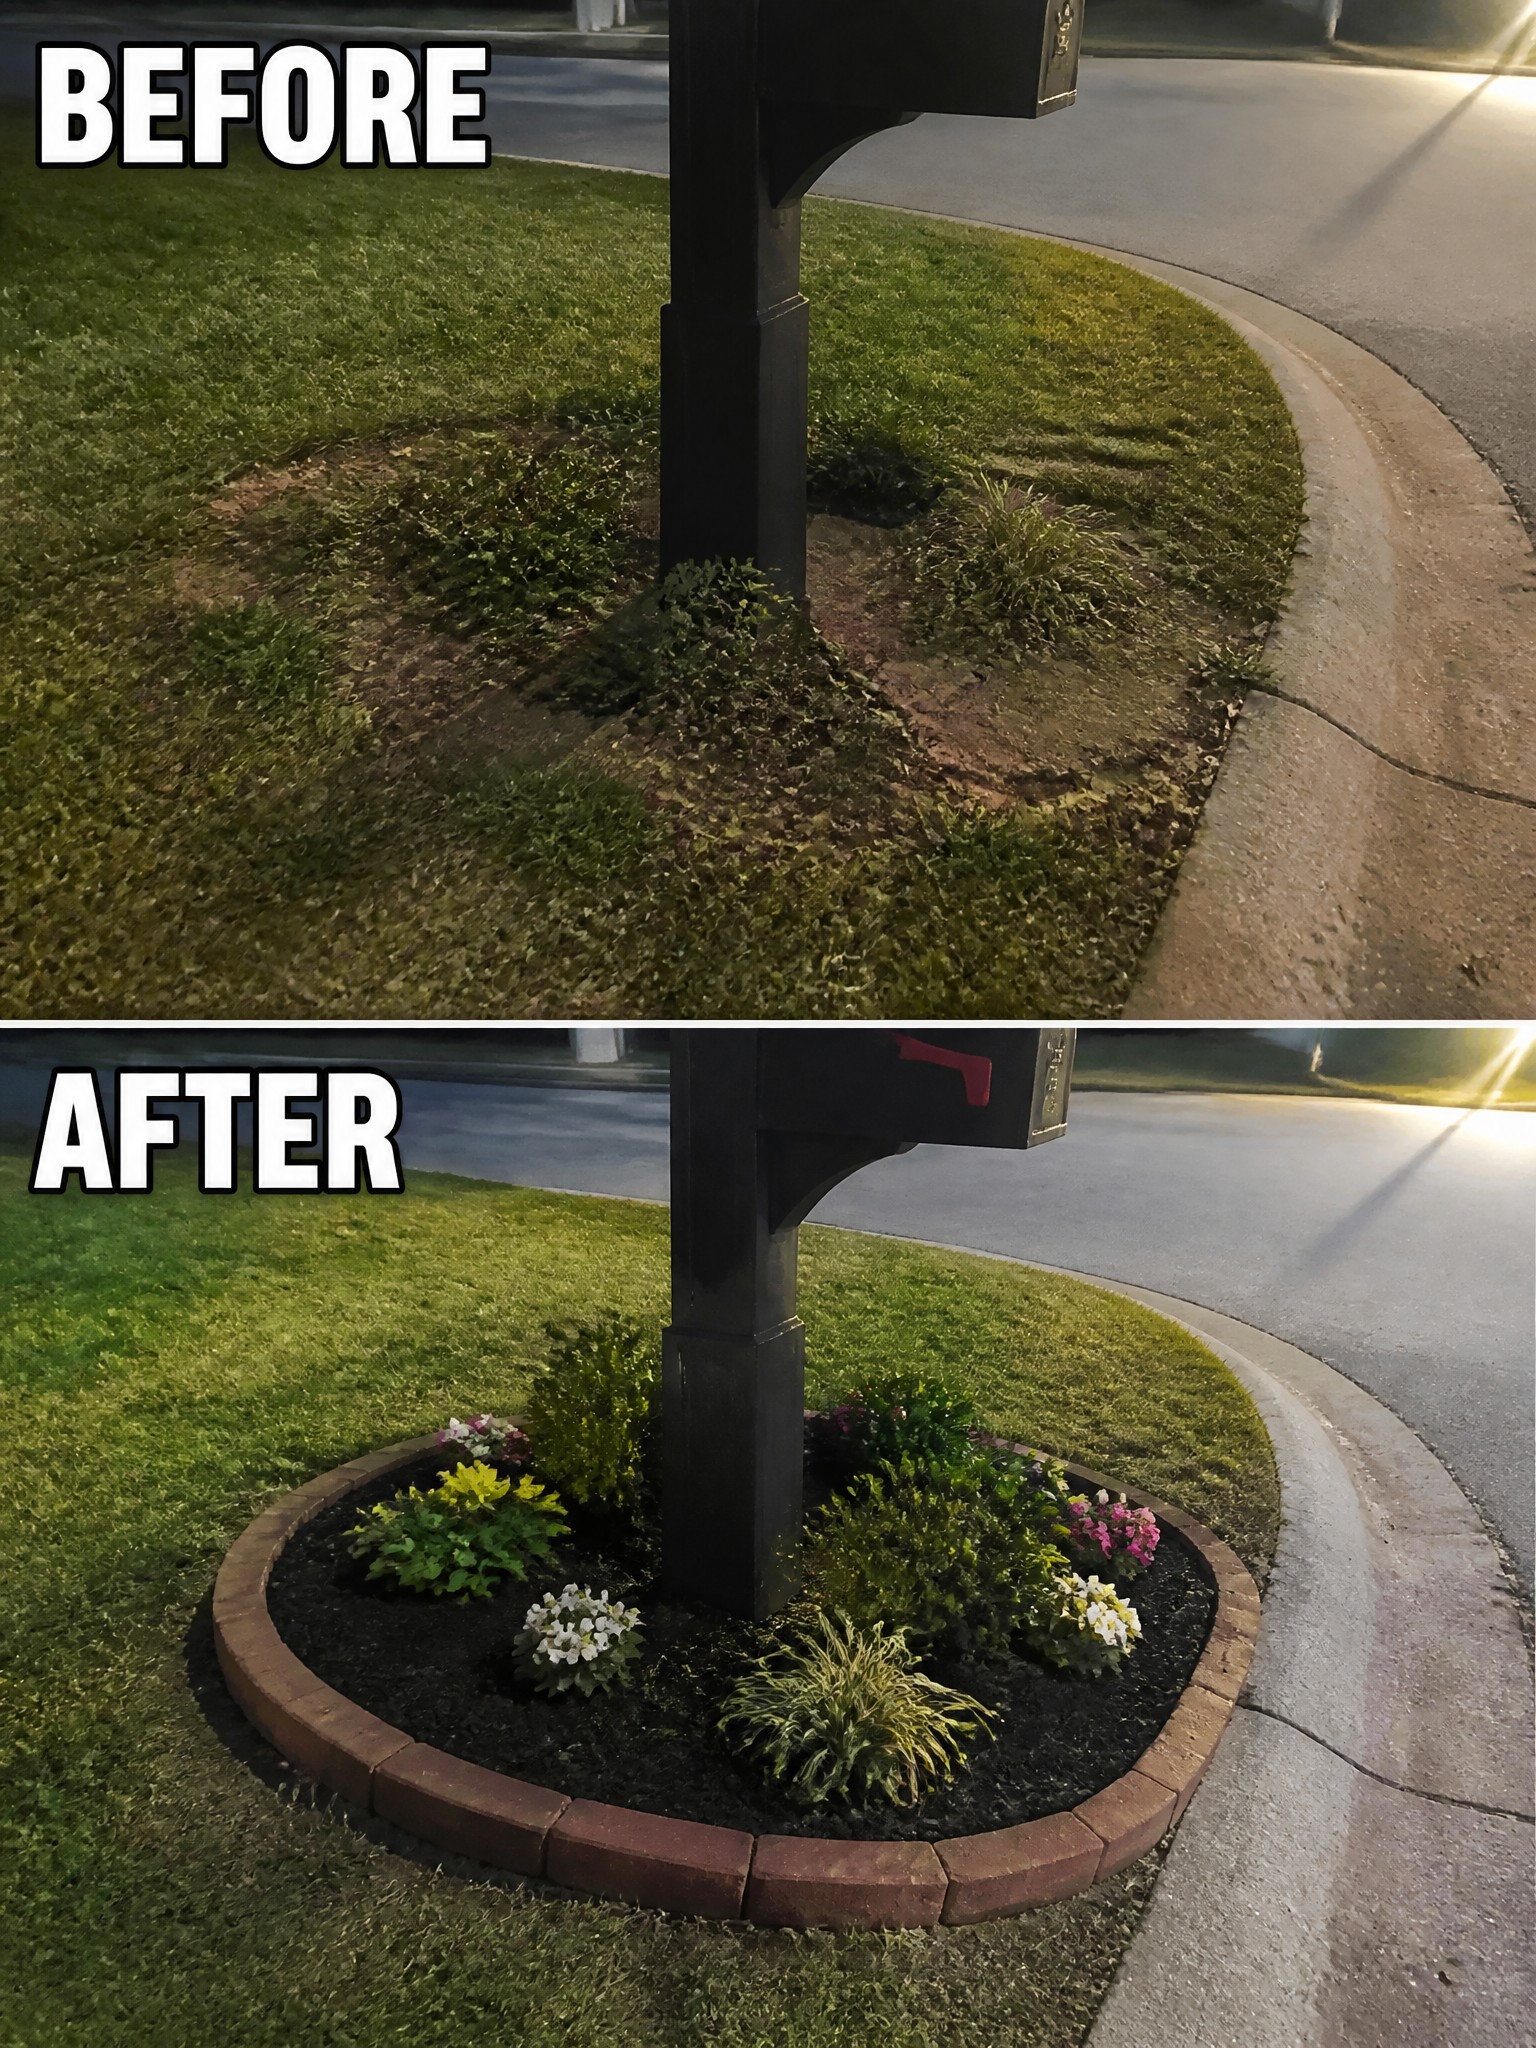
A patchy spot of weeds and bare soil around a mailbox post looks messy and unfinished. Adding a simple brick border creates a clear shape, then filling it with mulch keeps the area tidy and makes the plants stand out without a lot of extra work.
This approach works well on small patches near posts, trees, or corners where the lawn never quite fills in. Start by cutting a clean edge and removing the worst of the weeds, then add the border and a few inches of mulch before planting. It keeps the bed looking neat even when the rest of the yard is still a work in progress.
Add Mulch And Edging To Shape A Garden Border
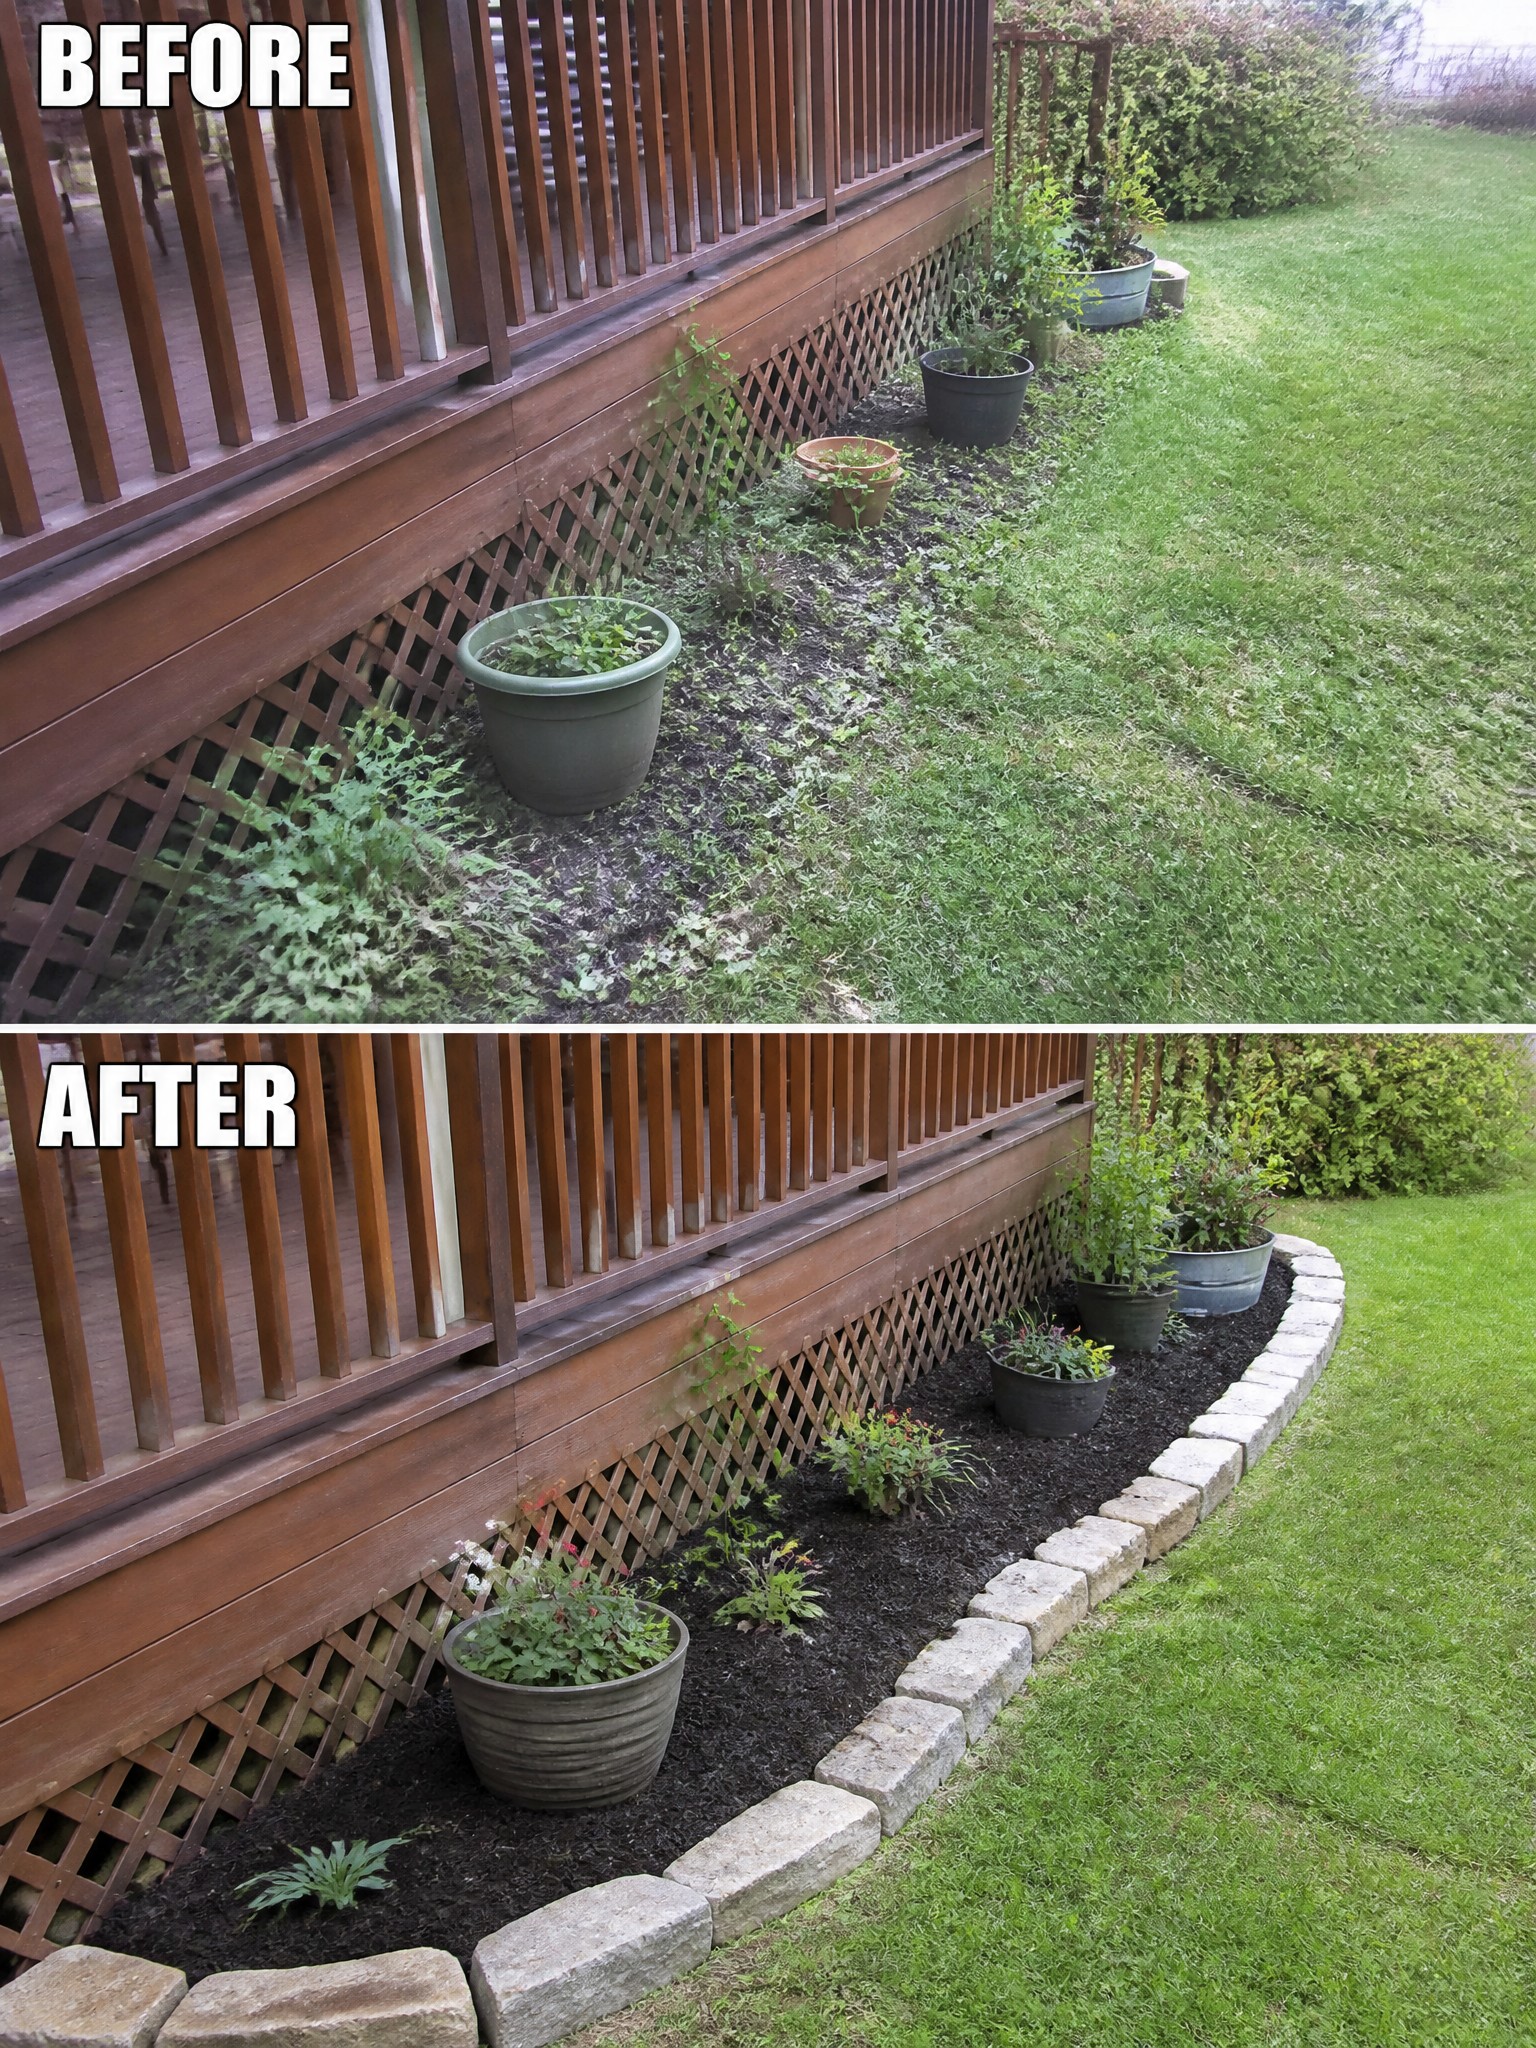
The space along the house looked messy and unfinished before, with weeds, bare soil, and pots scattered around. Adding a layer of dark mulch and a simple stone border pulled everything together and made the area feel intentional instead of neglected.
This approach works well along any house foundation or deck where the ground meets the lawn. Clear the weeds first, lay down mulch to keep things tidy and reduce future growth, then add edging to hold the shape. It keeps the planting area looking neat without needing a lot of new plants right away.
Clean Up Overgrown Beds With Mulch And Edging
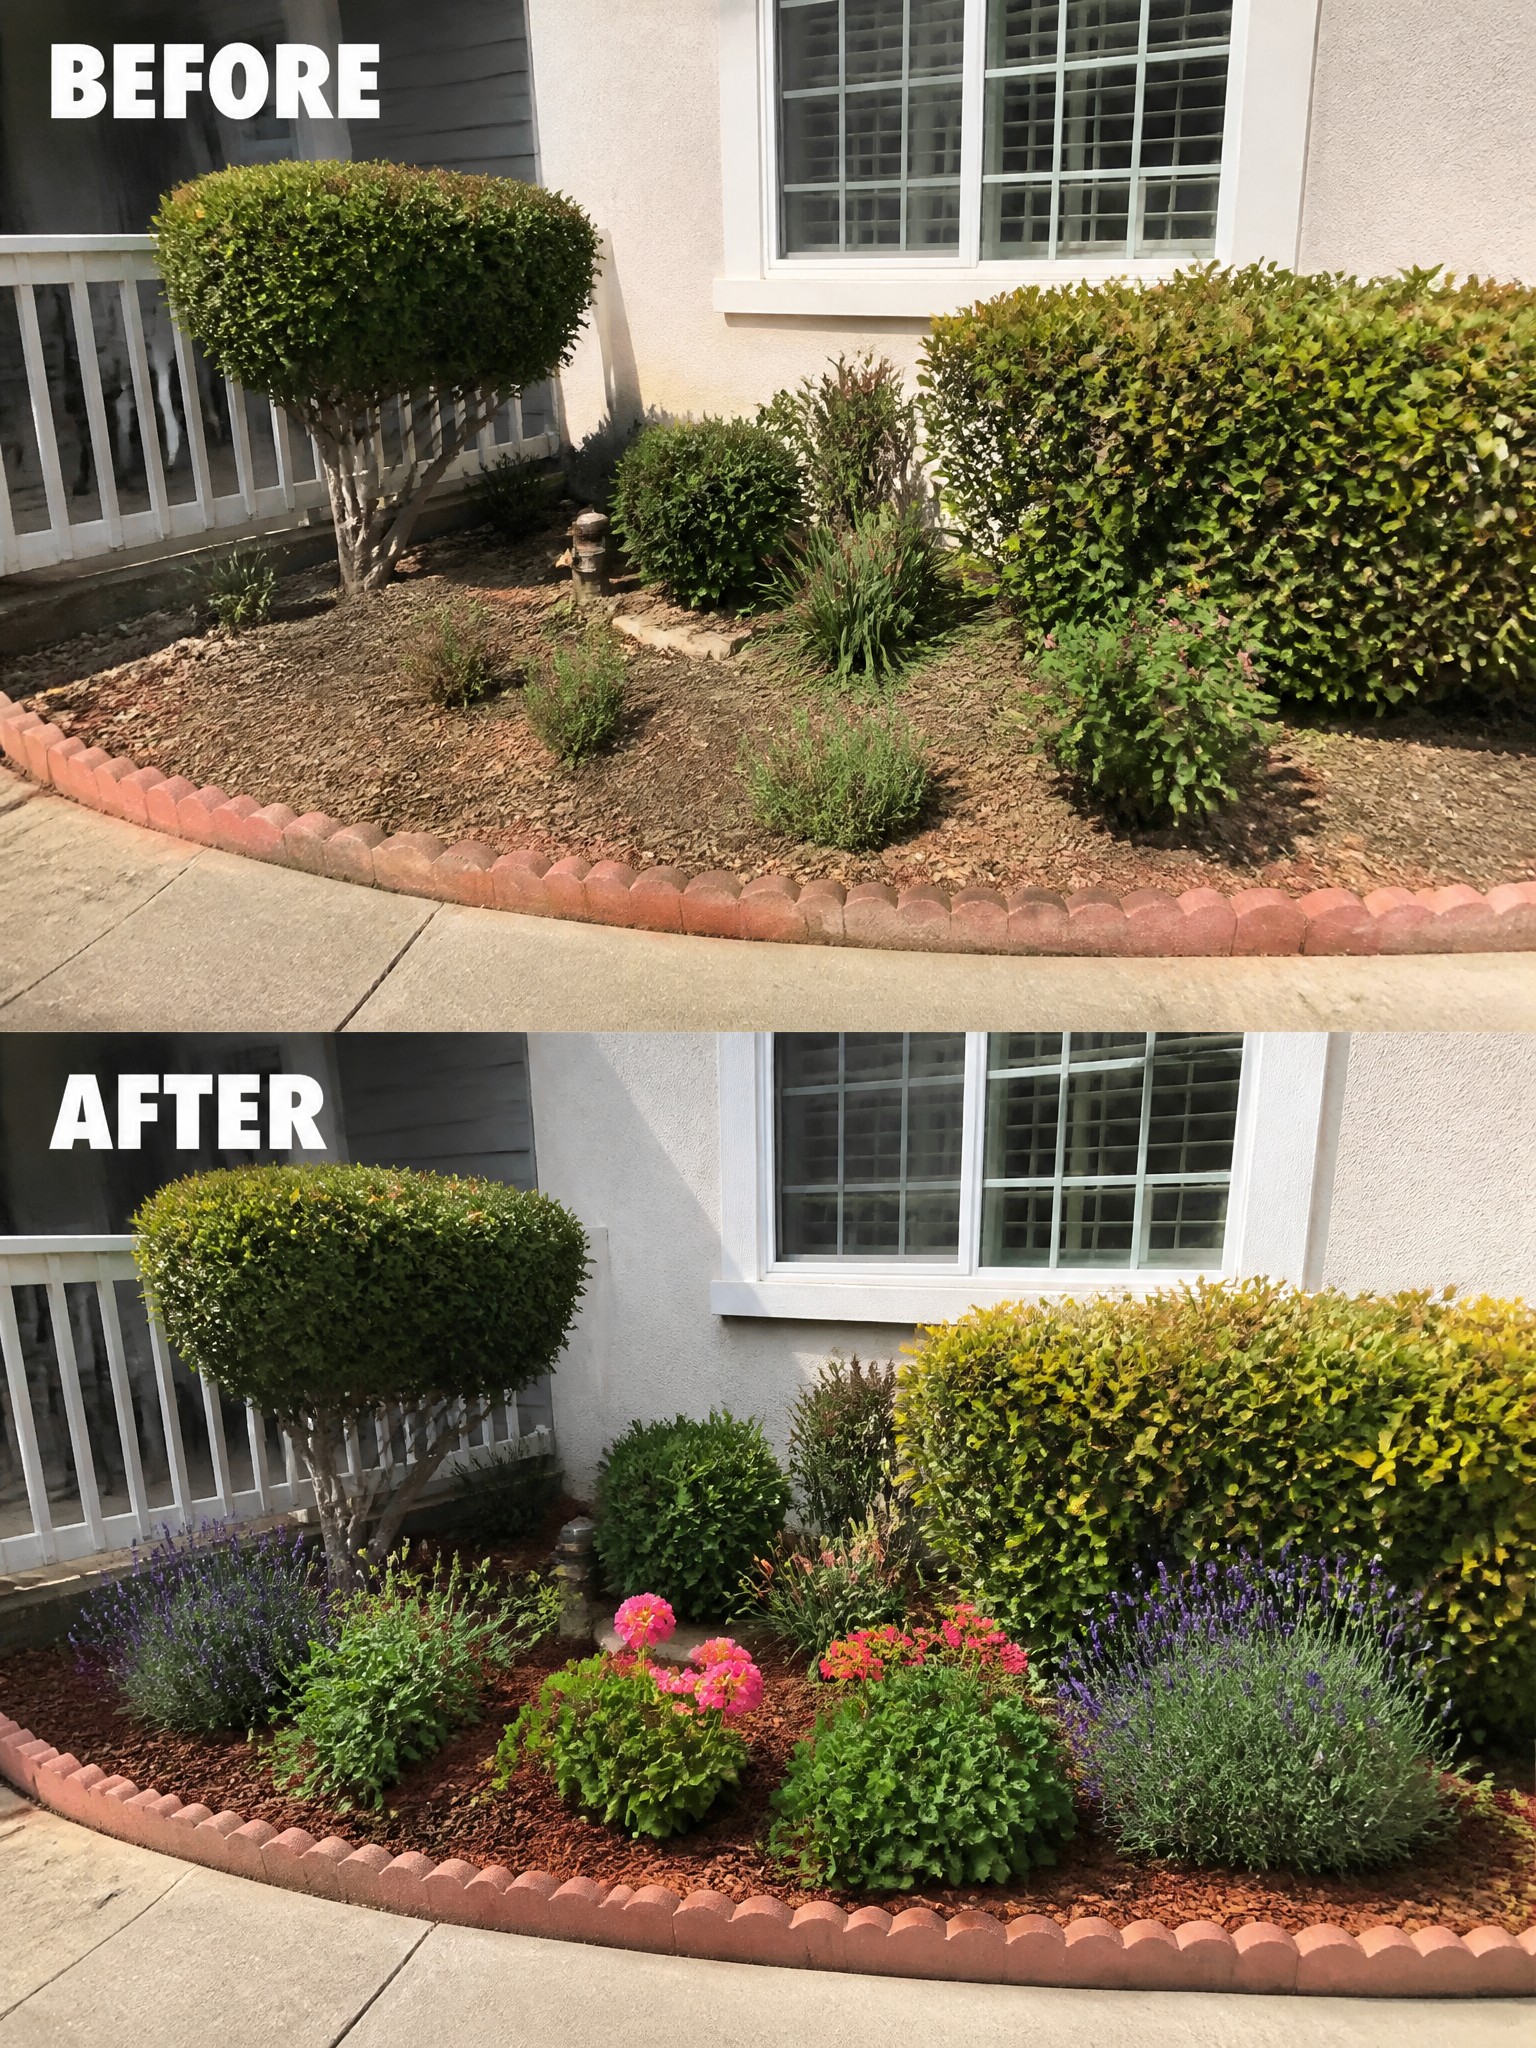
The main change here is switching from bare dirt and scattered shrubs to a set of clear beds filled with mulch. The edging keeps everything in place and gives the whole area a finished line that was missing before. That one step makes the space look intentional instead of neglected.
This approach works well along a front walkway or foundation where you want low cost and low maintenance. Start by removing the worst weeds, lay down a simple plastic or metal edge, then add mulch and a few easy plants like lavender or geraniums. It keeps the bed from looking messy even when the plants are still filling in.
Add A Mulched Border To Clean Up The Lawn Edge
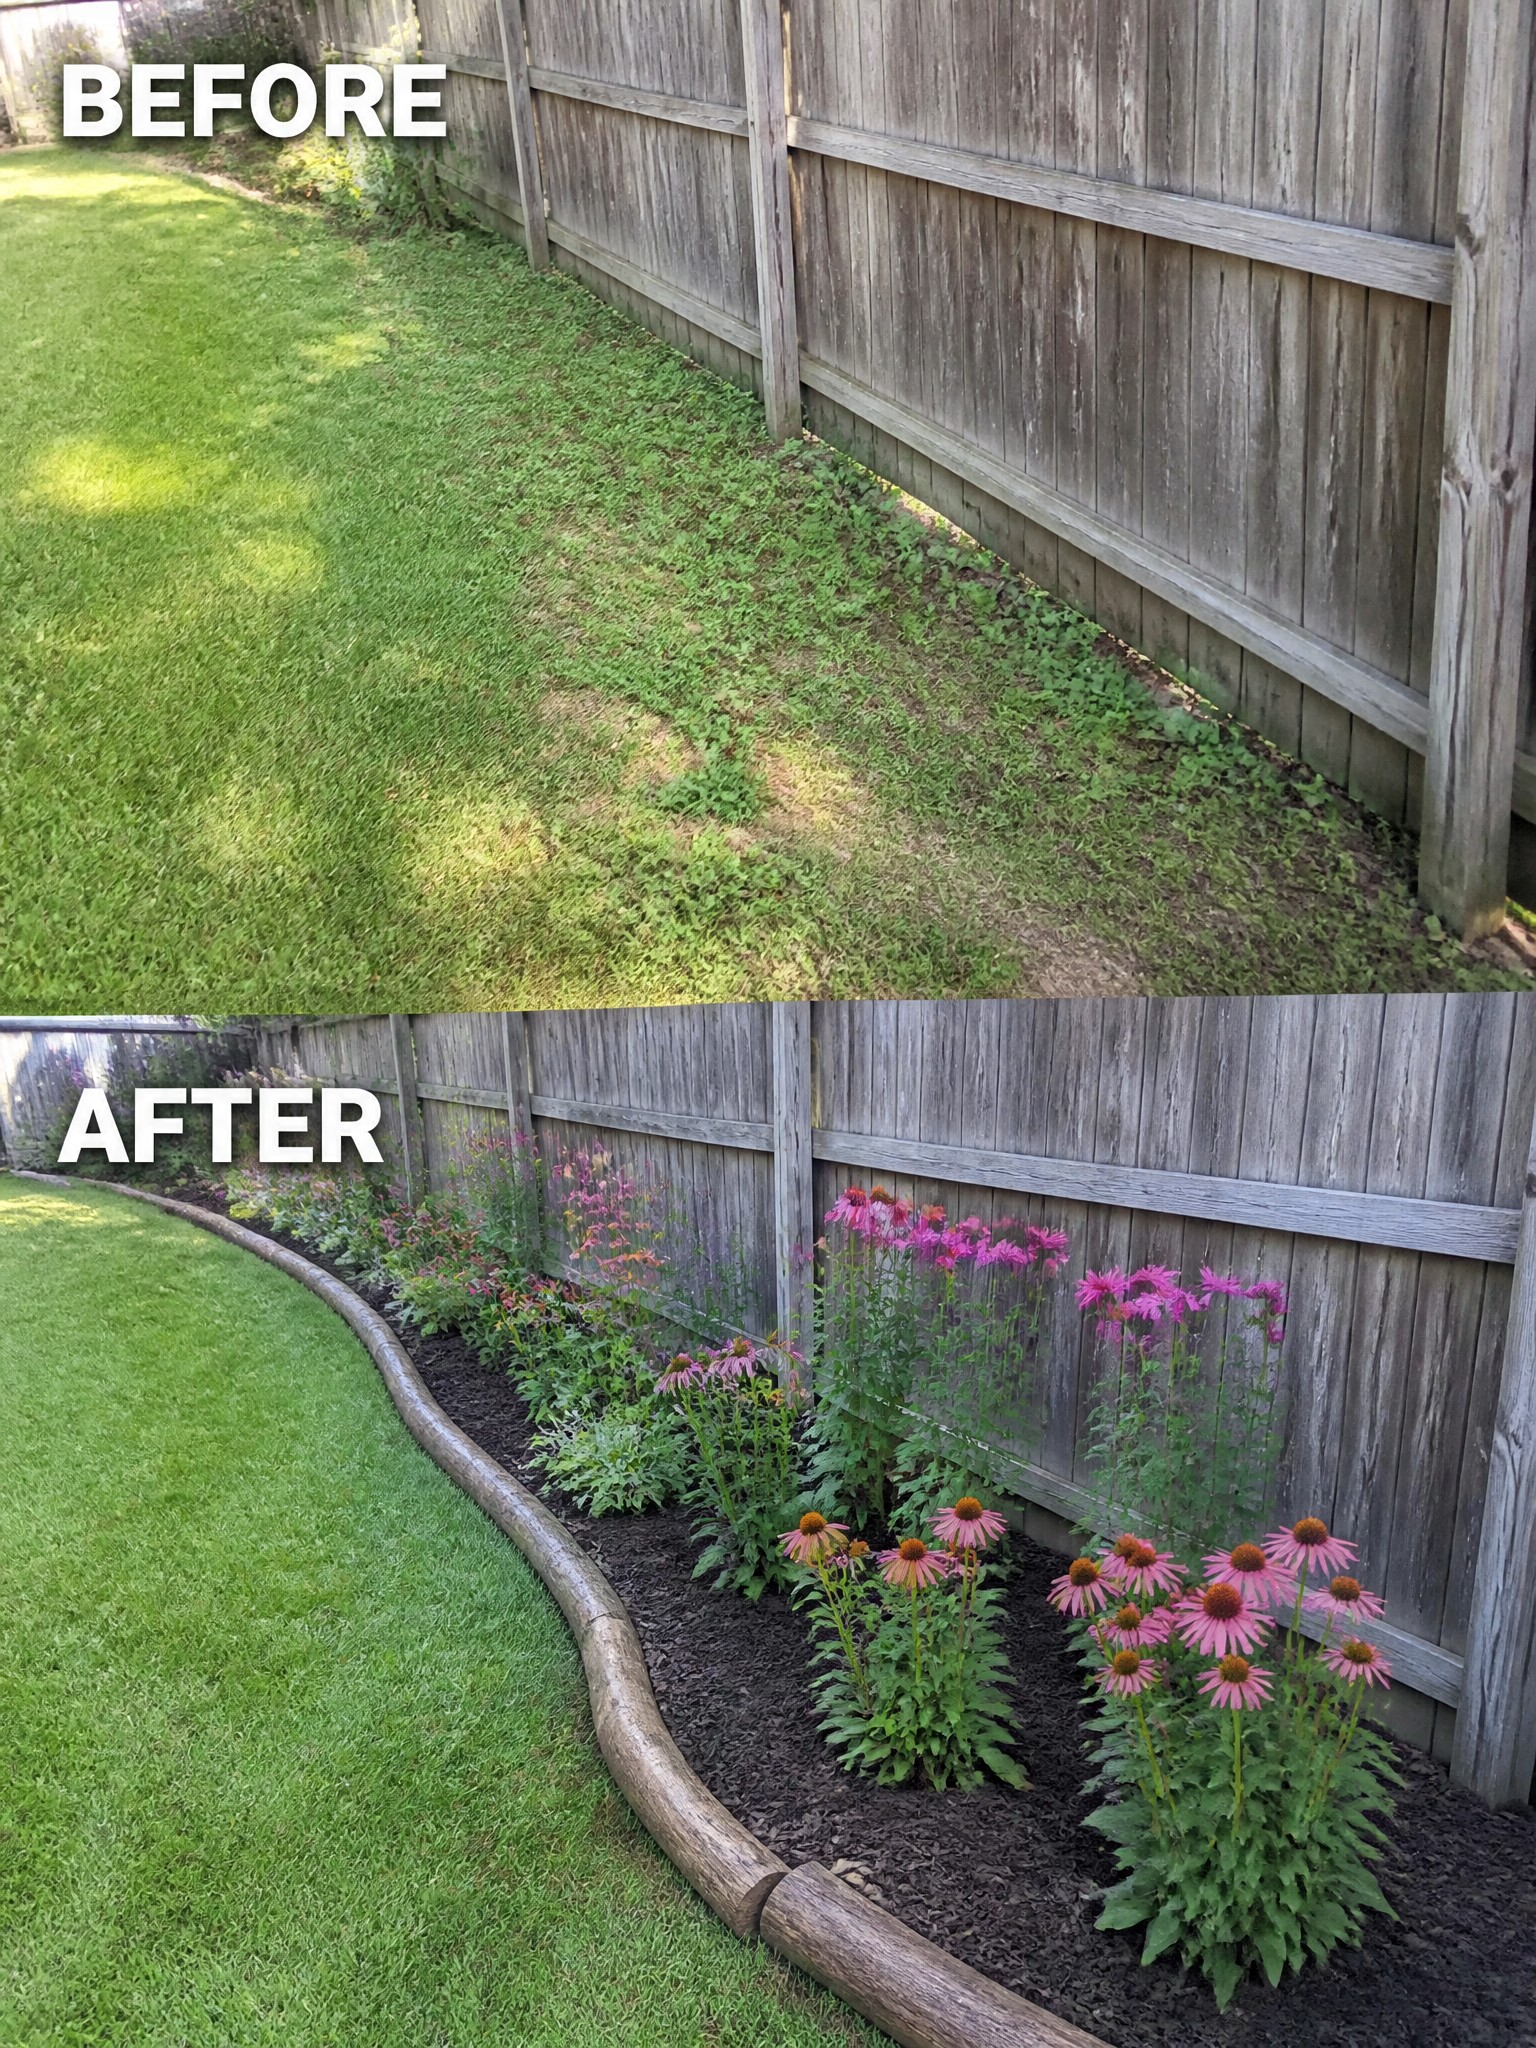
A long strip of grass right up against a fence often turns weedy and hard to mow. Adding a simple curved bed with log edging and mulch gives the area a clear shape and stops the weeds from spreading into the lawn.
This idea works best along side yards or back fences where you want a bit of color without taking over the whole lawn. Lay out the edge first so it flows with the existing grass, then mulch deeply and plant in groups. The edging keeps the mulch in place and makes the border look finished even while the plants are still small.
Define Garden Edges With Mulch And Brick Edging
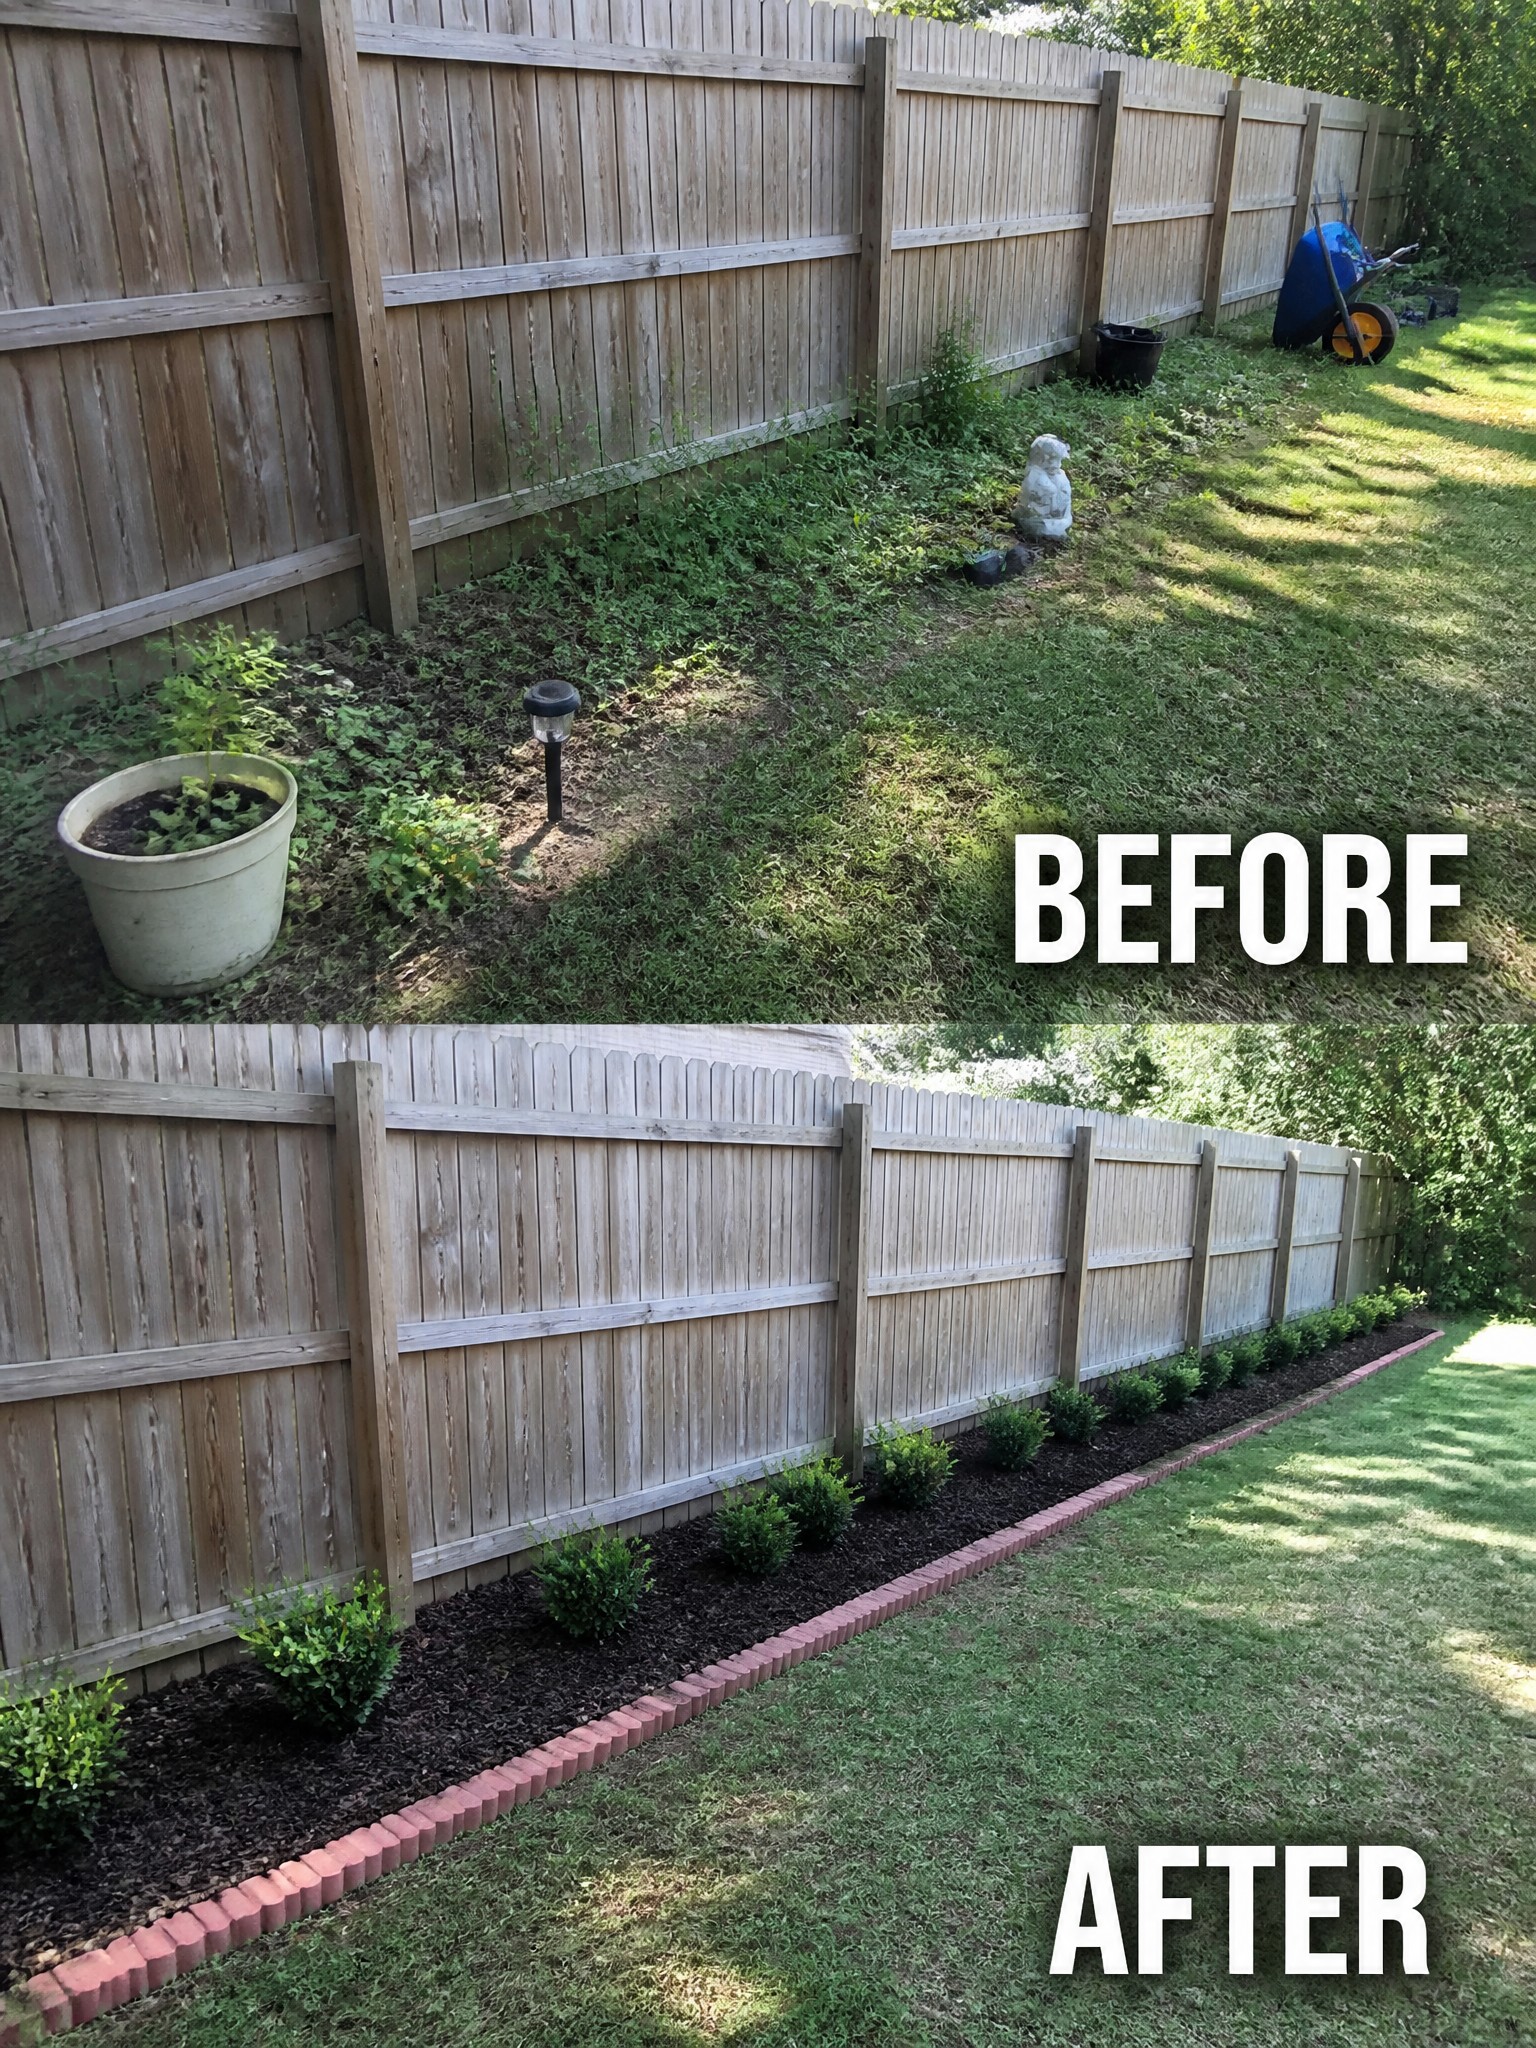
Clearing the weeds along a fence first makes the biggest difference. Once the ground is cleaned up, adding a simple brick border and a layer of mulch turns the messy strip into a proper garden bed that looks finished and stays easier to maintain.
This approach works well along fences or property lines where grass and weeds tend to creep in. Keep the bed narrow enough to reach from the lawn side, and space a few shrubs evenly so the bed reads as one clean line instead of scattered plants.
Frequently Asked Questions
Q: How do I keep mulch from washing away after a heavy rain?
A: Rake the mulch into a slight slope away from the edging so water flows around it instead of straight through. Add a thin layer of finer bark on top to help it settle and lock together. Check the low spots every few weeks and toss in a bit more where needed.
Q: Can I edge with old landscape timbers I already have?
A: Cut the timbers into short lengths and set them in a shallow trench along the bed. They hold mulch in place without extra cost and give a solid border that lasts a season or two. Just pound them level with a mallet so the top sits even.
Q: My garden gets full sun. Does that change how often I refresh the mulch?
A: Sun fades the color faster so plan to top it off once a year in early spring. Stir the old layer lightly with a rake first to loosen it and mix in the new stuff. This keeps the bed looking fresh without hauling in a full load every time.
Q: What if the edging shifts after the first winter?
A: Push it back into place by hand and pack soil firmly against the back side. A quick stomp along the line firms everything up again for the next season.
