

My yard always looked a bit messy until I started paying attention to the edges around the grass.
Simple cuts and borders can keep things neat without costing much.
I usually test one small change at a time to see what holds up through the seasons.
Over time these adjustments build a cleaner shape that makes the whole space feel more intentional.
Edging really does pull it together.
Add Brick Edging For A Cleaner Lawn Line
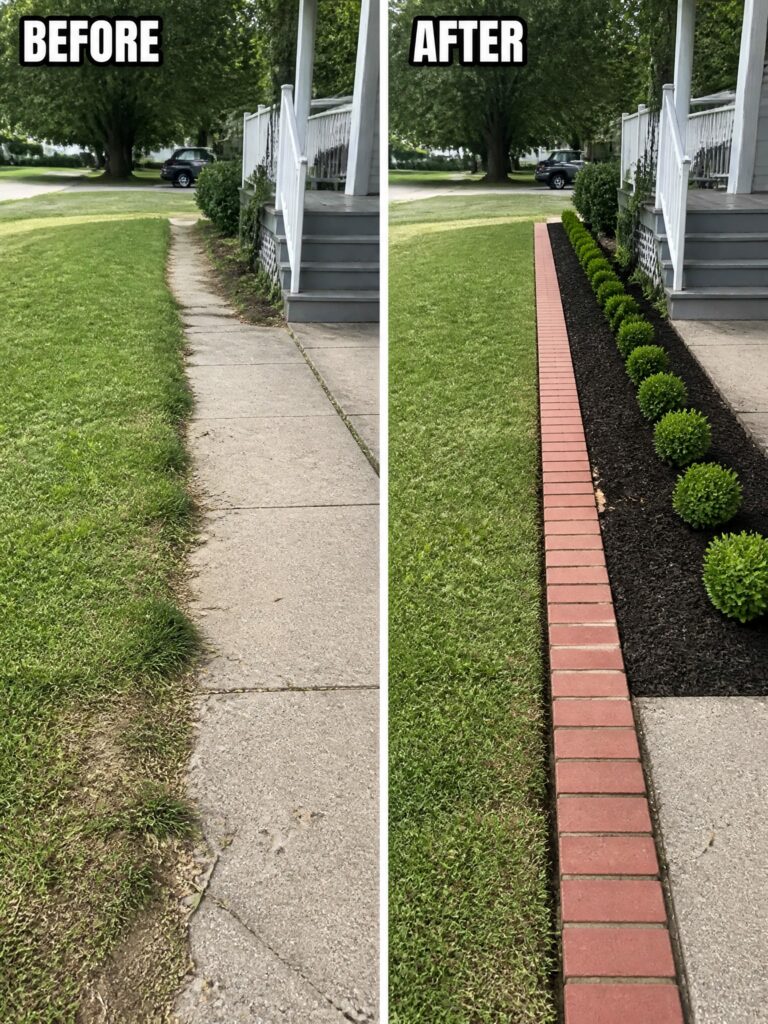
A straight brick edge can turn a ragged lawn into something that looks intentional and easier to maintain. The before photo shows grass spilling over onto the path with no clear separation, while the after shows a simple brick border that keeps everything in place and gives the yard a finished look.
This idea works best along sidewalks or driveways where grass tends to creep. Dig a shallow trench, set the bricks level with the ground, and add a few small shrubs if you want a bit more structure. It keeps the lawn looking neat without a lot of extra work.
Add Edging To Create Clean Garden Borders
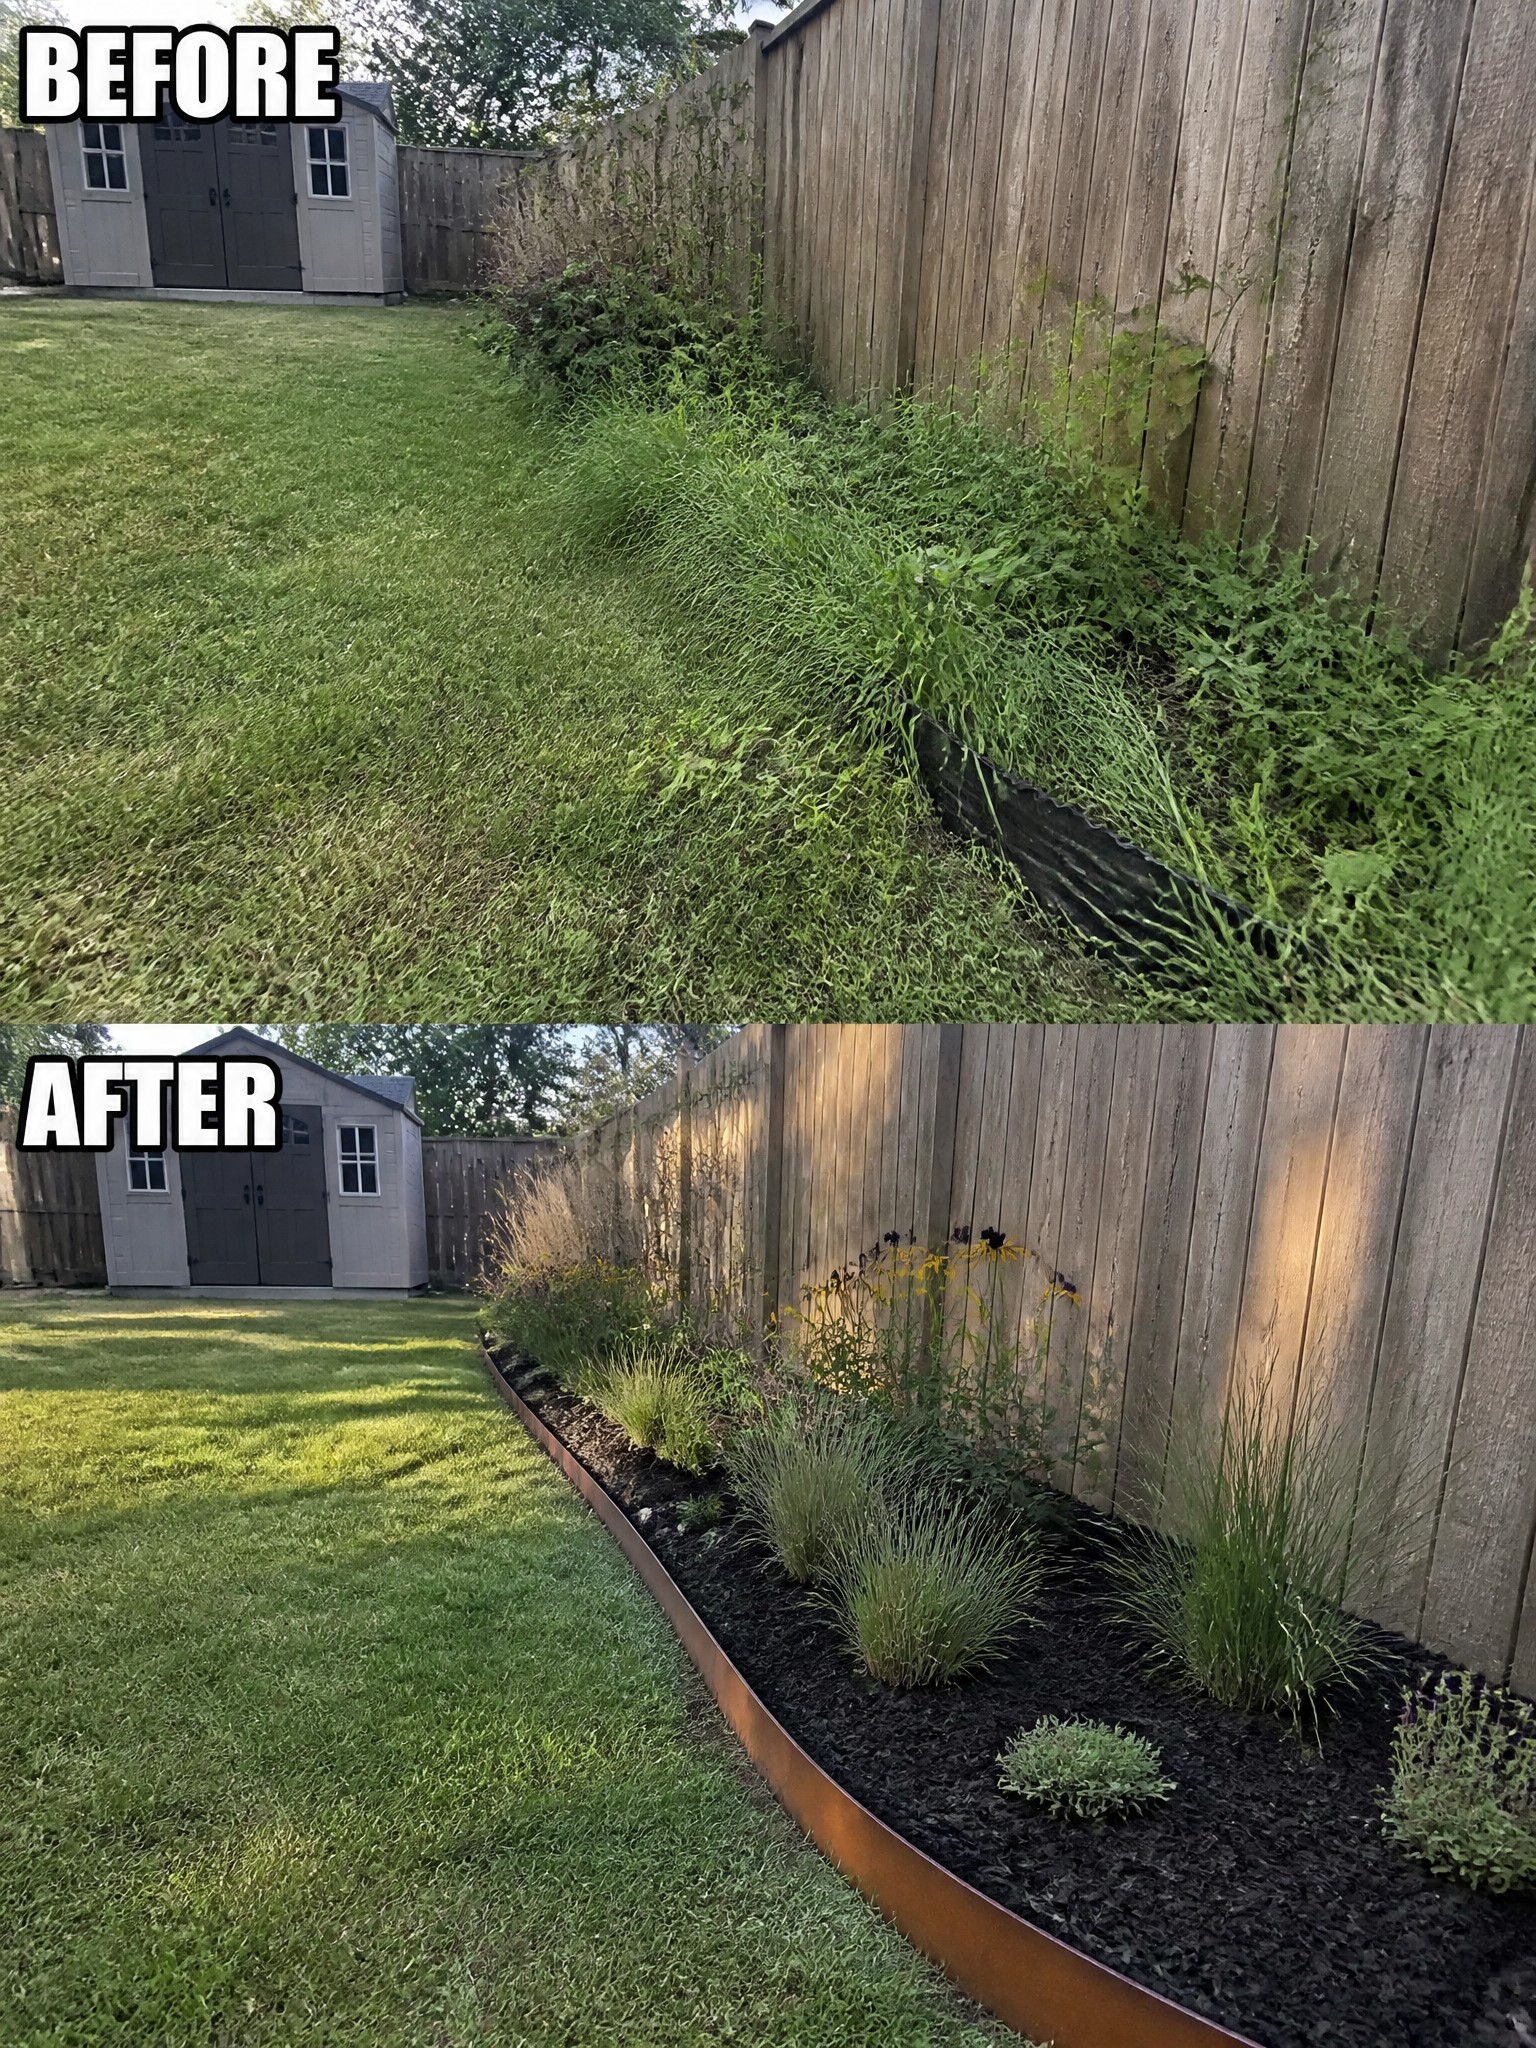
A simple metal edge and a strip of mulch can turn a wild, overgrown strip along a fence into a tidy planted border. The before photo shows grass and weeds spilling everywhere with no clear line between the lawn and the fence. After the change, the bed stays separate, the lawn looks sharper, and the plants have room to fill in without taking over.
This approach works best along fences or property lines where growth gets out of hand each season. Start by cutting back the overgrowth, then set the edging so it sits slightly above the grass. Keep the planting simple at first with a few grasses or perennials so the border stays easy to maintain.
Add Defined Edging To Clean Up The Lawn Border

A concrete curb gives the lawn a clear stop where it meets the driveway. The before shows grass growing ragged right up to the pavement with no real line, while the after shows how a simple border keeps the edge straight and the grass looking thicker and more even.
This idea works best along driveways or walkways where the lawn tends to creep or wear thin. Put the edging in first, then focus on the grass. It keeps the yard looking planned without adding plants or other features right away.
Define Your Lawn Edge With Stone Borders
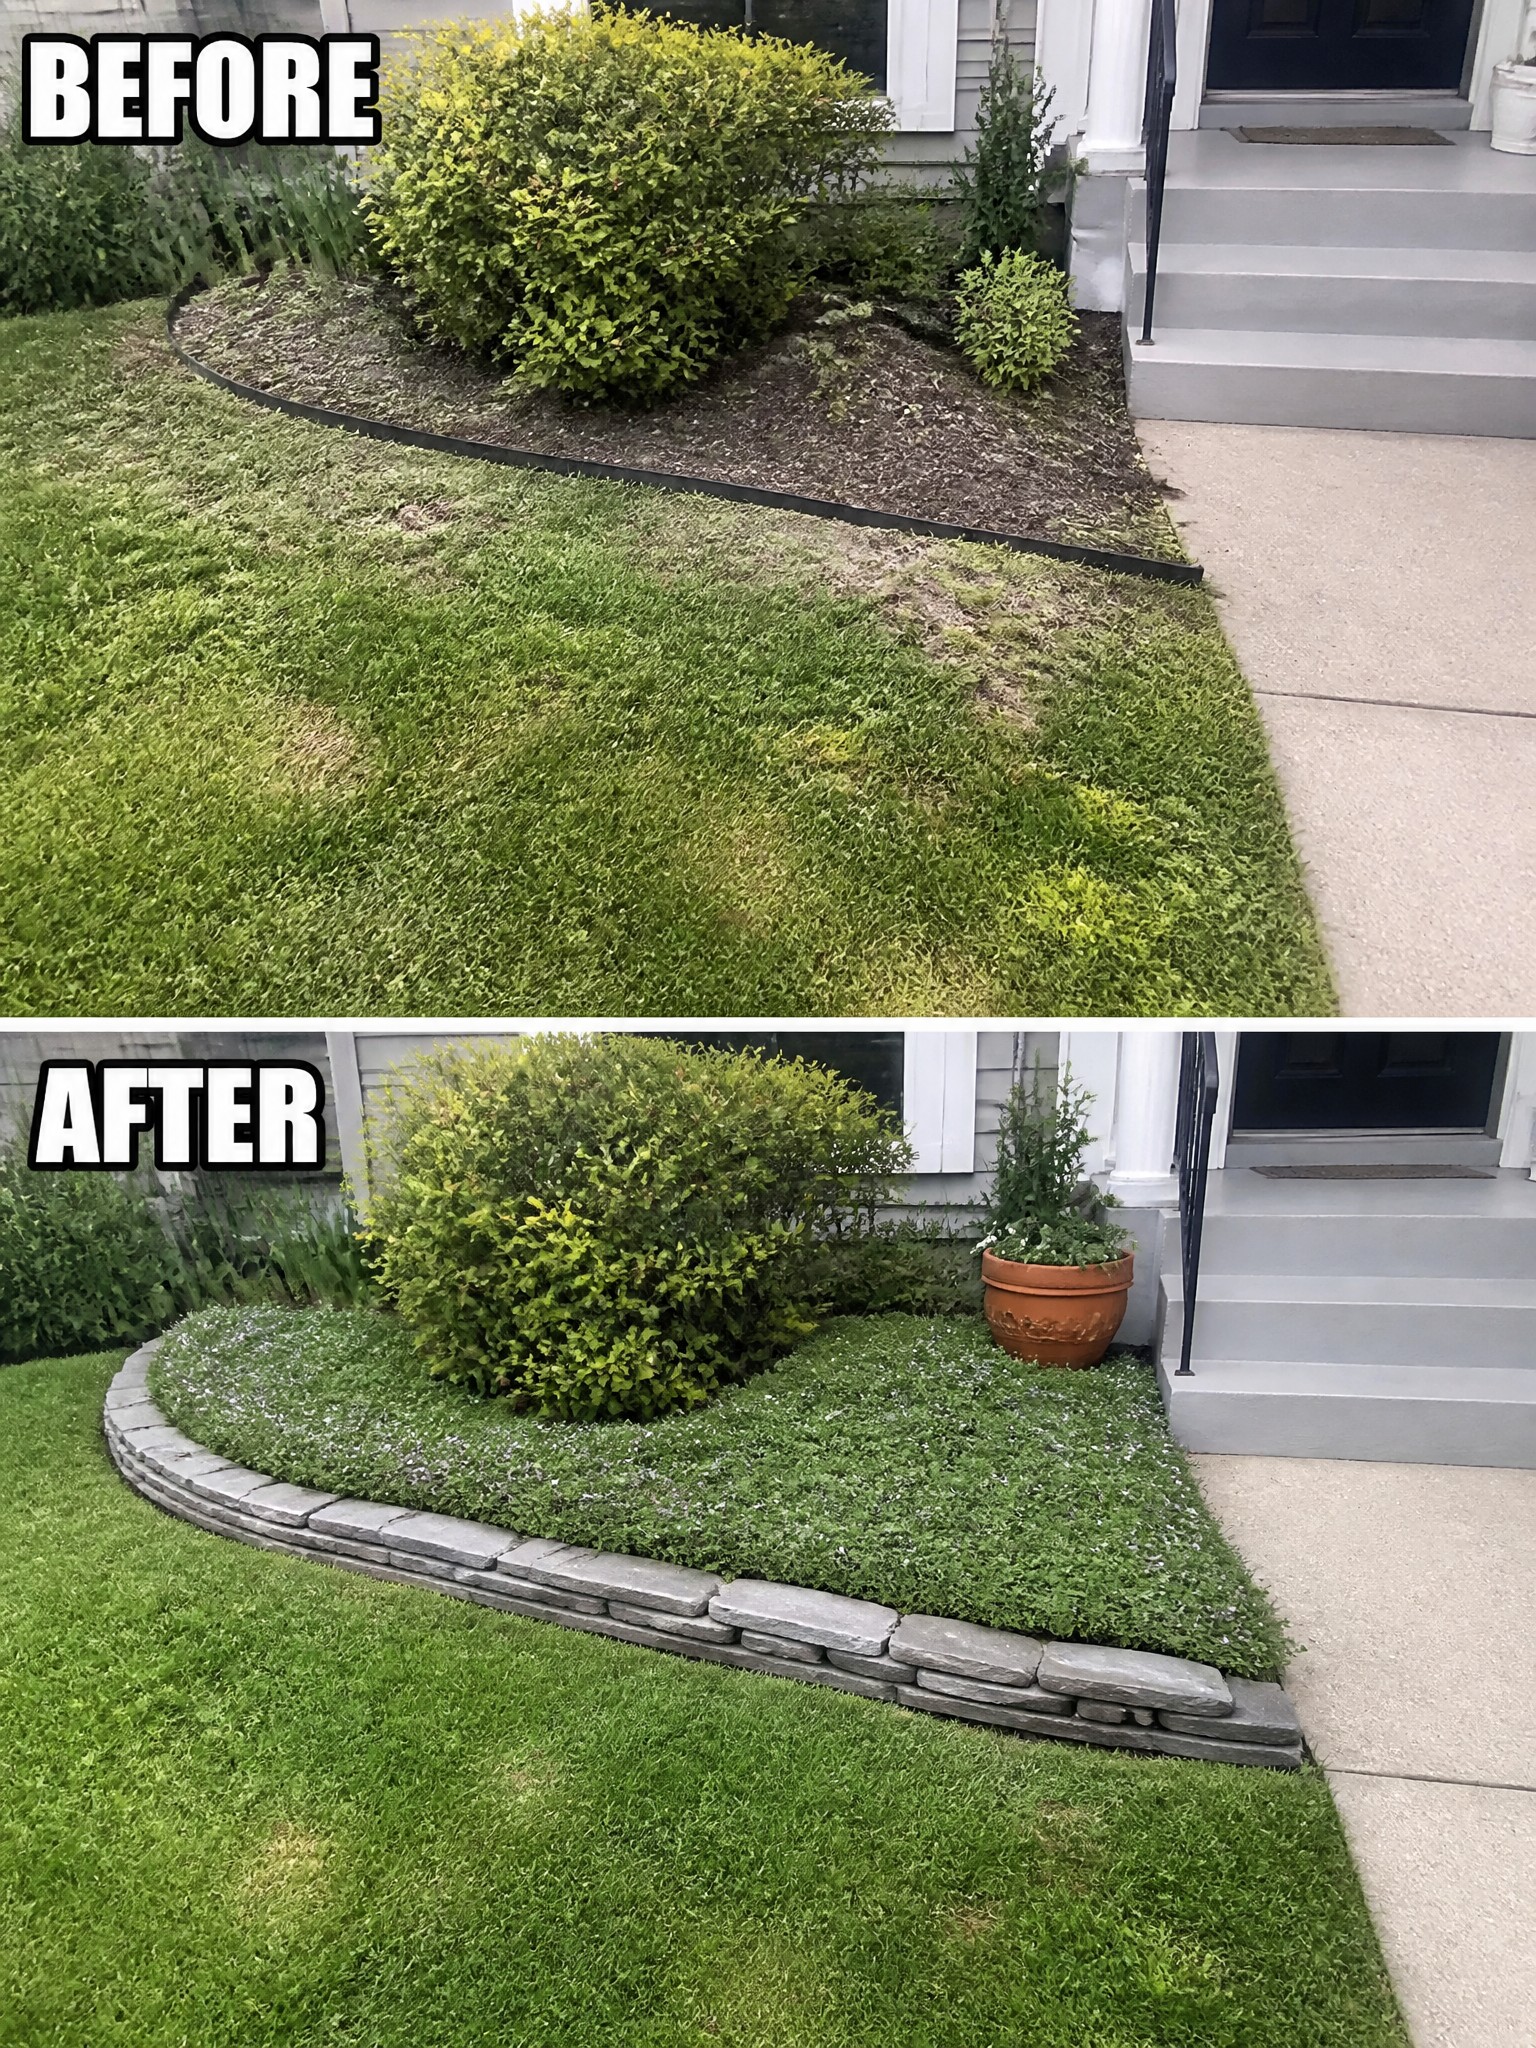
One of the simplest ways to improve a front yard is to give the garden beds a clear, lasting edge instead of letting the lawn fade into mulch. The loose black border was replaced with stacked stone that holds everything in place and allows low ground cover to fill the space neatly around the existing shrubs.
This idea works best along the front of a house where the lawn meets planting areas. Lay the stones in a shallow trench so they stay level, and pick a ground cover that spreads on its own. Keep the bed width practical so mowing stays easy.
Define Garden Beds With Proper Edging
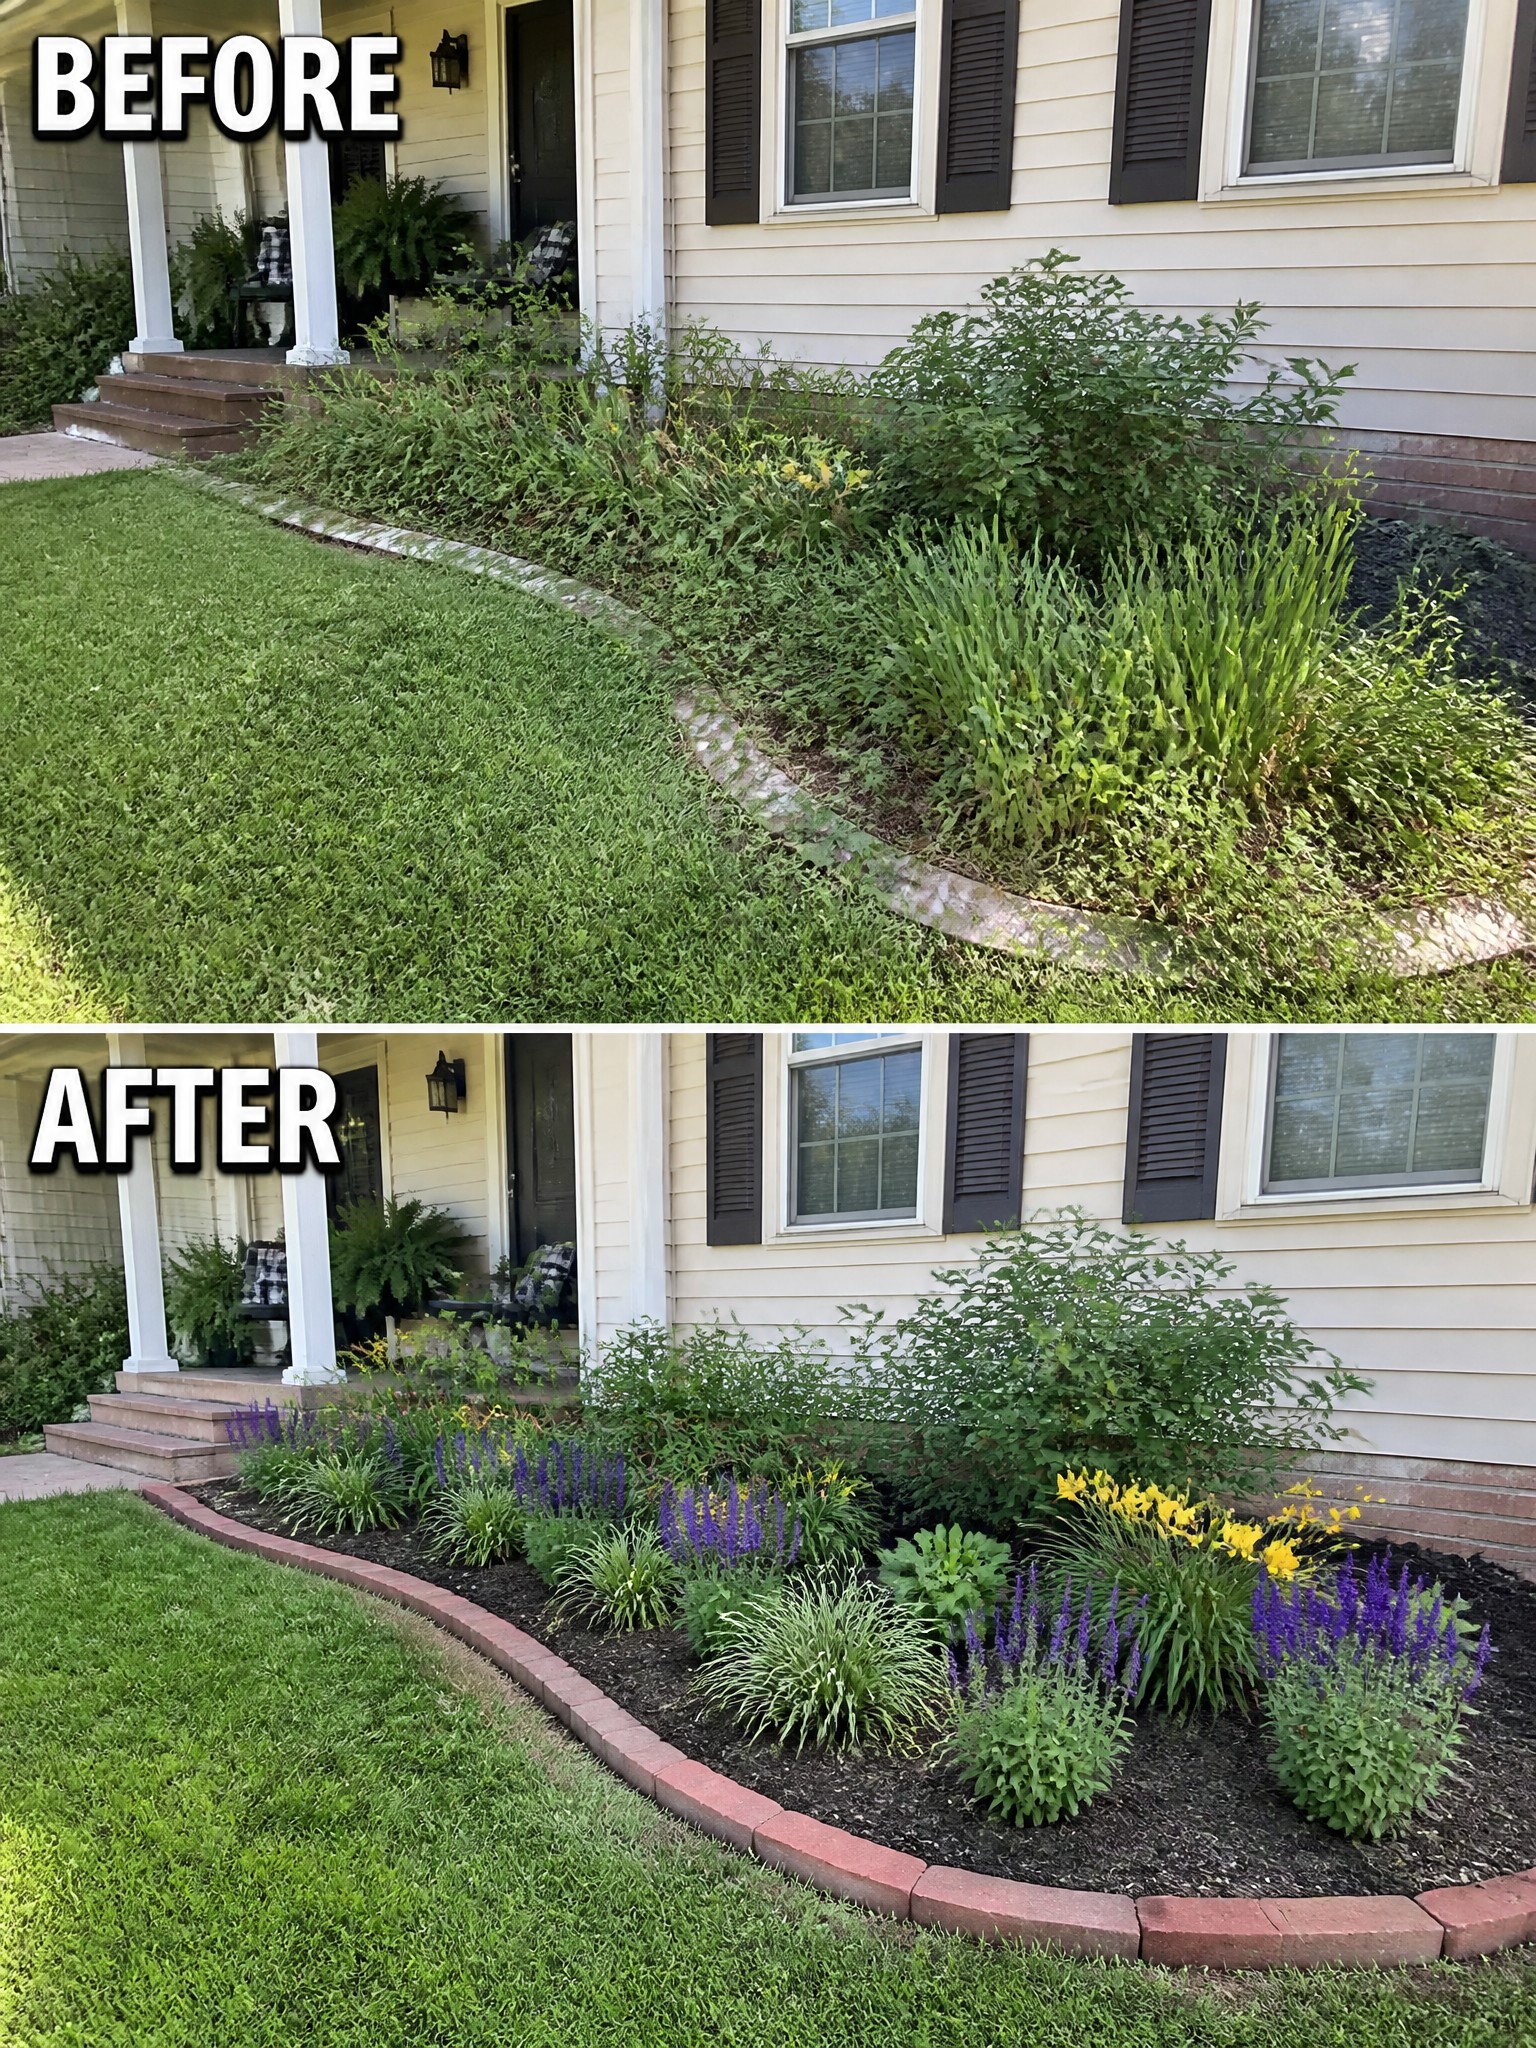
Adding a clear edge turns an overgrown strip along the house into a real garden bed. The before photo shows plants spilling onto the lawn with no real shape. Once the bed gets a brick border and mulch, the lawn stays neat and the plants look intentional instead of messy.
This works well on any home where the front beds run right along the foundation. Start by cutting back the worst overgrowth, then put in edging that fits your budget. Mulch afterward so the bed stays looking clean with less upkeep. It is one of the simplest ways to make a small yard feel more planned without spending much.
Define A Narrow Side Path With Gravel And Stepping Stones
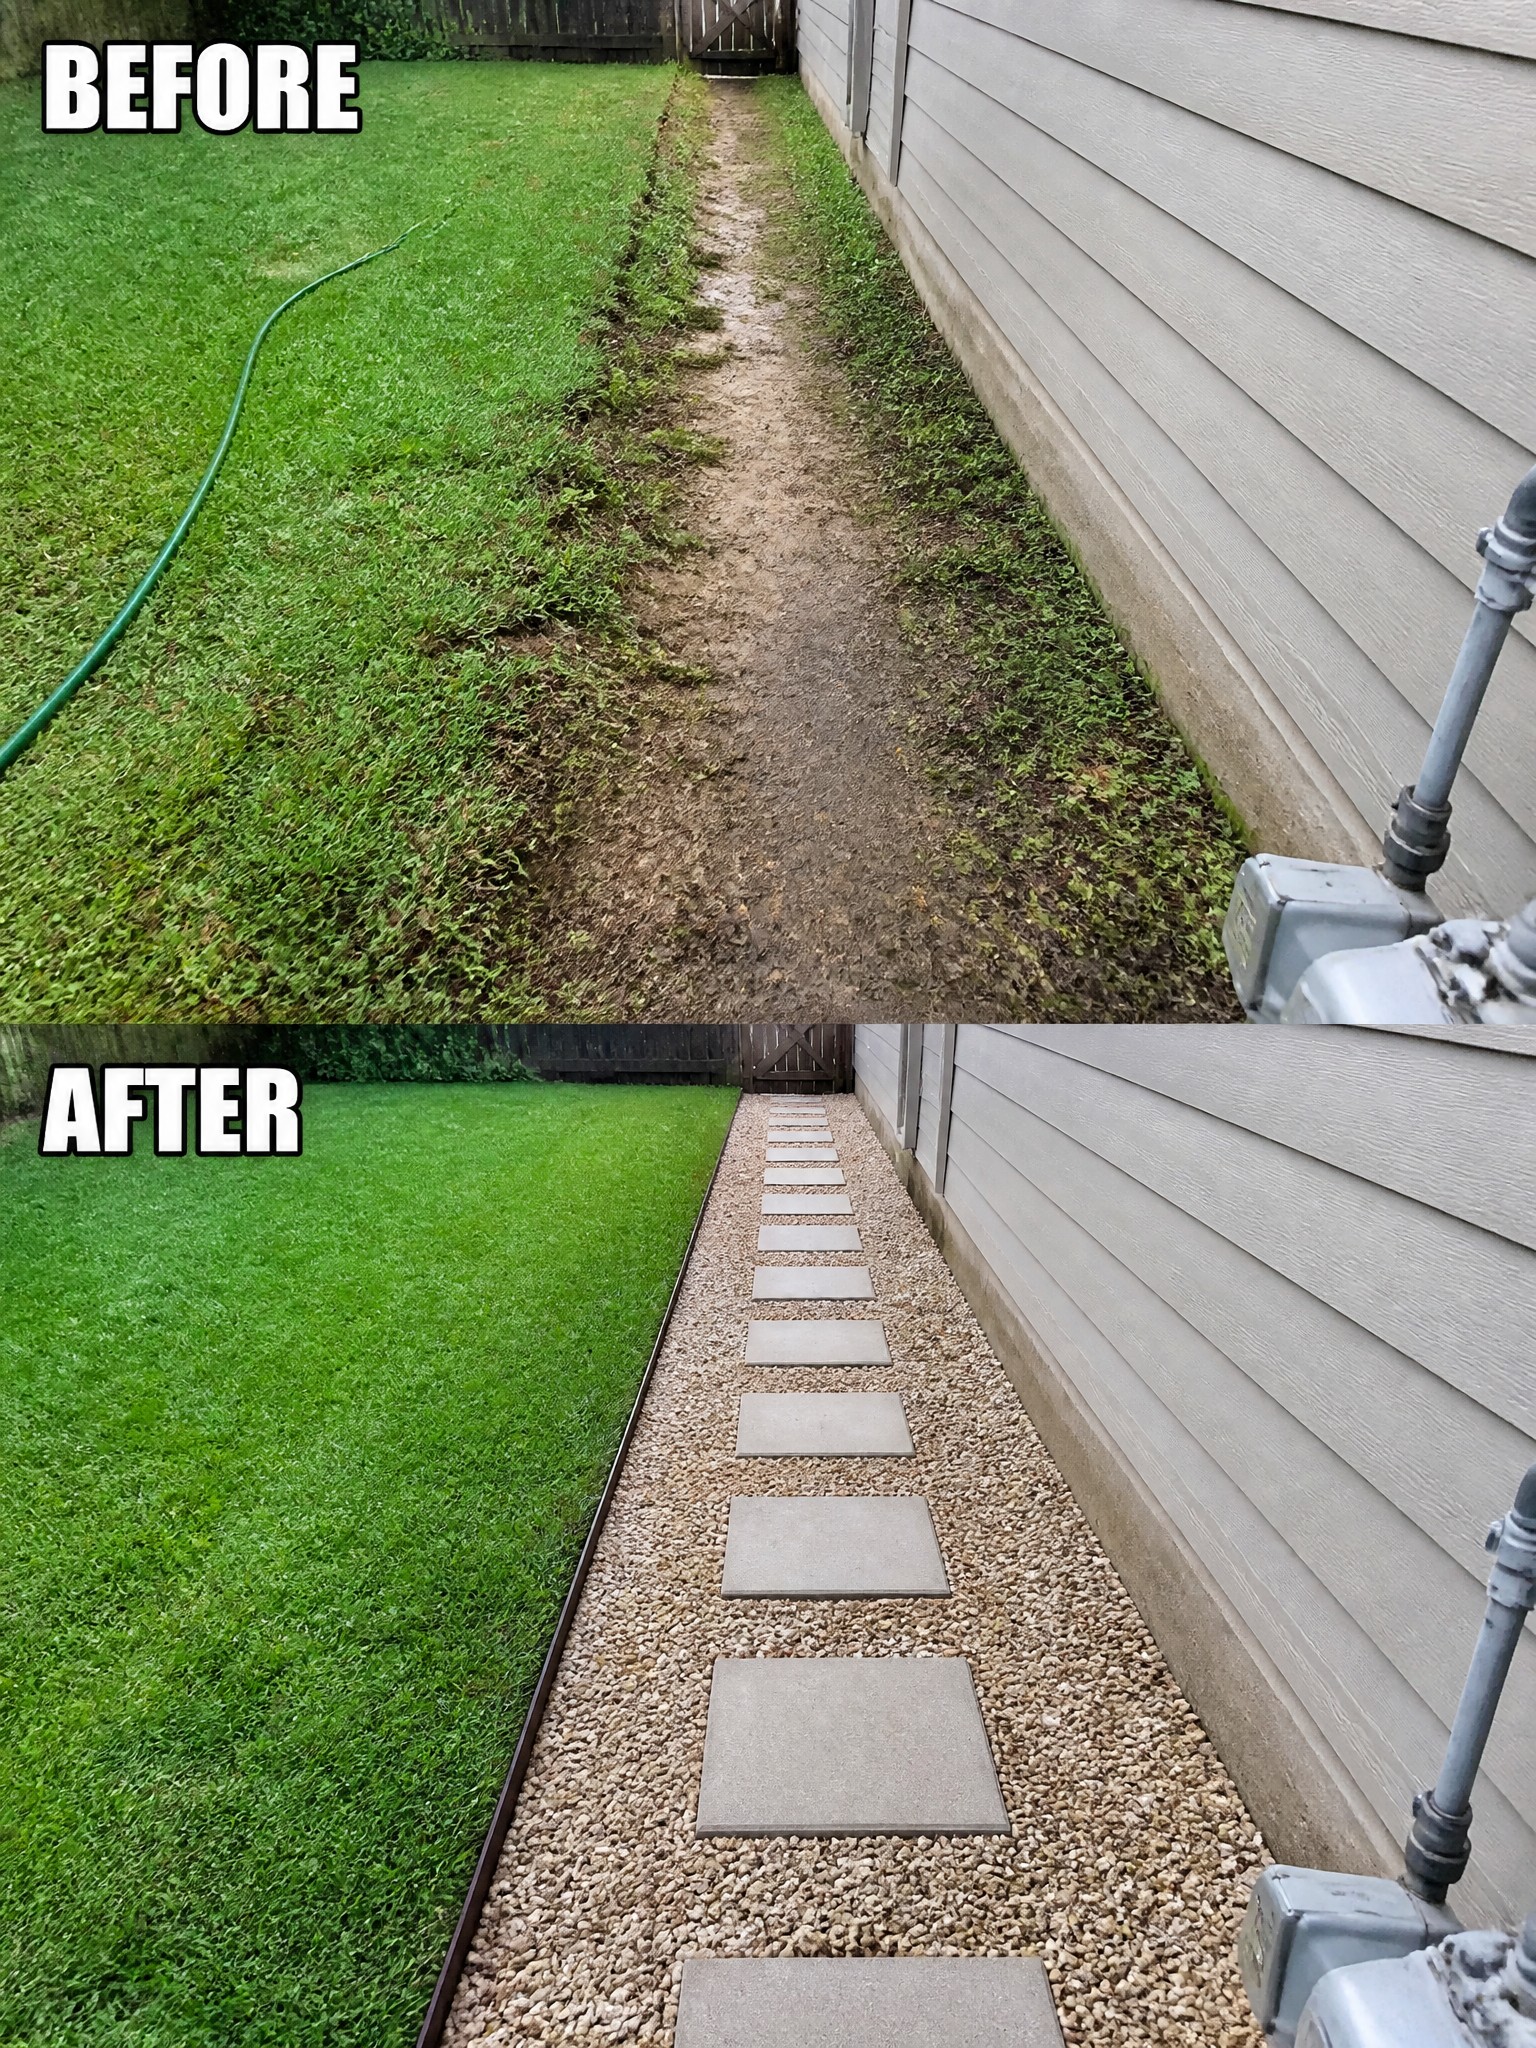
A worn dirt track next to the house often turns into mud after rain and makes the whole side yard look unfinished. Adding a gravel base with concrete stepping stones gives the path a clear shape while keeping the lawn edge straight and easy to mow.
This approach works well along the side of a house where space is tight. Lay down edging first to hold the gravel in place, then space the pavers evenly so the walkway feels natural to walk on. The result stays low cost and low maintenance as long as the gravel stays contained.
Add Simple Edging Around A Mailbox
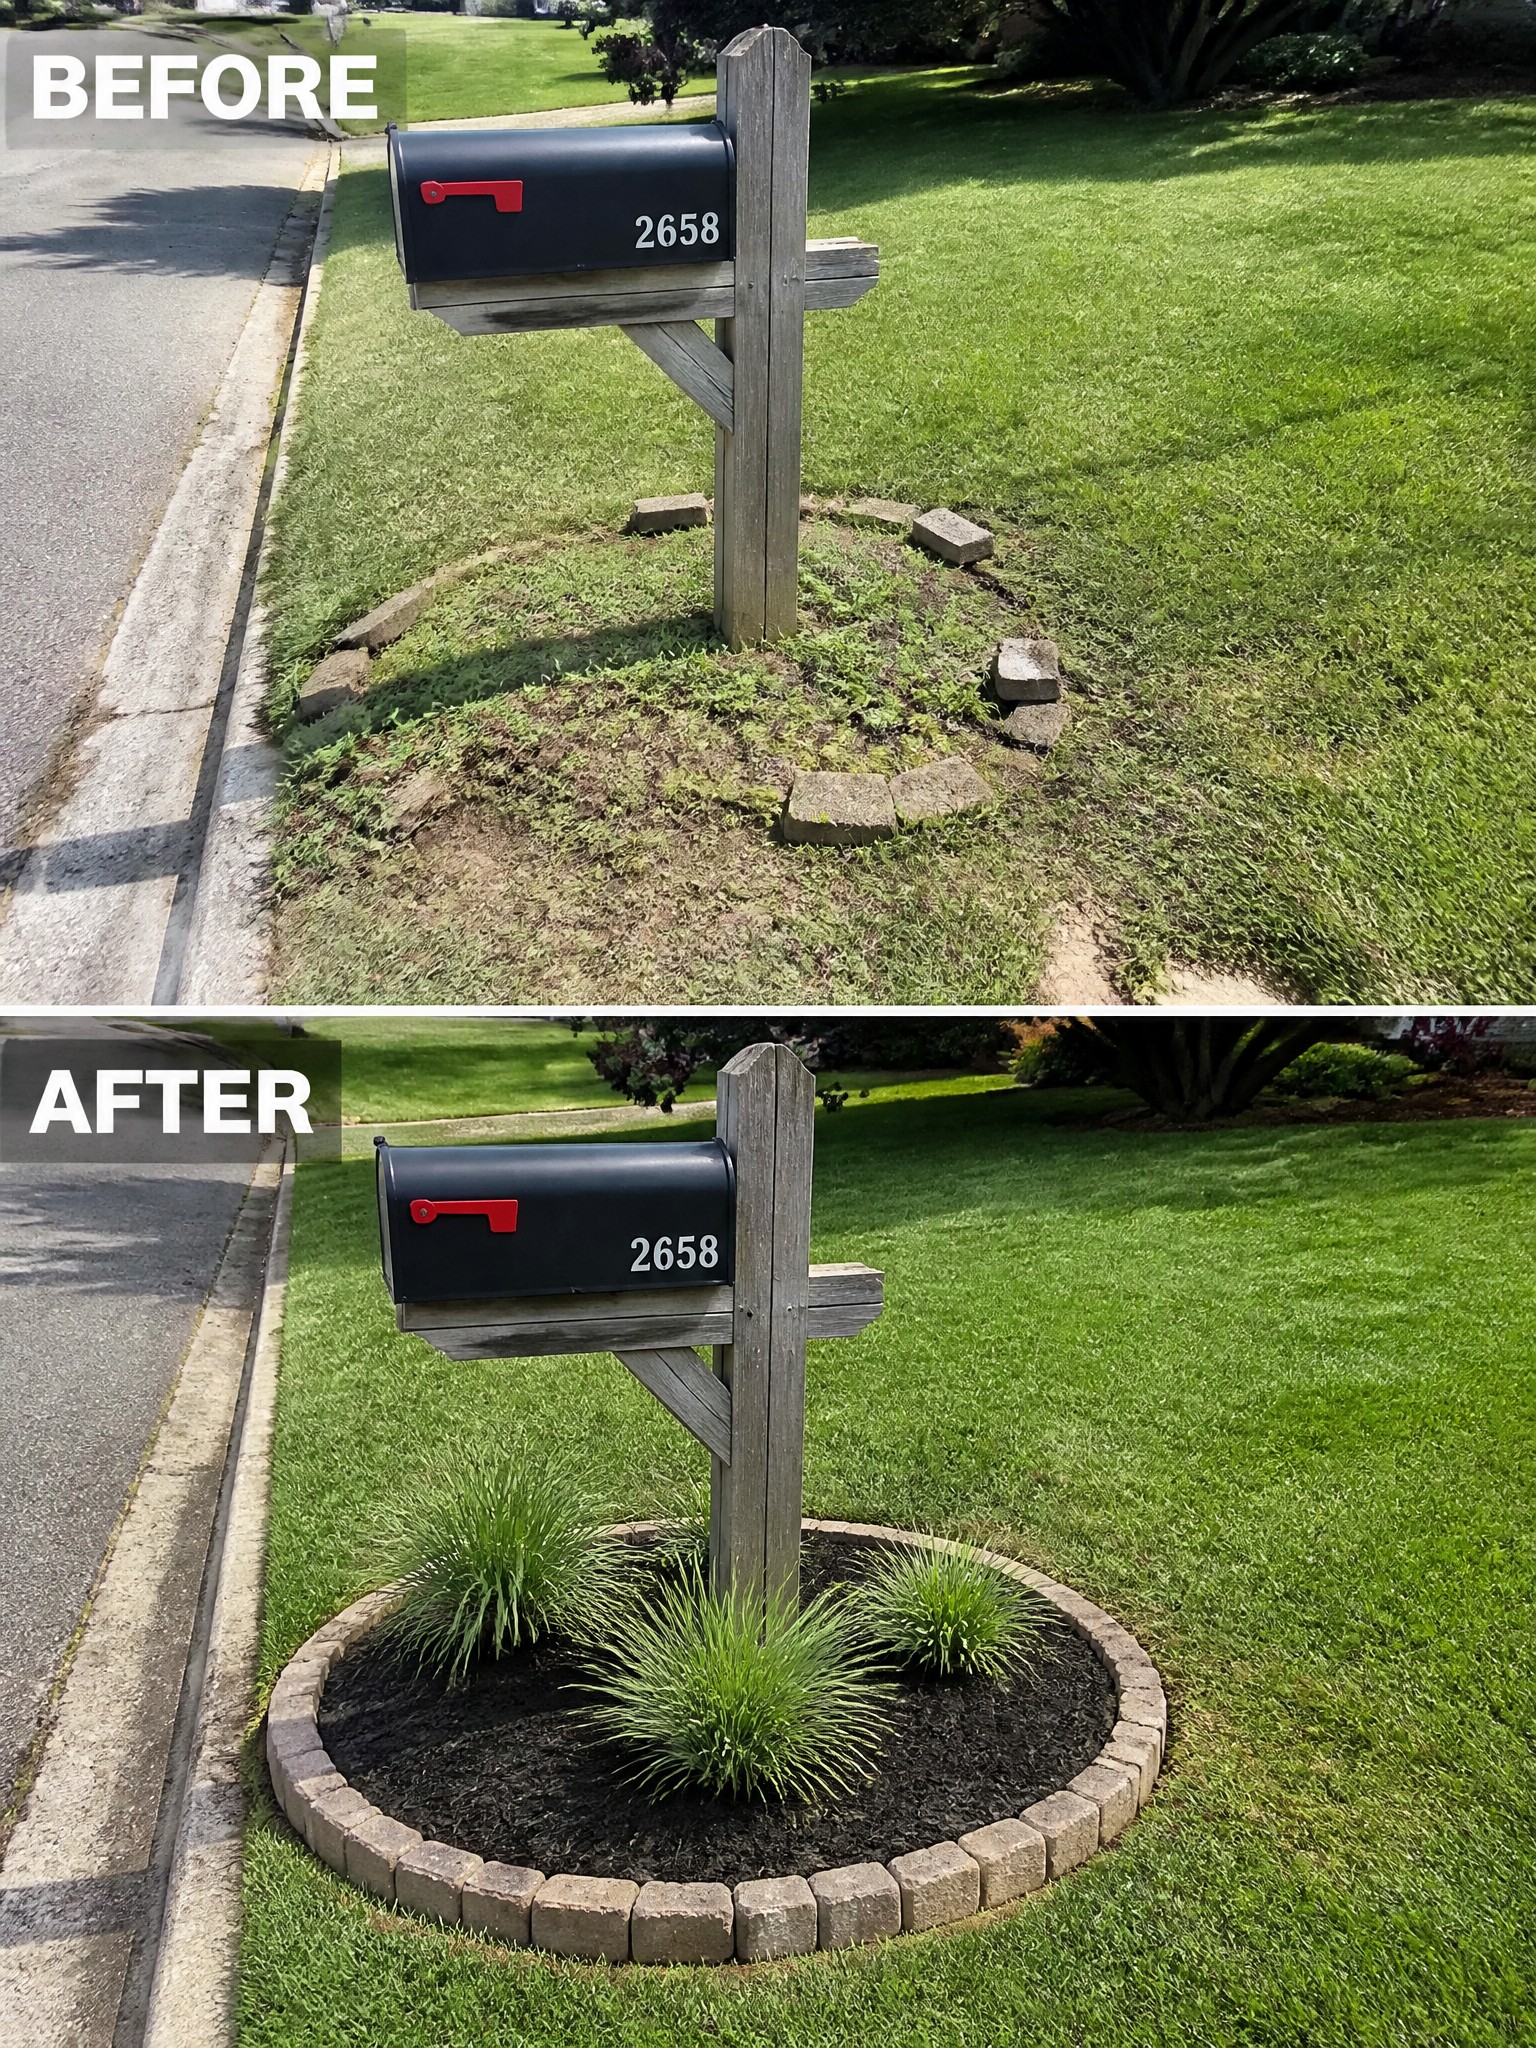
The before shows the mailbox post sitting in uneven grass with a few stray bricks tossed around the base. The after adds a clean circle of bricks that turns the spot into a proper bed filled with mulch and a few plants. That one border makes the whole area look finished instead of forgotten.
This works well along driveways or near the street where grass often gets patchy. Lay out the edging first in a simple shape, fill it with mulch, and keep the planting small so it stays easy to mow around. It is a low cost way to give structure without needing a full lawn overhaul.
Create Clean Tree Rings With Stone Edging
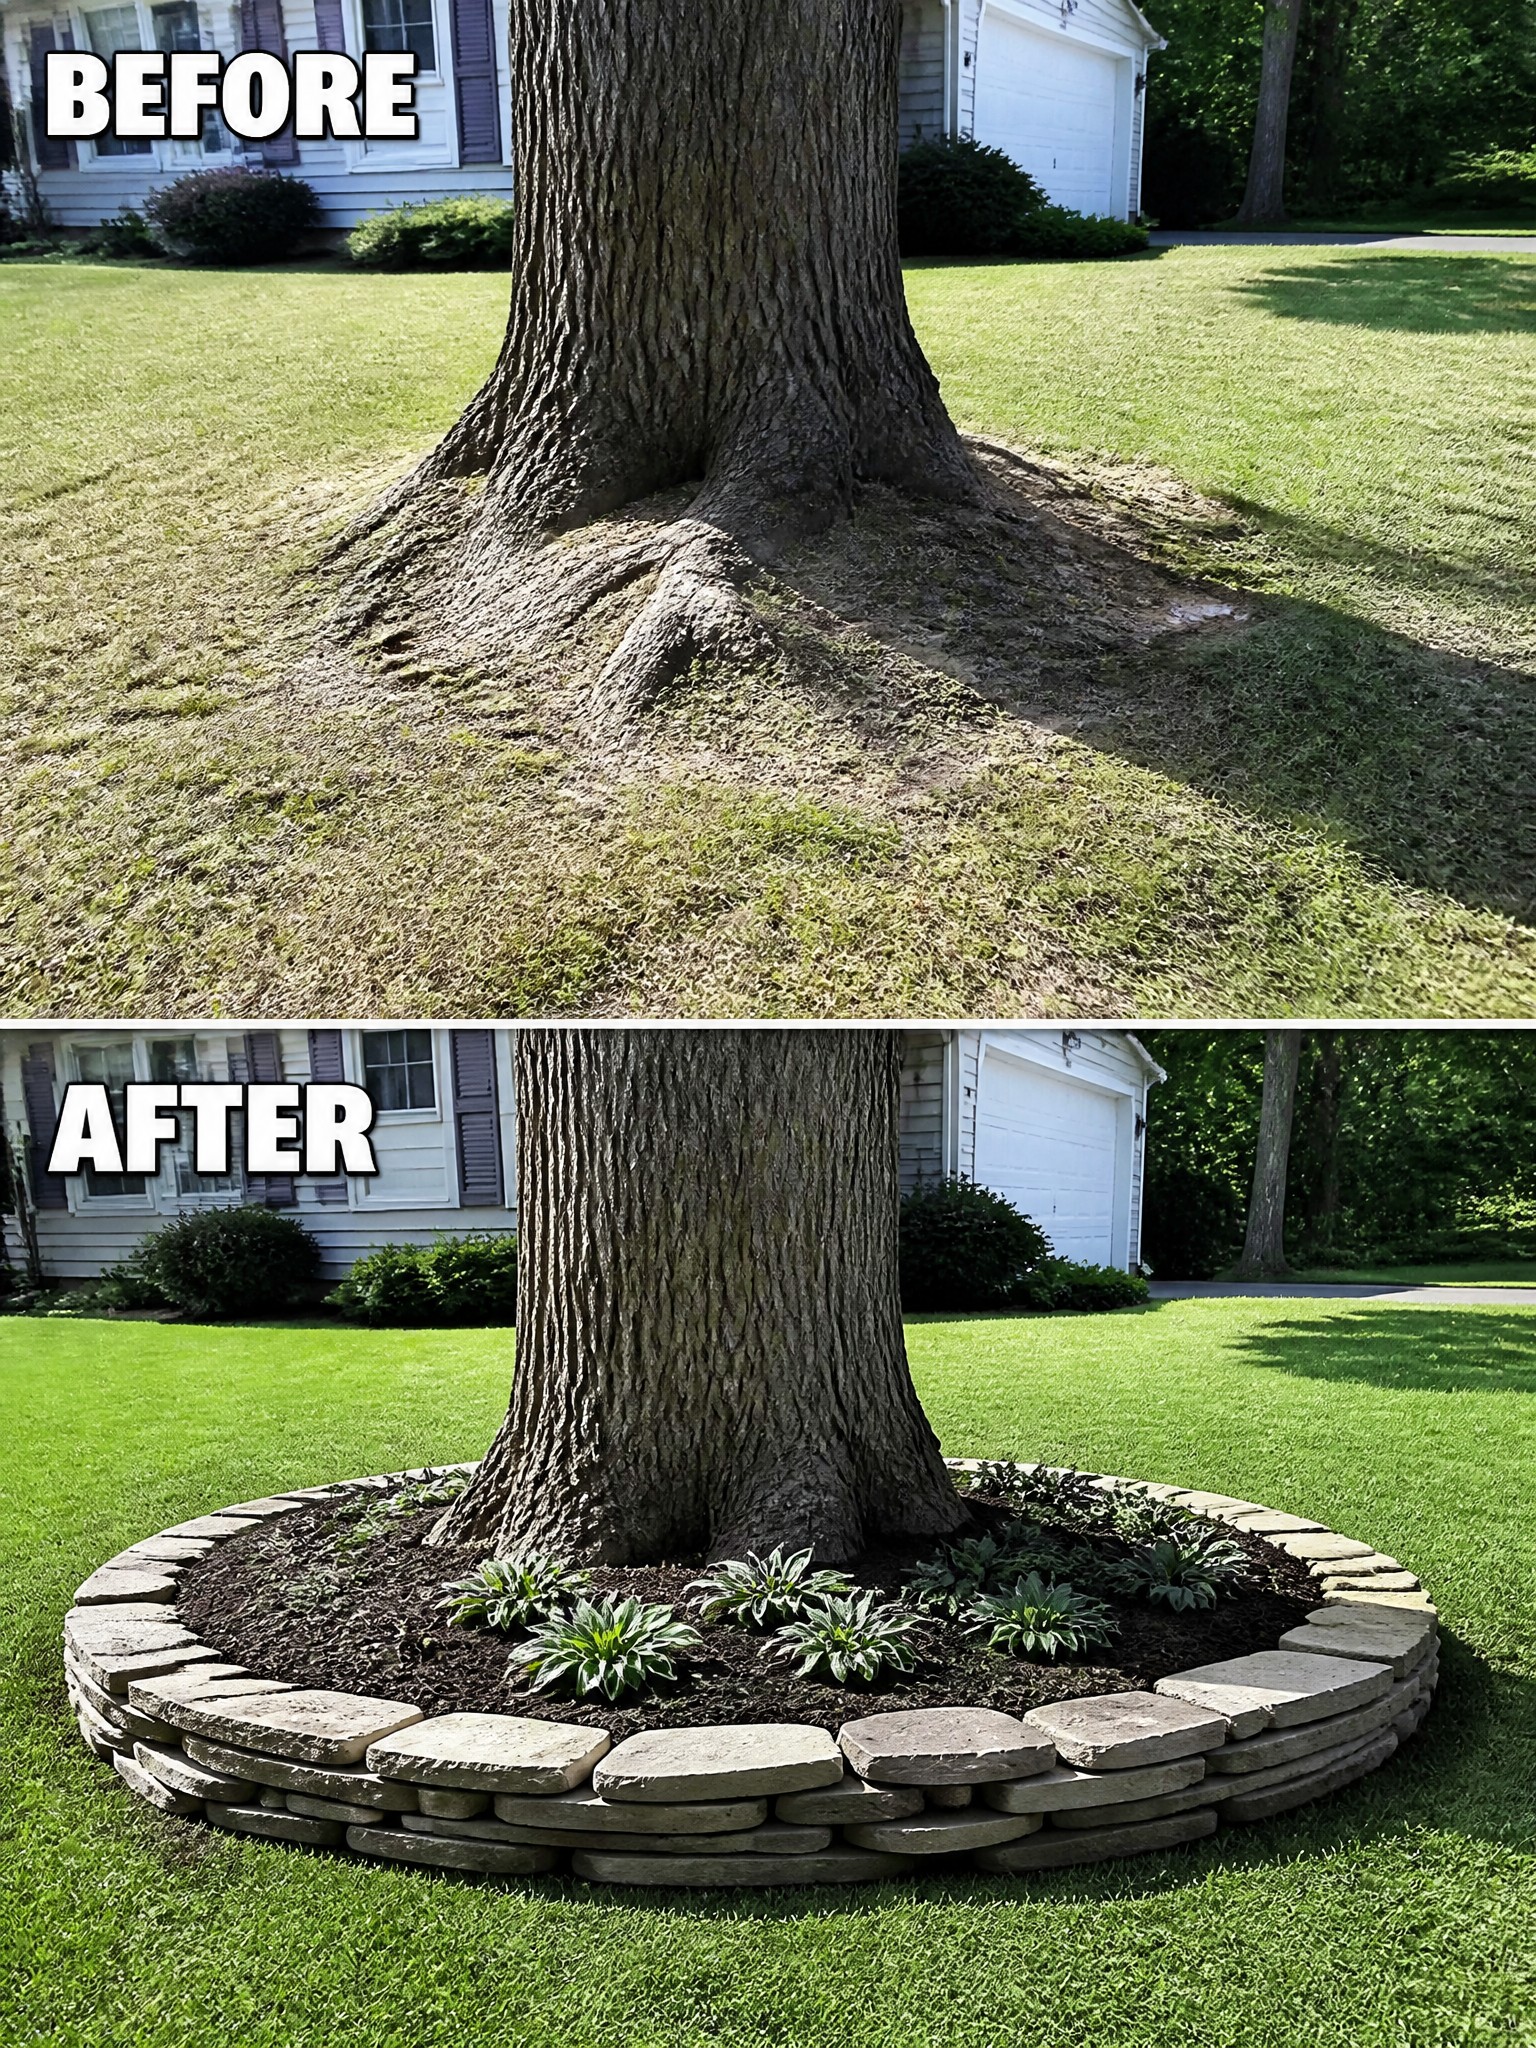
A mature tree often leaves an awkward patch where grass struggles to grow and roots sit exposed. Adding a simple stone ring turns that spot into a defined bed. The change keeps the lawn looking intentional instead of patchy and protects the roots from mower damage.
This idea works best in front yards with one or two large shade trees. Measure a circle that feels balanced with the trunk size, stack the stones two or three courses high, and fill the inside with mulch and a few shade plants. Keep the ring wide enough to walk around but not so large that it eats up open lawn space.
Add Defined Edging To Clean Up Garden Borders
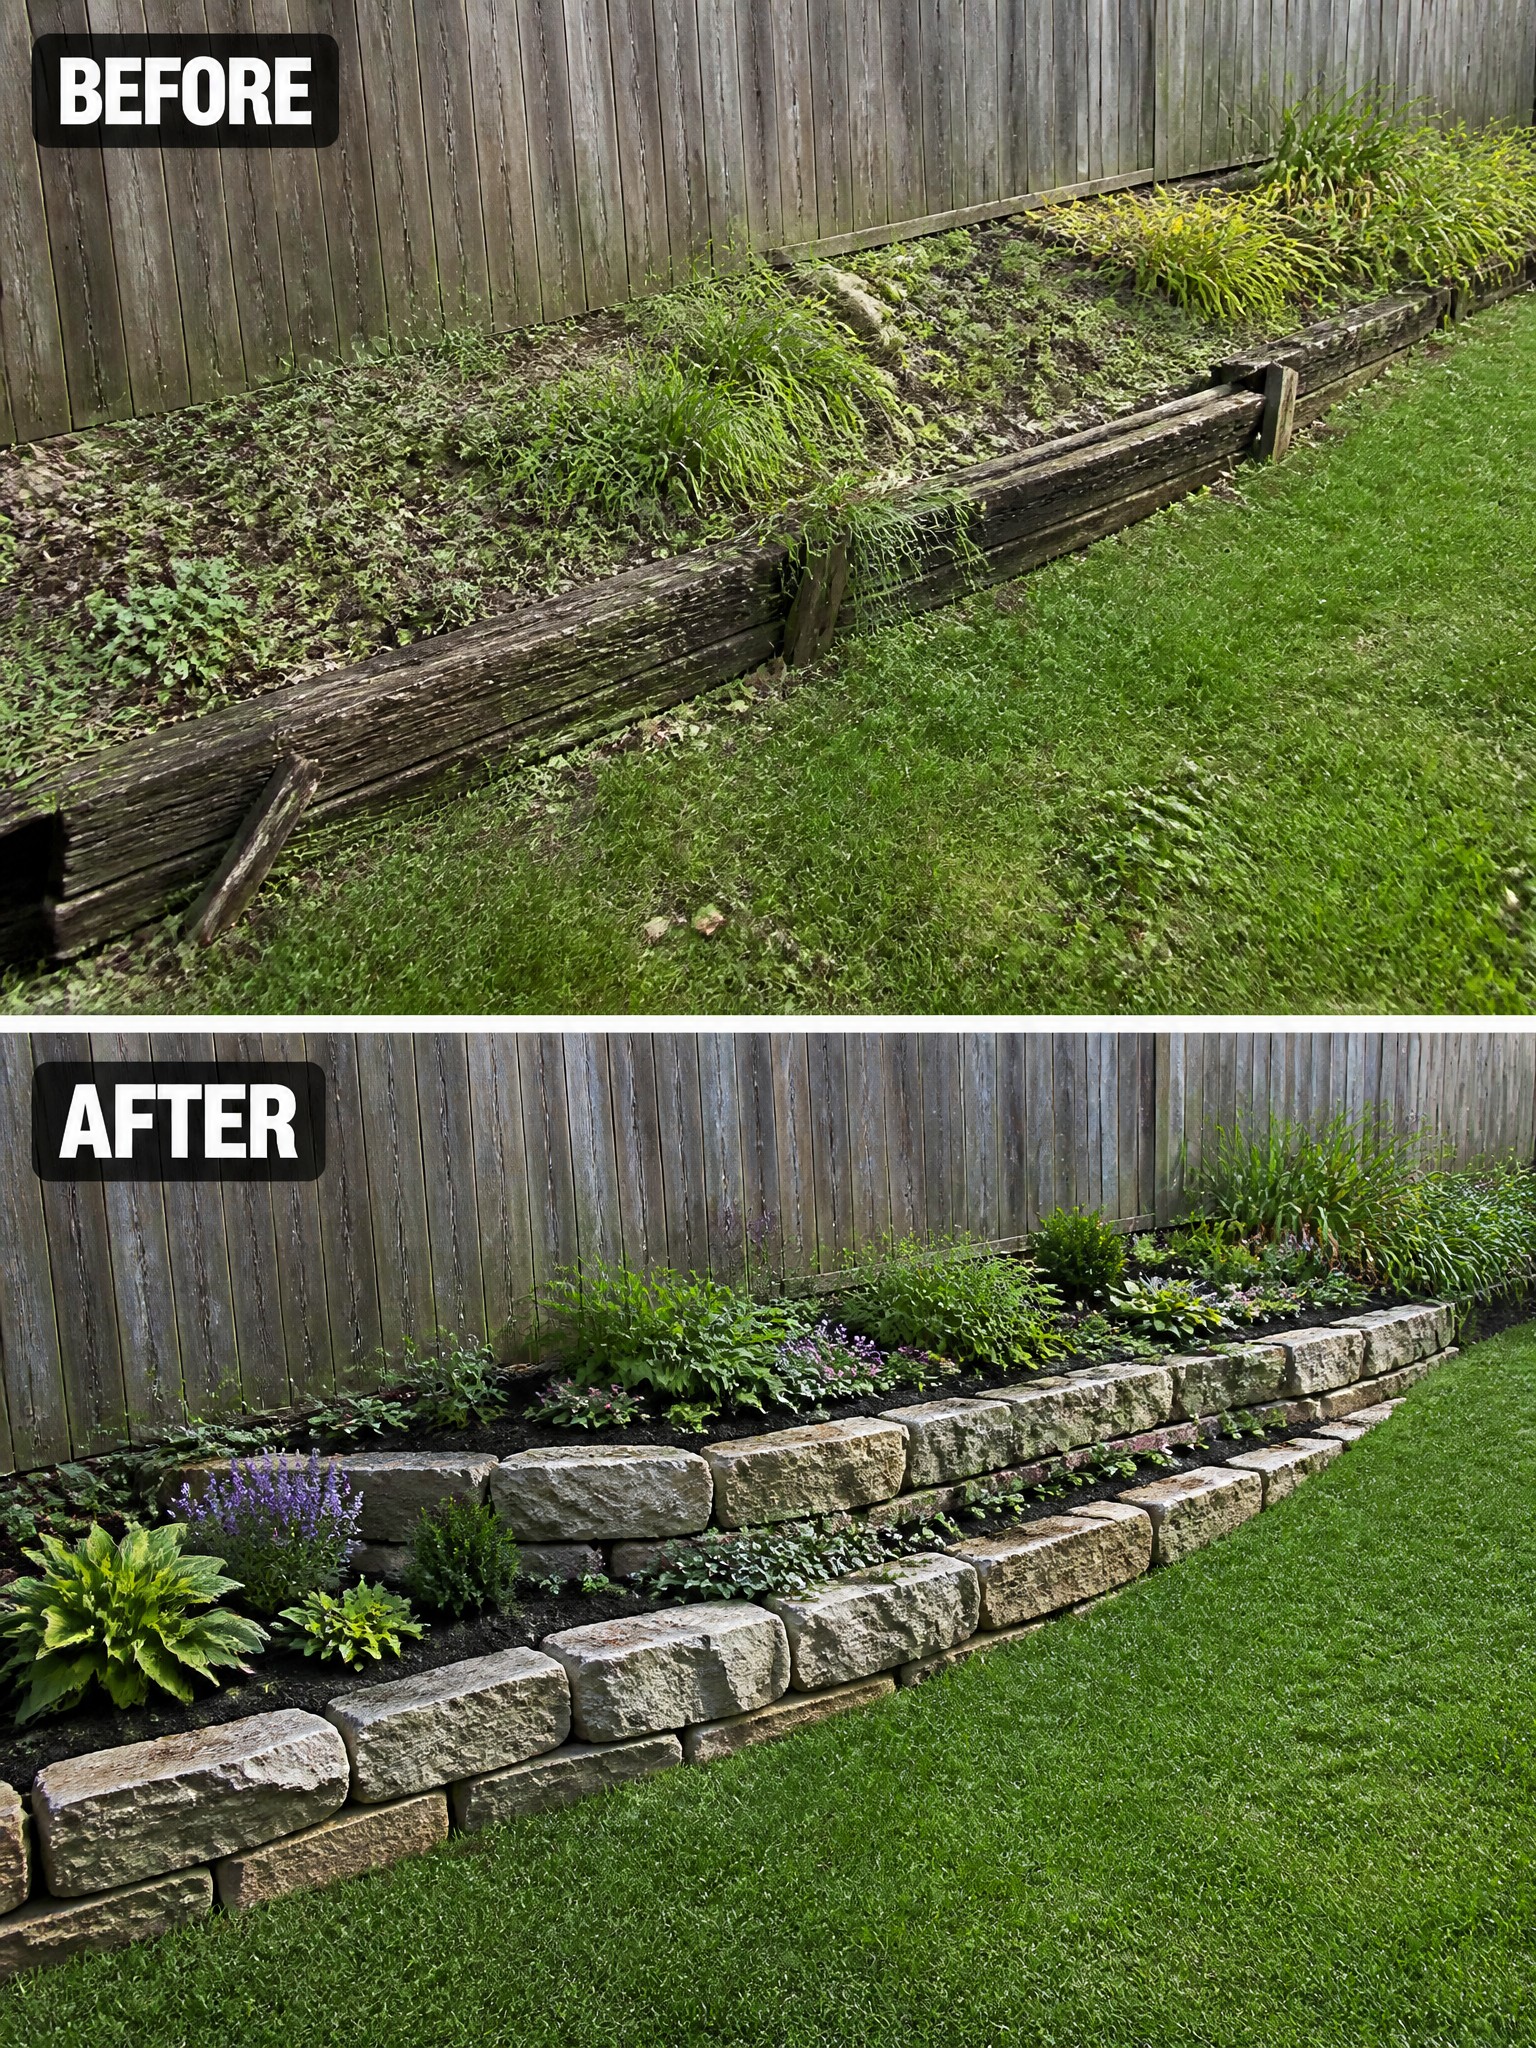
Old wooden borders often rot and shift, leaving the edge between lawn and planting area looking messy. Replacing them with stacked stone creates a solid line that holds the soil in place and gives the whole border a finished shape.
This idea works best along fences or side yards where the goal is to keep the lawn neat without adding complicated features. Remove the old material first, level the ground, then stack the stones in a low wall that follows the curve of your space.
Clean Up Lawn Edges With A Paver Border

A messy lawn edge next to concrete often looks worse than it needs to. Adding a narrow gravel strip and a line of pavers creates a clear break that keeps grass from creeping onto the walkway and gives the whole area a finished look without much cost.
This approach works well along pool decks, driveways, or any hard surface where the lawn meets pavement. Start by cutting a straight line, lay down landscape fabric, add a few inches of gravel, and set the pavers on top. The result stays neat with very little ongoing maintenance.
Define A Fire Pit With Edging And Gravel
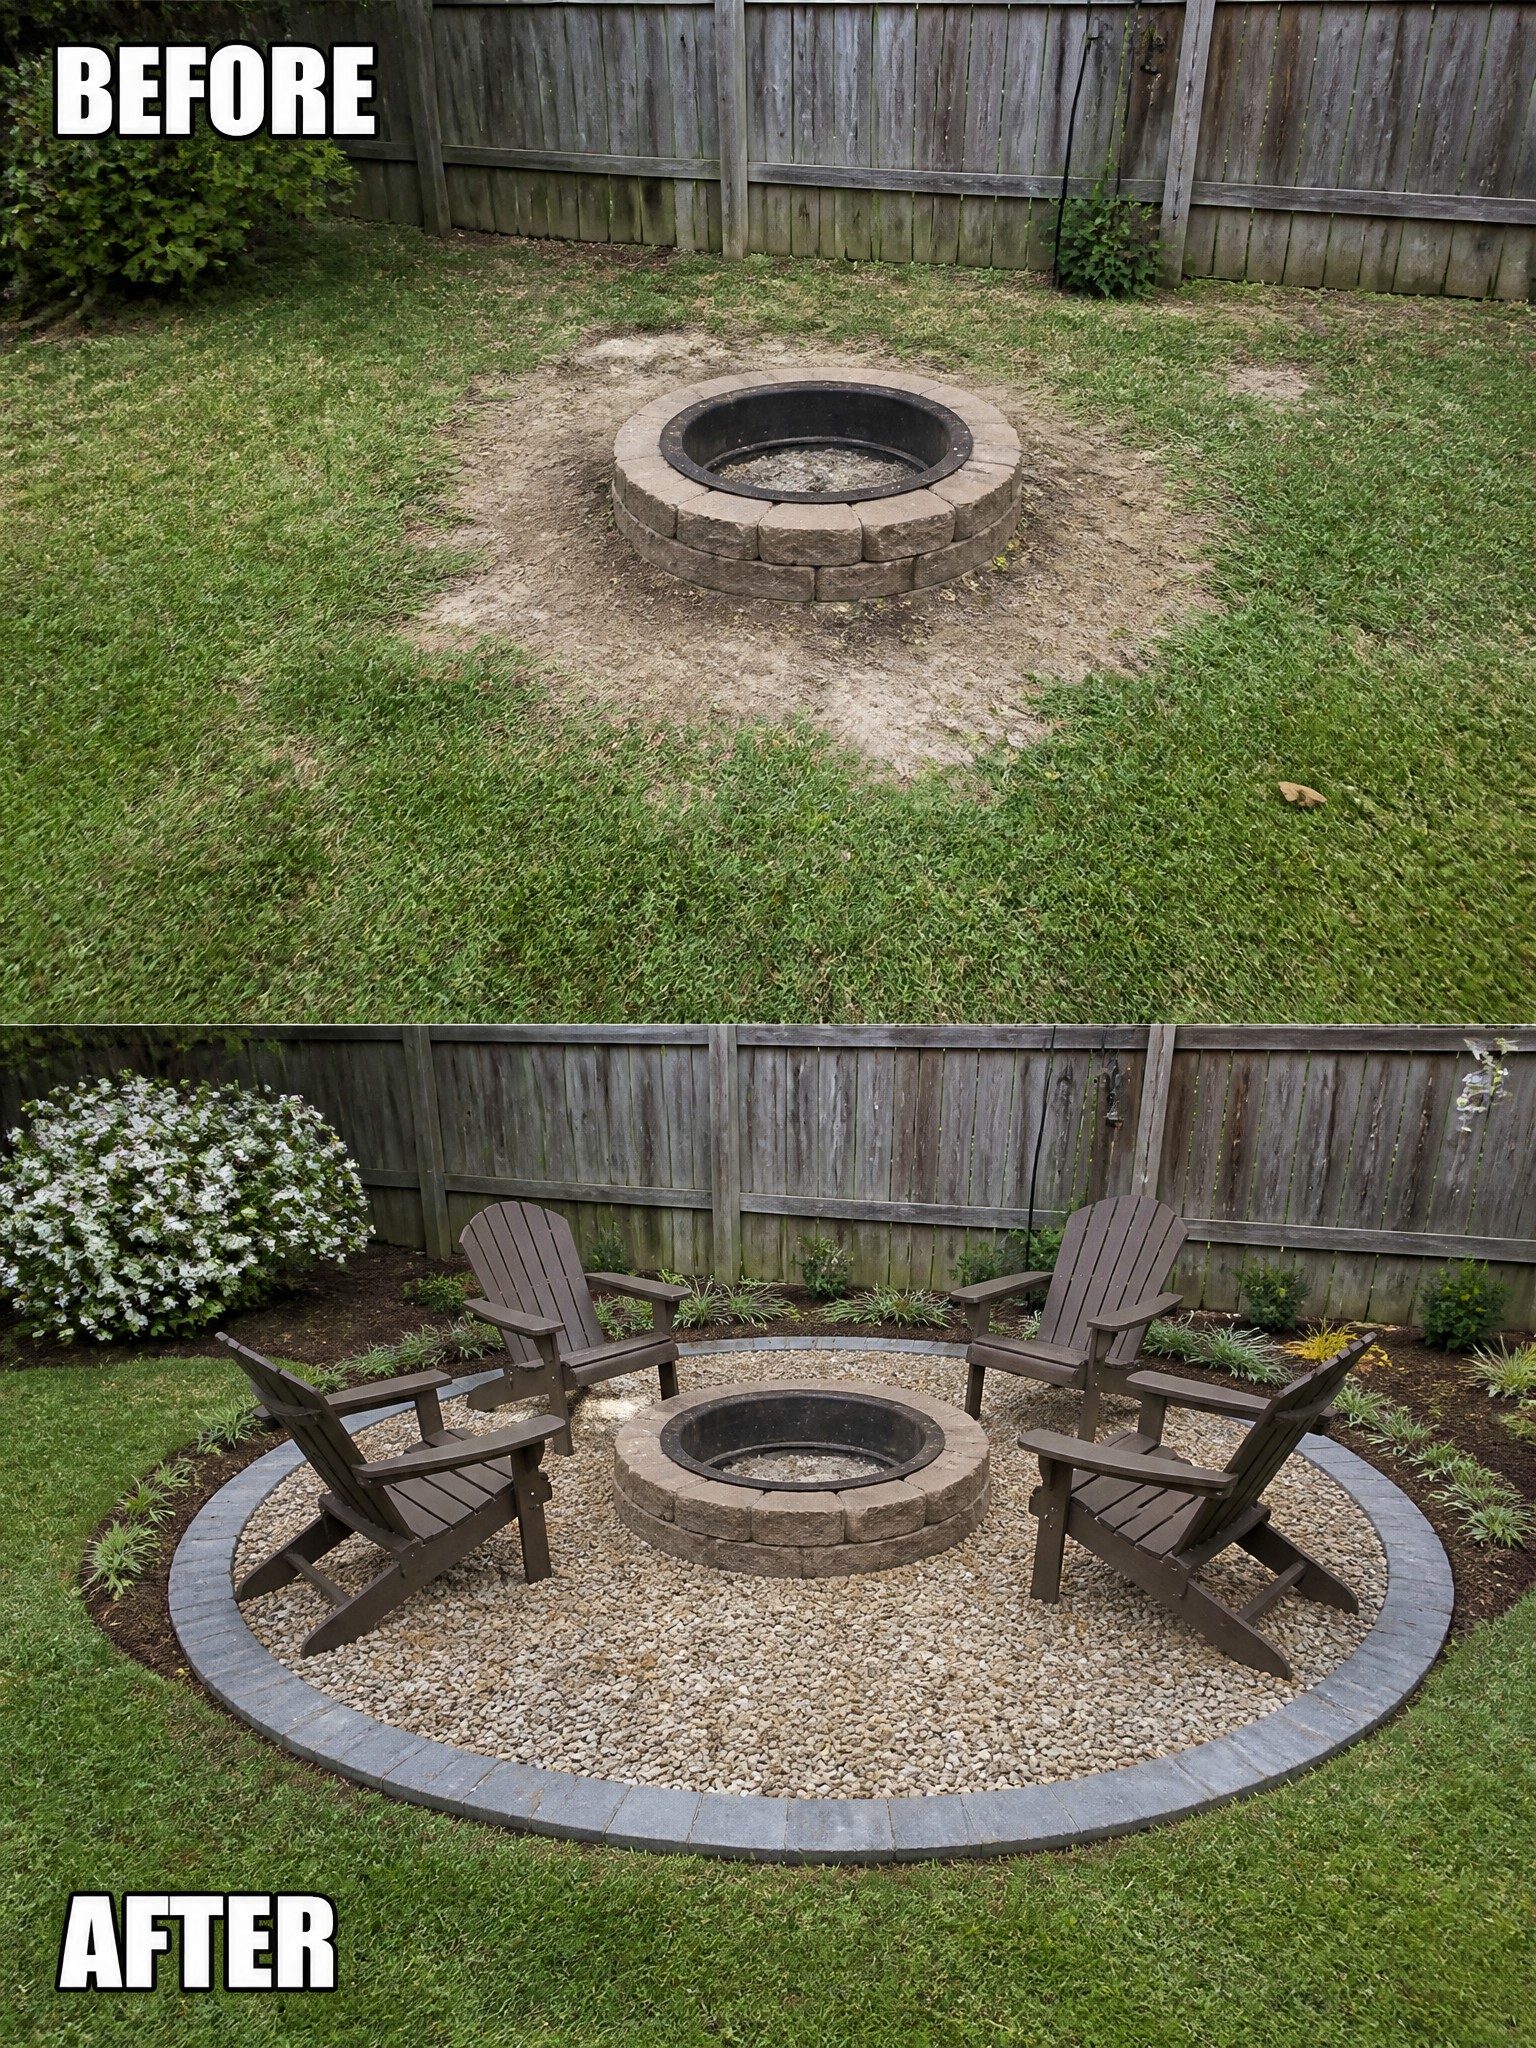
A bare dirt ring around a fire pit can make the whole backyard feel unfinished. Adding a simple stone edge and filling the inside with gravel gives the area a clear shape and keeps the grass from creeping in. The change turns a patchy spot into a spot that actually looks intentional and ready for use.
This works best in smaller backyards where you already have a fire pit but need better structure around it. Start with the edging first so the gravel stays in place, then add a few chairs. It keeps the lawn looking neat without requiring a full redesign.
Add Concrete Edging To Define Garden Beds
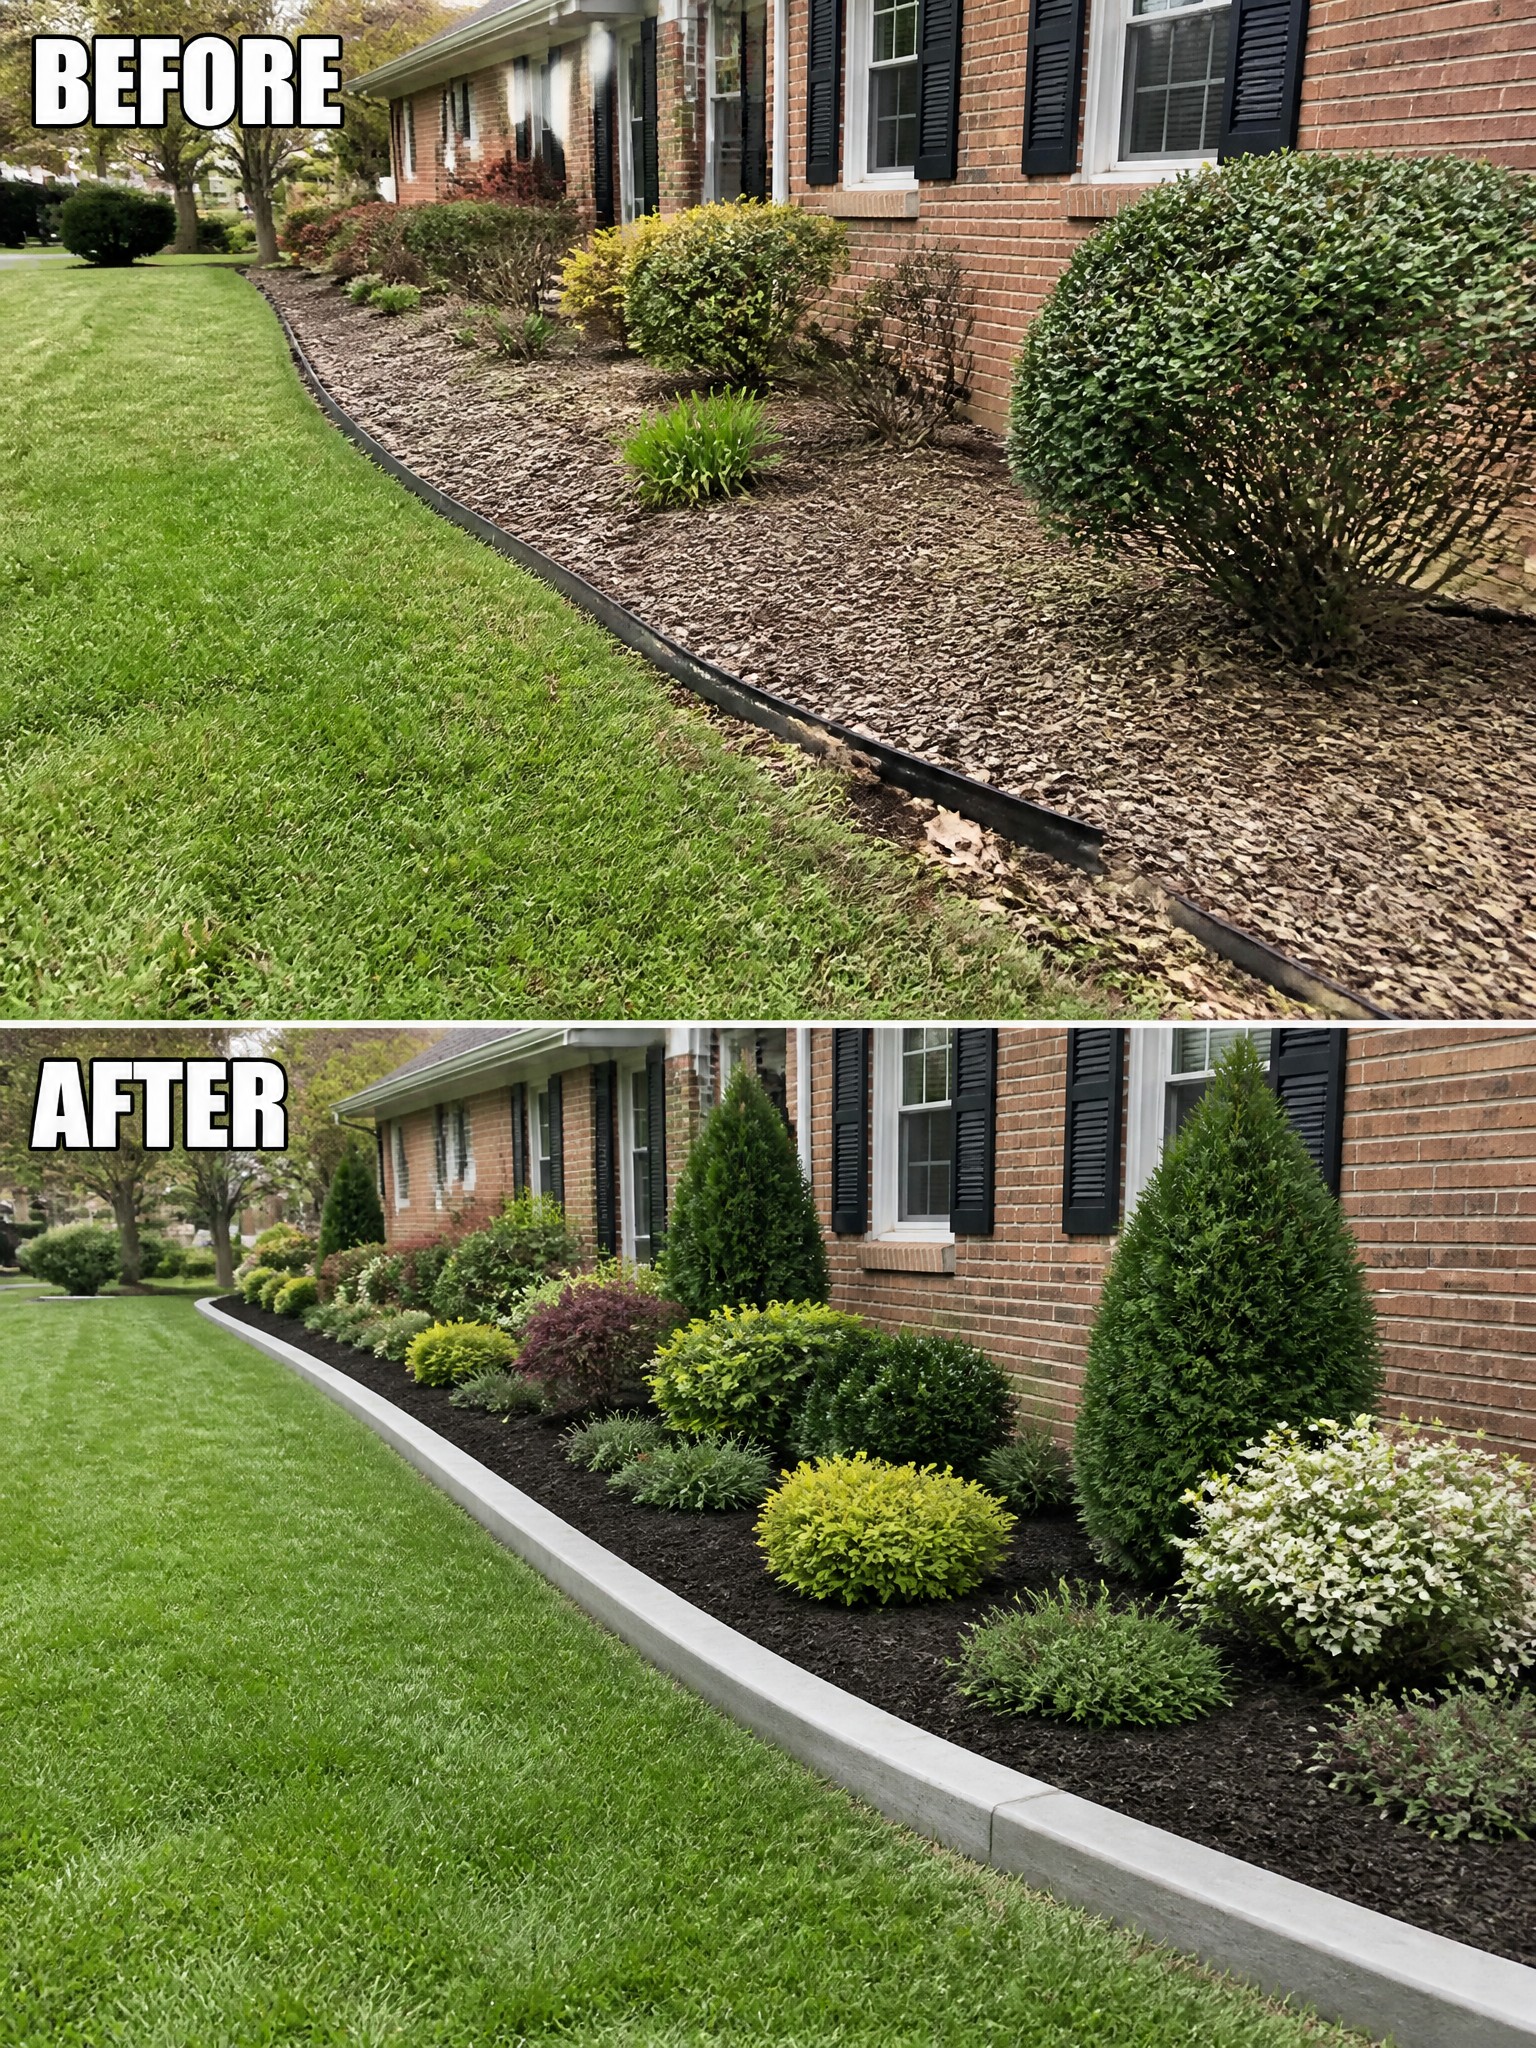
A messy garden bed that runs straight into the lawn often looks neglected even when the plants are fine. The simple addition of a low concrete curb creates a clear separation, holds the mulch in place, and gives the whole front a finished appearance without changing every plant.
This approach works best along the front of a house where the lawn curves around planting areas. Lay the edging first, then refresh the mulch inside the new border. Keep the bed width consistent so mowing stays easy and the line stays visible from the street.
Define Lawn Borders With Gravel And Planting
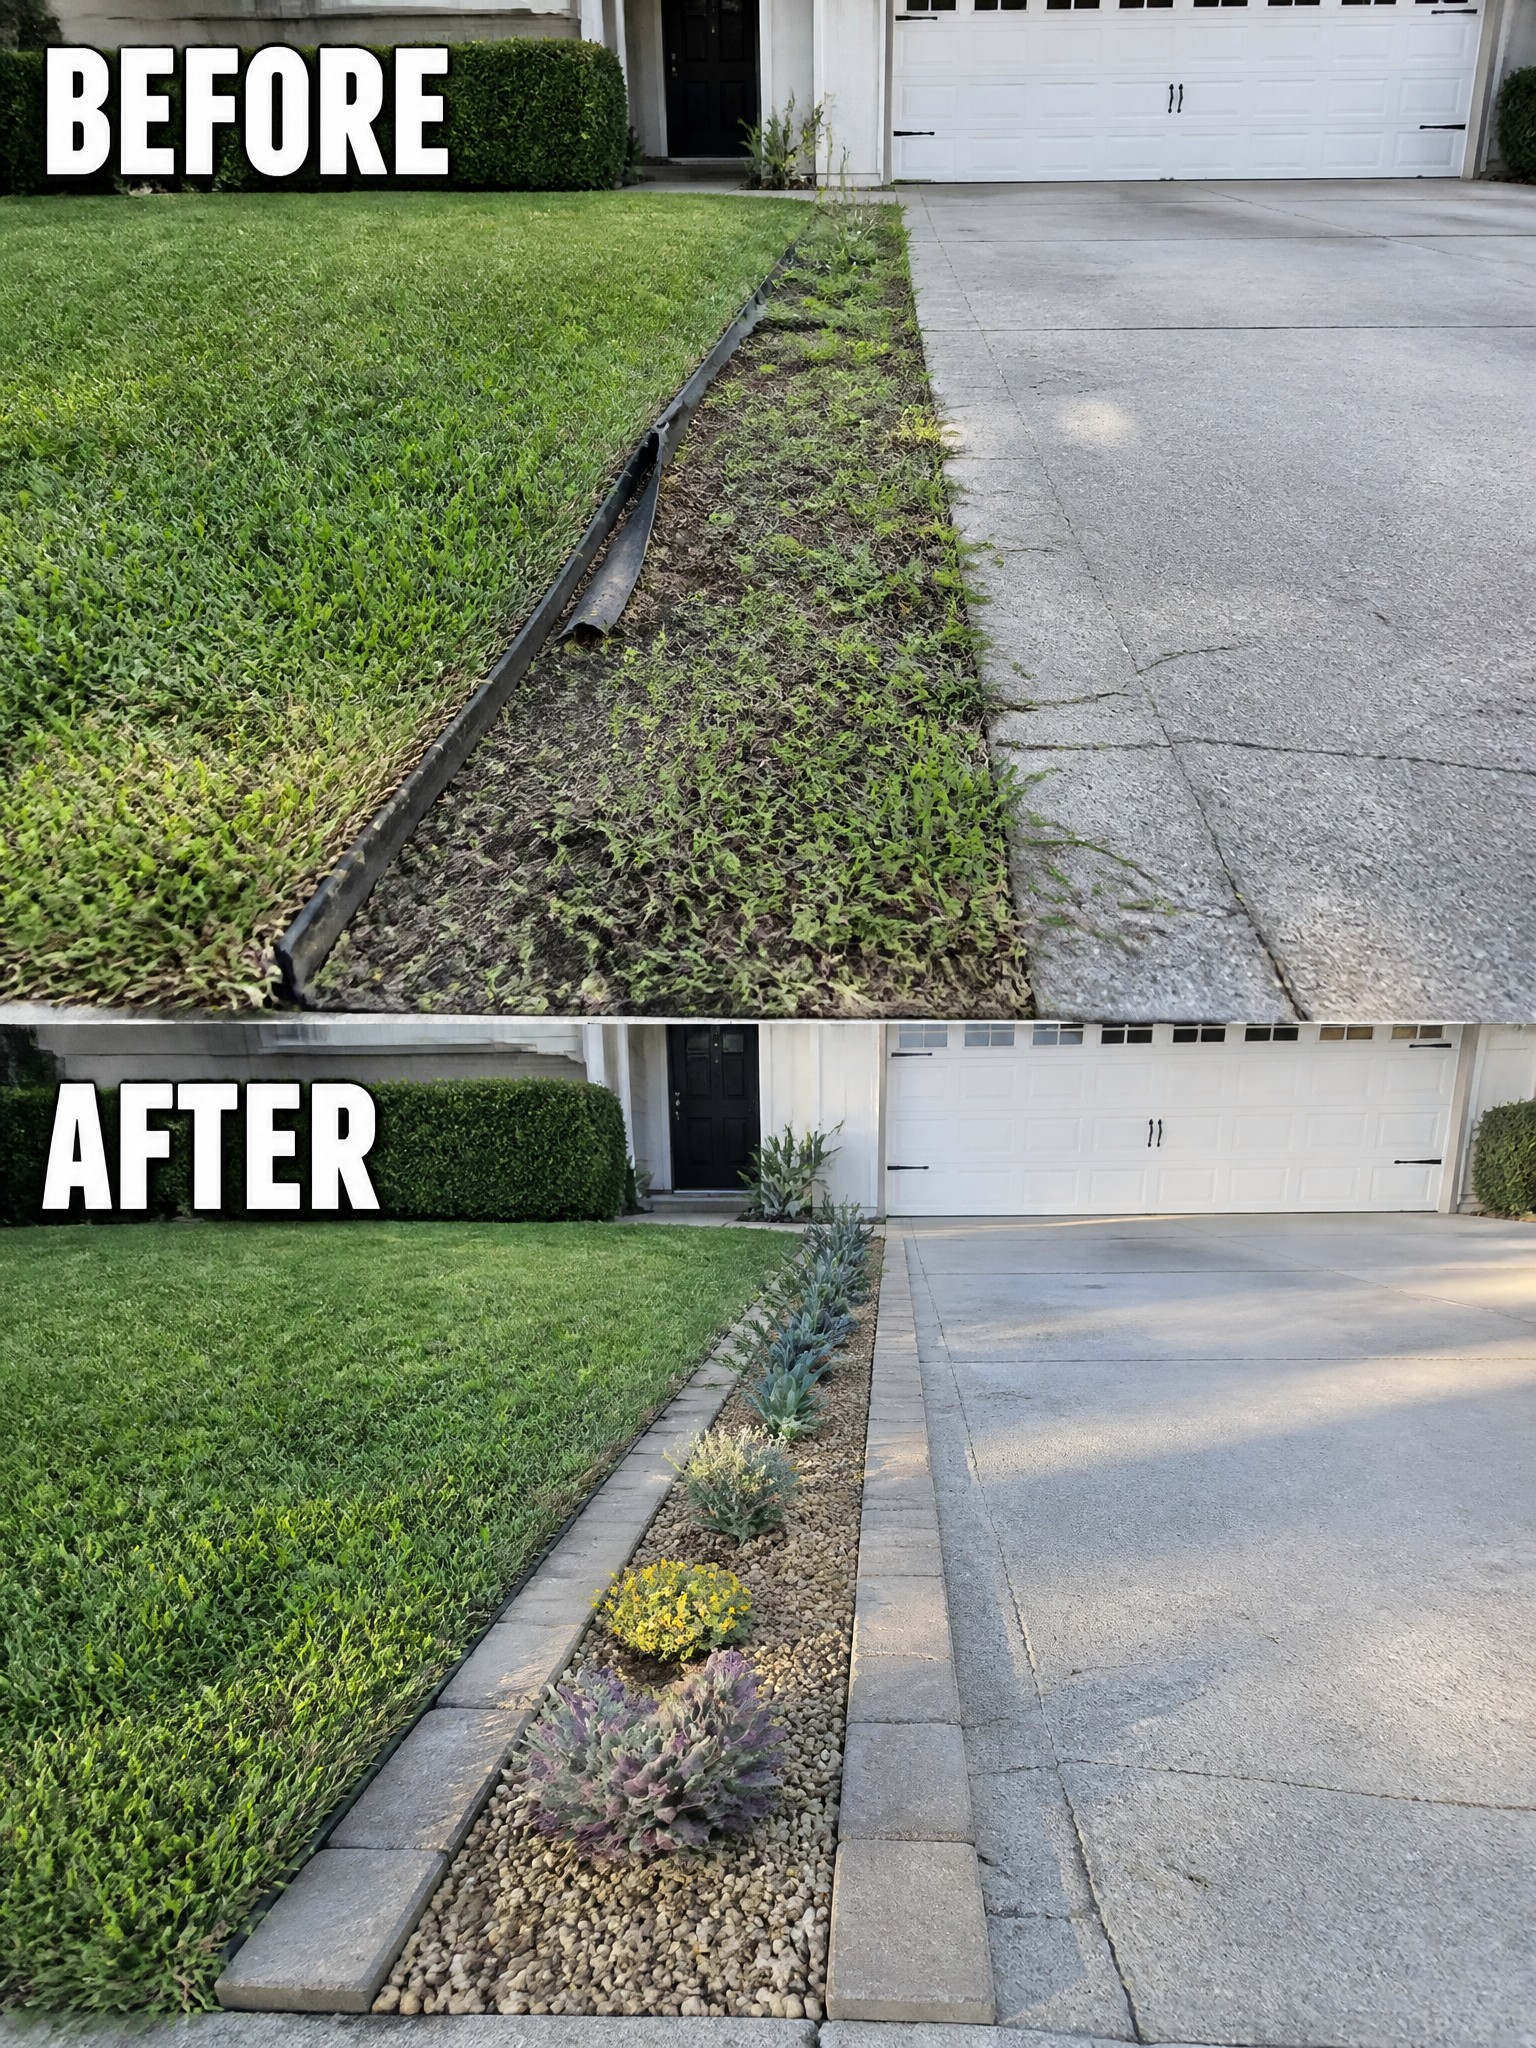
A ragged lawn edge next to a driveway often looks messy even when the grass itself is healthy. Adding a low stone border, filling the strip with gravel, and planting a few compact shrubs and flowers turns that thin strip of dirt into a clear, finished border. The result is a much neater line that separates the lawn from the concrete without needing constant trimming.
This approach works well along driveways or sidewalks where grass tends to creep or thin out. Start with a simple edging material that matches your house style, then choose low-water plants that stay under a foot or two tall so they do not block the walkway. The gravel keeps the bed looking tidy between seasons and cuts down on weeding.
Add Structure To An Overgrown Backyard
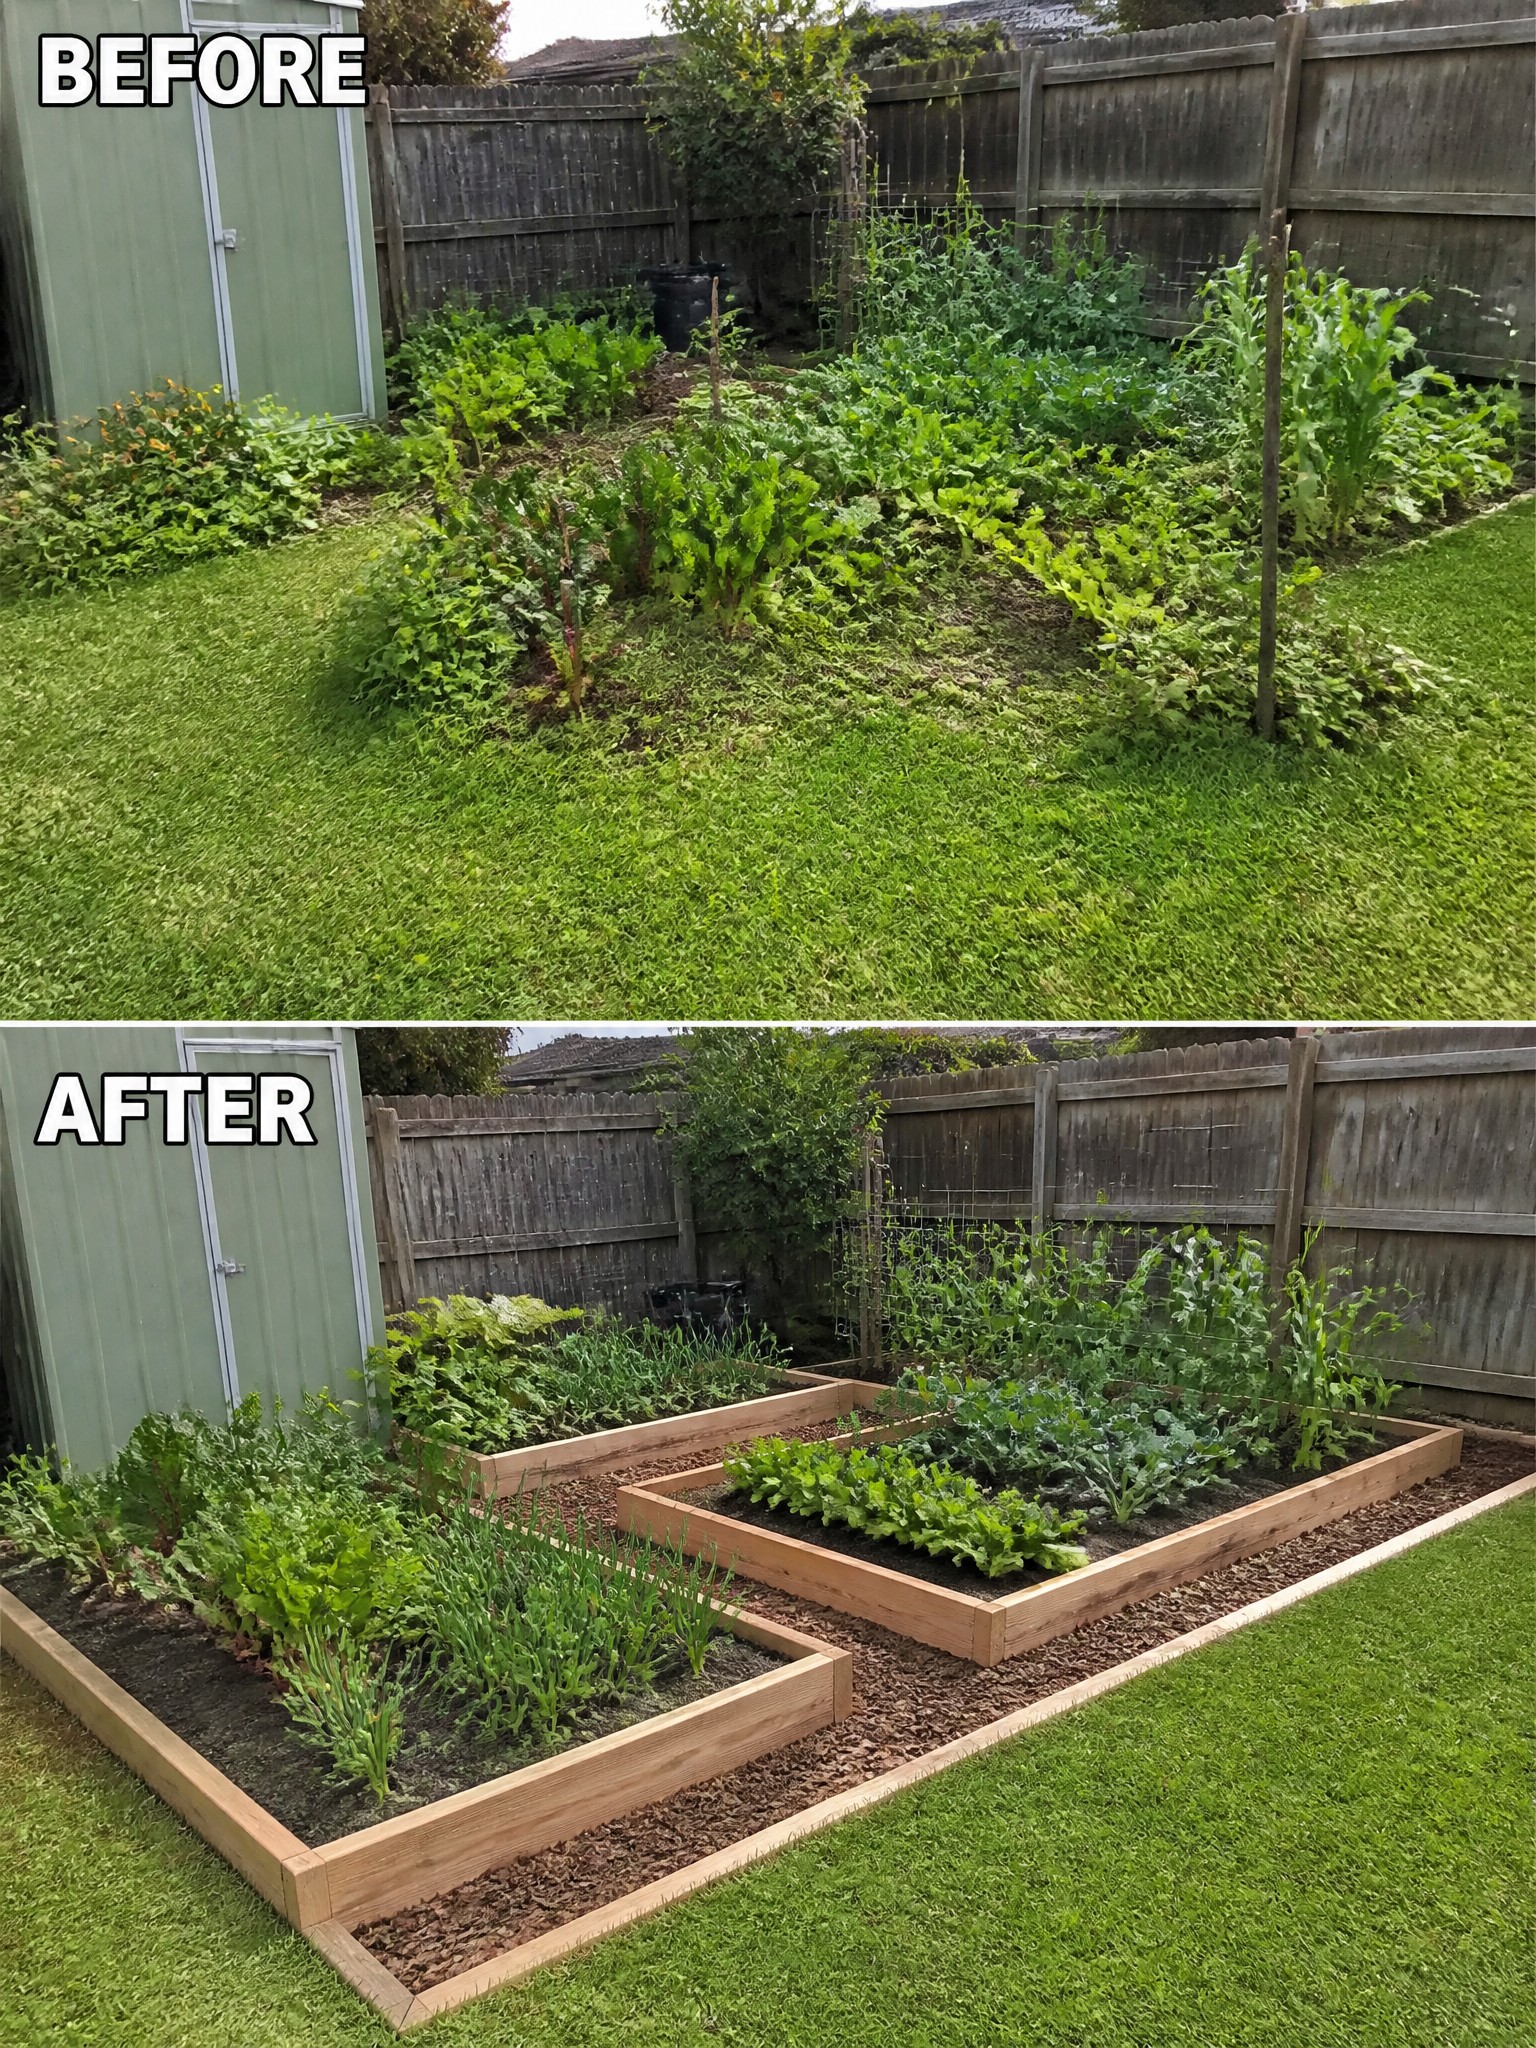
One of the simplest ways to fix a messy garden is to give it clear edges first. The before photo shows plants spilling out in every direction with no real shape. The after shows how raised wooden beds and mulch create separate growing zones and leave the lawn looking much cleaner.
This approach suits small backyards where you still want room to walk around. Keep the beds a size you can reach across and leave decent paths between them. Mulch helps control weeds, and the wood gives the whole area a finished look without needing fancy materials.
Define Your Lawn Edge With A Simple Border
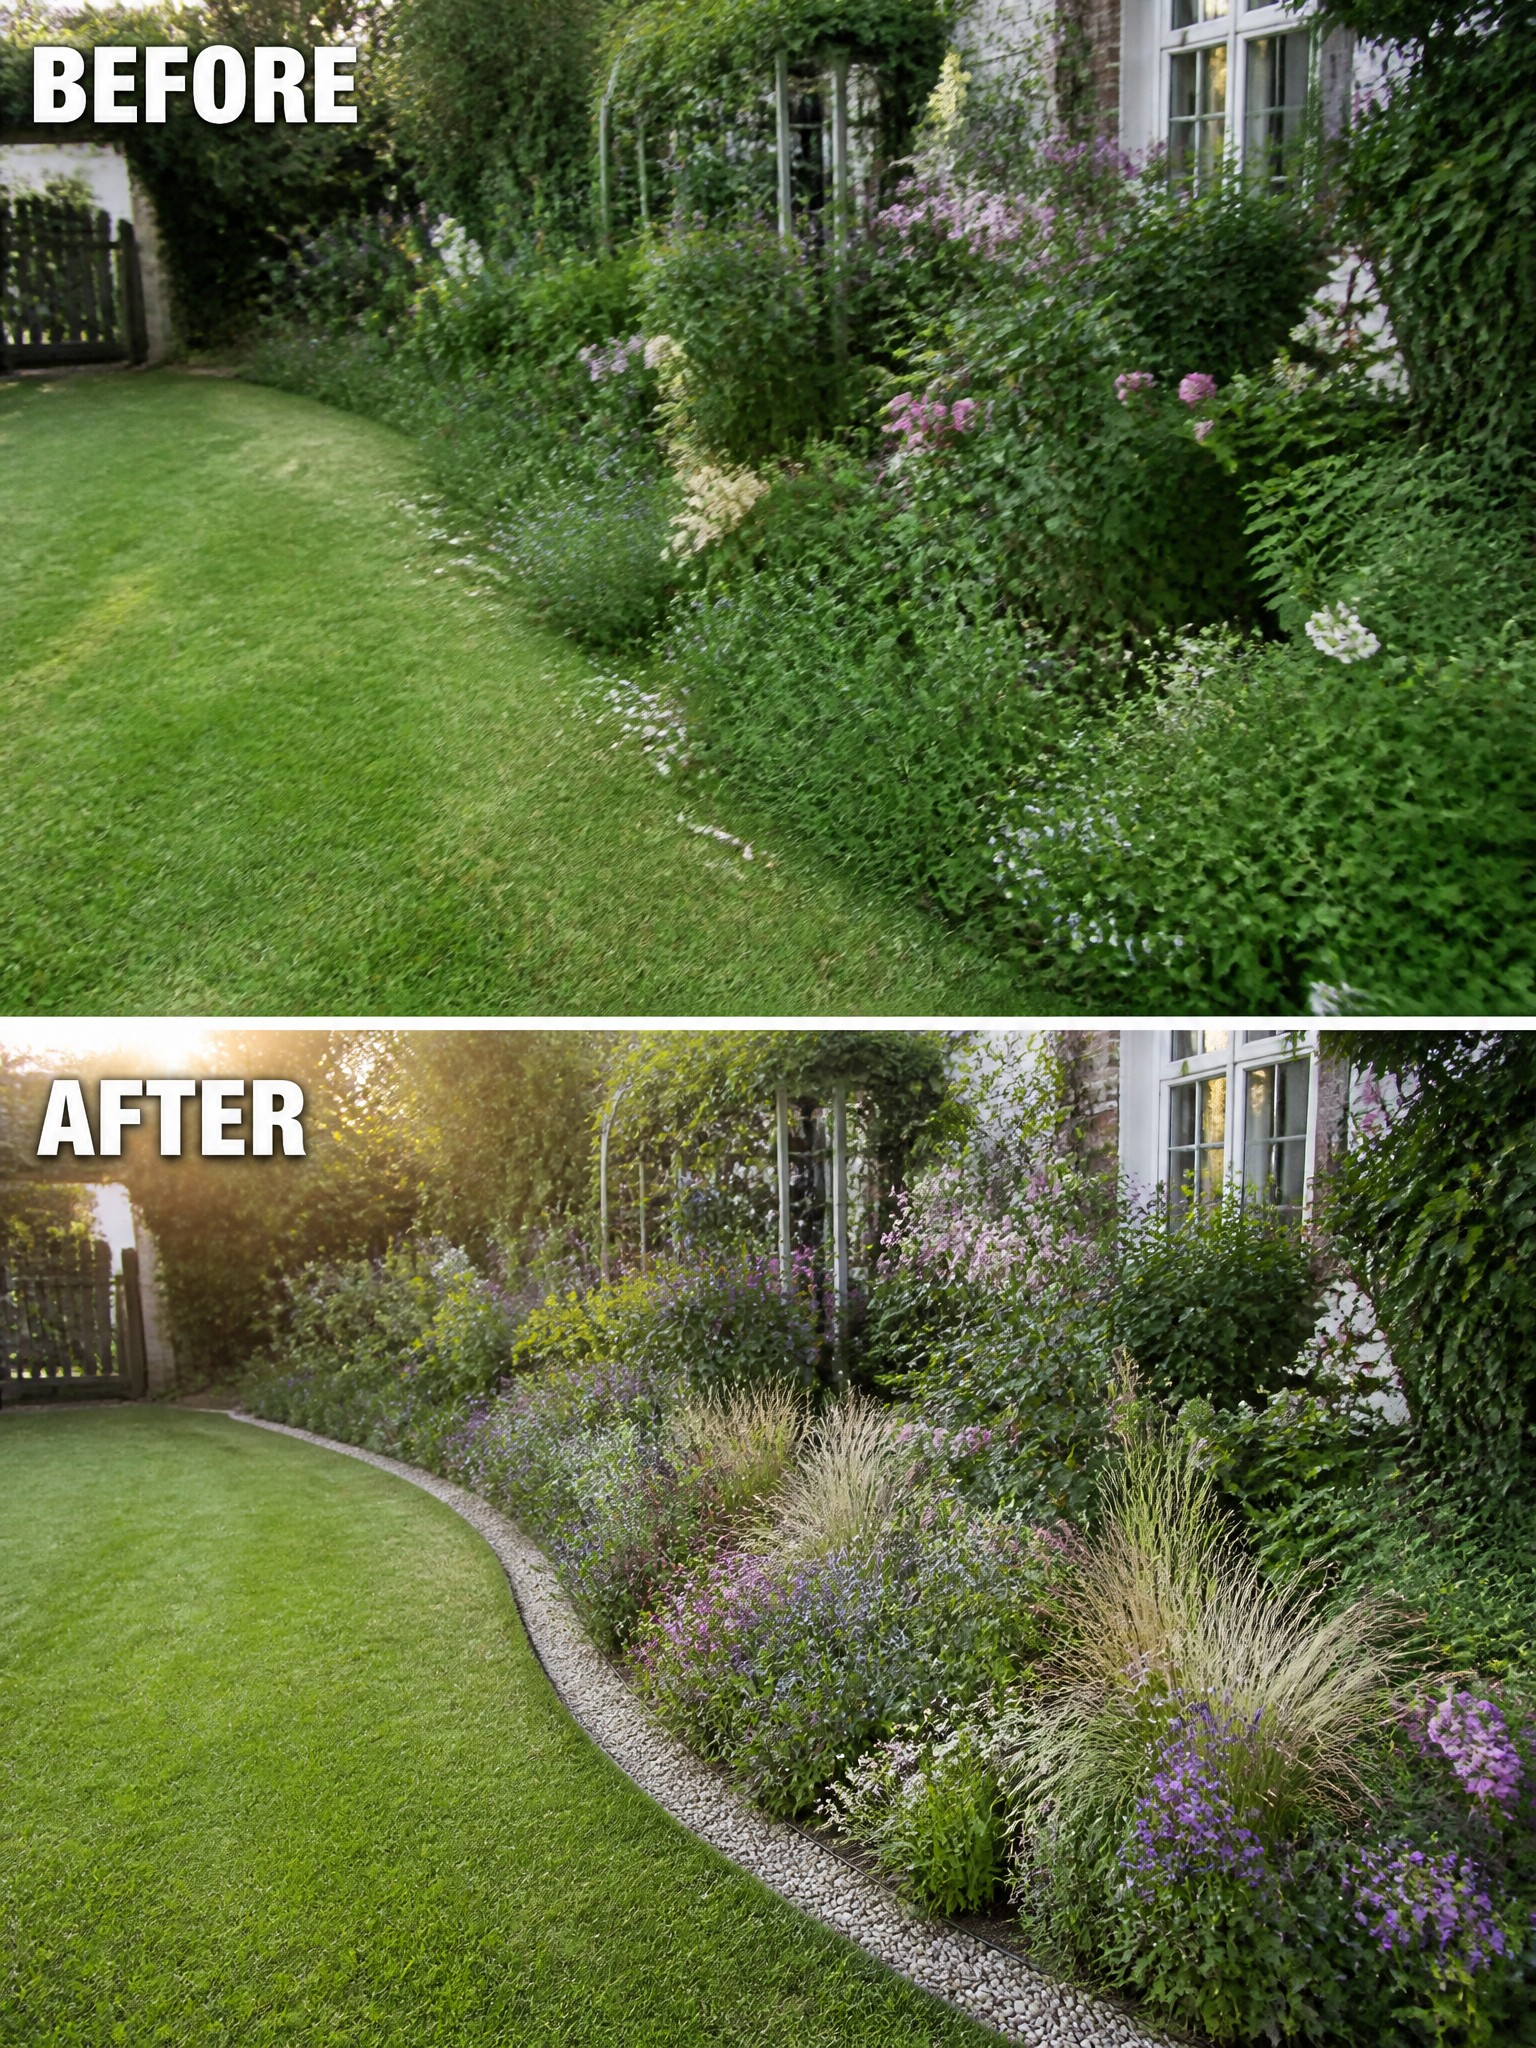
The main improvement here is the clean stone edge that separates the lawn from the planting bed. Before, the grass ran straight into the plants with no clear line, which made the whole side of the yard look messy. Adding the border gave the lawn a tidy finish and let the garden bed keep its own shape.
This works on most properties where the lawn meets flower beds. Cut a clean curve first, then lay gravel or stone along the line before you add or rearrange plants. The edge keeps grass from creeping into the bed and makes mowing much simpler.
Define Lawn Borders With Simple Edging
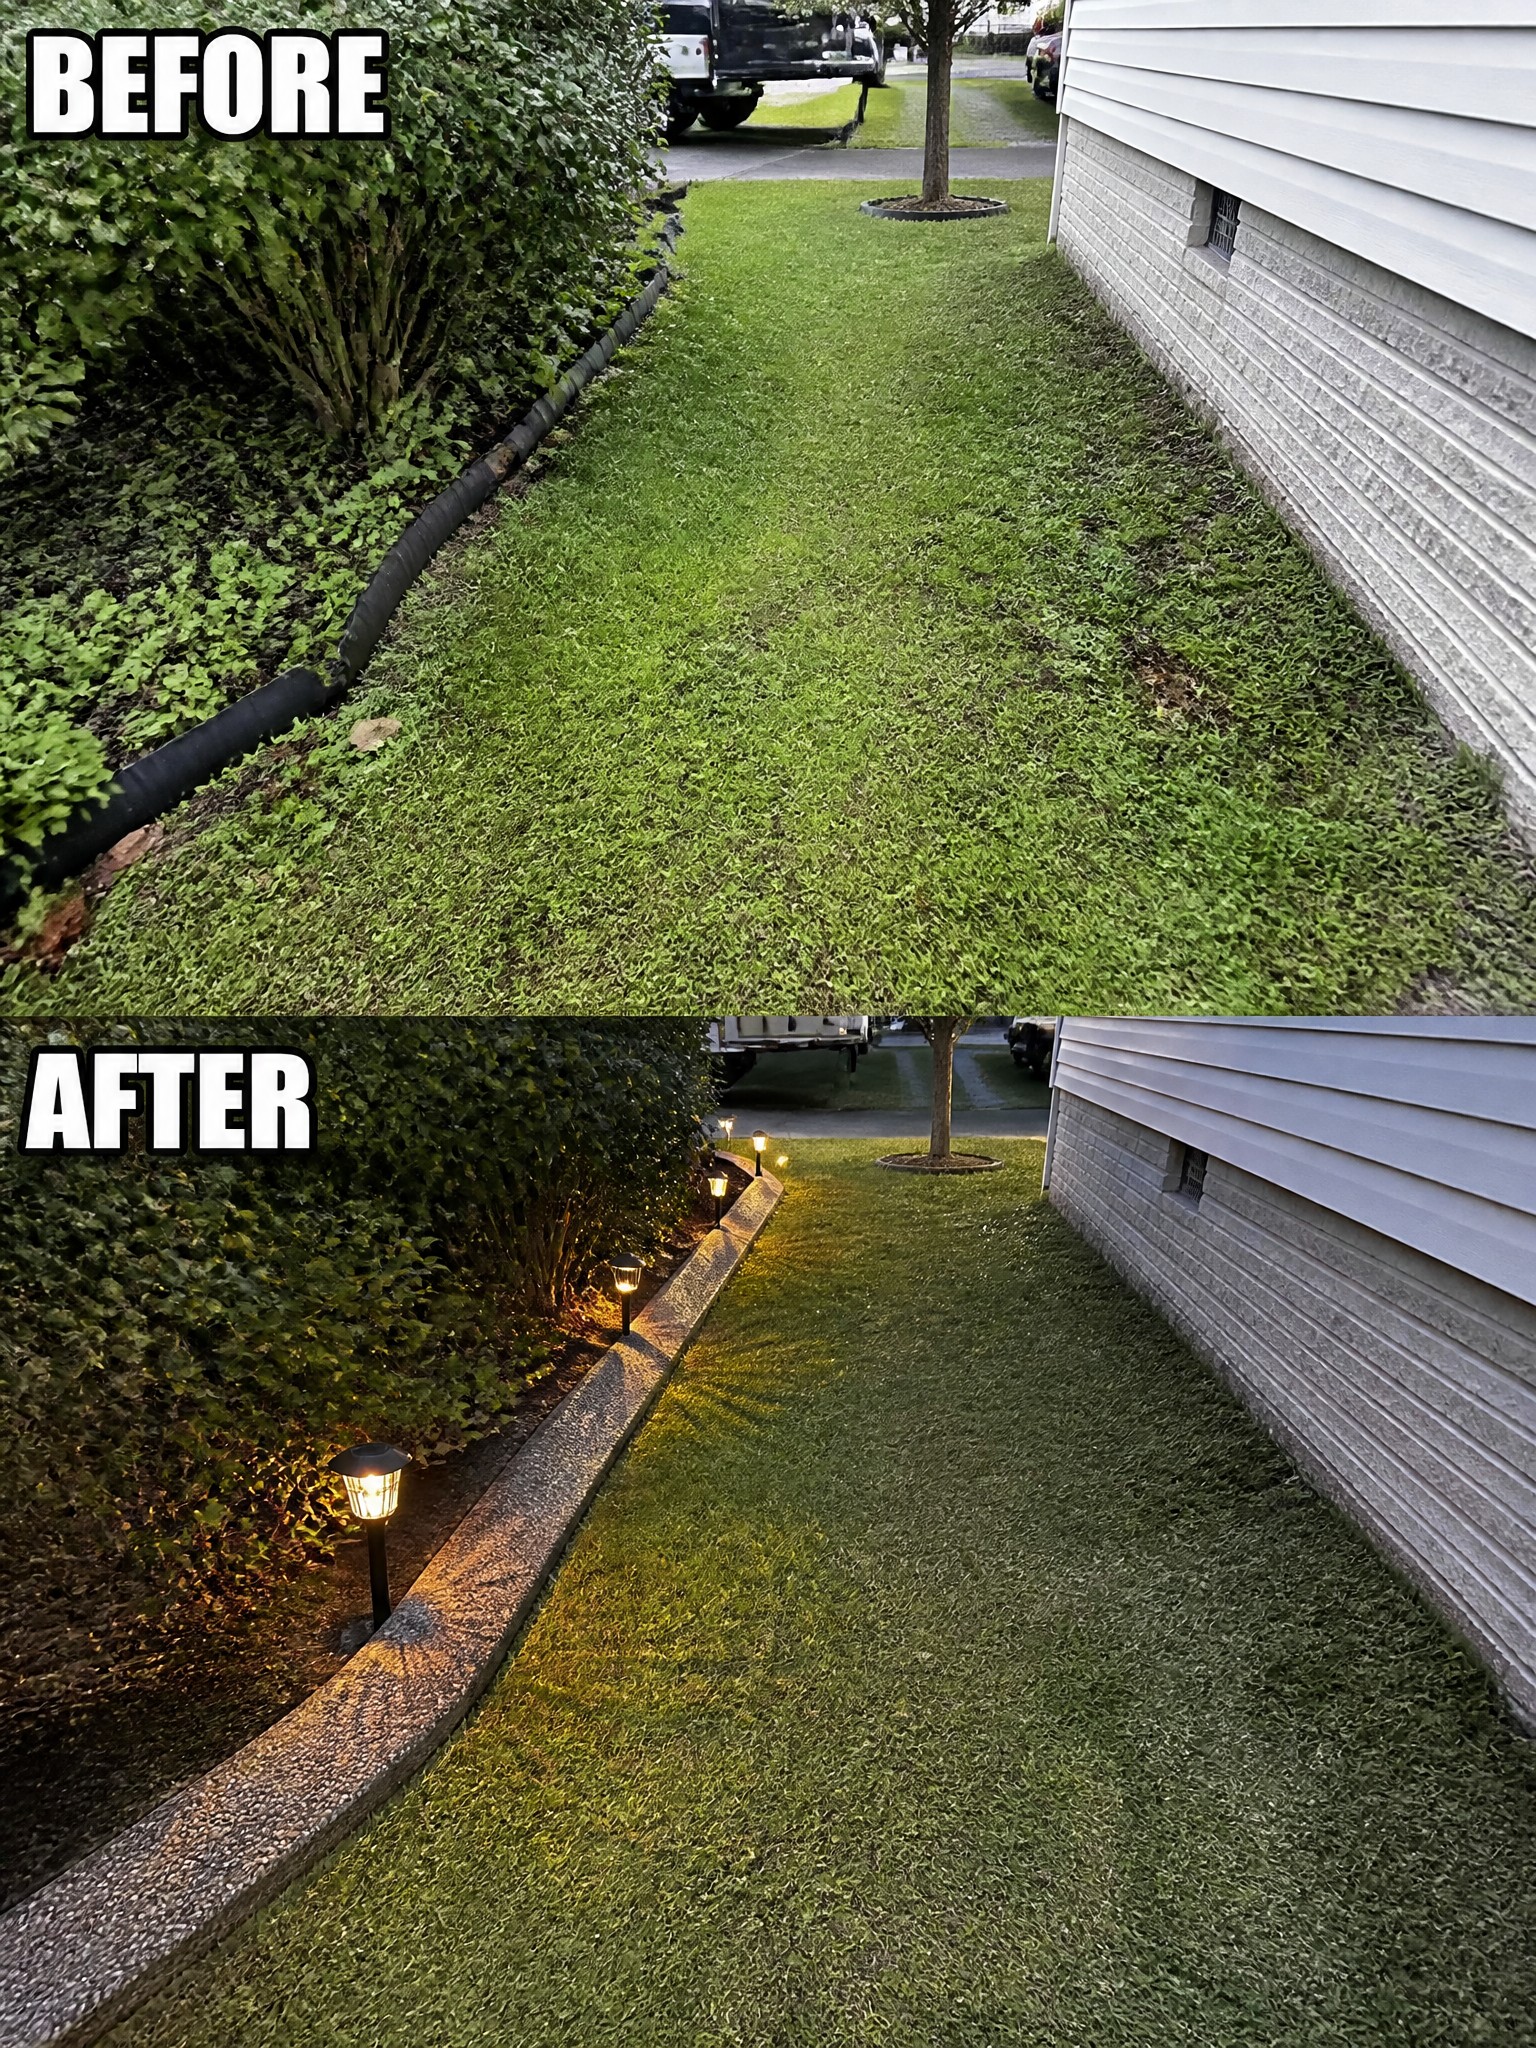
A messy lawn edge makes the whole yard look unfinished, even when the grass is mowed. In the before photo the border was held by a loose black material that blended into the ground. The after shows a solid stone edge that runs cleanly along the bed and holds the mulch in place. Adding a few lights along that edge gives the border purpose at night without needing much else.
This approach works well along foundation plantings or side yards where the lawn meets a garden bed. Start by removing old edging and cutting a straight line before installing new material. Solar lights keep the cost low and avoid running wires. The same idea suits any home with a long, narrow strip of lawn that needs a little structure.
Add Edging To Give The Lawn A Neat Finish

A clean edge makes a big difference when the grass has been allowed to spill over the path. The before photo shows the lawn growing right up to the concrete with no real separation. Adding a low stone border and a narrow planted strip creates a clear line that keeps the grass contained and the whole area looking tidy.
This idea works best along walkways or foundation beds where the lawn tends to creep. Choose edging that matches your existing hardscaping, then keep the new bed simple with a row of flowers or ground cover. It prevents the grass from spreading and makes mowing easier without needing a big redesign.
Use Retaining Blocks To Shape Sloped Lawn Edges
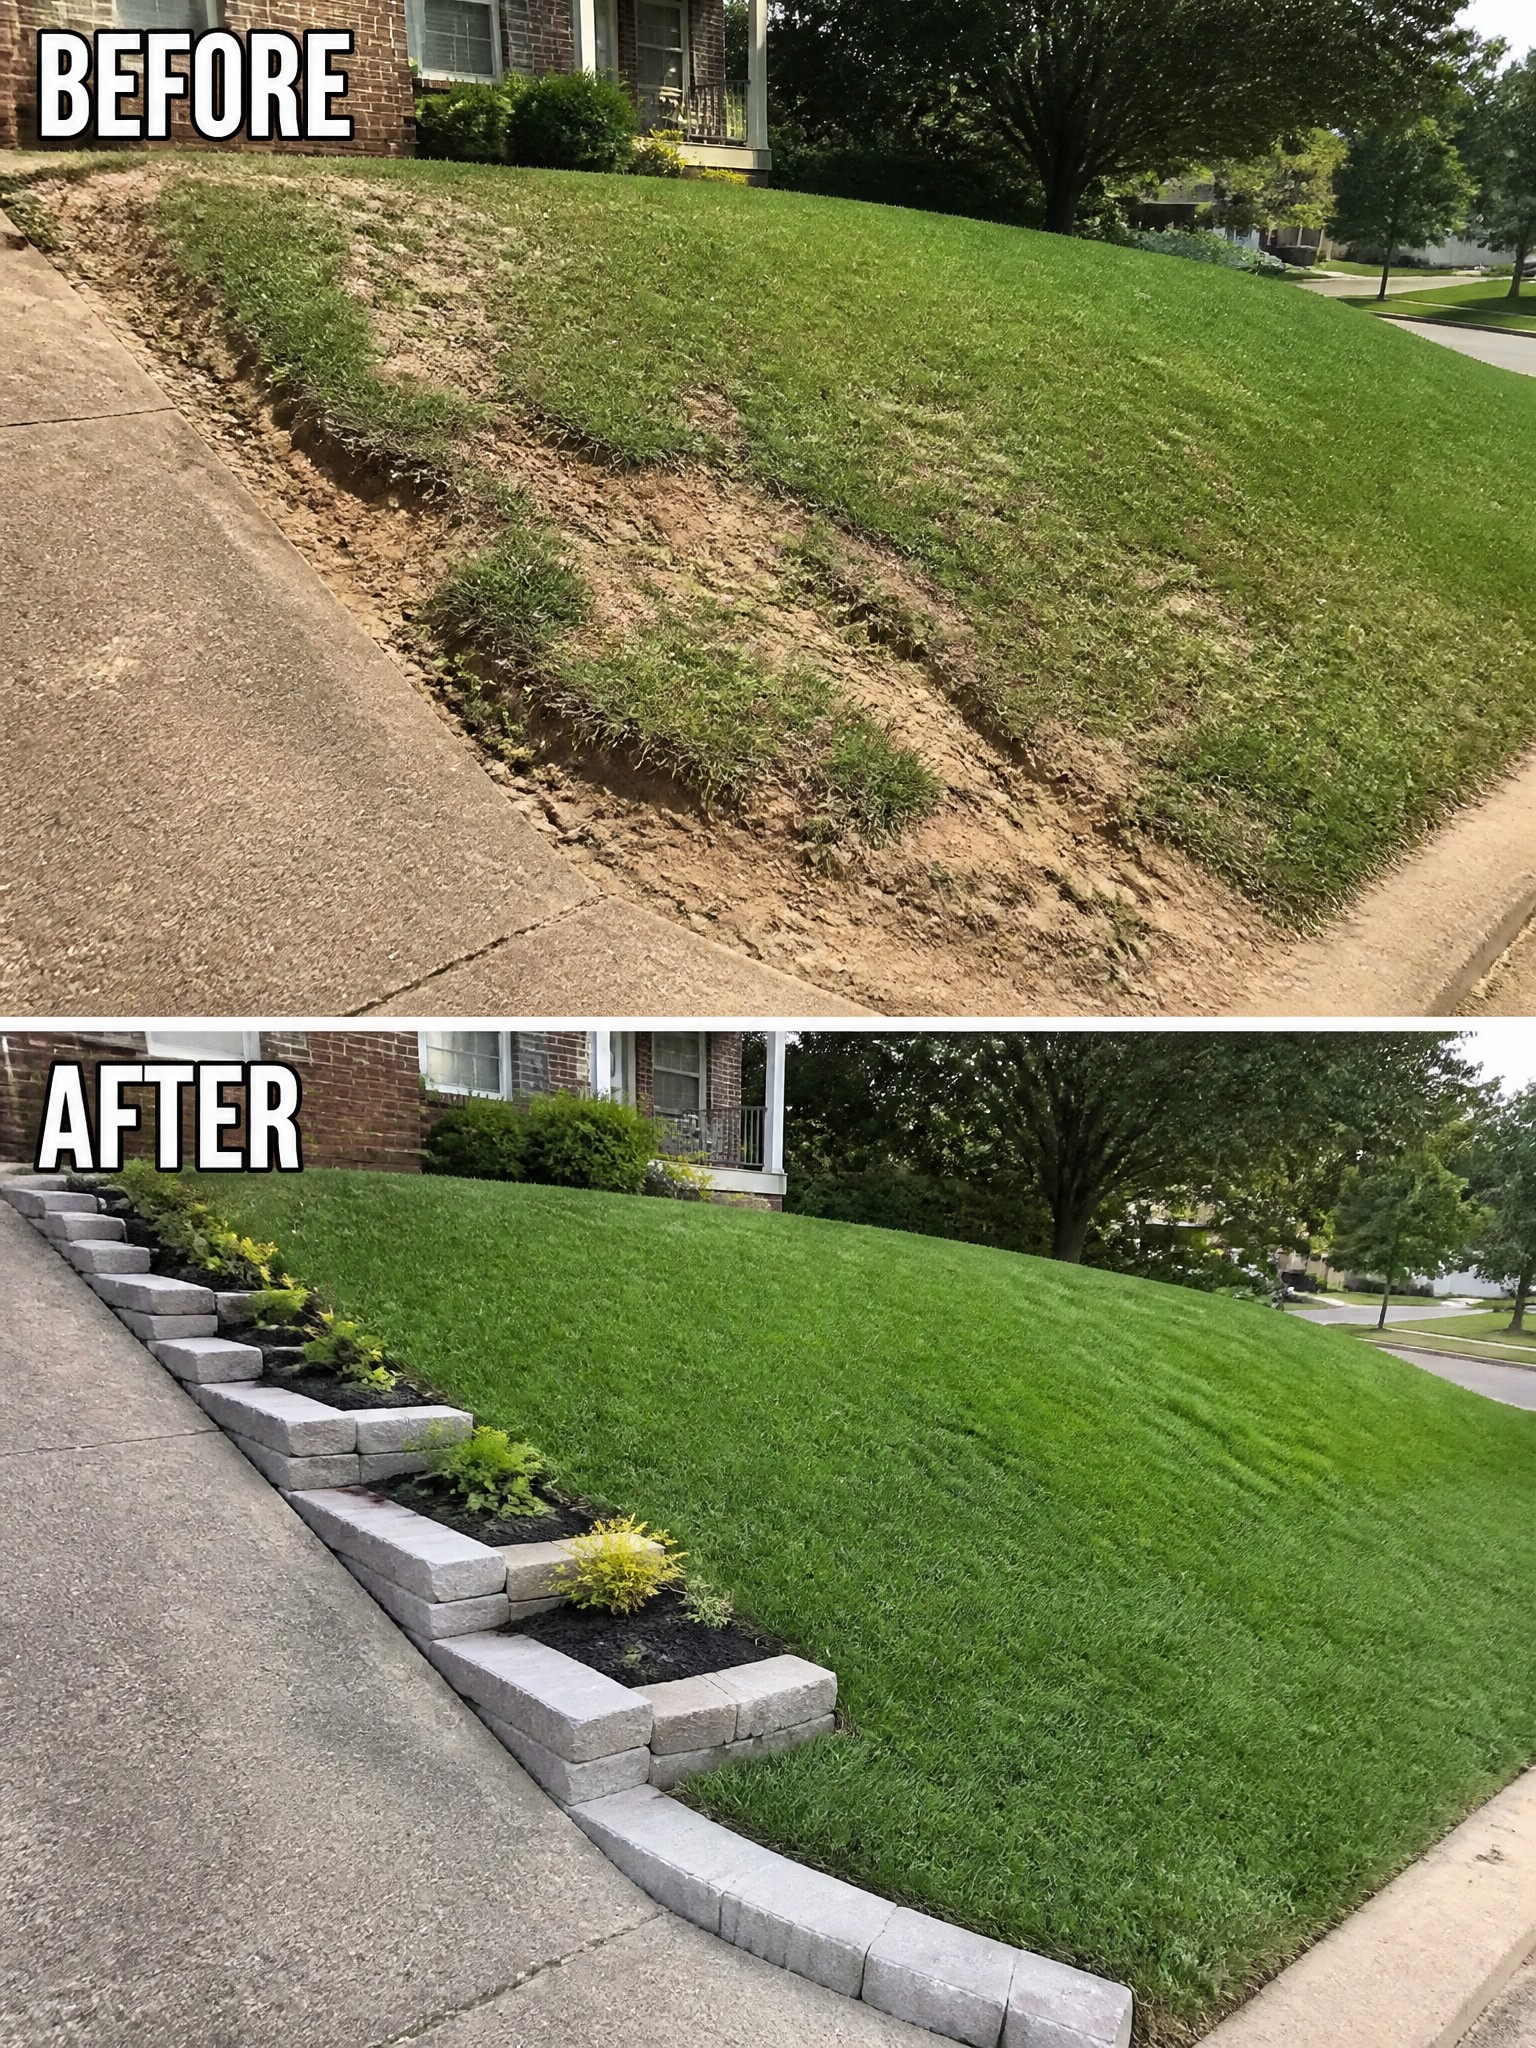
The before photo shows a lawn edge that has washed away along the sidewalk, leaving bare dirt and patchy grass. Stacked blocks now hold the soil in place and create small planting beds that give the slope a much cleaner line.
This works best on properties where the lawn drops toward a walkway or driveway. Pick blocks that are easy to stack without mortar, keep the beds narrow so they do not eat into the grass, and fill them with low plants that can handle the slope.
Frequently Asked Questions
Q: Can I really edge my lawn without buying special tools or kits?
A: Grab a flat spade from the shed and follow the curve of a garden hose laid out as your guide. Cut straight down about four inches and pull the sod away in strips. This gives clean lines that last through the season if you touch them up once a month.
Q: What works best for holding the edge on a sloped yard without spending much?
A: Pound cheap wooden stakes along the low side and pack soil behind them to create a small terrace. The slope stays put and water runs off instead of washing the edge out. Check it after heavy rain the first year and add a bit more soil where it settles.
Q: How do I stop grass from creeping back over my new edging so fast?
A: Keep the cut line slightly deeper on the lawn side and pull any runners by hand before they root. Mulch or gravel right up to the edge also blocks light so fewer shoots start. One quick pass with the spade every other weekend keeps it tidy.
Q: Is there a simple way to make straight lines look polished on a budget?
A: Stretch a string between two stakes and cut right along it for the first pass. Then go back with the spade to square the sides so the edge casts a sharp shadow. The whole job takes an afternoon and looks like you hired it out.
