

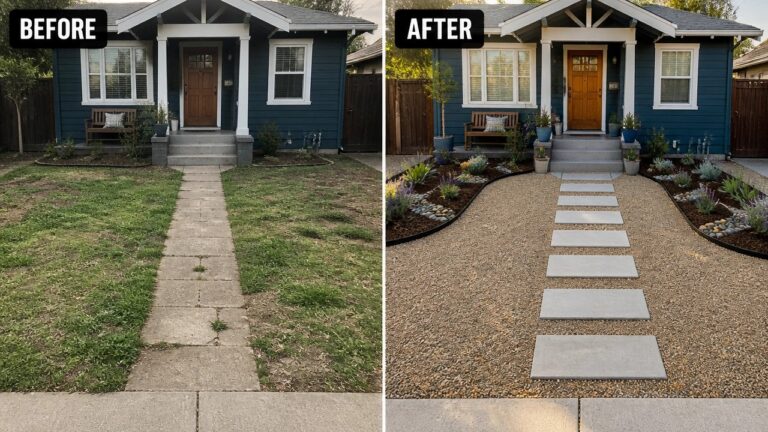
Gardens tend to feel unfinished when the borders blend into the lawn and the ground cover is patchy in spots.
Materials like gravel and mulch can define spaces and reduce maintenance once they are in place.
Simple edging changes the whole look.
I often find that focusing on the ground first creates a better base for anything else that comes later.
Some of these methods seem worth testing in a corner of the yard to see how they hold up through the seasons.
Define Yard Paths With Gravel And Basic Edging

A straight concrete path through patchy grass often leaves a front yard feeling unfinished. Adding gravel on either side of a stepping-stone path, along with simple edging and mulched beds, gives the space clear shape without major construction.
This approach works well on modest lots where you want better drainage and lower maintenance. Start by clearing the grass, lay down edging to hold the gravel in place, and keep the planting simple so the new layout stays easy to care for over time.
Turn A Muddy Side Path Into A Gravel Walkway

A narrow side yard often becomes a problem area because it gets heavy foot traffic and poor drainage. Adding a simple gravel path with edging keeps the ground stable and stops mud from tracking into the house. The before photo shows how quickly the space turns into a mess of weeds and standing water. The after shows how gravel and a clean border pull everything together without much cost.
This approach works best in tight spaces where you need a clear walking route but do not want to pour concrete. Start by clearing the overgrowth, then lay down landscape fabric and edging before adding the gravel. Mulch the beds on either side and keep the planting low so the path stays open and easy to maintain.
Define A Backyard Seating Area With Gravel And Edging

A bare patch of dirt next to a fence does not invite much use. Adding a circle of gravel with a simple metal edge turns that same spot into a clear place to sit and gather around a fire pit.
This approach works well in small or awkward backyard corners where grass struggles to grow. Keep the gravel contained so it stays neat, and add just enough plants around the edge to soften the look without crowding the chairs.
Define Garden Beds With Basic Edging And Mulch

An overgrown strip along a driveway often looks worse than it really is. Once the weeds and tall grass are cleared, adding a low stone edge and a layer of mulch instantly pulls the whole area together. The shrubs stay, but now they sit in neat beds instead of fighting with whatever grew in on its own.
This approach works well on any narrow border that runs beside pavement or fencing. Start with a straight or gently curved edge, lay down landscape fabric if you want fewer weeds later, then add mulch thick enough to cover the soil. Keep the planting simple so the clean lines stay visible instead of getting lost in too many new plants.
Use Gravel And Edging To Finish A Concrete Slab

A bare concrete pad next to the house often looks unfinished when it sits against patchy grass and dirt. Adding a gravel border with simple edging gives the area clear shape and makes the concrete feel like part of a planned space instead of something left over.
This idea works best on the side or back of a house where you already have a slab but want a low-cost way to clean it up. Keep the edging low and straight so the gravel stays in place, and use just a few pots rather than filling the whole border with plants.
Define Garden Beds With Mulch And Edging

The main change here is replacing a messy mix of overgrown plants with neat, mulched beds that have clear borders. This gives the front of the house a much tidier look without needing a full redesign.
You can try the same approach by first removing the excess growth, then laying down a simple border and covering the soil with mulch. It works well along the foundation of a house where you want low-maintenance planting that still looks planned.
Create A Defined Fire Pit Area With Gravel And Edging

A bare backyard with just dirt and a stray chiminea can feel unfinished and hard to use. Adding a simple gravel circle bordered by stone edging turns that empty space into a clear spot for sitting around a fire. The gravel keeps the area neat while the edging gives it shape so it reads as an intentional zone rather than leftover yard.
This approach works well in small or medium backyards where you want one main gathering spot without a big budget. Start with the edging and gravel first, then add two or three weatherproof chairs. Keep the circle large enough for movement but not so big that it crowds the rest of the yard.
Define Garden Beds With Simple Edging And Mulch

A messy strip of ground next to the porch steps can quickly start to look neglected. Adding a clear border and a layer of mulch turns the same area into something that feels planned rather than leftover.
This idea works best along the front of a house or beside entry steps where you want the planting to look intentional without spending much. Lay out the edge first so you know the exact shape, then spread mulch thick enough to keep weeds down and help the new plants stand out.
Define Garden Beds With Gravel And Edging

The front bed looked messy and unplanned with plants growing in every direction. Adding curved edging and filling the spaces with gravel gave the area clear shape and made the mailbox area feel like part of a larger layout.
This idea works best along a walkway or beside the house where you want low maintenance. Clean up the existing plants first, then lay out the edging in gentle curves before adding gravel or mulch. It keeps the focus on the structure rather than constant weeding.
Add Structure To An Overgrown Slope

A steep bank covered in tall weeds often feels like wasted space because nothing stays put and walking through it is awkward. Adding a gravel path with simple timber edging gives the slope a clear shape and turns it into something usable without needing a full redesign.
This approach works well on hillsides where you want access and low maintenance at the same time. Start by clearing the worst of the growth, then lay out the path and borders before adding plants. The edging keeps the gravel from sliding and gives you clean lines to work around when you plant later.
Add Edging To Define Your Garden Beds
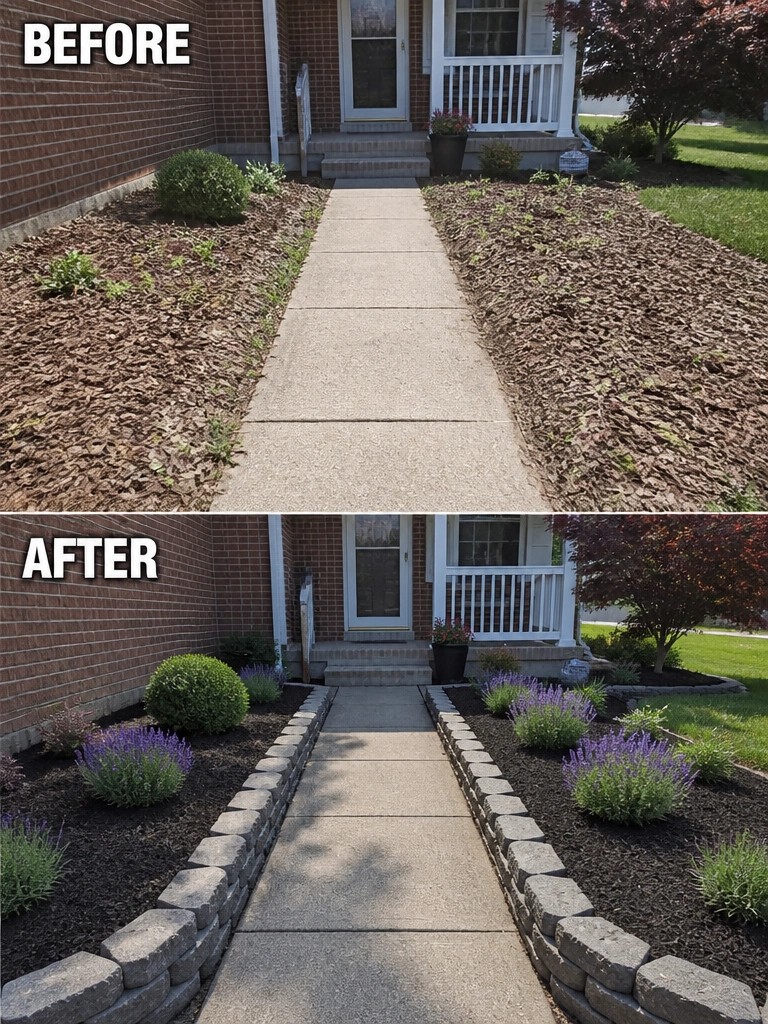
Adding a simple border turns scattered mulch into proper garden beds. The stone edging gives the walkway a clear shape and stops the ground cover from spilling onto the concrete.
This idea works best on straight front paths where the beds run alongside the house. Use basic concrete blocks or pavers to mark the edges first, then fill the new beds with mulch and repeat a few plant types. It keeps the space looking tidy without needing new plants everywhere.
Use Mulch And Edging To Define A Backyard Play Area

A bare dirt yard with play equipment spread out tends to look messy and unfinished. Adding a layer of wood mulch with a simple border gives the space clear zones, keeps the ground cleaner, and makes the whole area feel more intentional.
This approach works best in small yards where you want to separate play from grass or garden beds. Start with the main activity area, lay the mulch thick enough to cover the soil, and choose edging that follows the natural shape of the space. It keeps the project affordable and easy to adjust later.
Define An Overgrown Fence Line With Edging And Mulch

A long strip along a fence often turns into a weedy mess because it gets little attention and has no clear edge. Adding a simple stone border and a layer of mulch turns that same space into a contained planting area that looks intentional and stays easier to maintain.
This approach works well on narrow side yards or back fence lines where you want structure without a big redesign. Clear the weeds first, lay the edging to follow the fence, then spread mulch and add a few repeating plants. The result keeps grass from creeping in and gives the whole yard a tidier frame.
Define Tree Bases With Gravel And Edging
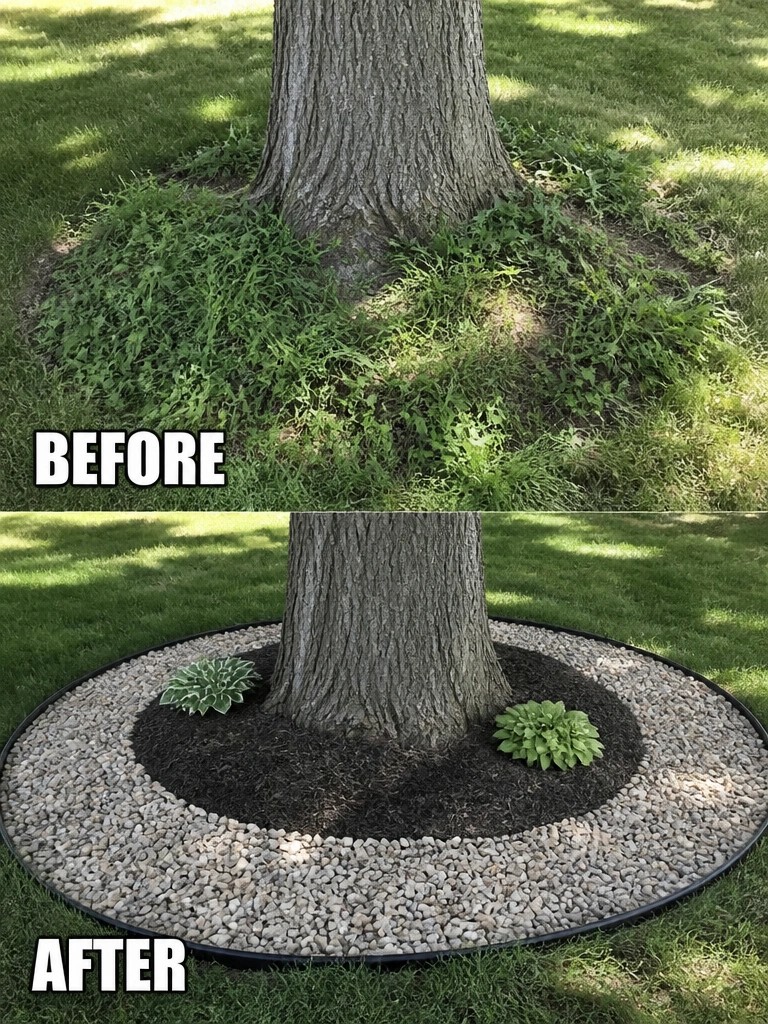
Many trees end up with a messy ring of weeds and grass right at the trunk. A simple gravel border with mulch and a clean edge turns that spot into something that looks planned instead of neglected.
This works in almost any yard with mature trees. It keeps the lawn from creeping too close to the trunk, cuts down on weeding, and gives you a low-maintenance area where a couple of small plants can go without competing with the grass.
Create Defined Garden Beds Along The Porch

The strip right in front of the porch often gets ignored until it turns into a weedy mess. Adding a simple border with edging, mulch, and a gravel strip cleans it up fast and gives the house a much sharper line where the structure meets the lawn.
This idea works on almost any home with a raised porch or foundation. Clear the old growth first, put down edging that matches your style, then fill the bed with mulch and a few easy plants. Keep the bed narrow enough that it does not crowd the walkway or block airflow under the porch.
Add Structure To An Overgrown Garden
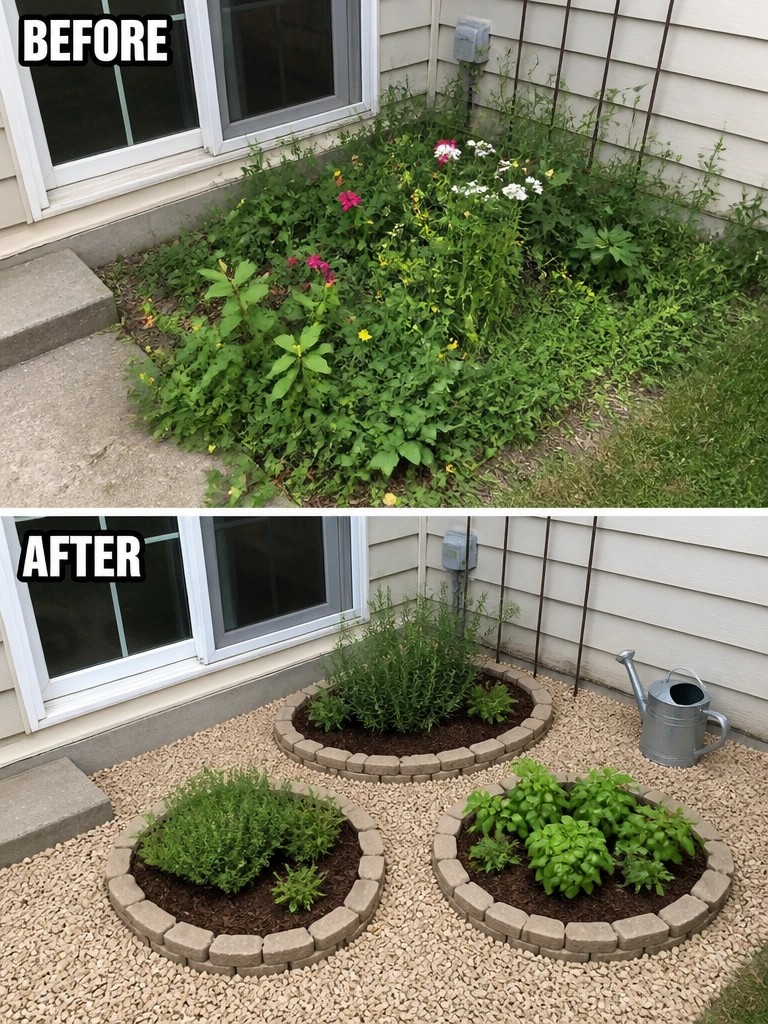
Clearing out the tangled plants first made room for simple circular beds edged with stone. Adding gravel around the beds keeps the ground clean and stops weeds from taking over again.
This idea works well in narrow side yards or along a house foundation where space is tight. Keep the shapes basic, use one edging material throughout, and leave enough room between beds for easy walking and mowing.
Add Gravel And Edging To Define A Small Backyard

A patchy lawn with furniture scattered around can feel unfinished. Adding a gravel circle with a simple stone border gives the seating area a clear purpose while the mulch beds along the fence create room for plants without taking over the whole space.
This works best in small yards where you want separation between seating and planting. Mark the shape first, use fabric under the gravel, and keep the beds narrow so mowing stays easy. The result feels planned even when the budget stays modest.
Define Garden Beds With Edging And Mulch

A messy patch of mulch and scattered shrubs can make the front of a house look neglected. Adding a clean metal edge and fresh mulch turns the same area into a tidy bed that feels intentional. The before photo shows how loose mulch and uneven planting quickly look unkempt, while the after shows how a simple border keeps everything in place and gives the plants room to stand out.
This approach works well along sidewalks or driveways where you want clear separation from the lawn. Start by cutting a smooth line for the edging, then spread a few inches of mulch inside the border. Keep the planting simple at first so the bed stays easy to maintain.
Add Gravel And Edging To A Narrow Side Path

An overgrown side path is easy to ignore until the weeds take over completely. Replacing the mess with gravel, a few stepping stones, and a simple border creates a clean, low-maintenance walkway that actually feels intentional.
This idea works best in tight spaces where grass or planting beds would be hard to keep up. Start with basic cleanup, add edging to hold the gravel in place, and use mulch around a few plants so the area stays neat with little effort.
Use Gravel And Mulch To Define Narrow Beds

A long, narrow strip between two lawns often ends up as a weedy mess because it is hard to mow and gets ignored. The simple fix shown here is to divide the space into clear sections with edging, then fill alternate parts with gravel and mulch. This gives the strip a finished look, stops the weeds from spreading, and makes the whole front yard feel more intentional.
This approach works well on any thin area that runs beside a walk or between lawn sections. Keep the beds narrow enough to reach across for weeding, and choose plants that stay in scale so the strip does not feel crowded. The different textures of gravel and mulch add interest without needing many flowers.
Frame A Trampoline With Gravel And Edging

The trampoline sat on bare dirt that looked scattered and unfinished. Adding a gravel circle held in place by stone edging, plus a mulch border with simple plants, gives the whole area a clear shape and makes the backyard feel more put together.
This approach works in any yard that already has a large piece of equipment. Lay the edging first to keep the gravel contained, then add mulch and a few low plants around the outside. It keeps the space practical while stopping the ground from looking neglected.
Define A Bare Backyard With Gravel And Raised Beds

Many backyards begin as open dirt or patchy grass that never feels finished. Laying down gravel across the main area and adding raised beds along the fence creates clear edges and turns the space into something usable instead of just empty ground.
This works best in smaller yards where you want low maintenance without pouring concrete. Keep the beds simple, fill them with mulch, and let the gravel handle the rest so walking and seating areas stay practical.
Frequently Asked Questions
Q: How much gravel should I order if my path curves around some trees?
A: Measure the length and width first then add ten percent extra. Curves eat up more material than you expect. Order it all at once so the color matches.
Q: Will mulch around my edging attract bugs into the house?
A: Keep the mulch a few inches away from the foundation and it rarely causes issues. Stir the top layer now and then to dry it out fast. Most bugs stay put when the bed stays tidy.
Q: Can I lay gravel right over old mulch without removing it first?
A: Rake the mulch flat and lay landscape fabric on top. The gravel sits better and weeds have a harder time pushing through. You save a full day of digging this way.
