

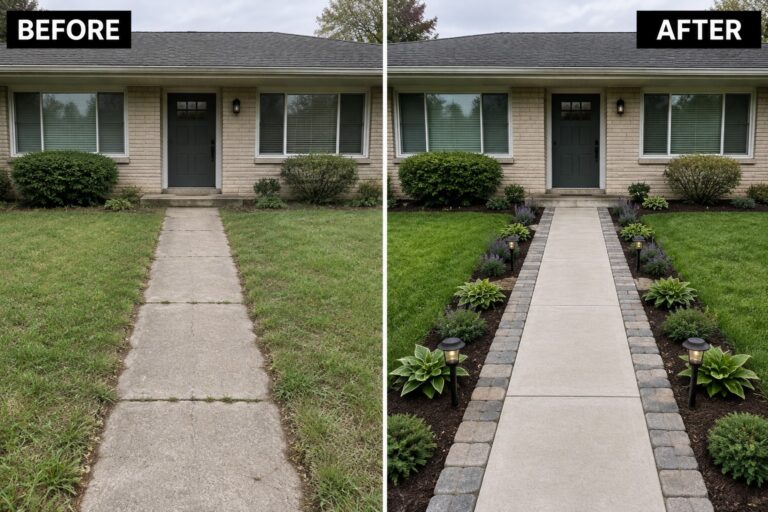
Walking up to a house, the path to the door is one of the first things you notice, and it often ends up looking a bit plain after a few seasons.
Adding paver borders can give it a cleaner edge and help it blend better with the rest of the yard.
I have found that even small updates like this make the whole front feel more intentional.
It is satisfying to see how a few materials can shift the way the entrance reads without touching the house itself.
Some of the layouts in these examples look easy enough to adapt if your own path needs a refresh.
Add Paver Borders To Define A Concrete Walkway
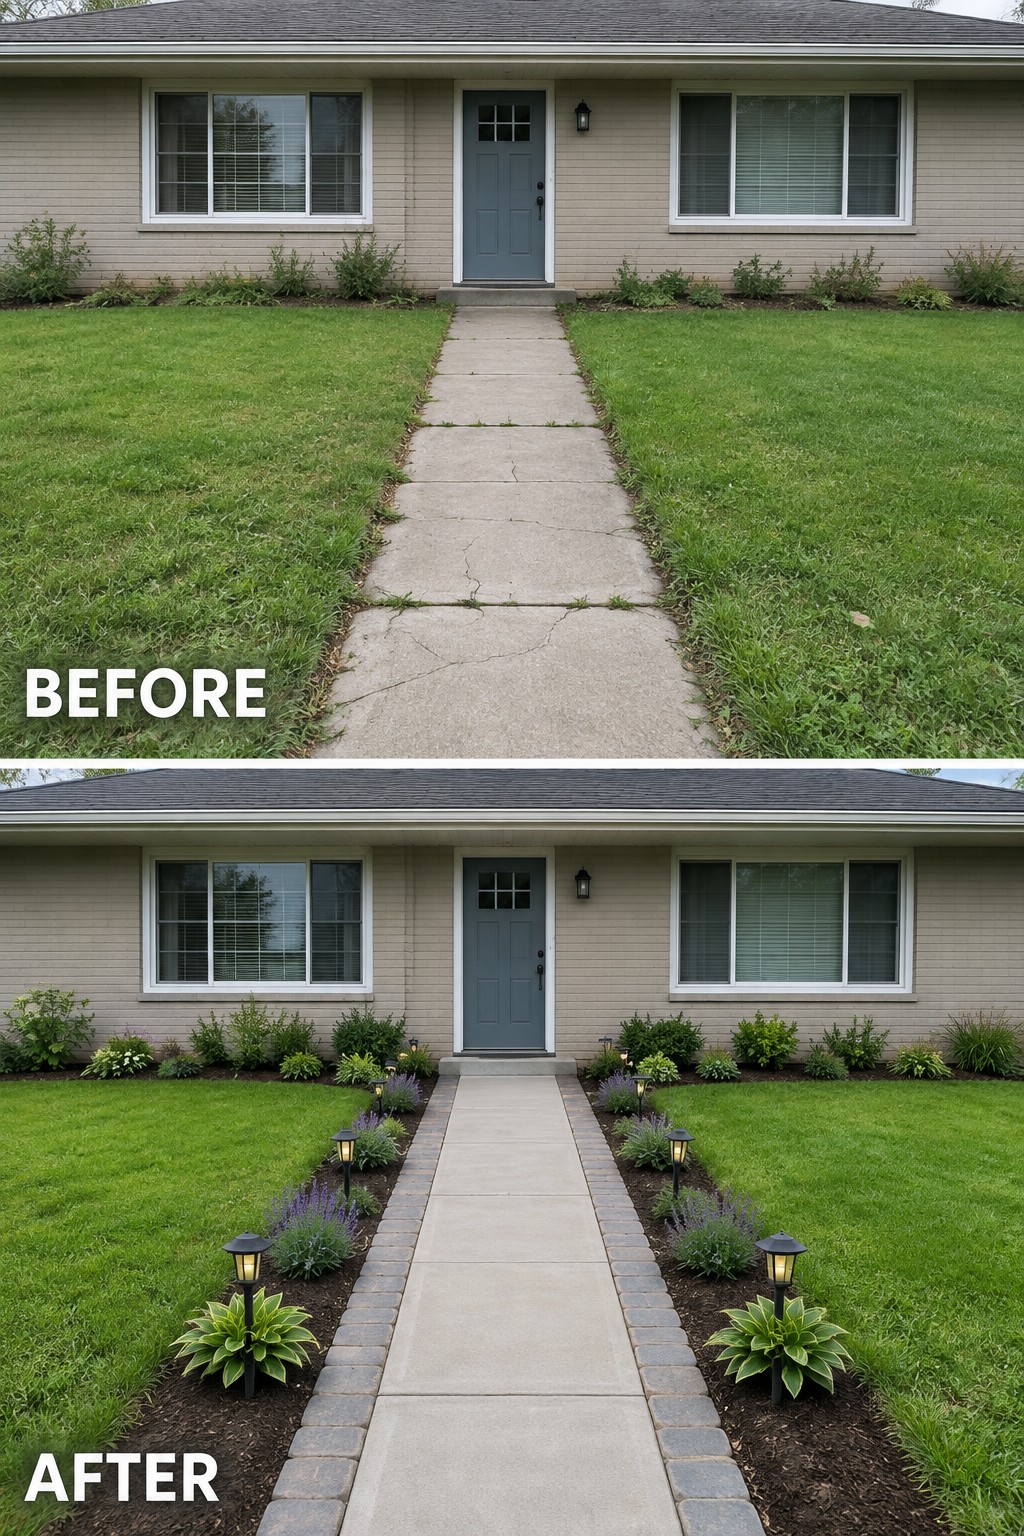
A straight concrete path often looks unfinished when it runs through plain grass with no clear edges. Adding a paver border on both sides gives the walkway structure and creates space for planting along the sides. The change turns a simple slab into something that feels more planned and connected to the rest of the yard.
This approach works best on front walks that are already in good shape but need better definition. Start with the pavers first so the beds have a clear shape, then add plants and a few lights if you want. Keep the beds fairly narrow so the path stays easy to walk and the lawn on either side still has room to breathe.
Add Paver Borders To Define A Gravel Walkway
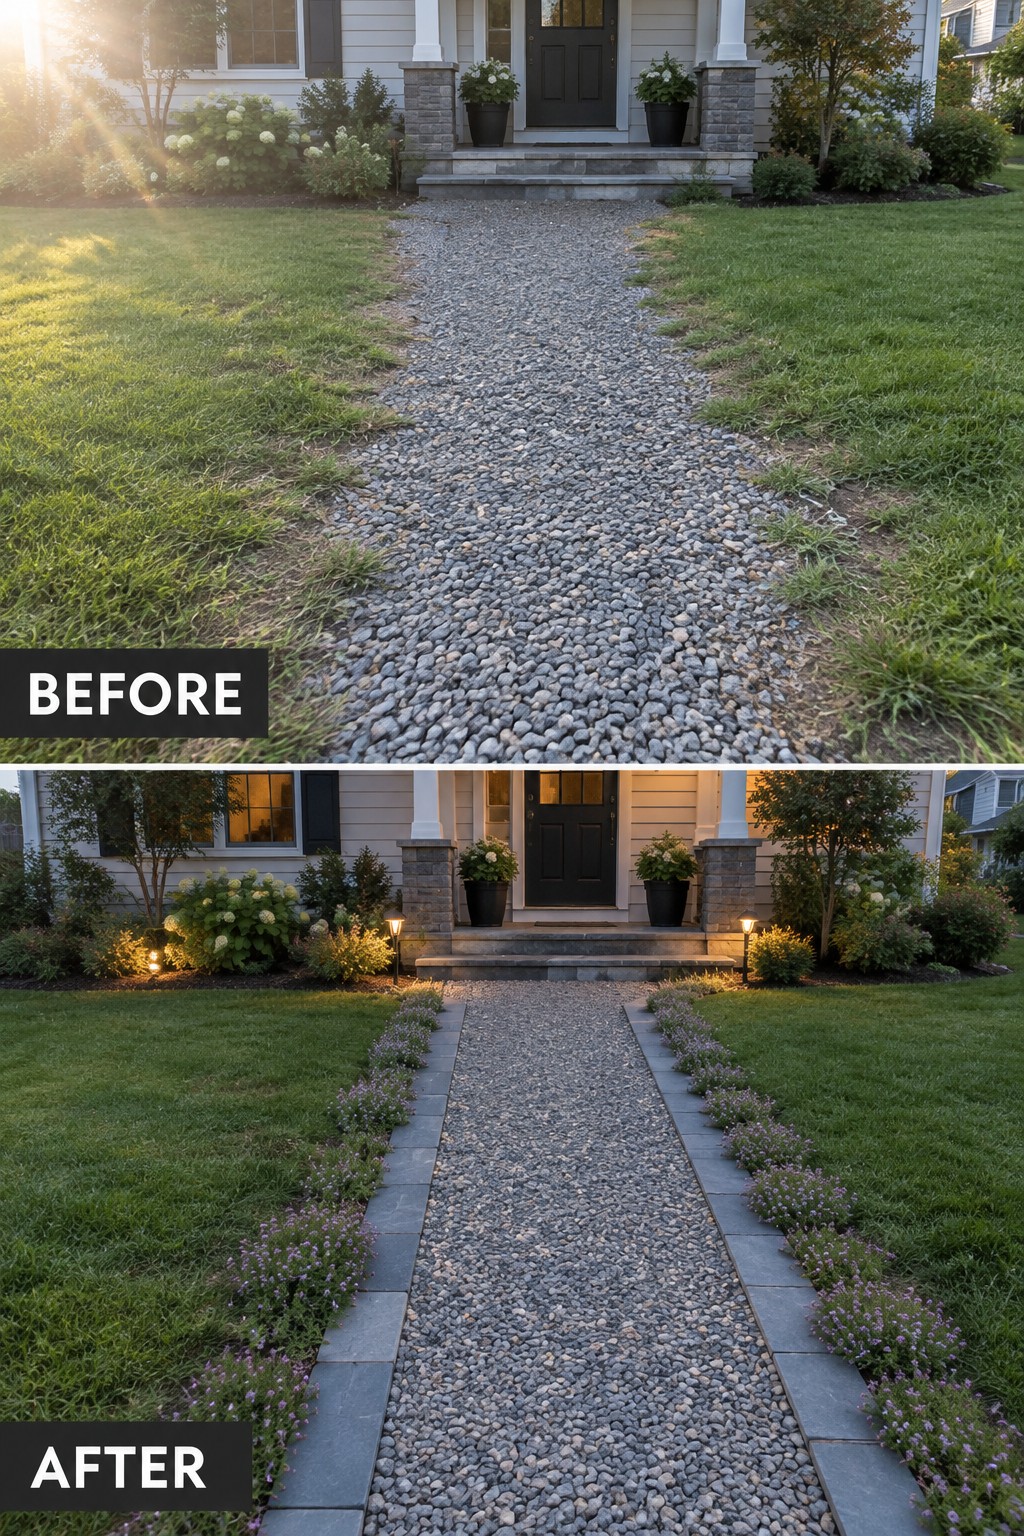
A gravel path often looks loose and unfinished when it runs straight through the lawn with no clear edges. Adding paver borders on both sides gives the walkway shape and keeps the gravel contained so it stops spilling into the grass.
This idea works best on homes that already have a simple gravel path. Lay the pavers to create straight or gently curved lines, then add a narrow planting strip on the outer edge. Low flowers or ground cover soften the look without crowding the walkway.
Add Brick Borders To Define A Stone Walkway
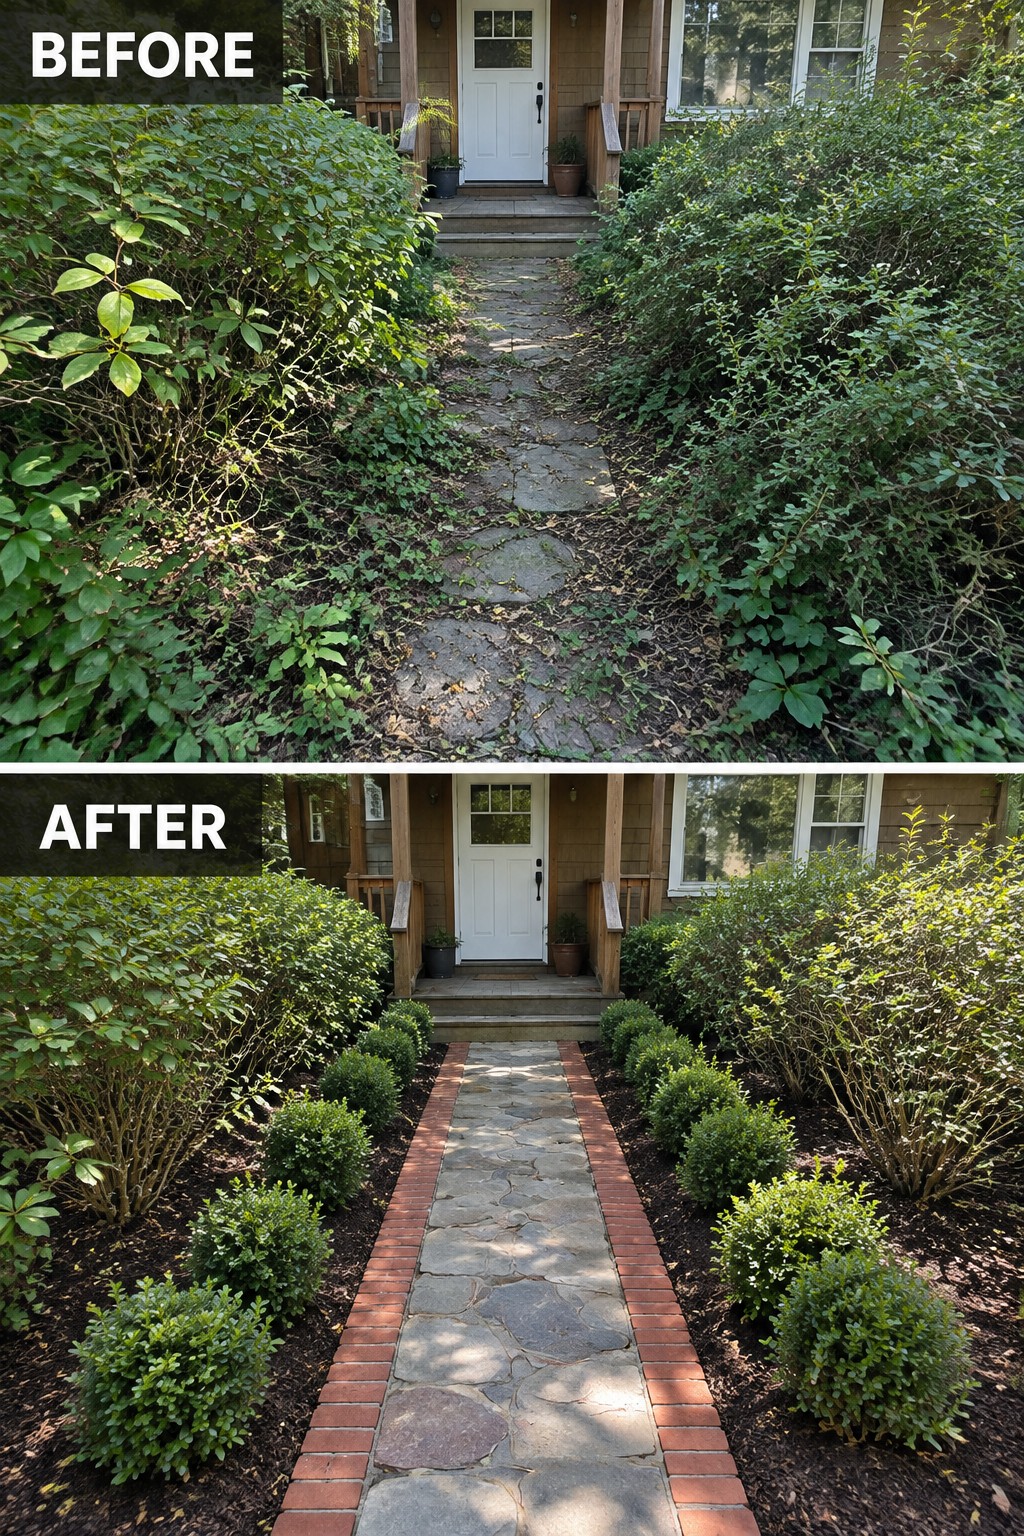
An overgrown path loses its shape fast when shrubs creep in from both sides. Adding brick borders on each edge gives the walkway a clear line and stops the plants from taking over again.
This idea suits older homes where the original stone path is still sound but the beds need structure. Clean up the overgrowth first, then set the bricks low and level so they frame the path without creating a lip.
Use Paver Borders To Define A Concrete Walkway
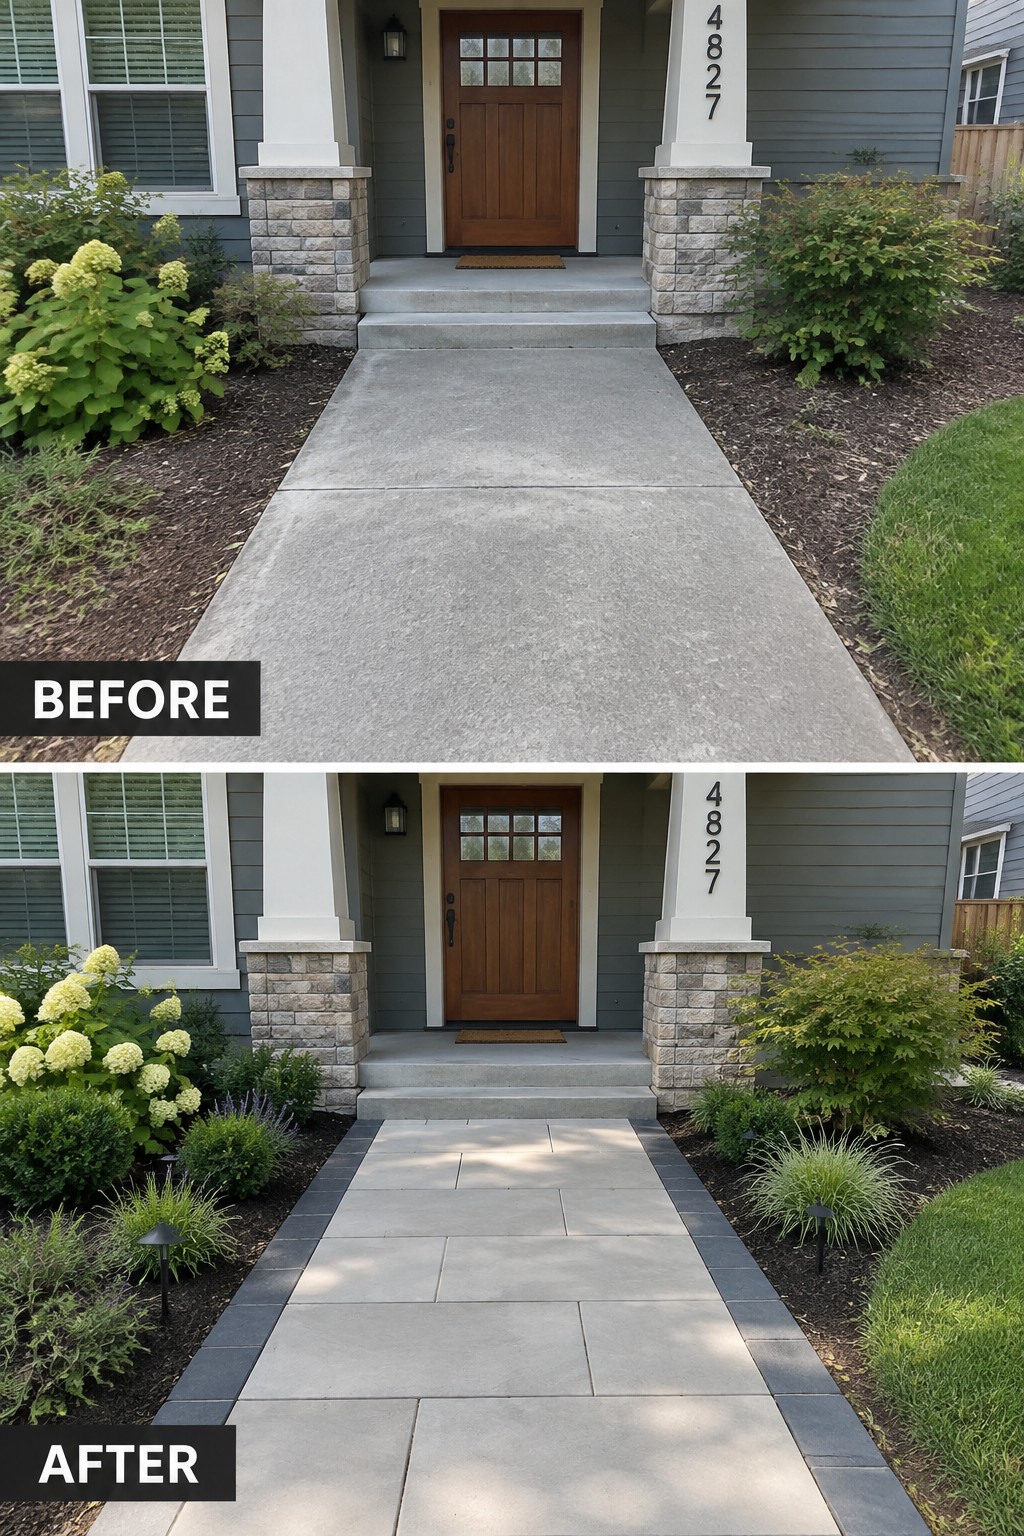
A plain concrete walkway often looks unfinished because it has no clear edges. Switching to pavers with a darker border on both sides gives the path shape and makes the front of the house feel more intentional without needing a full rebuild.
This idea works best on homes with a straight, simple path where the main goal is better structure. Match the new paver color to the original concrete so the change feels natural, and let the border stones create a clean line between the walkway and the garden beds on either side.
Use Paver Borders To Shape A Front Walkway
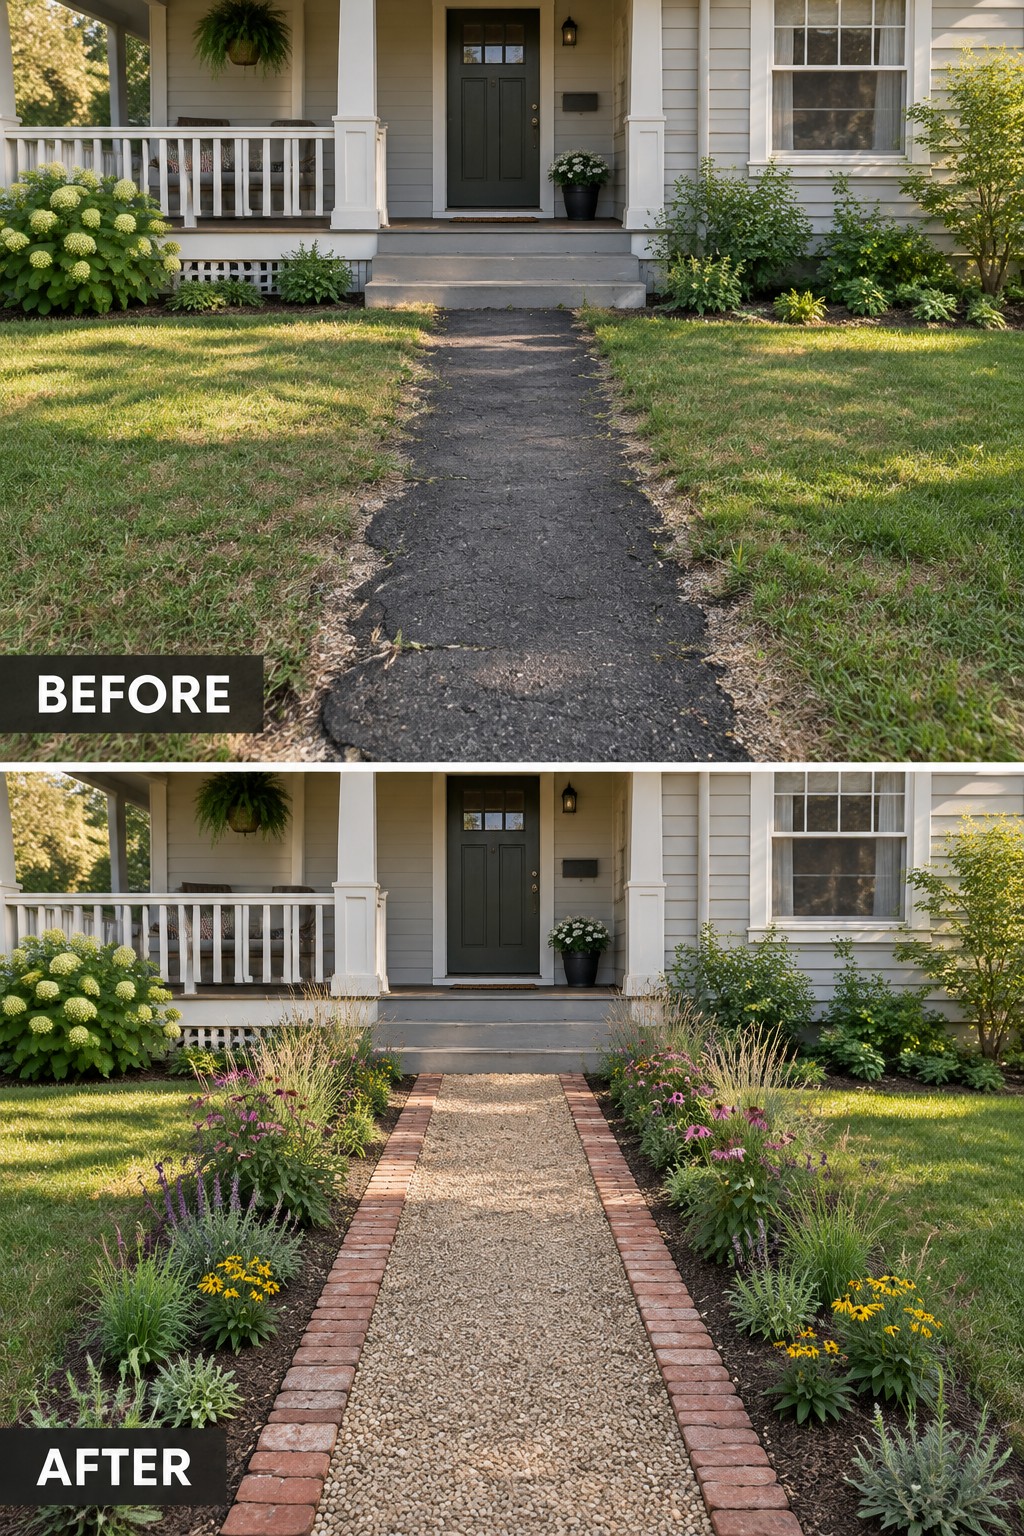
A cracked asphalt path makes the whole front yard feel neglected. Replacing it with a gravel walkway edged in brick pavers gives the entrance a clean line and stops the grass from creeping in. The borders do the main work by holding the gravel in place and making the path feel intentional instead of just a worn strip across the lawn.
This approach works well on straight, narrow lots where the house sits back from the street. Keep the gravel light in color so it contrasts with the bricks, and plant low perennials along the edges to soften the look without blocking the path. Start by removing the old surface completely before laying the pavers so the new walkway stays level over time.
Define A Front Walkway With Paver Borders
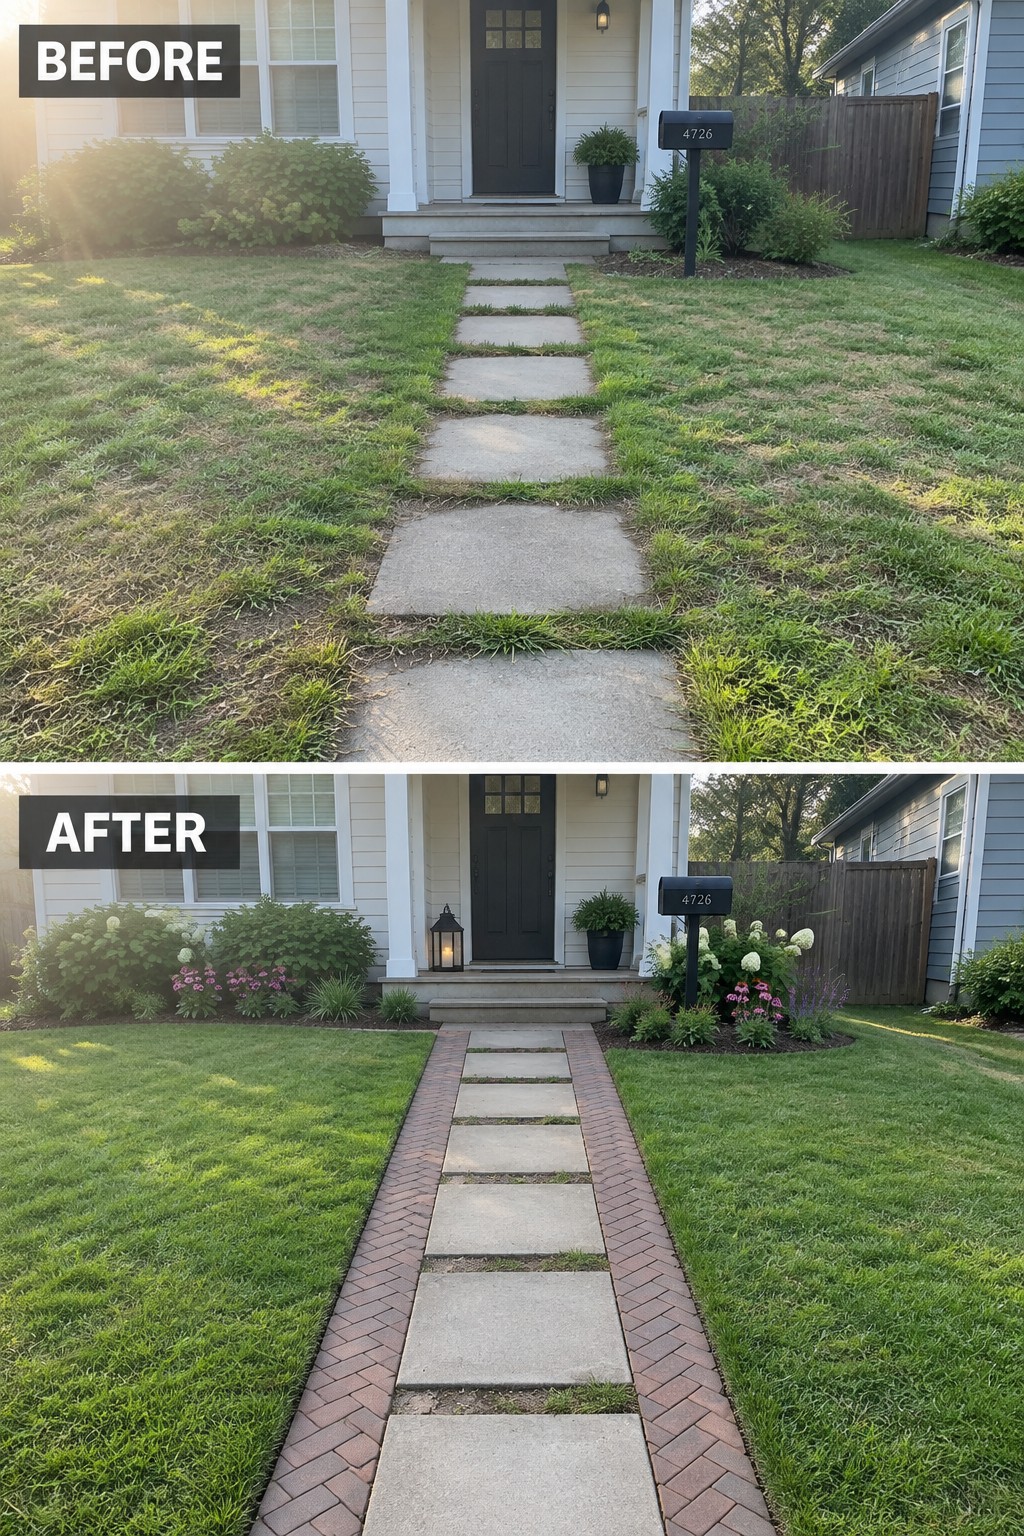
A basic concrete path set into grass often looks unfinished because the edges stay ragged and the whole thing blends into the lawn. Adding a paver border on both sides gives the walkway clear lines and makes it feel like a deliberate part of the yard instead of just a route to the door.
This approach works best on straight, simple paths where you want to improve the look without tearing out the existing concrete. Lay the pavers tight to the slabs, keep the pattern consistent, and let the border do the work of separating the path from the grass. It is a straightforward change that still leaves room for planting on either side if you want more color later.
Define A Mulch Front Walkway With Stone Paver Borders
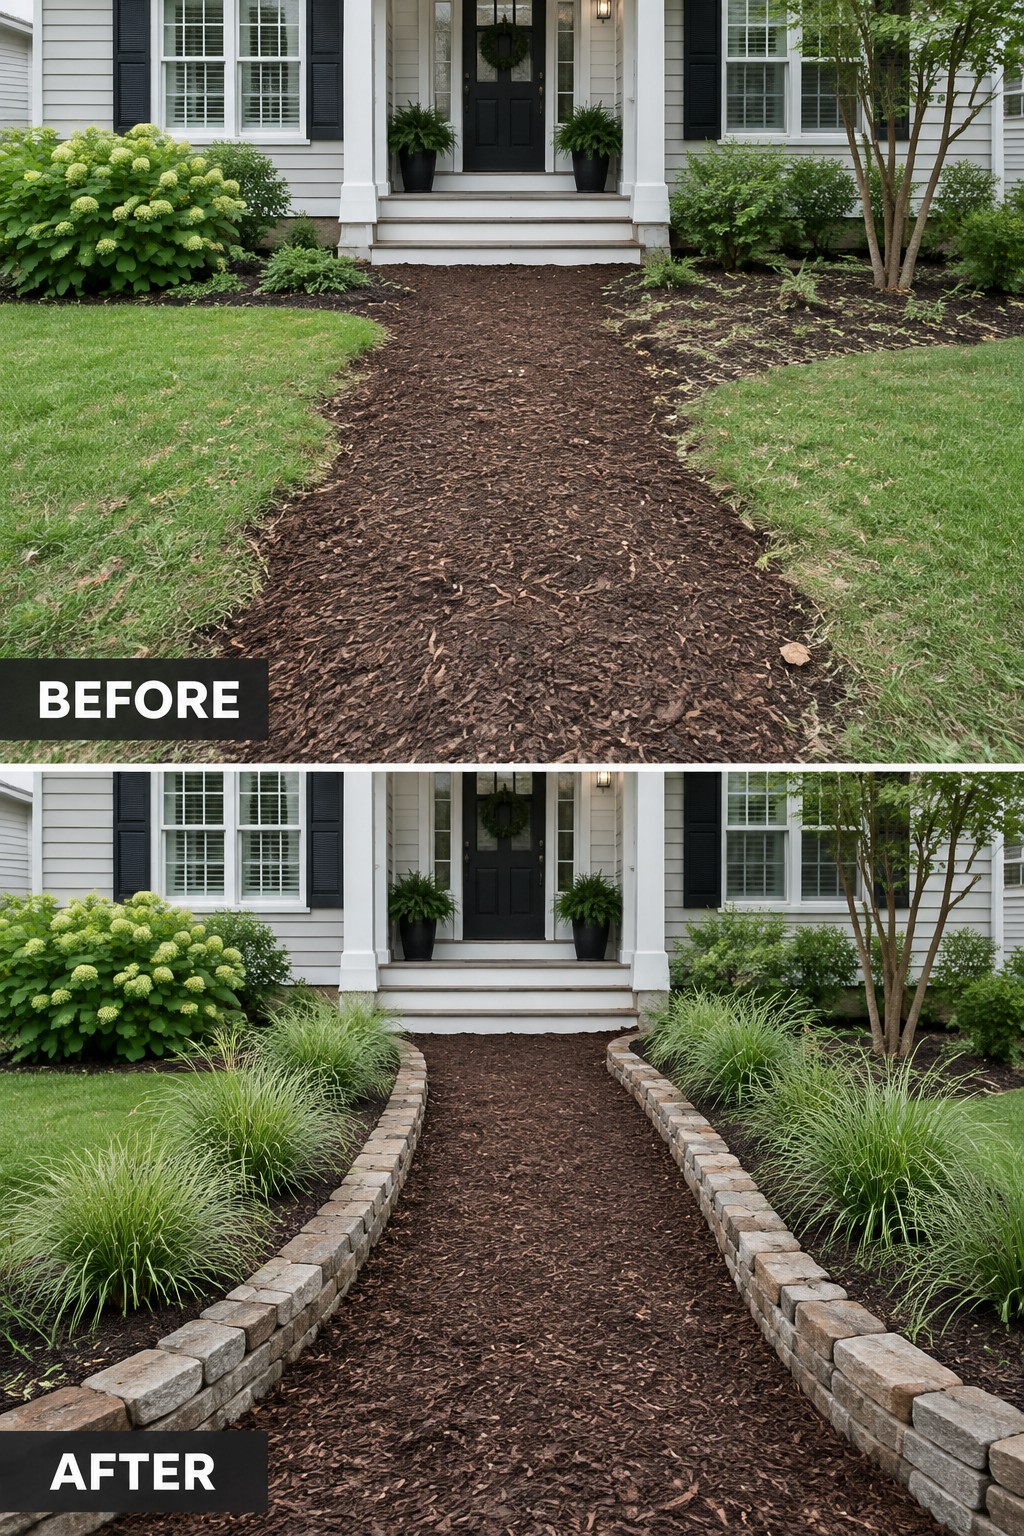
A loose mulch path often blends into the surrounding grass and starts to look messy over time. Adding a low stone paver border on each side creates a clear edge that holds the mulch in place and gives the walkway a tidy, finished appearance.
This approach works especially well on homes where the front path cuts through a lawn with existing shrubs and flower beds. Keep the border simple and low so it frames the path without competing with the house or plantings.
Use Paver Borders To Define A Front Walkway
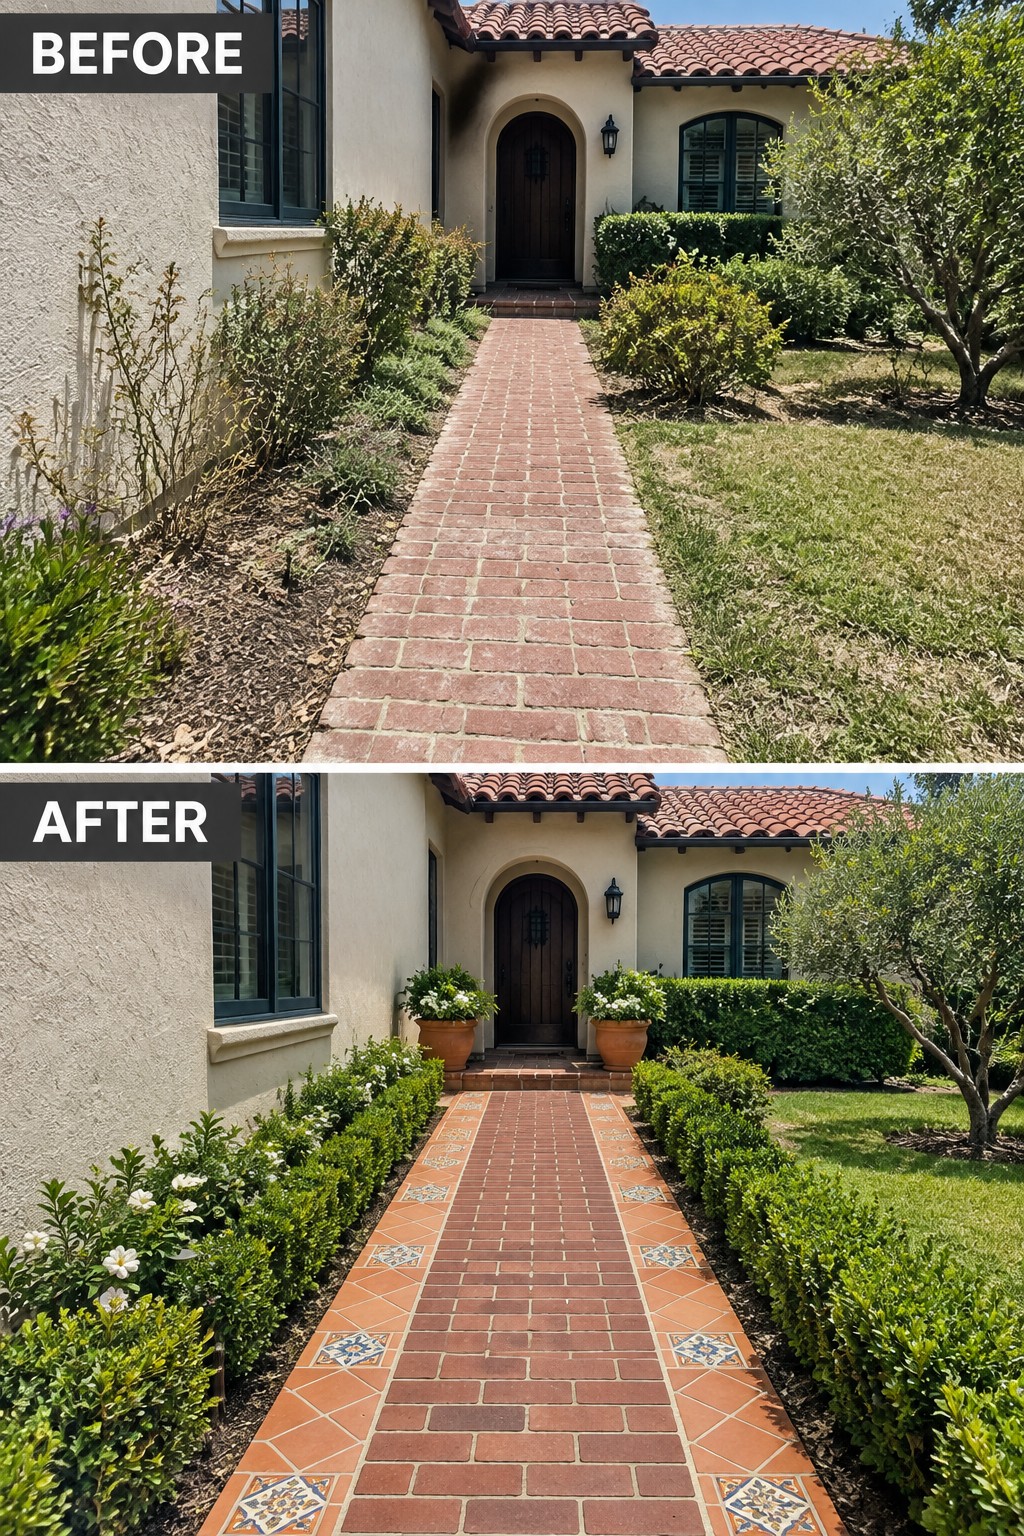
A plain brick path can start to look neglected when the edges blur into the lawn and plants. Adding a border of patterned pavers on both sides creates clean lines that hold everything in place and make the walkway feel like a deliberate feature rather than just a strip of bricks.
This works best on homes with straight front paths and simple architecture. Clean up the beds first, then lay the border pavers to match the scale of the house. Keep the plantings low and simple so the border stays visible and the walkway remains easy to walk.
Use Paver Borders To Define A Lawn-Side Concrete Walkway
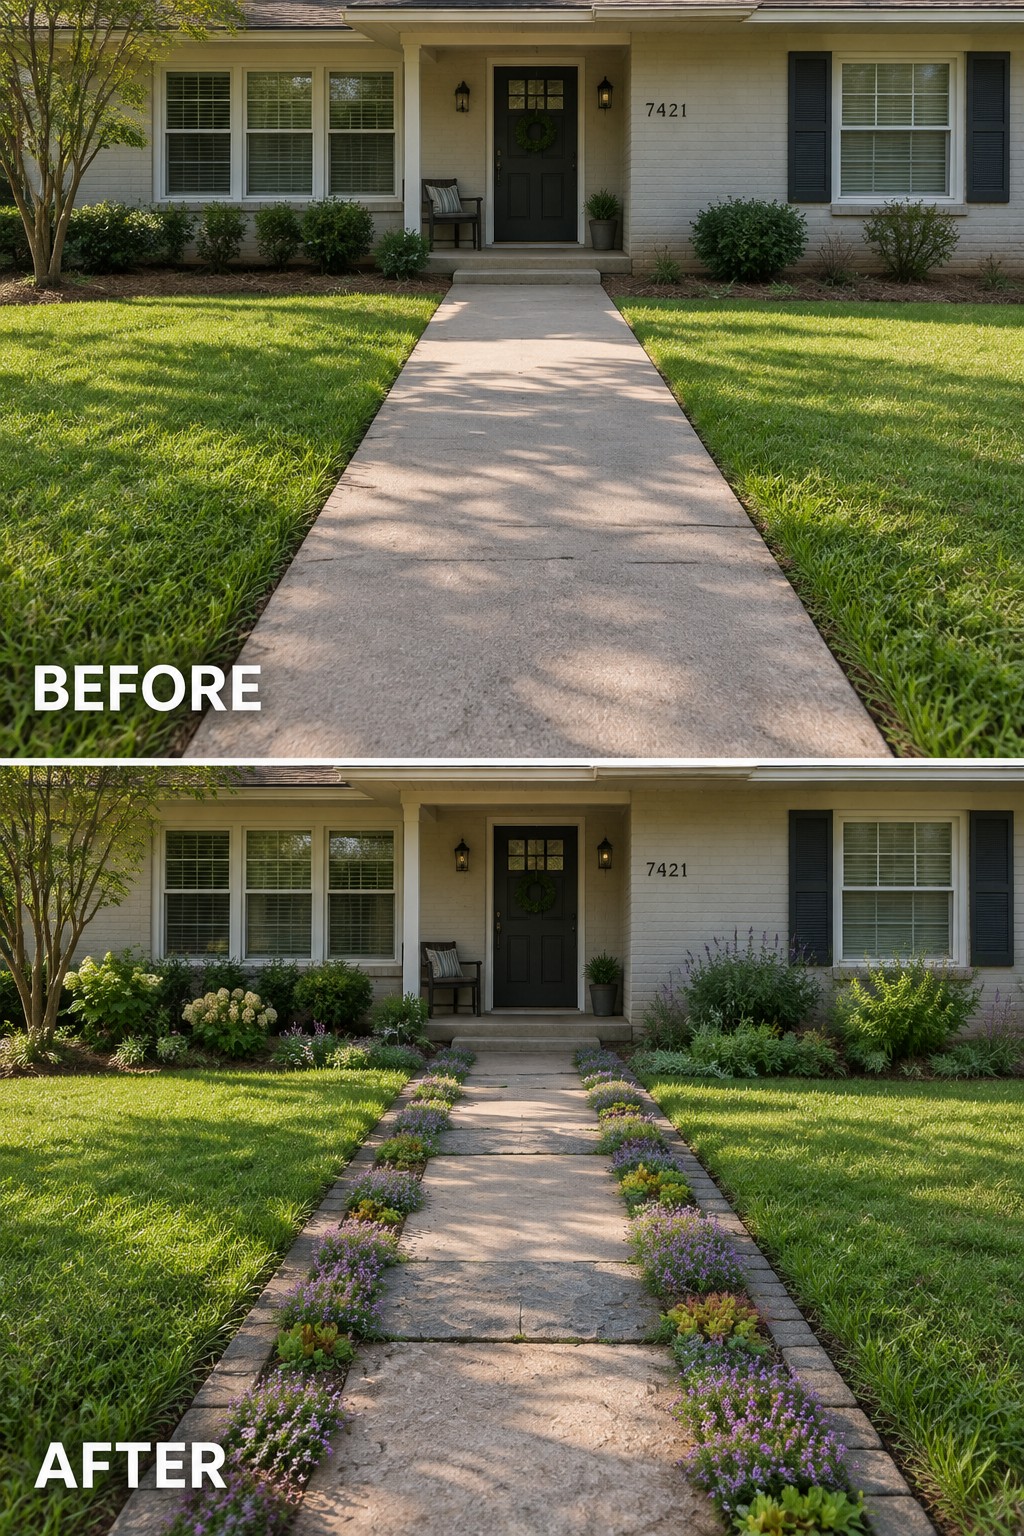
A straight concrete path can look unfinished when it sits between two wide lawns. Adding paver borders on both sides creates clear edges and gives the walkway a finished look without tearing out the existing concrete. The planted strip between the pavers and the lawn softens the hard line and keeps grass from creeping onto the path.
This approach works well on homes with simple, narrow front walks where the main goal is to add structure rather than replace the whole surface. Keep the planting low and repeat a few colors so the border stays neat and easy to maintain. The pavers also make mowing simpler because the edge is now clearly marked.
Define A Concrete Walkway With Paver Borders
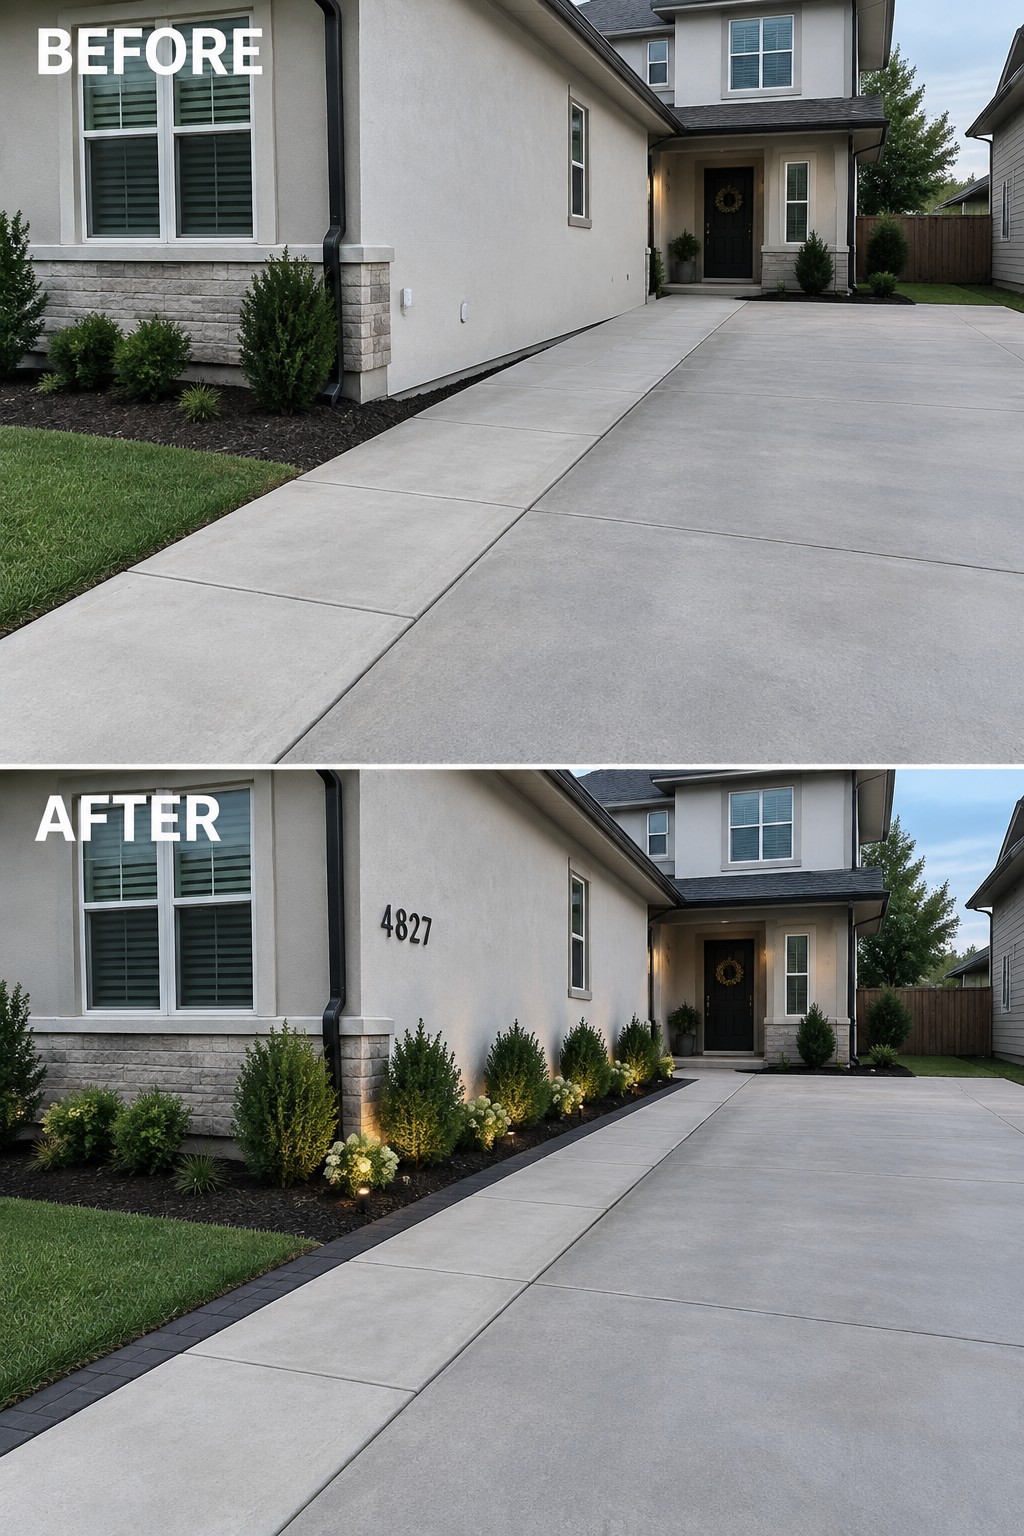
A plain concrete walkway often looks unfinished next to a house. Adding a paver border along the edge gives it a clear shape and makes the whole front look more intentional. In this case the border turns a flat slab into something that feels like a designed path instead of just leftover driveway space.
This idea works well on any home with a wide concrete approach. Keep the paver color simple so it frames the concrete without competing with it. Add a narrow planting strip behind the border if you have room. That small step keeps the walkway looking neat and makes mowing and edging much easier later.
Add Paver Borders To Frame A Front Walkway
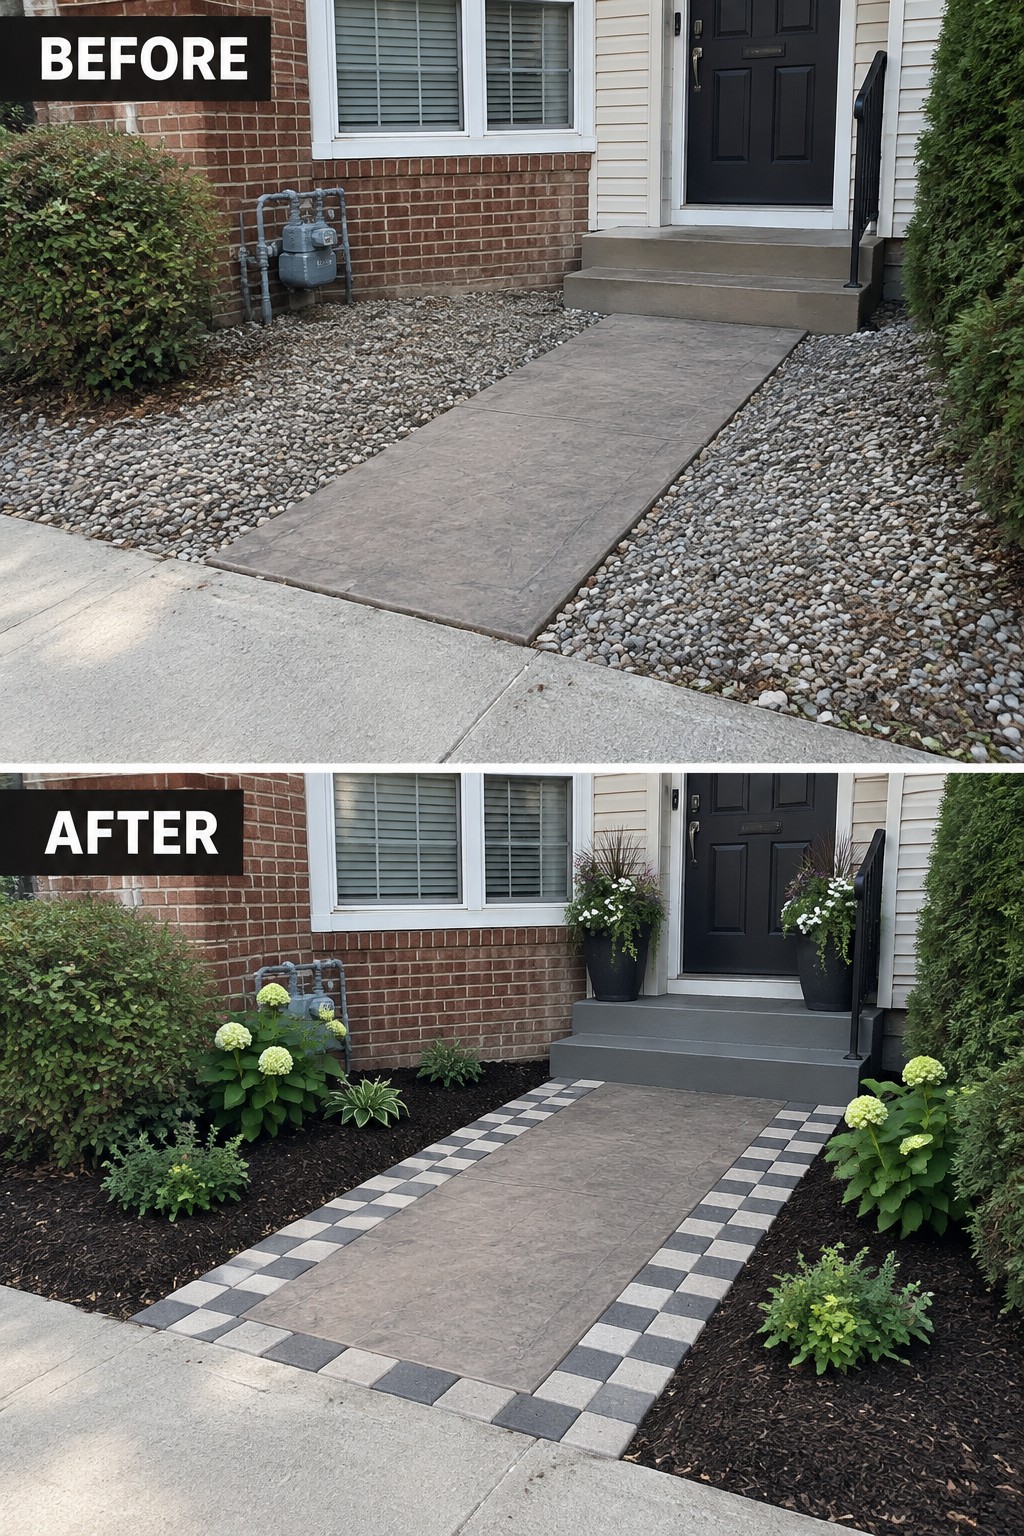
A plain concrete path with loose gravel on both sides can feel unfinished and hard to maintain. Adding a paver border along the edges gives the walkway clear shape and turns the gravel areas into neat garden beds that stay in place.
This approach works best on straight front paths where you want a low-cost way to improve the entry without replacing the whole surface. Match the paver colors to your siding or existing concrete so the border blends in, and keep the new beds narrow enough that they do not crowd the walking space.
Restore An Overgrown Front Walkway With Paver Borders
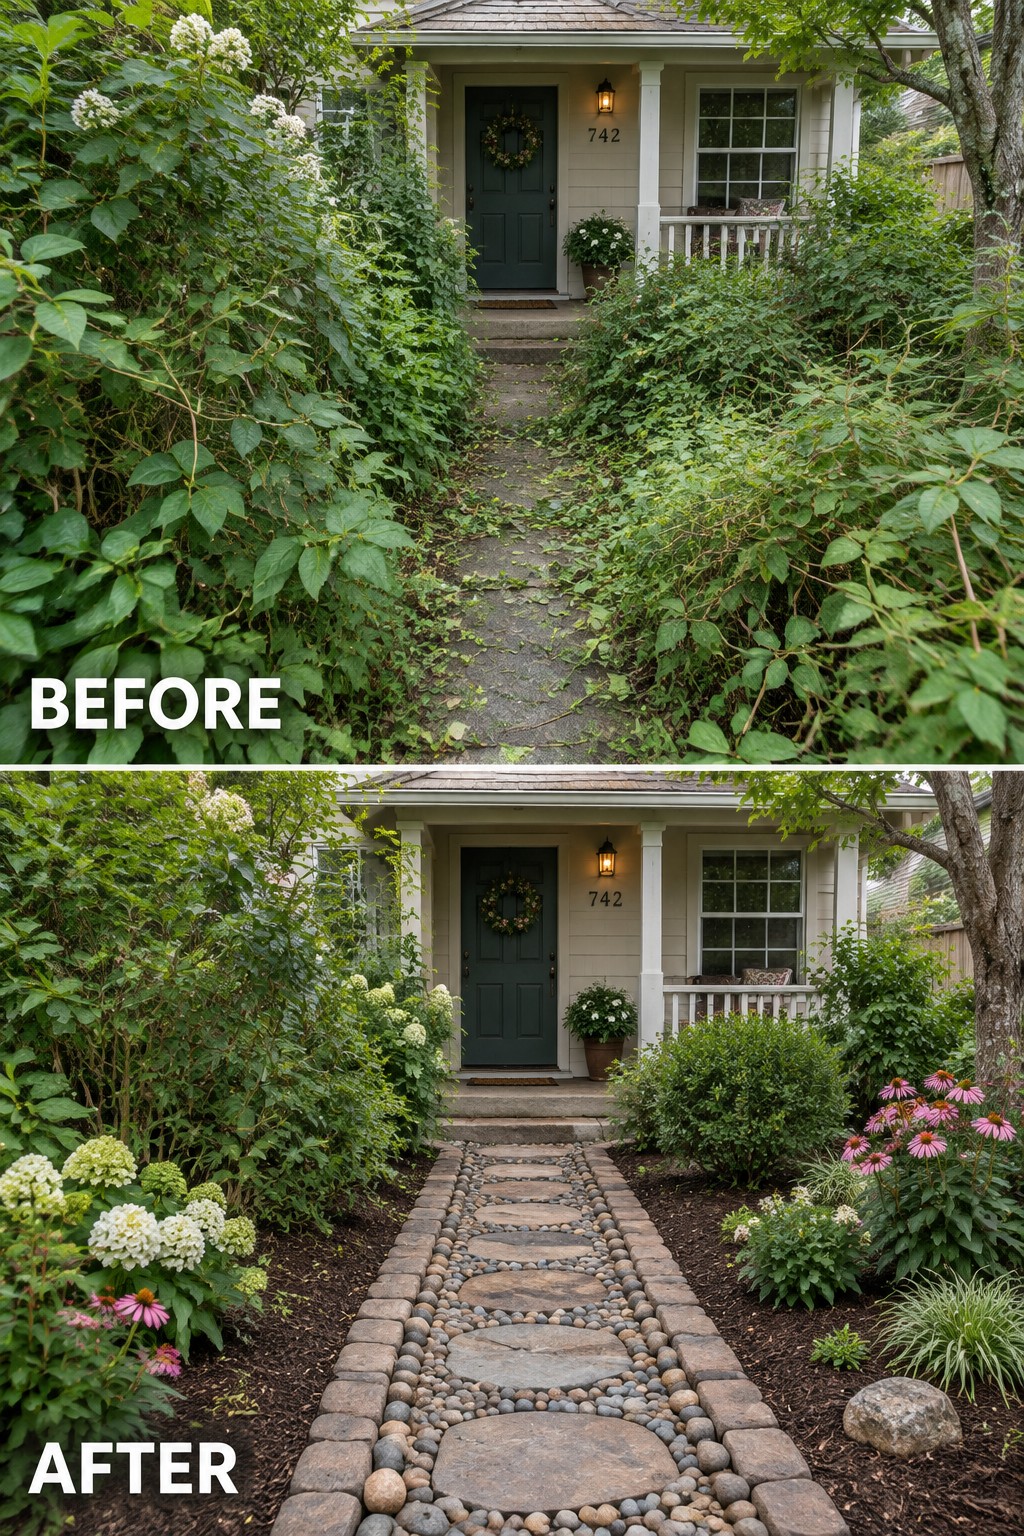
Adding paver borders is one of the most practical ways to fix a front walkway that has lost its shape. The original concrete path had become almost invisible under the spreading plants, and the whole entry felt neglected. Once the overgrowth was cut back and a clear stone border was laid, the path gained a clean edge and a much more finished look.
This approach suits older homes where the walkway is still usable but the surrounding beds have grown out of control. Start by clearing the plants away from the path, then choose pavers that sit low to the ground and follow the natural line of the walk. Keep the planting simple on either side so the border stays visible and the path remains easy to walk.
Use Paver Borders To Frame A Plain Walkway
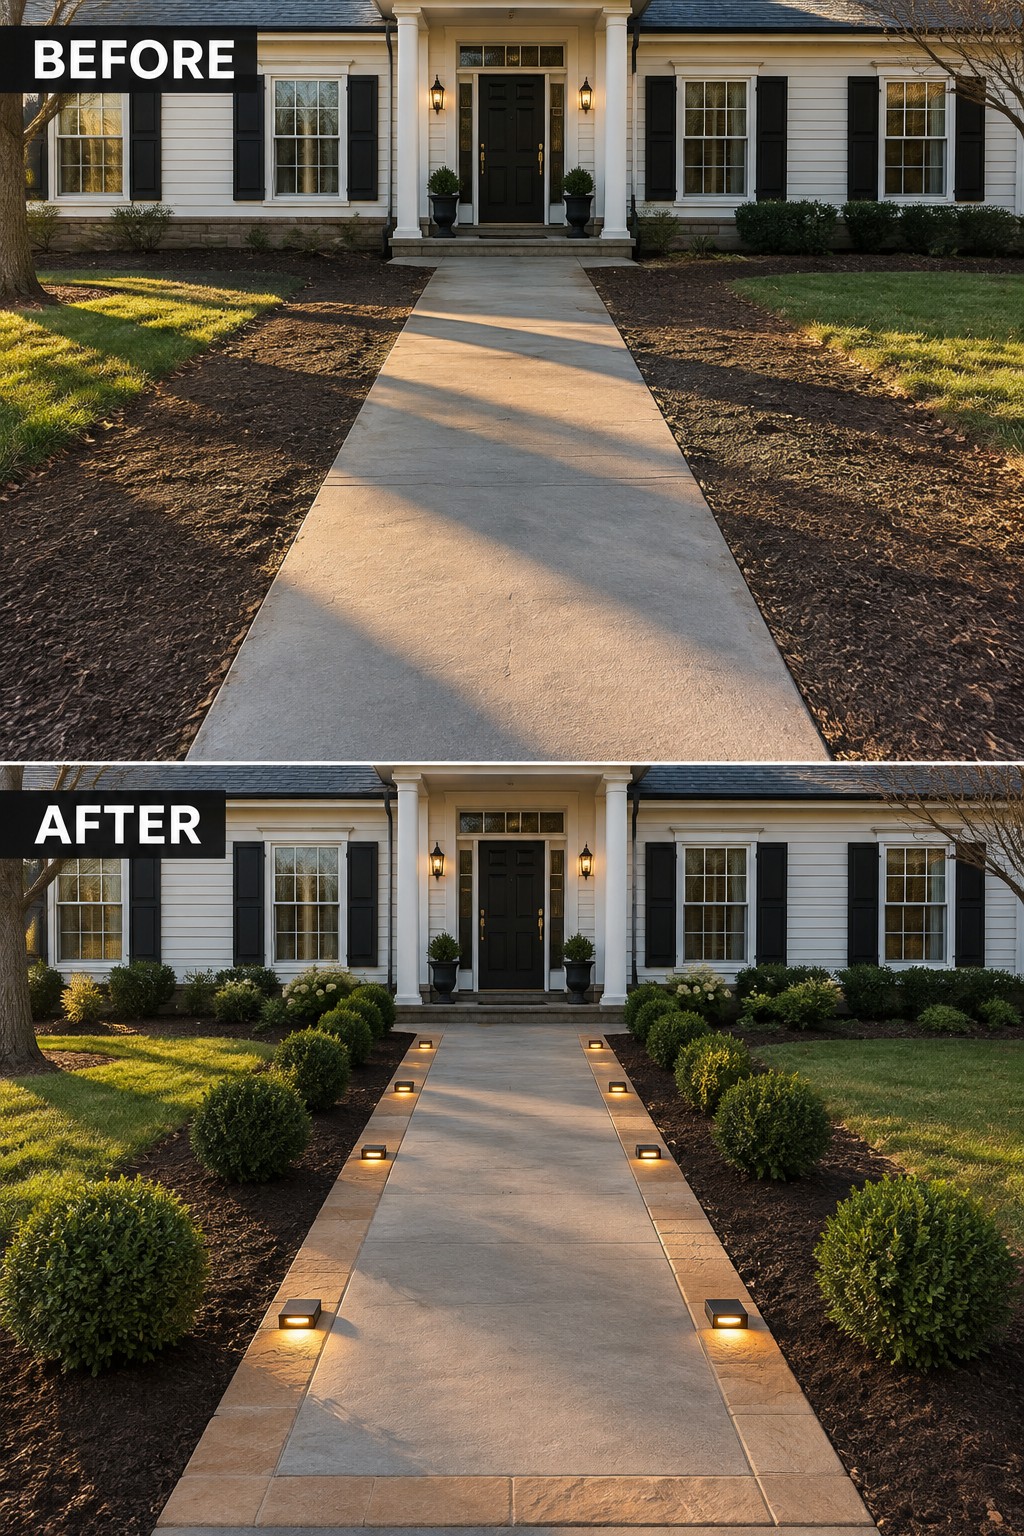
A basic concrete path can look unfinished when it sits between wide strips of mulch. Adding paver borders along both edges gives the walkway clear lines and makes the whole front approach feel more intentional. In this case the borders also created space for low pathway lights that guide visitors at night.
This approach works well on any straight or gently curved front walk where you want structure without a full rebuild. Start by choosing pavers that match or complement your house and existing hardscape, then set them just outside the concrete so the original path stays usable. Keep the planting simple on the outer side so the borders remain the main feature.
Shape A Gravel Front Walkway With White Paver Borders
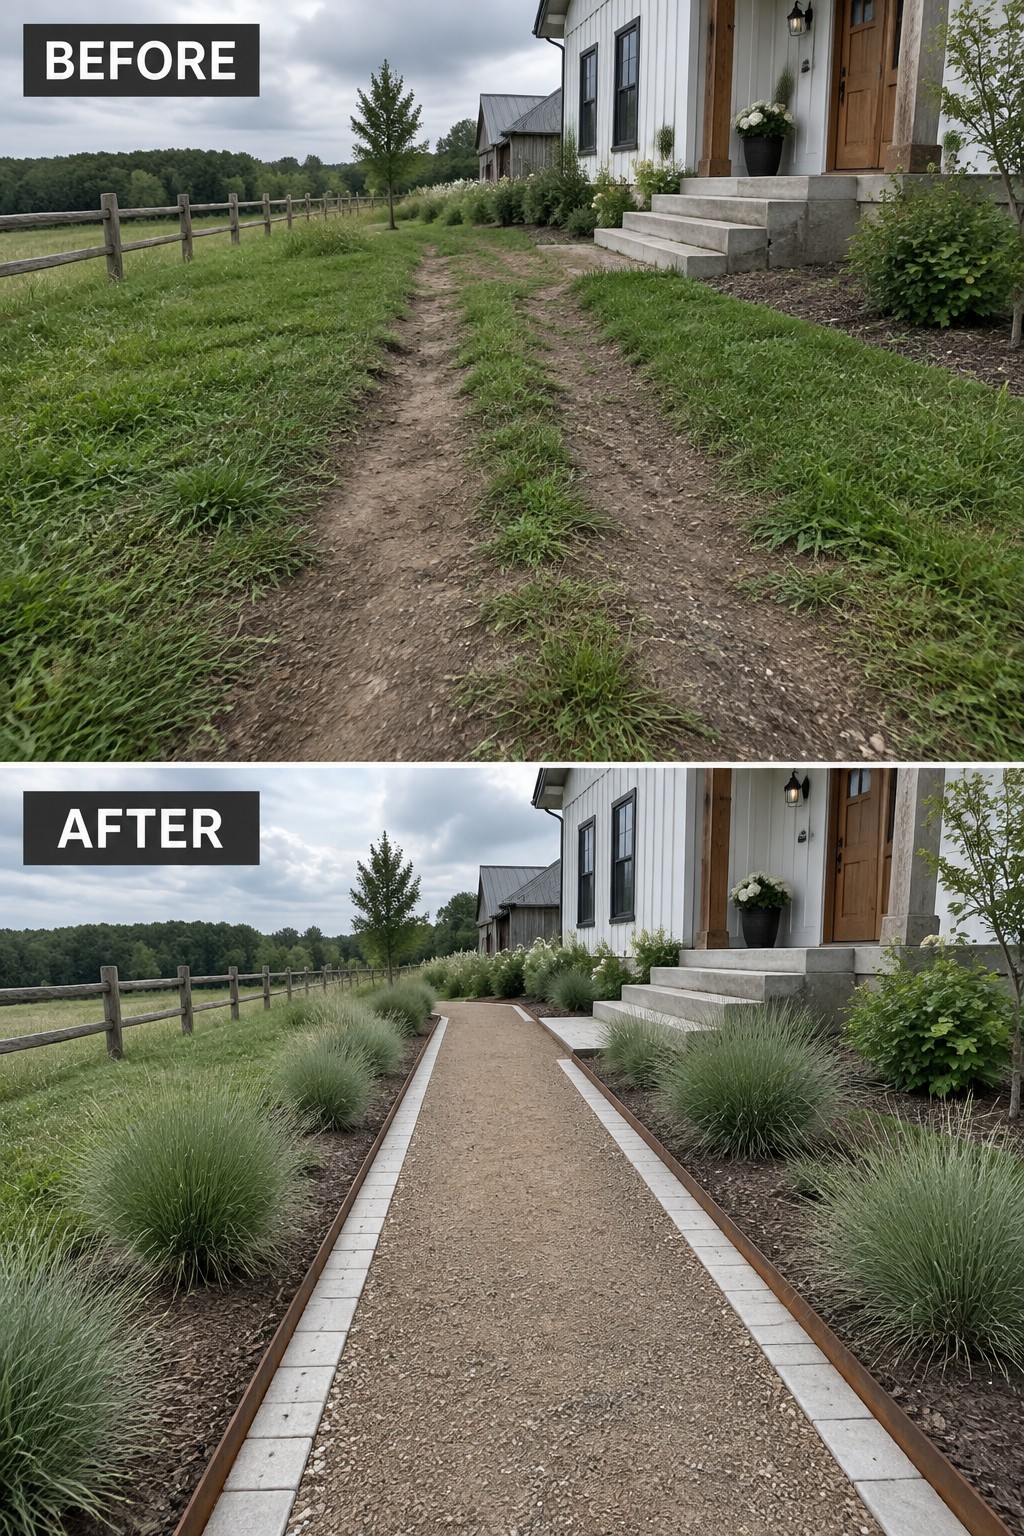
A worn dirt path can make the whole front yard feel unfinished. Adding a gravel surface edged with simple white pavers gives the walkway a clear shape, keeps the edges tidy, and makes the route feel more planned without needing a full hardscape overhaul.
This idea works especially well on longer paths or homes set back from the road. Keep the paver style simple, match the gravel color to your house, and plant low grasses or shrubs along the edges so the borders stay visible and the path stays easy to walk.
Use Brick Borders To Frame A Gravel Walkway
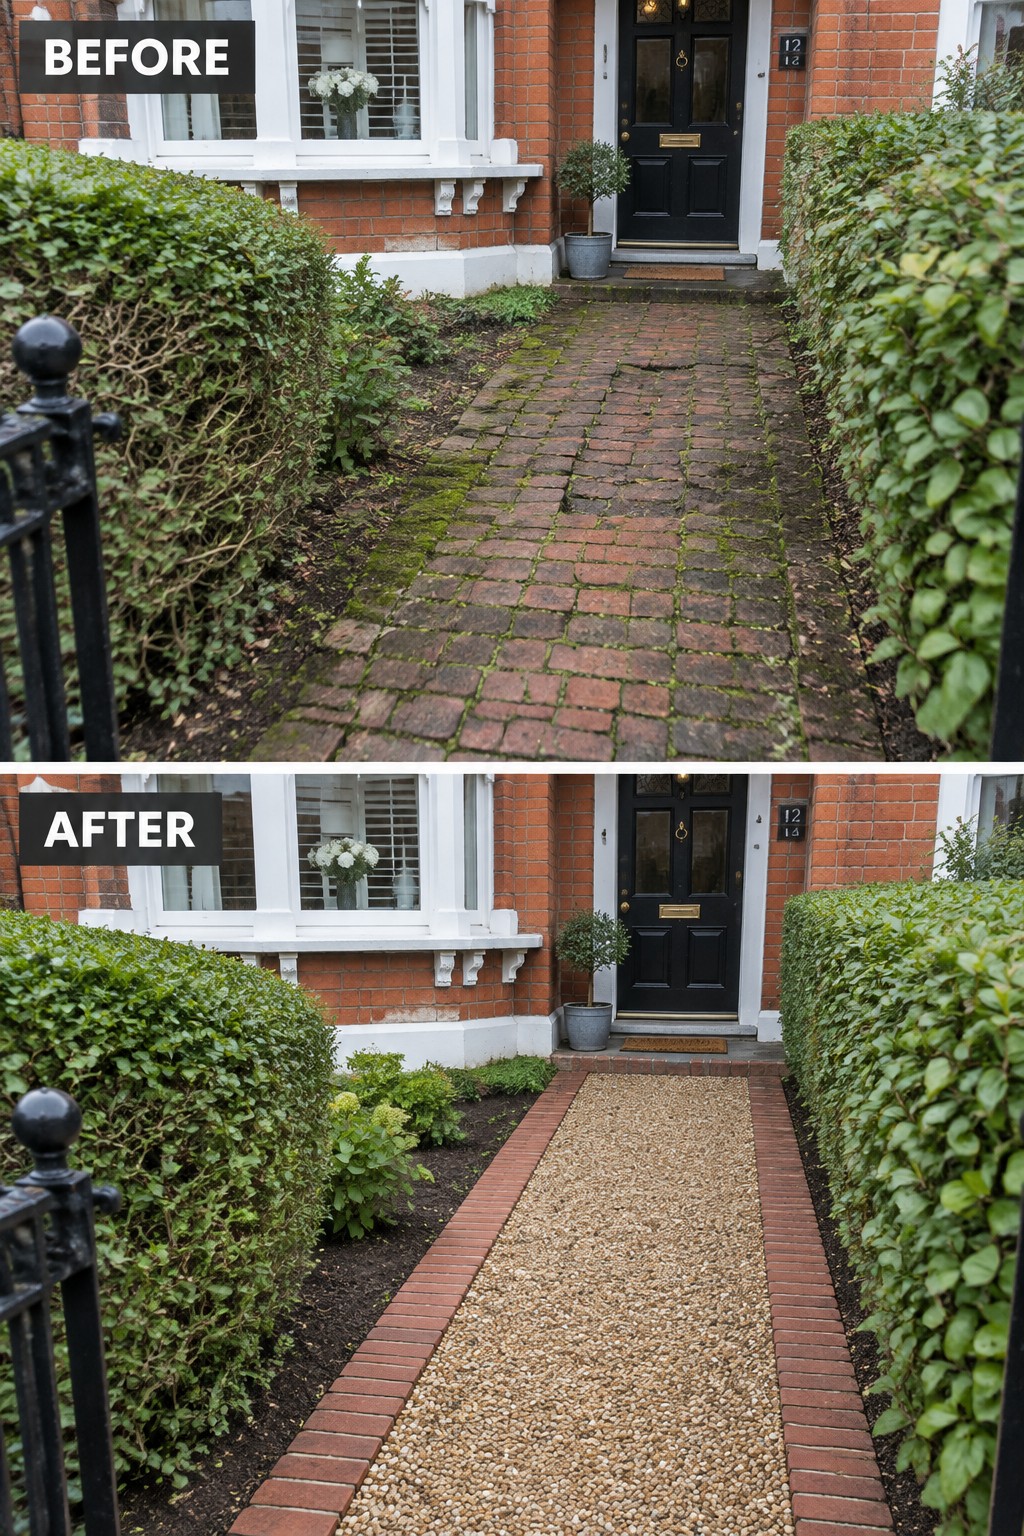
An old brick path that has settled and grown moss can start to look tired and uneven. Switching to a gravel surface held in place by brick borders gives the walkway a fresh, level surface that is easier to keep clean and still fits the scale of a modest front garden.
This approach works well on narrow front paths where you want to keep the focus on the house and the planting on either side. Lay the bricks first to create straight edges, then fill the center with a compacting gravel so the path stays tidy through the seasons without constant weeding.
Frame A Front Walkway With Patterned Paver Borders
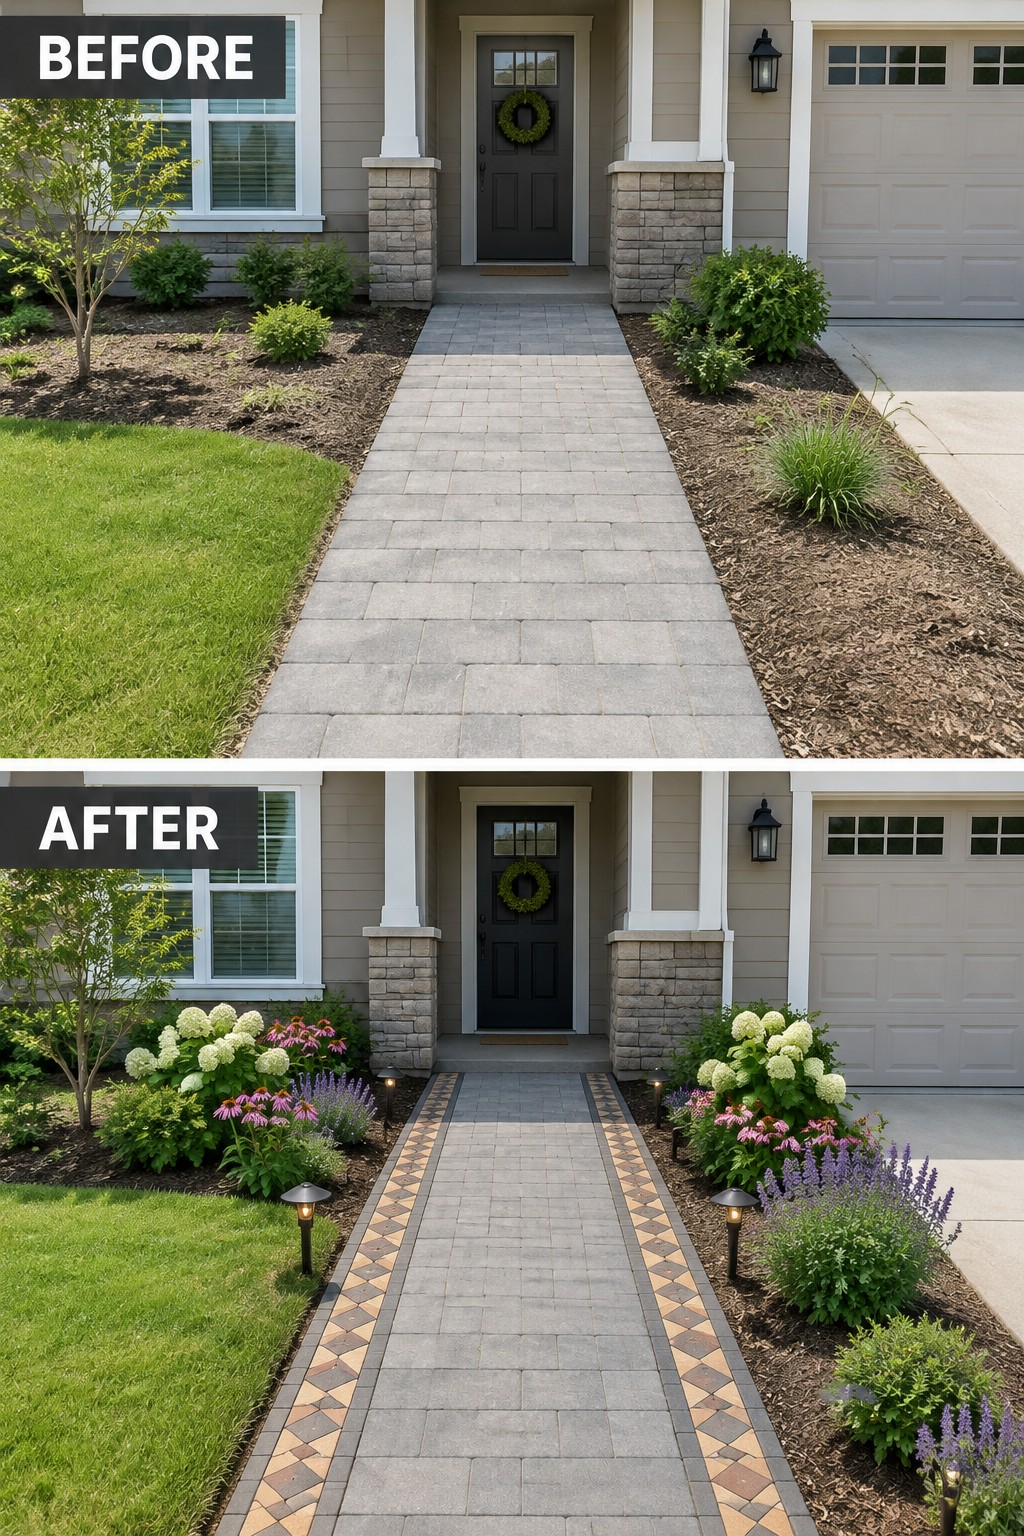
A straight walkway with plain edges often looks unfinished next to mulch beds. Adding a patterned paver border on both sides gives the path a clear frame and makes the whole front approach feel more intentional. The change turns a basic gray path into something that looks planned rather than just functional.
This idea works best on homes with a direct front walk where you want structure without adding new materials everywhere. Keep the border colors close to the main pavers so the pattern stays quiet. Start with the borders first, then fill in the beds so the planting can follow the new lines.
Add Narrow Paver Borders To A Concrete Walkway
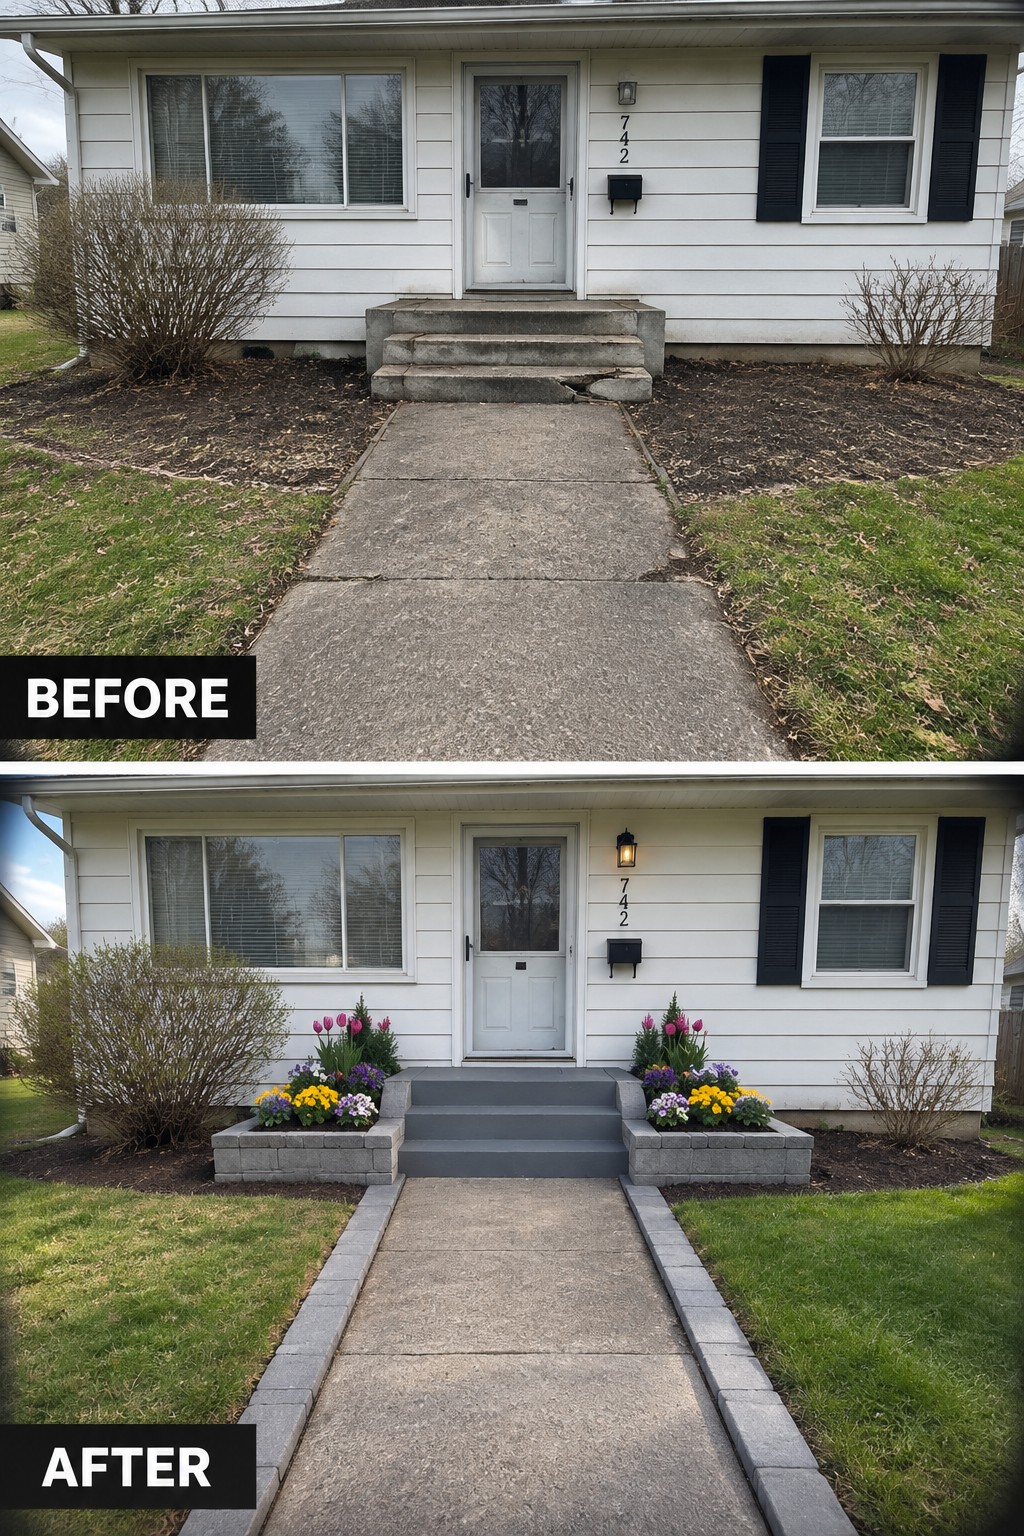
A plain concrete walkway often looks unfinished once the grass grows right up to the edges. Adding a simple paver border on both sides creates clean lines, makes the path feel more intentional, and helps it stand out from the lawn.
This approach works best on older homes where the original walkway is still solid but needs better definition. Keep the borders narrow so the path does not feel cramped, and use the same paver style for any small garden beds near the steps if you want the whole front to feel connected.
Give A Front Walkway Shape With Paver Borders
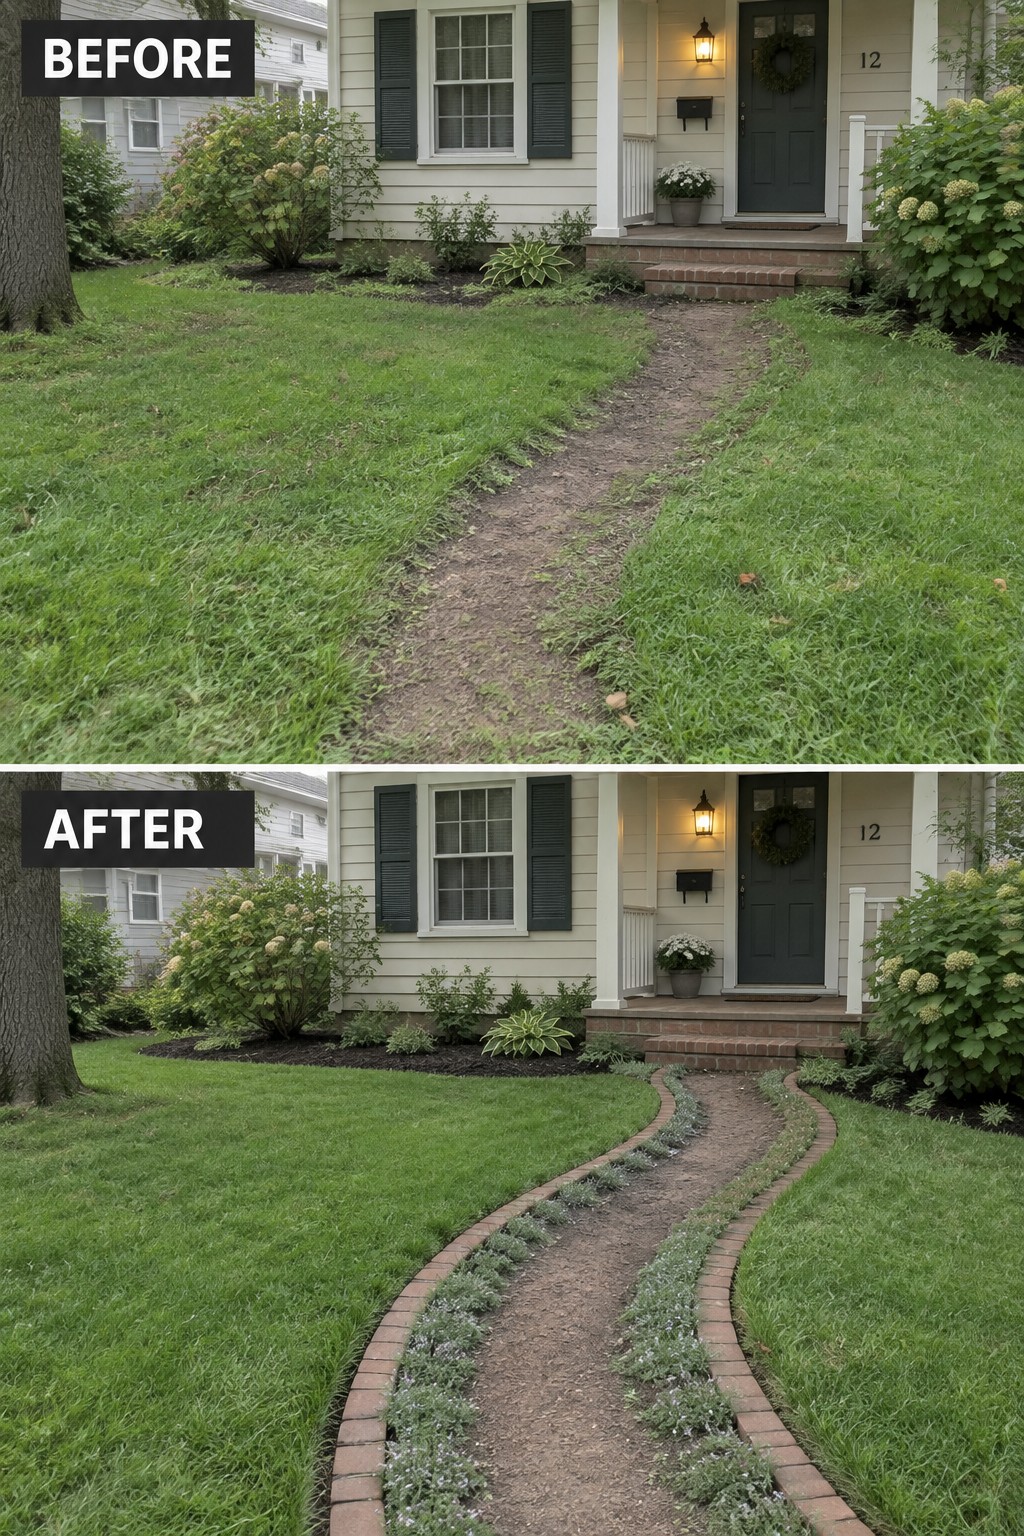
A straight dirt path through the grass often looks unfinished, especially when the lawn around it starts to grow uneven. Adding brick paver borders lets you control the shape, create a gentle curve, and keep the edges clean without needing a full hardscape overhaul. The low planting along the new borders also helps the path feel intentional instead of just worn into the lawn.
This approach works well on homes where the front yard is mostly grass and you want a simple upgrade that still leaves room to mow. Lay out the curve with a hose first so you can see how it flows from the sidewalk to the steps, then choose pavers that match the brick on the house. Keep the plants along the edge low and spaced so the walkway stays easy to walk and maintain.
Frame A Concrete Walkway With Paver Borders
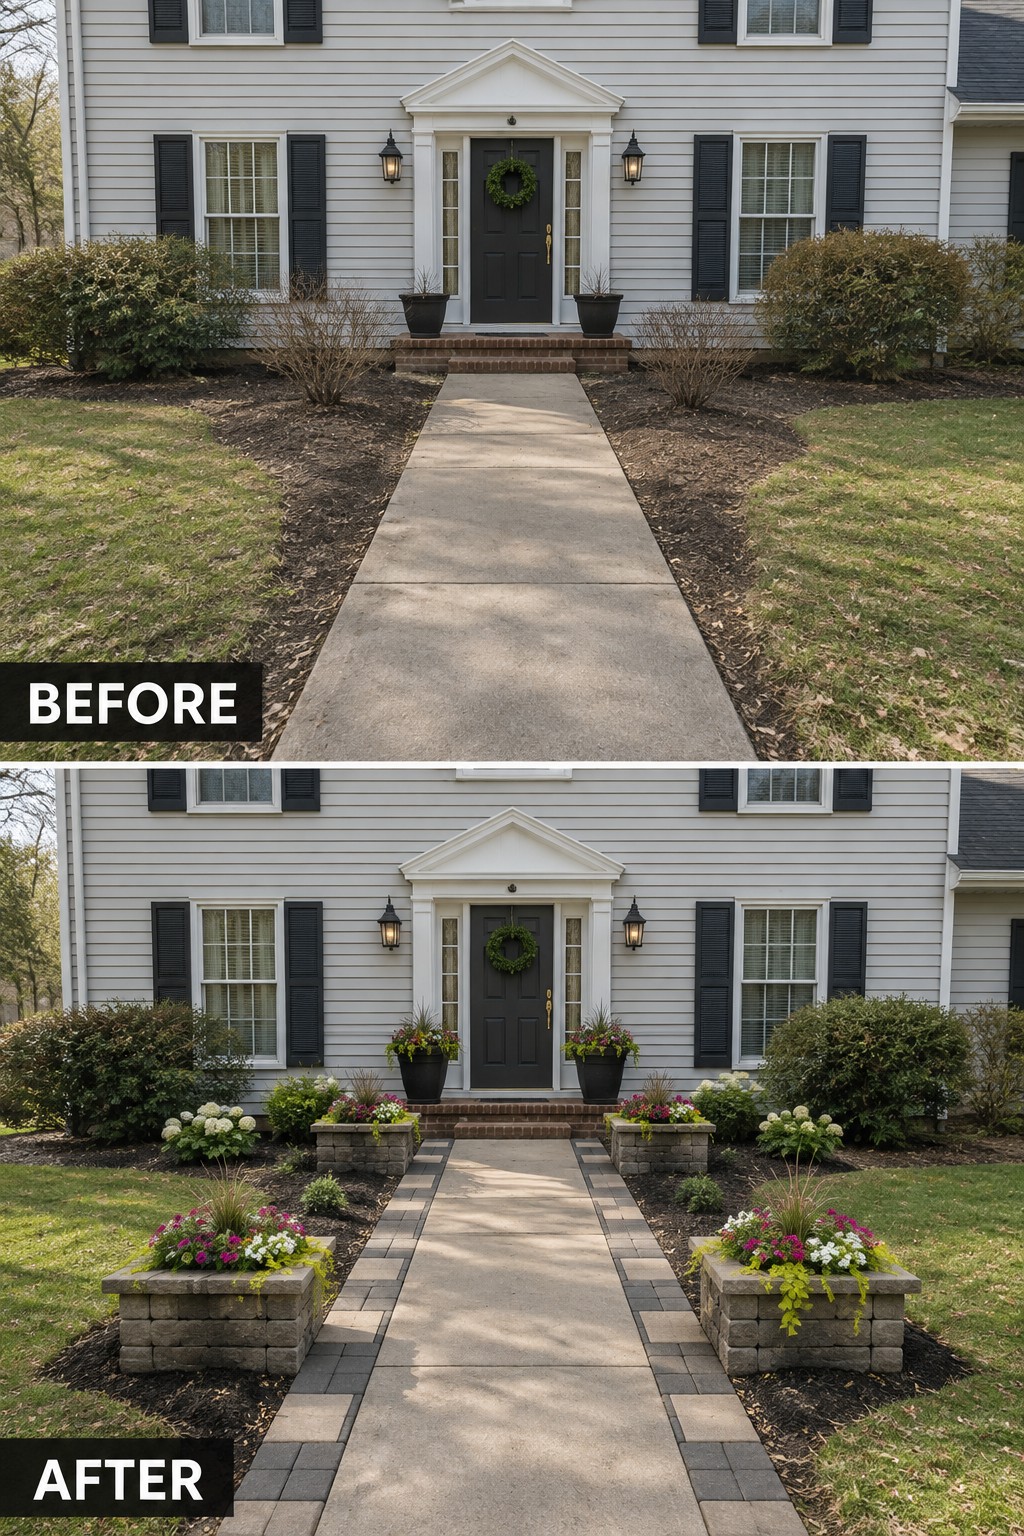
A plain concrete path often looks unfinished next to grass and mulch beds. Adding a simple paver border on both sides gives the walkway clear edges and creates narrow planting strips that make the whole front look more intentional. The after photo shows how those borders also give a place to set low stone planters without blocking the walk.
This idea works best when the existing concrete is still sound and you mainly need better structure. Choose pavers that match the house trim or foundation color, keep the border two or three pavers wide, and add just a few planted containers so the path stays open and easy to use.
Add Paver Borders To Frame A Concrete Walkway
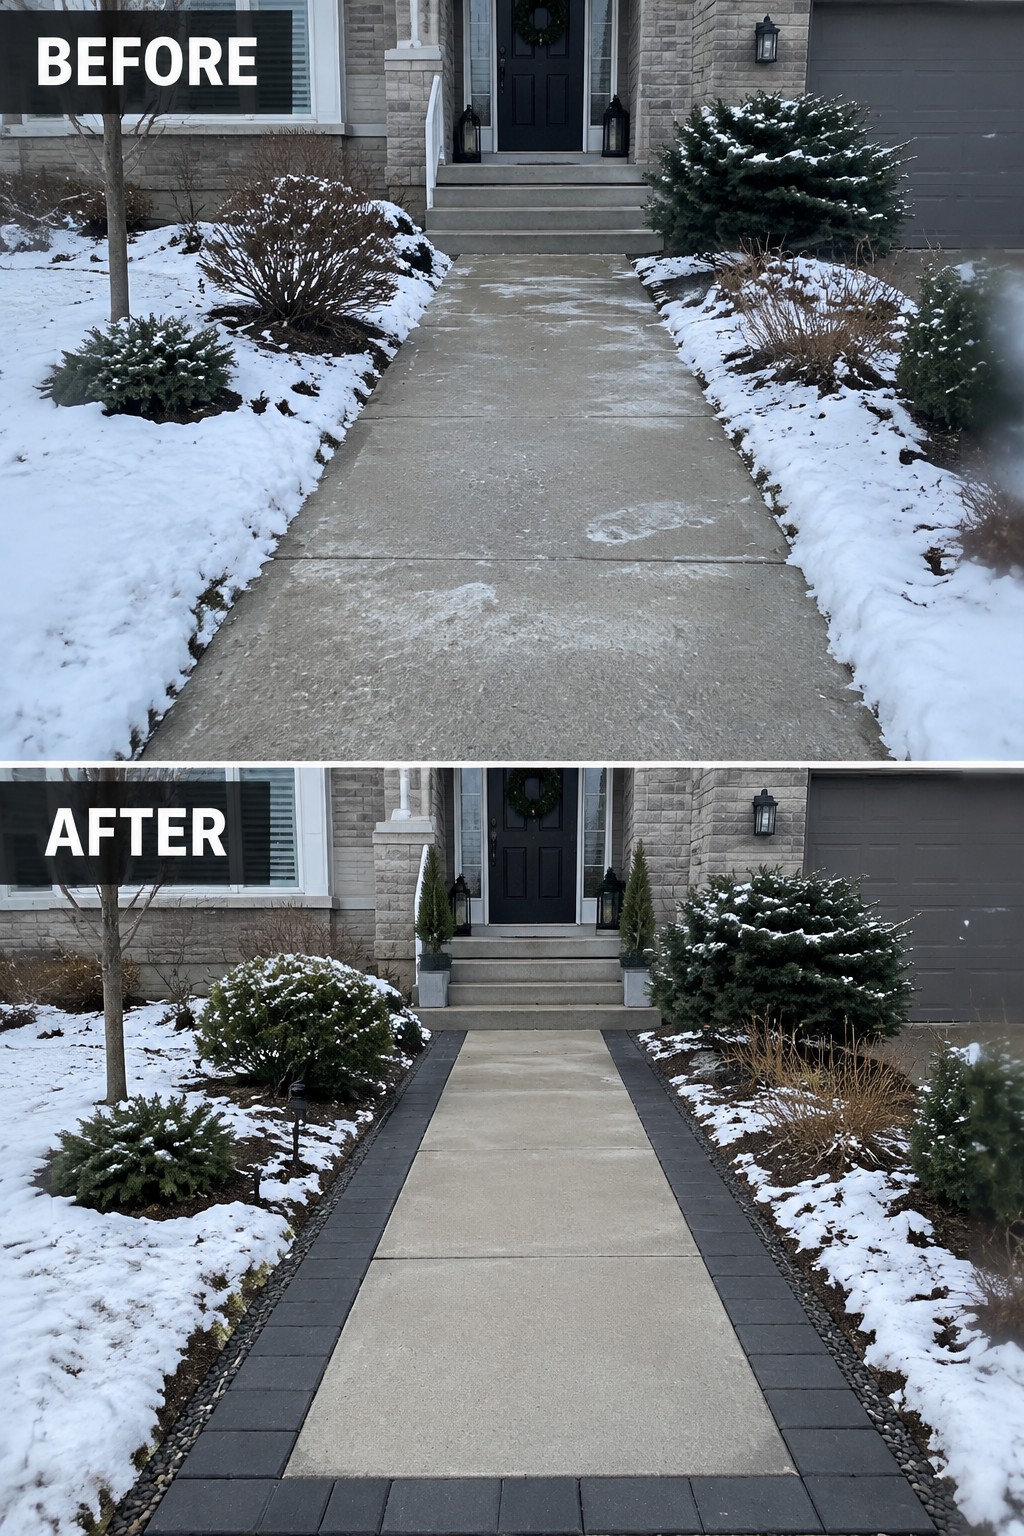
A plain concrete path can look unfinished when it sits between garden beds with no clear edge. Adding a dark paver border on both sides gives the walkway clean lines and makes the whole front yard feel more put together. The contrast between the pavers and the concrete does most of the work.
This idea works best on straight, simple paths where you want structure without replacing the existing concrete. Keep the beds beside the borders fairly low and neat so the pavers stay visible year-round. It is a practical step that adds definition and makes the walkway feel intentional rather than leftover.
Define A Lawn-Side Concrete Walkway With Paver Borders
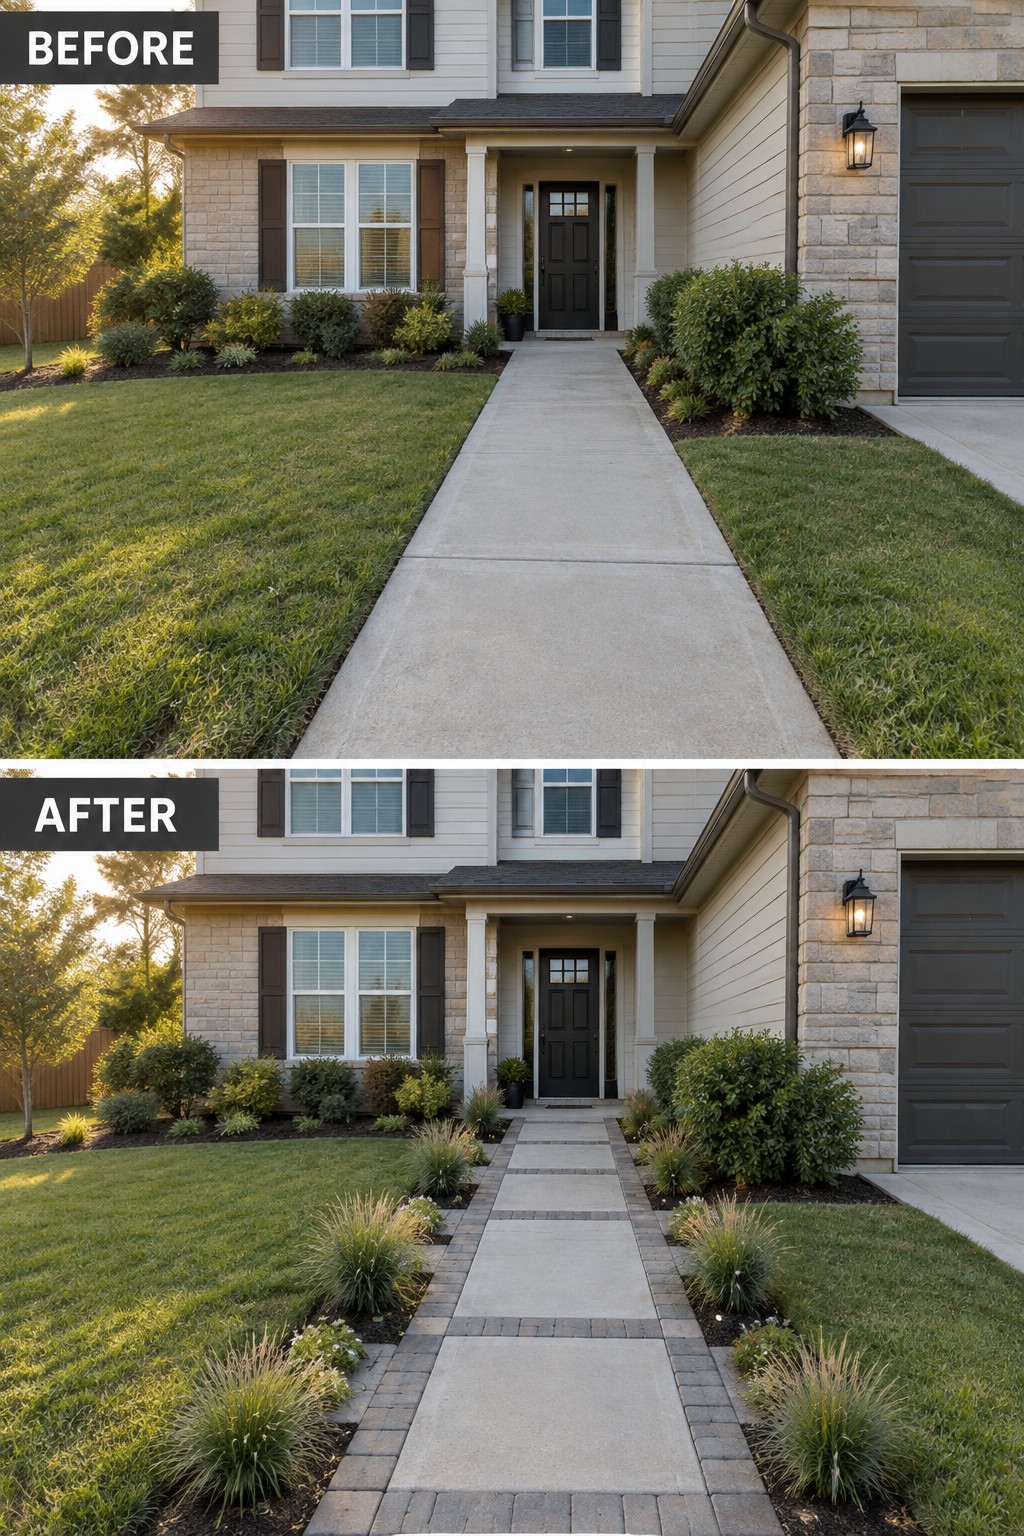
A plain concrete path can look unfinished when it runs straight through the lawn with no clear edges. Adding a simple paver border on both sides gives the walkway structure and makes the front of the house feel more intentional without tearing out the existing concrete.
This idea works best on homes where the path itself is still solid. Choose a paver color that stays close to the house tones, keep the border width modest so the path does not feel narrowed, and use the new edges to shape the planting beds on either side.
Define A Front Walkway With Brick Paver Borders
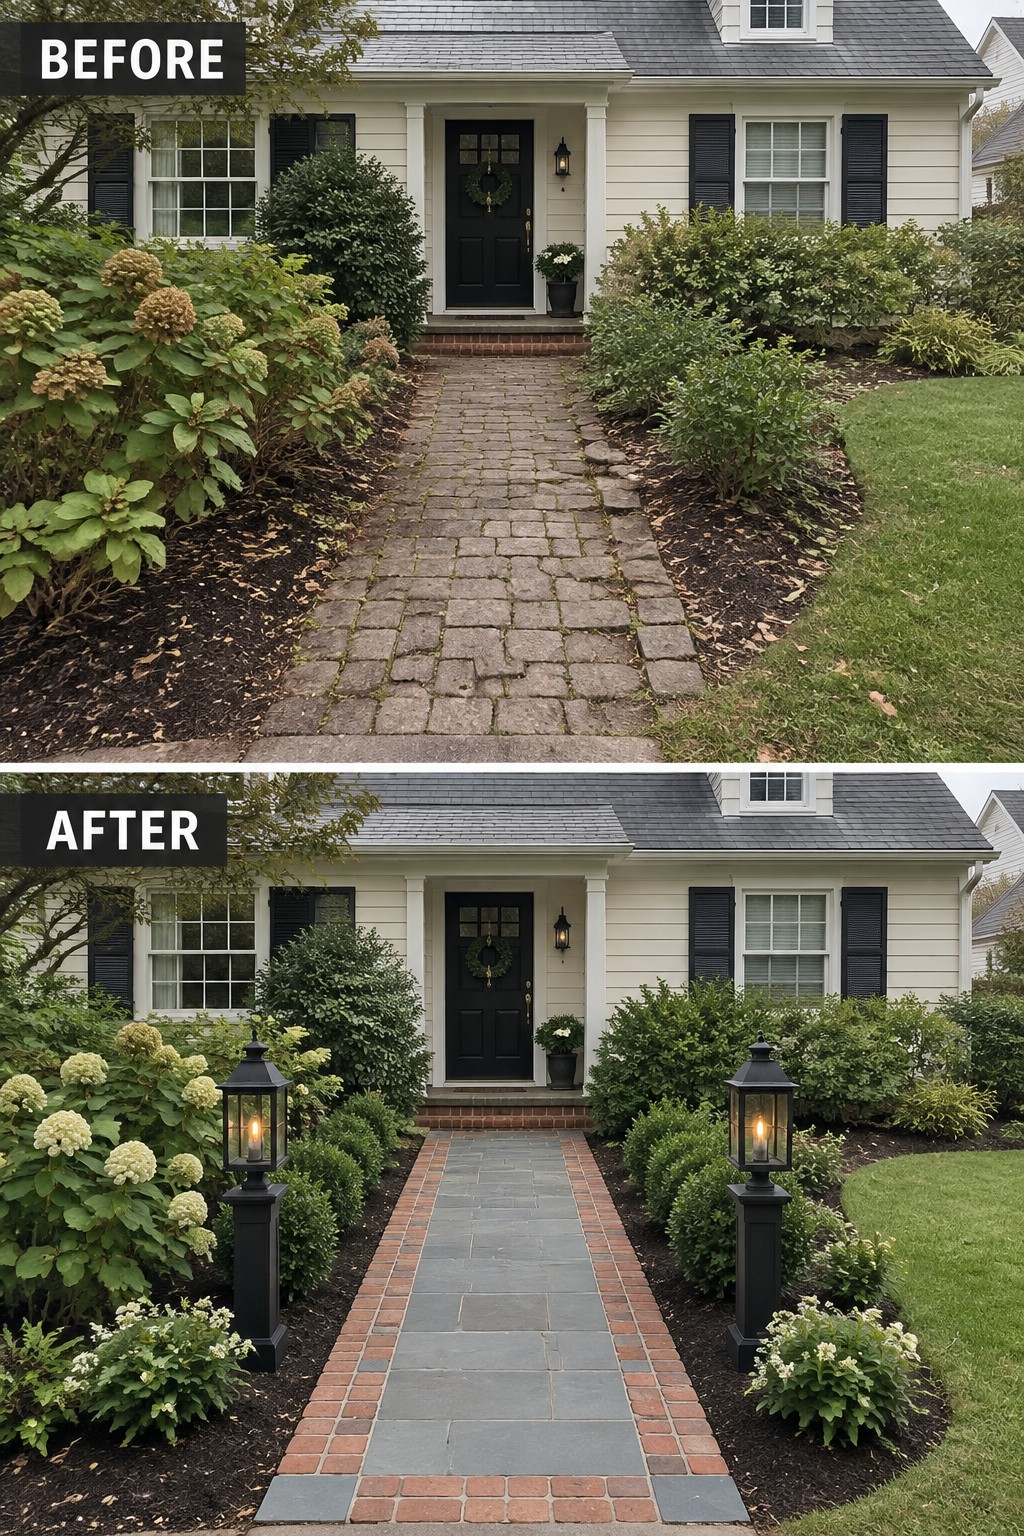
The original path had lost its shape among the uneven stones and spreading beds. A clean slate center with a brick border on both sides gives the walkway a clear edge and makes the approach feel more put together without any major construction.
This idea works best on older homes where the existing path is still usable but looks tired. Keep the border narrow, match the brick tone to your house trim if possible, and hold back on extra planting right next to the path so the border stays visible.
Refresh An Aging Front Walkway With Paver Borders
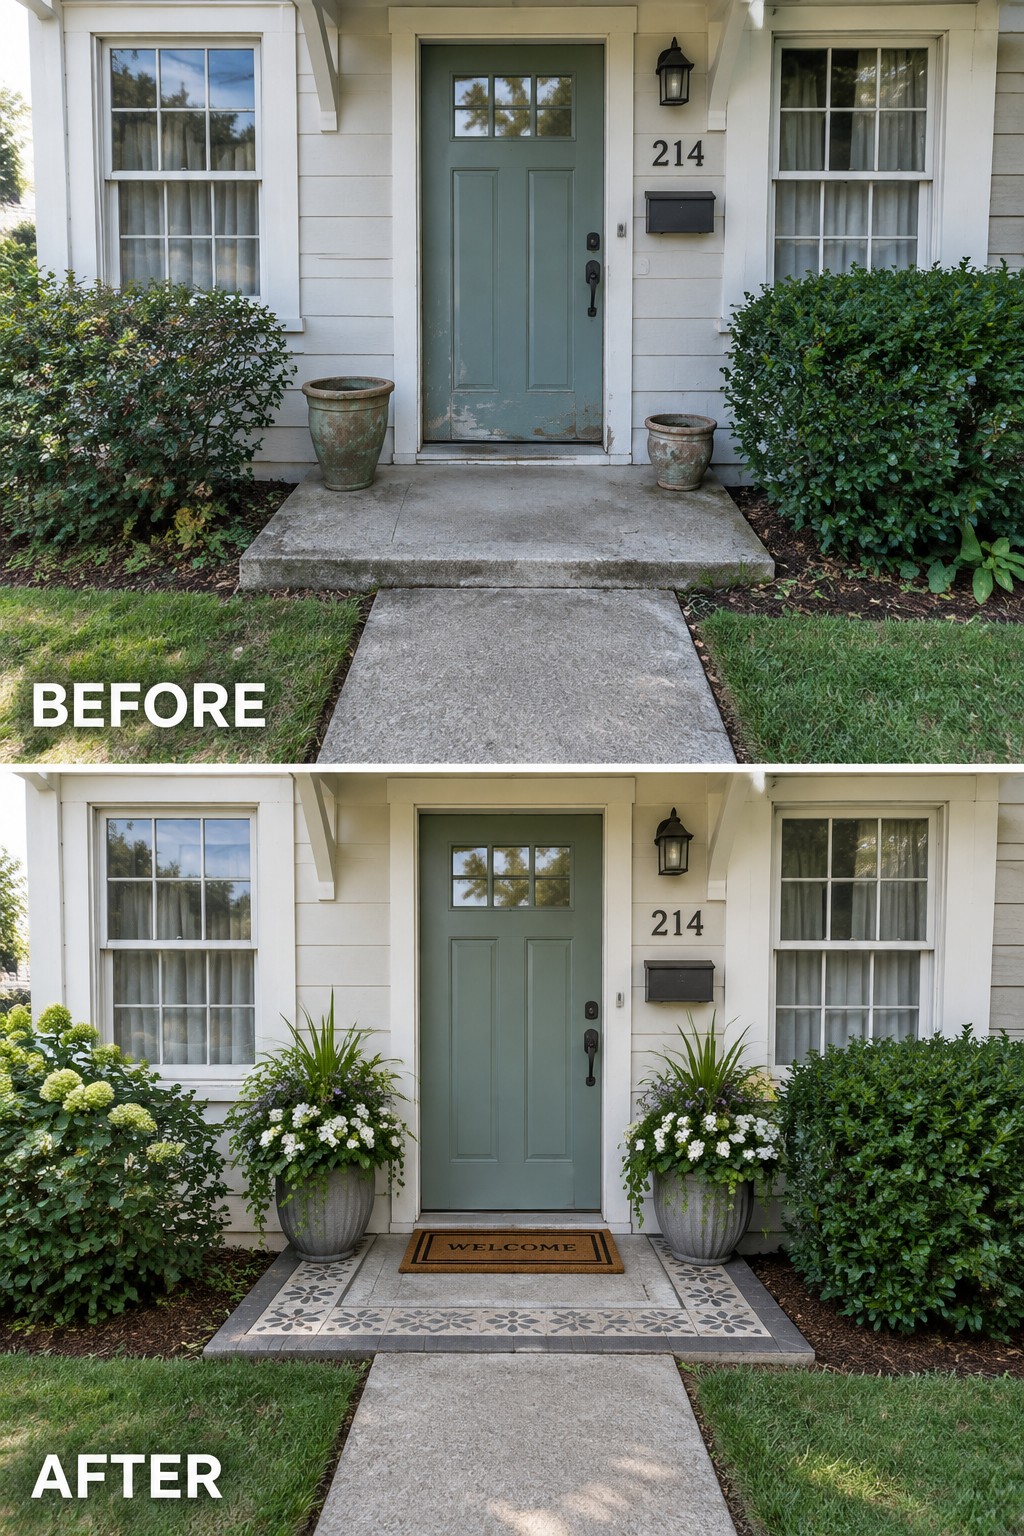
A plain concrete walkway often looks unfinished next to a house, especially when the rest of the entry has some age to it. Adding a simple paver border around the edges gives the path clear shape and makes the whole front feel more put together without any major construction.
This approach works well on older homes where the original stoop and walk are still solid but lack detail. Keep the border pattern modest, match the scale to the walkway width, and add a couple of matching planters on either side so the new edging feels like part of the original design rather than an afterthought.
Frequently Asked Questions
Q: Can I tackle these paver borders on my own if I have never done hardscaping before?
A: Start with a straight section of walkway to practice the layout. Mark your edge lines with string and set the pavers in place before you dig so you can adjust spacing. Most people finish the job over a weekend once they get the first few feet done.
Q: What if my front walkway curves around the yard?
A: Pavers bend with the path if you keep the gaps even on the inside of the turn. A wet saw handles the few angled cuts you need without much trouble. The border stays neat as long as you follow the existing edge instead of forcing straight lines.
Q: How often will I need to clean or fix these borders?
A: Sweep them off now and then to stop dirt buildup. Check for loose pavers each spring and reset any that shift.
