

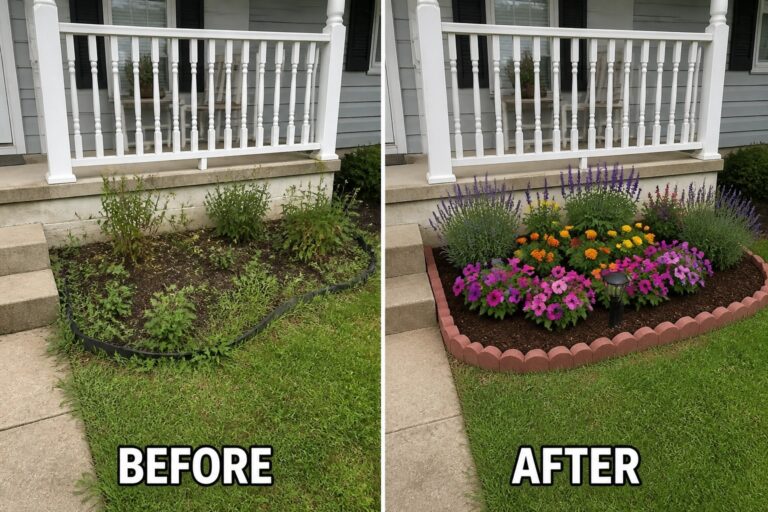
Flower beds often lose definition when grass starts to creep in around the edges and the planting lines blur over time. Adding a clean border helps the flowers stand out without requiring a full replanting or major redesign. I usually test the edging first. Once the shape is set it becomes easier to choose colors that work with the rest of the yard rather than fighting against it. A few of these edging styles look like they could be adapted to different soil types and sun levels without much trouble.
Create Defined Garden Beds With Simple Edging
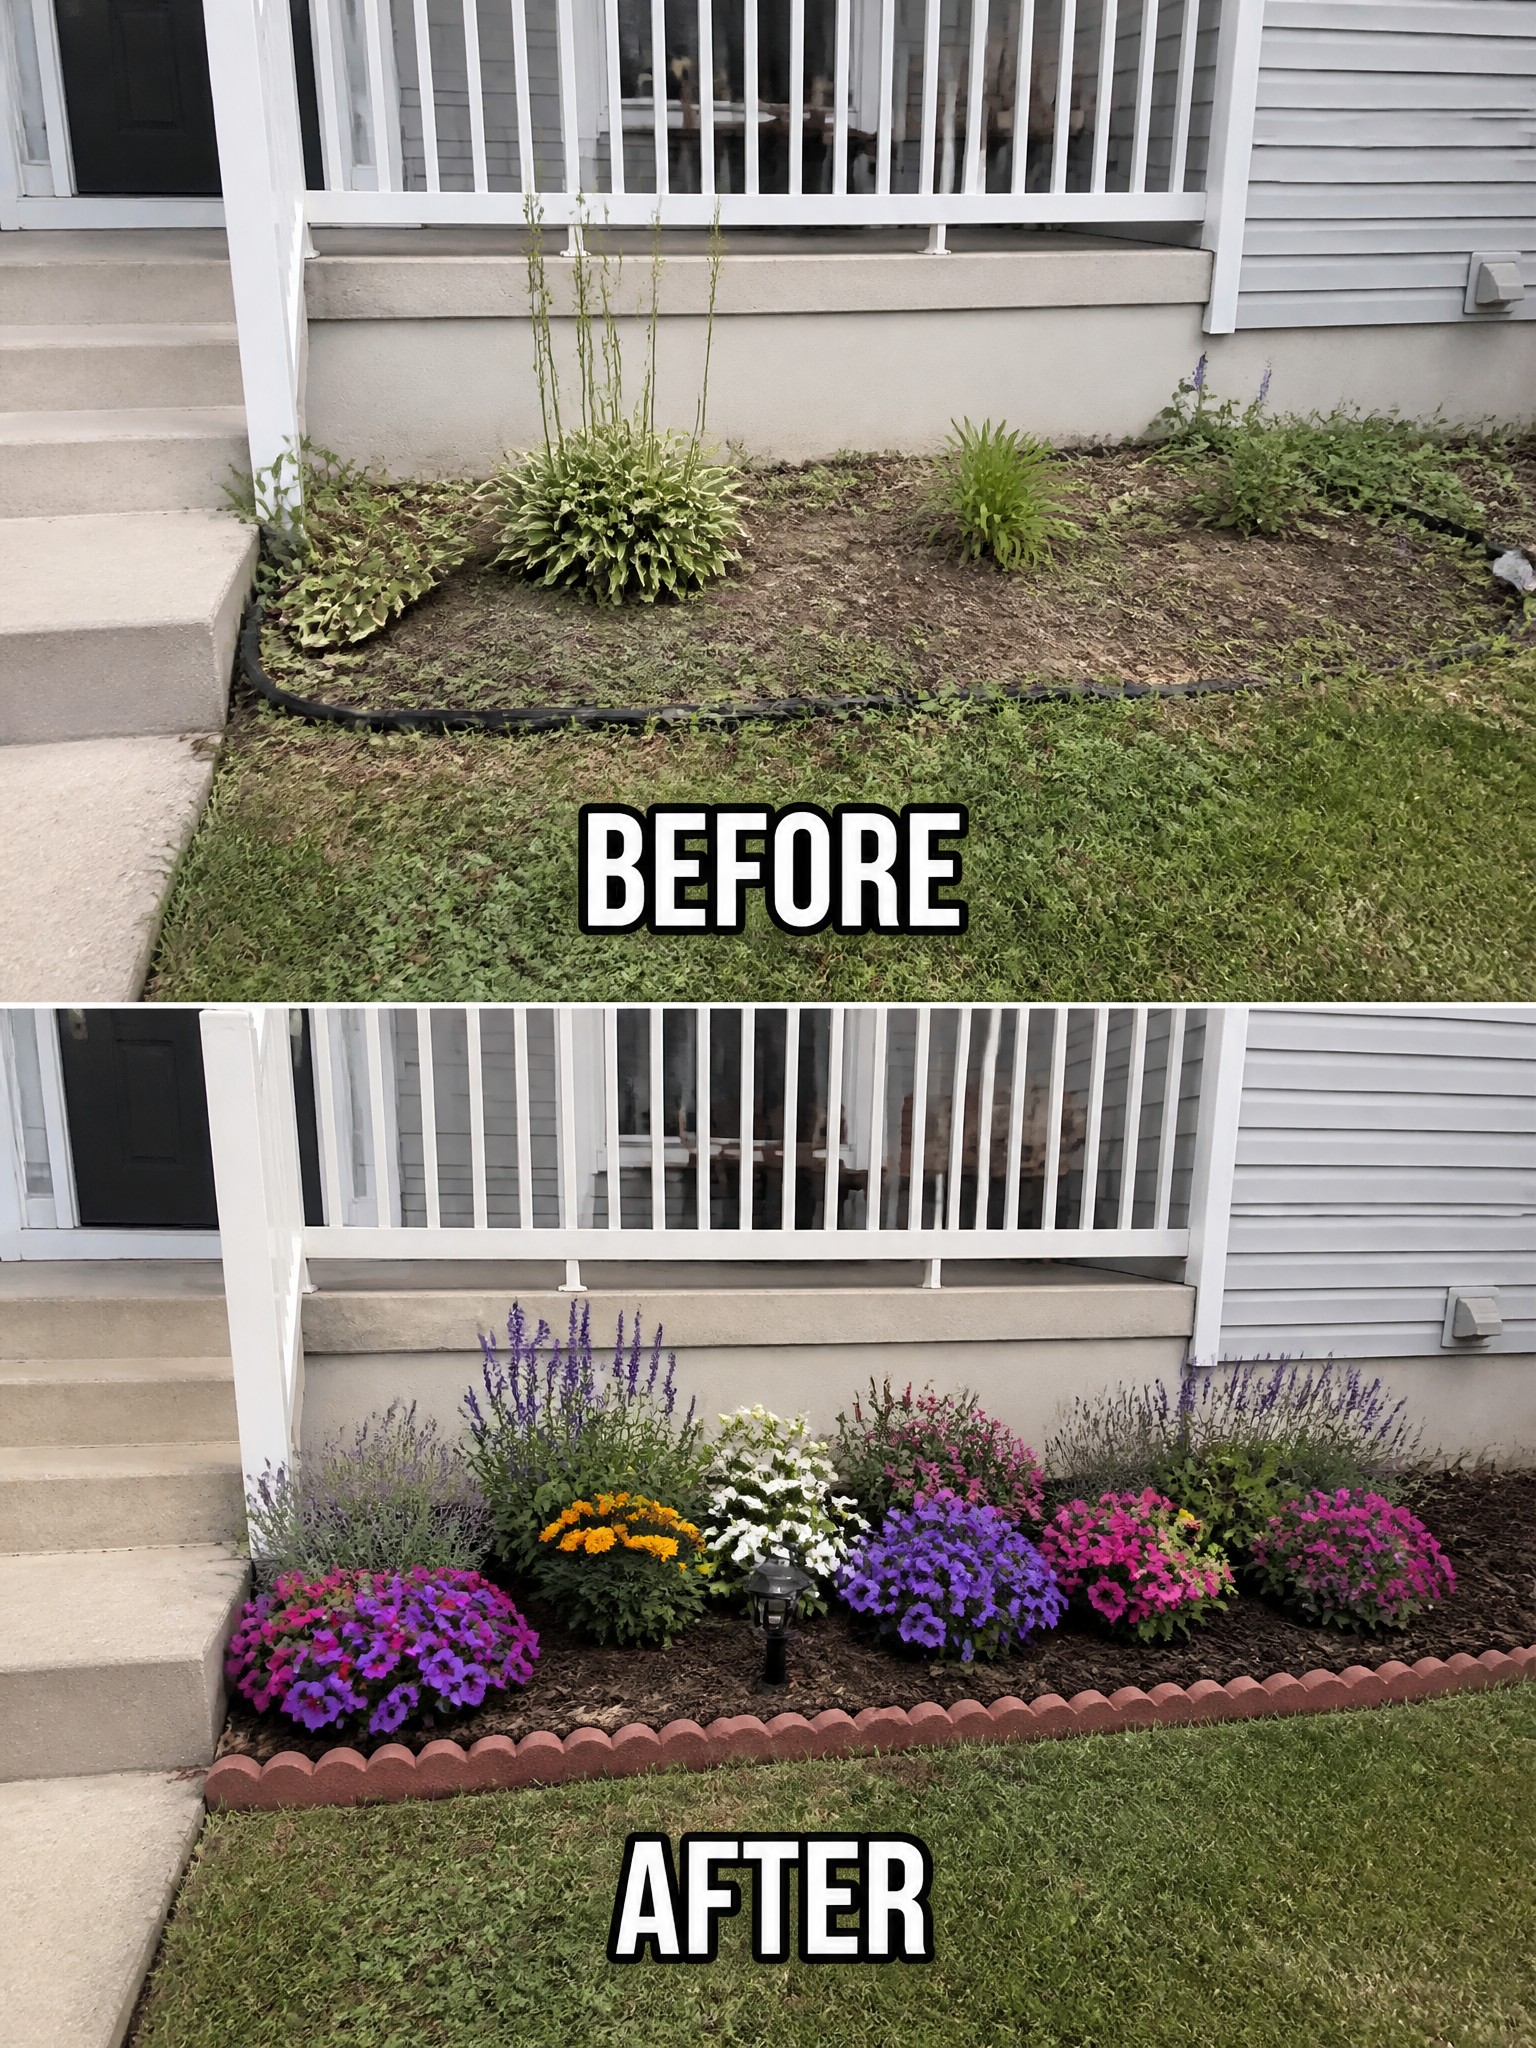
A messy strip of grass and weeds along the foundation can make the whole front of a house feel neglected. Adding a clean edge and a layer of mulch turns that same area into a proper garden bed that looks intentional instead of leftover space.
This approach works best on small strips next to the house or along walkways where you want structure without a big project. Start by cutting a clear line, lay down edging that suits your style, then fill the bed with a few groups of plants rather than scattering them. The result stays neat even when the rest of the yard is still a work in progress.
Add Defined Edging To Shape A Narrow Border
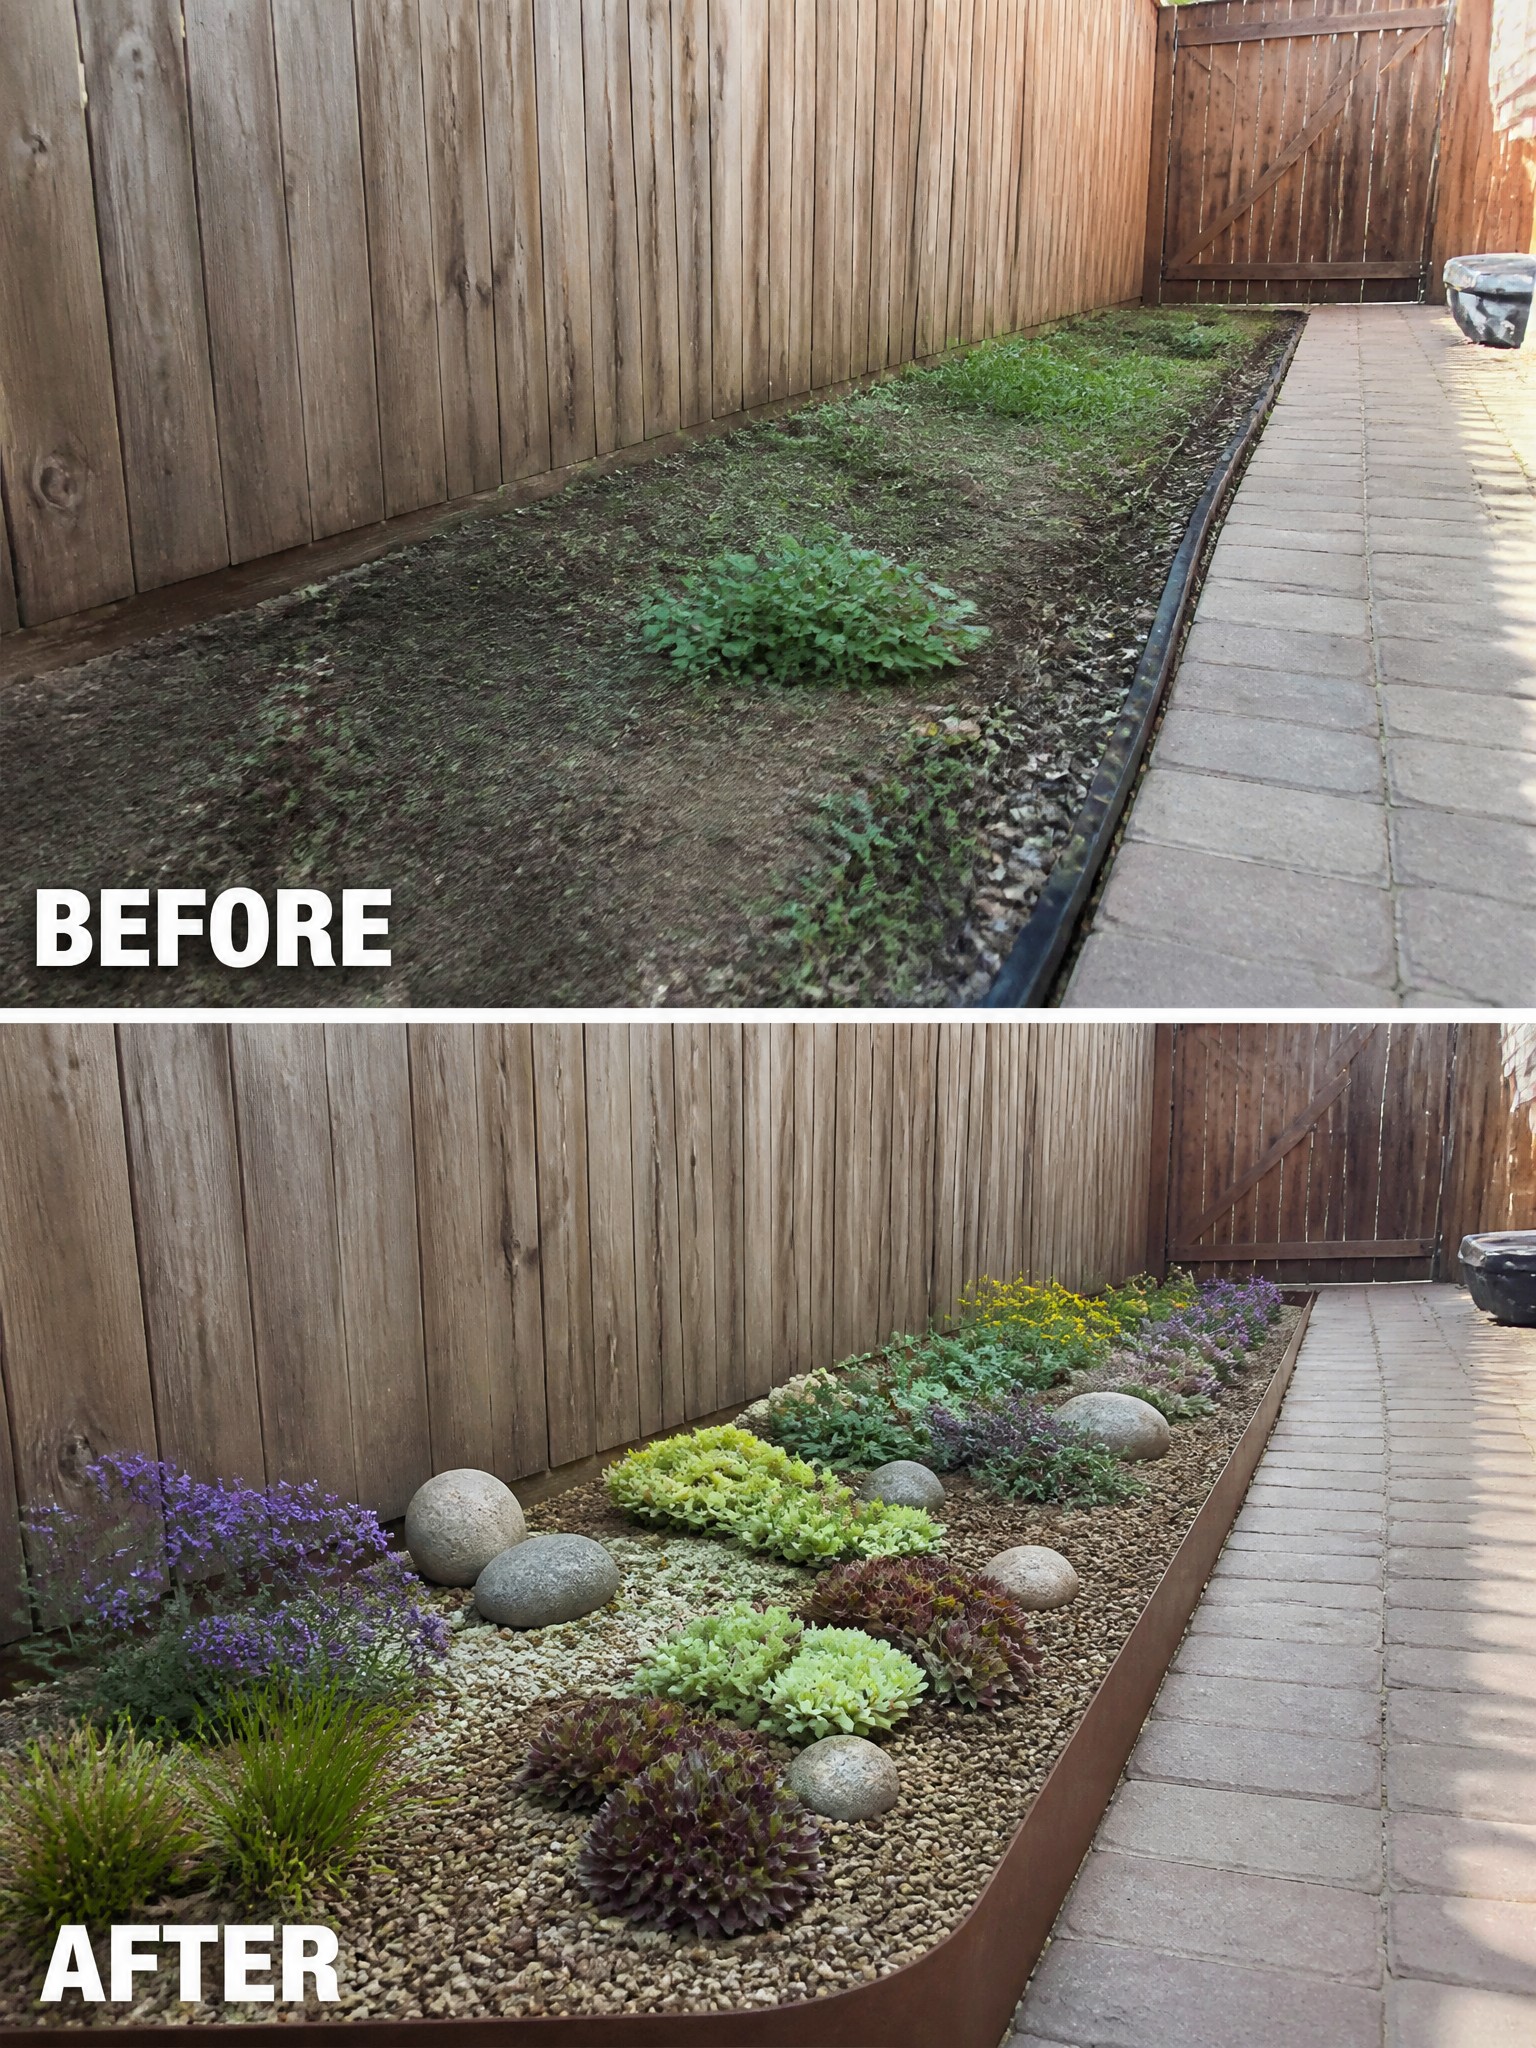
A thin strip of dirt and weeds next to a path often looks unfinished and hard to maintain. Adding a clean metal edge and filling the bed with gravel gives the space clear boundaries right away. The plants then sit in a tidy setting instead of fighting with grass and debris.
This approach works well along fences, driveways, or walkways where space is limited. Start with the edging to hold the shape, then choose low plants that can handle the conditions. Keep the planting simple so the bed stays easy to care for over time.
Add Stone Edging Around Trees For Defined Beds
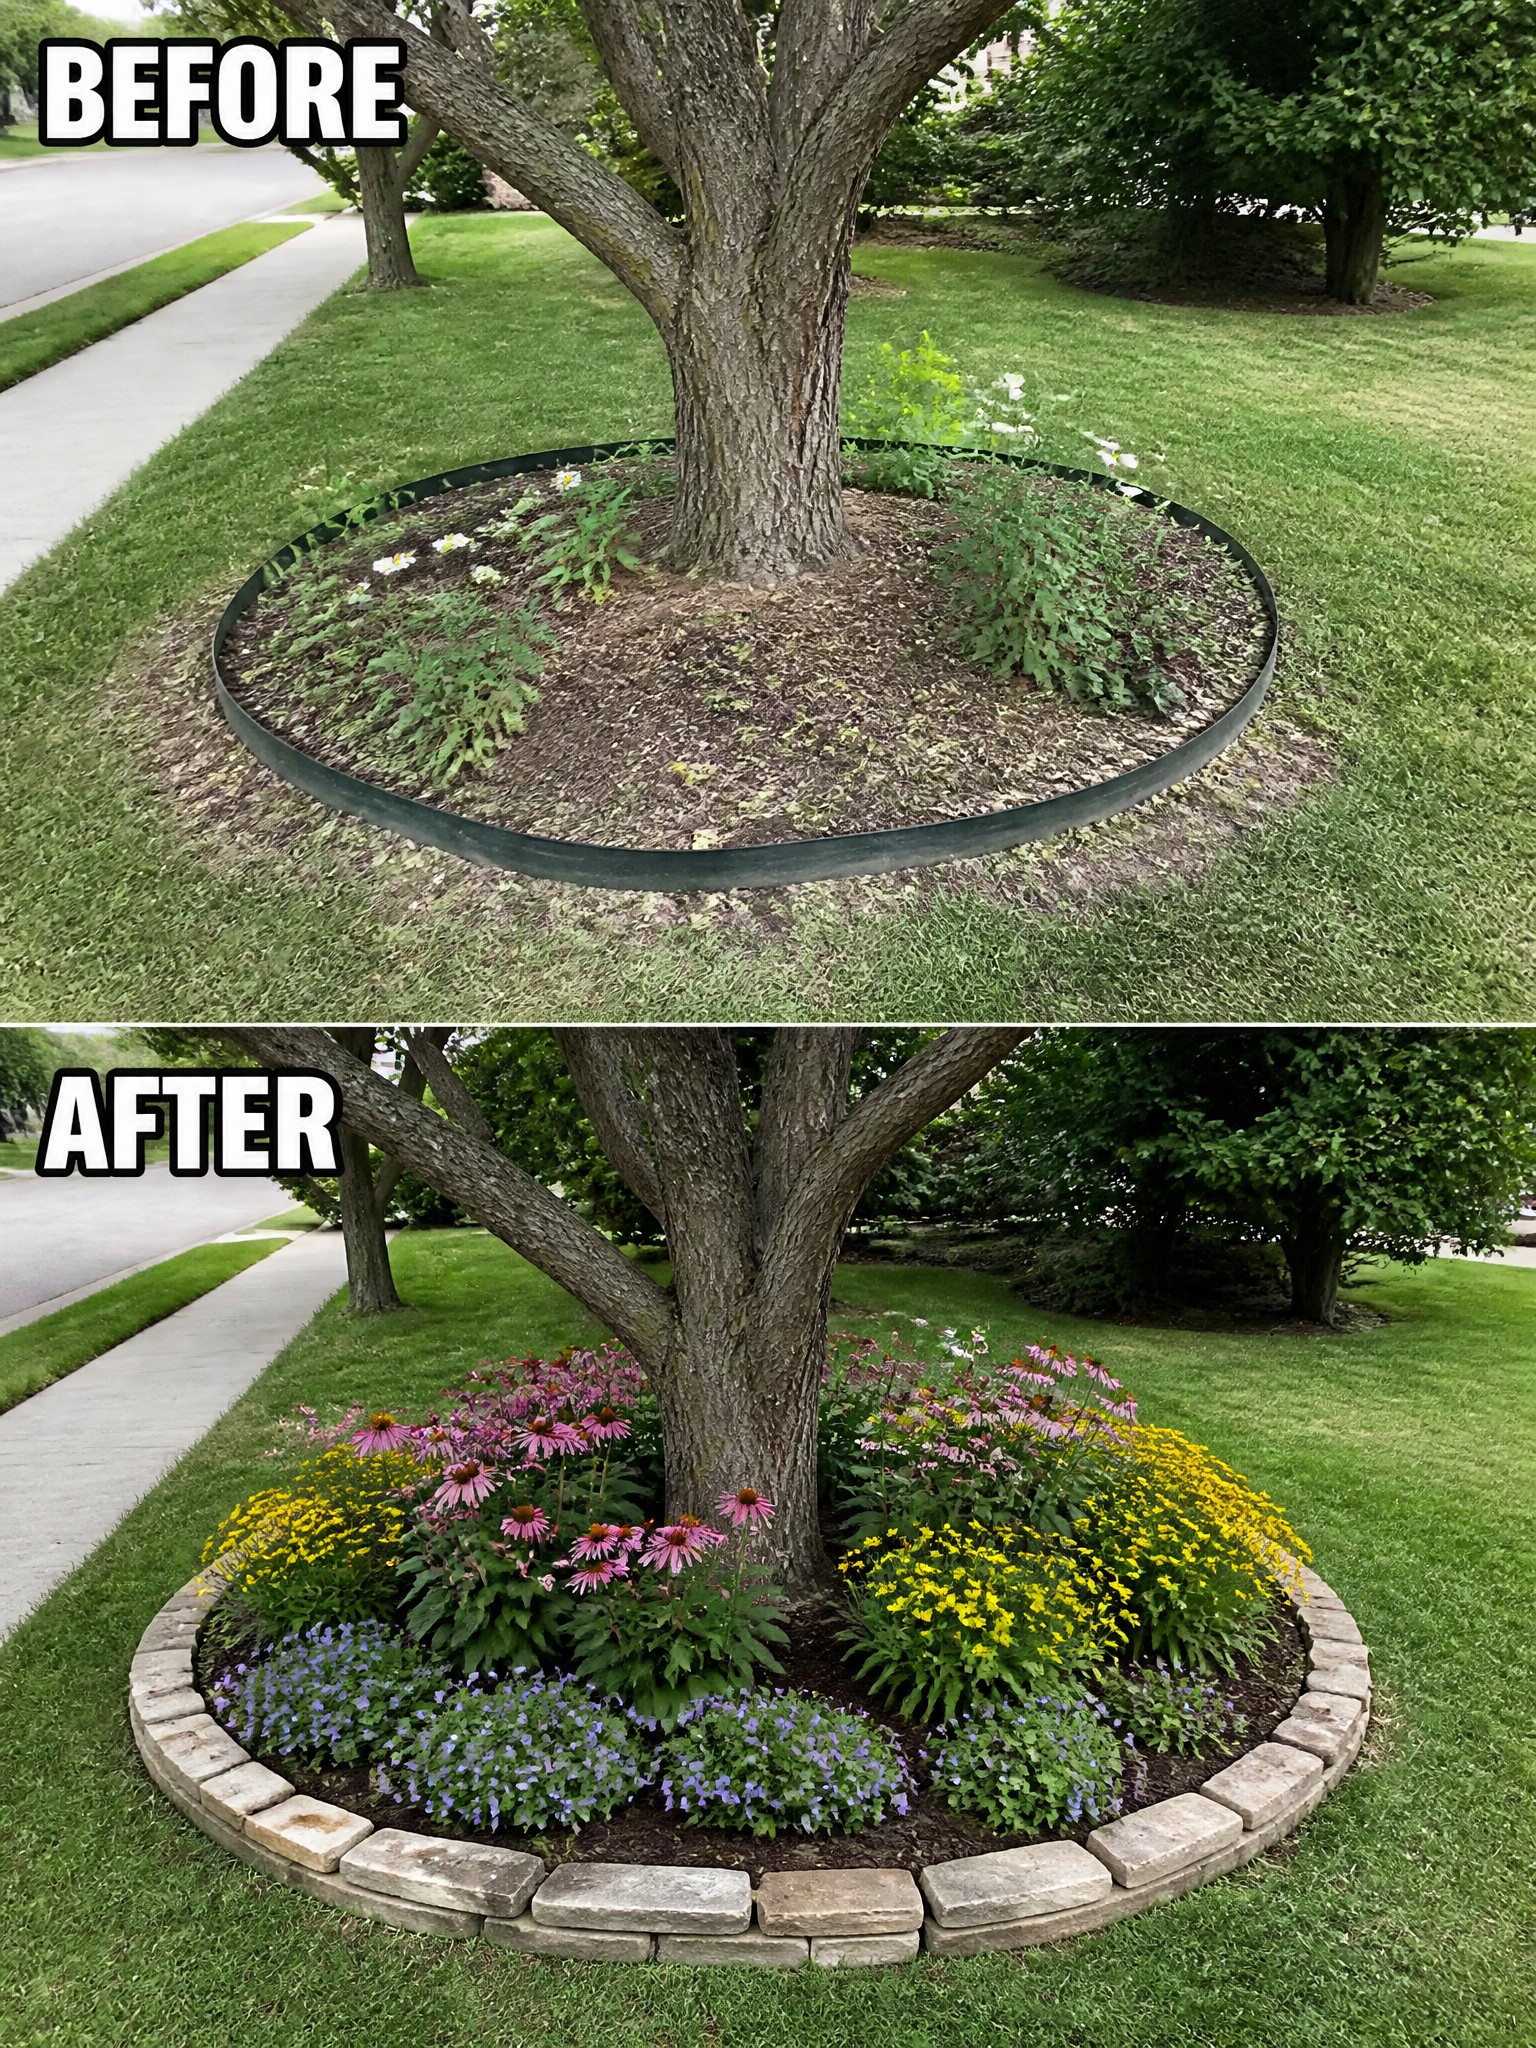
A basic metal ring around a tree often leaves the area looking unfinished. Switching to stacked stone creates a solid border that holds everything in place and gives the bed a clear shape. Filling it with layers of flowers then turns the space into something that feels planted on purpose instead of just mulched.
This approach works best in front yards or side yards where the tree sits in open lawn. Keep the new border a foot or two wider than the old one so roots have room, and pick plants that tolerate the mix of sun and shade the tree creates. The edging does most of the work by making the bed look intentional even before the flowers fill in.
Define A Messy Driveway Edge With Fresh Edging
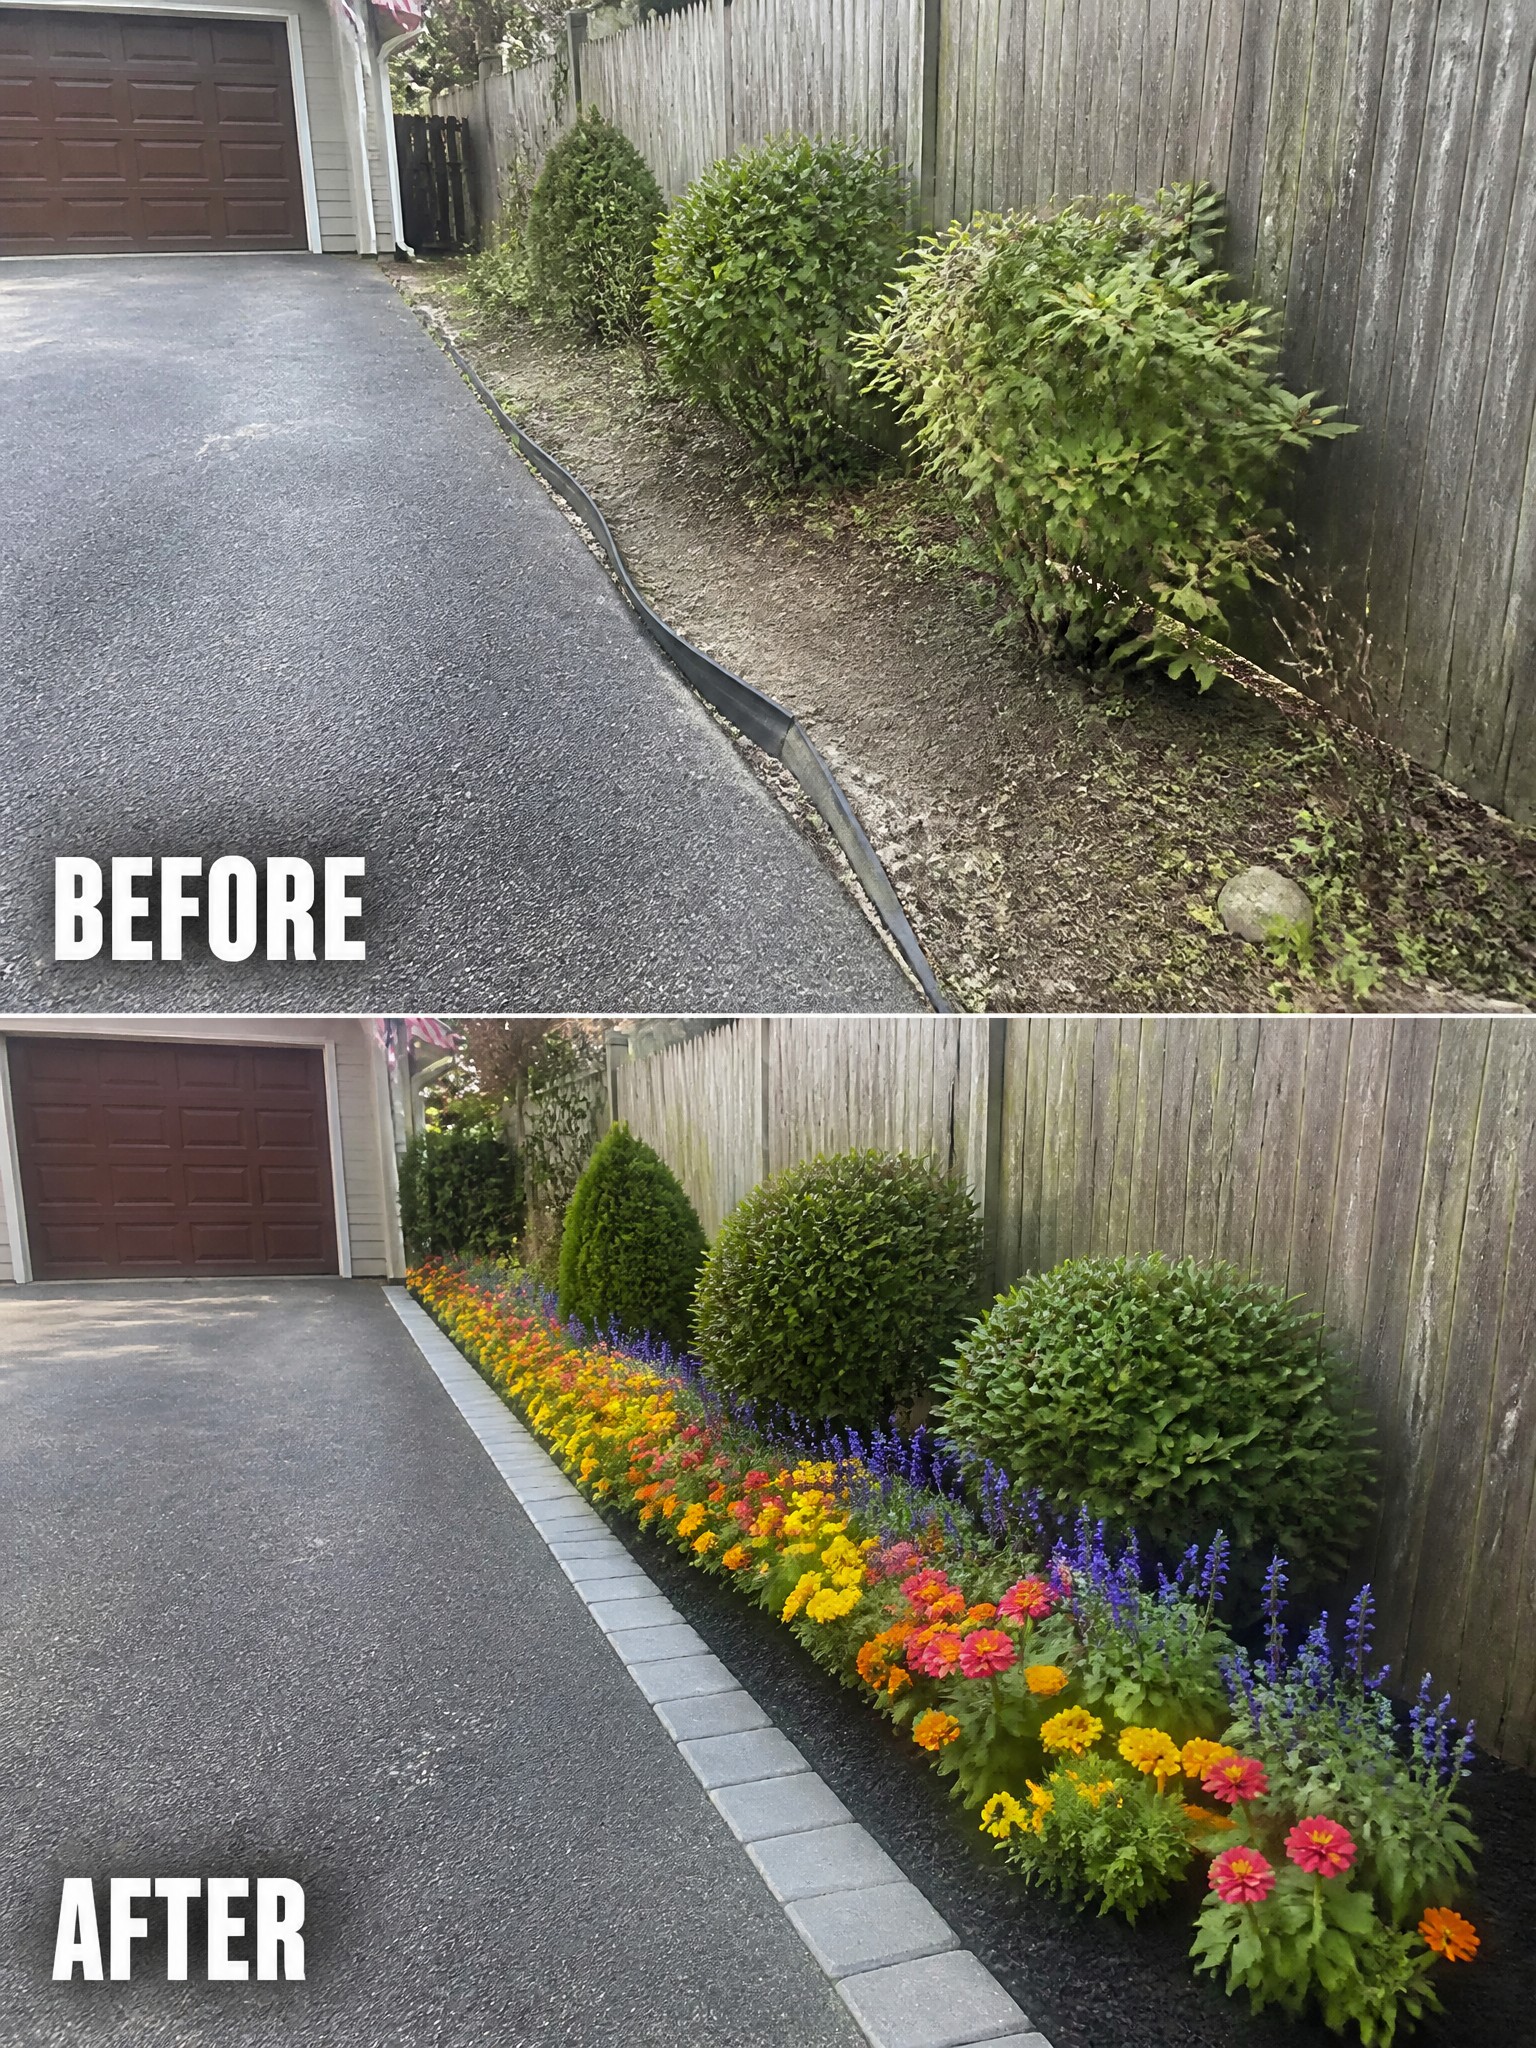
The main improvement comes from installing a clean paver border and turning the weedy strip into a mulched flower bed. This gives the whole side of the driveway a finished look instead of leaving it as an afterthought.
This approach works well on narrow strips next to fences or driveways. Put the edging in first so the bed stays neat over time, then fill it with a mix of shrubs for structure and bright flowers for color. Keep the planting simple so it stays easy to maintain.
Give Flower Beds Clear Edges With Raised Borders
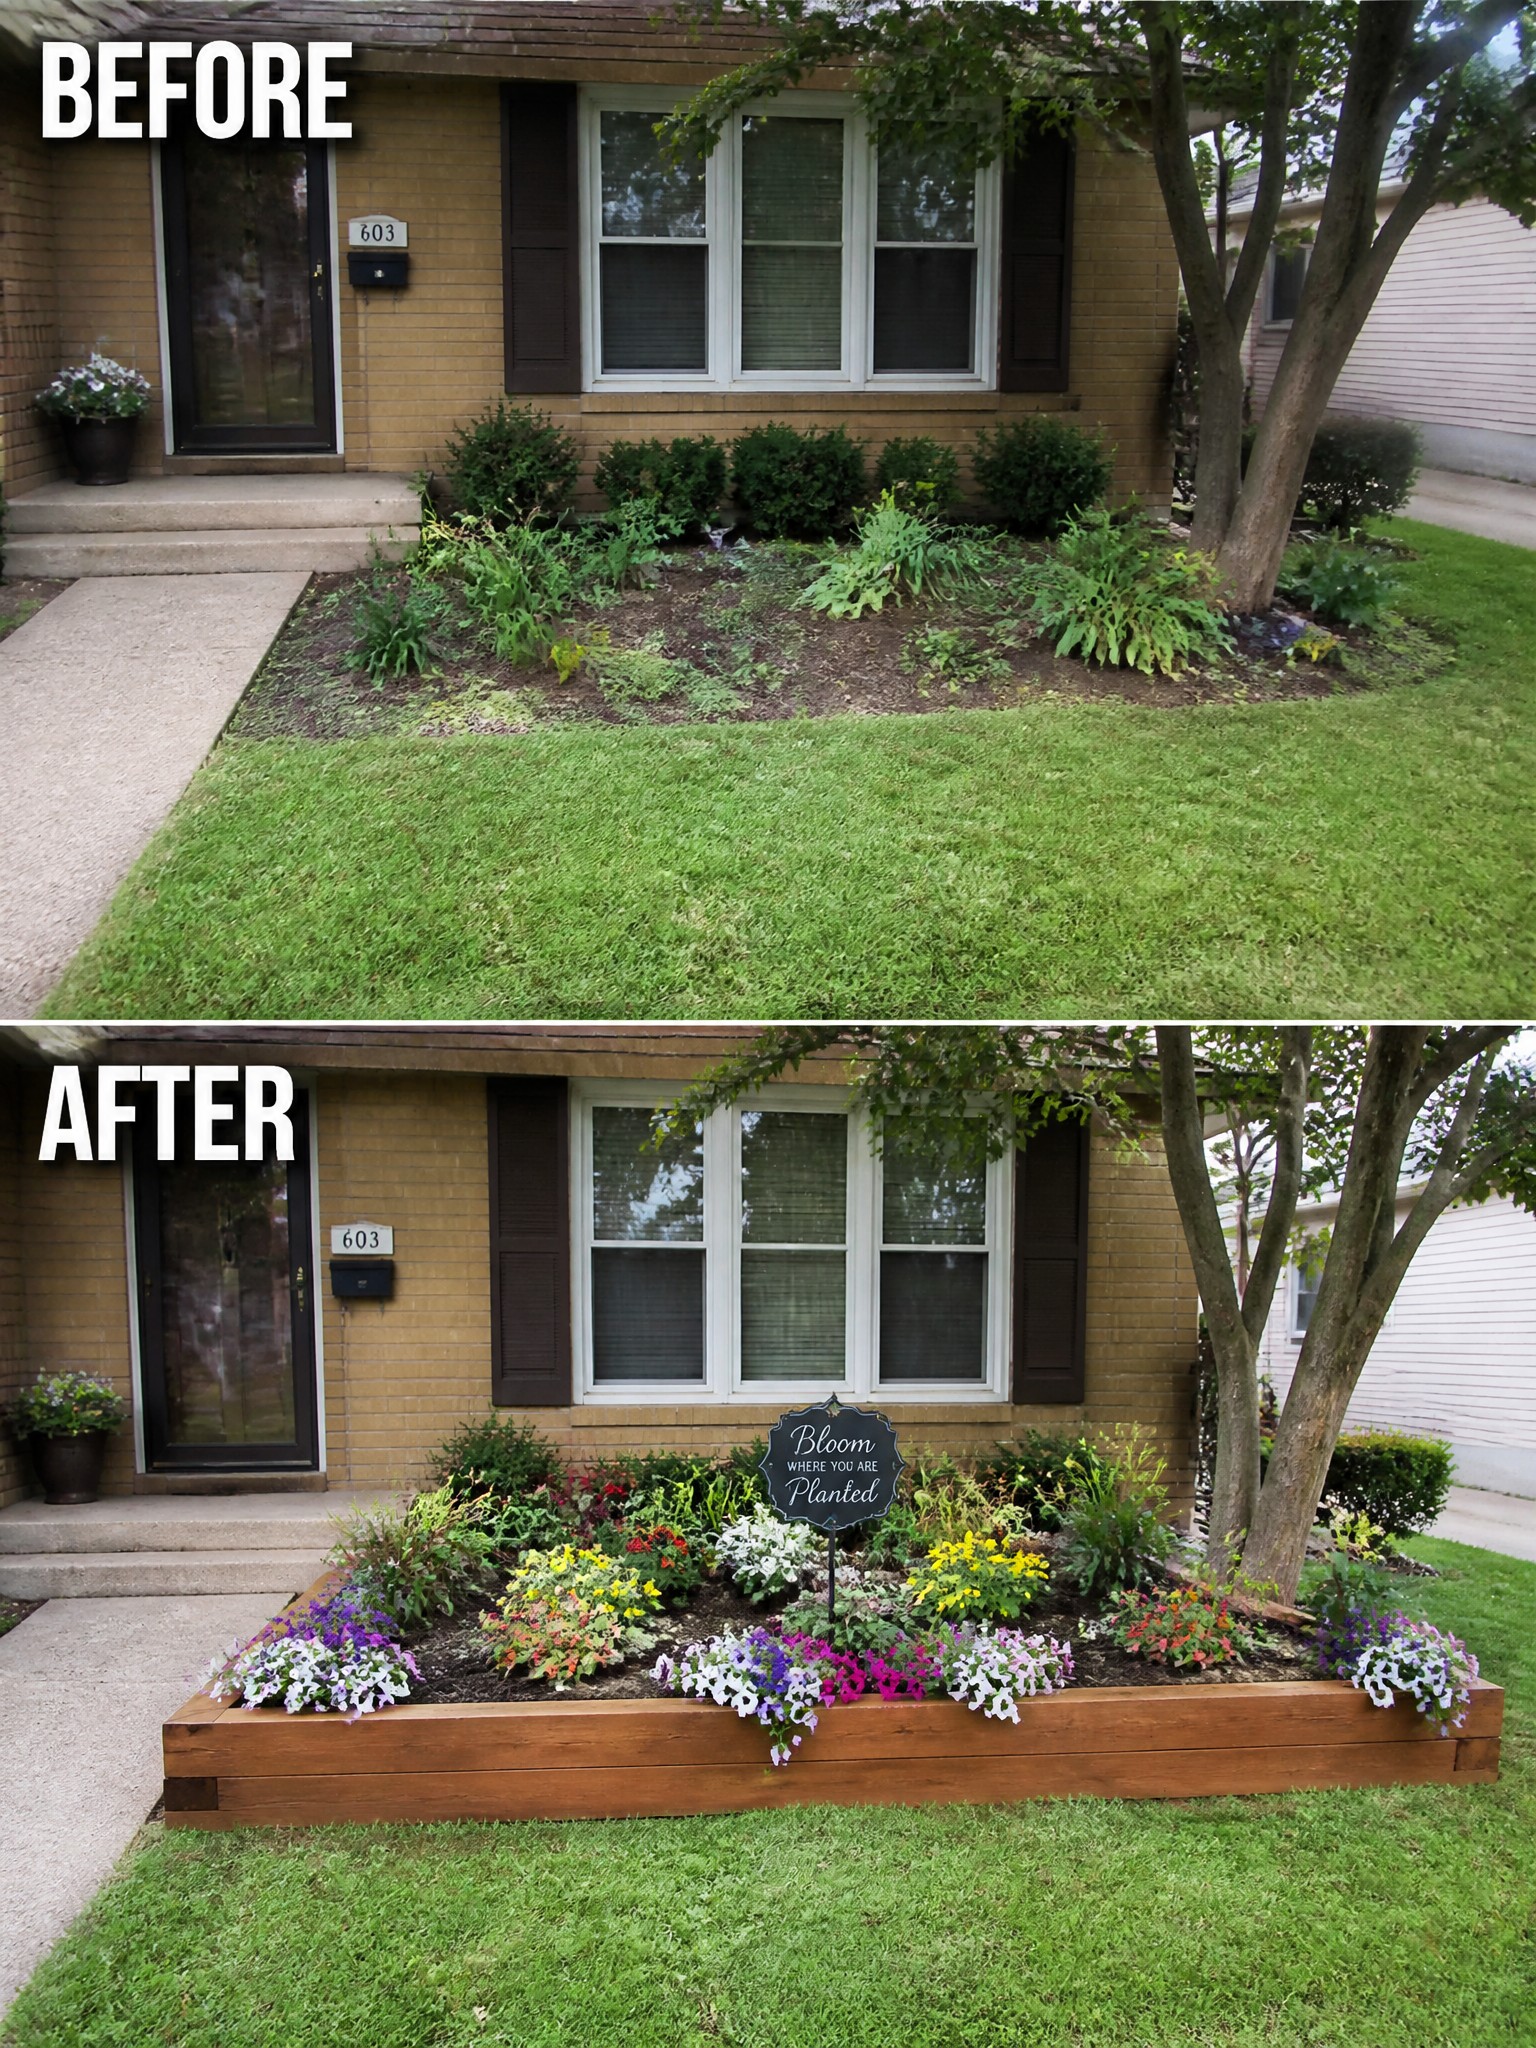
Adding a raised wooden border turns a loose flower bed into something that actually stays in place. The before photo shows plants spilling into the grass with no real shape. Once the wood frame goes in, the bed looks finished and the flowers stay contained.
This works best on small front yards where you want color without constant trimming. Use rot-resistant wood, keep the height low so it does not block windows, and add mulch inside the border. The edge makes weeding faster and gives you a clear spot to plant in groups instead of letting things spread everywhere.
Add Edging To Give Your Flower Beds Clear Shape

One of the easiest ways to clean up a front yard is to add a firm edge to the garden bed. The before version had no real boundary, so the grass and plants just ran together and looked messy. Once the edging went in along with a layer of mulch, the bed suddenly looked planned instead of neglected.
This idea works best on narrow beds that sit right against the house or along a walkway. Mark out a gentle curve first, put the edging in place, then mulch before you plant. It stops the grass from creeping in and makes the whole front look neater with very little ongoing work.
Terrace A Steep Slope With Retaining Walls
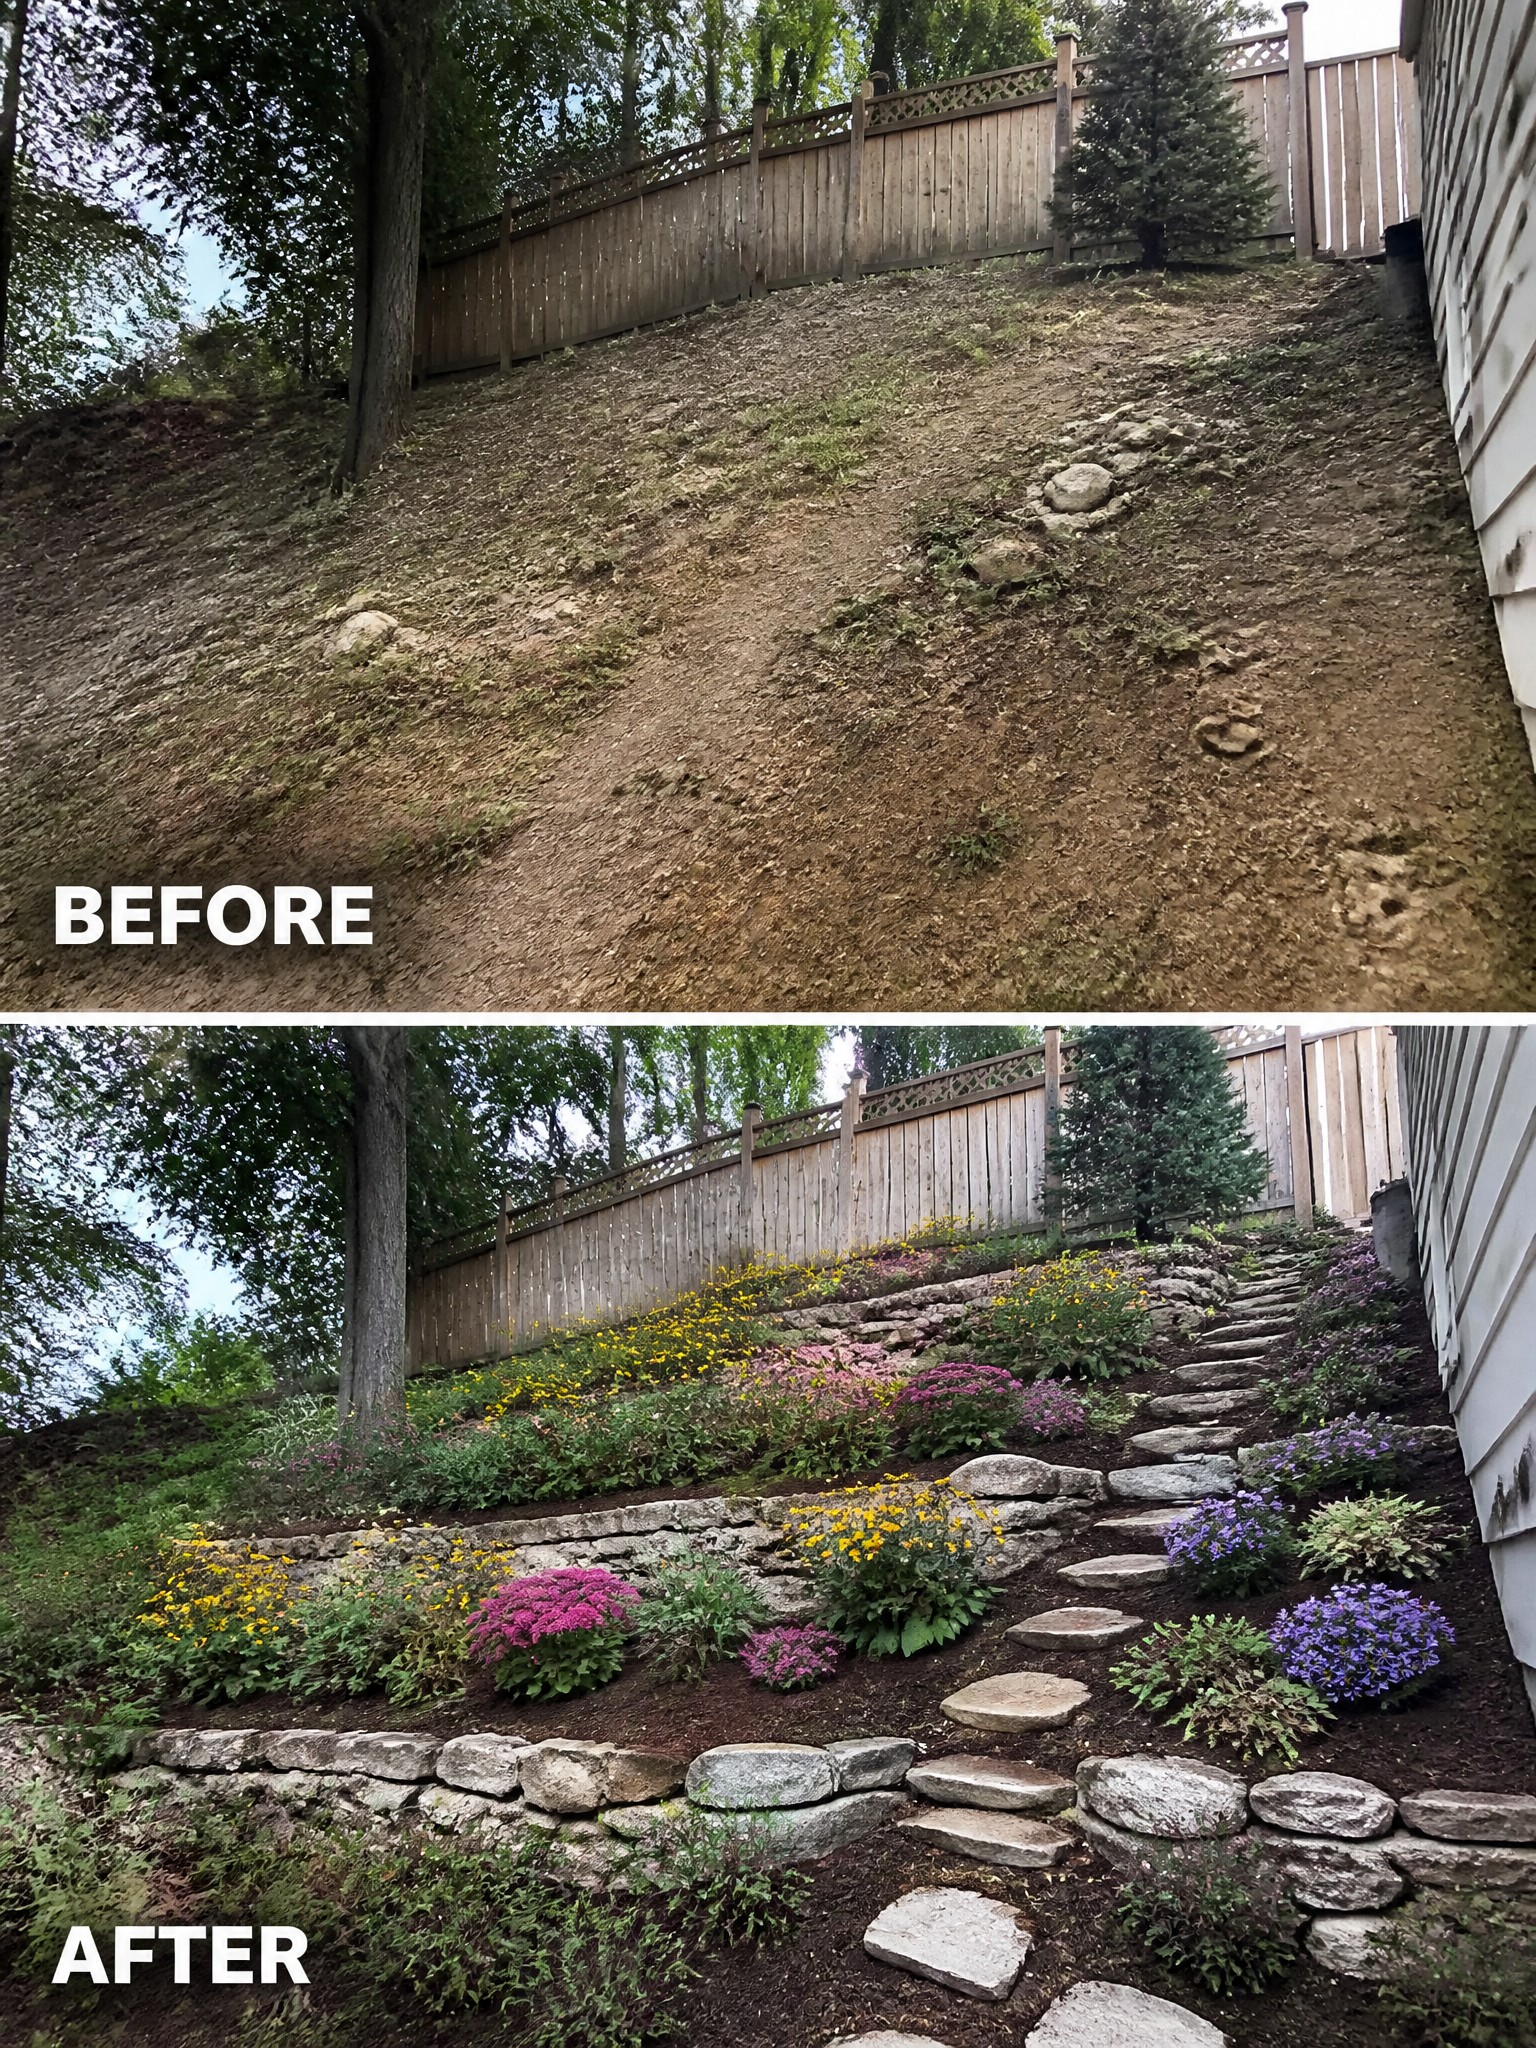
A bare dirt slope tends to stay empty because nothing holds the soil and plants wash away. Low stone retaining walls fix that by creating flat terraces that keep the dirt in place and give you actual beds to work with.
This idea suits homes with a noticeable drop right outside the back or side door. Build the walls first to shape the levels, then add a simple path so you can reach the plants without fighting the hill. Start with fewer beds if the slope is large so the project stays manageable.
Add Color To A Plain Front Bed With Fresh Planting
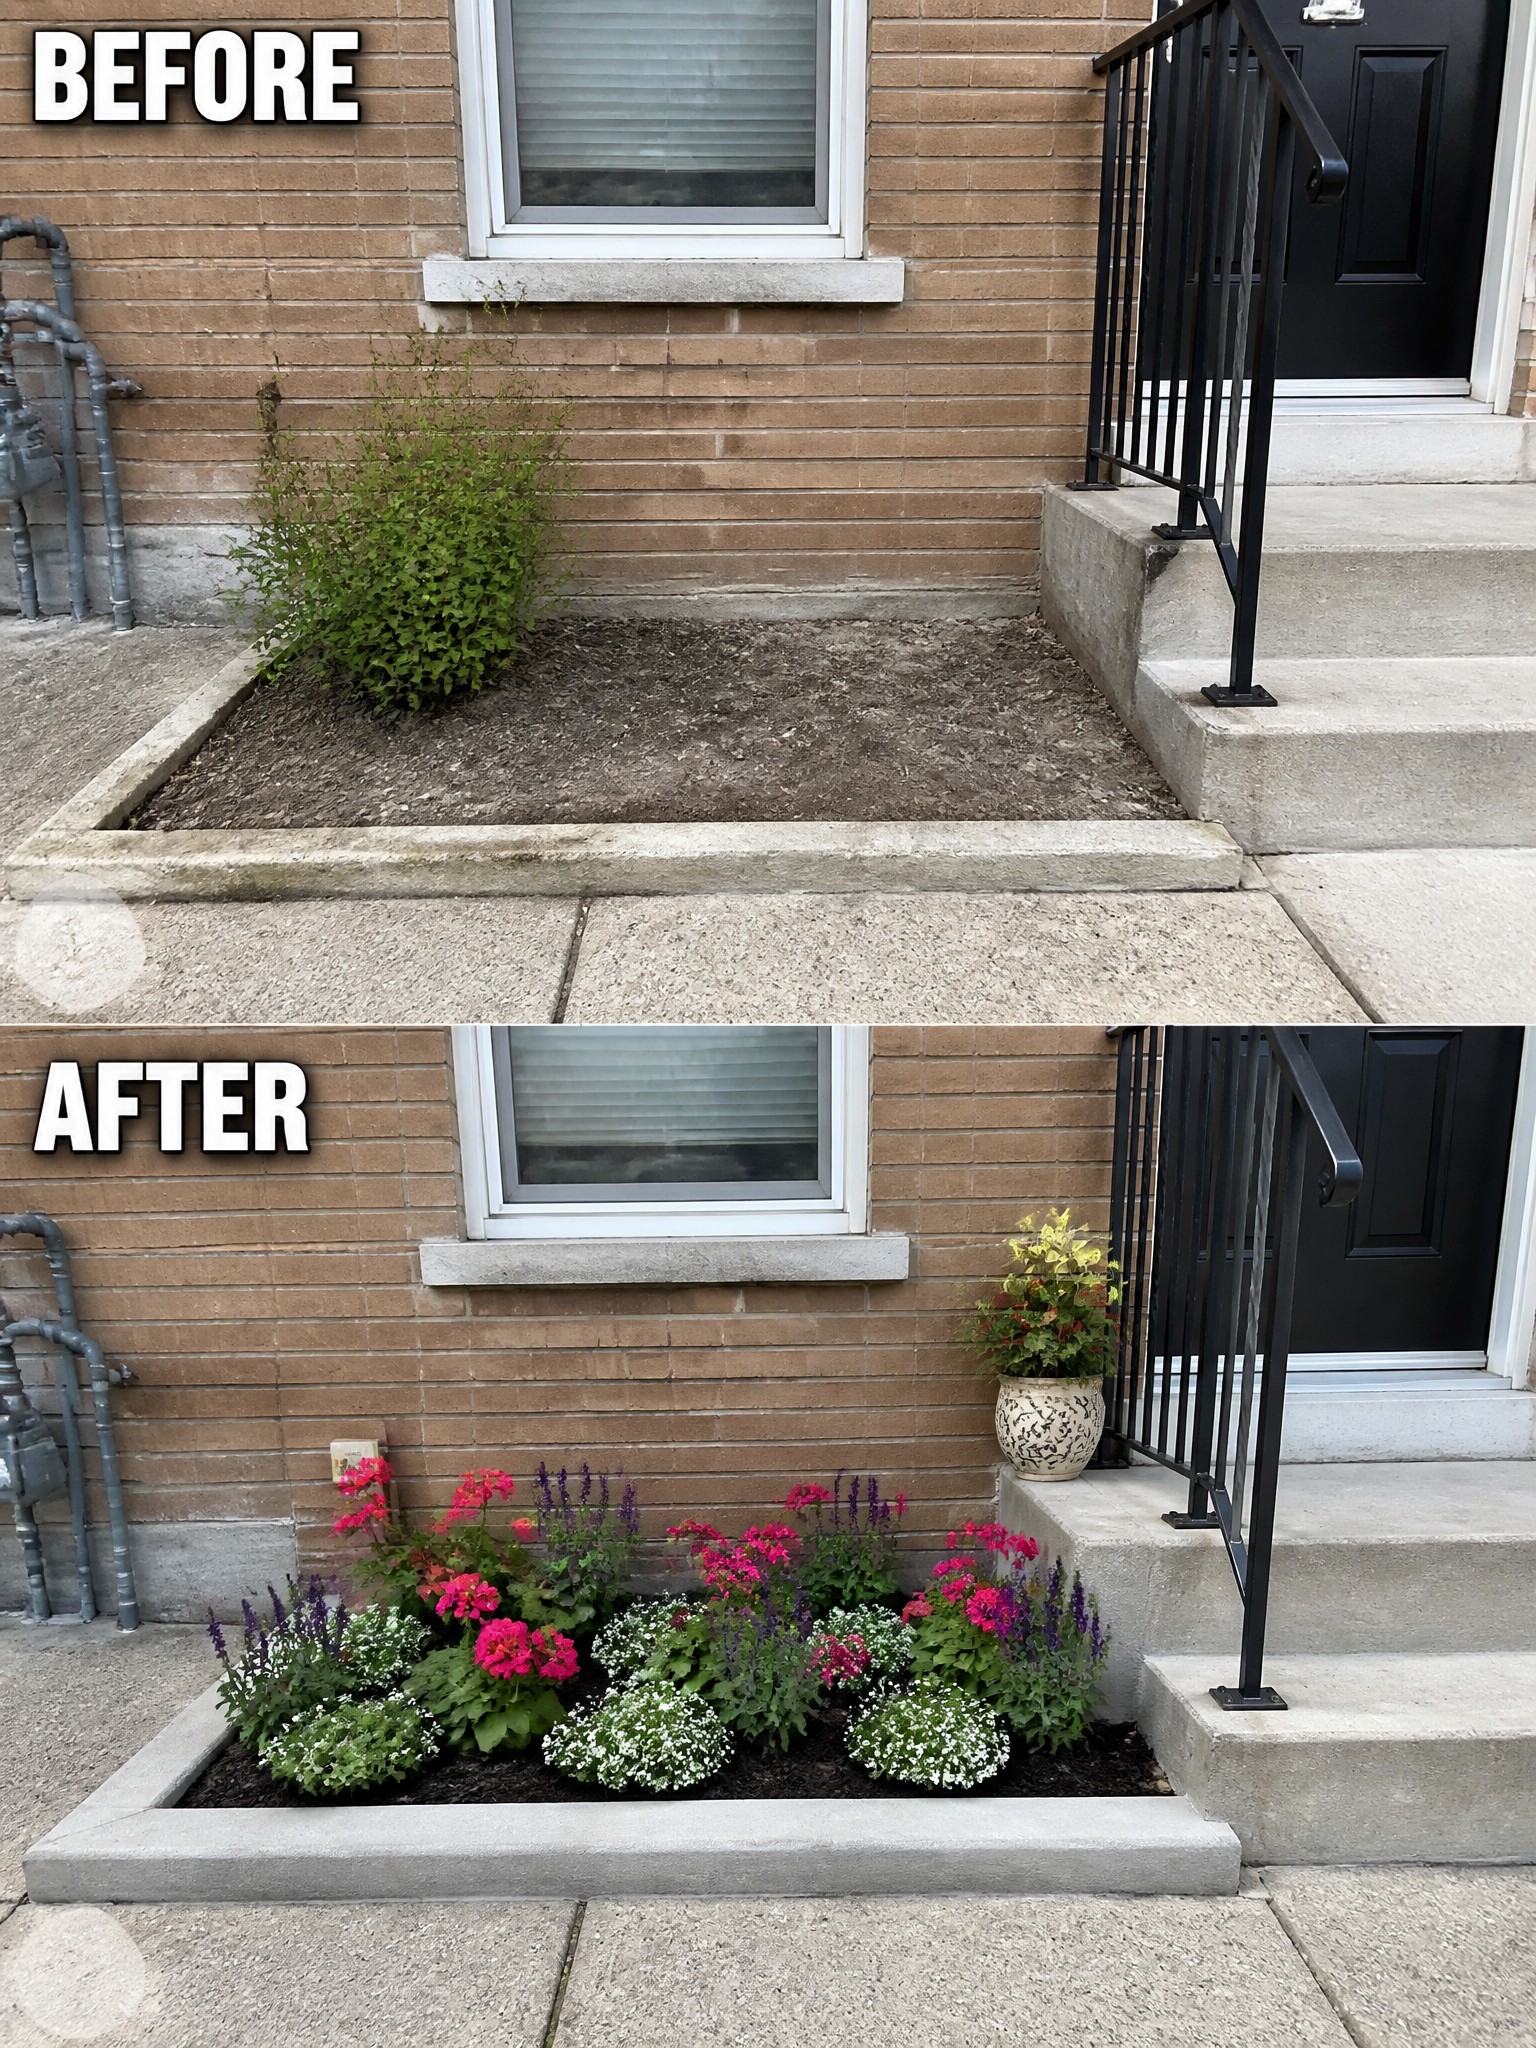
The bare dirt bed next to the steps looked flat and unfinished against the brick and concrete. Filling it with a mix of low white flowers, bright pink blooms, and taller purple spikes gives the whole front a finished look without changing the hard surfaces.
This approach works best on small foundation beds where you want quick color and structure. Start with a simple edge, then layer plants by height so nothing looks sparse. Repeat a few colors across the bed so the planting feels full rather than scattered.
Define Flower Beds With Edging
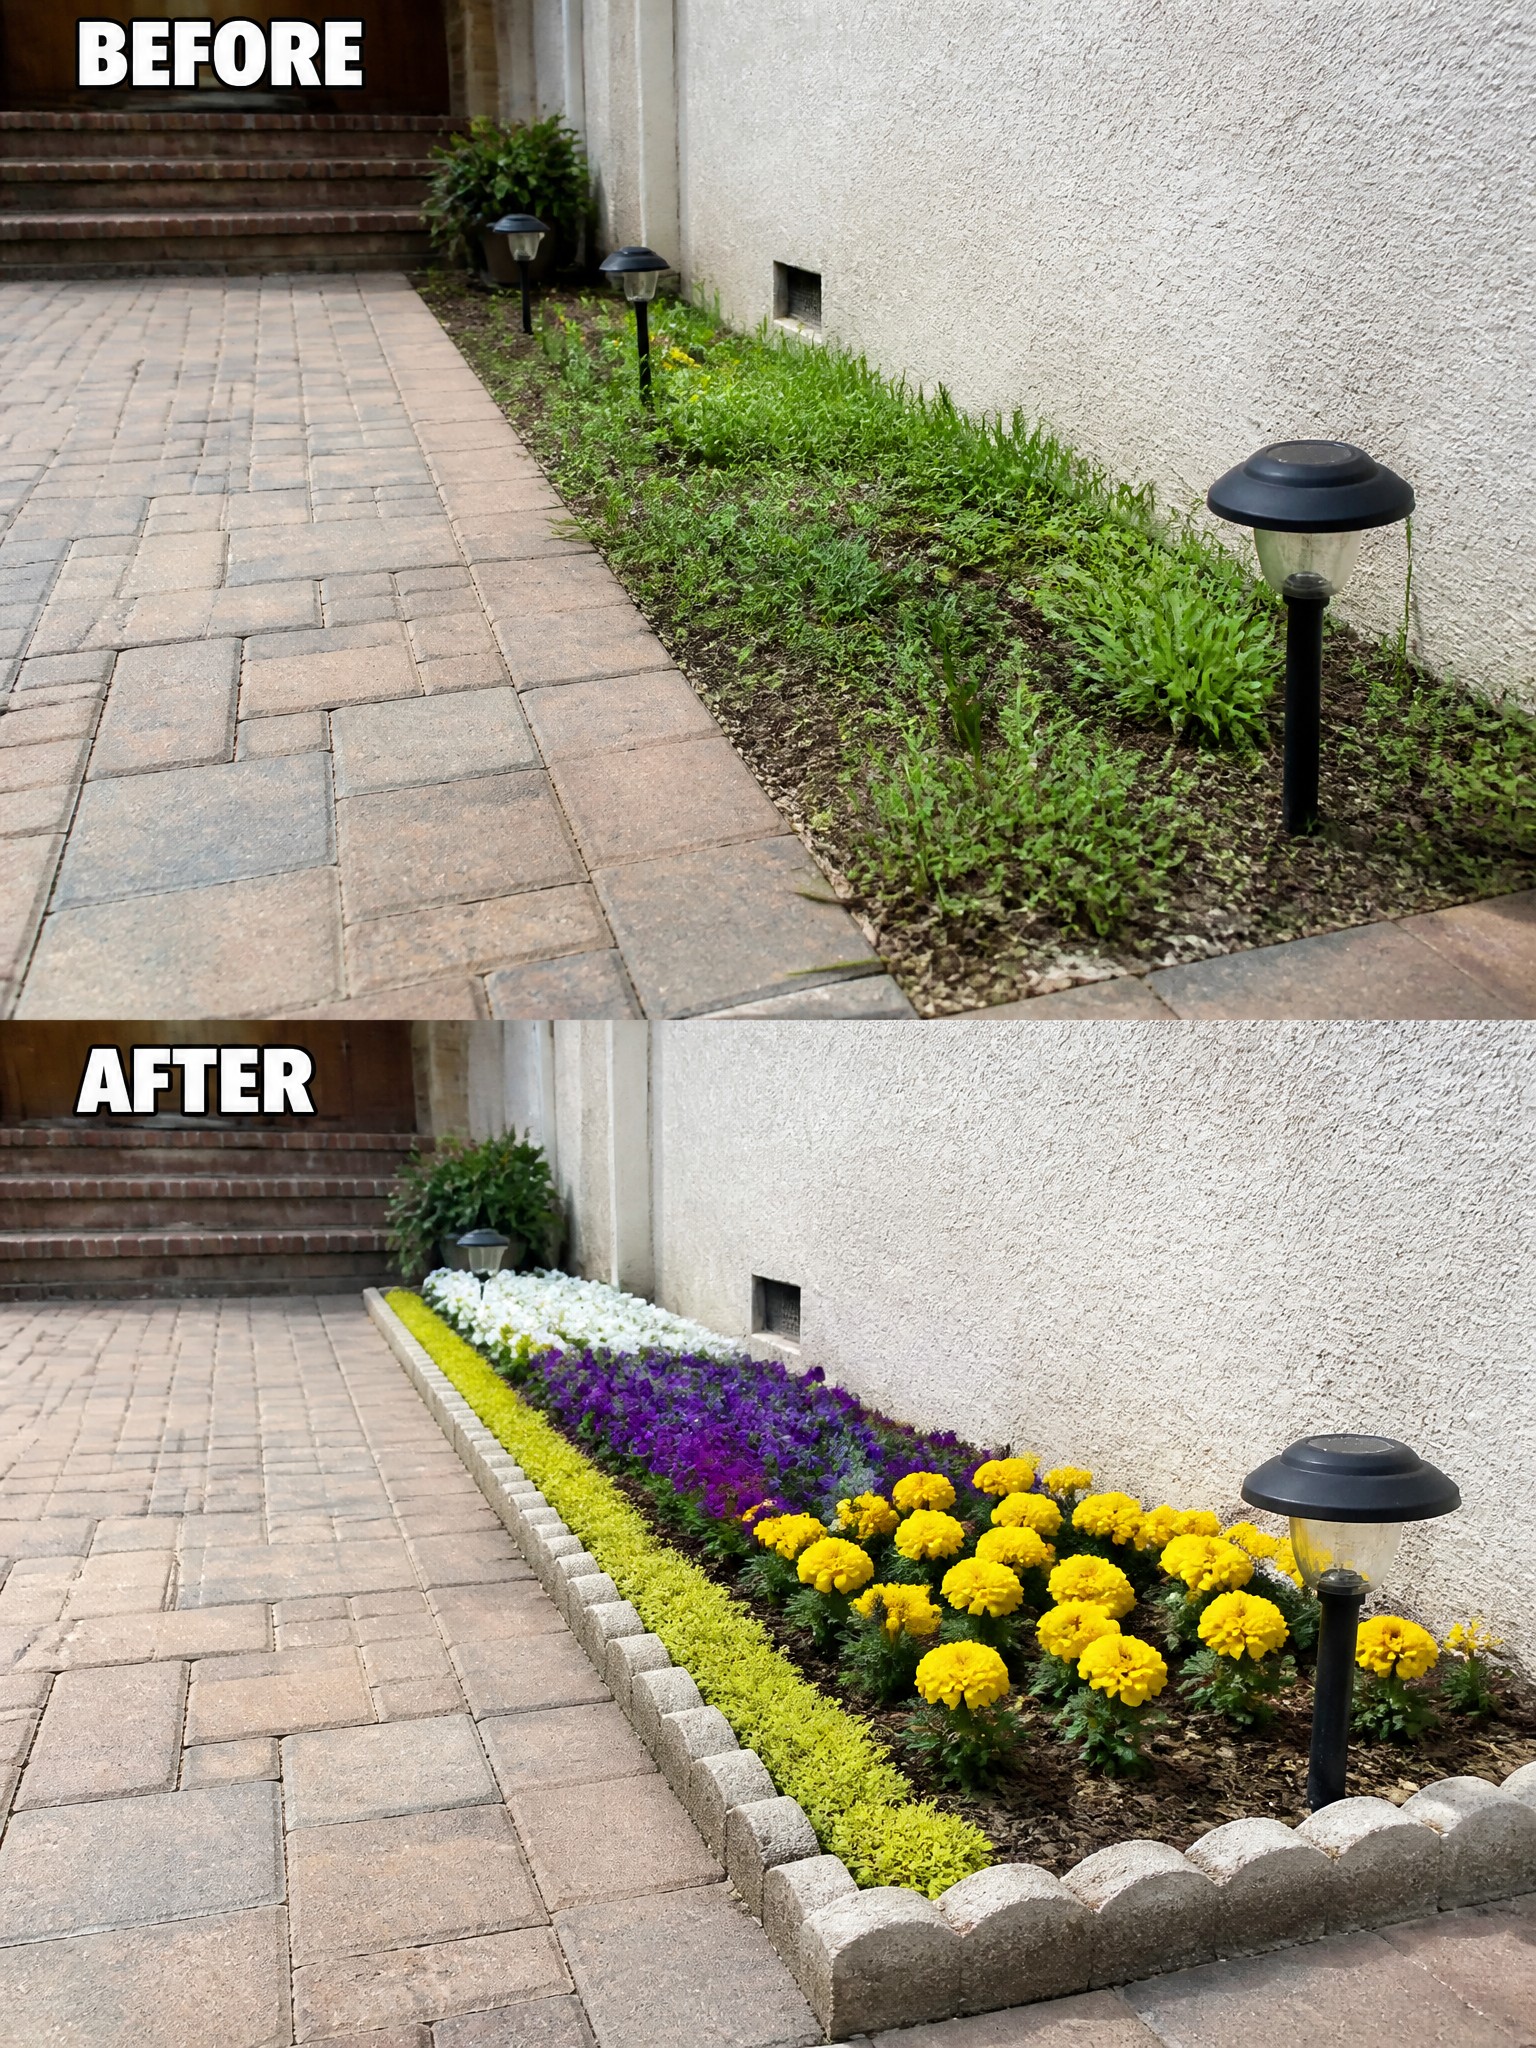
An overgrown strip of weeds and grass next to a walkway looks messy because there is no clear line between the bed and the path. Adding a low stone border gives the bed a firm shape and lets you fill it with fresh soil and plants that stay contained.
This approach works best along walkways or house walls where plants tend to creep outward. Mark a straight or gently curved edge first, set the border material, then choose low plants that fill in without crowding the path. The result keeps the area looking neat with far less weeding over time.
Define Flower Beds With Simple Edging
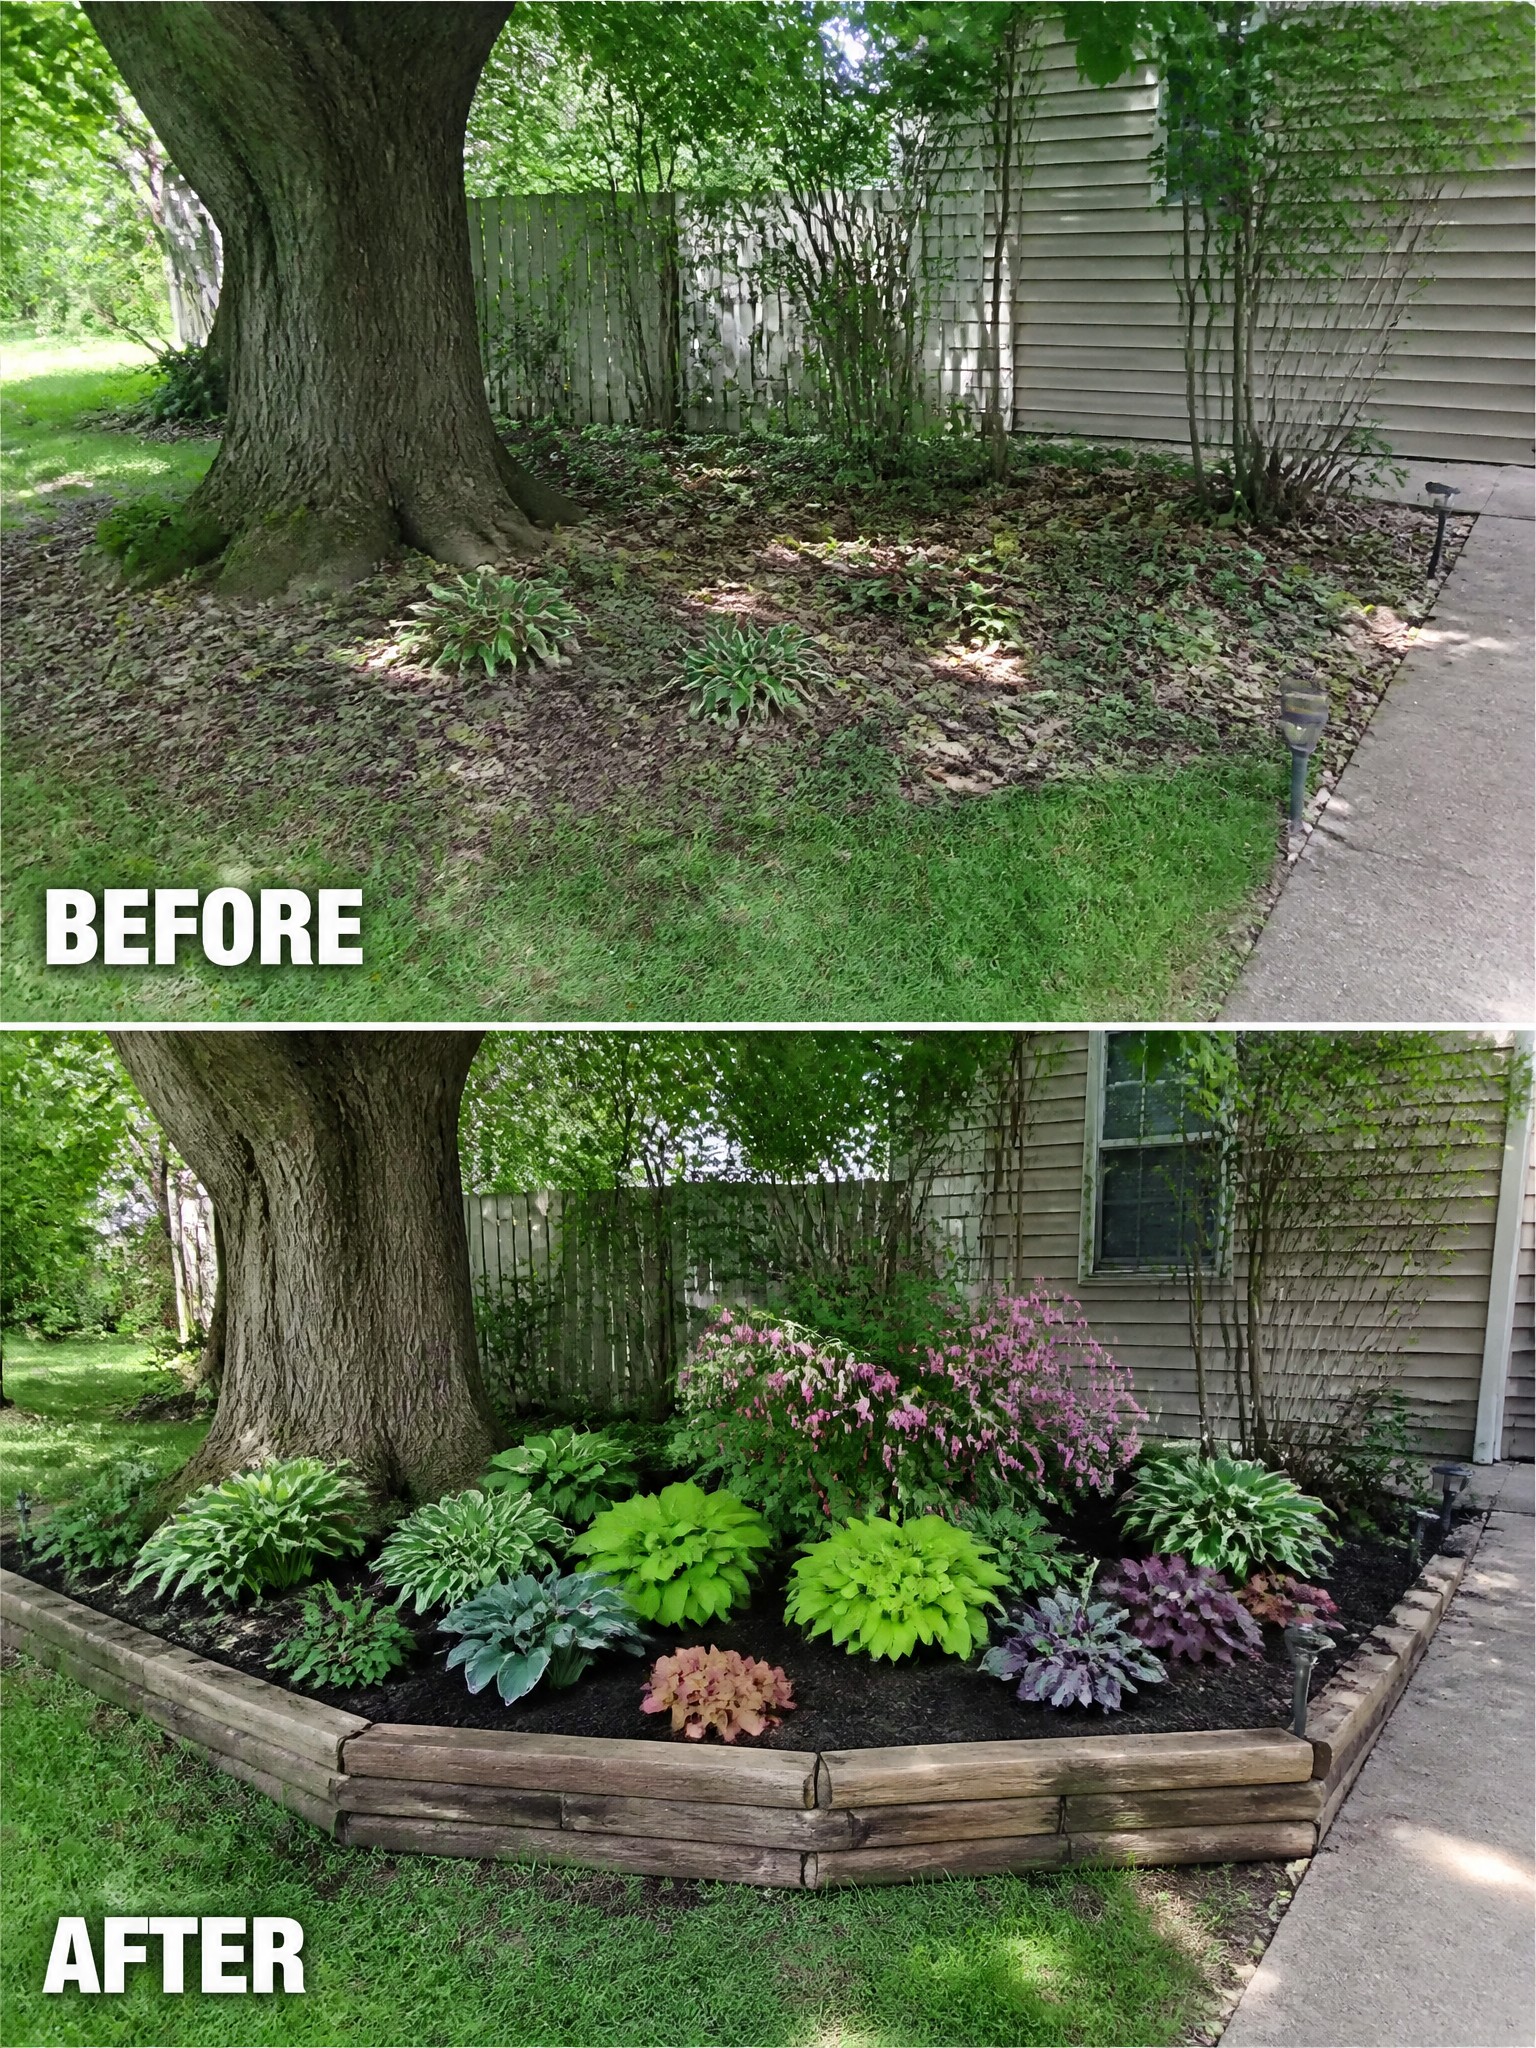
Adding a low border turns a scattered patch under a tree into a real garden bed. The before photo shows just a few hostas and loose leaves blending into the lawn. Once the wooden edging went in, the space gained clear shape and the soil stayed where it belonged.
This idea suits shady spots where grass thins out anyway. Lay the edging first to set the size and curve, then add fresh mulch and plants that handle low light. It keeps the bed from creeping into the lawn and makes future cleanup much simpler.
Add Defined Edges To Shape Flower Beds
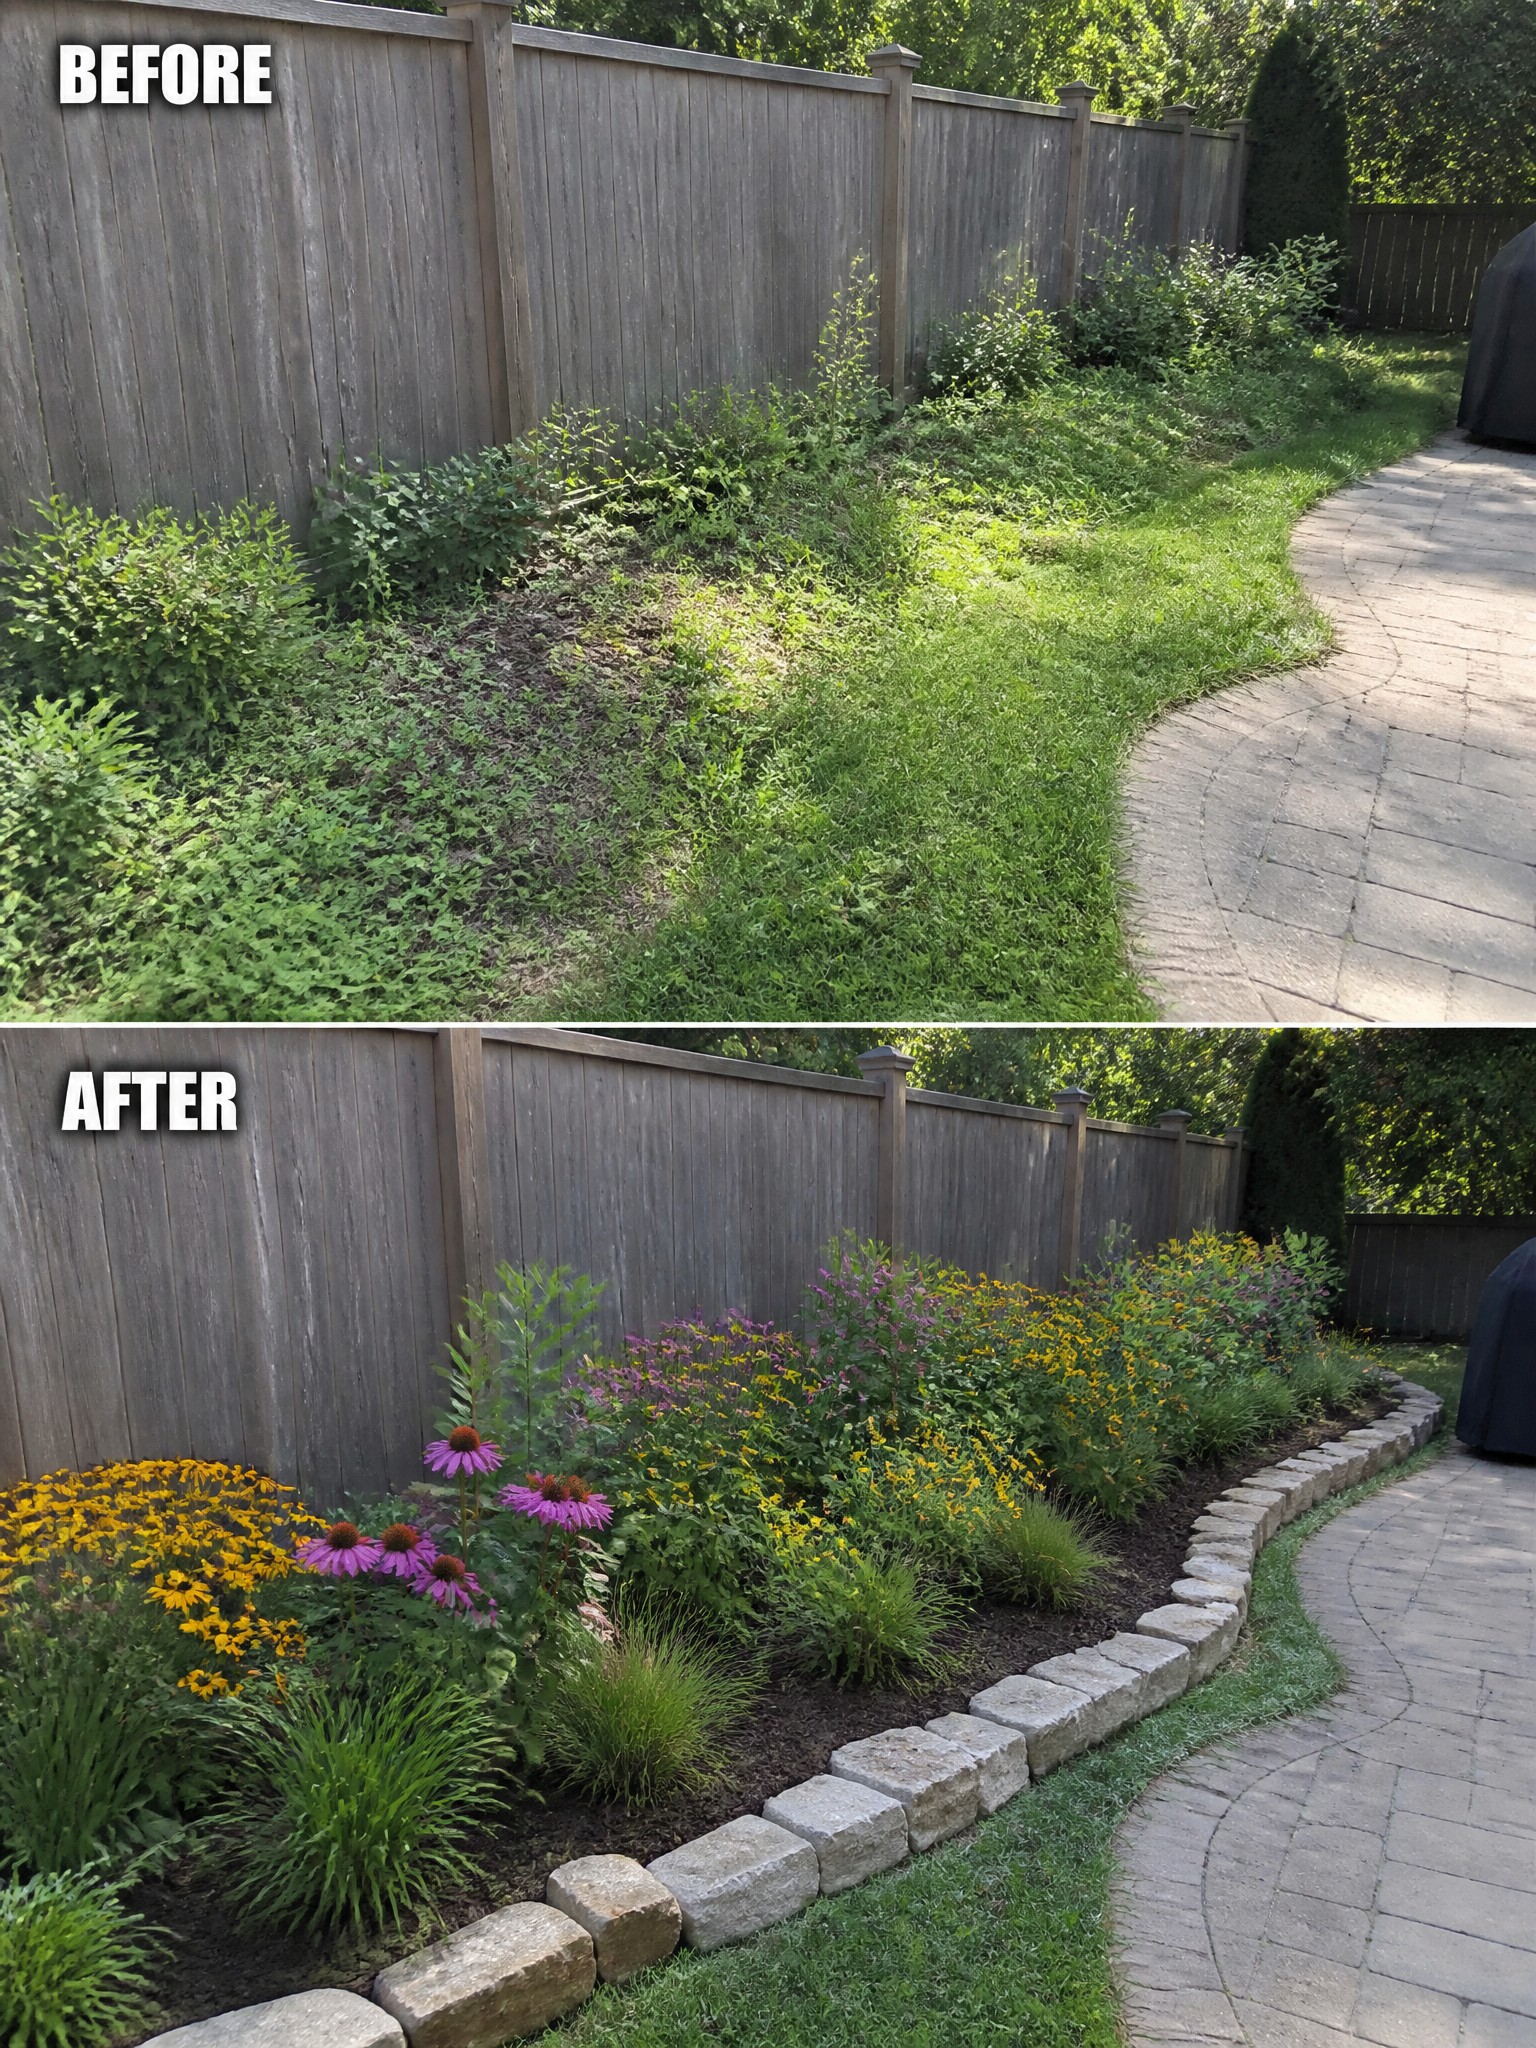
Adding a clear border turns an overgrown strip into a real garden bed. The stone edging holds the soil and mulch in place, stops grass from creeping in, and gives the flowers a place to stand out instead of blending into the weeds.
This idea works well along fences or paths where the space feels messy but you do not want a big renovation. Start with the edging, clear the worst growth, then fill in with plants that suit your light and soil. Keep the bed a consistent width so it stays easy to mow around and maintain.
Add Edging To Give A Bare Border Some Shape
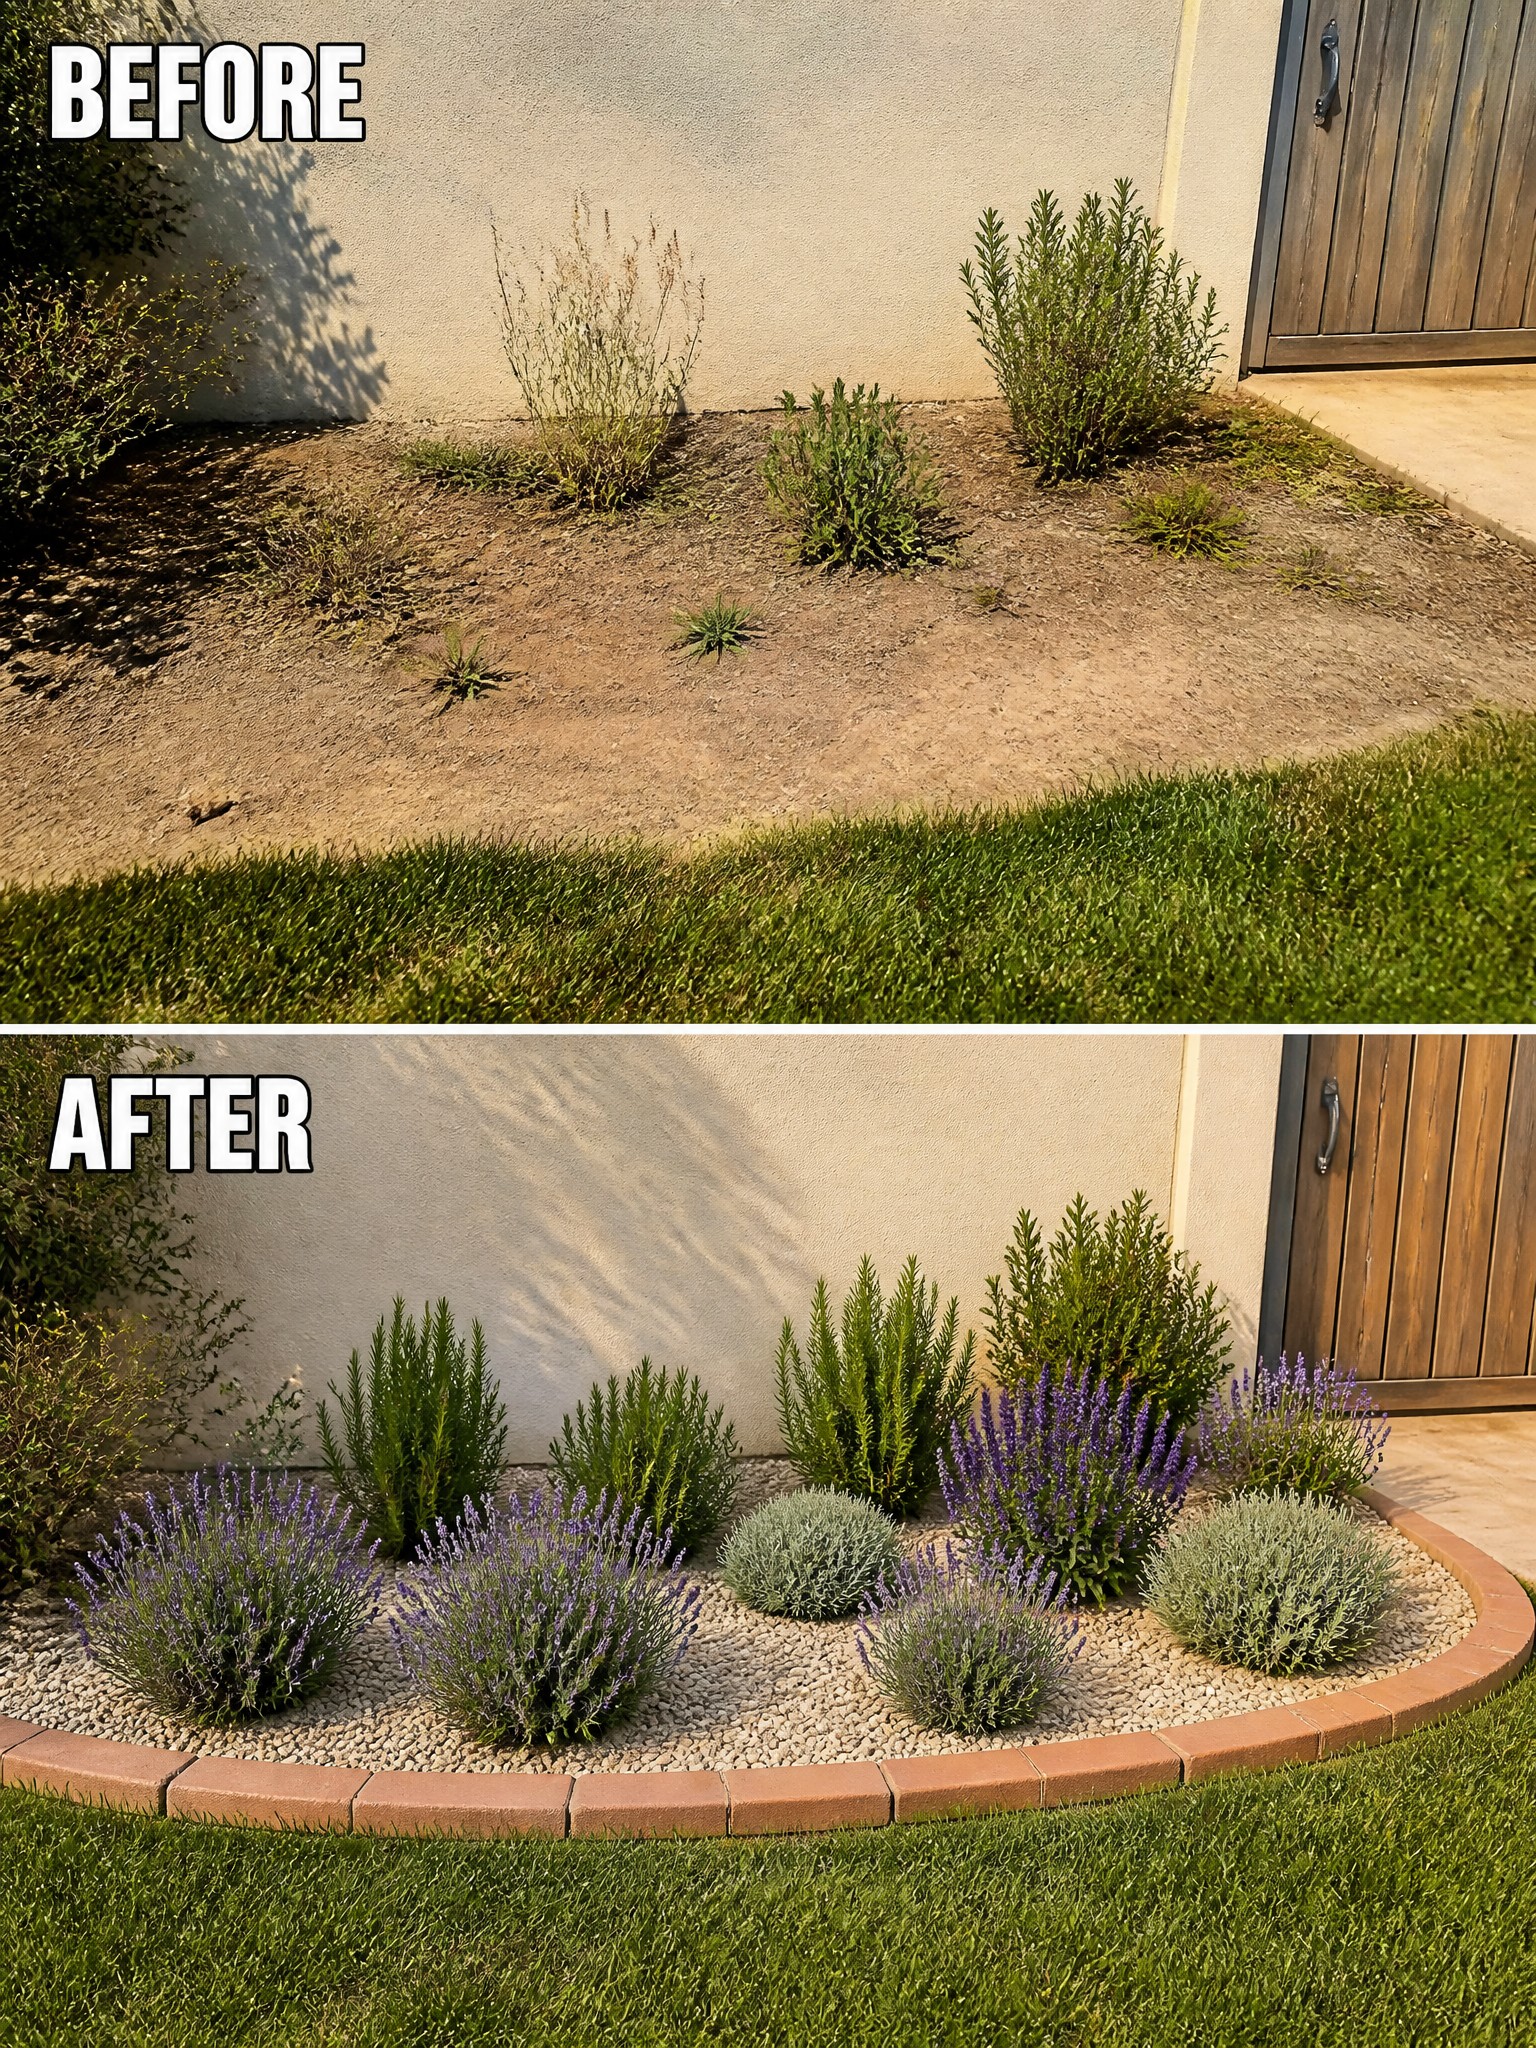
A simple brick edge turns an empty dirt strip into a real garden bed. The before photo shows just weeds and open ground running along the wall, while the after adds a clean curve that separates the lawn from the planting area and makes the space look intentional.
This approach works best on narrow strips beside the house where you want low upkeep. Lay the edging first to hold the shape, then add gravel and repeat a few plants like lavender so the bed stays full without needing constant work.
Define Flower Beds With Clean Edging
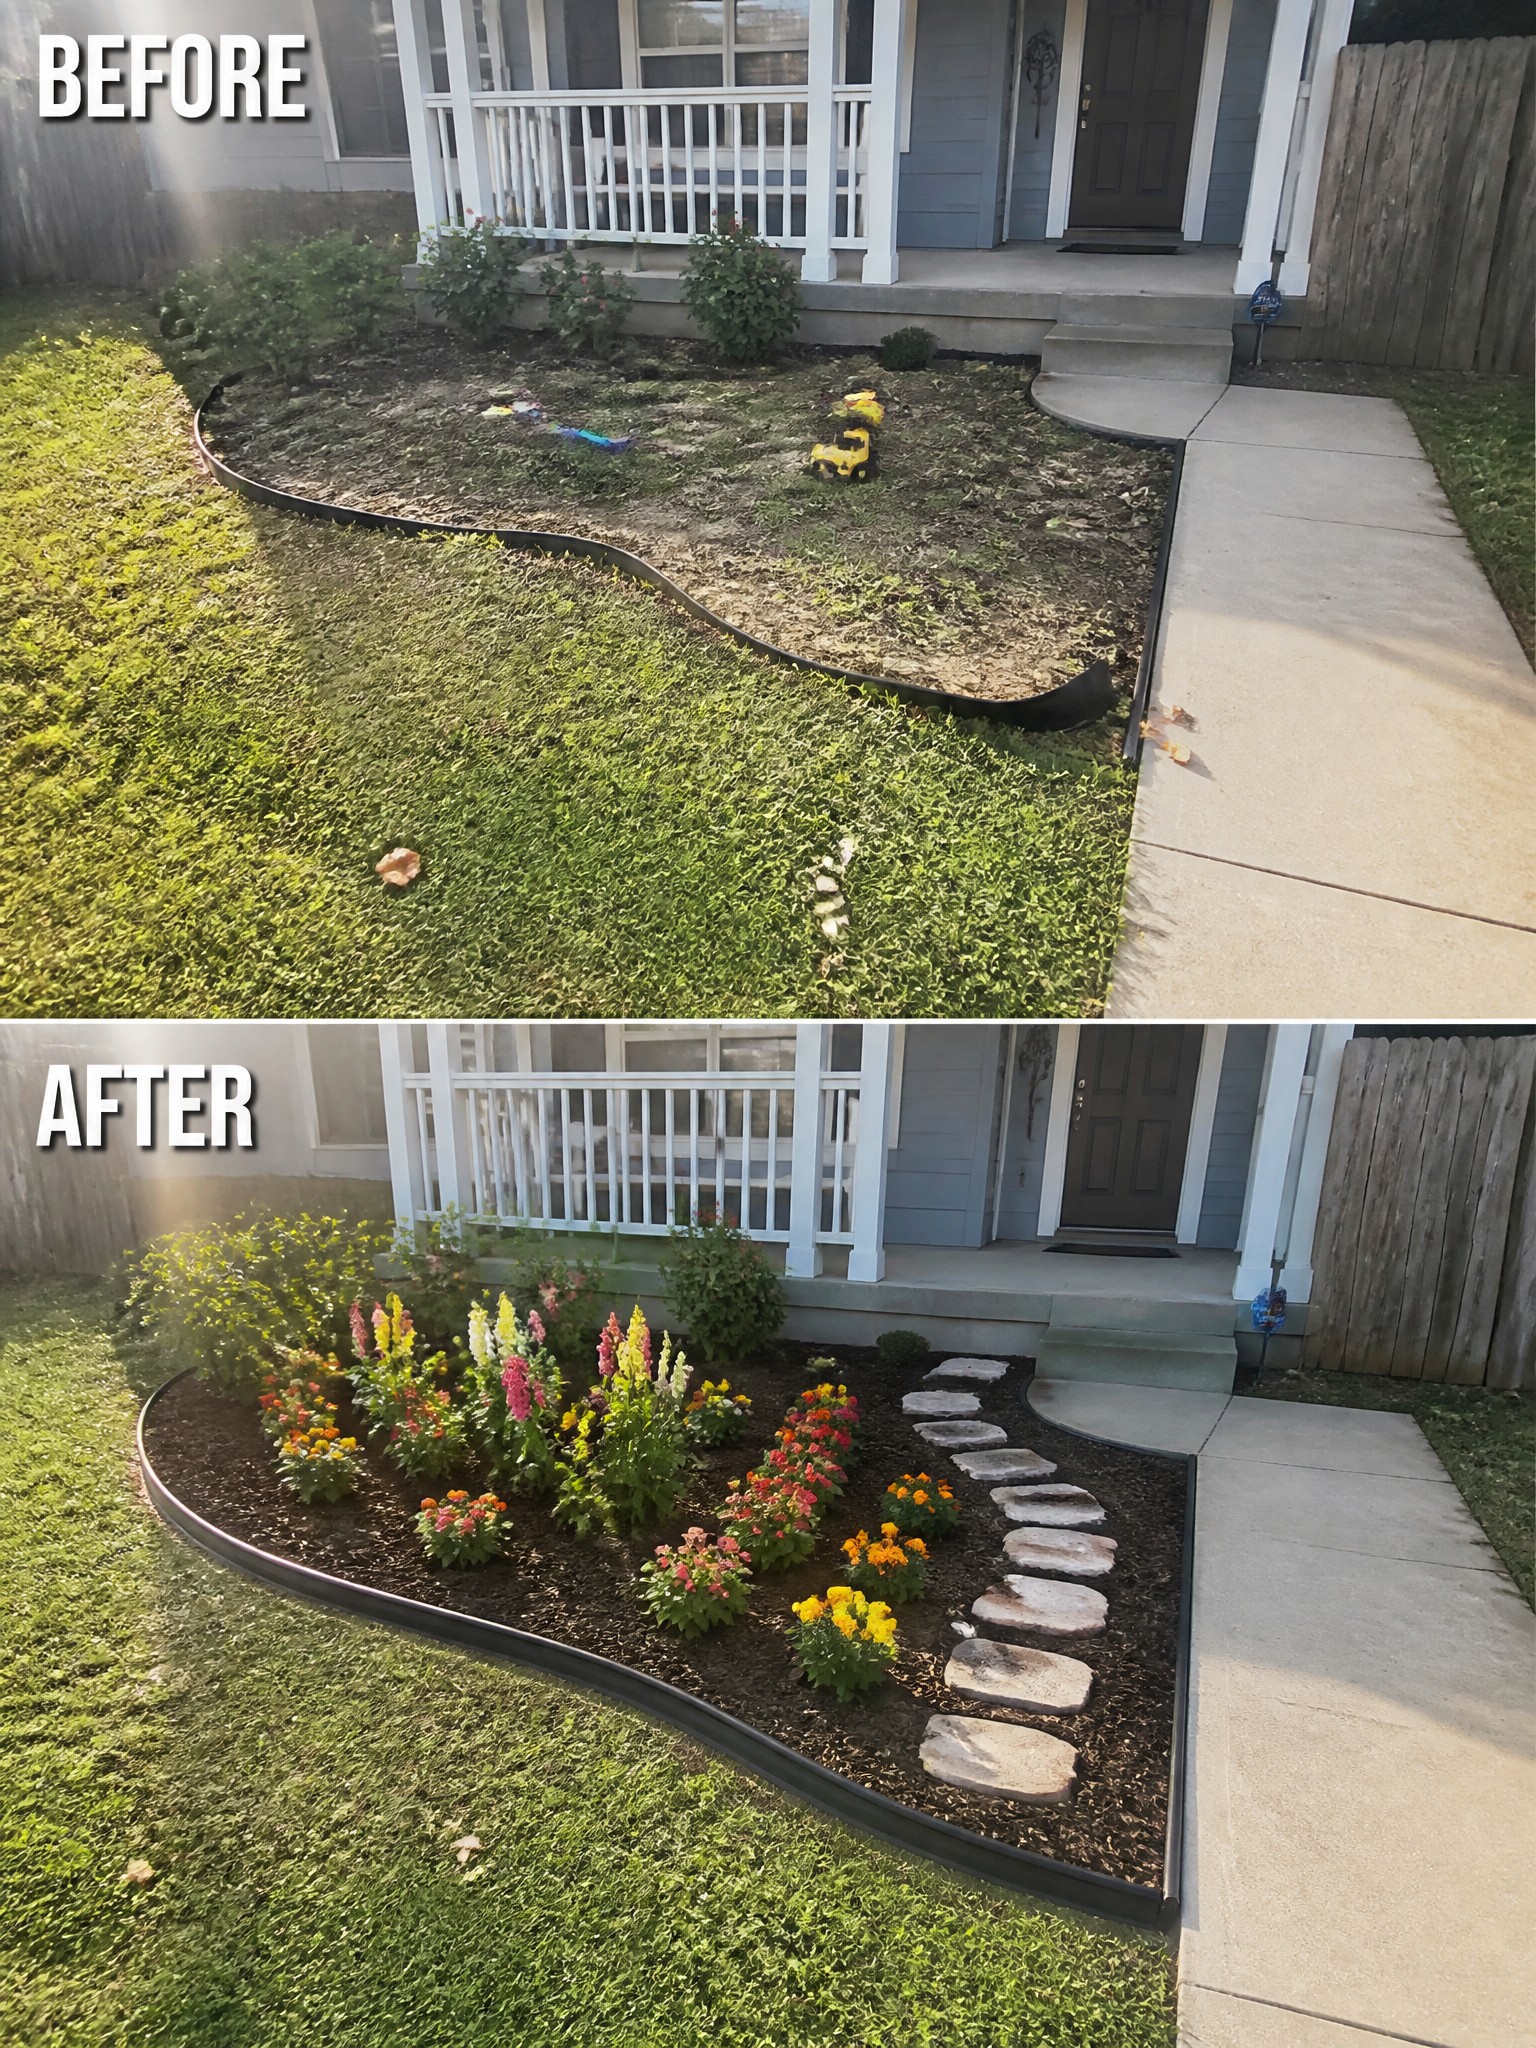
An overgrown bed next to the house quickly makes the whole yard feel messy. Adding a solid edge and a layer of mulch turns the same space into something that looks planned and easy to maintain.
This works best along sidewalks or foundation lines where the bed needs a clear boundary. Clear out the old debris first, set the edging, then mulch and plant. The result keeps grass from creeping in and gives you a simple path to follow when you mow.
Add Structure With A Raised Flower Bed
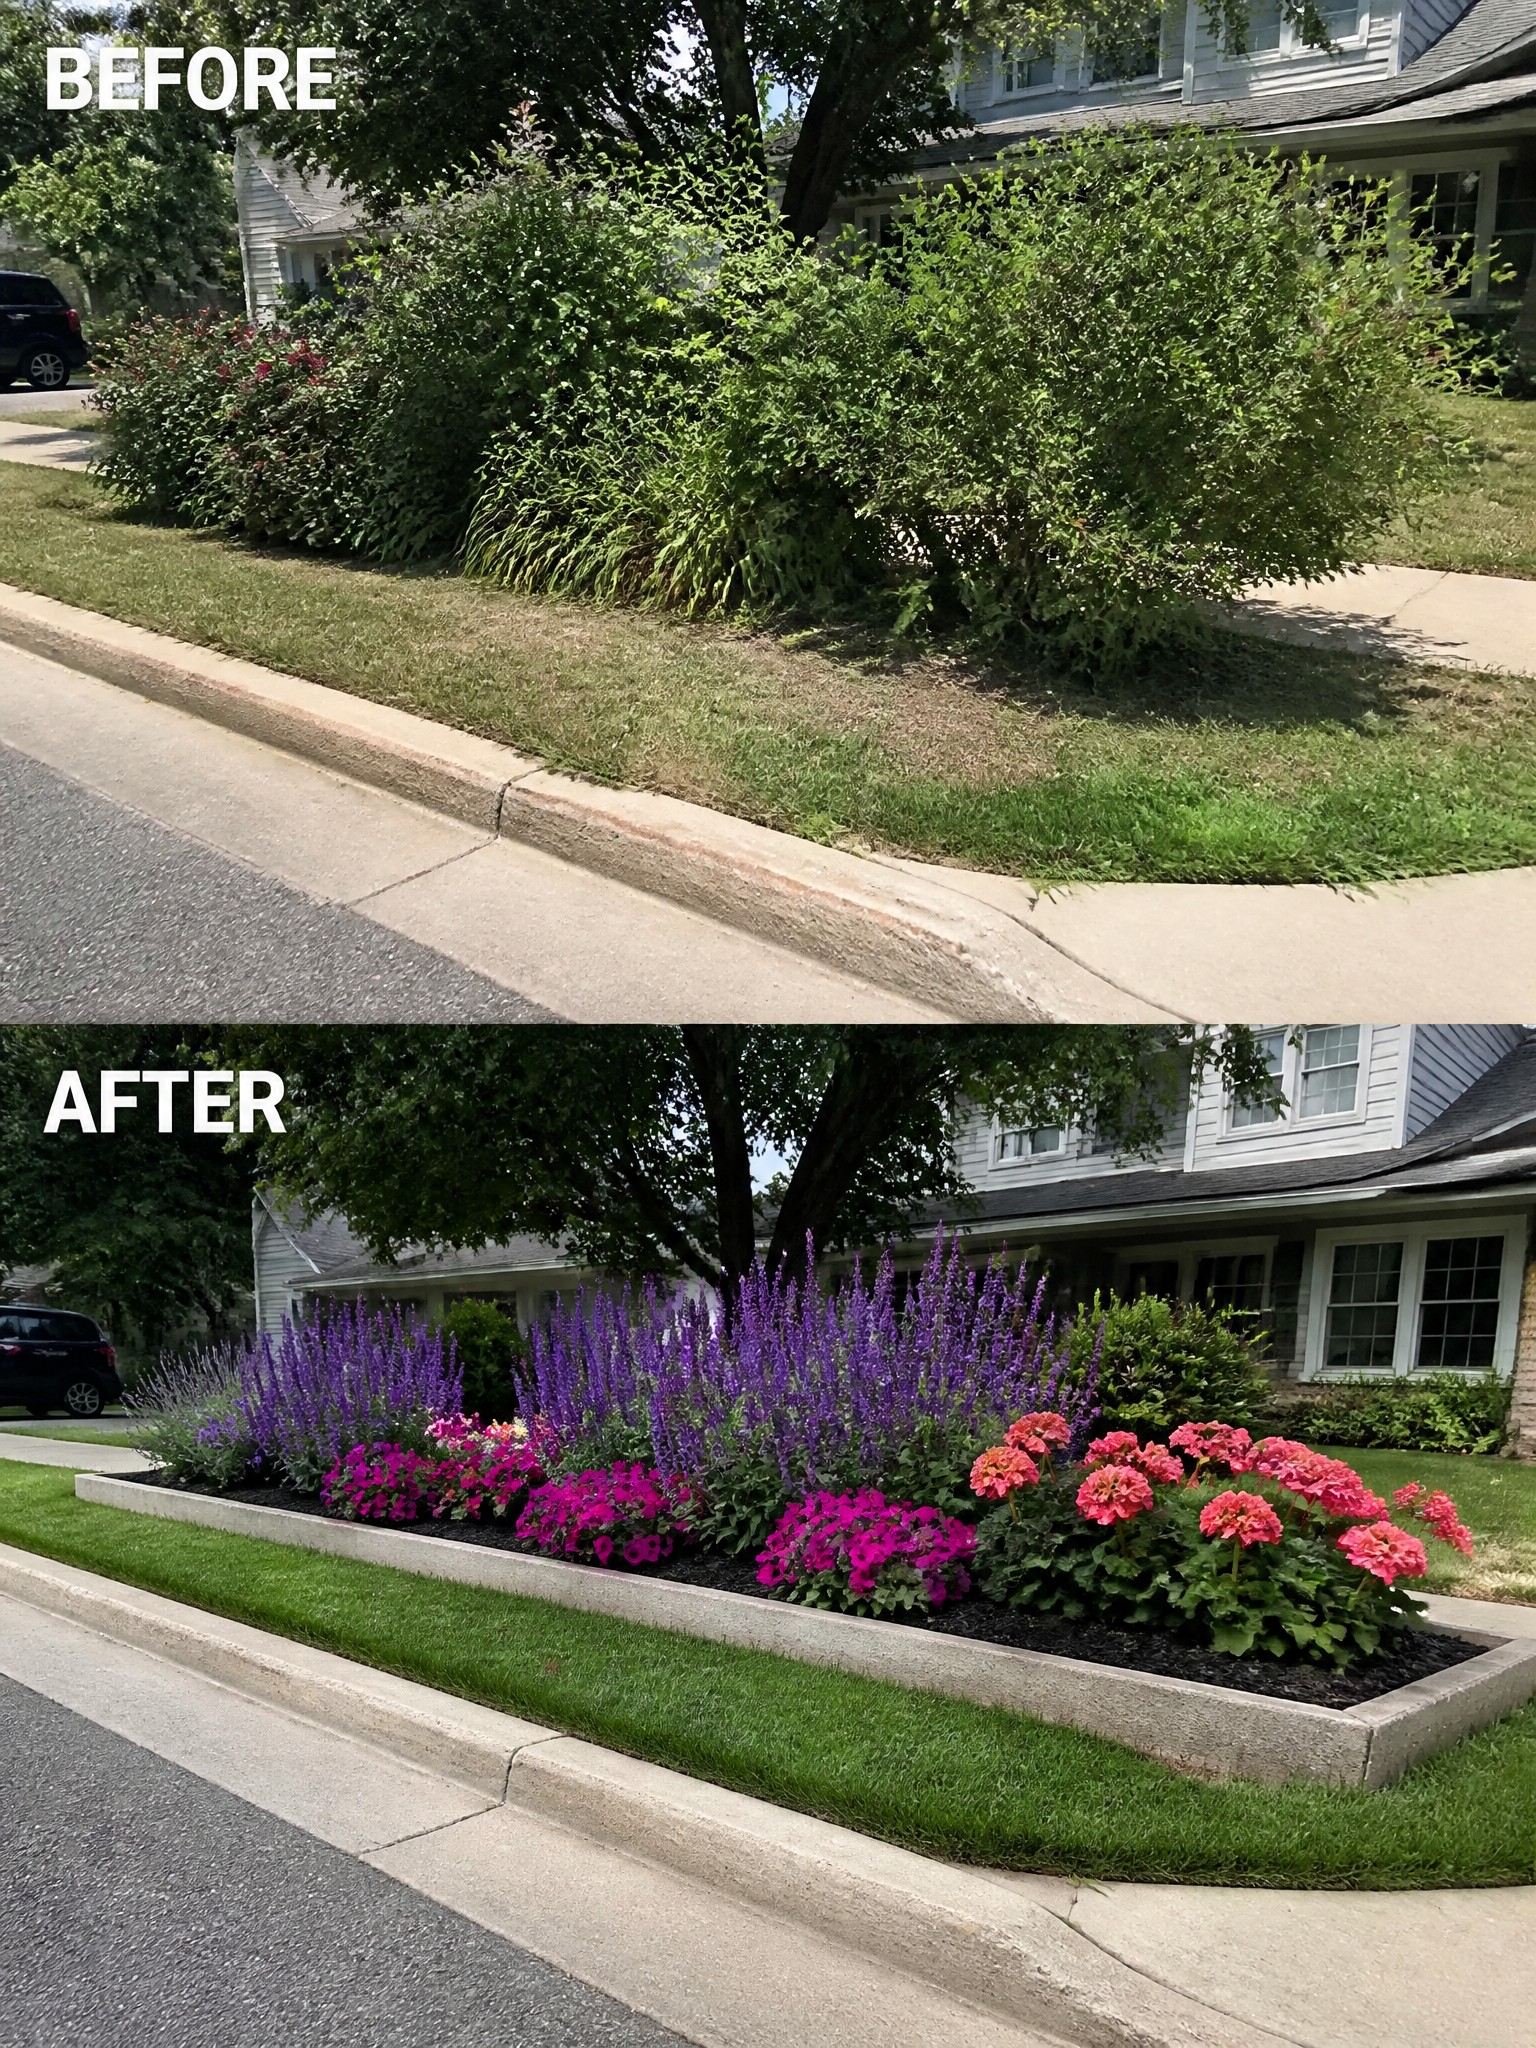
Clearing out the messy shrubs along the curb and installing a raised concrete bed makes the whole front strip look intentional instead of neglected. The simple edging and dark mulch keep the plants from spilling onto the sidewalk and give the house a much tidier appearance right at the street.
This approach works well on narrow grass strips between the road and sidewalk where regular mowing is awkward. Start with the border and soil level first, then fill in with a mix of taller plants in the back and lower flowers toward the front so the bed stays neat without constant trimming.
Add Defined Garden Beds To Sloped Areas

A sloped front area next to the steps often ends up as patchy grass or bare mulch because it is hard to maintain. Adding a low stone border and filling the space with layered plants turns the slope into a clear garden bed that stays neat and actually gets attention instead of being ignored.
This approach works best on modest slopes where you can keep the bed width reasonable and still mow around it. Start with the edging so the shape stays clean, then choose plants that fill in at different heights. The same idea helps any side yard or corner where the lawn just runs into the house without any real boundary.
Add Climbing Plants To Give A Fence More Structure
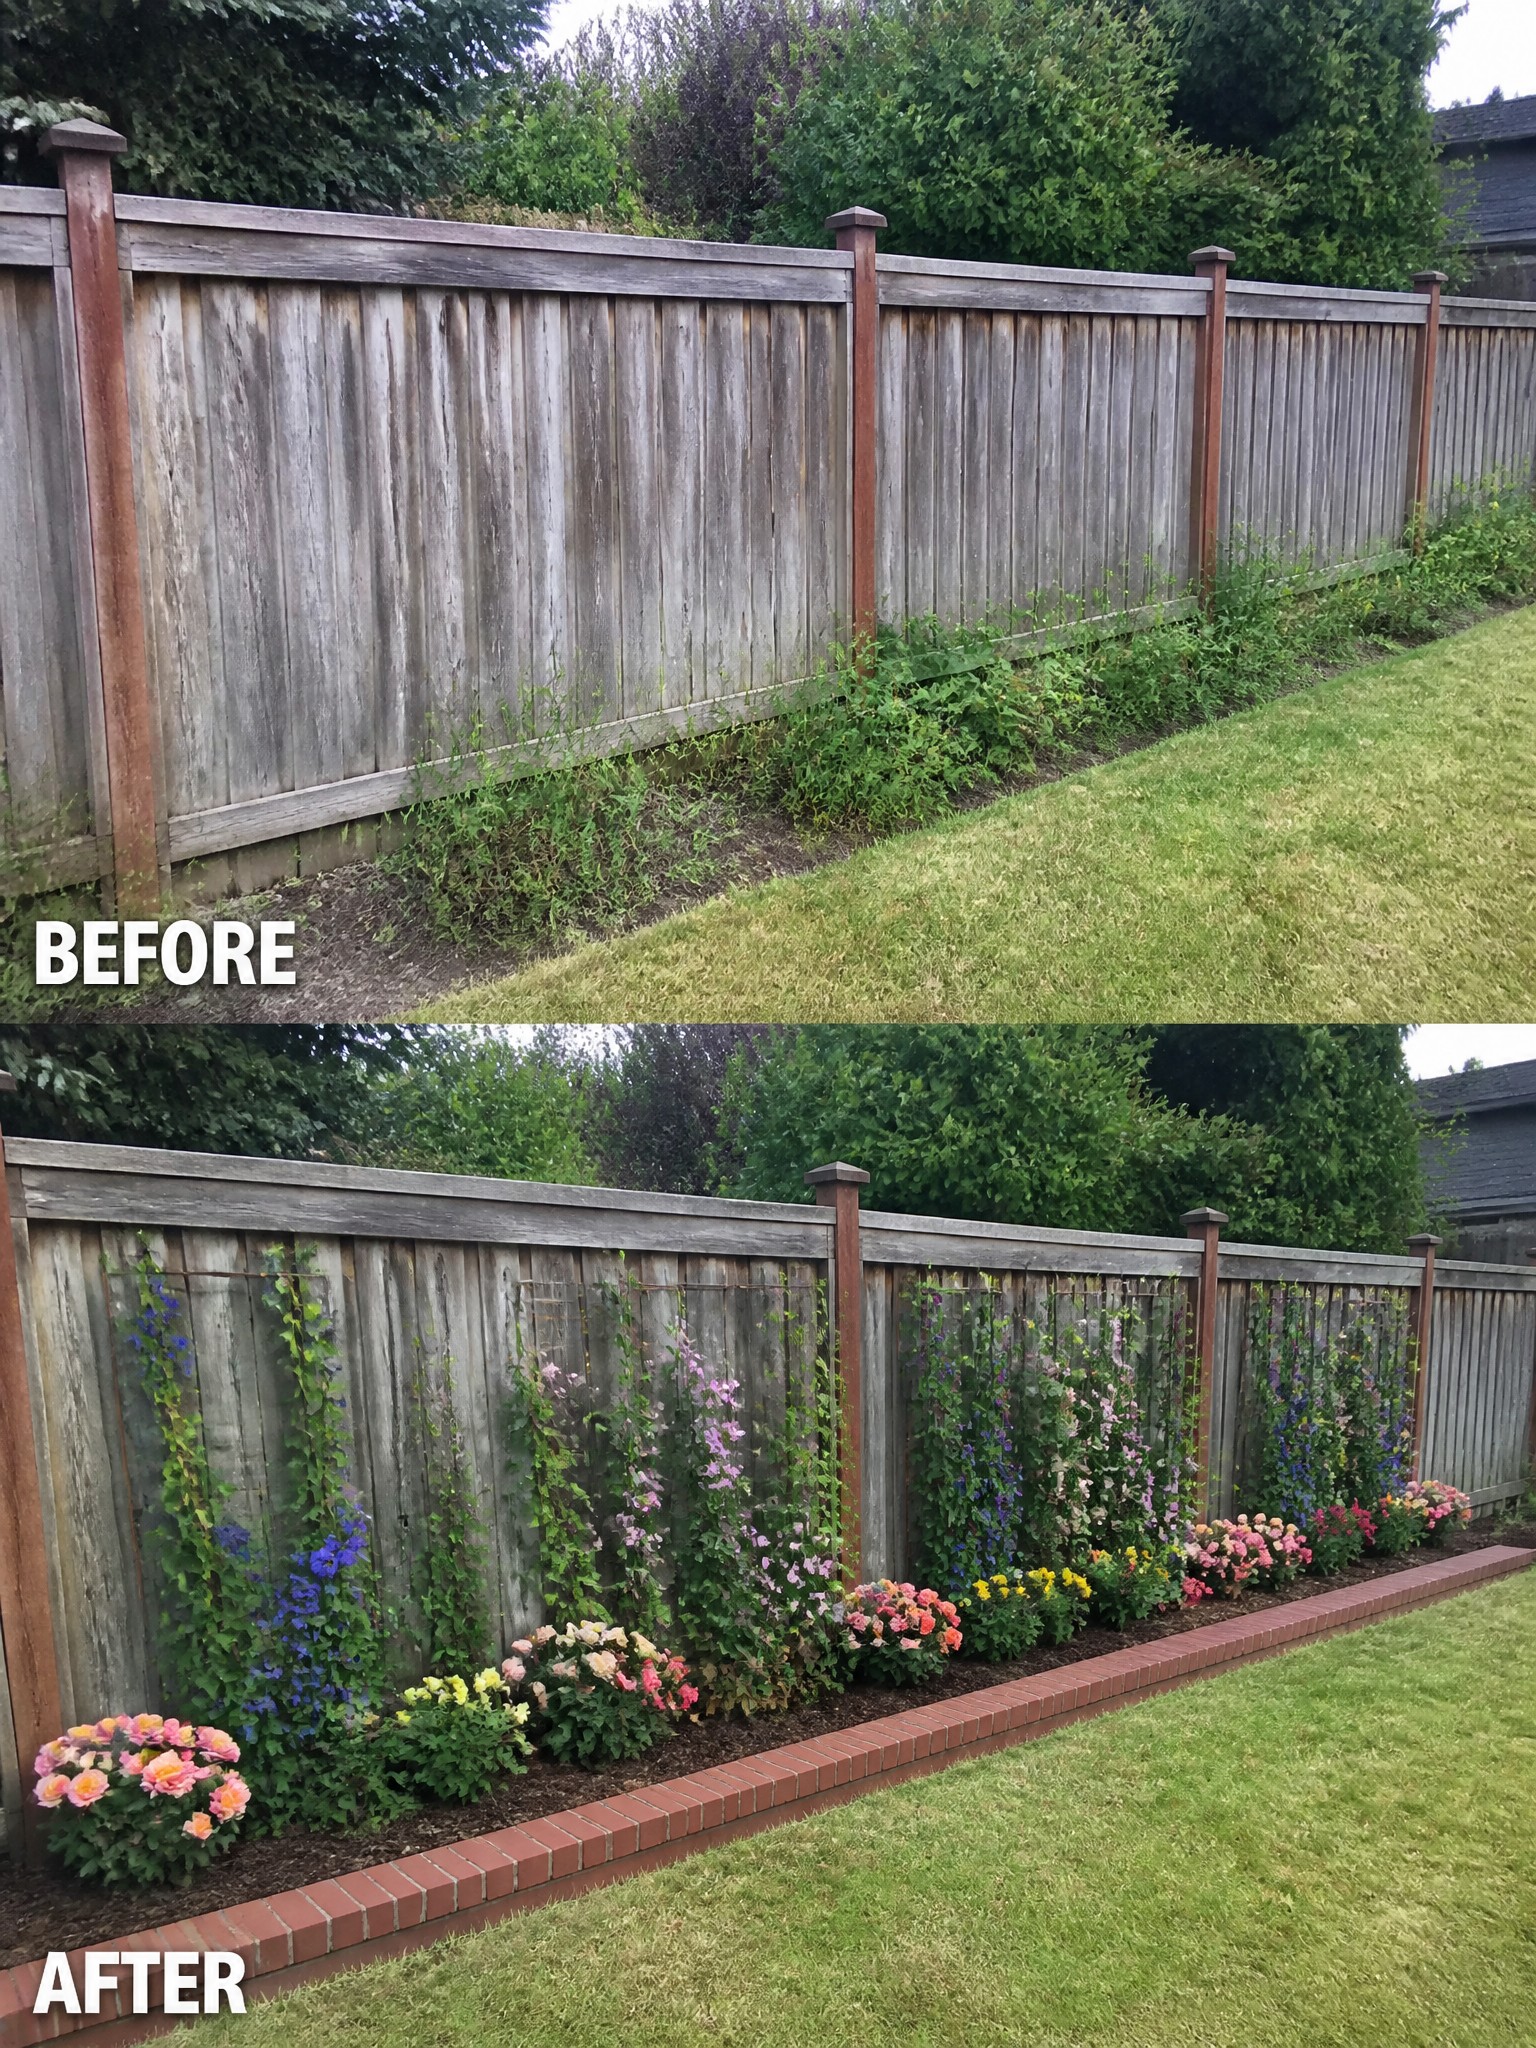
A plain fence with weeds along the base can feel unfinished and a bit neglected. Adding climbing vines that grow up simple supports and planting a row of flowers at the base creates a clear garden line that makes the whole area look planned instead of forgotten.
This approach works well along side or back fences where you want color without blocking light or taking up much ground space. Start with a basic trellis or wire grid so the vines have something to hold, then choose a mix of tall and low plants that match your climate. Keep the bed narrow enough that it stays easy to maintain.
Define A Flower Bed With Simple Edging
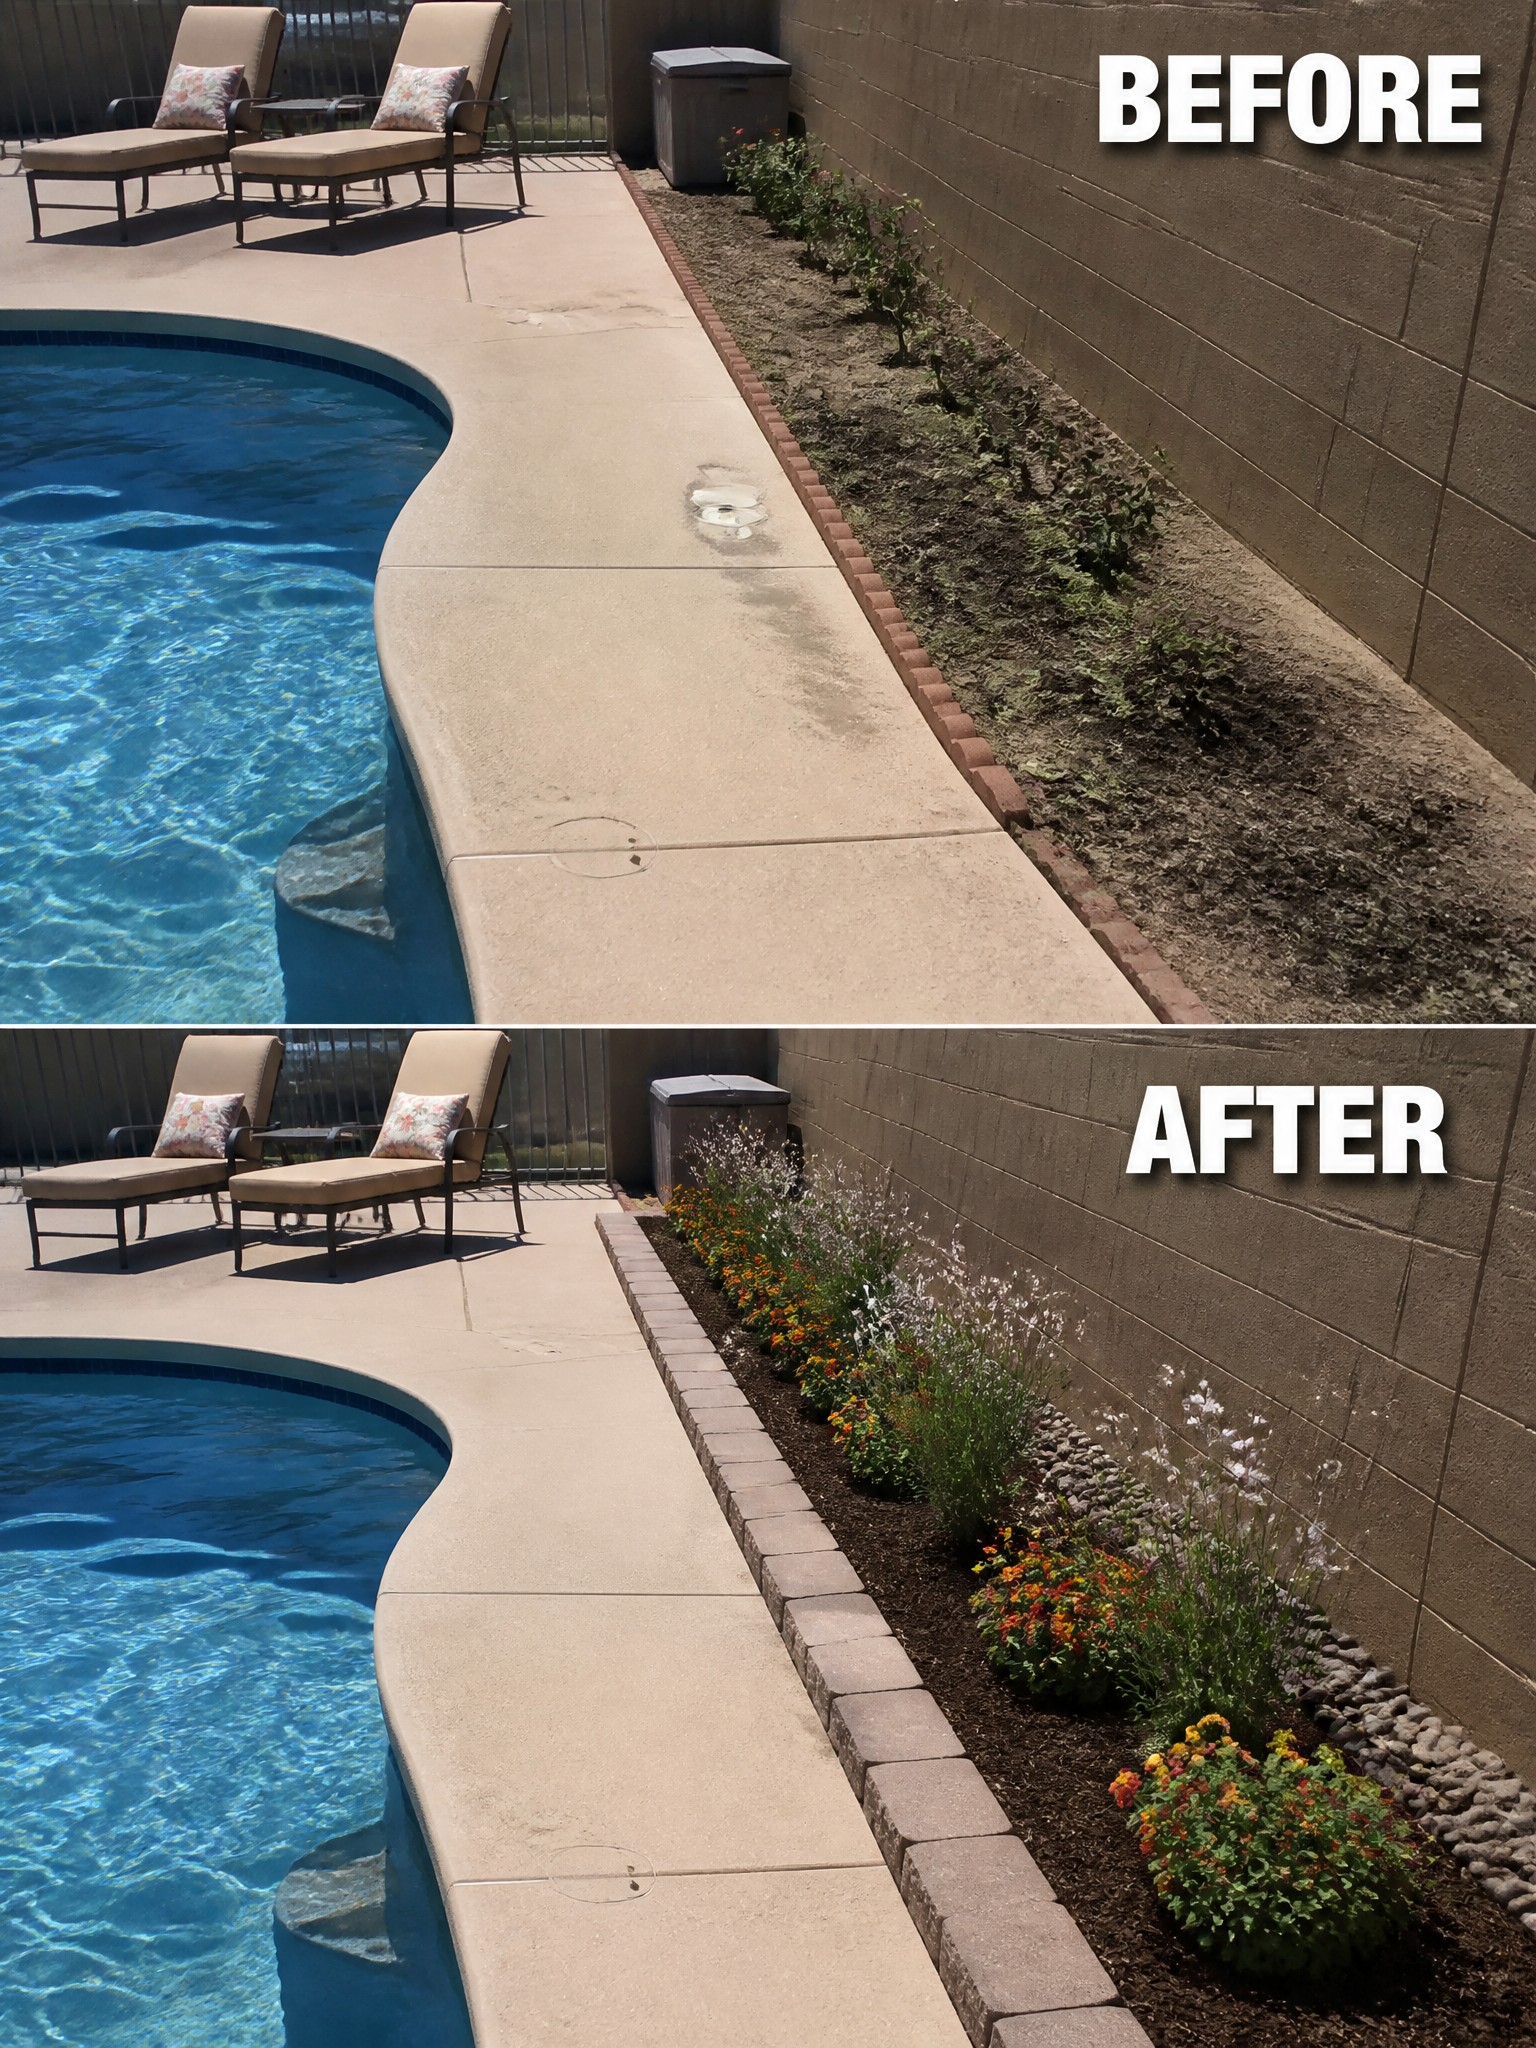
A clean edge makes a big difference when a narrow strip next to a pool or path has turned weedy and bare. Replacing the old loose bricks with a solid paver border and adding mulch gives the bed clear shape and keeps soil from spilling onto the concrete.
This approach works best along existing hard surfaces where you want plants to stay contained without taking up much space. Remove the old growth first, set the edging level with the surrounding ground, then fill with soil and plants suited to sun and occasional splash. Keep the bed narrow so foot traffic still flows easily.
Add Edging To Create A Neat Flower Border
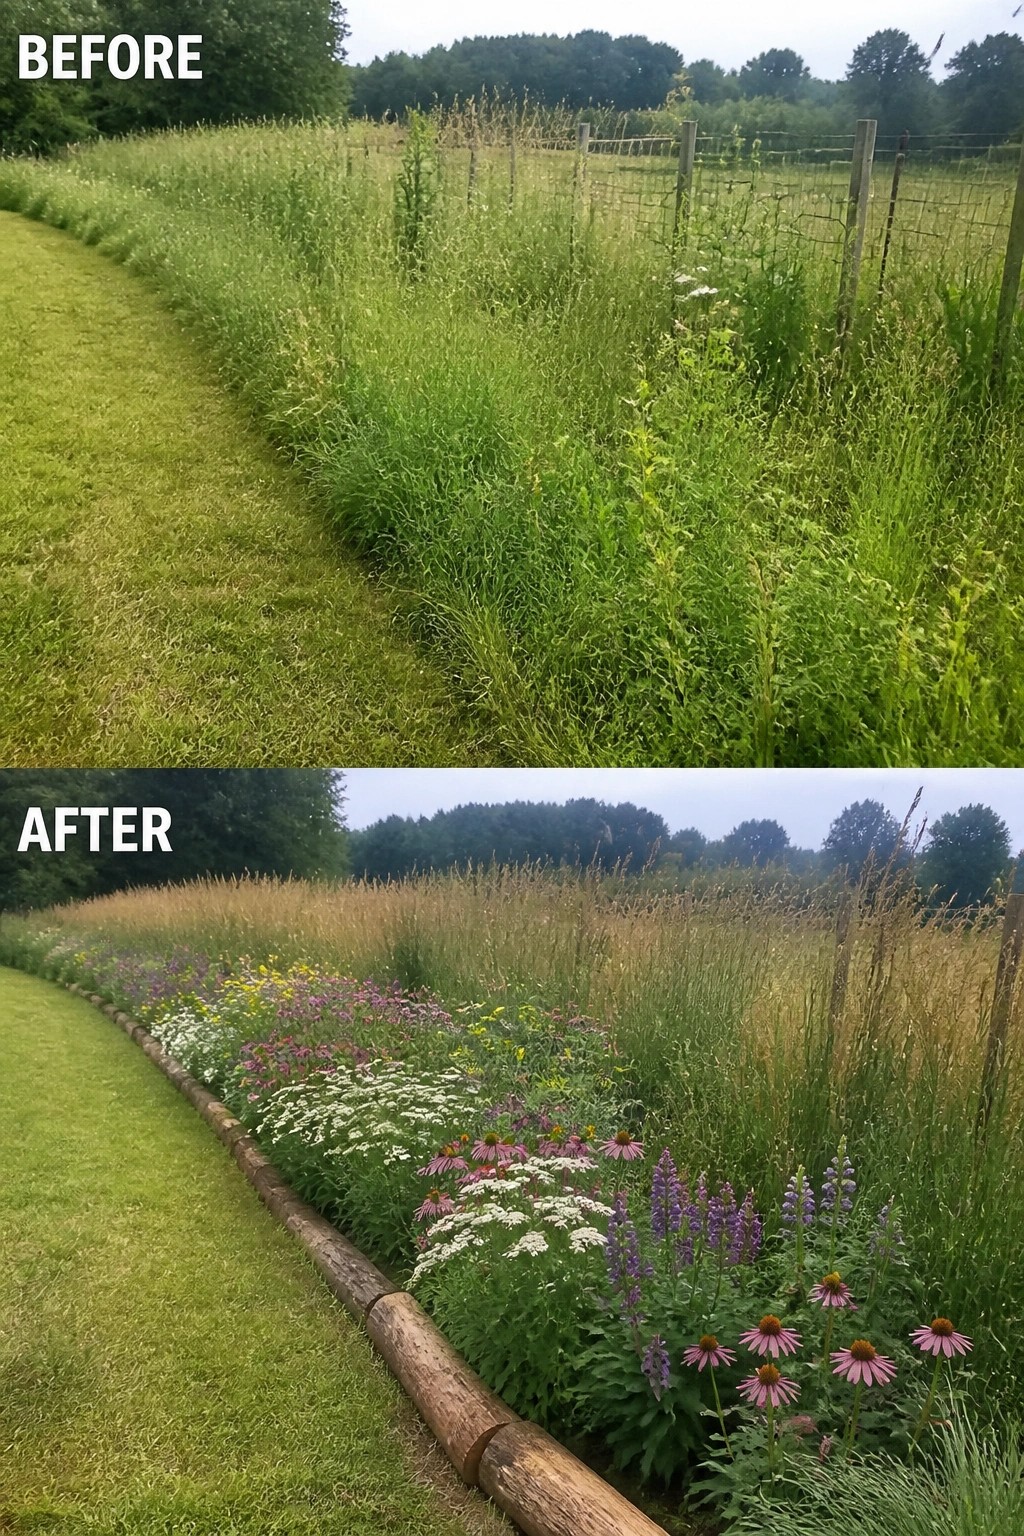
An overgrown strip of grass and weeds can make the whole edge of a yard feel neglected. Adding a simple log border and planting a row of flowers turns that same space into a clear garden bed that looks cared for and intentional.
This works best along paths, fences, or lawn edges where things tend to spread out of control. Clear the area first, put down basic edging to hold the shape, then fill it with a few types of perennials that come back each year.
Define Flower Beds With Low Stone Edging
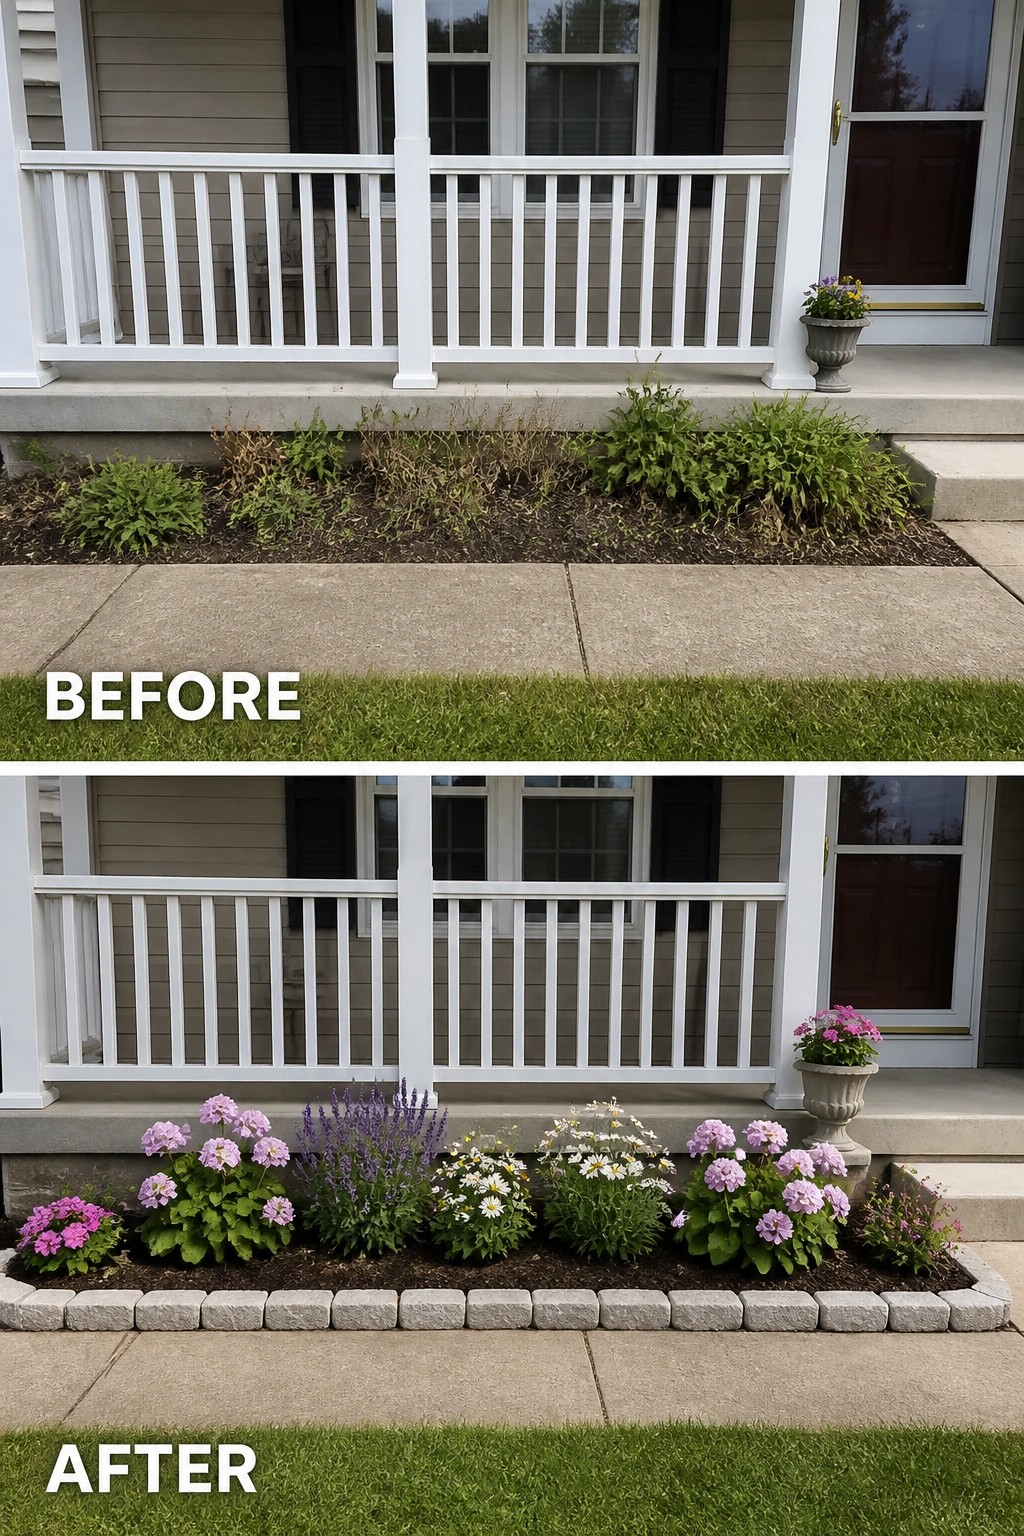
A ragged flower bed right in front of the house can make the whole entry feel neglected. Adding a simple stone border creates a clean line that separates the bed from the walkway and gives the planting area a finished shape. The new edging also makes it easier to keep mulch in place and weeds under control.
This approach works best along a porch or front walk where the bed is narrow. Lay the stones first so the shape stays straight, then refresh the soil and add plants in groups rather than scattering them. Keep the height low so the border does not block the view of the house or the steps.
Define Front Beds With Gravel And Edging
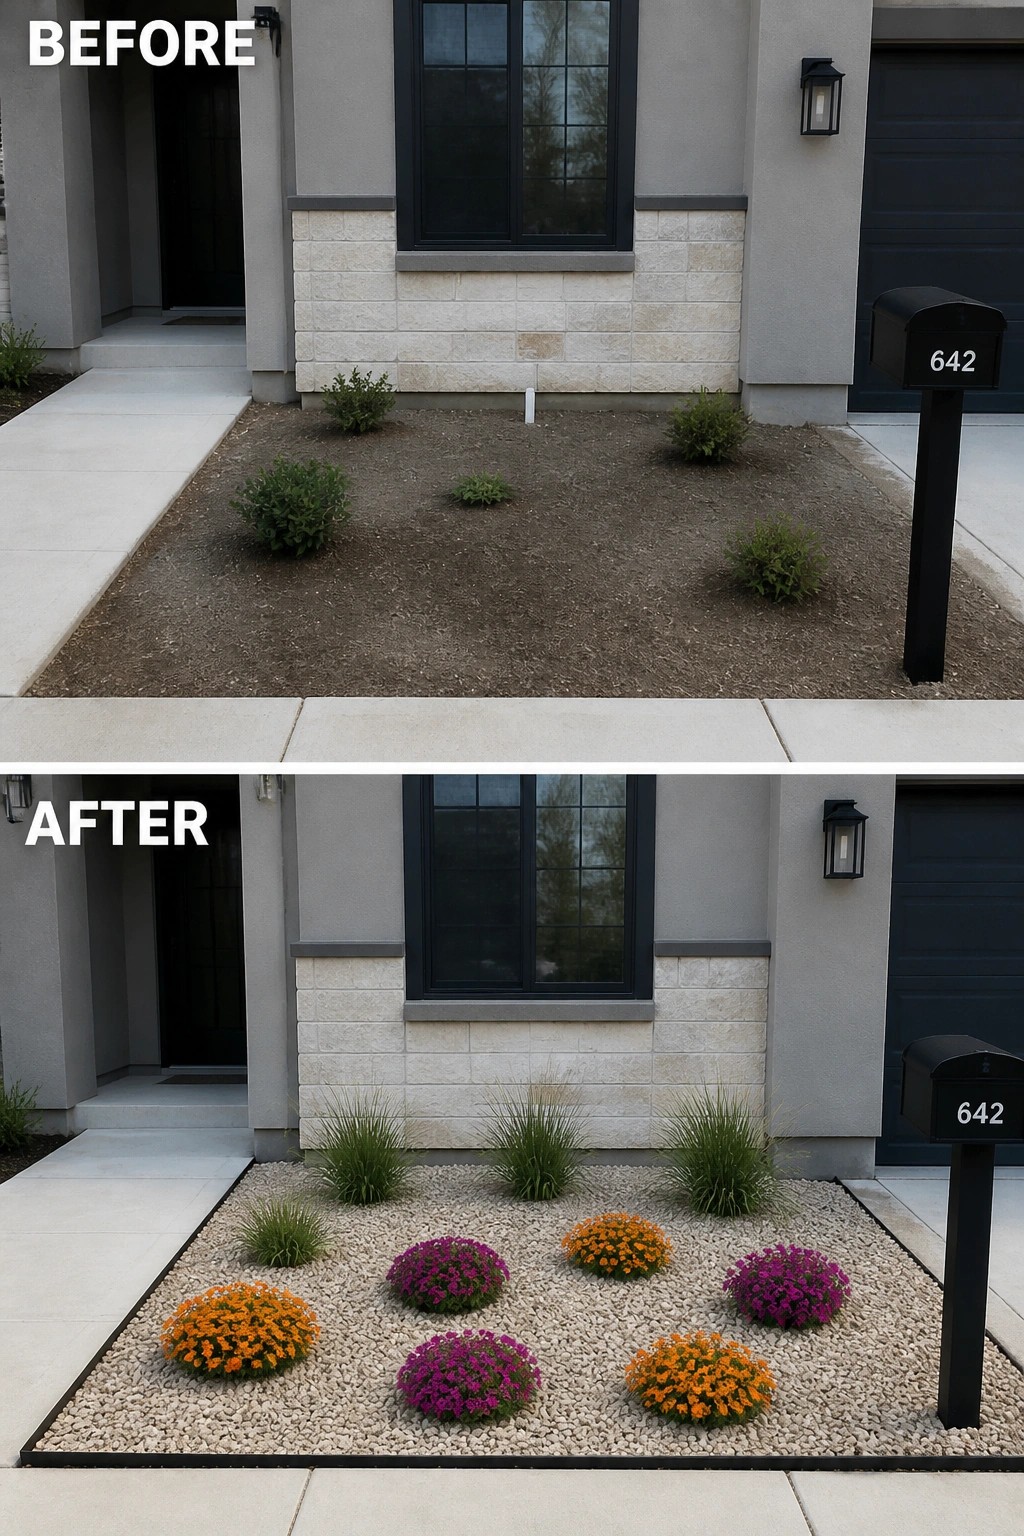
The bare dirt area along the front of the house looked unfinished and hard to maintain. Adding a layer of gravel held in place by a clean black border gave the space clear shape and made the plants stand out without extra work.
This idea suits homes with simple front beds that need structure more than new plants. Lay the edging first so the gravel stays put, then keep the planting simple with a few repeating colors. It keeps the area looking tidy even when the rest of the yard is still a work in progress.
Add Raised Planters To Organize A Balcony Border
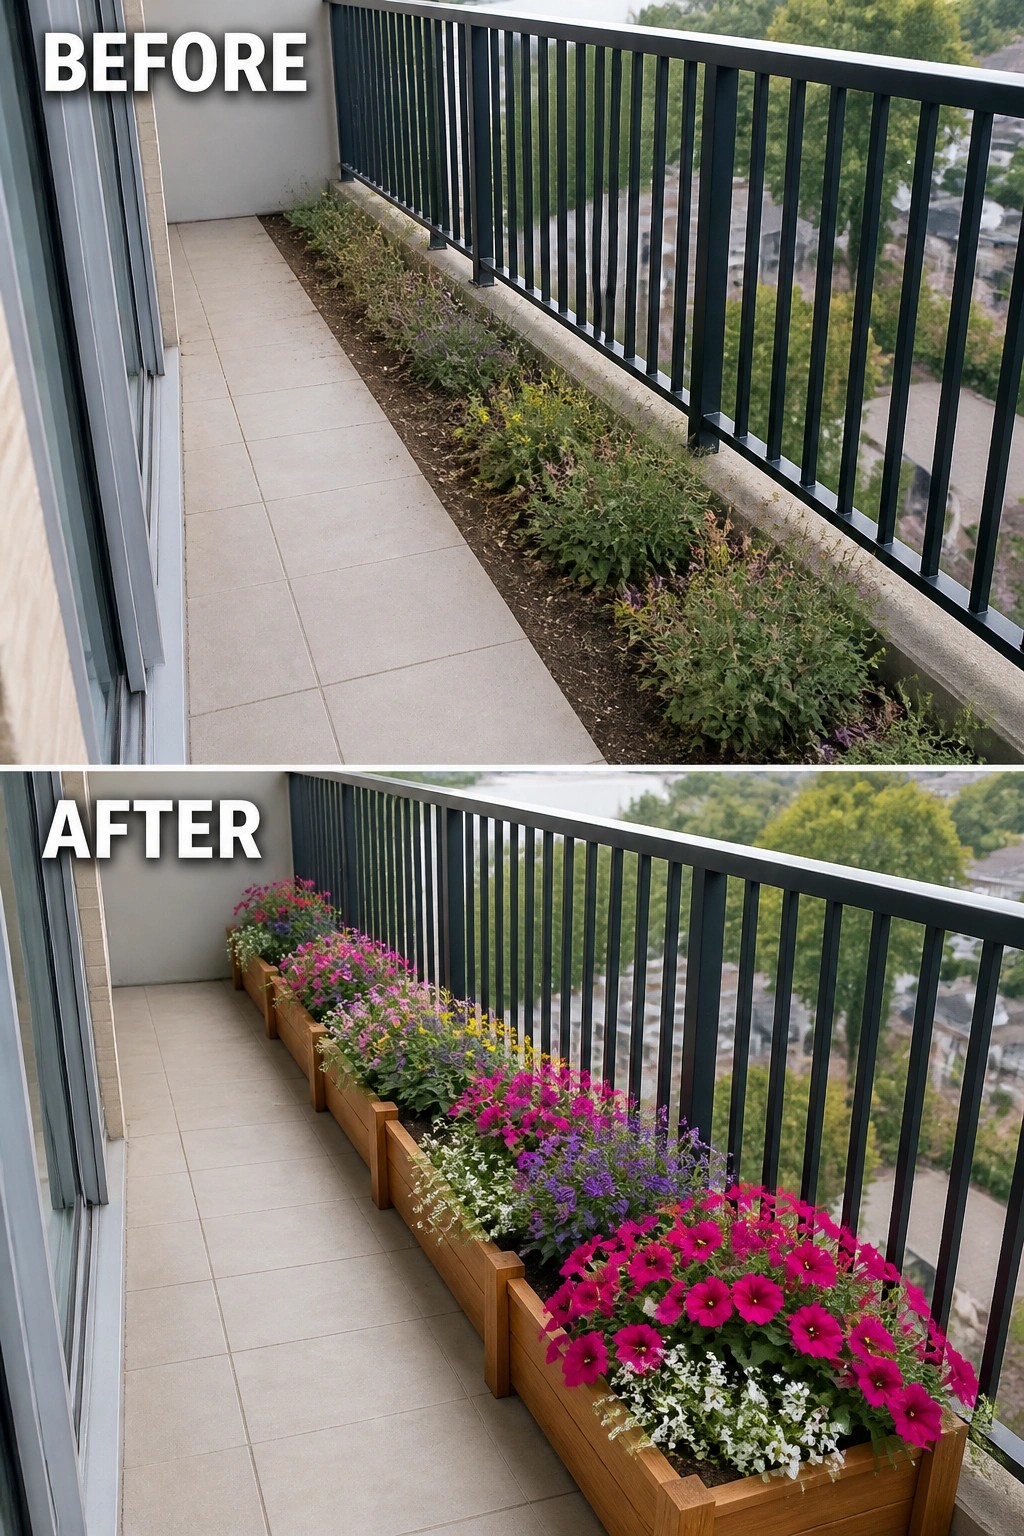
An overgrown strip of dirt and weeds along a balcony railing can make the whole space feel neglected. Switching to a row of simple wooden planters brings order right away and gives you a place to plant colorful flowers without worrying about the original soil or edge.
This approach works well on balconies or patios where the ground is narrow or hard to maintain. Keep the boxes low enough to sit against the railing, fill them with good potting mix, and choose flowers in a few repeating colors so the look stays full but not crowded.
Add Edging To Define Flower Beds
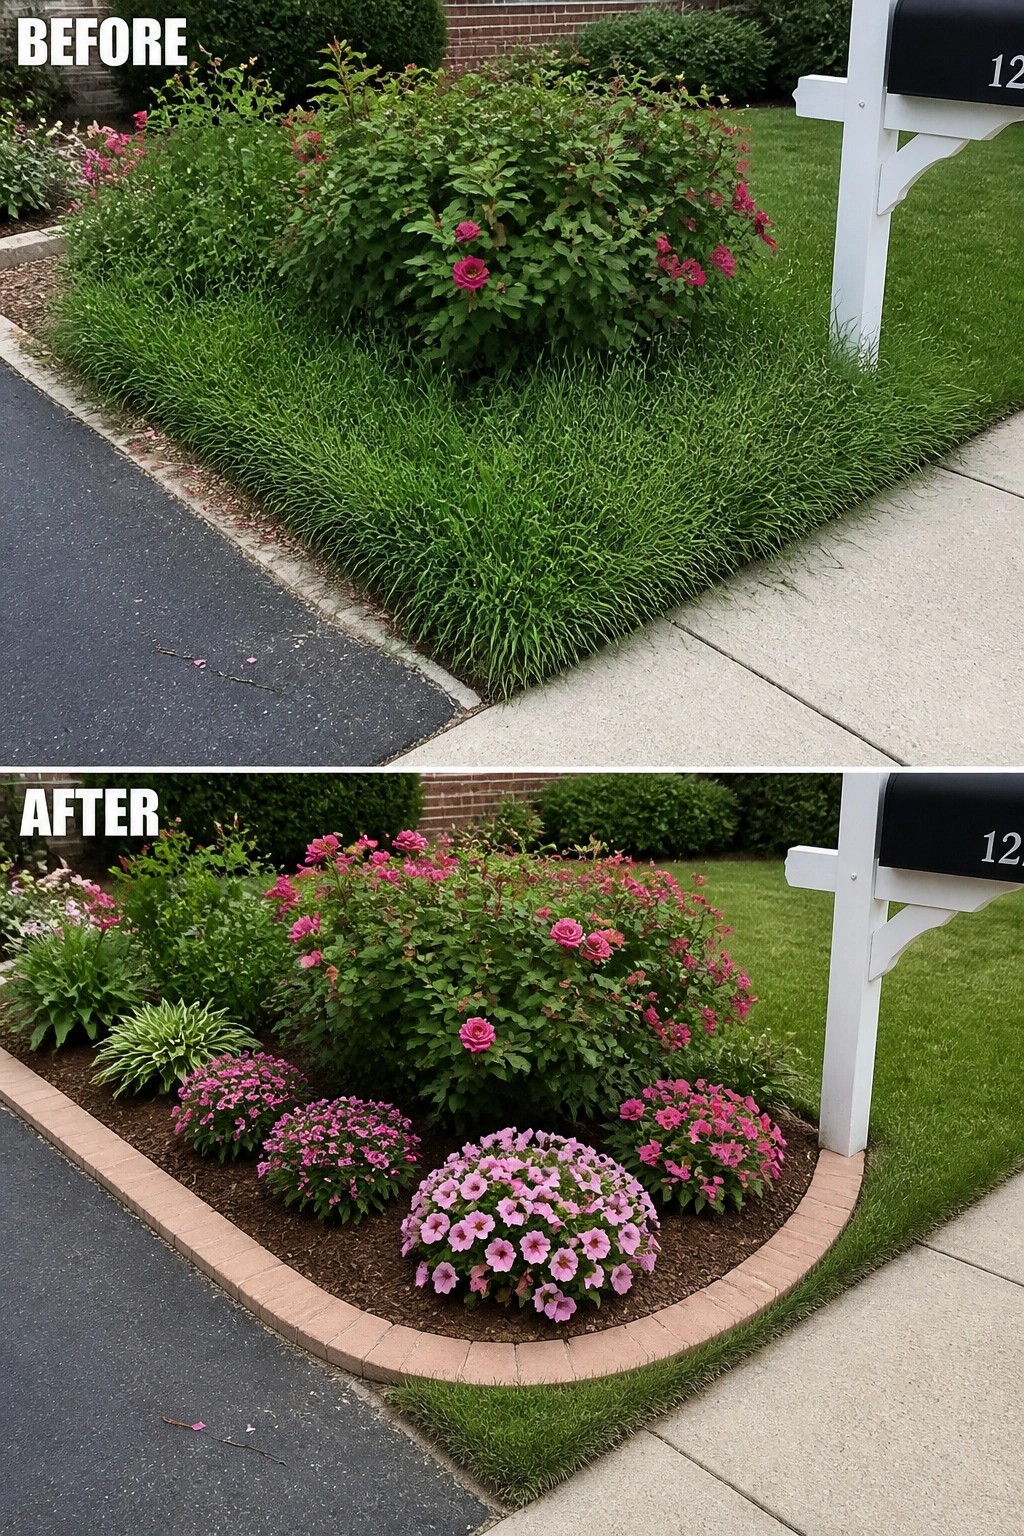
Adding a simple border turns a loose patch of grass and roses into a clear planting area. The before photo shows the lawn creeping right up to the plants with no real separation, while the after shows a brick edge that holds the bed in place and lets the flowers stand out.
This idea works best along sidewalks or driveways where the lawn tends to spill into the planting space. Lay the edging first so the shape stays neat, then fill with mulch to keep weeds down and give the bed a finished look.
Define Flower Beds With Simple Edging
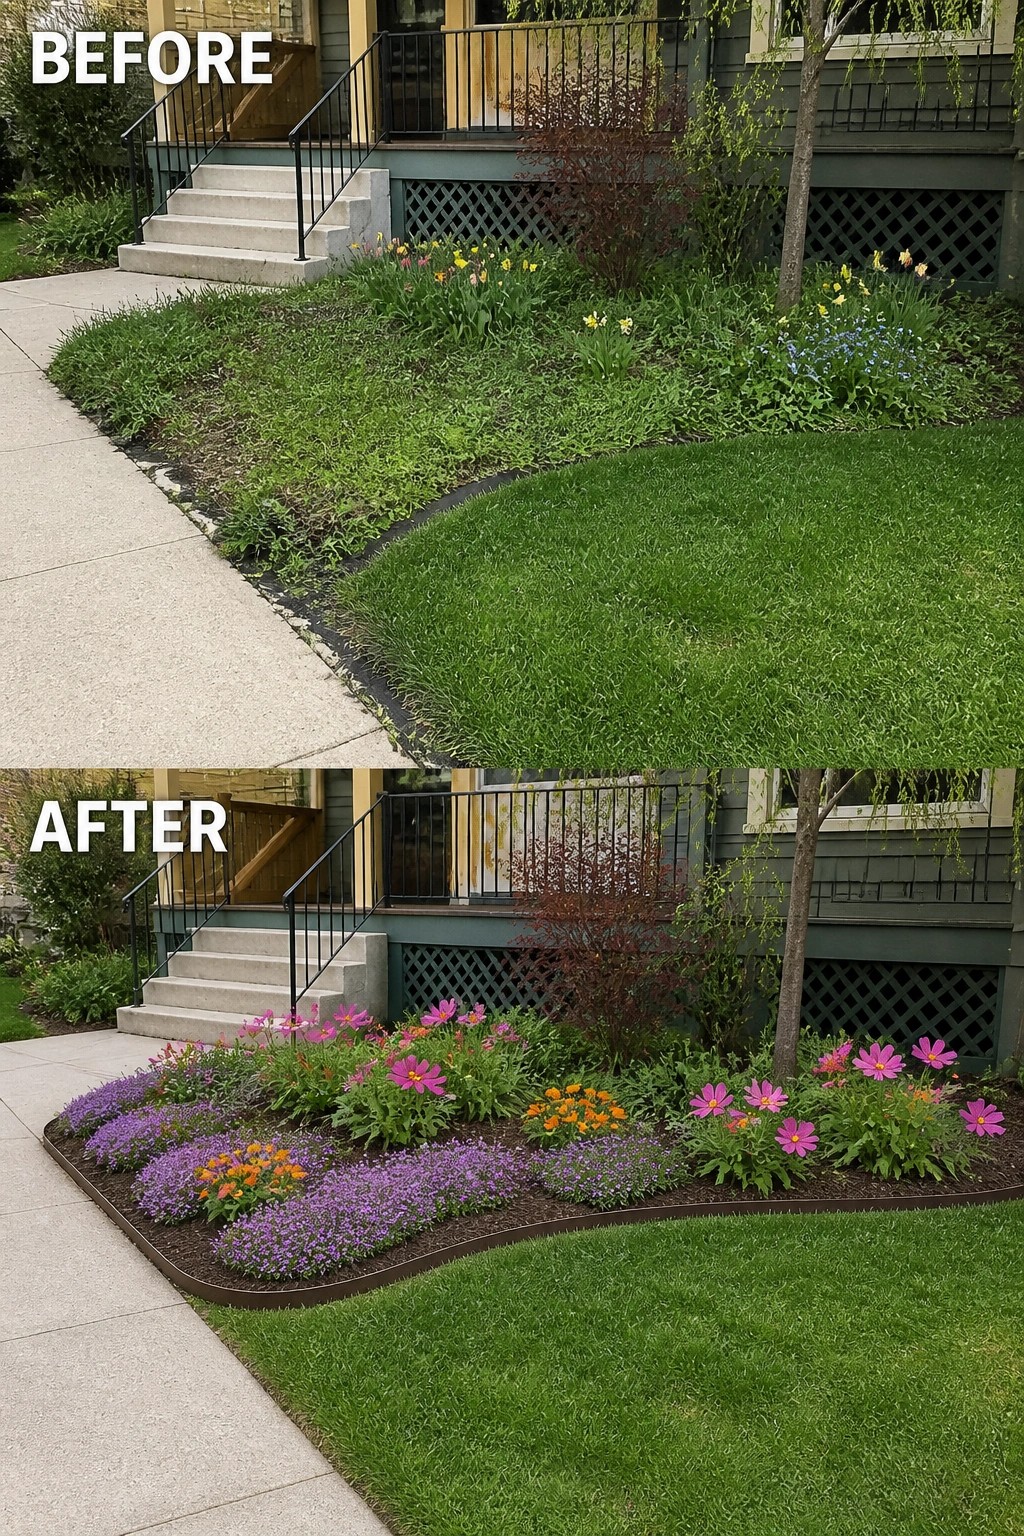
The biggest shift here came from adding a clean border that turned scattered plants and uneven grass into a single, shaped bed. The curved edging keeps everything in place and gives the front of the house a much tidier frame without any big construction.
This approach works best along a walkway or house foundation where the bed needs to feel intentional rather than random. Cut a smooth edge first, lay down mulch, and group flowers by height and color so the bed stays easy to maintain over time.
Frequently Asked Questions
Q: How do I keep grass from sneaking back into the flower bed after I put in fresh edging?
A: Dig a shallow trench along the edge before you set the border in place. Pack soil firmly against the inside of the edging so nothing can slip under it. Check the line every couple of weeks at first and yank any shoots that appear.
Q: What edging material holds up best when the soil stays damp most of the year?
A: Metal strips or stone stay solid without rotting or shifting. Wood can swell and crack over time in wet spots. Lay a thin gravel base under whatever you choose so water drains away from the border itself.
Q: Can I swap out plants midseason without wrecking the edging I just added?
A: Lift small clumps carefully with a trowel and drop new ones into the same holes. The edging stays put as long as you work a foot or so inside the line. Water the new plants well for a week so roots settle fast.
